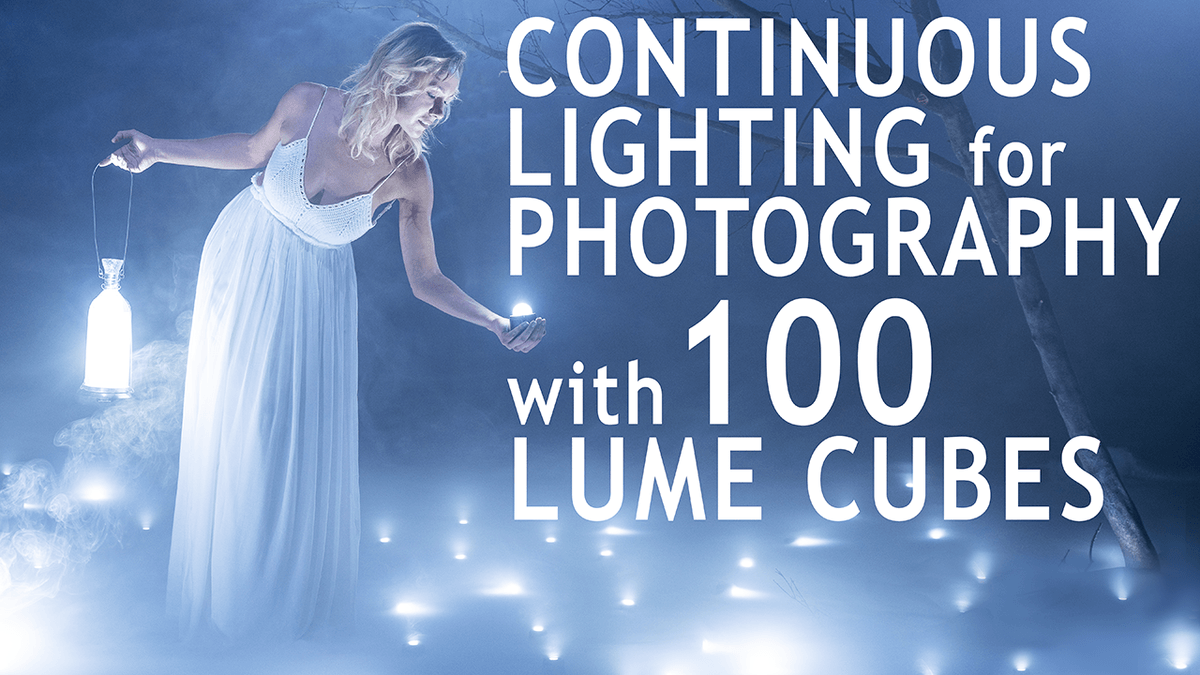
We are going to use 100 Lume Cubes to teach you how continuous light can be used on a film set.
Seeing is Believing
Using continuous light on set for still photography is a great way to learn photographic concepts and getting you comfortable with lighting techniques. Since continuous light never turns off, it’s much easier to see what the lights do and make easy adjustments.
A key light will generally be a stop less than your rim light. First, you set your aperture, shutter, and exposure for your key light. Now the rim light is just a little brighter and gives us nice separation from the background.
We are also going to put our background light a bit brighter than our key to give our subject separation from the background.
If you have a single continuous light source, doesn’t matter how small or big it is, the light will give you an f-stop on camera. If I want to be able to light from behind, I can’t have my key light and rim light be the same brightness. I want the rim light to be a little harder.
In order to do this, I’ll put a piece of diffusion in front of my key light and open up my aperture. Now my rim light is brighter than my key light.
If I want to use one Lume Cube as my key light, and I still want my rim light to be stronger than my key, I will need to add a second light to my rim light.
First Setup
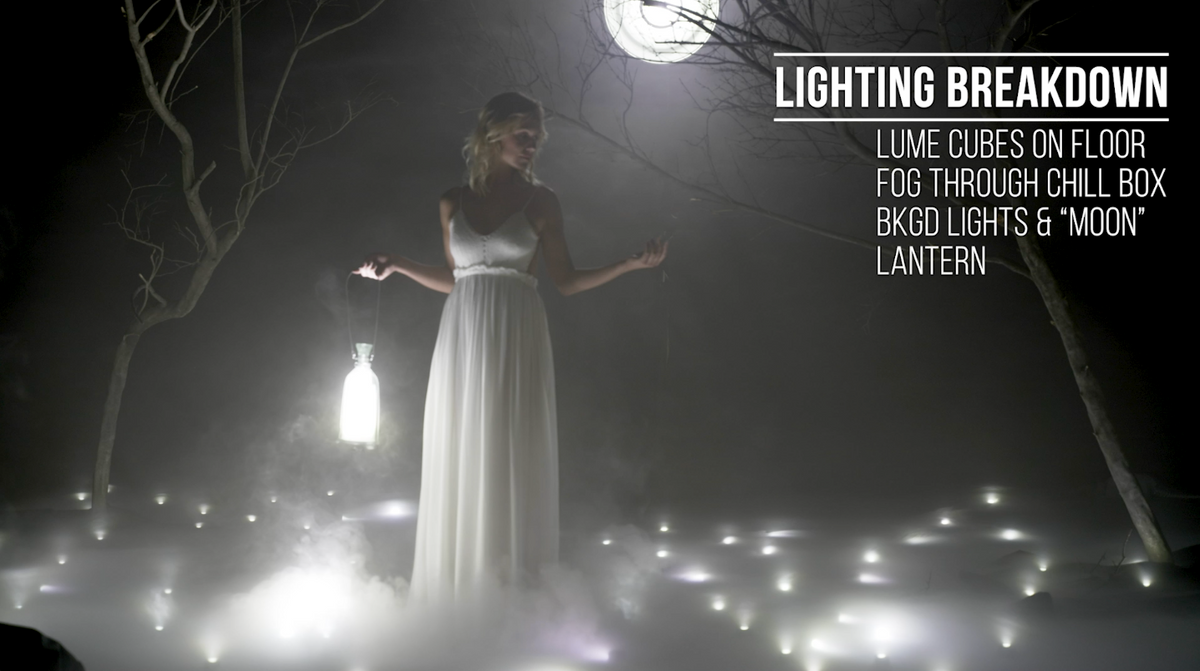
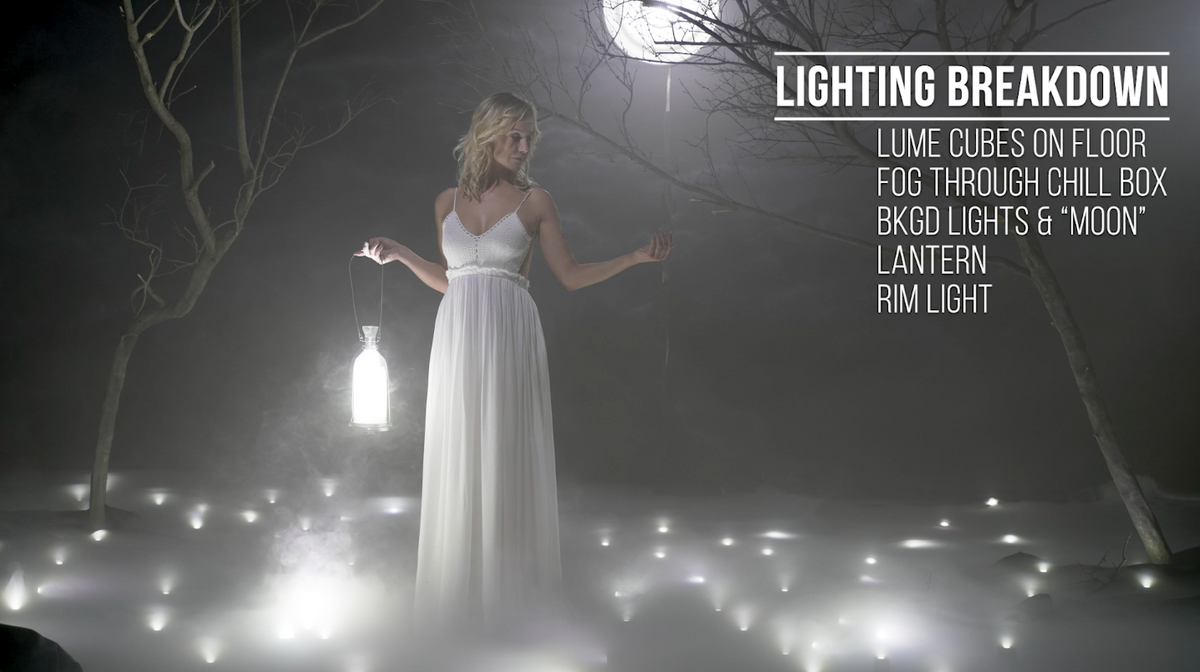
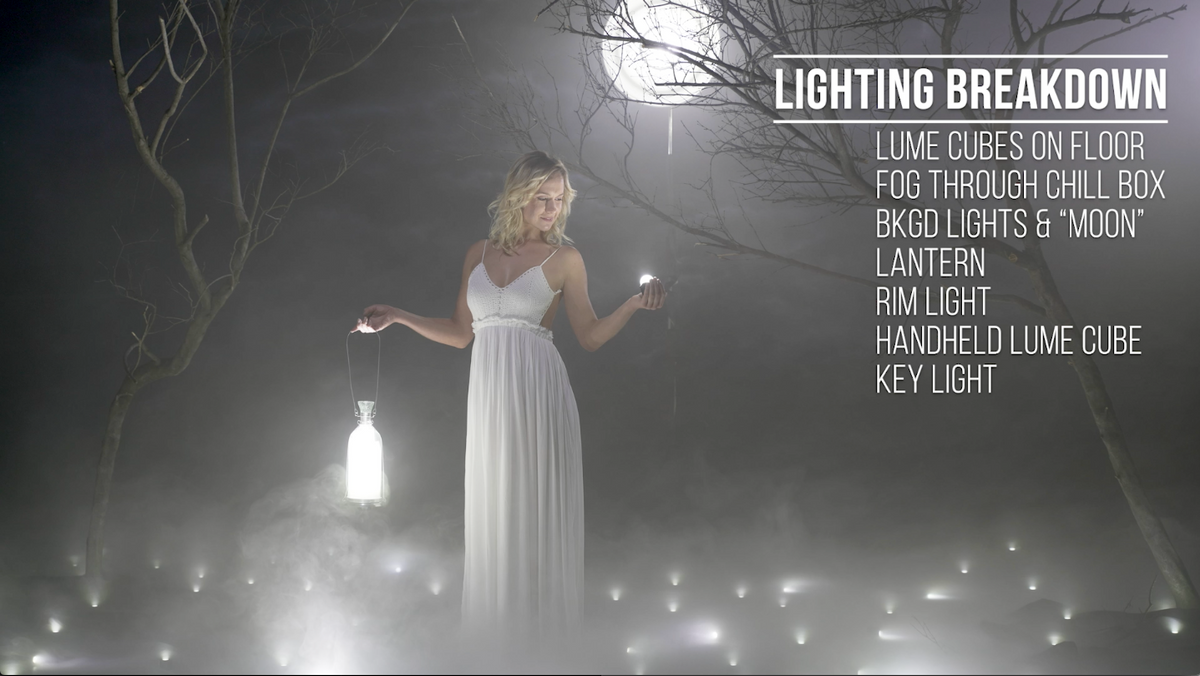
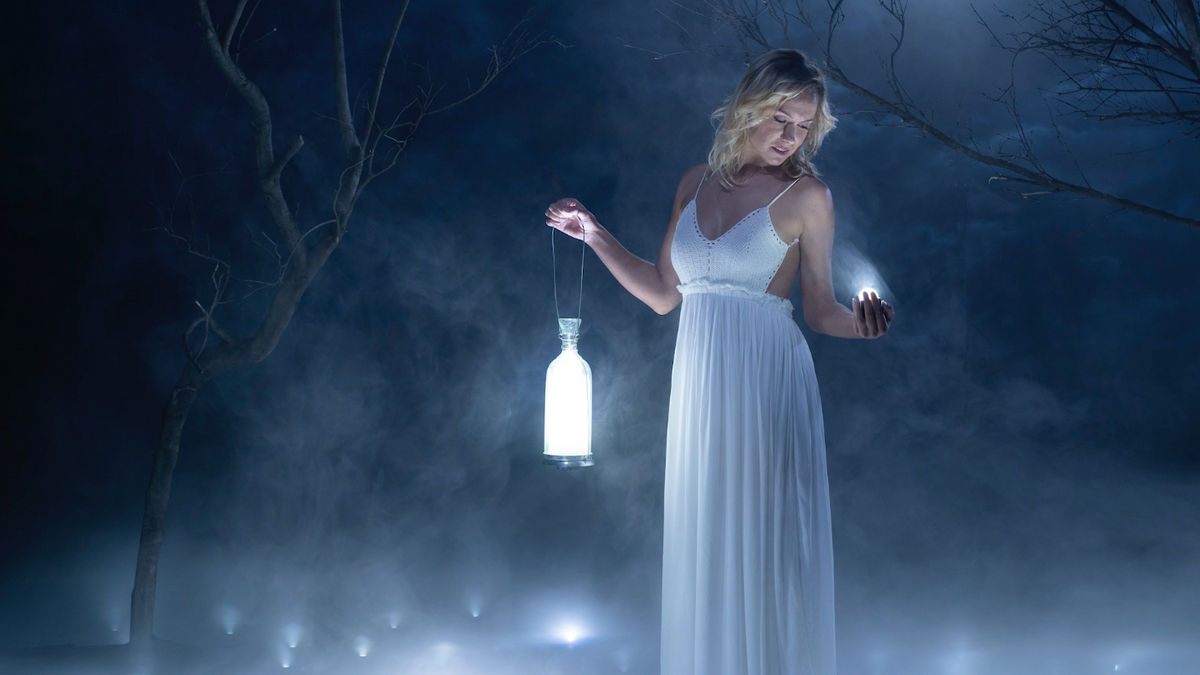
We put a bunch of Lume Cubes all over the ground and used our homemade chill box to have the fog sit low on the ground. The fog is also acting as our diffusion.
We put four Lume Cubes in the back in a beauty dish to light the background, four more to light the other side, and four more on a stand to act as our ‘moon’.
Here is our lighting breakdown of the first setup:


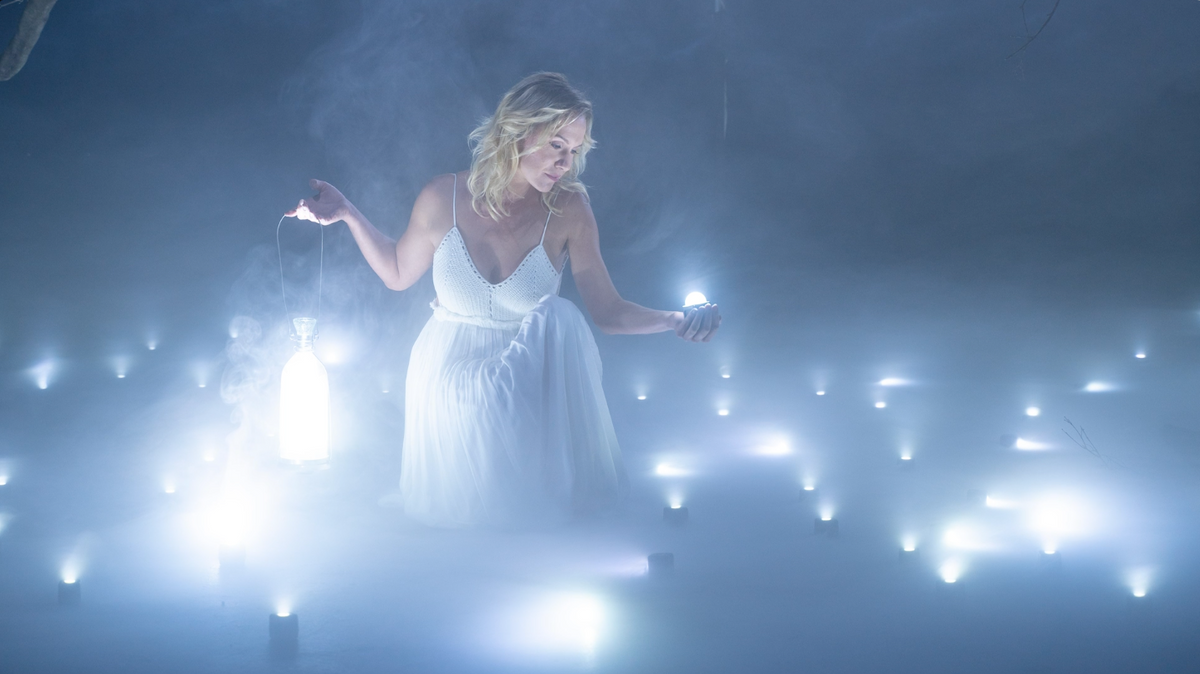
Second Setup
We put about 80 Lume Cubes on the ground which is giving us a great glow from below. Our key light is a beauty dish with a grid on it. The beauty dish has four Lume Cubes in it at 70%.
The gird on the beauty dish allows us to get a soft light with a hard edge, which opens up our skin tones. The grid also makes this soft light more directional so it’s not splashing onto our background.
Our rim is back away just to give a slight edge to her side. We also put a flag on the bottom so our light won’t bleed onto the floor.
When we control our light, we’re able to get some really nice results!

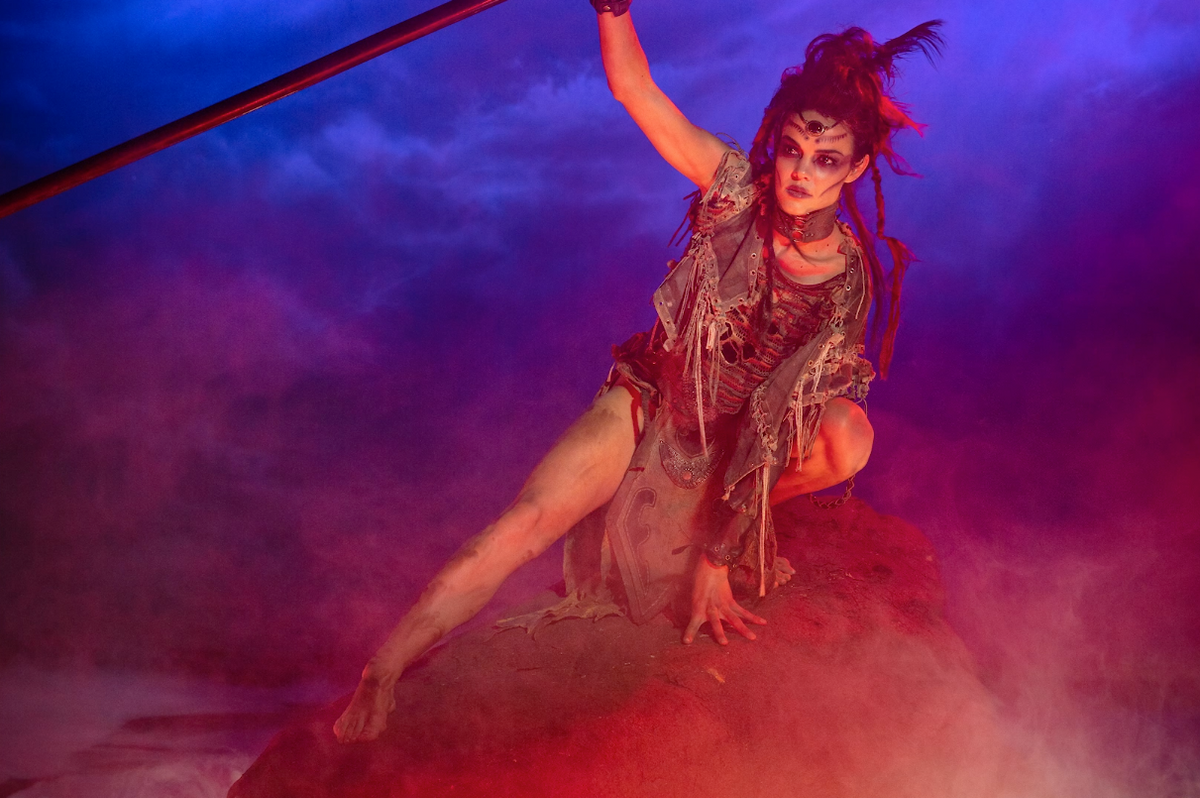
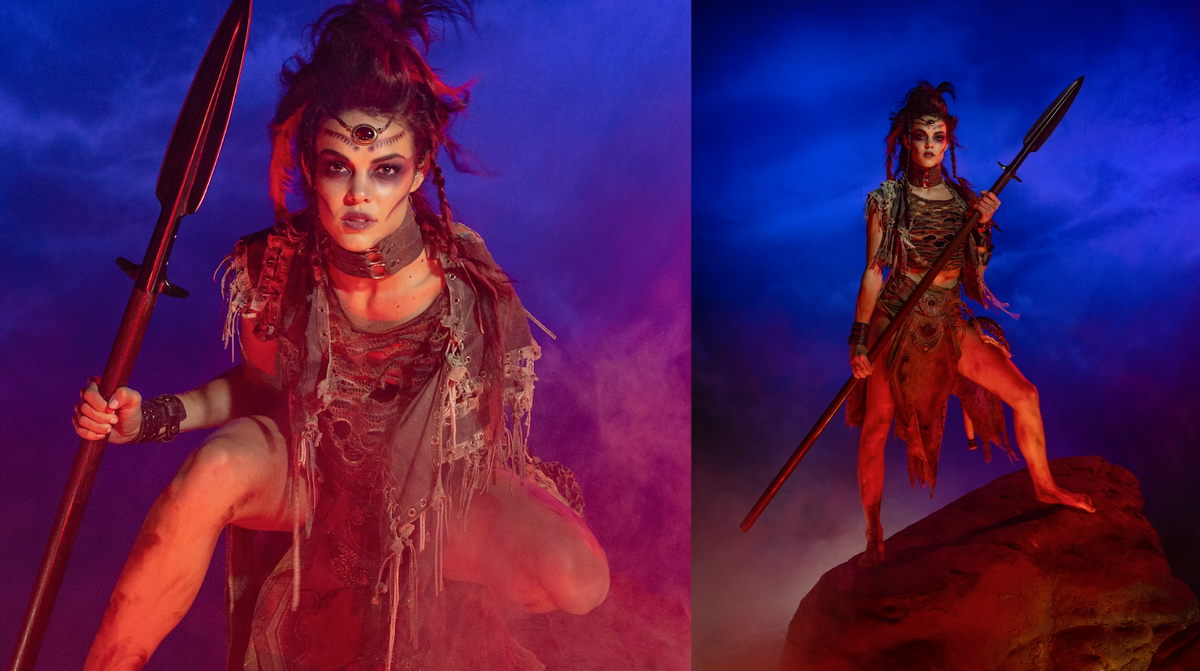
Third Setup
This setup we wanted to do something a little funky with colored light. The Lume Cubes come with a pack of gels in them. They’re magnetic so it’s really easy to switch out the colors.
We have a nice red rim light from camera right side which is the light we’re going to see on the side of her face.
Our beauty dish with a
grid is our key light. Get your key light off to the side so it starts to wrap around your subject and doesn’t look so flat.
In the background, we have four Lume Cubes with blue gel on them. So we have the red rim light, the blue background, and we have some yellow and red Lume Cubes down below under our fog to give us some warm light from below. The lights are lighting the smoke from below.
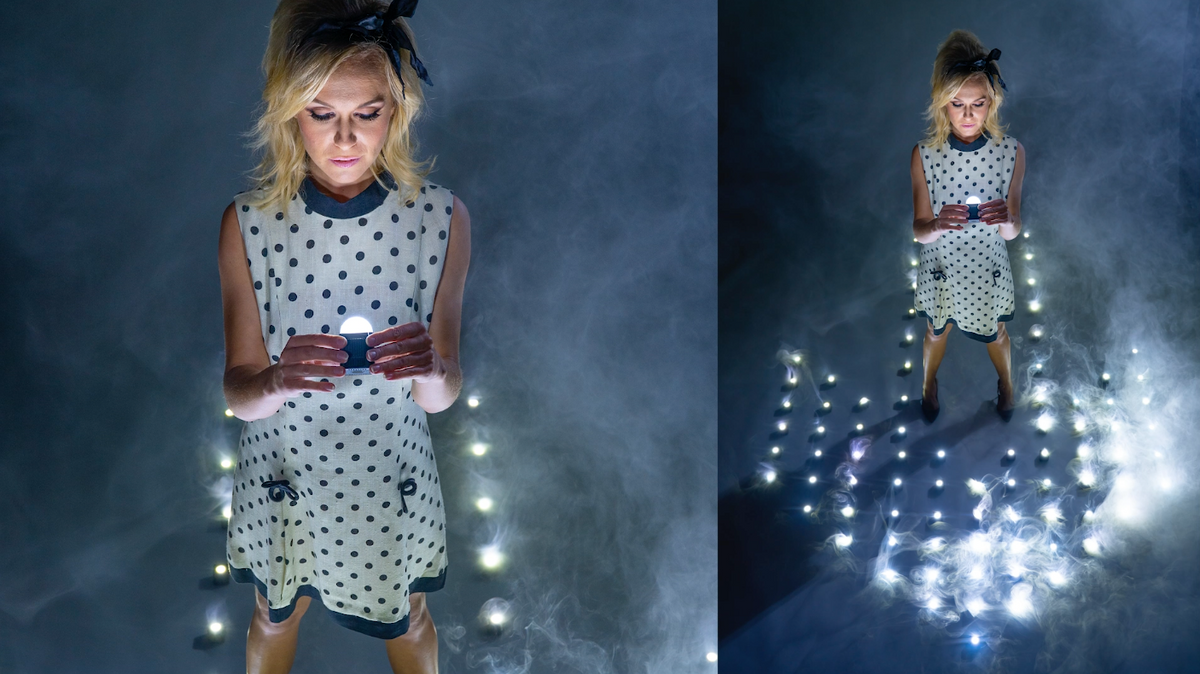
Here are some of our final images!
Camera Settings
For most of these shots I was at 1/125 for shutter speed or as low as 1/50. That’s the downside to working with continuous light. It’s not going to be as powerful as strobes. But it’s a great tool to have if you’re trying to transition to film, or if you’re just learning how to light.
Gear We Used
Canon 5D Mark III – B&H / Amazon
Vangurad Tripod – B&H / Amazon