

Today on the Slanted Lens we have a horror lighting tutorial. We are here with a few scary characters from a B-movie. We will be looking at how to create lighting for a horror photo shoot in the woods. This was a difficult shoot for many reasons. We were off in the woods, away from the road and had to carry all the equipment and generators to location. There was poison oak at the location and a lot of make-up needed to be done. We also struggled with smoke as the shoot progressed because the wind was carrying it into the wrong direction. Teri Groves did an incredible job with make-up. The images turned out great and our three scary characters when put together in the same image looked a bit like a vintage horror film. Keep those cameras rolling and keep on clickn’.

The Lighting Breakdown


#1 Let’s break from the story and look at the light. The first and main light to set in this situation is the back light for the smoke. This lights the whole scene and gives you a canvas to work with. We placed a Dynalight 1600 watt pack in the background with a single head. It’s a travel head and needs no reflector. We aimed this at the scene. It’s a long way back there but will light the smoke and the scene.


#2 We then added a new mono block made by Photoflex called the Flex Flash. It’s a 400 watt second mono block. These are reasonably priced and a great strobe unit. We used this in the cauldron pointing at the face of our talent. We added two layers of 3027 tough white diffusion to soften the light for their faces.


#3 We then added a second Flex Flash from camera left to light the smoke and give some light on the talent. Next we added another travel head in the background on an 800 pack.

#4 Our last light was the Triton behind the camera with a soft box. This was a fill light. Here is the lighting diagram.
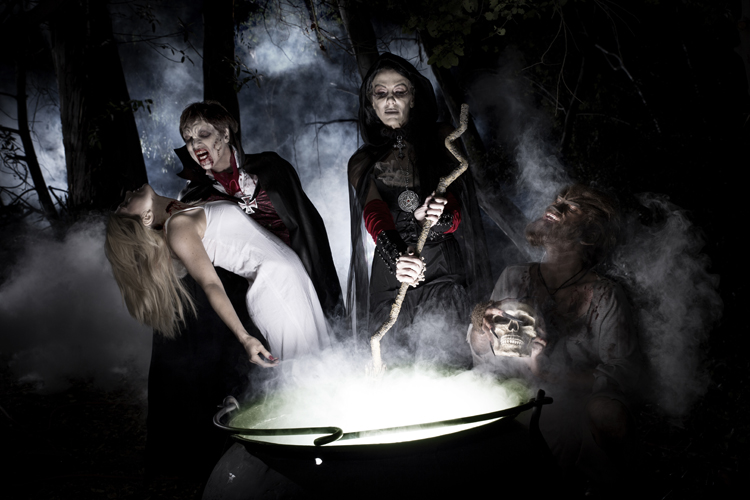
#5 I adjusted the images in Photoshop to give them a better look. I upped the exposure and opened up the shadows. Then I moved the color balance to 4150 to make the image feel cold. Last I pushed the clarity up to sharpen the smoke. I did add a vignette on some. Here is the look. Keep those cameras rolling and keep on clickn’.
Special thanks to our great sponsors!
www.kesslercrane.com
www.tamron-usa.com
www.videoblocks.com
www.photoflex.com
www.dynalite.com
www.rosco.com
www.glidecam.com
www.spiderholster.com
www.vanguardworld.com
triplescoopmusic.com
www.lensprotogo.com
www.PhotographyTalk.com

