
In today’s DIY Equipment lesson from The Slanted Lens, Lars Lindstrom, our cameraman will teach you how to make a portable green screen on a small budget. The total cost of the green screen created is about $14, but does not include the cost of the stands.
You will need:
1- green gabardine fabric (from Jo-Ann Fabrics and Crafts) wider the better – Lars sewed two 60″ panels together;
2- “A” clamps;
1 – 120″ long PVC pipe (from Home Depot);
2 Stands- Lars used mic stands.
We hope you will find this segment useful. Share in the comments any improvements you made or what you used for the stands.
Keep those cameras rolling and keep on clickn’.


Video Transcript:
Jay P: Hi, this is Jay P. Morgan. In today’s Slanted Lens lesson, we’ve got a special DIY equipment segment for you. Lars Lindstrom is going to show us the things we need to understand about green screens, how to build our own, and some interesting facts about how to use it.
Lars: Hi, everybody. My name is Lars Lindstrom, and today I’m going to show you how to make a DIY green screen that’s portable, effective, and very affordable. Let’s go ahead and get started. Whoa.
There are a couple of applications for using a green screen in today’s video market. The first would be making dumb videos of people jumping over cars and things exploding, which is fun, but maybe the more practical application of green screen would be just to create a very clean atmosphere. There are lots of companies that are willing to pay good money for good looking green screen video, and you can make those videos in your living room, you can make them outside, just about anywhere with a portable green screen.
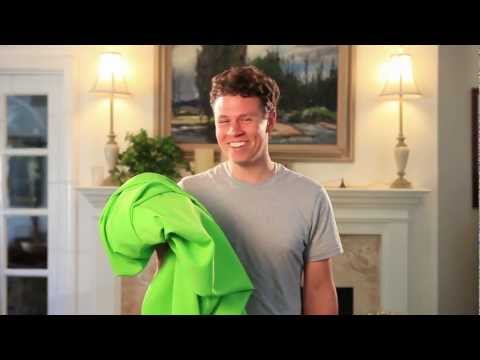
There are a couple of things you’re going to need. First and foremost, you’re going to need some green fabric. You can buy this green fabric. I think the thing you’re looking for the most is just look for something that is really offensive, I think, to the eyes. This green really is terrible. It’s really ugly. So try to find something like this.
Also, one thing you want to make sure to do is look for one that it is really wide. So this one was 60 inches wide. I think standard is about 45. Try to get it as wide as possible so that you don’t have to make as many seams. Now because this was 60 inches and I did want a whole 120 inches of green screen, I did have to sew one seam, right here, and actually you would be surprised, it’s never showed up in any of my videos. I can key it out really nicely, and when I say that I sewed it, I actually mean that my mom sewed it. So that’s something to have handy.
If you don’t have a sewing machine, you can try using some “A” Clamps or some tape on the in seam. Experiment. That’s what this is all about.
In addition to the seam down the center, you’re also going to want to sew a pocket or seam on top, where you’re going to slide your PVC pipe through. You can see here that this just goes the along the entire length of the fabric, all the way across.
As far as stands go, this is where you’re going to have to get a little creative. The fabric only cost me about $3 a yard. I think there’s about four yards in there, so $12 for the green screen fabric. Sure beats over $100 if you buy it from any of the big boys.
As far as stands go, you’re going to have to get a little creative. I was an audio engineer before I became a cinematographer, and I have a lot of microphone stands hanging around. So I got a microphone stand, and I put a mic clip on it and I found that I could actually squeeze some PVC pipe into this mic clip, and they created great stands for my green screen.
You’re going to need two “A” clamps. These were 99 cents at Home Depot, and these are going to attach to the base of your microphone stand, as you wrap the fabric around it, so you can pull it nice and tight, get rid of all the wrinkles, make it a nice, keyable green screen.
The last thing you’re going to need is a 10 foot, 1 inch PVC pipe. You can try three-quarters, if you’re worried about fitting this into your mic clips or it being too heavy. What happens with three-quarters of an inch, it starts to bend in the middle, and you don’t want that, because then you’re going to start getting wrinkles all the way down.
All right. Let’s go ahead and get started by placing both stands on either side of your PVC pipe. Extend the arms vertically, then lock them down, nice and tight. I also put some weights at the base of the stands for extra support.
Now slide your fabric onto your PVC pipe. You don’t actually have to sew this pocket. For the longest time I actually used safety pins to hold the fabric to the pipe.
Now gently force the PVC into the mic clips on both your stands. You’ll want to use some flexible clips. These are made by Audio-Technica. They work great, but anything that gives will work just fine.
Now take your mic stands all the way up and lock them into place. The “A” clamps are going to help stretch the fabric across to make a tight, even green screen, and you are ready to shoot.
So there you have it. All-in-all I think I spent about $14 on the green screen with the fabric and the “A” clamps. That’s not including the stands. So with the microphone stands, you could probably find a couple on Craigslist for pretty cheap, or you could come up with something of your own.
So go ahead and experiment. Let me know what you come up with. Thanks for watching.
Jay P: That was great information from Lars Lindstrom here on green screen. For me, the thing I learned, most importantly was you don’t have to have the perfect green color to get a good key to be able separate people using green screen. A lot of different colors will work. In fact, when I first started in this career, we used blue screen. They realized really early on that most people wear blue jeans, blue shirts, blue eyes. So a really ugly, hideous green, most people don’t wear that. So you key that out. Makes it easy to separate people.
So we got some great information today. How come Lars got to jump over a car? I don’t get to jump over a car. I mean, what do I get here, huh? I get a fat Chihuahua, that’s what I get. Barney, look good, look good.
Anyway, there’s another DIY experience for you, from the Slanted Lens.
Special thanks to our sponsors!

www.kesslercrane.com
www.tamron-usa.com
www.dynalite.com
www.photoflex.com
www.rosco.com
www.glidecam.com
www.vanguardworld.com
www.triplescoopmusic.com