

Hi, this is Jay P Morgan and today on The Slanted Lens we are going to take a look at lenses. What’s the next lens you should buy after the kit lens that came with your camera? We will discuss what different focal lengths do, zoom lenses vs fixed focal length, image stabilization, and then explain our simple lighting set up. Let’s start by taking a look at what different lenses do.

The Lighting Breakdown


#2 This is a 24 mm lens.


#3 35 mm lens.

#4 50 mm lens.

#5 70 mm lens.

#6 100 mm lens.

#7 135 mm lens.

#8 And finally a 200 mm lens.
The longer the focal length the narrower the angle of view. People come closer to us. That gives us an idea of what lenses do.Lenses don’t change the perspective, they narrow or broaden our view. Moving closer changes our perspective. A wide angle lens allows us to move closer to the subject and keep them the same size in the frame thus changing the perspective on their face. Look at a TSL lesson called “How Lens Focal Length Shapes the Face: A Lighting Tutorial”.

#9 After you purchase a camera and you want to buy your next lens, which one should it be? Long lenses are great for portraits, wildlife and sports. Primes are great for shallow depth of field and specialized photography like children, people or creating bokeh. Zoom lenses will give you the ability to move in and out and work quickly. I work almost exclusively with zoom lenses for that very reason. This picture is taken at 1/60 of a second at f2.8 so I’m wide open. It’s a great shot.


#10 With prime lenses it’s a fixed focal length so you have to walk in closer in order to make the person larger in the frame and this changes the perspective. Here is “zooming” or walking in with 24 mm prime lens.

#11 Your first purchase might be a 50 mm lens since it sees the world as a human eye sees it.
Here is a 50 mm Macro lens at normal distance.

#12 To “zoom in” we have to come really close to our subject. This macro lens allows us to see just the eye of a person if we want to.


The next question I get asked is about image stabilization and if it’s worth the money. Absolutely! Especially when you hand hold a 200 mm lens. Its worth the money.
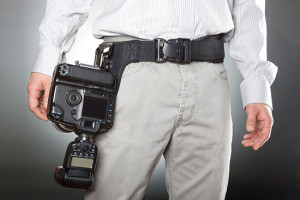
So primes will give you sharpness and more light, zooms will give you more convenience so you can move fast. Your kit lens has a varying aperture so as you zoom in you will have to adjust it. It’s a sign of an inexpensive lens. It’s very inconvenient and another reason why I strongly suggest to get a different lens for you camera.
If you purchased a 50 mm lens the next best choice would be 24-70 mm lens. It’s a great walk-around lens and allows you to work quickly while giving a great focal range. For those who are more advanced the lens you will want to purchase will depend on the specific work that you do and if it fulfills the need in this department and pays off.


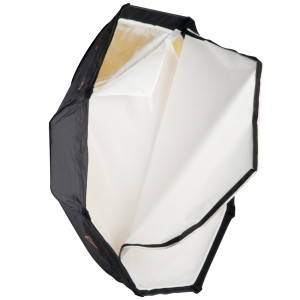
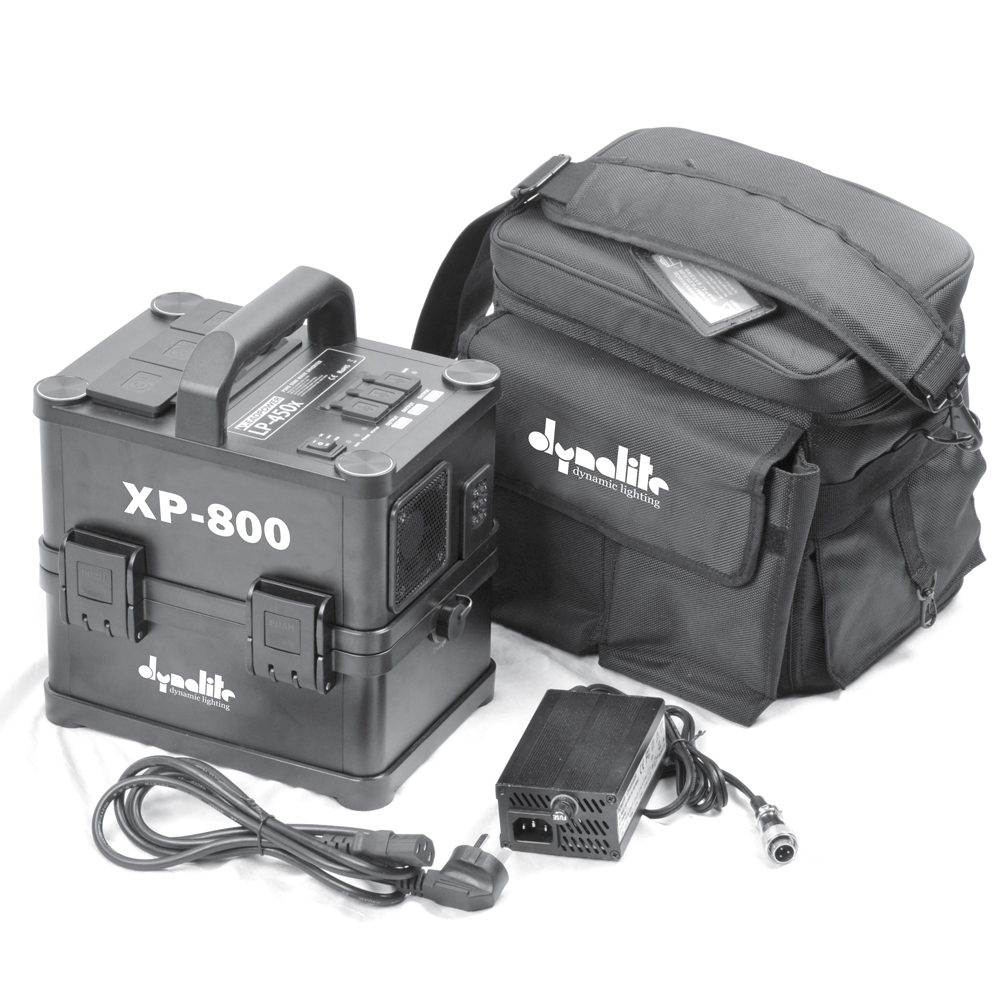
#15 We used a Photoflex FlexFlash on a stand along with a Dynalight XP-800 battery pack. There is an octodome with a grid on it which will keep our light very defined and just on the talent’s face. We feathered the light away from the wall so the light would be on her face and not spill onto the wall. It’s a little warm. So when I go into the raw images I can take the warmth out which will make the background a little cooler. I hope you found this helpful. Keep those cameras rolling and keep on clickn’.
Jay P Recommends for this Shoot


Video Transcription
When the smoke clears in the end of the video, make sure you sign up for the Vanguard give away.
Hi, this is Jay P Morgan. Today on The Slanted Lens we’re going to look at lenses. What lens do you buy after you bought your camera with that little kit lens that came with it? What’s the next step from there? What are the choices you have and how do you spend your money wisely. I’m here with Deliana, we shot on the bridge this morning, we show the different focal lengths and what they do. We’re going to show a little bit of that shoot and how we did it. But first off let’s talk about lenses.
As a foundation for our conversation today, we’re going to take a look at our talent using different lens. I’m going to stand in the same place, let’s take a look on what those look like and how it changes the scene as I don’t change my position but we just simply change the focal length. Here’s the 16 mm lens, here’s the 24 mm lens, here’s the 35 mm lens, here’s a 50 mm lens, here’s a 70 mm lens, this is a 100 mm lens, now were looking at 135 mm lens, last of all we have our 200 mm lens. The longer the focal length, the narrower the angle of view. People come closer to us. Look at my lesson called How the Lens Focal Length Shapes the Face to see what happens when you move closer with the wide angle lens. That gives you a good idea what lenses do as you move closer changing their perspective. When I first bought my Marc II, I bought three lenses. I bought 16 to 35, 24 to 70, and a 70 to 200. I mean I feel like I had a range of about everything I could do with those three lenses. So, those are my next purchases when I bought my camera, maybe you can’t afford to buy all the three of those at the same time. So, what’s the one lens you wanna buy? It really comes down to what it is your shooting. Let’s look at this between fix focal length and zoom lenses. Zoom lenses, have the ability to zoom in and out, which means on this you go to 24 or 70 mm, it gives you the ability to really work quickly. I use zoom lenses almost exclusively, because I can just get in and shoot quickly, it gives me the ability to change my focal length very fast and really frame my image. Keeps the flow going for me. So, I love it.
The prime lenses really fix focal length, which means you get one focal length, you gotta walk in closer or walk back if you wanna change the perspective. Fixed focal length lenses are sharper because there aren’t any moving elements, they’re just a sharper lens. A zoom lens gives you the option to get in closer and zoom in and out. But because the elements moved, it’s a little softer. But you know, zoom lenses come a long way, it’s pretty darn good. I start I have a 50 mm lens here. A 50 mm lens is very normal. If I take a shot of her, it’s good to see pretty much the way my eye does. I’ve got a very comfortable shot, feel very nice of her. This one actually is a macro lens. So, I get in really, really, close. So, great shot of her eye. Even closer. So, I’m basically just getting her eye and nothin’ else. That’s a specialty lens, it’s not a normal 50 mm lens, it’s a macro lens. If you use a fix focal length lens then this is what the zoom is. A 24 mm lens, this is the only way you can zoom, and zoom more. That’s one of the reason I love zoom lenses, ’cause I can just go in and out it gives me a lot of options.
With the fix focal length lenses, as you walk in closer of further away from the subject it changes the perspective. But with the zoom lens you can zoom in or out and it doesn’t change it’s perspective at all. Well, zoom lenses you got a 2.8 that’s about as fast as you’re going to get but the prime lens you can get to 1.0, you… I mean you really get four to six times more light with the prime lens. A much shallower depth of field, which means if you want that really nice bokeh or really want the focus to fall out of the background. So much as you think to do with the prime lens. A 50 mm prime lens at a 1.2 the background is gonna drop out from very quickly. It’s a great lens for doing children or people kinds of things. I really like when you get into longer lenses. So, I really permit the 70 to 200 mm zoom is great for me and again it’s a 2.8. I just love that 200 mm lens, it’s just so sweet. It’s a highlight on the right side from the open sky and a little sun the left side. And really, 1/60th of a second two eights on wide open, it let’s everything kind of go out of focus on the background. The next thing you face is… and I get asked this all time, what about image stabilization. You know, is that worth the money? Absolutely, if you’re gonna hand hold lenses at all using some kind of vibration control, which Canon has, the image stabilization that Canon has. You’ll need that, if you’re gonna hand hold the 200 mm lens, you absolutely have to have that. So, I think it’s worth the money, I really do. If you’re gonna keep it on a tripod and you’re gonna shoot nothing but on your tripod, then you’re probably gonna be okay. But I think it’s worth the money to get the image stabilization the broad ways you consider.
So, to wrap that up, primes, sharpness and apertures so you get more light. Zooms, ease and convenience, you can get in and out fast. Those are the difference between those two lenses. So, lets talk about aperture because the most important thing you’re going to purchase when you buy lens is the aperture. It’s not just a focal length. So, it can also be how fast is the lens, that means how wide and opens up. Your kit lens that came with your camera probably has a 3.5, 4.5, for some varying aperture. So, as you zoom in the aperture changes. That really is inconvenient, your light changes, it’s hard to work with. It’s really the sign of an inexpensive lens. When you get a fixed aperture of 2.8 that means that your light is not going to change. But is a 2.8 really going to give you the shallowest depth of field? It really isn’t. Can you get a 1.2 or a 1.8? That really is going to be very shallow depth of field. It makes it so you get really wonderful bokeh, it gets the background to drop out very quickly. So, aperture is worth the money, but it does cost money. There was saying in the racing industries, “Speed costs money, how fast you wanna go?”. So lenses cost money, how fast you wanna go? And I think it’s absolutely worth it. The quicker the lens is, the shallower depth of field, the easier it is to work. But remember this, when you really get in to that really shallow depth of field kind of work, you really need to know and have some experience to make that really valuable to you. Because if you’re gonna shoot at 1.2 there’s not much in focus, especially, on 5D mark III, there’s not much in focus at all. So, it might not be the first lens you’re gonna want to buy. You might wanna get something that’ll be a little easier, not spent the money and get a 2.8, lens and that will help you get the work you need to. Help you kinda move into that world and you can progress with it. I don’t know how much you spend by I do know this, the kit lens that came with your camera has got to go. And you need to get something that’s got to be a little better to help you to get the work you need to.
Okay, so we’ve talked about different focal lengths, we talked about zoom versus fix focal length, we talked about apertures, we talked about vibration control or image stabilization. Now, the question comes, you have your 50 mm lens, what’s the next lens you buy? Really for me, it’s a 24 to 70 mm lens. That’s the best choice for me because it’s a great walk-around lens, it’s a great application, it’s a fixed aperture, it really does the job it needs to. But again I can’t answer that question because your going to apply this to what you do, a little research about the kind of work that you wanna do and find the lens that’s gonna best suite the images that you wanna make. But I will guess that 24 to 70 is probably your next purchase. For those of you who are a little more advanced, you maybe have some zoom lenses, you wonder what the next purchase is. You know, it really become a very surgical decision. You buy a certain lens to do a very certain thing. I bought the 24 1.4 lens, I’m really going to use that on the Glidecam, I’m going to use it to do time lapse. So that… that lens will solve that problem for me. So, you start making decisions. Generally speaking, you start buying prime lenses to do very specific things, they’re sharper, they’ll work a little better for you and you kind of graduate to that next level.
Let’s look at our lighting setup for today’s lessons, we used a FlexFlash on a stand with a Dynalight XP-800 battery pack. I have an OctoDome with a grid on it which will keep our light very defined and just on the talent’s face. This is place on that small alcove just over to the side of the bridge. That’s the only place we could find, where we could kind of tuck our light in. So we move our shoot down to that area. We set that light of that left side, then as we aimed it at our talent we fell it away at the wall and slightly down so it wasn’t lined up too much on the wall and just stayed on her face. It’s a little warm, so when I go in to those raw images I can take the warm side of it, which can make the background just a little bit cooler and get a nice look in the end. So, this is the basic lighting set that we used.
Remember, it isn’t the equipment you buy that takes great images. You use equipment to make great images but you’ve gotta be able to take great pictures. You gotta’ practice, you gotta’ be able to use the equipment that you buy. So make sure your using equipment to it’s fullest, don’t spend tons of money on things you don’t need. But buy the things you need to be able to progress to the next level. So keep those cameras rollin’ keep on clickin’.
There’s many different ways you can enter to win one of these pieces of equipment from Vanguard, so go to theslantedlens.com. You have until midnight on the 20th of December and we’re gonna give these all away for Christmas. So go to theslantedlens.com and enter there to win one of these great pieces of equipment from Vanguard. Also, don’t forget to like us on Facebook and subscribe on our YouTube channel. Keep those cameras rollin’ keep on clickin’.