

Today on the Slanted Lens we will teach about balancing light bulbs with strobes . This principle can be a bit tricky to understand and apply but it is an important part of the photographic process. If you shoot with strobes you will need to balance them with a secondary source on a regular basis. Whether it’s the lamps in a room or the setting sun the principle is the same. Using the exposure triangle we will show in this lesson how to balance 2 different light sources, strobes and light bulbs. As I said this could be strobes and the setting sun or strobes and tungsten lights. The principle is the same. The strobes are the main light source and the constant light becomes the secondary source. An average photo can look so much better if you give a proper exposure to the lights in a room, creating a scene with a warm and inviting look. Let’s see how to accomplish this.
Jay P Recommends for this Shoot


Video Transcription
Hi. This is Jay P Morgan. Today on The Slanted Lens, we’re gonna talk about what should be a simple principle but can be kind of complicated to apply. We’re going to talk about how you combine your practical or Tungsten lights, in a room or on your set, with your strobes and how you combine those two together. It’s a very simple equation. On the exposure triangle, both the strobes and the Tungsten lights are controlled by the ISO. But your aperture is going to control your strobes, and your shutters are going to control your patio lights. So let’s apply this on set and just see what we get when we try to control our strobes with the aperture and all these light bulbs, with our shutter speed.
If you’ll balance the room lights with your strobes, it really gives the room a lot of warmth and depth. It gives the room a sense of being lived in, and it makes it look more real. So it’s really important to give life to those practicals by giving them an exposure, so let’s see how we can do that. So when you’re shooting, you have two lights versus your strobes, and your practical lights in a room, like lamps and other Tungsten. Let’s look at the exposure triangle because it’s going to help us understand how to balance these two different light sources when we’re shooting with two lights that are in the same room. Our exposure triangle has three parts: ISO, shutter, and aperture. The ISO controls the scene overall, as we raise it up or down, we’re gonna get more or less exposure. It affects both the light bulbs in the shot and strobes equally. This leaves us two areas on the exposure triangle that allows us to control two different light sources, the shutter speed and the aperture. The shutter speed affects the light bulbs or Tungsten lights and the aperture controls the strobes.
Let’s talk about why that is. In a dark room where there is very little ambient light, the shutter speed does not affect the strobes. It can be long or short, it just has no effect on the strobes. The flash duration of strobes is too fast to be affected by the shutter speed. The only exception to this rule is that faster shutter speeds faster than 180th of a second, they are going to start to clip the flash duration of the strobes and darken the image, but most of the time we’re balancing light bulbs to the practicals of the room with the strobes, we’re going to want longer shutter speed so this is not a problem. So the strobes are not affected by the shutter speed so the aperture is going to control the strobes. If I turn my strobes on, I got a reading of f8 at my subject and with the light meter, I set the cameras after to F8. The light bulbs in the room, at 160th of a second, are gonna be way too dark, so we’re going to need to lengthen that shutter speed. I now lengthen the shutter speed until I get a correct exposure on the practical lights or light bulbs in the room. It’s a very simple equation.
Let’s take a look in an example. My strobe exposure is F14, the shutter is 1/50th of a second. His face has a correct exposure but the light bulbs are a little dark. I want to make them brighter and not affect his face. I’m going to lengthen the exposure to see what it does to the light bulbs. Here we are at 1/25th of a second. Not much time so obviously they are brighter. We’re going to go to 1/30th of a second, obviously the bulbs are getting brighter, he’s away from the bulbs and not staying next to them, so the light bulbs are not affecting his face at all. Here’s 1/6th of the shutter speed and starting to pull out. When we’re using a high aperture like F14, we’re going to need a very long exposure for those light bulbs. But remember, we’re looking at these light bulbs, we’re looking at the filament of the light bulbs, so it’s like looking directly at the flash tube. If this was in a lamp, it would need to be much longer, because we’re not looking at the direct light source, we’re looking at the effect of the light source. I’m going to 1/25th of a second, and for me that looks the best. It’s really a matter of personal opinion, but I like 1/25th of a second. Let’s move on to our shoot.
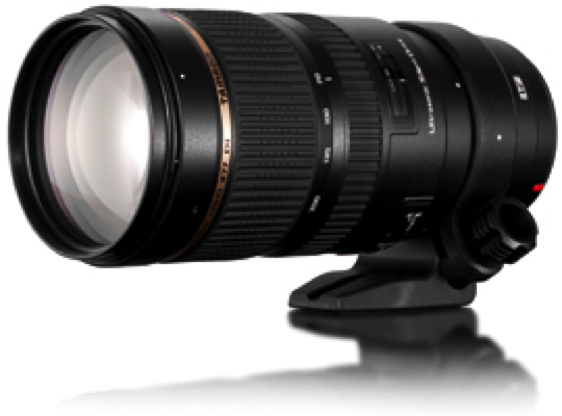
We did a shot combining light bulbs with strobes and let’s see what we got. We hung 30 light bulbs from cords in a shot. 30 sounds like a lot, but it wasn’t as many as I thought it would be. These are old-fashioned light bulbs; they are fun to work with, you see that really fun-filament inside the bulb? I wanted to have a black and white image, black cords with white lights, black hair with our model, and the white dress had some black accents. She is standing in the middle of the light so the shorter I can make my shutter, the less exposure I’m going to get from the light bulbs on her face. I’m on a Tamron 70-200mm lens, my focal length is about 120mm, it’s slightly long. My aperture is F6.3, because I want a shallow depth of fields, so light bulbs will go out of focus in the background. I started making exposure at 1/4th of a second, and shortened them until I get the best exposure. Here’s my image at 1/50th of a second. The exposure is almost too long, I’m starting to see just a little bit of light on her face but I think I’m okay. We’re gonna move forward at 1/50th of a second. I then added the background strobe, I dialed the power down on those, until they looked good as a light background. I then added a flexible flash upfront with an OctoDome, it has a grid on it. It’s going to come underneath, because I wanted to look like a soft glow of the lights on her face. I then added another FlexFlash as a rim light on her, it’s got a 7 inch reflector with a 40 degree grid in it. Here’s some of the final images from this set-up.
Just to change things up, I then added a blue gel up to the background light and shot some more images. I added a 39 inch reflector, just to add a little bit of feel on her face. Here’s some of the final images from the set-up.
It’s not a hard concept to grasp, but a hard principle to apply. This principle is the same for sunsets, outside lights at night, lamps, any kind of constant light source. Aperture controls the strobe, the shutter controls the secondary or constant light source. So go out and apply this principle, make it work in the images you are shooting, just keep those cameras rolling, keep on clicking.
Welcome back to Lens Pro To Go, a great sponsor that we’ve had in the past and joining us once again. They have a great rental service where you call them up, you can use either your app or you can call them up or you can e-mail them. You put the equipment down you need, they ship it out anywhere you’re working in the United States. When you’re done you put them back on the box and ship it right back to them. It’s just a great service. I find it very useful when I’m on location. Lens Pro To Go.
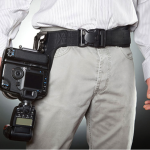
We’ve enjoyed using Spider Holster for this last year, really a great sponsor of ours. This is a belt system that goes around your waist. They also have a spider monkey, this I clip right on to my belt, right next to my belt clip where I can put my meters. I can pull my meter on up. It’s a belt on strap that goes around any piece of equipment you want to stick on to this little system. So you can put this on your light meter, you can put it on your portable flashes, just anything you want to have really at your hip. They are also coming out with a cellphone pouch that can go on their system. They got a pouch to put a 200mm lens, both great pieces of equipment, just hook on this belt system. It’s really an easy piece of equipment that you use and I feel secure with one of my cameras down on my hip. So check it out, Spider Holster.
We had a great time shooting with that FlexFlash on set with all those light bulbs. It really was an easy thing to be able to illustrate how you combine Tungsten or your practical lights with your strobes, so I hope you find that very interesting. I hope that formula makes a little more sense to you now. Like us on Facebook and follow us on Instagram and Twitter. We got a lot of great stuff coming in the next few months. Our Business Coaching Class comes up real soon, so get on our newsletter, it’s at theslantedlens.com. Great information about our photography, photographic lighting, we hope to make life easier for you to give you the information and the tools you need to be able to be successful in your business. We also have a brand new webpage I just put up, a lot of great information there, easy to use, go to theslantedlens.com. We’re now posting all our videos first on theslantedlens.com, before they hit YouTube. They’ll be on there, for about a week to two weeks before they come to YouTube. So if you want to see them first, go to theslantedlens.com, so keep those cameras rollin’, and keep on clickin’.