


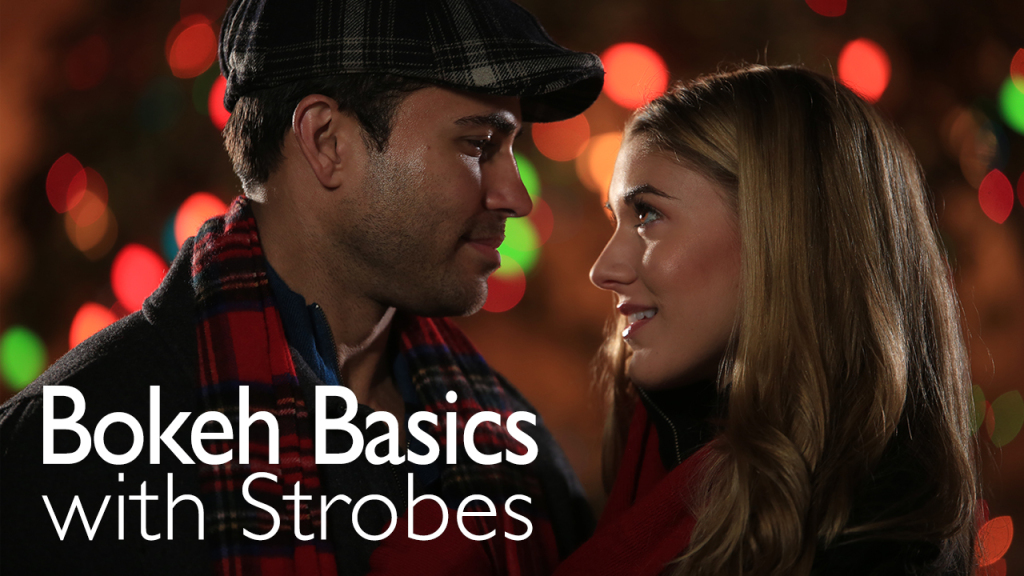
Bokeh is a look that you achieve when you open the lens wide open and allow the background lights to fall so out-of-focus that they become large circles, or ovals, of light. It is a wonderful way to create a romantic lighting situation and looks best when the lens is wide open. Different lenses can create different bokeh patterns but most modern lenses have round bokeh in the middle that gradually changes to ovals on the edge. I want to make the background of my image a bokeh pattern and use a strobe light on the couple up front. I will use a double rim/key lighting setup with a strong fill as our lighting. Let’s get our light up and see what we can do.

We hung large Christmas bulbs in the trees behind the couple to create the bokeh pattern. I like the large lights because they give off more light and it’s easier to get an exposure. The couple will be quite a ways away from the lights so I have room to use a 200mm lens and allow the lights to go out-of-focus.
This was fun to look at different lenses and the bokeh they create. I love the double rim and key light, it is one of my favorites. It’s great for a two-person interview as well. I hope you have learned as much as I have in this experiment with strobes and bokeh.
Thanks for watching! Keep those cameras rollin’ and keep on clickin’.
Don’t forget to enter our December 2014 giveaway to get a chance to win one of 50+ prizes!
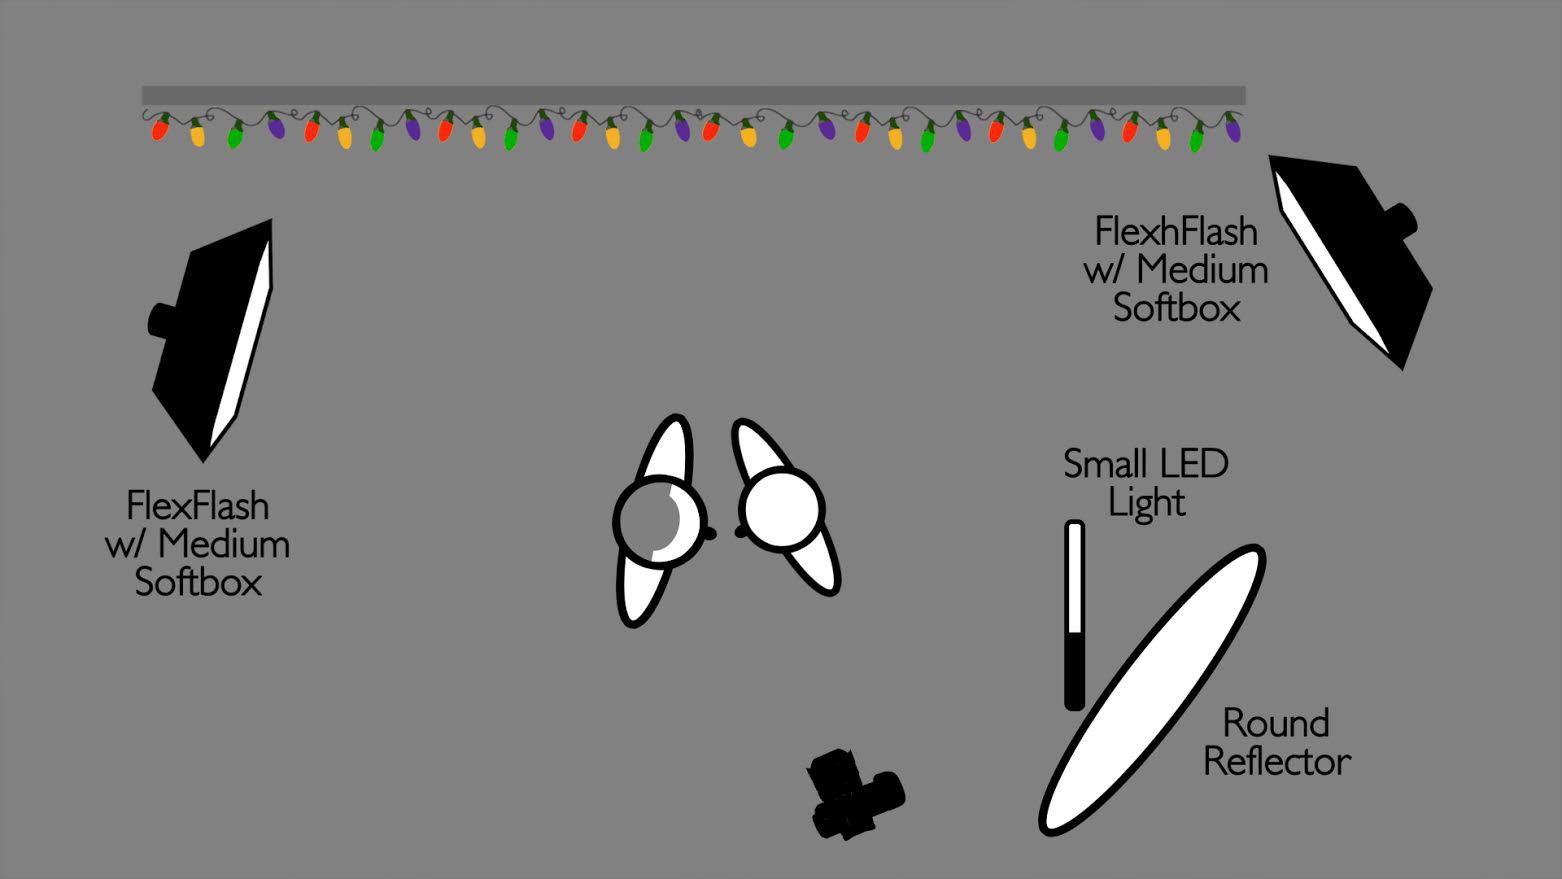
The Lighting Breakdown

Lighting Breakdown
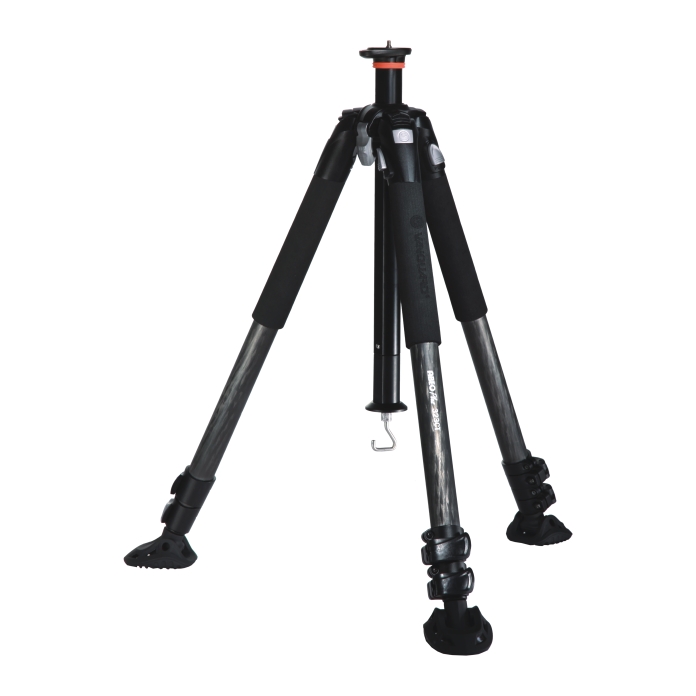
Jay P Recommends for this Shoot


Video Transcription
Hi, this is Jay P. Morgan and today on The Slanted Lens, we’re going to do a two-light rimmed key lighting setup combined with great bokeh to make a romantic image of our young couple.
Jingle bells, the flamingo smells and you’d better enter our giveaway at the end of the lesson. Don’t miss out!
Bokeh is a look that you achieve when you open the lens wide open and allow the background lights to fall so out of focus that they become large light circles or ovals. It looks best when the lens is wide open. Different lenses can create different types of bokeh patterns. Most modern lenses have round bokeh in the middle and gradually changes to ovals on the edge. For my shot today, I want the background to be entirely bokeh with strobe light on the couple up front. I’m going to use a double rimmed key lighting set up with a strong fill as our lighting setup today. So let’s get started and see what we can do. We hung large Christmas bulbs in the trees behind the couple to create the bokeh pattern. I like the large lights because they give off more light and it’s easier to get an exposure. That’s how we’re going to create our background. My couple are going to be a long ways away from the light so I have room to use a 200mm lens and allow the lights to go way out of focus in the background. Here’s our lighting setup with just the bokeh.
We’re going to add a fill light from the front to open up the shadows. We’re shooting really fast so I’m just going to grab an LED with a battery. It’s an easy way to open up the light in the front. Here’s our fill light.
I’ll now add a rim from camera left that’s going to rim him and key her. This image isn’t terrible right now but it still needs more. I’ll add a second rim key light from the camera right side to rim her and key him. Here’s the image with both the rim key lights working together. I love this look. I think it’s really beautiful.
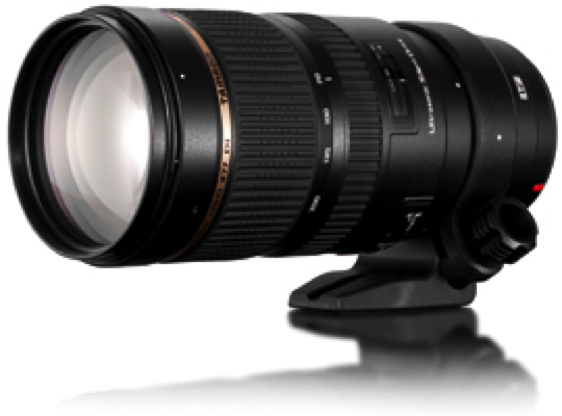
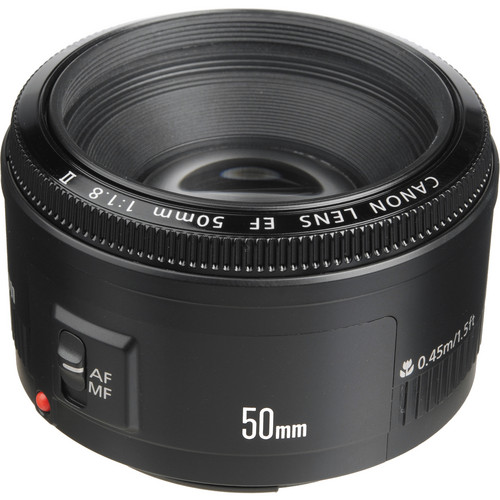
Here are some of the shots on the Tamron 70-200mm lens. I love the compression on these images. The 200mm lens makes this work. My settings were 2.8 at one-one hundredth of a second and 640 I.S.O. I’m going to slowly become wider and wider on the lens choice and show you what it does to the bokeh and also to the scene. So we’re going to go next to a 70mm lens, the 24-70 Tamron but we’re going to shoot at 70mms. So take a look at these images. There’s the change in lens. I don’t like the background as much in this shot. I see more of the scene and I don’t get quite as much of the nice bokeh but it’s not a bad setup. The settings were 2.8 at one-one hundredth of a second, 800 I.S.O. I’m still going to open up wider. I’m now going, just for fun, go to the Canon 50-mm fixed focal length lens and shoot at 1.2 aperture at one-one hundredth of a second, 100 I.S.O. So now the couple’s really nice but the couple needs to be moved closer to the lights. I’m too far away from the lights with this setup. I see a lot more of the background but not enough of it to make it interesting. I’m not in love with this crop. I’m really not but you can see what the bokeh has done as we’ve gotten further away from it but if I push them closer to that background it would make a huge difference. It would look a lot nicer. We’re still heading in this direction of becoming wider and wider. I see more and more of the background. So I’m going to put the 24-70mm Tamron lens back on and I’m going to go to 35mms. This shows the whole scene including the sky and creates a really different look. I actually love this look when you see this much background with people in the foreground but it’s just a very different look. My settings were 5.0 at one-thirteenth of a second at 800 I.S.O. The bokeh’s almost gone. It’s very little bokeh in fact very little is the word. It is almost no bokeh at all but a great look at balancing your strobe lights with the Christmas lights with the setting, ambient light. Our next image has the very same settings but our ambient light had dropped closer to our Christmas lights and they balanced out better in this shot. So there’s a look at that time frame just a difference of a few minutes.
This was fun to look at different lens lengths and the bokeh that they create or lack of bokeh that they create. I love the double rim and key light. It’s really one of my favorites. It’s great for two people. It’s actually great for interviews. I hope you’ve learned as much as I have in this experiment with strobes and bokeh so keep those cameras rolling and keep on clicking.
Hey, the holidays may be coming to an end but the giveaway’s not. We still have $5,000 worth of stuff to give away, over 50 winners, so get to theslantedlens.com. You’ve got till the end of the month. Don’t miss out and these flamingos are bouncing around every time I talk! Get to theslantedlens.com. Don’t miss out!