

For today’s TSL lesson, we are going to look at camera diffusion and do a diffusion filter comparison. In the late ’80s and ’90s, you could not shoot with enough diffusion on the camera. Today, we live in an era of sharpness. We’ve hit the point where it’s so sharp that it is difficult for retouchers to get a nice image.
I think the trend now is shifting towards a little softer image in camera that needs less work later on.
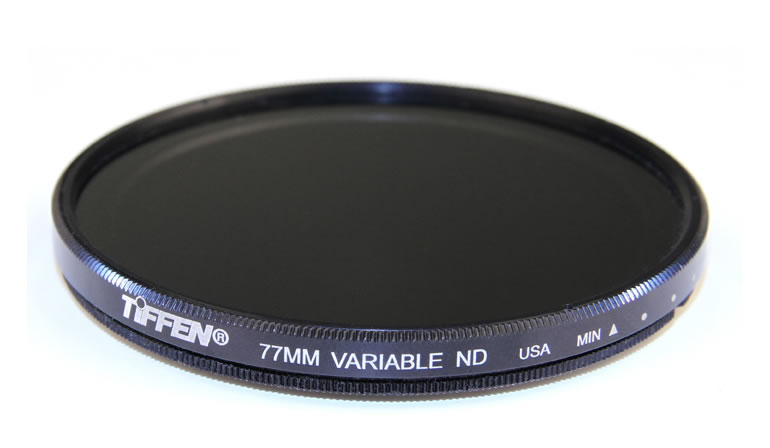
Tiffen makes screw-in filters ideal for DSLR users. They are not our sponsor, I just thought it was a great product that I wanted to review.
Here are some diffusion basics:
- Highlights bleed or bloom into shadows or blacks
- Longer lenses need more diffusion than wide lenses
- Reduces contrast and softens skin tones
Let’s take a look at these three different types of filters Tiffen makes. We used them on a black-and-white set inside as well as outside to get several comparison shots.
Thanks for watching! Keep those cameras rollin’ and keep on clickin’.
Don’t forget to enter our July 2014 INTERNATIONAL giveaway to get a chance to win a NeroTrigger or Light Blaster!
The Final Images


The Lighting Breakdown
Jay P Recommends for this Shoot


Video Transcription
Check out the end of the video our international give away ’til July 31st.
Today, on the Slanted Lens, I want to take a look at Camera Diffusion. I shot through the late 80s and 90s and you could not shoot with enough diffusion on the camera. It was impossible to add diffusion later and had to be done in camera. You had to make a decision and when you made that decision you had to live with it. Today we live in an era of sharpness. Well, we’ve hit the point, where it’s so sharp that it’s difficult for retouches to get a really nice image because they’ve gotta take all that sharpness out and clean up the skin and things in the image. The trend now, I think, is shifting towards a little softer image in camera that later, you don’t have to do so much work on. I started looking around at N.A.B. to see what kind of diffusion was out there. Tiffen, that used to have these 4-inch glass filters in black satin, satin pearl, has now offered 52 to 82 millimeter screw-in filters, ideal for DSLR users because you can just screw these on at the end of your lens. Tiffen is not our sponsor. I just think this is a great product. This has been offered on the market. I asked them if we could review it. They sent me the filters so I can review them. I just think it’s a product you ought to look into.
Let’s take a look at some of the diffusion basics. One, diffusion basically blooms the highlights or lets the highlights, kind of bleed into the shadow areas. That’s how you can tell if something is diffused, as you look at that kind of diffusion, as it moves from the highlights into the shadows. It’s also on a long millimeter lens, like a 200 mm. You need more diffusion on that to make it look the same as on a 24 millimeter. It doesn’t need near as much diffusion to look as diffused. So longer lenses need more to look as heavy as a wider angled lens. So, that’s two. Number three is that you lose a little bit of contrast. You’ll see it start to blur into the face.
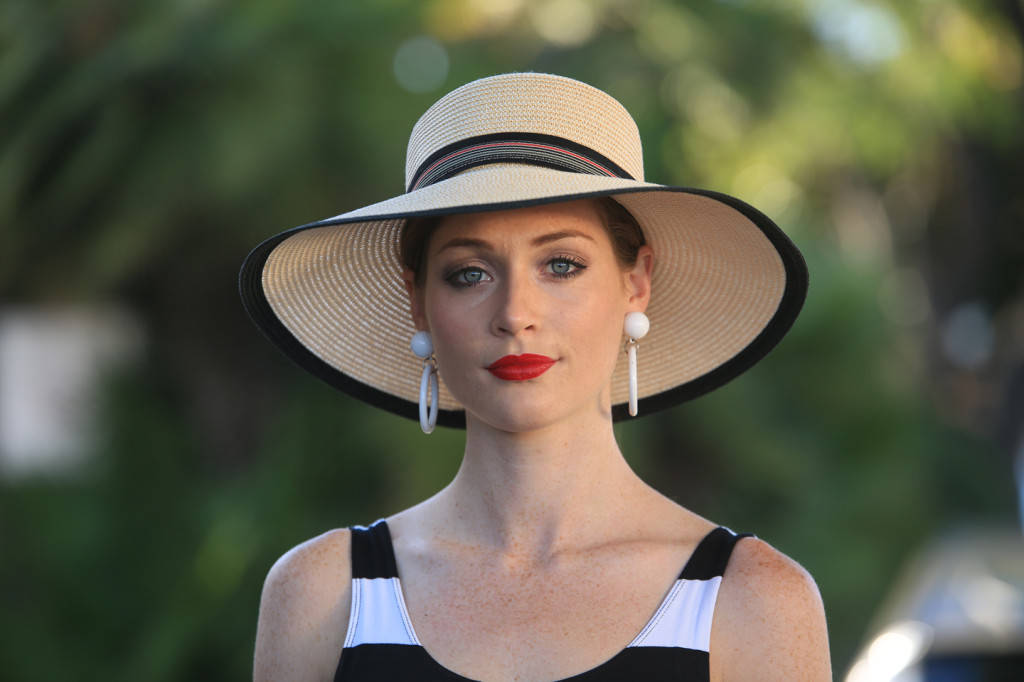
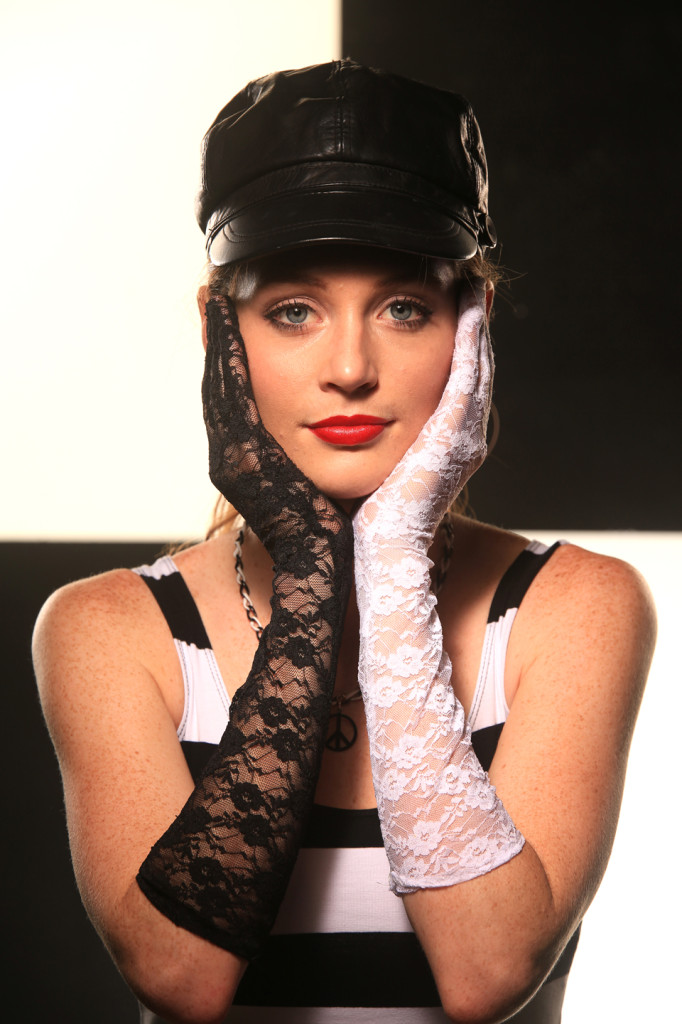
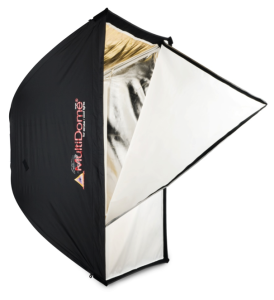
So, let’s take a look at these three different sets of filters. First, let’s look at how we lit our set and then we’ll get started from there. I setup a black and white set to show the difference in each filter. I wanna have black areas that the whites can bleed into. So, this black and white set is gonna emphasize a comparison and gonna make it a lot easier for us to see. I also took the filters outside and used them in natural light situation that was only lit with a single reflector. This is more of a real life comparison. We’re gonna take a look at how they react in that scenario as well. Here’s the line diagram for our first setup. I’m gonna use a beauty dish. It’s a deep dish Mola beauty dish. It’s painted white inside. We had two large Photoflex Softboxes acting as rim lights. These two softboxes were placed just behind the set, so the set wall itself is gonna act as the flag, keeping the light off from the front of the wall. We used two medium softboxes aimed at the white squares; one high and one low. Those were acting just as a background light. This is our first image with absolutely no diffusion. Tiffen make satin filters and black satin filters. So, let’s start off first with our black satins. They produce a grainier, warmer feeling. This gives a really nice smooth look to the skin. It’s gonna smooth out blemishes and wrinkles. This gives just a little more of a soft look to texture surfaces but it’s gonna add a mild glow to the highlights. So, here’s the Black Satin 1. Here’s the Black Satin 2. Here’s the Black Satin 3. All the qualities that I talked about become a little more noticeable as we increase the intensity. Now, let’s go to the satin filters. They’re gonna produce a cleaner and muted kind of diffusion. They also give a nice smooth look at the skin that’s why we’re gonna use them. So, let’s take a look at the Satin 1. Here’s the Satin 2. Here’s the Satin 3. Now, let’s take a look at Tiffen’s pearlescent filters. These bloom more on the highlights than the other filters. Tiffen calls this a halo glow. They’re going to reduce the sharpness and contrast while really maintaining the focus. They’re great to mute colors if you want more of a pastel look especially when you get to the Pearlescent 2. It just gives a very nice glow to the image. Here’s the Pearlescent 1/2. Here’s the Pearlescent 1 or the Pearl 1. Here’s the Pearl 2. That Pearl 2 really blooms across the image. You kind of see a reduction in the contrast. You kind of see that nice white look to the image as all those highlights bloom. I love the look at the Pearl 1/2. It softens the face. It gives a little bloom to the highlights but it’s very subtle. That’s actually my favorite.
Let’s take a look at how each of these filters affect the face outside in natural light. This scene is lit with just a Photoflex silver gold reflector. I picked a nice dark foliage background and shot at 170 millimeters just like I did in the inside. You know, longer lenses need more diffusion to show. A wide angle lens can need much less diffusion to look the same as the long lens. So you may use 1/2 pearl on a wide angle lens but go to a 1 with a longer lens. Here’s our image alone with absolutely no filtration. Now, here’s the Pearl 1/2. Here’s the Pearl 1. Here’s the Pearl 2. So, again, the Pearl series is stronger and gives a softer white glow over the image. I still love that Pearl 1/2. It’s a great look and gives us a little bit of bloom to the highlights but just so subtle. Here’s the Satin 1 outside in that comparison. Here’s the Satin 2 outside in that comparison. And, here’s our Satin 3. It’s a very nice look with this long lens and smooths out a lot of those freckles on her face. Just a nice look. Now let’s take a look at that black satin. Remember. it’s gonna be a little warmer; a little more grainy. But, let’s take a look at the Black Satin 1. Here’s the look at the Black Satin 2. And, here’s our Black Satin 3. The black satins are a little more gritty, a little more grainy, but, you know, that’s pretty hard to see. Each of this filter is useful for different situations. You know, for me, when I’ve got a scene in front of me, I’ll pull the filters out and just start looking to each one of them. Taking the frame and seeing which one I like the most. Sometimes, the color’s going to affect them. Sometimes it’s the contrast that’s going to affect them. So you use them for different reasons. You can stack them, sometimes, if you wanna get really fun and crazy with them. If I’m a shooter who’s shooting a lot of senior portraits and things like that, I would use a really light diffusion on my camera and that would take off the edge of blemishes. A little bit of the issues I’m trying to retouch and work on later would really help my work flow in the end. From a creative standpoint, you use them to create a look; to give it a vintage look, to give it a surreal look, to give it a dreamy look. Whatever you choose, look at the diffusion material and you can make a decision on what works best for you. So, get out there, experiment with some of the diffusion and keep those cameras rolling, keep on clicking.
Here’s our international giveaway, a light blaster and a Nero trigger. International giveaway ’til July 31st.
Go to TheSlantedLens.com.