


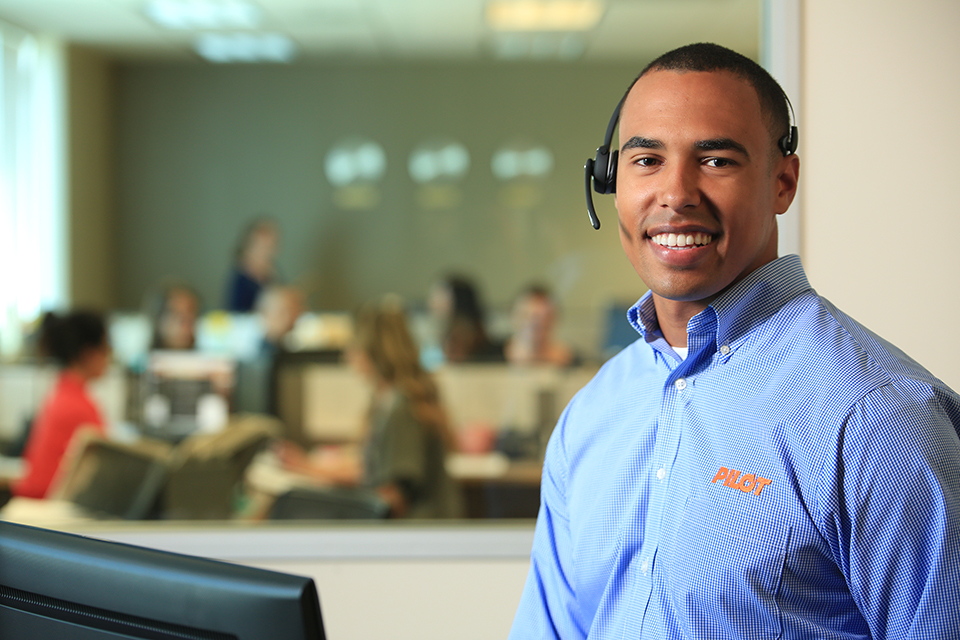
In today’s lesson, I am shooting a corporate image of someone in a call center. I have done these images for years and their success hinges on getting the right person to be the talent. The image represents the face of the company, so the talent should make the image feel open and inviting.
There are a couple things to know when prepping talent for a photo shoot, whether that person is an employee from the client company or a paid model/actor:
1. Have them bring several options for clothing
2. Make sure clothes are clean and pressed; bring an iron or steamer with you
3. Talent should be well groomed
4. Make a conscious decision about facial hair with the client and the talent
5. Have the talent bring personal grooming supplies, from tooth brushes to razors
This type of image demands a few things from the talent, and you will need to provide direction to him or her:
1. Need to look directly into the camera
2. Need to have a comfortable smile
3. Help talent feel comfortable by engaging in conversation
4. Positive encouragement
We only had an hour to get this shot but because of the prep work we did with the talent and client, we were able to set up everything needed for this shoot in 30 minutes, leaving us plenty of time to get the shot. Prep work is just as important as the time spent on set.
Thanks for watching! Keep those cameras rollin’ and keep on clickin’.
Don’t forget to enter our October 2014 giveaway to get a chance to win a tripod and bag from Vanguard!
The Final Image

The Lighting Breakdown
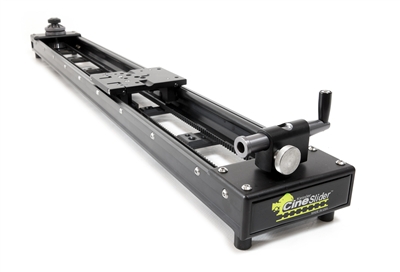
Jay P Recommends for this Shoot


Video Transcription
It’s not too late for the Vanguard Giveaway. Check out the end of the video.
Hi, this is Jay P. Morgan. Today I’m shooting a corporate image for Pilot Freight Services of someone in the Call Center. This is going to be a one light corporate image. I have done these images for years and their success hangs on getting the right person to be the talent, and to make the image feel open and inviting. The image represents the face of the company. This is the person that you’re going to be talking to when you call in to place your order. Here’s a couple of things to know when preparing the talent. If you’re using an employee from the company, this is very critical that you go over these things with them. If you’re using a paid talent, it’s still pretty important to go over these things, because they may not know it.
Number one. Bring, or have them bring, several options of clothing. They always show up with one t-shirt and it’s just not the right thing.
Number two. Make sure the clothing is pressed and clean. You’re going to have to have an option to accomplish this with you on set. An iron and an ironing board are pretty darn critical. Or a really good steamer.
Number three. Make sure they’re well-groomed from head to toe.
Number four. Some companies like beards and that’s great. Just make a conscious decision with the client about the beard and its length. Don’t just fall into it. Like they show up with a big beard and won’t cut it off.
Number five. Have them bring all personal grooming supplies. Their razors, their toothbrush, anything they need, male or female, to be able to groom themselves if they need to on set.
These are just some hints to help you make sure the person is prepared so that things go smoothly the day of the shoot. This type of shot demands a few things from the talent.
Number one. They need to look right into the camera. That’s critical.
Number two. They need to have a comfortable smile. If they feel comfortable, then the viewer will feel comfortable.
Number three. To accomplish this, as you direct them, ask them questions. Talk about their life. Talk about their kids. Get a dialogue going with them, so that as you talk, they’re going to feel more and more comfortable, and you can start taking pictures in that process. You’ll find you’ll kind of move yourself into a very easy, comfortable look.
Number four. Tell them how well they’re doing, even if they’re not doing very well. You have to keep telling them how great it’s going and how wonderful it is. Just keep reinforcing them. As you do that, they’re going to feel more and more comfortable and things will look better. Those are just a few tips on directing your talent. Let’s get to how we lit a shot.
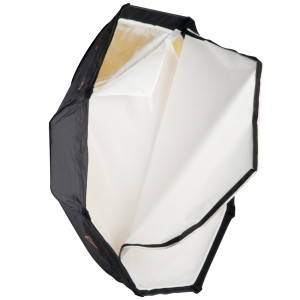
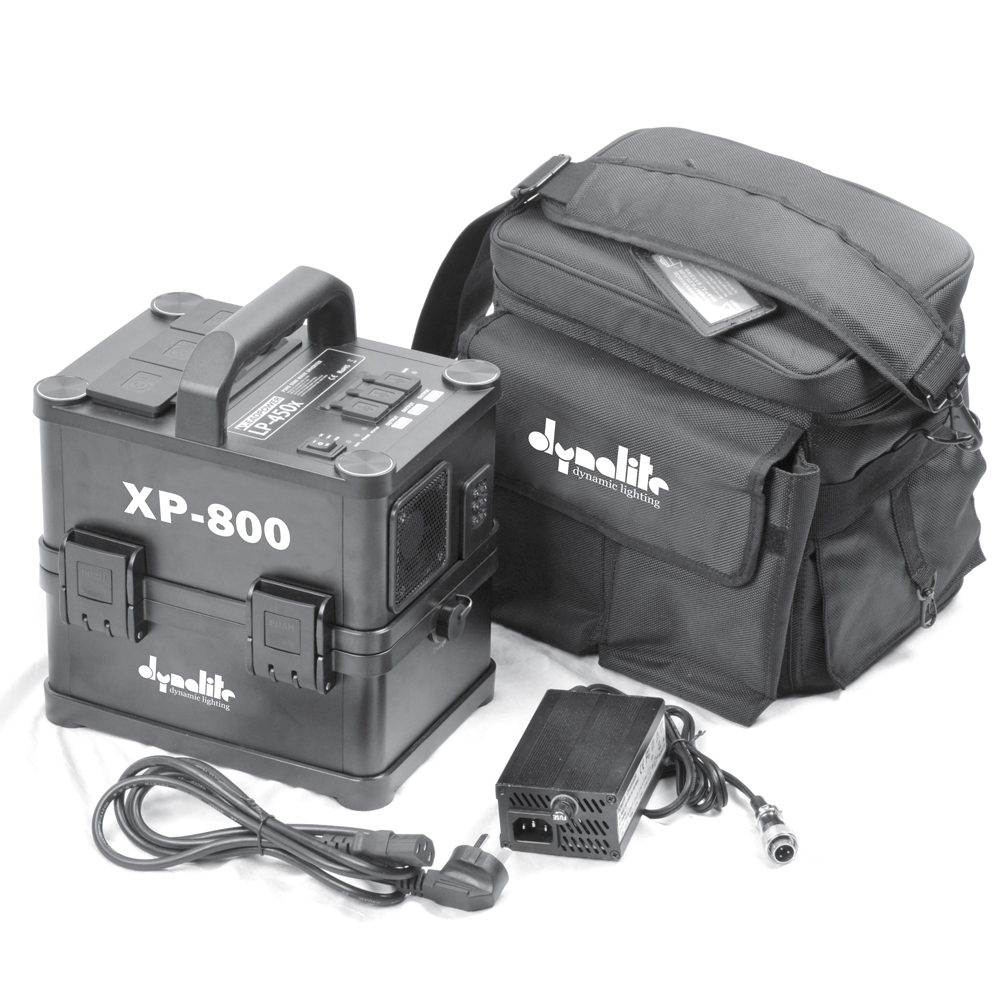
We have two different places in this image. We’ve got the person up front, and then we’ve got the group of people in the background. The people in the background will be lit by the window light, and also the artificial light overhead. I’m going to expose for them, and a correct exposure for them will become the basis for my photograph. Here’s the image with only the light from the window. The background looked great, but he’s underexposed and really doesn’t work up front. If I open up enough to expose him, the people in the background are going to be way too bright. I’m going to add a Photoflex Small OctoDome from camera left on a Dynalite head and pack to mimic that window light. It’s an OctoDome with a grid that gives us nice control, because it keeps it really pooled on his face. I did struggle with seeing the reflection of the camera and myself in the window, and had to put up blacks so it’d get rid of the camera reflection in that window. That was more work than the lighting was. We got ready to shoot in about 30 minutes, and then had about 20 to 30 minutes to photograph him. Here’s our final image. Take a look at this image compared to the image we shot in the very beginning. We spent a lot of time organizing the people in the background so it looked busy and it looked good, but not cluttered. Backgrounds are just as important as foregrounds, so don’t throw them away. Spend time organizing them so they look good. The room was very small, so we had the client outside on a computer looking at the images as we went, it went very well. Things came together and we got our shot very quickly, but it was because of the prep work we did ahead of time. We made sure that we had the right talent, that they brought the right clothing, that we had everything organized, so that the minute we got there, we could shoot very quickly. Remember, keep those cameras rolling, keep on clicking.
October’s only half over, and the Vanguard giveaway is still going on. Go to TheSlantedLens.com, where you can win one of these wonderful tripods or get one of these amazing bags. Go to TheSlantedLens.com. TheSlantedLens.com. Sign up today.
Don’t forget to subscribe to The Slanted Lens and like us on Facebook, and check us out on Twitter. And I even put one image on Instagram. Only one.