

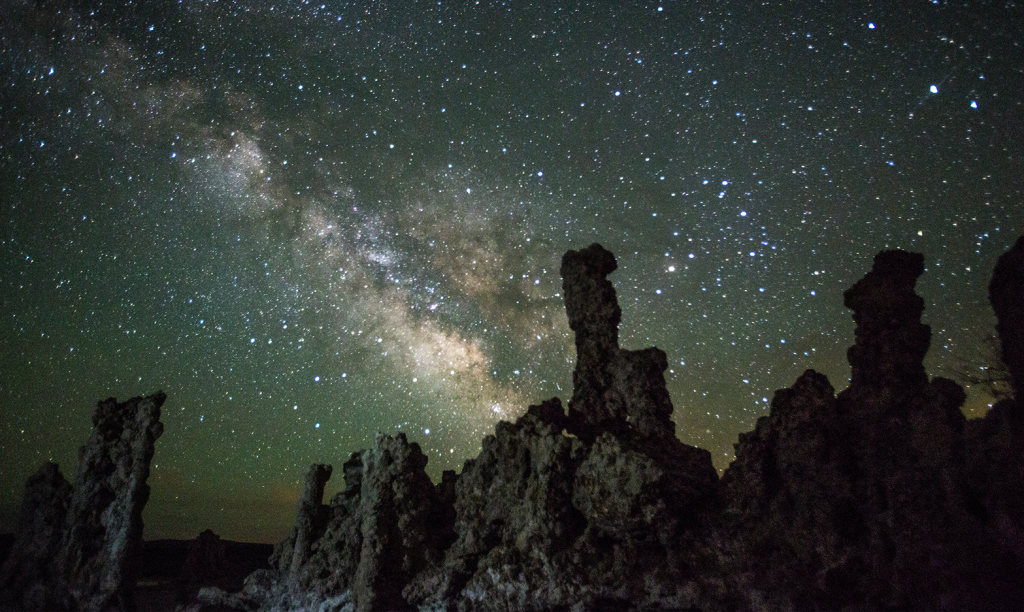

Today on The Slanted Lens, we are up at Mono Lake in northern California to teach you about shooting time-lapse photography at night. I want to get a great shot of the Milky Way as it moves across the night sky behind the tufas, which are the towers of calcium build up present all over the Mono Lake area.
First off, we need to know where the Milky Way is going to be in the sky and when it will rise above the horizon. I found a great article on Star Circle Academy to help get me started; read the article here: http://starcircleacademy.com/2012/06/milkyway/.
It is important to scout your location ahead of time. You cannot show up half an hour before it is going to start, throw down the camera and expect to get a good shot. Get out there early and check out the location. Here are a couple things to bring along to make this experience a little easier:
- A backpack – We had to walk quite a long way to get to the area where we wanted to shoot and a backpack makes it a lot easier to haul everything you need.
- Chair or foam pad – The time-lapse is going to take a while and you need something to sit or rest on.
- Headlamps and extra batteries – Even if you don’t arrive in the dark, you will probably be packing up in the dark.
- Dim flashlight – A small light like the kind found on keychains will give you enough light to move around while the time lapse going, but won’t be so much that it will affect your subject, in this case, the tufas.
It was a great time to be out in that location, sitting under the stars with my sweetheart. I love photography and video – where else can you get these kinds of experiences? Get out there and see what you can do.
Thanks for watching! Keep those cameras rollin’ and keep on clickin’.
Don’t forget to enter our August 2014 giveaway to get a chance to win a Tamron 70-200MM Lens for Canon or Nikon!
The Final Image


The Lighting Breakdown
Jay P Recommends for this Shoot


Video Transcription
– I can’t believe we’re giving this away in August. I am so excited
– We’re here to teach you a little bit about time-lapse photography, not just any time-lapse photography, but nighttime time-lapse. Hi, this is Jay P. Morgan. Today on The Slanted Lens, we’re out here at Mono Lake. This is up around the Mammoth area, more northern in California. We have come here, to Mono Lake, to be able to shoot some time-lapse photography at nighttime. I want to get a great shot of the Milky Way as it goes by these tufas. Tufas are a calcium, some kind of deposit, I don’t know what it is, it’s a bunch of stuff piled on top of itself that makes these neat looking structures. Our goal is to get a little bit of light on the tufas, but get great stars and the Milky Way in the background. You need to shoot in a dark place, not polluted by city lights. We chose Mono Lake because it’s in a dark area and it’s a cool natural wonder away from all those city lights. It’s dark with no ambient light, it’s a perfect place to do our time lapse.
First off, we have to know where the Milky Way’s going to be and what time it’s going to come up on the horizon. You know, the reality is when people say “We’re going to photograph the Milky Way” all the stars you see in the sky are in the Milky Way. What most people think of as the Milky Way is that kind of cloudy area that comes together. In order to figure out exactly how to find that, I did a little research and found out that it’s basically the constellation of Scorpio down to Cygnus and really around Sagittarius. Now, I’m acting like I know what I’m talking about here, the reality is, I’m looking for that cloudy area that comes up on the horizon. But in order to find that, I’ve got to find the constellation Sagittarius and in that constellation is that cloudy area. You can check out an article on starcircleacademy.com for more information on finding the Milky Way. I’ll put the URL in the notes. I do use an app to track the constellations, there’s an app called StarTracker and Stellarium. I’m not an expert on astronomy, but those are the apps that I use, there may be better ones out there, but those are the ones that I’ve found. I also have a planisphere, which is basically a hard copy to show you where the constellations are going to be on what day, so there’s a couple of different ways to find the Milky Way. With our app, we’ve seen that the Milky Way is going to come up here at about 10:30 on my right, it’ll go through our tufas, our camera will be stationary, the Milky Way will just glide through them, it’ll take about three hours. So we’ll start about 10:30 and we’re going to go until 2:00 or 2:30 in the morning. It’s going to be a long night. We brought our lawn chairs. We’re going to sleep a bit. So let’s get started and see what we can do.
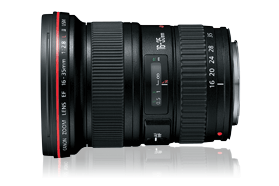
The biggest question every time you shoot time-lapse at night, when you’re trying to catch stars in the Milky Way, is “what are my camera settings?” That’s the hardest decision to make. They are very simple and easy to replicate. I’m going to shoot on manual, so I get a manual exposure. I’m going to use two different lenses tonight. I’m going to use a 16 to 35, the reason being is I want to make it as wide as possible to give me as much of the sky as I can see, it’s a 2.8 lens so it’s pretty quick. I’m also going to use a 24-70 Tamron lens, it’s also a 2.8 lens. It’ll give me a little tighter view, but it still gives me a broad look at the sky. Both of these cameras are going to be set at f2.8. We’re then going to do a 20 second exposure and we’re going to set the ISO at 2000. A 20 second exposure now will be followed with a 25 second time-lapse interval. So a 20 second exposure, 5 second rest, another 20 second exposure. We’ll do that consistently from 10:30 until about 2:30 in the morning. That’s going to give us somewhere around 500 frames to make our time-lapse with. I’m going to set my white balance on daylight, after all stars are daylight, I get great results with these settings.
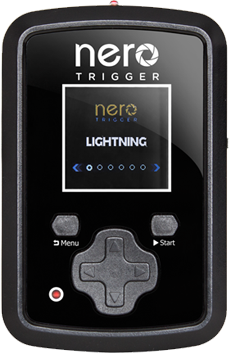
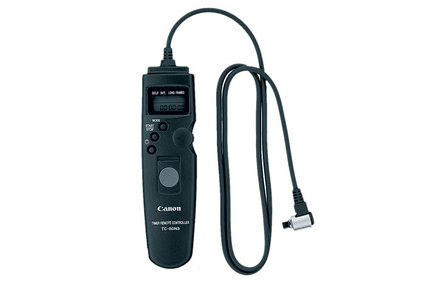
To fire the camera, I’m going to use a Neuro Trigger on time-lapse mode and the Canon TC-80N3. Do you know the Neuro Trigger is $199 and the TC-80N3 is $169. The Neuro Trigger is well worth the extra money. For one, it’s going to give me a preview every time it shoots an image, it’ll put a preview up on the screen on the back of the camera. The Canon one does not do that, so I get to see as the image progresses, I can see how it’s looking each time. With the Canon one, I’ve got to stop the time-lapse, hit the preview button, look at it. I hate that, I’m afraid I’m bumping the camera. The preview alone is worth the extra $21.
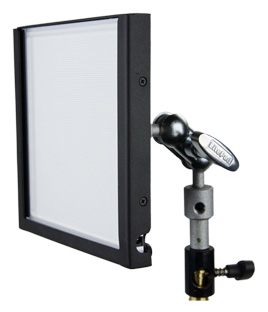
To focus, I’m going to set the camera on video and magnify 10 times and then I’m going to focus until I see the dots become as small as possible. If I’m having trouble with this, I’ll put my Zacuto loop on the back to be able to see it as I focus. That’ll give me the option to be able to get that as sharp as possible. For our format, we’re going to shoot both a JPEG and a raw image. The reason for that is I want a JPEG to play with so I just want to get it in and look at it, but I have a raw image that I can completely manipulate. I can change the color balance, I can do whatever I want with it. That really is valuable to me. We’re only shooting about 500 frames tonight, so it’s not going to matter that much. You know, it’s not like we’re shooting, you know, 2 and 3,000 frames like you do in some time-lapse. So that makes it very easy for us to work with later in post, gives us a lot of options. So we’re going to light our tufas tonight with a headlamp, nothing but a regular hiker’s headlamp. We’re going to put it on the stand on the camera left side here. We’re going to put three stops of ND on it and it’s going to knock it way down. You’ll look at it and you’ll think “my word, it doesn’t even look like it’s on, ” but it needs to be very dark. It’s a 20 second exposure at 2.8. It doesn’t take much light to light something this close. Unfortunately, my headlamp started to lose its battery and became dim after about three hours. So in the future, I wouldn’t do that again. I’d bring a small LED like the Rosco battery-operated soft LEDs. Those would’ve been ideal in this situation, I should’ve brought one.
It is important to scout your location ahead of time. You can’t just show up 30 minutes before it’s going to start, put your camera on the ground, and expect to get a great shot. Get out there early, check out your location. Here’s a couple of things that’ll make this experience a little easier for you: bring your equipment in a backpack, because it’s a lot easier to haul it out to where you’re going to have to be. Bring a lawn chair or a foam pad, something to sit on or take a nap on, because you’re going to be there for a long time. Bring head lamps and extra batteries, because you’ll use them as you pack up and back to the car. Also, I found it very helpful, because any light in this area was too much exposure on our subject, so I have a little flashlight and it has just a little red beam and that little red beam made it so I could kind of move around in the background and not get light on the subject matter. A head lamp was way too bright, it just blew everything out. So there’s just two or three things that’ll help make that experience a little bit nicer.
You know, I didn’t choose to use motion with a Kessler slider on this example, it was meant to be a very simple, straightforward example of shooting the Milky Way, something easy that everyone can replicate. Be sure to watch the next lesson to see my method of processing raw images and putting together time-lapse sequences in Quicktime. It was a great time to be out in that place, it’s an incredible place, sitting under the stars with my sweetheart, probably no greater place in the world. It was a great experience that night. I do love photography and video, man, where else in the world can you go out and have these kinds of experiences? So get out there and keep those cameras rolling. Keep on clicking.
You’ve only got two weeks left, August 31 to win your 70-200 mm Tamron 2.8 lens. This is an incredible lens. Do not miss out. Go to TheSlantedLens.com, sign-up to win this, August 31st. Make a great- looking image. We’re got a a guy joining us here on our hiking, who loves us, evidently. You just made it on The Slanted Lens. – Oh my goodness, you know I’m going to have to Google myself here. – Absolutely. Say your name one more time? – It’s Ron Harris. – Ron, welcome to The Slanted Lens. He will be a faithful Slanted Lens follower after this. Right, Ron? – Darn right. I’m checking it out.