
Today on The Slanted Lens, we are shooting out at the Yanks Air Museum in Chino, California. Here we will look at the process of using a Tilt-Shift lens for focus control.
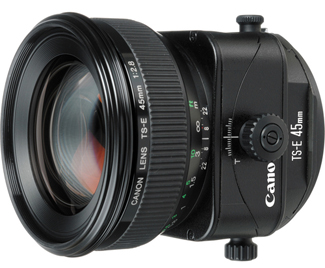
Before we break into the lighting lesson, we will talk about how the Tilt-Shift lens works and how we will use it as a creative focus tool for our shoot today. I have a 45mm 2.8 Tilt-Shift lens. I like the focal length because it gives me a great focus effect, and I can use it in smaller spaces without distortion when shooting people.
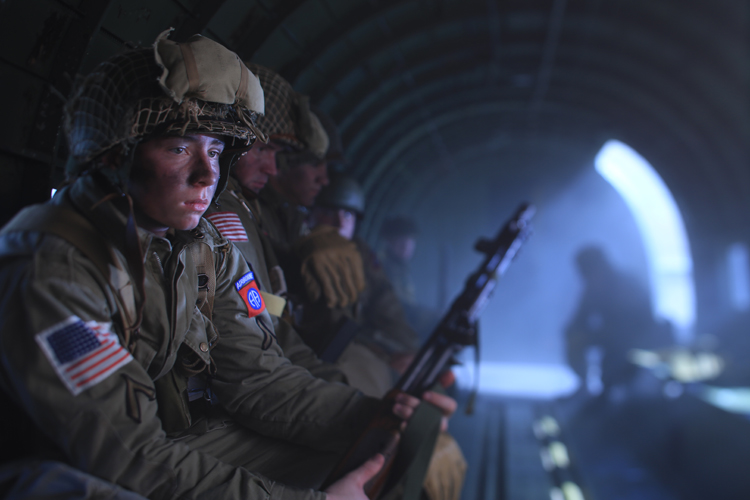
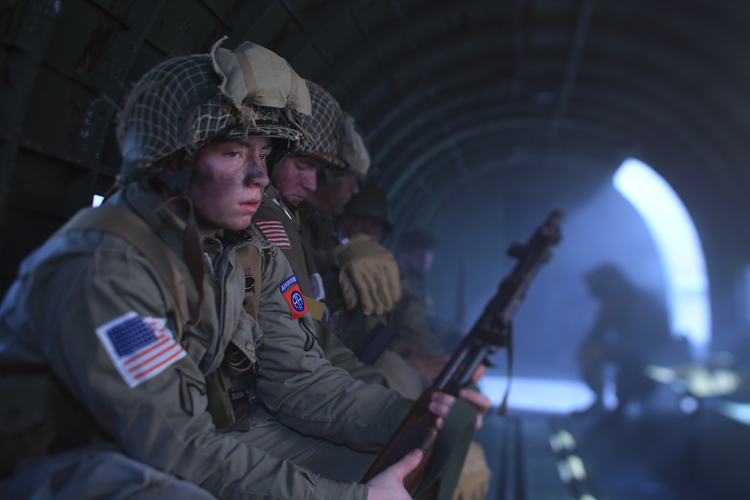
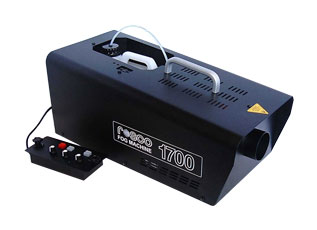
For the lighting lesson, we are going to set up inside the C47 with the 82nd Airborne. The door will be open, and we will direct smoke to flow into the door from the Rosco 1700. We will not fight the sun but set the color balance to tungsten and let the sunlight go blue.
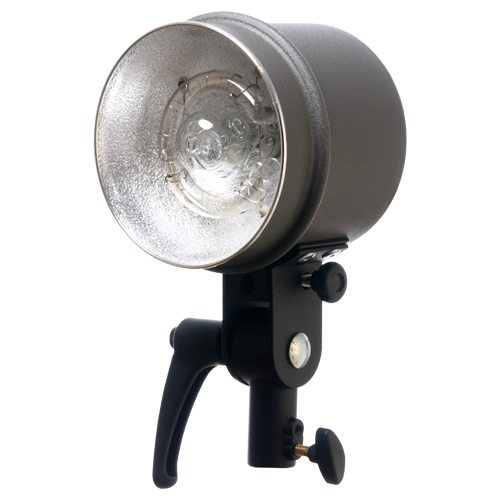
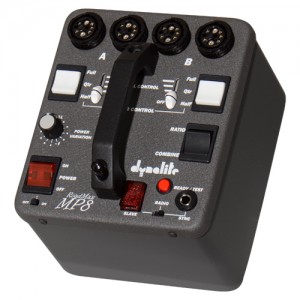
I will be shooting at 200th of a second shutter speed and f5.0. The ISO is set at 160. This will allow us to shoot strobes inside the airplane and balance them with the sunlight streaming in the door. We will be using Dynalite strobes today to light our scene.
We had a great time at the Yanks Air Museum. They were wonderful to us. Thanks go out to them for allowing us to work there with the 82nd Airborne. Thanks for watching.
Keep those cameras rollin’ and keep on clickin’!
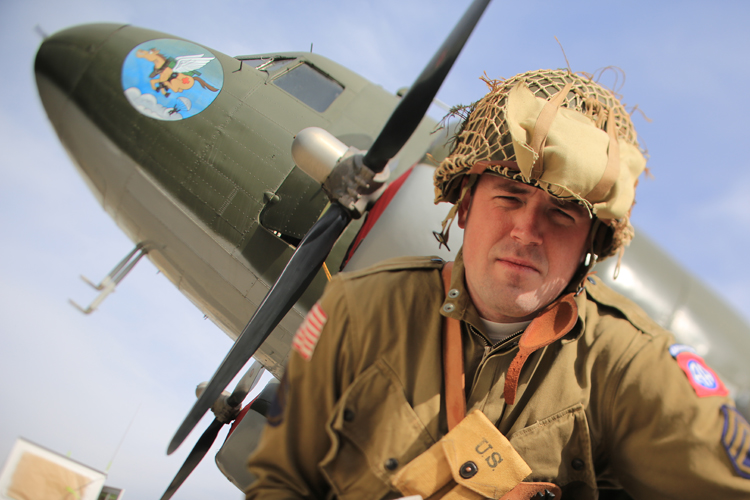
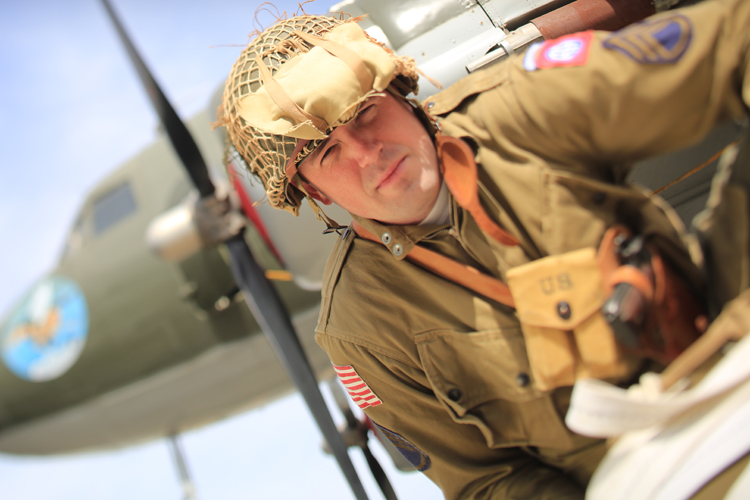
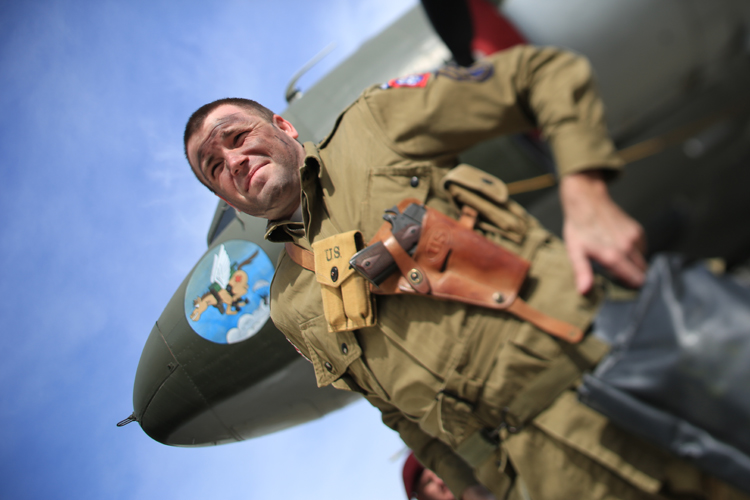
The Final Images

Tilt-Shift Lens Breakdown
Tilt-Shift Lens Breakdown


The Lighting Breakdown
Using a Tilt-Shift Lens for Focus Control
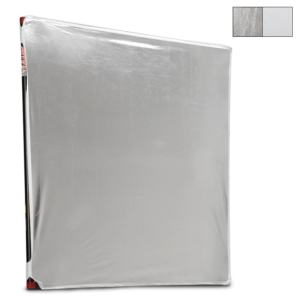
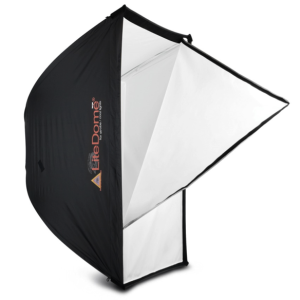
Jay P Recommends for this Shoot


Video Transcription
Stick to the end, because there’s a great giveaway for you. So check that out at the end of the video. No skipping ahead.
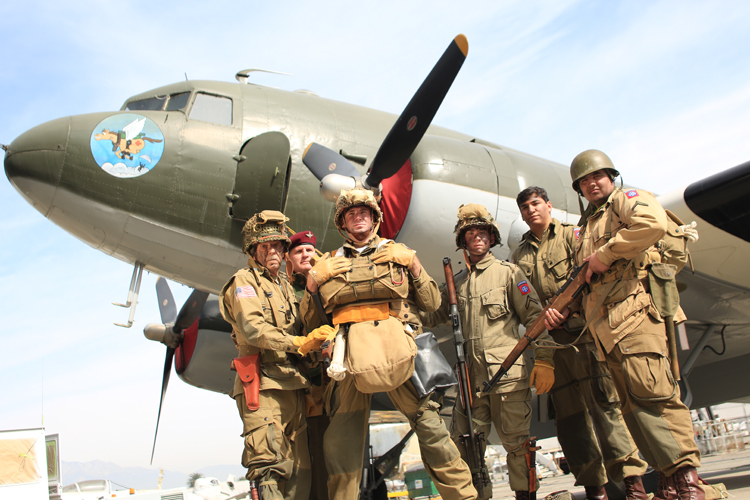
We’re out here at the Chino Airport at the Yanks Air Museum. And we got the 82nd Airborne with us. We’re going to get on this C-47, we’re gonna do some great shots of them, as if they’re parachuting out. We’ll have smoke coming in the airplane. We’re gonna set three lights to make this happen. Using the sun, we’re gonna cross our color balance. We’re gonna shoot tungsten but let that sunlight go blue in the background. One of the things we’re going to use today is a tilt-shift lens. Which is a great piece of equipment, cause it’s going to allow me to shift my focus from the person in the front to the person in the very back. Or I can shift my focus the opposite way. And just keep the person up front in focus and let everything fall way out. So let’s play with this tilt shift. Let’s see what it does. Let’s break this down. Let’s go ahead and get started.
You guys ready?
– Yeah.
Alright, let’s go.
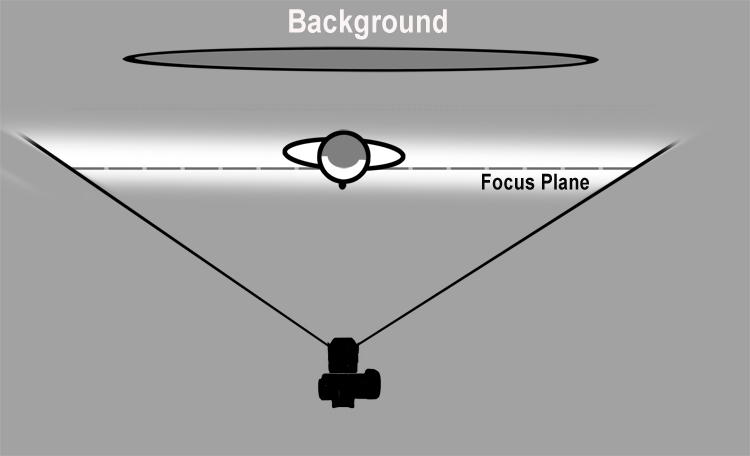
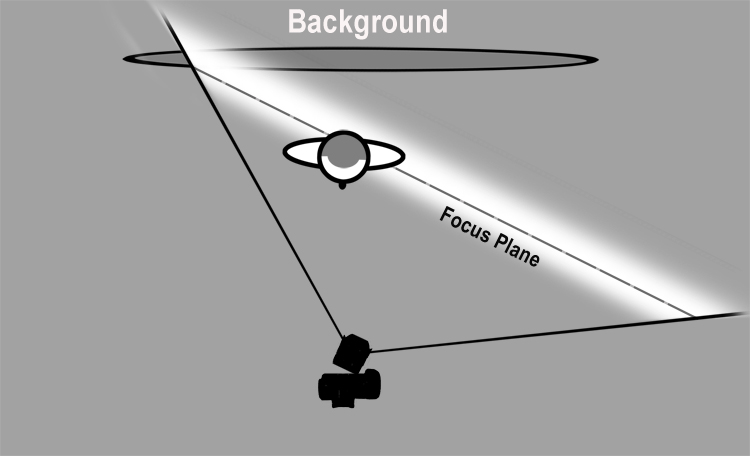
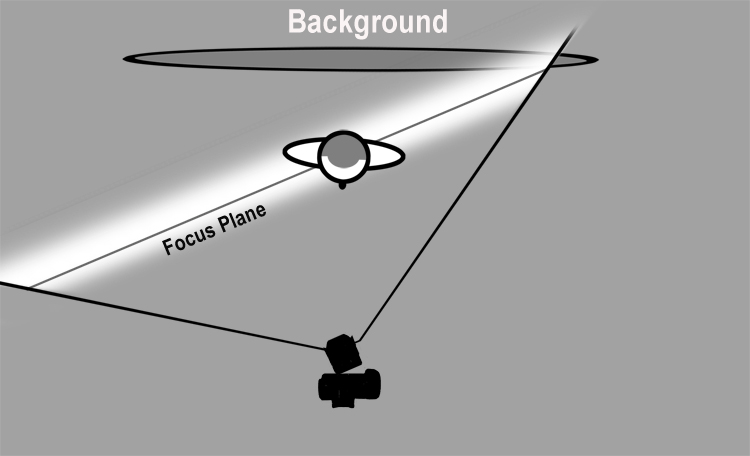
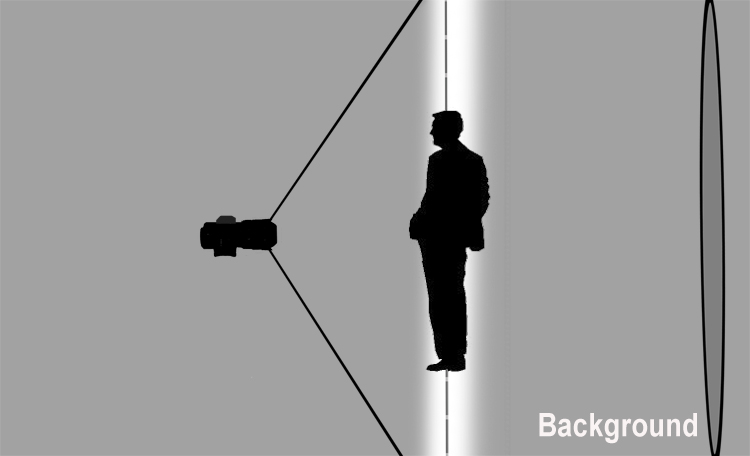
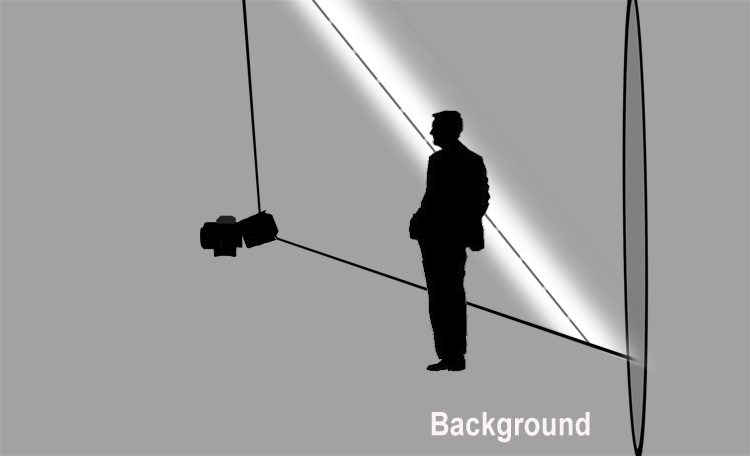
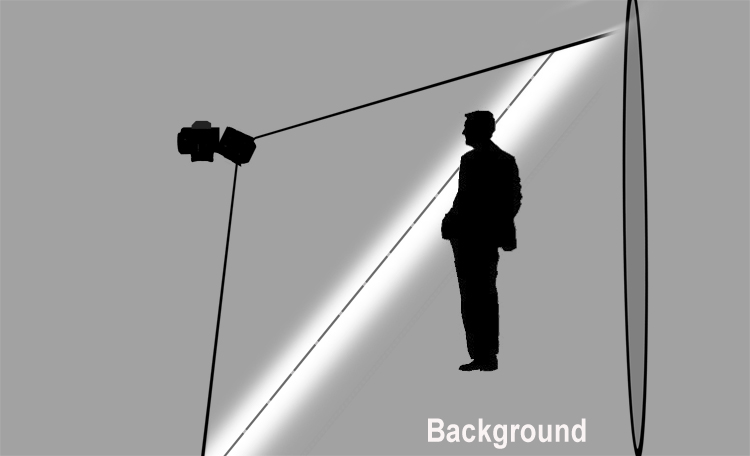
You know before we break in the lighting lesson, let’s talk about how the tilt shift lens works. And how we can use it as a creative tool for our shot today. I have a 45mm, 2.8 tilt shift lens. I like the focal length because it gives me a great focus effect and I can use it in small spaces, without distortion when I’m shooting people. So it’s more of a normal lens, with people. There are other tilt shift lenses out there, but this one is really a safe choice. I love the 90mm, but it’s long and that focus effect is very dramatic. But it’s very cool looking. There’s also wider angle lenses, a 24 and a 17. But those, again, the wider angle lenses, they don’t show the effect quite as much because they’re more wide angle. I think the 45 is a pretty good choice. If I stand straight onto my subject and point my camera straight at the subject. The background is just gonna fall out of focus, equal on each side. It’s a normal look for a lens. If I swing my lens to the right, the subject and the left side of the background will come into focus. And the right side of the foreground will fall out of focus. Here’s an example in this close up image. The subject and the front nose of the airplane are in focus, as we swing the lens to the right. When I swing my lens to the left, the subject and the right side of the background will be in focus. We see the left side of the background as very out of focus. And the right side over his shoulder, is sharper. This is based on the fact that we have to move the focus back to our subject, each time we swing the lens. So we swing the lens, refocus on our subject and we’ll get this effect. Here are some of the images that represent this principle. In these shots, the lens is only swinging right or left. It’s not tilting up or down.
Let’s now look at tilting the lens up and down. On the side of the lens, you can rotate the lens 90 degrees and now the swing, from right to left, becomes an up and down tilt. Let’s take some images of Alla in her Dickens dress, to see how this look works for portraits. Again, if I stand straight on at my subject and point my camera at the subject. The background will fall out of focus equally on both sides. The lens is not tilted. As I tilt the lens up, the background above her head will go out of focus, and the background below her will come in focus. Now as I tilt the lens down, the background behind and above Alla’s head, is going to be in focus.
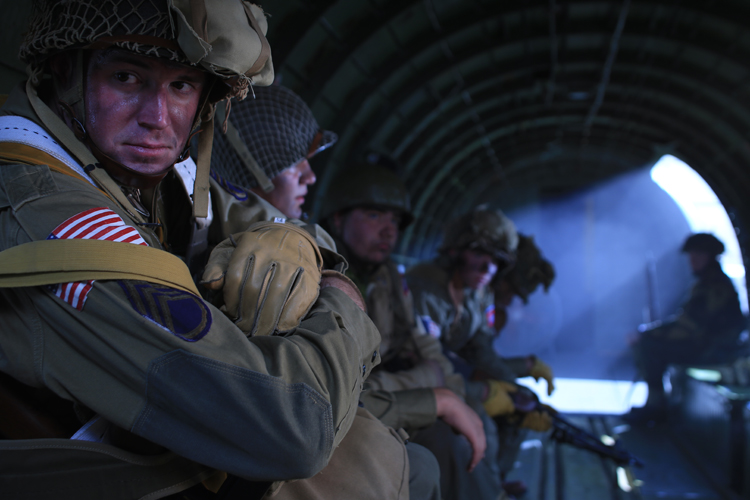
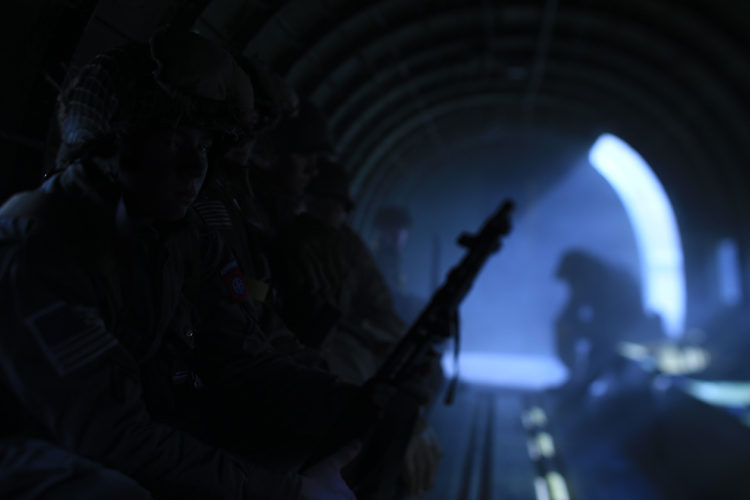
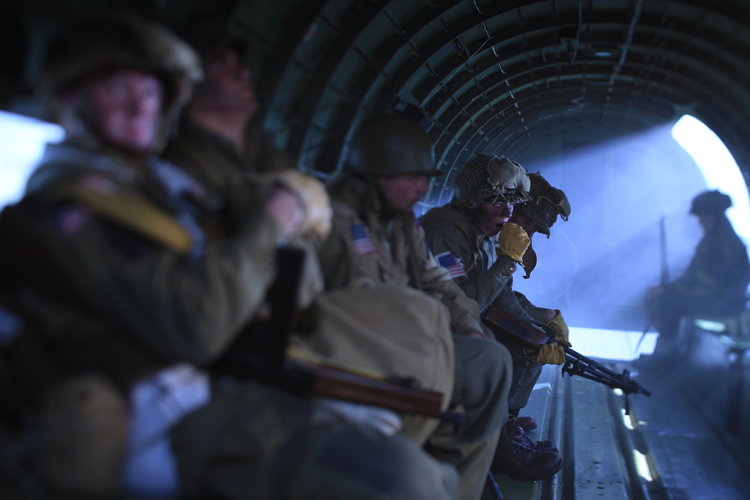
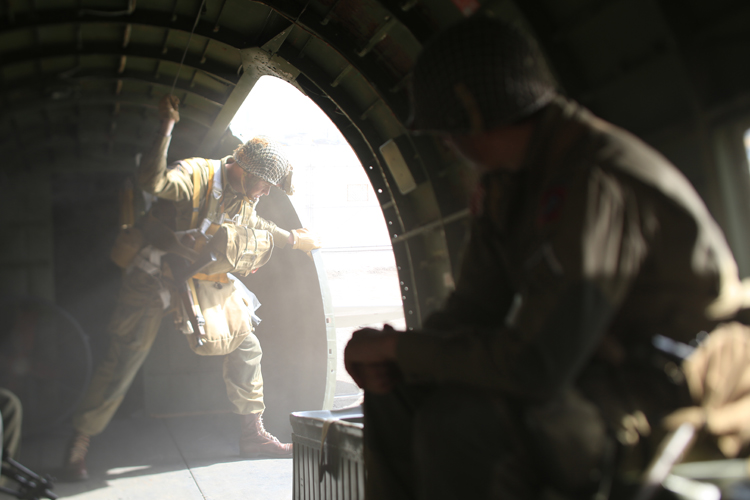
Let’s see how we apply this principle in our shoot today. We’re going to set up inside this C-74, with the 82nd Airborne. The door will be open, we’ll direct smoke to flow into the door with the Rosco 1700. We’re not gonna fight the sunlight, but we’re gonna set our color bounds to tungsten. And set that sunlight go blue, and let it stream in the windows and door. I’ll be shooting at 0.002 of a second, shutter speed and F 5.0. The ISO is set at 160. This is going to allow us to shoot strobes inside the airplane, and balance them with the sunlight streaming through the door. I can crush that sunlight just enough, to be able to make the strobes work with it. We’ll be using Dynalite strobes today to light our scene. Here’s our first shot set non tungsten, with just the sunlight coming through the door. We will now add an Octodome, bouncing into a 39 inch light panel. The soft light of the box, even becomes softer, as we bounce the light out of the reflector. The area is very tight and space is a consideration. We were able to push the reflector against the wall of the airplane and keep the Octodome out of the way, as we bounced it in the reflector and onto our subject. Here’s a shot with the soft key light. The light is just behind the talent, so it let’s the shadow fall towards the camera and looks like the light is coming from the door. We now added a Dynalite travel head, shooting through two layers of the fusion material, that we tapped into the airplane doorway. This becomes a nice fill light, to open up the shadows. The Rosco smoker created the look of clouds out the door and hid the fact that we’re sitting on the ground. The tilt swing lens was swung to the right, making the background out of focus on the right hand side. The door is very out of focus. The other soldiers are pretty much out of focus, because the left side of my focal plane goes out of the airplane and doesn’t land on any subject matter. With the lens swung to the right, I can walk the focus along the row of men and only focus on a single person at a time. It’s make this a very selective process to isolate each individual. I love the way the focus of this lens can single out an individual person and let everything else fall way out of focus around them. It’s a great look. We finished the shot off, with a few shots of the door, using natural light coming through the door. I moved the color balance back to daylight and allowed the sun to just stream into the plane, through the smoke. The lens is swung to the right and the two on the right are in focus. Here the lens is swung to the left and the man on the right is out of focus. This keeps the emphasis on the man at the door.
We had a great time at Yanks Air Museum at Chino, California. They were wonderful to us and allows us to come and shoot there. We really wanna thank them. It was great to work with them. Also, the 82nd Airborne, the guys who came to work out at the Yanks Air Museum at Chino. They were also there, they were a great support. We really appreciate them as well. So it was a great shoot. I do love the tilt swing lenses. There are however, a few things to consider. It’s hard to focus and it takes a lot of concentration. The auto features don’t work. Auto focus does not work and getting exposures is a bit tough. It’s best to set the exposure when the lens is not swung, and keep the exposure as you swing or tilt. They work great for so many applications. I see them a lot, being used for weddings and portraits. They give you such a great look. They are a bit expensive, but a great rental from a place like LensProToGo. LensProToGo will send one of these out to you, it’s very reasonable. You can get it for your shoot, then send it right back. Go ahead and keep those cameras rolling. Keep on clicking.
We’re offering a free download, that was put together by our team Adelaide Lawren and Hector Olguin. It’s sponsored by Squarespace. But it’s a great free download on how to design your webpage, your landing page. So it’ll bring people in and convert them into clients. It’s called “The 7 Steps To a Landing Page That Sells” so go to theslantedlens.com/7steps and download this free download. It really is a great download that will teach you the things you need to do, to set up a webpage that shows your great photography. But converts the people that come there into clients, that want to hire you. It’s “7 Steps to the Landing Page That Sells”, free download sponsored by Squarespace, check it out on theslantedlens.com/7steps.
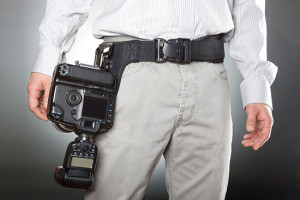
Hi, this is Jay P Morgan. Today on The Slanted Lens product review, we’re going to talk about Spider Holster’s single camera belt system. I’ve used this for now, over a year and a half. I love the system. It’s great because on the bottom of your camera, you’ve got a great plate, it screws onto the camera. That pin, allows you to just simply drop this into the groove. It falls with the lens away from you, so that the camera is sticking out, lens is back. Just a very convenient place to get it. It’s easy to pull it up, to go into shoot mode. Drop it right back down when you don’t need it any longer. It does have a clip here, you can push that clip down, so that it wont come out. It’s locked into place. Or, if you’re going to be going in and out, in and out. You can click it up like this, which allows it to come in and out quickly. Or, when you push it all the way down, now all you have to do is push it down, pull it up like that and it let’s it come out, but it locks back in place when it comes up. So just an easy system to go in and out. I usually use it in this mode here, where I’m locked. Then I just kinda push it up as I pull it out. But then I know it’s locked into place when I go and I don’t have to worry about it coming back out. On the belt also, I have a 200mm pouch. Which is a really great system. It’s got a rain cover for it. You can detach the rain cover, if you’re not gonna be using it. Just let it sit with the Velcro in the back, and rolling it up and getting it out of the way. Or you can completely take it off, if you want to get it out of your way. And I’m just gonna set it aside for just right now. In this system, I love it, you’ve got a zip pocket, allows it to expose your 200mm lens. There’s a lens cap that has a Velcro piece on it. So you can take your lens cap on and off and you don’t loose it. You can just leave that, fall to the side. Now what I do, is I just flip the camera up like this. So my camera is up, makes it easy for me to take this lens off. Pull this lens out, drop this one in. And then I simply drop this one on top. Clip it back around and then I’m ready to go with the 200mm lens. Dial cap this back off, here. Zip it up, and I can go back to shooting, now with my 200mm lens. You know, you get faster at making that change after you use this quite a bit. This just give you a decent place, so your lens is not, you don’t have to set it down on the ground and search for it. The cap is always there because it’s on the Velcro. Just makes it easy to switch this back and forth. So I find this a very successful system for using. And I think it’s something you’ll really enjoy using. If you’re doing wedding and this, this is a great piece of equipment. ‘Cause you can have a single or a double camera set up. So you can go back and forth with two different lenses on your hip. You don’t have them banging around. I mean obviously, they’re at your hip and you gotta watch ’em as you hit on things. But it’s not as, kinda cumbersome as on straps, as you kinda fly around as you move in them. I find this really nice. They’re contained, they’re held tight to your body. And I just know where they’re at. It’s much easier to use. So check it out, it’s called the Spider Holster Pro Belt System. It’s got a little thing called Spider Monkey also. That has on the side of both the pouch and I’ve got a couple on my belt here. But those are so you can put a piece of equipment. Piece of Velcro goes on your equipment, just snaps on there. Can use for light meters or you can use it for a small flash. Just a great way to hold just a few extra things on your belt. Take it on and off using that Spider Monkey System. This has been Jay P Morgan for The Slanted Lens product review. So keep those cameras rolling, keep on clicking.
Hey everyone. Have you gone to theslantedlens.com to sign up for all your free gear that we’re giving away? Who cares about gear anyway? There’s Spider Holster equipment, there’s Photoflex equipment, there’s stuff from Squarespace and there’s some great stuff from LensProToGo. So get over there. I’m heading there right now.