

The Slanted Lens is back at the YouTube Space shooting with their high-speed Phantom camera. We are going to take a look at the basics of slow motion video, and then try out using the Phantom camera – which is anything but the basics.
Basics of Slow Motion
Slow motion video is easier to understand when we relate it to frame rate (fps), or the number of still images that create one second of video. Sorry to my European visitors but I am using the US standard of 24fps today. On a normal clip of video shot at 24fps, the camera strings together 24 individual frames to create the illusion of motion. When we watch playback, we see 24 frames for each second of time in the video. This is called real time. If I were to change the camera settings to 60fps, it would capture 60 frames for each second of video. When I put the 60fps video clip onto the timeline that is set to playback at 24fps, that one-second video now takes 2.4 seconds to play. If I were to take the original, one-second 24fps clip and slow it down to 2.4 seconds, the movement would be blurred since there is not enough data to fill the gaps between each image.
Converting 60fps to 24fps will slow down a person walking through a frame, but would not be enough to show something that is extremely quick. In order to slow down a clip of me smashing a camera with a sledge hammer, for example, we will need a much higher frame rate. This is where the Phantom comes into play. On the Canon 5D Mark III, you can only shoot 24fps at 1080p and would have to drop the resolution to 720p to get 60fps. The Sony A7s is a little better with a max of 60fps at 1080p and allows up to 120fps when shooting at 720p. The Phantom Miro LC320S we will be using today boasts an impressive 1540fps while shooting at 1080p and if I were to drop the resolution down to 640p, I would have the ability to shoot at 8490fps.
Camera Settings
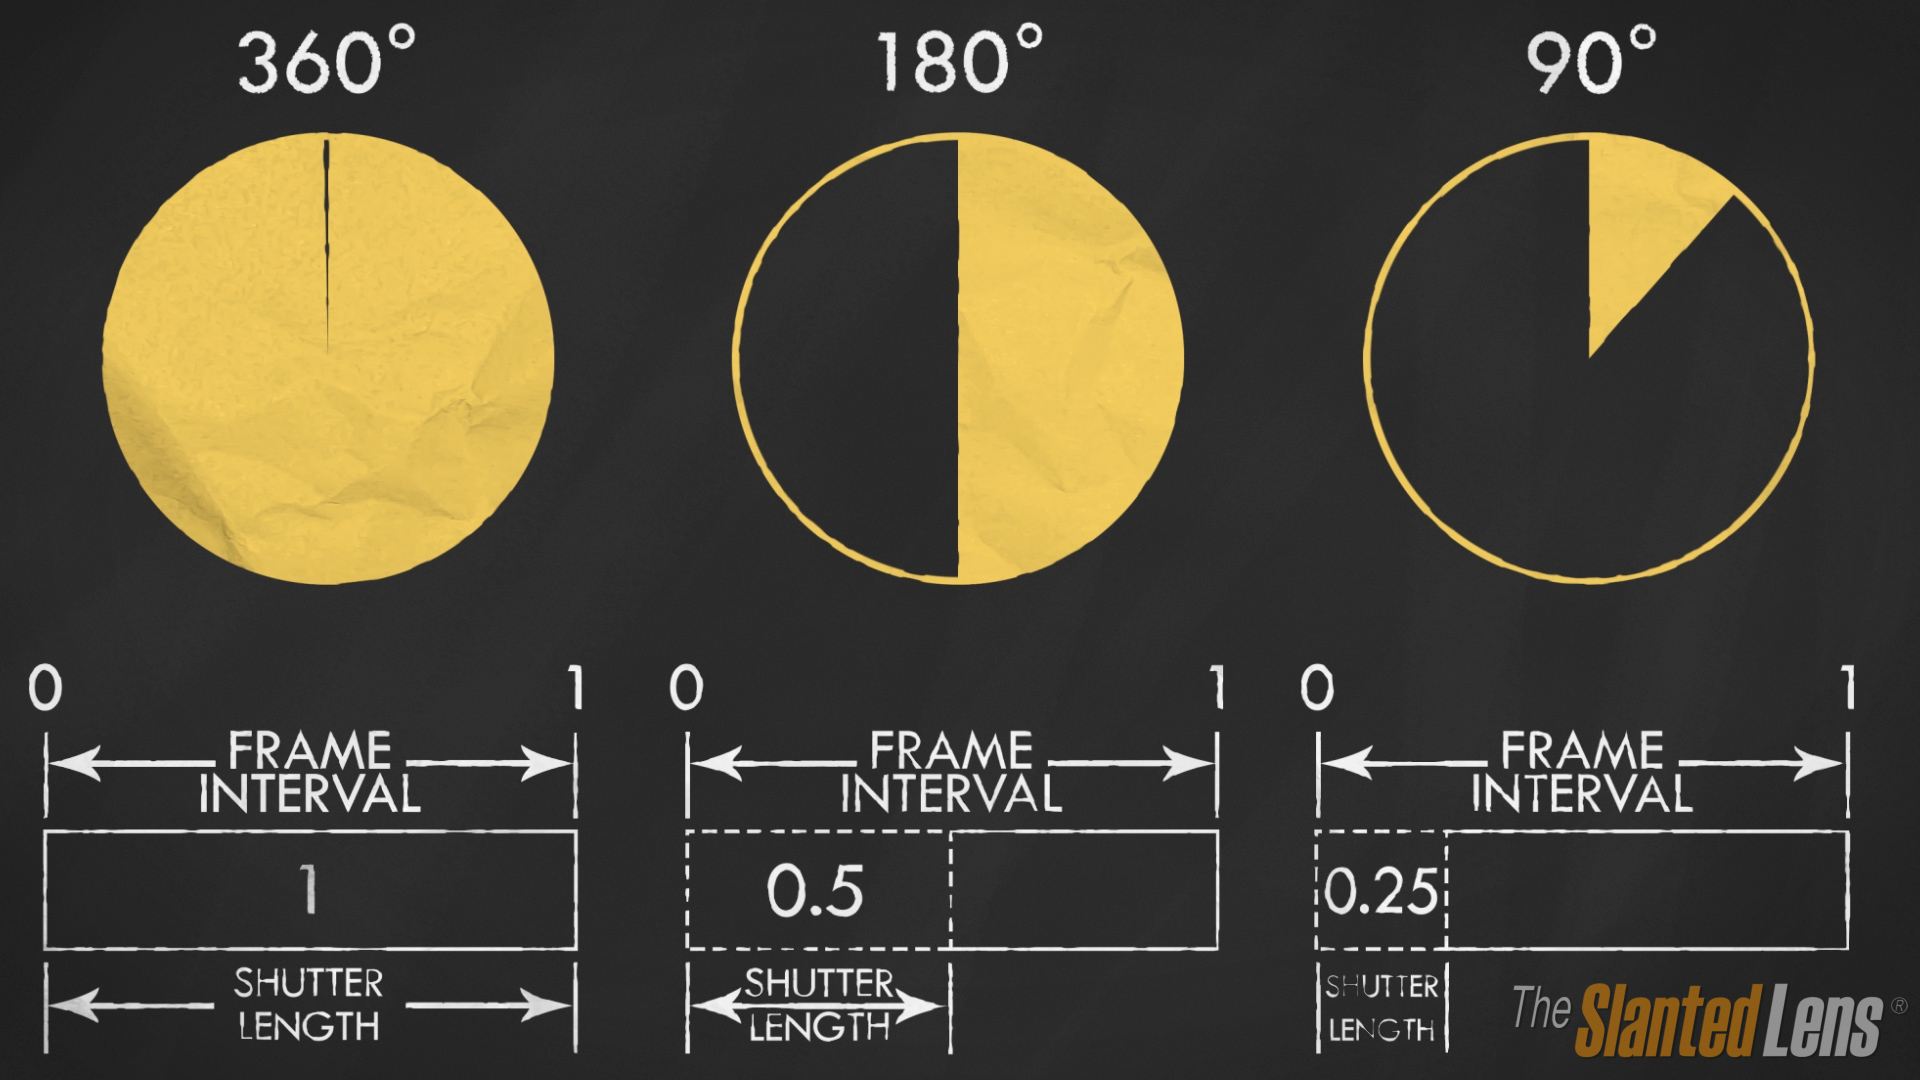
We will be shooting at 1000fps for our camera smash and therefore the shutter speed will be 1/2000sec. Remember that the shutter speed should be twice the frame rate. The Phantom does not measure the shutter in fractions of a second but rather at angles. At 180°, we know that the shutter will give us the equivalent of twice the frame rate so this is what we will use. The frame interval at 360° is equal to the shutter length. If we were to use a 90° shutter, it would be equivalent of four times the frame rate. The aperture will be f4.0.
Here are some graphics that might explain this concept better.


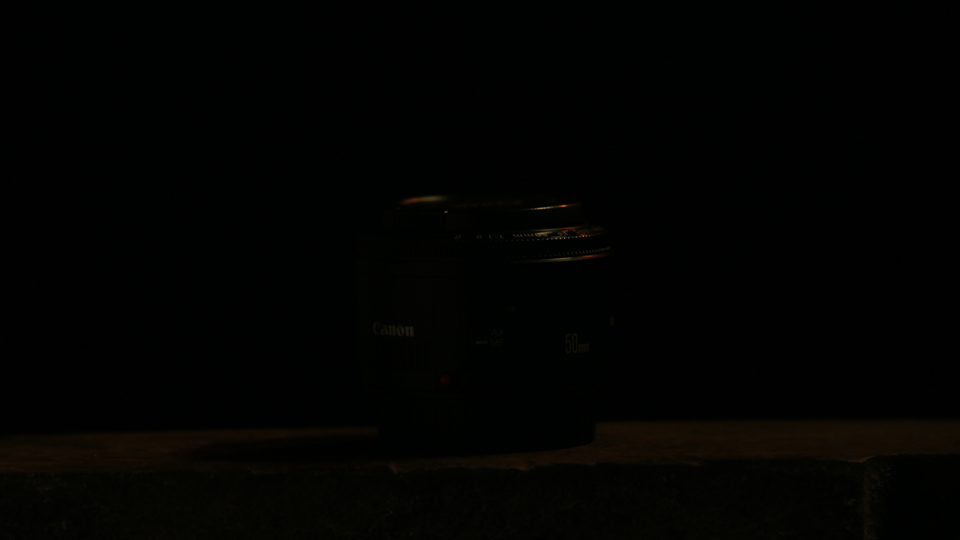
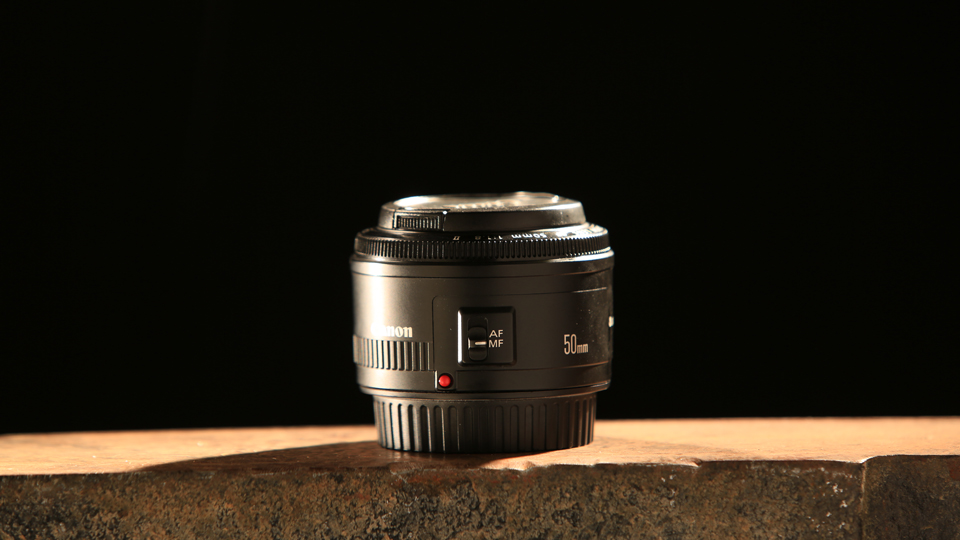
Shooting at 2000th of a sec, we will need a lot of light so let’s take a look at our setup. There is not much light in the room at to begin with as you can see in this first image.
First, we added a 2K as a rim from camera right and then another from camera left.
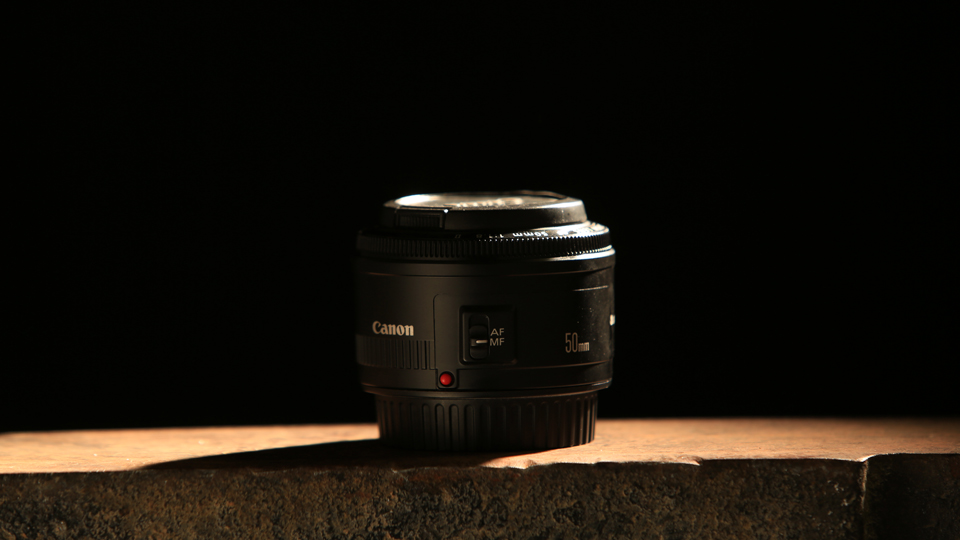
Next, we added a 1K on camera left aimed straight at the product.
The 1K proved to be too harsh by itself so we added a layer of diffusion to soften the pool of light.
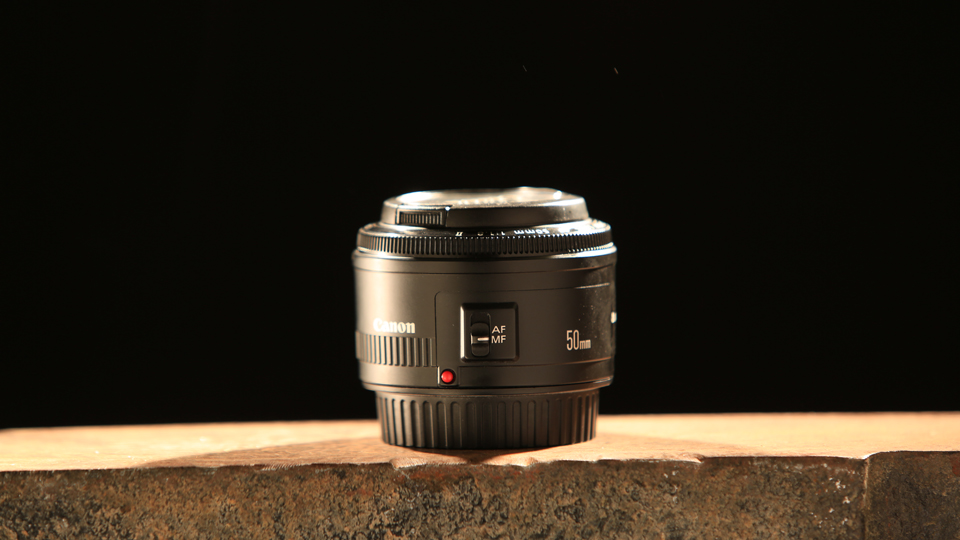
Finally, we added two reflectors in front of the product. The reflectors will bounce a fill light back into the product and also block the 2Ks from flaring in the lens of the camera I am shooting with.

Shooting Process
This camera only allows four seconds of record time when set at 1000fps. This limitation would make it difficult to use the Phantom Mico as a production camera to shoot a lot of things. There is a trigger method that, once I understood it, I liked very much. Once it is set up, the camera is always recording so if I were to hit the trigger precisely when the action occurred, the camera saves the two seconds on either side. This feature makes sure you don’t miss the big moment.
The camera had to be run on a laptop but it is very intuitive so everything can be set through the interface program. The lag time from camera to laptop though was difficult to deal with so we did end up focusing on the LED monitor.
Now it is time to smash some cameras. I hope this helps you understand how slow motion video works and if you already knew that, then I hope you liked the videos we got. Stay tuned to the very end of the video to see the water balloon that didn’t break. Keep those cameras rollin’ and keep on clickin’.
Don’t forget to enter this month’s giveaway of a PhotoFlex FlexFlash 200W Strobe Light Kit!
Jay P Recommends for this Shoot


Video Transcription
Hi, this is Jay P. Morgan. Today in The Slanted Lens, we’re back at the YouTube space shooting with our high speed camera the Phantom. We are going to take a look at the basics of slow motion video and then how to use the Phantom camera which is anything but the basics of slow motion video.
We have the two, two, two, two, two giveaway. Check it out at the end of the video.
Let’s look at the basics of slow motion video. It’s easier to understand when we relate it to frame rates. On a normal clip of video, we shoot 24 frames a second. In 1 second we stream together 24 individual frames and create motion. Our editing timeline is set for 24 frames to show each second. When we watch our video, we see 24 frames for 1 second of time. That’s called real time. The person walking through the frame is walking at normal speed from point A to point B.
When we change the rate, at which we capture frames to 60 frames a second then we have captured in 1-second 60 individual frames. Now when we put them on the 24 frames per second timeline it takes 2.4 seconds to show the 60 frames. The distance they traveled in 1 second is the same but on our 24 frame, timeline 60 frames will play back at 2.4 seconds. It slows the person down so it takes 2.4 times longer to walk from point A to point B. They walk very slow.
If we just slow down a normal clip that’s shot at 24 frames a second to 2.4 seconds, the frames are going to be jittery and jumpy and it just looks really odd. There’s not enough frames to fill so it jumps from frame to frame. So we need to shoot more frames to show slow motion.
On the Mark III, you can only shoot 24 frames at 1080p you have to drop to 720p for 60 frames. On the Sony A7s, you can shoot 60 frames at 1080p and 120 frames at 720p. If you really want to see the detail that comes when you smash a camera for instance not that there’s any reason we would be doing that but you’re going to need to go 1000 or 1500 frames a second thus the Phantom camera. It will shoot up to 1540 frames at 1080p and 8490 frames at 640p. For our demonstration, we’re going to shoot at 1000 and 1500 frames per second at 1080p.
Let’s take a look at our camera settings. They’re a bit tricky with the Phantom and then how we lit our camera smash because we’re shooting 1000 frames a second we’re going to need to shoot a 2000th of a second for our shutter speed. That takes a whole lot of light.
Remember twice the frame rate for our shutter speed. On the Phantom, there are not different shutter speeds but just shutter angles.
At 180 degrees, we know that the shutter will give us the equivalent of twice the frame rate. If we shoot at a 90 degree shutter, it’s going to cause the motion blur to be much less than what we’re used to looking at. It’s going to feel a little choppy. So we need to shoot at 180 degrees which will give us the equivalent of roughly twice the shutter speed.
Remember we’re going to need twice the frame rate and that’s what we get at 180 degree shutter. Our aperture is going to be 4.0. Let’s take a look at our lighting. Remember we’re going to need a lot of light because we’re shooting at roughly a 2000th of a second and in some cases 3000th of a second.
The first image shows the light that’s here in the room. There’s not much here at all. We added a 2k from camera right to give us some backlight and a rim on our product. We then added a 2k from camera left to rim the other side of our product and to give us more backlight. Then from camera left we added a 1k aimed straight at the product. We then added a layer of diffusion to smooth out the highlight. Last of all, we added two photoflex light panels up front. They’ll bounce light back into the product and also block the 2ks from flaring into the lens of the camera.
The problem with this camera is it only gives you about 4 seconds of record time at 1000 frames a second. At 15,000 frames, it only gives you two and a half seconds record time. This limitation would cause this camera to be hard to use as a production camera to shoot a lot of things.
There was a trigger method I didn’t really understand at first but now it makes better sense. The camera’s always running. It’s always recording and you can use a trigger where the trigger when the explosion happens, you hit trigger and it gives you two seconds before and two seconds after the explosion or the moment, you hit the trigger. That’s actually a pretty good way to make sure you don’t miss the explosion.
We did run the camera from the laptop. It’s impossible to run on the camera. The laptop’s very intuitive. You can see the settings, you can set things from there, you can make the changes. It’s just much easier to run from there.
The lag time from camera to laptop however was hard like if you’re trying to focus you got to do that on screen on the side of the camera which made more sense. So now, I think it’s time for us to take a look at some smashing cameras.
Keep those cameras rolling and keep on clicking. Keep those cameras rolling and keep on clicking.
And here it is the two, two, two, two, giveaway. Two flex flash heads, 2 100 watt seconds, 2 light boxes, 2 stands and we’re giving away 2 of them. Go to the slantedlens.com.
Action.
Awww, dang it.