

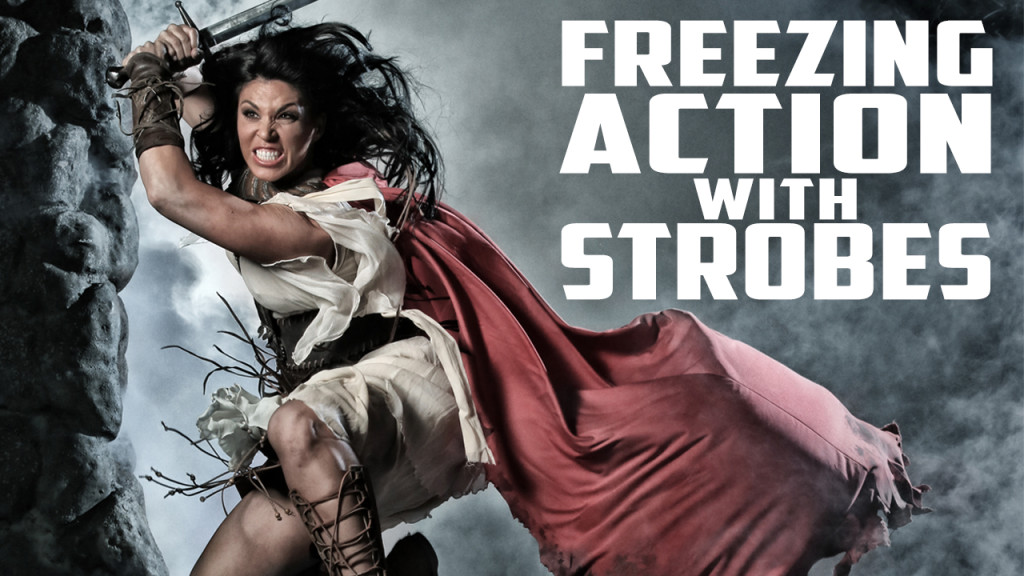

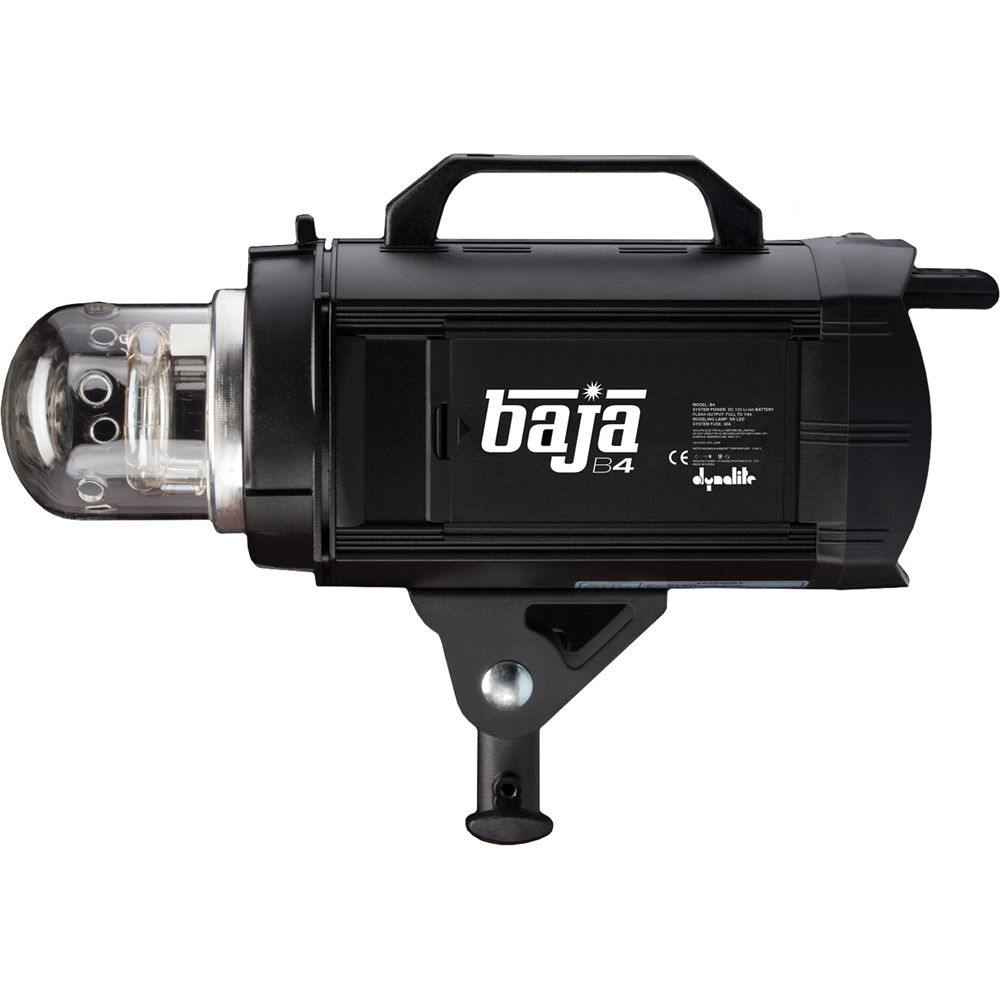
Today on the Slanted Lens, we’re going to show you how to freeze action with strobes, not high speed sync, but freezing action with monoblocks in normal flash mode. I’m going to use a trampoline, my Baja B4’s, and a warrior princess to illustrate this principle.
First, to understand how to freeze action with strobes you need to understand how strobes work. More importantly, how your strobes work. They’re all very different and you need to figure out how yours works to apply these principles.
Strobes are simply a flash of light. Most people think that flash is immediate because to our eyes it happens so fast we think it all happens at once. That’s really not the case at all. Strobes have what is called a flash duration. Flash duration is the amount of time it takes for a strobe to come to peak power and then to tail off.
Flash duration on a chart is like a shark’s fin. It makes a sharp rise up and then a slow fall off. Kind of like a tail. T5 records the amount of time that the flash duration is above 50 percent. T1 represents all the time that the flash is burning from the time it’s above 10 percent and then back down to 10 percent. So consequently, a T1 give you a much better idea of the flash duration because 50 percent of the light is happening underneath that 50 percent mark. So it’s happening in the long tail off and that causes blur on your subject.
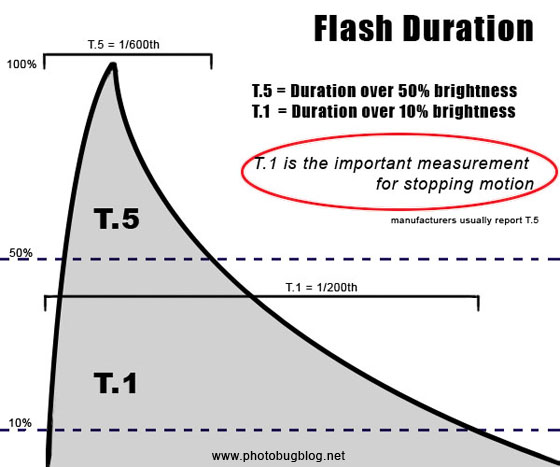
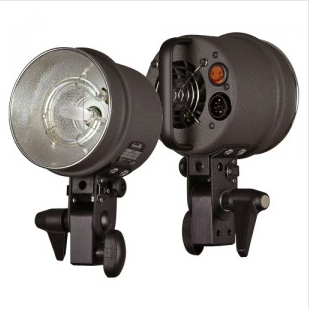
Nowadays, and the Baja B4 has this, there’s a modern technology that is called IGBT technology. It basically acts like a switch that turns the flash off quick and cuts it giving you a spike flash duration. This cuts a little bit of the power out but that spike flash duration is very short and allows you to stop action much easier.
For our photo shoot today I’m going to do 3 things to freeze the action. First, I am going to dial my power down to 50 percent on my Baja B4. It’s going to reduce the flash duration as I dial the power down. Now not all monoblocks will do this. Like the Einstein, it actually lengthens the flash duration when you dial the power down. So it’s important if you’re going to apply this principle you look at the manual for your monoblock and see if shortening the power actually reduces the flash duration.
Second, I’m going to shorten my shutter speed until I get a clip from the shutter speed on the image. So I’ll start out at 1/30 then 1/60 and keep dialing it down until finally it clips the frame. Then I’ll step back one step and that will be my shutter speed.
Third, I’m going to use the oldest trick in the book. All right, maybe not the oldest trick but certainly the second oldest trick in the book. It’s simply a matter that I am going to shoot at peak action. Everything that goes up has got to come down. So there’s that moment when it’s going up when it just pauses and then starts to come back down. Now I may not be able to hit that exact moment every single time but I can be very close to it. If I can shoot at that moment I’m going to be far more likely to freeze the action because the subject is not moving near as fast.
So there you have it:
- Dial your power down
- Get the fastest shutter speed you can
- Shoot at peak action
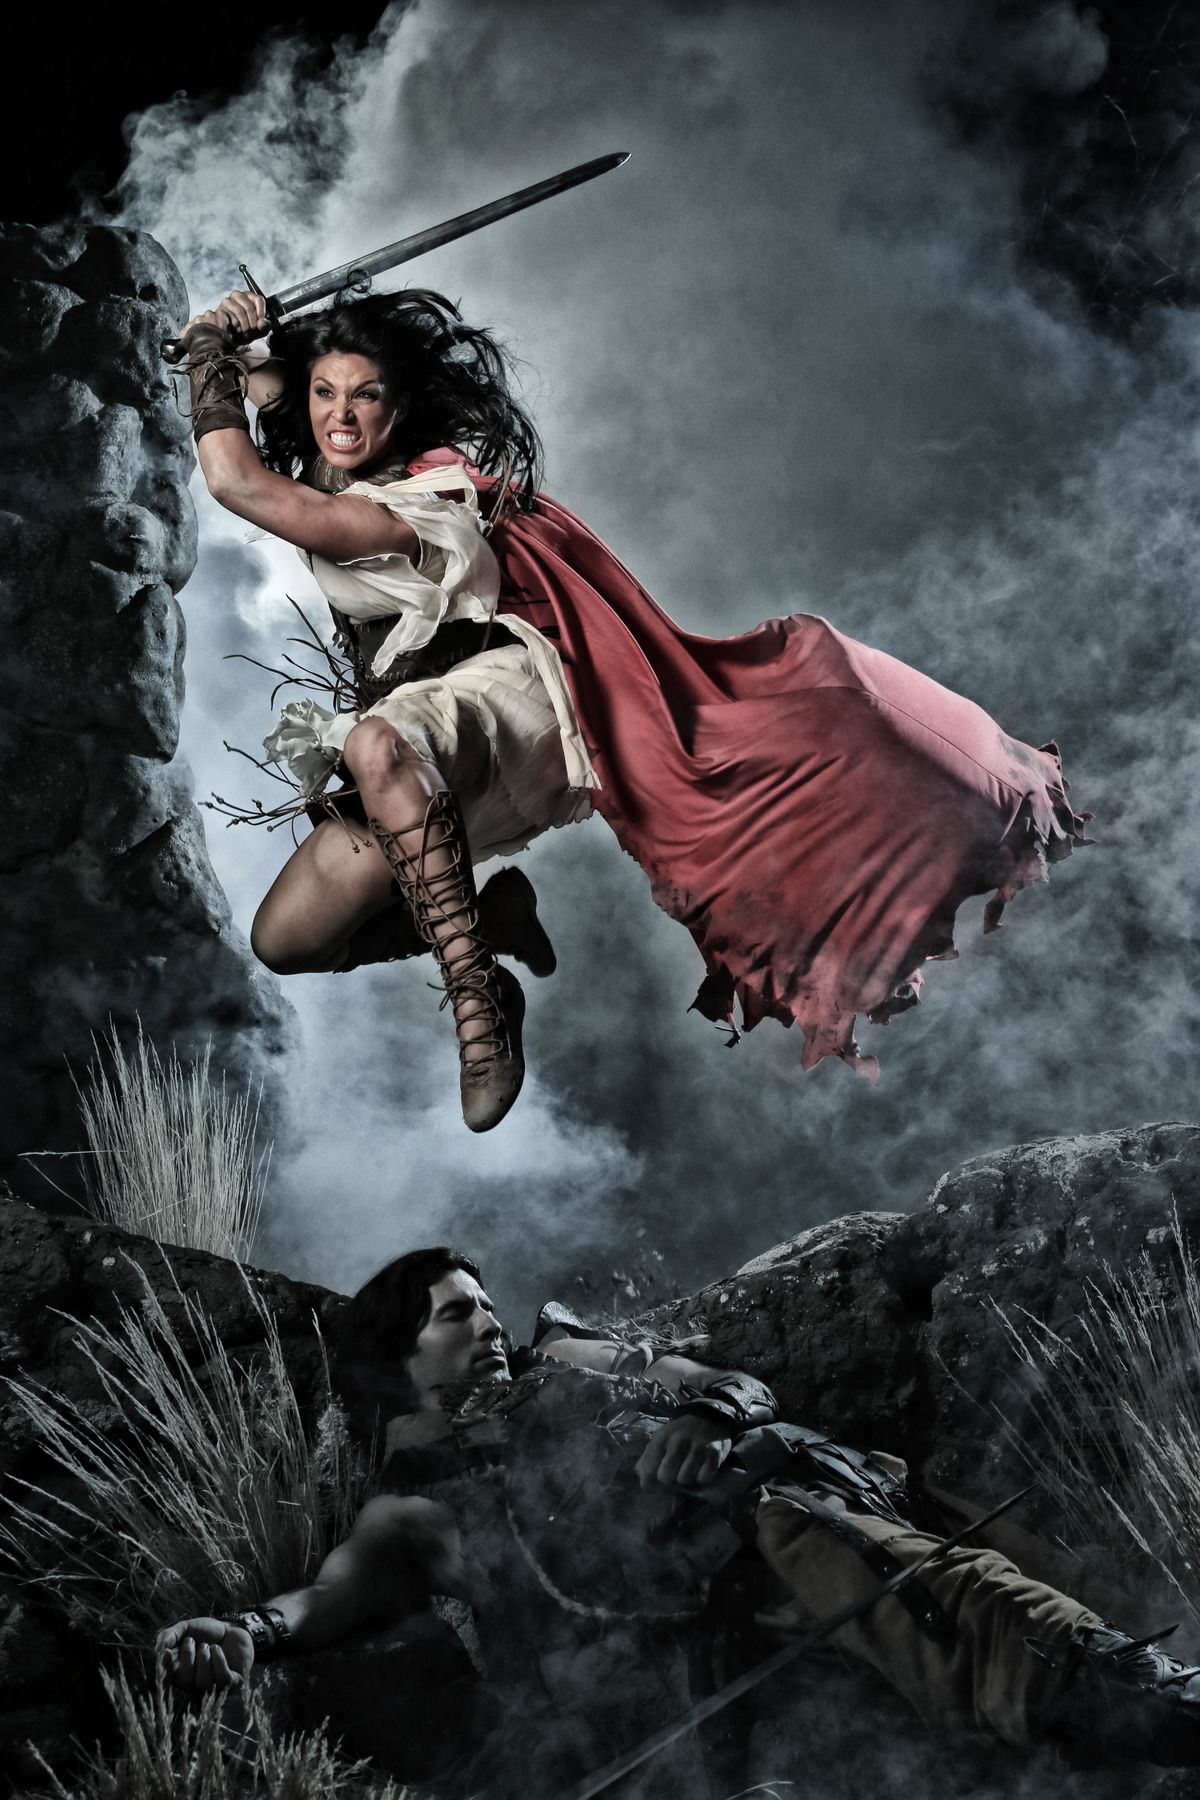
Let’s apply that to our warrior princess and see what we can do. I’ve got a trampoline set behind the wall she’s going to jump on. She doesn’t have to be very high to look really good. It’s just below the surface of the wall. She just takes a little jump to get up in the air, pulls her legs up underneath her and it looks like she’s high up in the air. It also sets me up so that she’s going to go back up and then come back down. I don’t want her jumping over the wall towards me because now my focus is changing. I want her to go straight up and straight down. I can keep a plain of focus and find the peak action. It’s a perfect time to shoot.
Let’s take a look at our lighting breakdown. My first light is a Baja B4 with a reflector on the camera left side. It’s going to open up the smoke a lot more than this image shows. It’ll open up the smoke on that left hand side.
My second light will be a strobe setup on the camera right side deep in the background. We actually put it on the roof in order to light the smoke from behind. That’s going to give us a nice, rimless smoke on the right hand side. So 2 lights in the background for my smoke.

This next image shows our third and fourth lights. Up front we have a medium softbox with a grid as our key. For a rim light we’ve got a Baja B4 with just a reflector on it giving us a nice little rim on the cape and on the side of her hair.

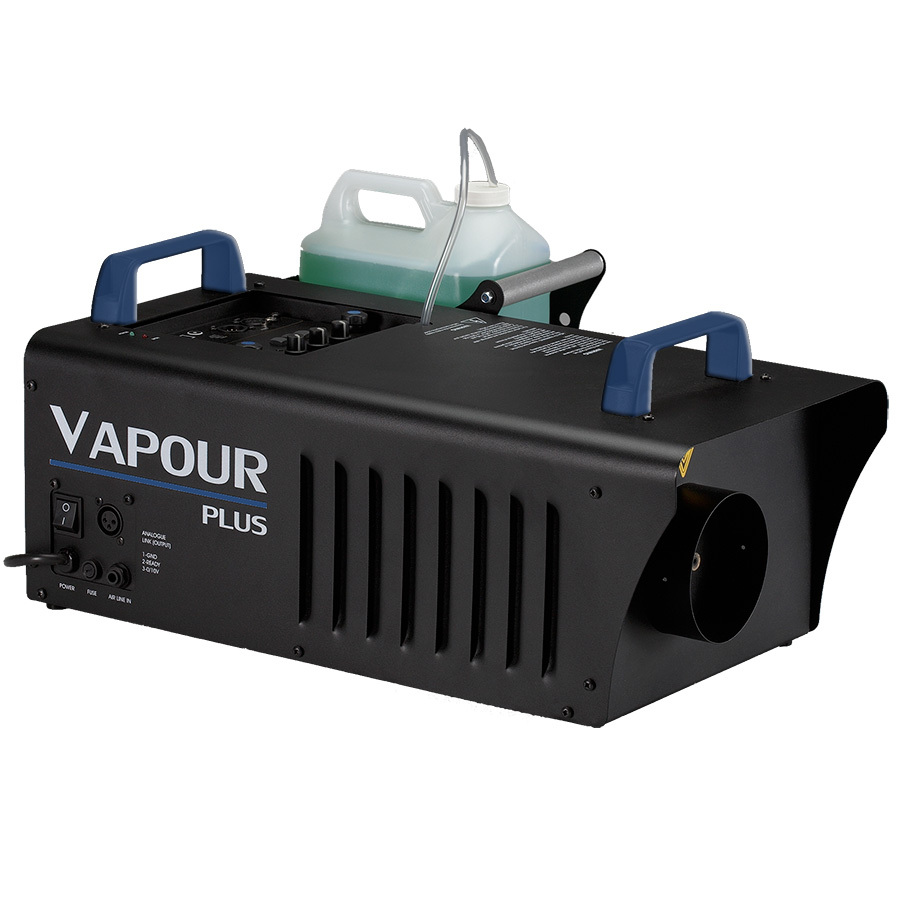
There’s a few other things that are going on in this shoot. First, we’ve got a fan on the camera left side that is going to blow up underneath her cape. We’ve tied a rope to the cape so it catches the wind underneath the cape and becomes like a sail and just kind of blows behind her. We’re also using 2 smoke machines. We’ve got a Rosco Vapour Plus in the background. It’s loaded with stage and studio fluid and is pointing right through a fan. That fan dissipates it and kind of throws it out in the air and makes it a lot softer. We have a second Rosco Vapour and it’s going to be on the camera left side. So we have one on camera right and one on camera left. For a few of the shots we had an air cannon behind and we blew some leaves and other materials towards her back. This gives another dimension of stuff exploding around her as she jumps over the wall.
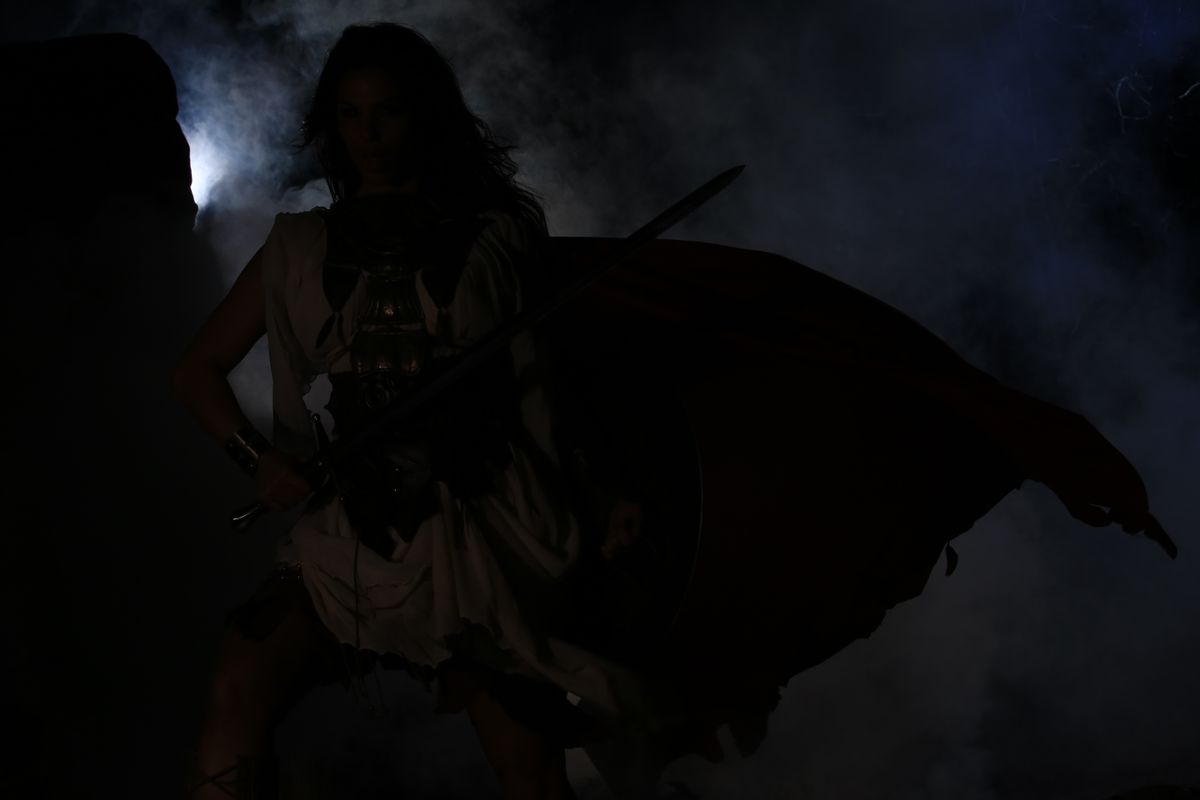
So here’s a few of our images before we did our retouching.

The last step is to take the image into Nik Software and to work on it. First, I’m going to add a bleach bypass layer. I love bleach bypass. It takes a lot of the color out and I can control some of the contrast issues in bleach bypass. Then I added a light blue color rising layer. I then added a contrast layer and last of all, I added a vignette. So there’s our final image.
Jay P Recommends for this Shoot


Video Transcription
Today on The Slanted Lens, we’re going to show you how to freeze action with strobes; not a high speed sync but freezing with actually mono blocks and normal flash mode. I’m going to use a trampoline, my Baha B4’s and a warrior princess to illustrate this principle. Let’s get started and see what we can do.
First, to understand how to freeze action with strobes it’s important to understand how strobes work; and more importantly how your strobes work. They’re all very different, you need to figure out how yours works to apply these principles. Strobes are simply a flash of light; most things that flash it’s immediate, because to our eyes it happened so fast we think it just happens all at once, that’s really not the case at all.
Strobes have what is called a flash duration, the amount of time it takes for a strobe to come to peak power and then the to tail off. Flash duration on a chart is like a shark’s fin, it makes a shark rise up and then a slow fall off kind of a tail. T-5 records the amount of time that the flash duration is above 50%. T-1 represents all the time that the flash is burning from the time its above 10% to back down to 10%.
So consequently a T-1 gives you a much better idea of the flash duration because 50% of the light is happening underneath that 50% mark, so what’s happening in the long tail off and that can cause burn on your subject. So when you buy your strobes, look at a T-1 flash duration rating, that will give you a true idea of just how long flash duration is.
Nowadays, and the Baja B4 has this, there’s modern technology that is called IGBT technology. It basically acts like a switch, that turns the flash off quick and cuts it and gives you a very spiked flash duration. It cuts a little bit of the
power out, but that spiked flash duration is very short and allows you to stop action much easier. So there’s something else you should check out when you’re buying your mono blocks, do you have IGBT technology.
For our photoshoot today, I’m gonna do three things to freeze the action; first, I’m gonna dial the power down to 50% on my Baja B4; it’s going to reduce the flash duration as I dial the power down. Now not all mono blocks will do this, like the Einstein it actually lengthens the flash duration when you dial the power down. So it’s important if you’re going to apply this principle that you look at the manual for your mono block and see if shortening the power actually reduces the flash duration, on the Baja B4 it does.
Second, I’m gonna shorten my shutter speed until I get a clip from the shutter speed on the image. So I’ll start out at 30th, 60th and I’ll keep dialing it faster and faster until finally it clips the frame; and then I’ll step back one step and that will be my shutter speed.
Third, I’m gonna use the oldest trick in the book; maybe not the oldest trick in the book, but it’s certainly the second oldest trick in the book. It’s simply a matter of I’m going to shoot at peak action, everything that goes up has gotta come down. So there’s that moment when it’s going up, when it just pauses and then it starts to come back down. Now I may not be able to hit that exact moment every single time, but I can be very close to it. If I can shoot at that moment I’m gonna be far more likely to freeze the action because the subject
is not moving near as fast.
So there you have it. Dial your power down, get the fastest shutter speed you can and shoot at peak action. Let’s apply that to our warrior princess and see what we can do.
I’ve got a trampoline set behind the wall that she’s going to jump on. She doesn’t have to get very high to look really good, it’s just below the surface of the wall, she just takes a little jump to get up in the air, pulls her legs up underneath her and it looks like she’s way up in the air. It also sets me up so that she’s going to go up and then come back down; I don’t want her jumping over the wall towards me because now my focus is changing. I want her to go straight up and straight down, I can keep a plane of focus, I can find the peak action, is a perfect time to shoot.
Okay, let’s look at our lighting break down and we’ll get started shooting. My first light is a Baja B4 with a reflector on the camera left side. It’s going to open up the smoke a lot more than this image shows. It’ll open up the smoke on that left hand side.
My second light will be a strobe set up on the camera right side deep in the background. We actually put it on the roof in order to light the smoke from behind. That’s gonna give us a nice rimless smoke on the right hand side. So two lights in the background for my smoke; camera right, camera left.
This next image shows our third and our fourth lights. Up front we have a medium soft block with a grid as our key and for a rim light we got a Baja B4 with just a reflector on it. It gives us a nice little rim on the cape and on the side of her hair.
There’s a few other things that are going on in this shoot. First we’ve got a fan on camera left side that’s going to blow up underneath her cape. We tied a rope to the cape, it catches the wind underneath the cape and becomes like a sail, it kinda flows behind her. We’re also using two smoke machines; we’ve got a Rosco Vapour Plus in the background. It’s loaded with stage and studio fluid and it’s pointing right through a fan. That fan dissipates it, kinda throws it out into the air and and makes it a lot softer. We have a second Rosco Vapour, it’s going to be on the camera left side. So we have one on the camera right, one on camera left.
I use the stage and studio because our neighbors are complaining that the smoke is packing into their yard and their house and they’re just complaining. So we use the stage and studio, it gives us a big burst, but then dissipates very quickly and doesn’t flow into the neighbor’s yard. It also goes through a fan to kind of break it up and gives us a nice wall smoke behind our subject matter.
For a few of the shots we had an air cannon behind, we blew some leaves and materials towards her back just to give another dimension of stuff exploding around her as she jumps over the wall. So here’s a few of our images before we did our retouching.
The last step is to take the image into Nik software and work on it. You know, first, I’m gonna add a bleach bypass later. I love bleach bypass, it takes a lot of the color out. I can control some contrast issues in bleach bypass. Then I added a light blue colorizer layer. I then added a contrast layer and last of all I added the Vignette. So there’s our final image.
So this was shot for Dynalite. It’s going to be an ad that’ll run in PhotoDistrict News. I guess I should say an ad that’s already ran, at this point, in Photo District News, so check that out. I hope you learned something about freezing action and you can apply it to your strobes and to your situation so keep those cameras rolling, keep on clicking.
The hardest part of the process of doing imagery is doing estimates. It’s the scariest thing a photographer ever has to deal with. How do I estimate something? If you go to TheSlantedLens.com/estimating, a digital download is there. It will teach you all of the things you need to do to put your estimates together. It’s got templates, terms of agreements, everything you need to know to be able to put your estimate together, so go to TheSlantedLens.com/estimating.