

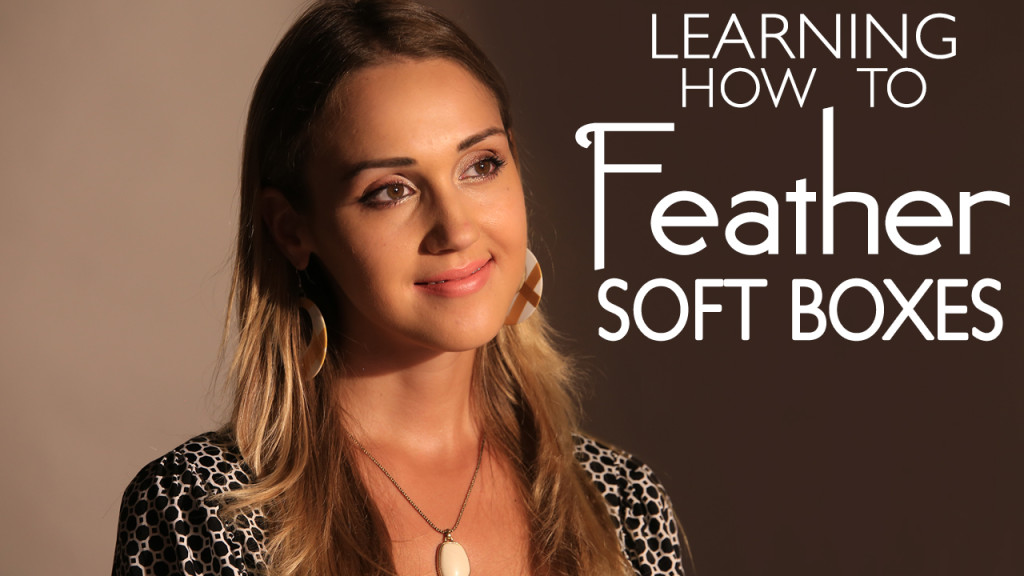

Today on the Slanted Lens we are going to look at how to gain more control of your light and more specifically, your soft box, by using a technique called feathering.
What is Feathering?
It is really quite simple. Every light has an area of coverage or circle of coverage. In Soft Boxes 101, we discuss that the area of coverage does not get larger with larger boxes. The light gets softer with larger boxes, but it does not cover a larger area.
The area of coverage is like a large beam of light. It gets softer and dimmer on the edges. Dimmer because it’s out on the edge and softer because it is more of a reflected light and not as direct as the middle of the light.
Feathering is maneuvering a light source’s area of coverage so that only the desired area of the subject is lit. We can use the middle to make the light harder and let everything be lit or we can use the edge of the area of coverage to light only the upper torso of the person and let the light fall off in a vignette.
Before Feathering

After Feathering
We are making a deliberate decision about what we want to do with the area of coverage and not just plunking our soft box down and aiming it directly at the person. We feather to gain more control of the area of coverage and the quality of light. Feathering does not reduce the area of coverage it simply moves all the unwanted light off of the things we do not want to emphasize.
We can reduce the area of coverage of a soft box by adding a grid, but we still have an area of coverage and need to make a decision on how to use it. Feathering in many ways can give you the same look as a grid and does not cost anything. Let’s take a look at some practical examples of feathering soft boxes.
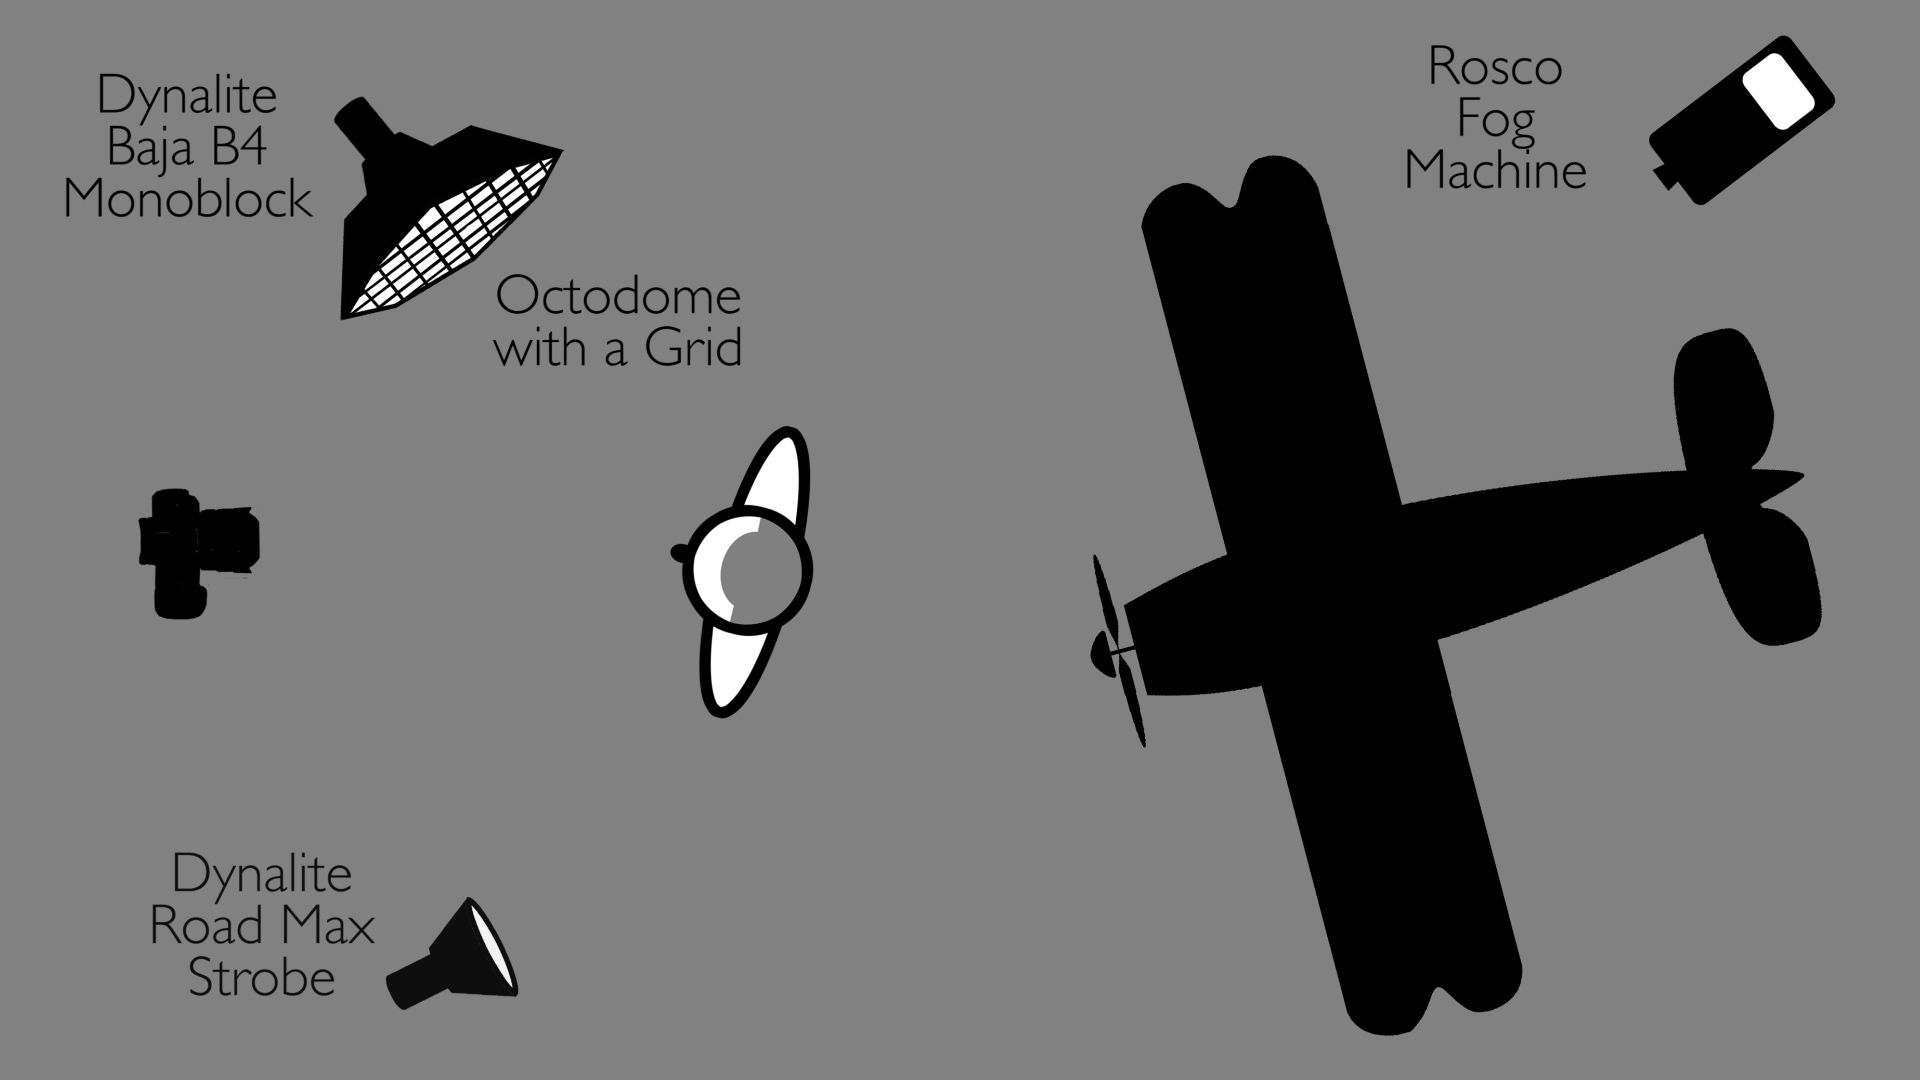
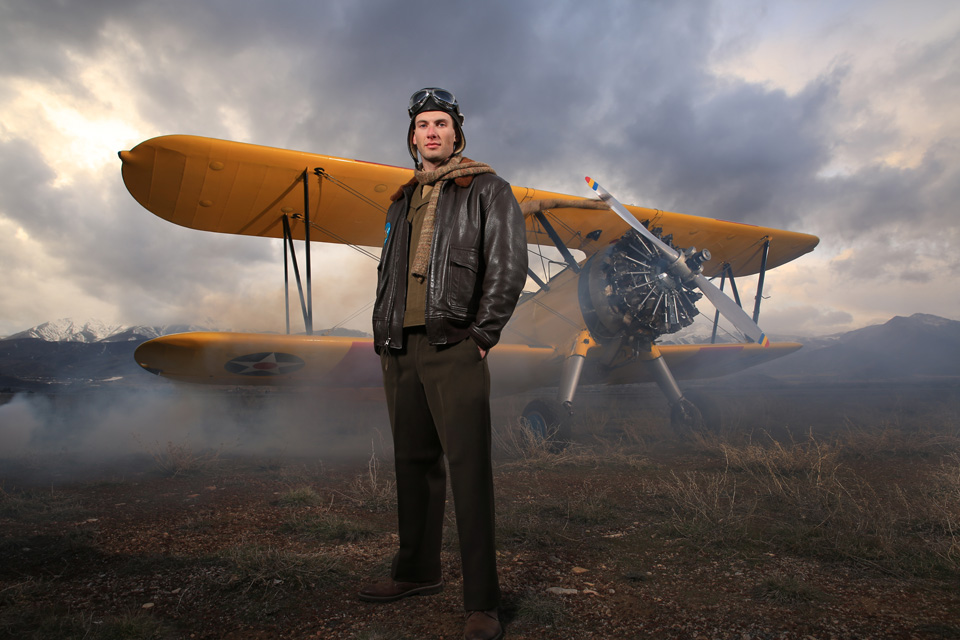
When I was shooting my Time Period Art Series I did a shot of a man in front of a bi airplane. In this image I am using 2 lights. One is a octodome from camera left aimed as a key light on our pilot up front. The second is a head with only a reflector aimed at the airplane in the background.
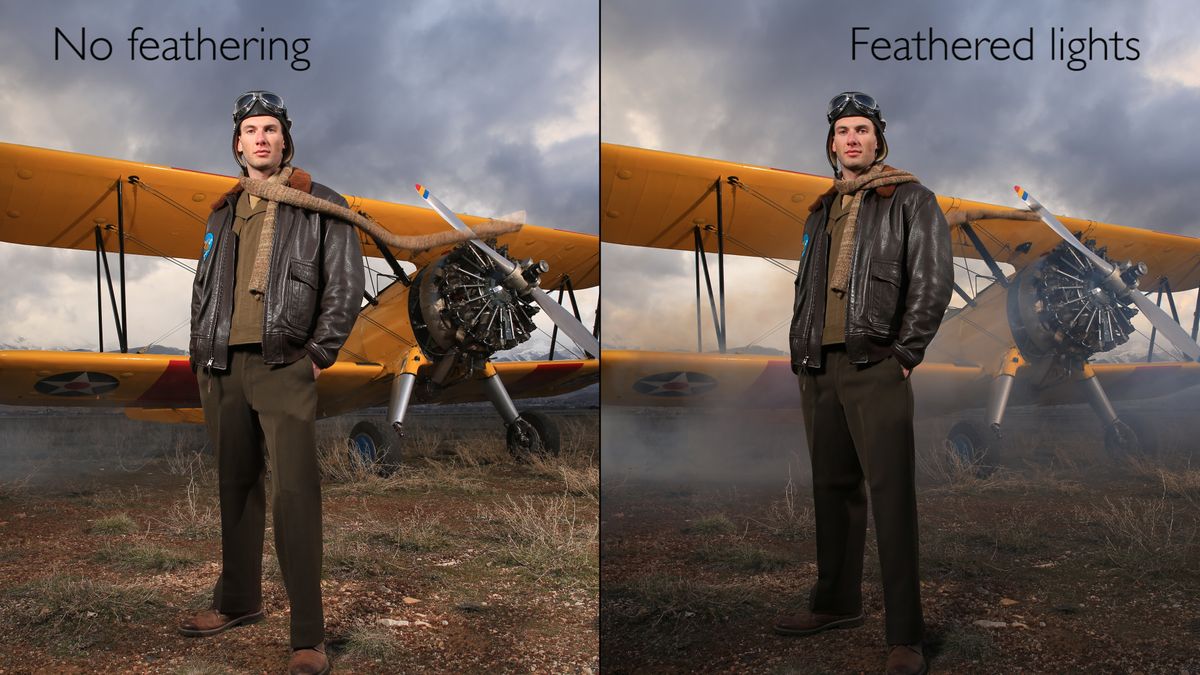
In the first image the octodome is aimed directly at the subject and the head with a reflector aimed directly at the airplane. The area of coverage is covering everything. The ground, his pants, there is no control in this image.
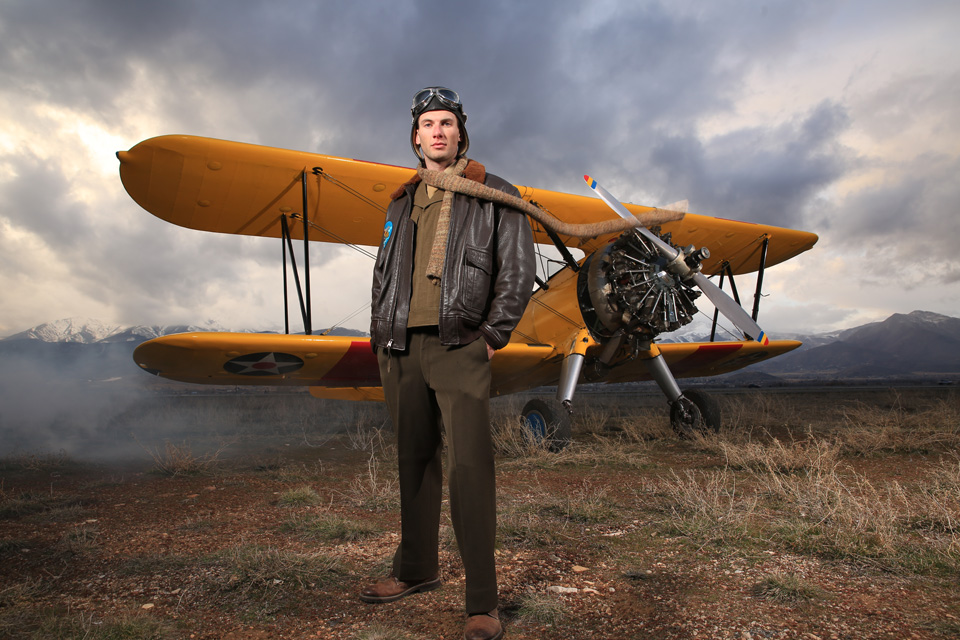
In the second image we redirected both lights. We feathered the octodome by tilting it up to take the light off his pants and then feathered it toward the camera to take the light off the background. The head with a reflector we tilted up to take the light off the ground and keep it only on the airplane. As a result, we get a much more controlled image with prettier light.
In this case, feathering the light by tilting it up and toward the camera creates a natural vignette that keeps the light off of things in the shot that don’t tell the story and let the light emphasize the things that tastefully do tell the story.
The second image is a nicer lit image. The difference is subtle but very noticeable to me. The first image looks like strobe light and the second image looks more naturally lit. Strobes reveal themselves when they light the ground so I often feather my lights up and sometimes for a key light feather them up and toward the camera to create a more natural looking light.
It’s good to note that when I feather the light by turning it toward the camera I will put up a flag to cut the light off the camera.
I use this feathering in the studio all the time. In my Basics of a One Light Setup, I show that as you feather the area of coverage toward the camera you start to light only the far side of the background. This gives you light on the background behind the shadow side of the opposite side of the face. As you feather the light more toward the camera and away from the background, the background goes dark and can now be lit if desired with a second light. We are moving the area of coverage around to allow it to only light what we want to see on set or on location. There’s a multiplicity of different looks you can get when you use feathering.
Something to consider, if you aim the light up and there is a ceiling it will reflect back and fill the image.
Those are the basics of feathering. If you have ever looked at someone’s photo and wondered why they are getting a different result when using the same equipment, it’s usually because of finessing the light and that usually starts by feathering the light. I make small adjustments as I set up my light. It’s the reason that I do not want my assistants to bring the light down to change the power. Small adjustments will make a big difference. I hope you have learned something about finessing a soft box and how to feather. Keep those cameras rollin’ and keep on clickin’.
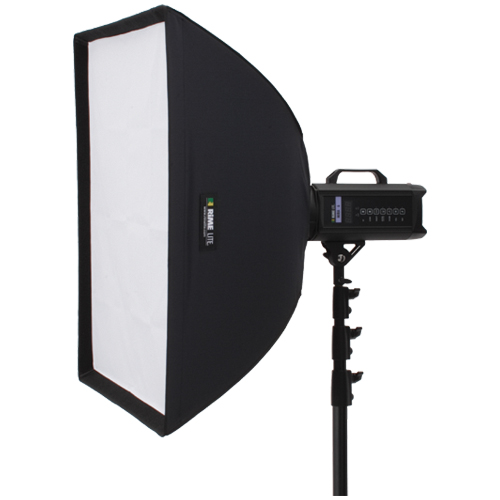
Jay P Recommends for this Shoot


Video Transcription
These images were taken with the same Softbox. We got a completely different result. We’re going to show you how we did that with a technique called feathering.
Hi this Jay P Morgan. We’re out on location here with beautiful Elaina, some peacocks, a horse and a dog next door. We’re going to show you a technique called feathering, gaining control of your Softbox with just simple movements make a huge difference. So, let’s get started and see what we can do.
So what is feathering? Feathering is using the area of coverage to light just what you want to light. The area of coverage is a large, it’s like a large beam that comes out of your Softbox. The outside edges are softer, the inside area is a little harder. So what we’re going to do is learn how to feather that area of coverage, so it just views the outside edges.
Now remember, in Softboxes 101, we learned that large boxes don’t cover large areas and small boxes don’t cover smaller areas. They cover the same areas. Large boxes are softer, small boxes are harder. But we’re going to take the area of coverage, the area and we’re going to start to manipulate that and to turn it and to be able to light exactly what we want to see.
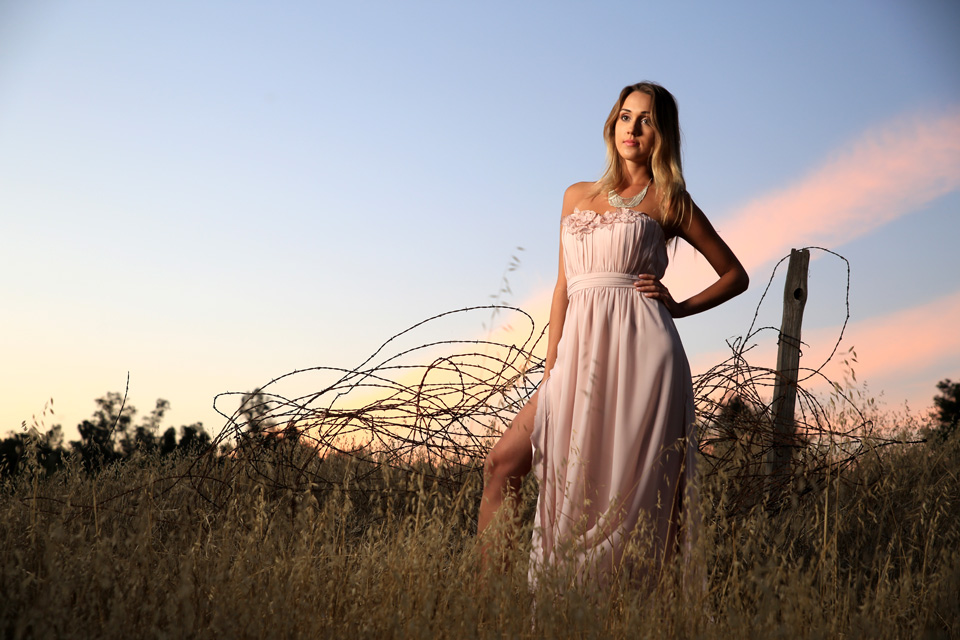
So most people just plunk their light down, take their first shot. What do they get? They get exactly this. Everything is lit. I don’t want all of the grass on the ground. So the first thing I’m going to do is I’m going to take and I’m going to feather this towards the camera. What that’s going to do is it’s going to take the light off from the barbed wire in the background.
So we’ve moved our light forward but it’s still all over the ground. Now we’re going to take it and were’ going to tilt it up and take another shot. There’s the shot with the light feathered. Light is up, light is towards the camera. I put my softboxes up like this all of the time. I don’t need a grid in this situation. I mean, a grid will narrow the area of coverage but this takes it so that we’re using the soft edge of the area of coverage.
We’re taking it off the ground and then we pitched it up to get it off from the lower part of her dress. It really finesses the shot. It only lights the area that we want to see. It takes the light off of the areas we don’t want to see. It’s almost like a vignette. It creates a nice pool of light just on our subject matter, makes a very pretty light. Let’s take a look at some practical examples of feathering Softboxes.
When I was shooting for my time period art series, I did a shot of a man in front of a biplane. In this image, I’m using two lights. One is an Octadome for camera left, aims a key light on our pilot up front. The second is a head with only a reflector aimed at the airplane in the background.
In the first image, the octadome is aimed directly at the subject and the head with the reflector on it is aimed directly at the airplane. The area of coverage is covering everything, the ground, his pants. There’s no control over this image what so ever. In the second image, we redirected both the lights. We feathered the octadome by tilting it up, take the light off his pants and then feather it towards the camera to take the light off from the background. The head with the reflector we tilted up to take the light off from the ground and to keep it only on the airplane.
As a result, we got a much more controlled image with prettier light. In this case, feathering the light by tilting it up and towards the camera creates a natural vignette that keeps the light off from things in the shot that don’t tell a story and let the light emphasize the things that tastefully do tell a story.
Shot number two is a much nicer lit image. The difference is subtle but very noticeable to me. Number 1 looks like strobe light and Number 2 looks more naturally lit. It’s good to note that when I feather the light by turning it towards the camera, I will put up a flag to cut the light off the camera. Let’s now go to the studio and see how the same feathering technique works there.
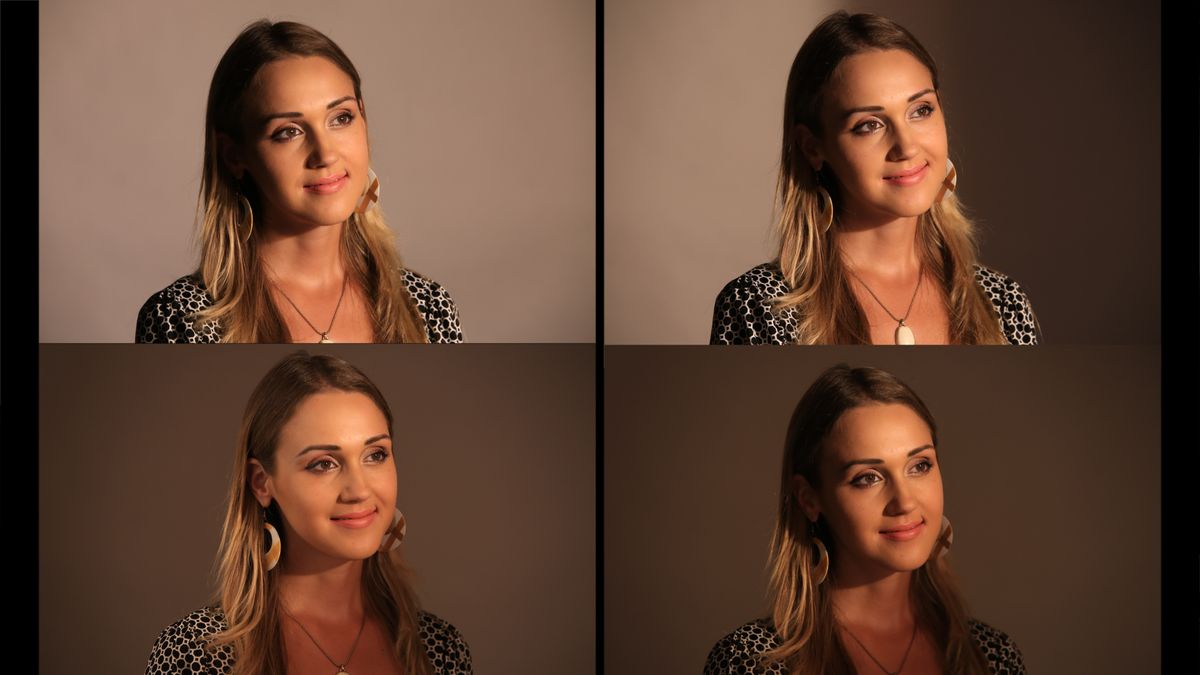
So we brought Elaina back here to the studio and we’re going to demonstrate this principle of feathering in a studio situation. We looked at what it does if you’re out on location, where you’ve got big boxes and you rolling them up and around but how does it work on set where the space is a little smaller and the light is a little more finessed? It actually works every bit as well and in some ways, it’s probably the principle that gives you the best light. Everybody can throw a light up but it’s how you finesse it and how you work the light that really makes the difference. So, in this case, I’ve got that area of coverage.
That big area of coverage is aiming directly at Elaina. It’s lighting her entire face. It’s lighting the background and I’m using that middle of that area of coverage. The light’s a little harder on her face and it’s very directional. So I’m going to just feather this away from the background and when I get it to about the right spot there, it’s going to split her face. And what I get now is I’ve taken that large area of coverage and I’ve moved it off from the background. So I’m just using the edge of it. So the light side of her face has dark background so it separates. The dark side of her face has a lighter background, so it’s going to separate as well.
If you go to Basics of a One Light Set Up, you’ll this completely explained in that video. But now if I don’t want light on the background, I can take that area of coverage and just roll it around a little further. I’m just starting to clip with the area of coverage her ear there. But now, I’ve got a nice light on her face and I’ve lost all the light on the background.
This gives me the ability now to add a second light on the background and to do whatever I’d like with it on the background. Okay, now I’m going to take this area of coverage and I’m going to pitch this way up. So I’m going to pitch
this up to where I just start to just get the edge of her chin, the back of her ear. So, there shouldn’t be anything on the background just a little glow on her face. It’s going to cut the light off from her neck.
Now we’ve taken and feathered this way off from her face. Now this is with an open face Softbox. It doesn’t have a diffusion on it, so it’s very easy to see because it a very hard line. Now, if you put that cover back on and you put the Softbox on a strobe, you can get the same look. But, with continuous light, when you put that cover back on, it diffuses the light so much. These lights, the LED, are just so soft that you don’t get a nice hard punch through them like you do with the strobe. But, for demonstration purposes, we’re leaving it with continuous light so you can see how the area of coverage can be moved around. But we’ve really moved this around, given a nice look on her face, just a pretty look at the light there. It’s just something interesting.
Now let’s think about this. What happens if we go exactly the opposite direction? We pitch it all the way down, area of coverage on the top and we pitch it all the way out. What do we get? We get a really crappy looking shot because all we’ve done is thrown the light on everything we don’t want to see and we’ve really not lit her very nicely. You could probably make something work with this but in my mind, it doesn’t work near as well as up and towards the camera.
Remember, you may have to put a flag in front of the camera. The flag will block the lens but up and towards the camera is going to work. So let’s get back to that, up and towards the camera, right there.
So now what we’re going to do is we’re going to put a fill card in but we’re going to use feathering with our fill card in order to control a little bit of light on her face as a fill and also on the background. Now we’re going to take our reflector and we’re going to slide this in. As we slide it into her face, it just opens up the shadow side of her face. It gives us a nice look there of her face. But now with this, we can do one of two things with it. We can either feather this towards her, which is going to brighten the background and brighten the side of her face, or we can feather this away from the background and that’s going darken the background and slightly darken the side of her face.
So there’s a principle using feathering with both the key light and now also with the reflector, which is becoming our fill light. With the combination of those two lights and feathering them, there are a multiplicity of different looks you can get. So when you just put a light down and aim it at your subject, you’re making one decision that will give you one look. But when you feather your light up and away and you feather your fill in out or up and away, it’s going to give you multiple looks. Small adjustments make a huge difference.
So I hope you learned somethings about finessing your light. Get out there, work those Softboxes, look at the light, make changes, really finess it. Keep those camera rolling, keep on clicking.