

10% off registration expires April 1st. Use “earlybird“. 


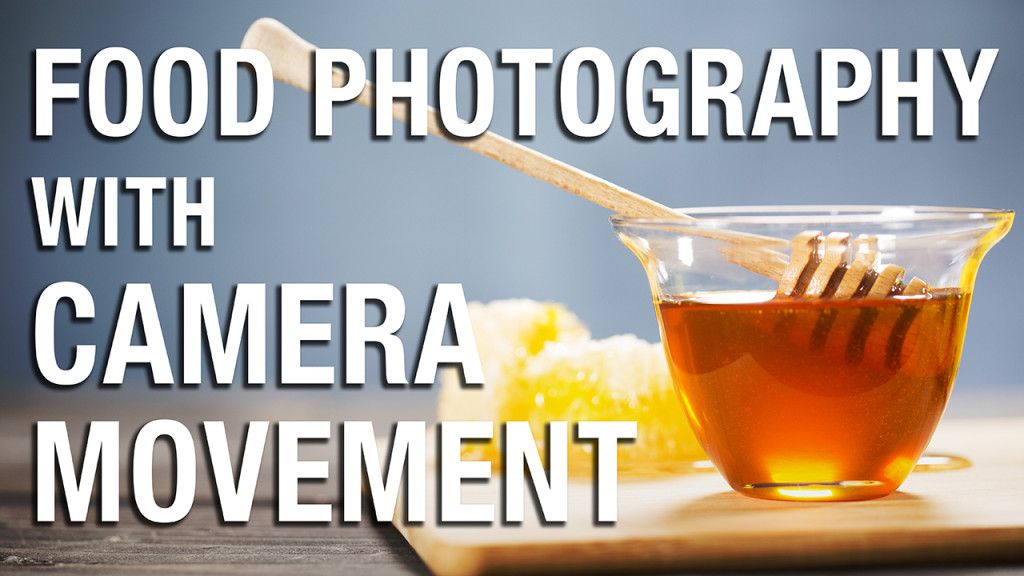
Hi, this is Jay P. Morgan. Today on The Slanted Lens I’m going to show you my favorite lighting setup for photographing or filming food using the Sryp Genie, Genie Mini, and Magic Carpet slider. Not only that, I’m going to show you a great parallax move that really brings that food alive and makes it look really stunning. Let’s get started and see what we can do.
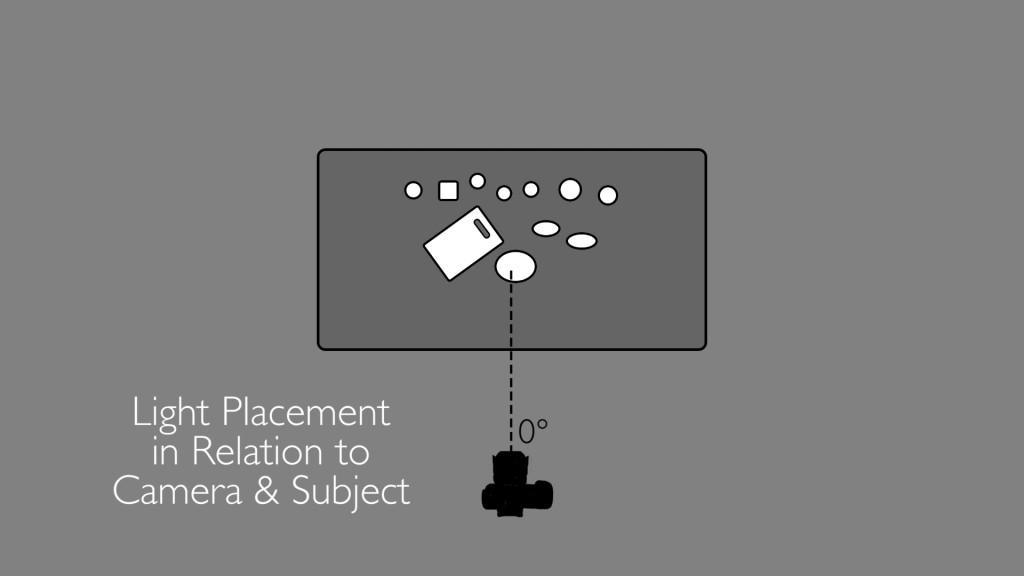
Let’s take a look at our lighting set up. When I shoot food I just love a top back light. When the light on your subject is right at the camera, it’s at zero degrees and it’s going to be very flat.
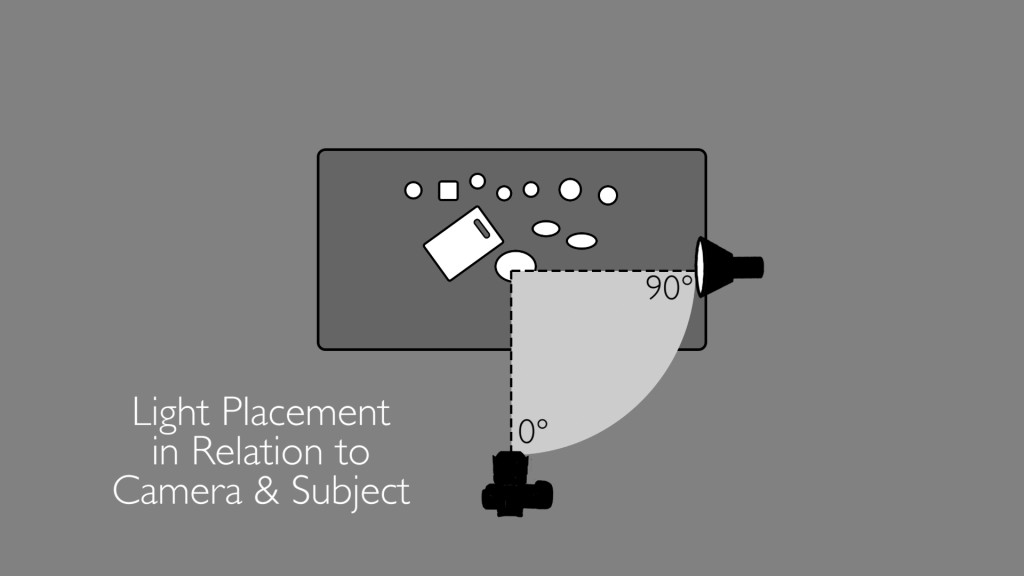

Now I’m gonna add some light to separate it from the background. I’ve got a nice blue background back there. And this’ll give me a little bit of highlight in my bottles. So when I turn this backlight on it separates the subject from the background and gives us a glow. Gives us a nice light, you can raise it up, make it brighter or darker. I kept it pretty subdued. You can bring in a white card as fill if you feel like this it too dark, let this light from the front bounce back in and open up the shadows of the objects in the front. The last light we added was a fill light from the camera. So we put a vector light back behind the camera. Turned that on and opened up the shadows a little bit in the front, not much. We kept that very low because most of our subjects are in glass containers and we didn’t need a lot of fill for the foreground. So we’ve got this great top back light.
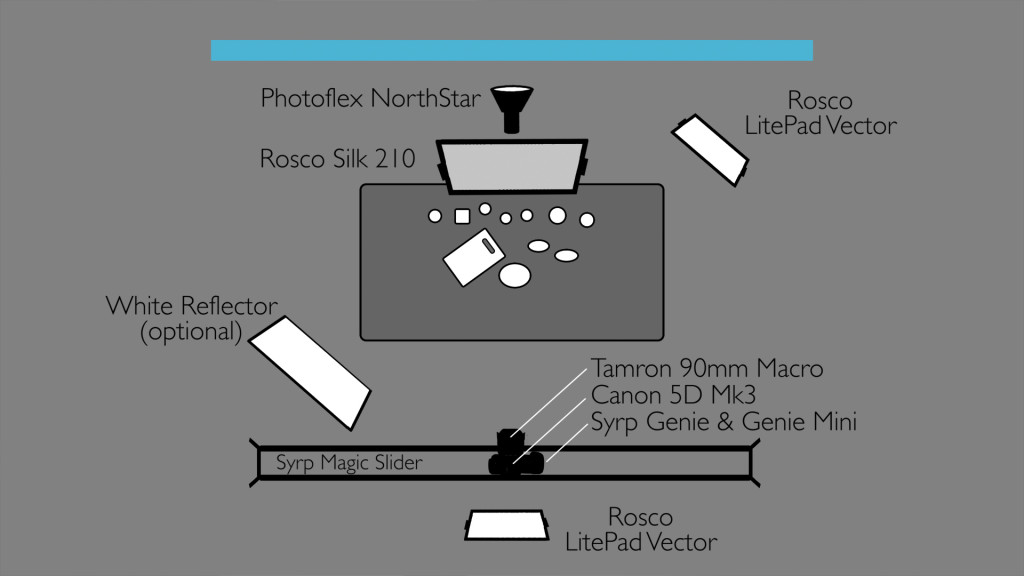
But now what do we do as we film this thing? How are we gonna make it come alive and look interesting? You know the difference between a photographer and a film maker is camera movement. So we want the camera to move. And so to accomplish that we’ve got two or three different things. We use a slider, obviously. Because that gives us a solid platform for the camera to just simply move in our scene. The very first thing we’re going to use is a standard linear move from right to left. And I’m gonna measure out about a foot and a half. I don’t need to go very far. In that foot and a half, I’m going to leave my focus on the foreground, and as I arrive at the subject matter it’ll be in focus. As I record we’re going to just romance across. I’m not going use all of this footage, I’ll just use it as it comes in right now, as I start to show my subject matter. Now the things in the background are moving at a different pace than the foreground. It looks very interesting, it’s a very nice looking shot. I’ll let it run and get it past my olives, because I don’t know where I’m gonna want to cut the footage. So I’ve got that nice little move. And I’ve got the slider set to come back, so it goes right back to the start so I can do it again.
So there’s your first and easiest way to use a slider. The second things is my favorite and it’s a parallax move. That means that the camera is moving in a horizontal fashion, but the subject matter always stays in the center of the frame. And so what happens is the camera is moving right to left, and the lens is moving from left to right. It’s gonna slowly crab back and look at your subject matter. The subject matter always stays in the middle. It’s a wonderful look. So let’s take a look at how we can do our parallax move using our Syrp system. First off our Genie’s gonna give us our right to left, our linear. And our Genie Mini is going to give us our parallax that’s gonna pull the camera back from left to right. On my phone app I have the Genie so that I can zero it out when I look straight at the olives. It’s on zero degrees on the Syrp ball head. Now when I get to the last position I simply refocus it on my olives. I look down at my degrees and it says about 27 degrees. I simply punch that in to my move on the bottom. I’m gonna go a foot and a half with my Genie, and it’s gonna go 27 degrees clockwise with the Genie Mini and that’s gonna give me my parallax.
One thing that’s important to understand about a parallax move is that when you’re doing, say, an interview, and you’re quite a ways from the subject, as long as you’re about the same difference on right and left your focus is gonna stay pretty close. Because you’re not changing the focus distance enough to really affect it. But when you’re using a macro lens and you’re getting in close, your focus on a parallax move is gonna come in and out. So you have to use that to your advantage. You use it to move the focus in to the subject matter and now it’s in focus at the very end. That’s a pretty move. And it’s really nice to do with this 90mm Macro from Tamron because I can get in really close. And I can do those kind of small moves on a small subject and it looks really pretty. The reason you would use a linear move vs. a parallax move is because a linear move becomes a reveal. That is you slowly slide in and you reveal your subject matter. So depending on the pacing of your piece and how you really want to introduce your subject matter you can use a linear move. Saying, “Well here we are in this world. We’re not sure where we are.” And, “Oh it’s this beautiful piece of jewelry.” It becomes a great way to introduce your subject and a way to keep your motion going from right to left. You can go from a parallax move and you can cut to a linear move. Using those two together will allow you to cut back and forth. The parallax is beautiful because it focuses on one piece and lets the focus drift in and out. It’s very dreamy and it gives an added emphasis to the subject matter, and emphasizes the subject matter. So they both have a place. They both have a way that make them valuable and useful on set. You could absolutely mix them together to kind of give you a sense of constant movement throughout your piece.
So there you have it. A wonderful glimpse at the world of shooting food. Wonderful top back light and those nice slider moves. But it’s just a glimpse. There’s so much more we can learn. This lighting setup will work for video as well as stills. Strobes or continuous light, doesn’t matter. It’s the same principle. You can apply it each way. So get out there. Shoot some food. Understand a little more. This is just a start. There are so many more things we can talk about. But get out there and try it. Make it a part of your world.
Keep those cameras rollin’ keep on clickin’.
-Jay P.
Be sure to enter our giveaway if you haven’t yet. You could win your own Syrp Genie, Genie Mini, and Magic Carpet.