

Please support new content by shopping our affiliate links with Amazon and B&H Photo Video.
My Lighting on Location photography workshop is coming up! Register today. 


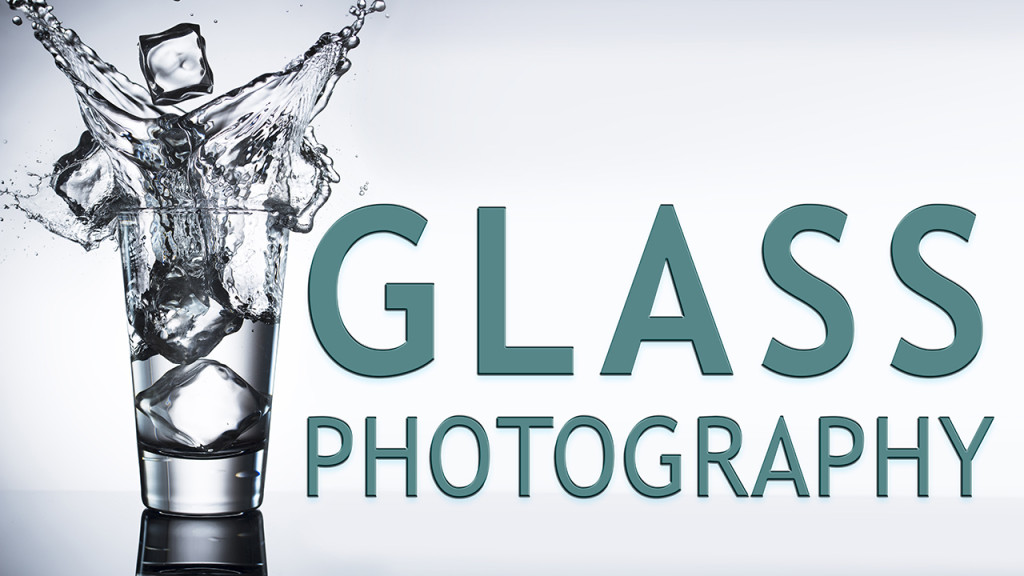
Hi, this is Jay P. Morgan. Today on The Slanted Lens we’re going to show you how to light glass and then photograph ice splashing into a cup of water. We’ll be using a laser trigger from MIOPS. Let’s hope nothing gets broken. Let’s get started and see what we can do.
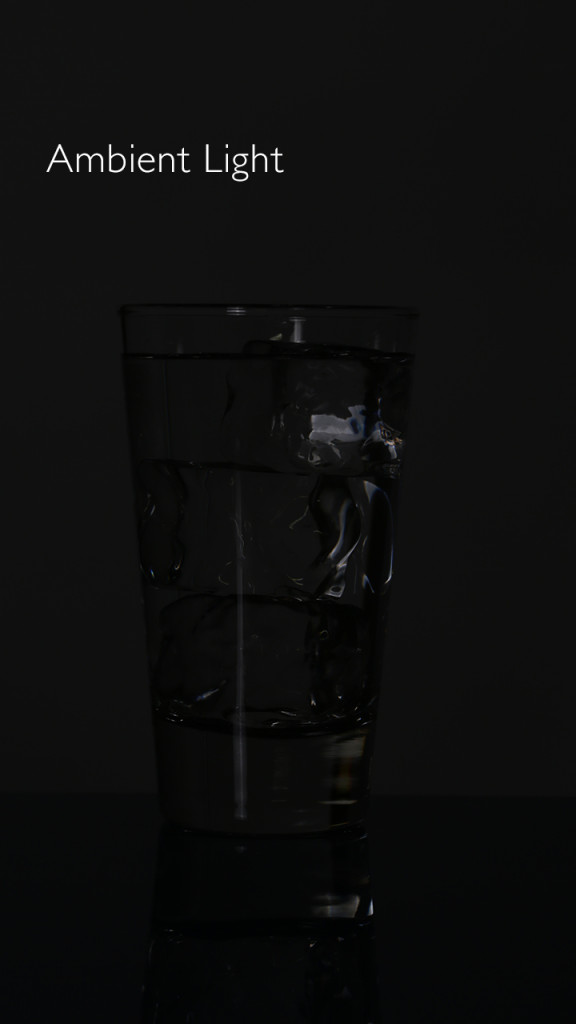
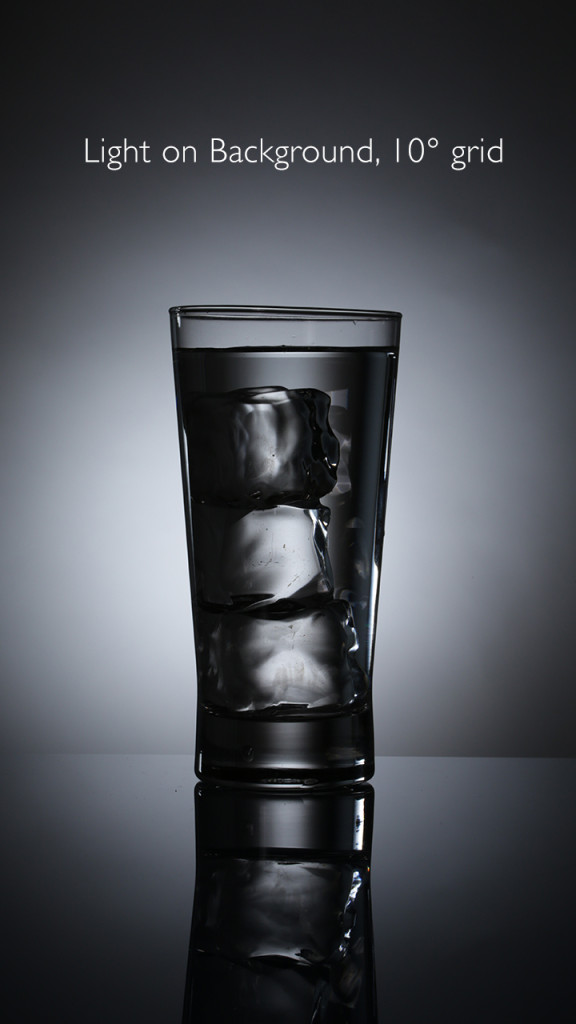
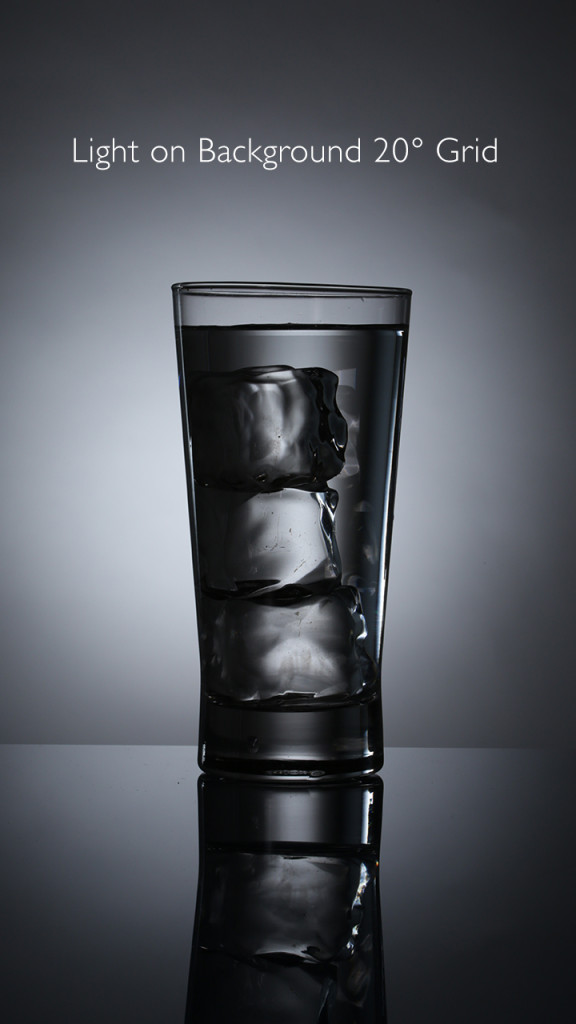
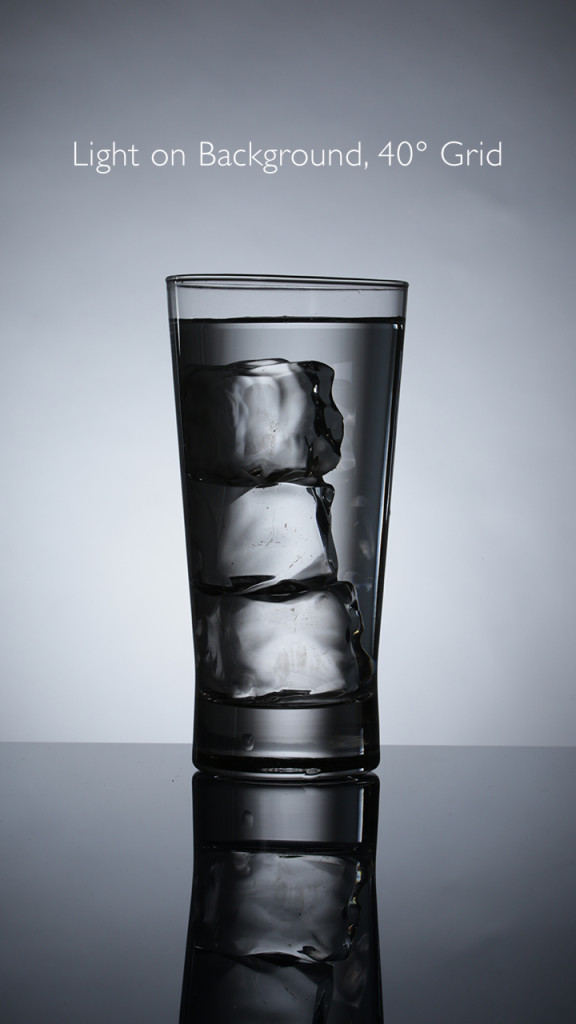
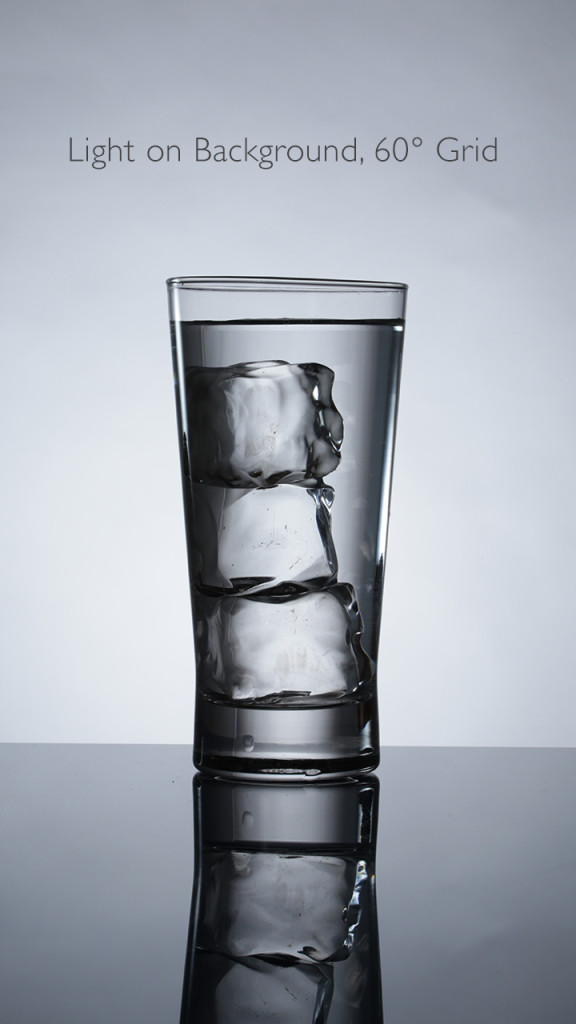
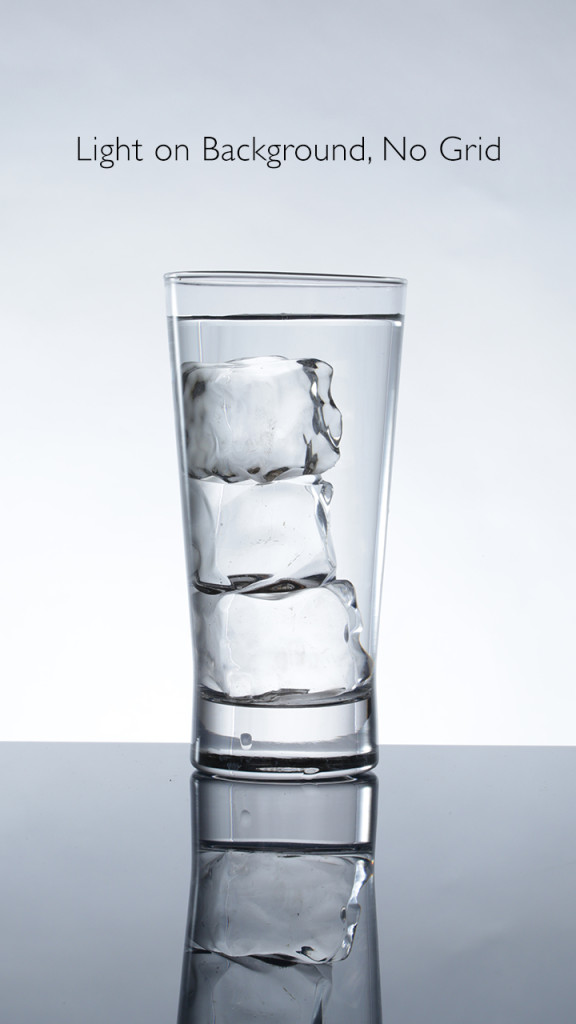
Lighting glass is not so much about the light you put on it as it is the light you see through it. So the easiest way to do it is to simply put a light (we used a Baja B4 from Dynalite) on the background behind the glass. That gives you a beautiful glow through the glass and lights it nicely. The principle is very simple. A cup is a curved object. This curved object is going to see a lot of the background. If you only light a small area in the background, it’s only going to light a small area in the back of the glass. The bigger you get that lit area on the background the more it will wrap around the glass and the more it will open up and make it brighter. You get darker lines on the right and left of the curved glass as you light only a small area of the background. But as you increase that lit area of the background then those dark lines start getting smaller. So you have to decide- how wide do you want the lines, how bright do you want the glass? I like the black lines. I think it’s nice to let them kind of come in a little bit from the side.
Starting from ambient you can see how the ten-degree spot is just lighting a small area on the background. It gives us a nice glow in the middle of the glass, but we get nice dark lines on the sides. As you go to twenty, forty, and sixty, the bright area gets a little larger each time, and you start to light more of the glass, and have less of the black lines. And last of all you light the whole background, and it just becomes pure white.

But for me, that’s not enough. That’s just the background light. I’m not going to see anything in my ice. Ice again is a glass type subject. So it doesn’t matter what light I put on it from the front, it’s a matter of what light I can shine through it. I put translucent panels behind because I can get that line way to the back of the glass. The line up front looks too obnoxious to me. When you get it further back it frames the glass very nicely. I use panels because we’re in a tight space and don’t have enough room for softboxes. The panels allow me to get a light behind the glass, gives me the nice highlight, and I can work more easily in a confined space.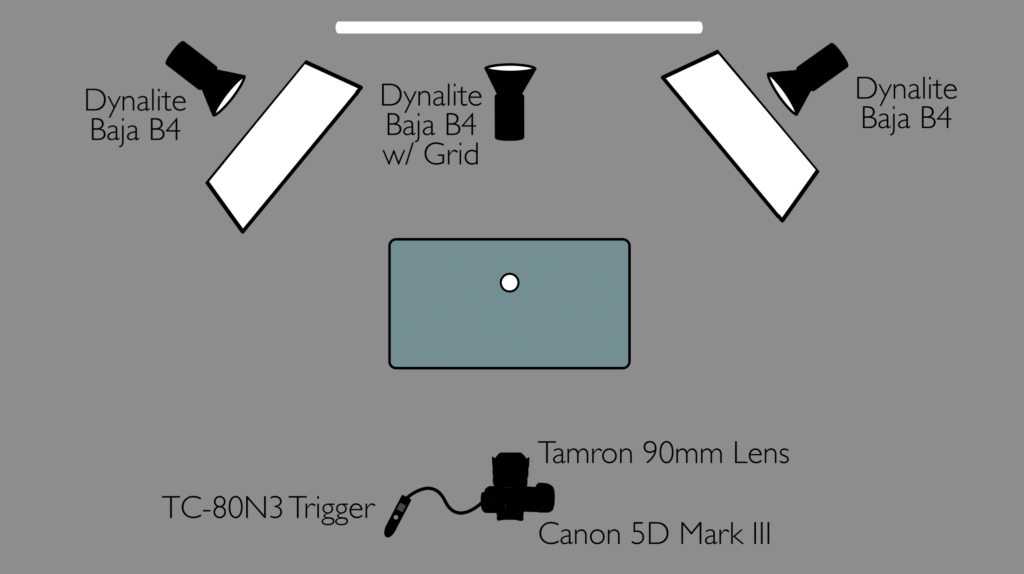

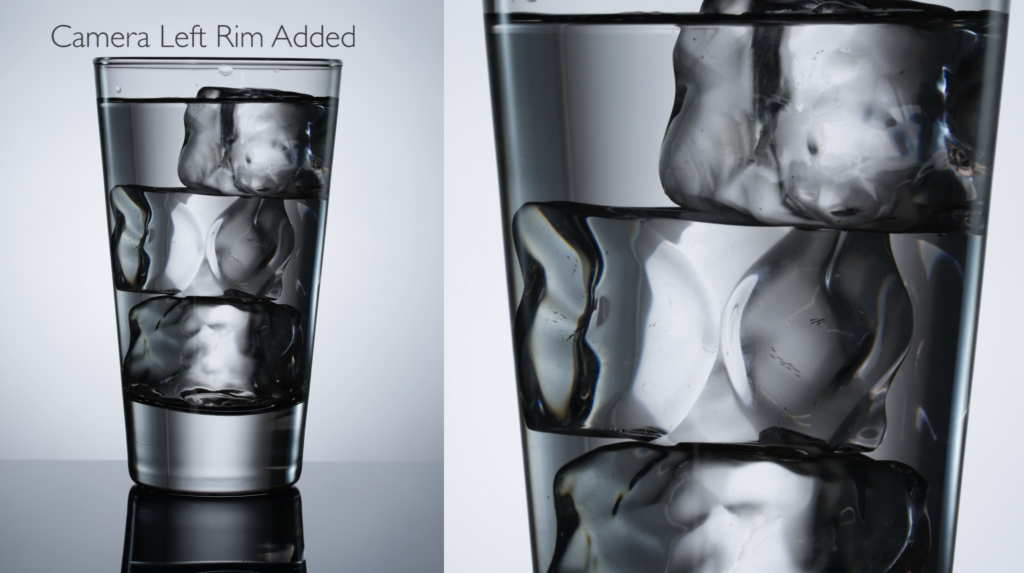
So I turn those on and I have my nice light on the side of the glass. Interestingly enough the light on the camera right side is going to give us a nice line on the camera right side of the glass, but it’s going to light the camera left side of the ice cubes. That light on the camera left side is going to give us a nice line on the left side of the glass, but it’s going to light the ice cubes on the right side of the glass. They cross. 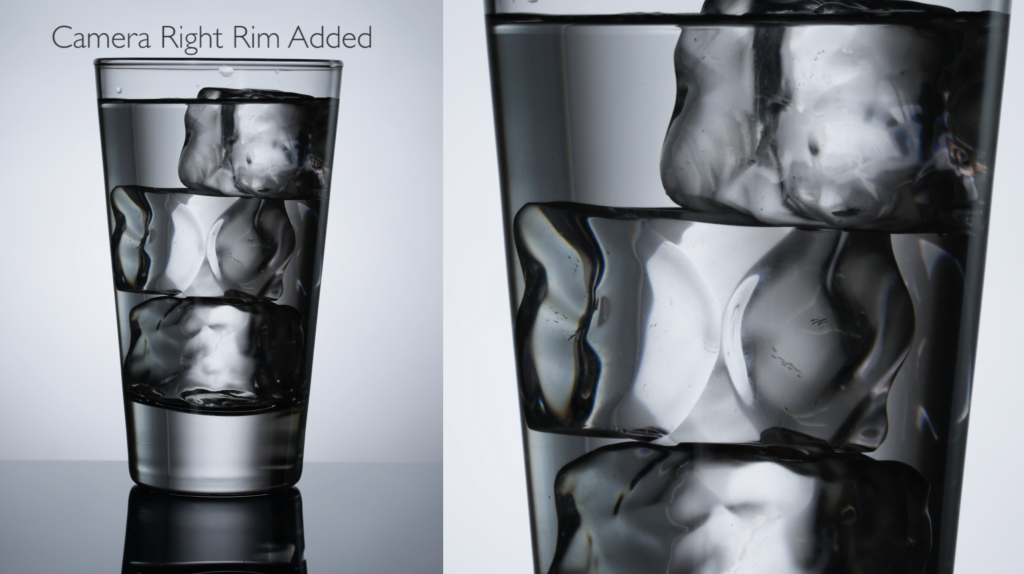

I love this surface I’m working on. It’s just a piece of glass you can get from any cheap furniture store, this one’s from IKEA. It’s just what you’d put on top of a piece of furniture. This one has a bit of blue cast to it, which is beautiful. You can get some that are just black. They give you a beautiful reflection. So there’s a three light set up for lighting glass. You can get away with one but when you add those ice cubes I think you need two and three. That gives you a nice glow in the ice cubes.
But of course that’s not enough for us here at The Slanted Lens. We’re going to drop ice cubes into the glass and watch the water explode out of it, and capture that with our MIOPS laser trigger. So let’s see how we set that up. We’ve got our laser going across the top of the glass.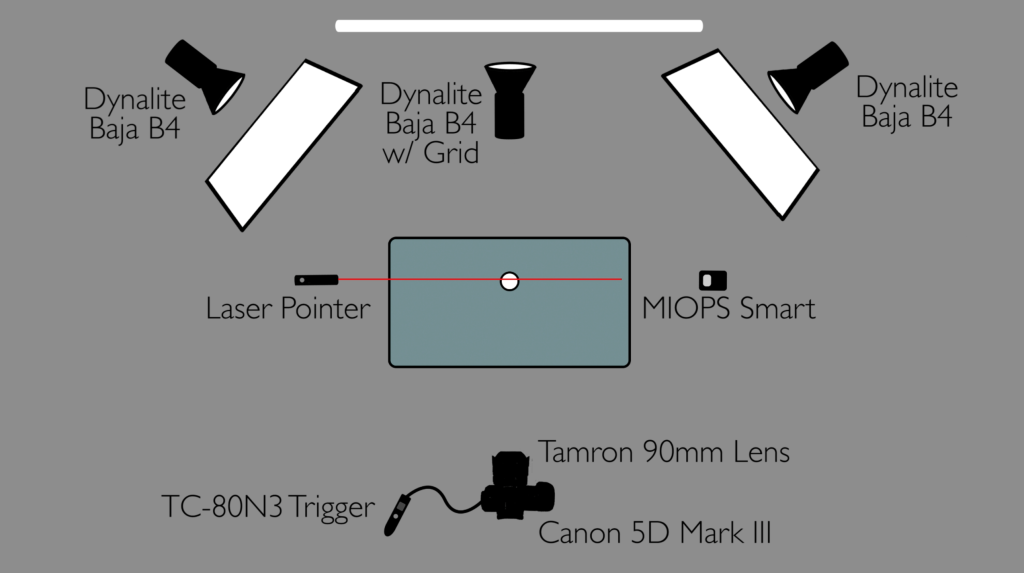
We’ve got to try to get as many things under control as possible. We want our water to be at the same height each time, and our glass to be in the same place each time. We’ve got our ice scoop up above the glass, attached to a c-stand, and we’ll push our cube off and down into the water. As it breaks the laser beam it triggers our strobes. At the beginning we started with a delay of ten on the trigger. But the ice cube barely entered the frame. Then we went to fifteen. A little bit more of the ice cube got into the frame, but not very much. Then we went to fifty and the whole ice cube was almost in the frame. There’s a point at about 150 where it was hitting the water and the water was just starting to come out, but it wasn’t very large, it hadn’t bloomed inside the glass. We had to drop it down to 175 and then we got the water exploding out. At 200 the water started to fall, started to drop down. We didn’t have that nice big explosion inside the glass.
What’s nice about using the MIOPS trigger is that you are able to control the timing of the shot and get a repeated look. You can get that over and over again. You can adjust the timing as needed. Obviously there are things we can’t control. The way the ice cube hits the water makes a difference. If it’s hitting flat, it will make a bigger splash. If it hits the on the edge it will make a much smaller splash. But with the trigger we’ve controlled everything that we can control. And in doing that we are able to repeat it over and over again.
One of the things I struggled with, and you’ll want to be very careful with, is that I thought I was focusing on the front edge of the glass. But when I took it in and pulled it up on the computer I realized the focus was off. The Tamron 90mm macro is really a great lens, very sharp, so I knew it was user error. So I put a stick about a third of the way back, where I expected the ice cube to drop, and focused on that. Focusing is a little tricky on this because you’ve got all these different depths, sometimes it’s hard to tell which one is at what place. So using the stick instead allowed me to focus to the front of the glass, and most of my splash that come forward was in focus looked very good. Then it was just a matter of drop and shoot, drop and shoot, drop and shoot.
We were working in the dark again, which is just the way it is when you’re doing this type of thing. So the strobes were being fired by the MIOPS trigger, and I was back at the camera. Had my camera on bulb, opened the shutter with a remote to avoid camera shake with that shutter speed, we dropped the ice cube, got our shot, reset for the next one. So let’s take a look at some of the images we shot.


So there’s a quick look at how to light glass. Remember it’s more what you see through it that lights the glass than the light you put on it. That really is the principle of lighting glass. So get out there and light some glass.
Keep those cameras rollin’, keep on clickin’.
-Jay P.