

Photo or video business not doing as well as you hoped? Download my class today and get back on track.![]()


High-Speed Sync
Hi, this is Jay P. Morgan. You may have heard the term high-speed sync as it relates to photography. This technique is handy when you want to shoot with strobes, but still have a shallow depth of field. It allows you to use the power of the strobe on a bright day, but also open up your aperture. In today’s lesson we’ll high-speed sync our camera with a Dynalite 800 watt/second pack and head system using a speedlight. It will allow me to set my shutter speed as fast as I need it to go to give me that small aperture in order to crush the background.
One of the biggest issues you have with high-speed sync is the loss of power which means you don’t have enough power a lot of times to give you the f-stop that you want or to give you just the power you need to get the shot. Using an 800 watt/second pack is really a valuable thing. So here’s how you do it. It’s a very simple process.
The Process
First I’m going to put my speedlight on manual, and then going to turn on the high-speed sync and I’m going to switch it to 1:1. What it does is it tricks the camera into saying, “Okay, you can shoot at faster shutter speeds now.” And that’s all it’s really doing is telling the camera, “It’s okay to shoot at 1/2000 of a second.” If you don’t do that your camera will only allow you to go to like 1/200-1/250 not any faster. You’ll begin to get the black bar across your images which happens when you’re shooting above what your camera will sync to.
Now my speedlight becomes a trigger method for my strobes. I set my strobes on slave, which means when they see an influx in light they go off. And then I take my speedlight and I point it away from my subject so it won’t get a ton of light on my subject. I got a little bit of fill on her but not very much. I fired my pack which I have here on the camera right side. So when that pack blows off, now with the slaves on the other strobes on the setup here it sets those off.
The hard thing about doing this in sunlight is sometimes it’s hard to get the slave on the pack to see the change in light from the strobe. If that’s happening you can put a little bit of black wrap around the slave to shade it from the sun and kind of collect the light from the speedlight. That helps. You can also get your pack as close as you can to the camera and speedlight, and it will be more likely to go off.
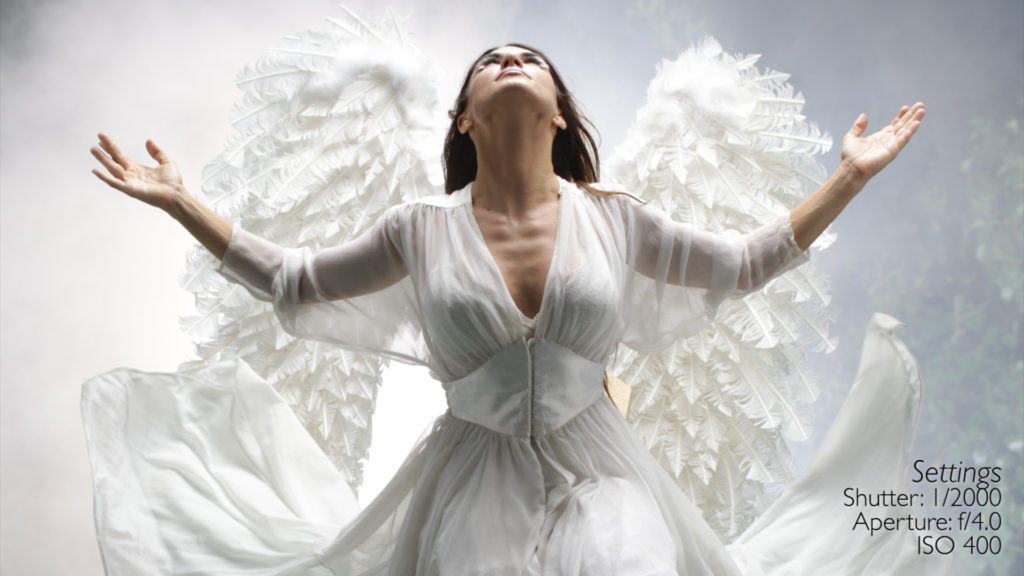
Now you have an 800/second pack that’s going to go off and you think to yourself, “Why would that high-speed sync with my camera?” It’s because the pack has got a long enough flash burn that it covers the entire move of the shutter across the sensor. So it gives us a complete exposure. And that gives you a lot of power, but I was high-speed syncing at 1/2,000 of a second to get rid of the sunshine around us so it could shoot this not in the middle of the night…even though it took us into the middle of the night to finish. But we could shoot in daylight and get rid of all of that ambient light on set.
This technique gives me the ability to control the background. And I get a little bit of sky, a little bit of clouds, a little bit of trees back there, but I can control that with my shutter speed. I’m sure you could go even than 1/2,000 of a second.
The Setup
So let’s break this thing down and see what we’ve. First off, our setup. We put a platform in the pool. It’s a 4′ x 8′ piece of plywood. We’ve got a structure that our angel’s going to sit on. We took and we clamped our wings to the back of the structure so they’ll be right in the right place behind her. We’ve got a bunch of plants that Julian got from Home Depot. And we’ve got fake rocks.
In the background, I cut a bunch of branches off from the trees in the yard and just covered up the edge of the pool with those. We did stick one of our old rocks back there, kind of give it some kind of break-up in the background. So there’s that kind of our setup. I told Julian, “This is going to be kind of simple. It’s not a big deal. You know, a structure, a platform, little bit of water.” Julian’s going, “Are you crazy?” And it turned out to be a big deal.
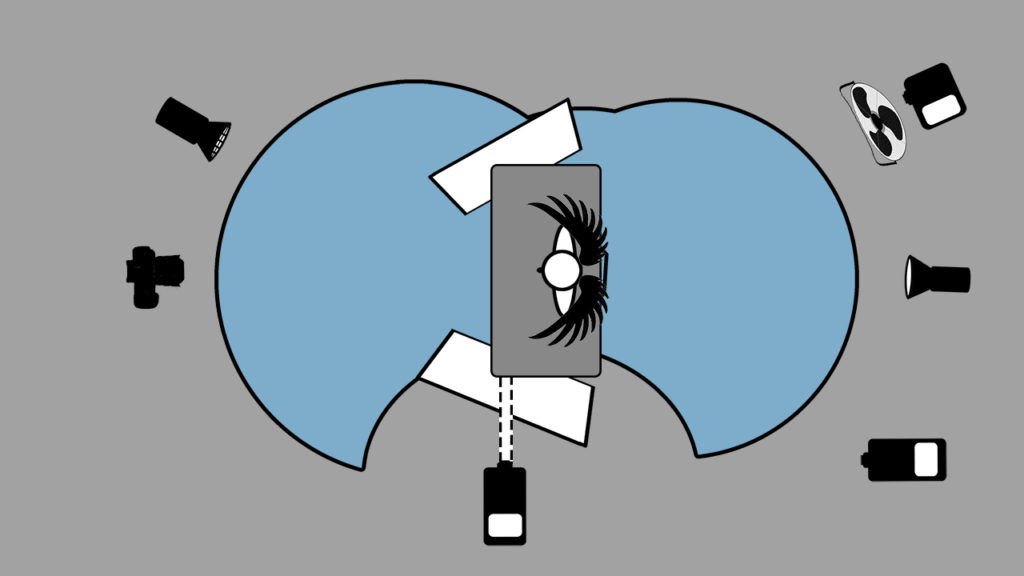
Lighting
So now let’s talk about our light. I really wanted to have a nice light from above, kind of this ambient light from above, reminiscent of an angel coming down. So we’ve got a large Photoflex OctoDome above us, gives us a nice beautiful soft light from above. But as she turns her head up, we get a nice highlight on her face. As she turns towards the camera, we get this kind of chiseled look on her face that I thought was really beautiful. And then we added a light from the camera, just a little bit of light on her face to open up the shadows just a bit. And then we brought in a fill card on the camera left side and then a fill card on the camera right side, opened her up in the foreground.
We then added one light directly from behind. The problem with smoke is it’s basically a lighting tool. The more smoke you get on set, it reflects light and you have less density in your shadows. You have more open shadows. So as the smoke got brighter around her it started opening her up and made her a lot more bright. As it got darker around her it became a little more dense and you see a little heavier shadows.
So smoke is that way. It changes in every shot. We shot this with three smoke machines. A smoke machine in the front through a chill box to give us smoke on the ground. A smoke machine on right and left to give us a nice background. The one on the camera left really did most of the work, gave us a nice background. We send the smoke machine through a box fan. As you tilt that up and down it just moves the smoke up and down, gives you a nice painted background back there.
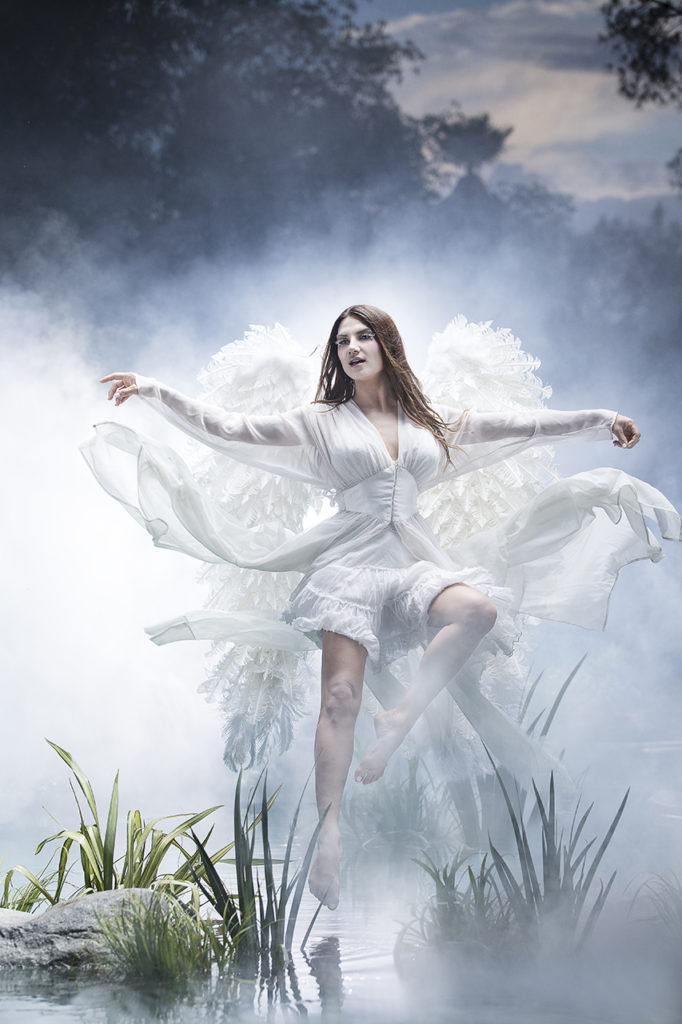
So we got everything set up, we started to shoot, we’d only shot about 10 or 12 shots. And then all of a sudden all the power went off. Someone had hit a power pole out on the street next to us and we had no power. We quickly brought in generators, got everything repatched, and started shooting again. It was a bit of a setback but we made it happen. Let’s take a look at some of the images. The way Lauren moved her hands and her arms was just amazing. So take a look at some of these.


Special Thanks
There are three people that really made this happen here. Lauren Abraham was fabulous. She has a dance background so the way she used her arms and her body was just incredible. I mean, that was fabulous and made this shot work. Also, Teri Groves and Makeup Magik. I mean, she did a fabulous job. She did pale skin on her whole body and then some great eyelashes just made this whole shot look fabulous. And last, of all, my sweet wife Julene, who always makes it happen, wardrobe and other things. So there you have it, those three people made it happen.
So there’s our setup and there’s our lighting. And that’s how we high-speed sync our camera to an 800 watt/second pack and head system. So keep those camera rollin’. Keep on clickin’.