

Last chance to sign up for my photography workshop! Take 25% with code “workshop25” off if you sign up today! 

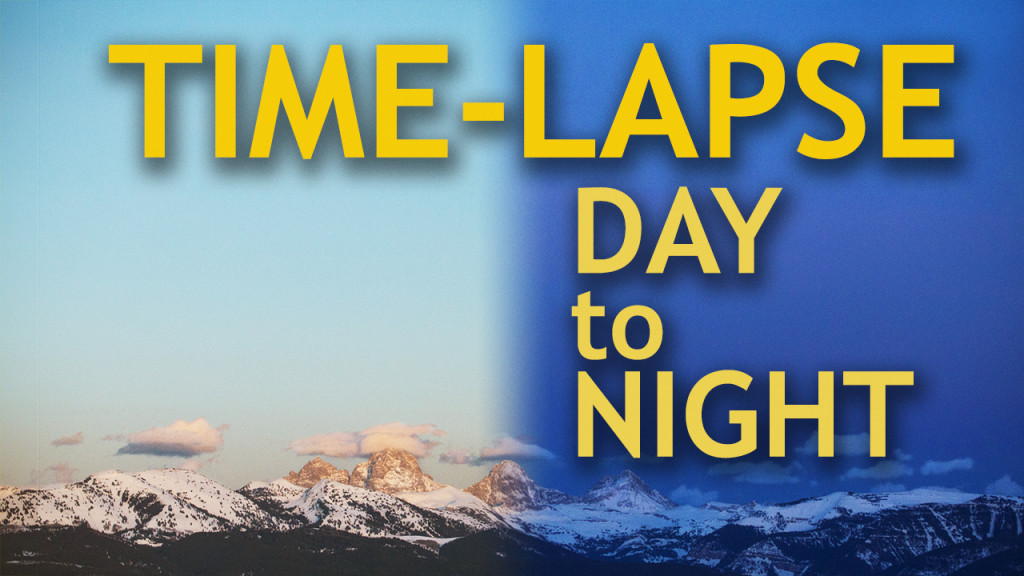
Hi, this is Jay P. Morgan. Today on The Slanted Lens we’re on the Idaho side of the Grand Tetons. It was cloudy when we came up here and scouted our location. They looked like they were gonna be a whole lot closer than they actually are. But our goal here today is to show you how to take time-lapse from day into those stars at night using the Genie, and Genie Mini from Sryp. We’re gonna do that by blending three time-lapses together. We’re going to do a time-lapse as the sun goes down. Another as the sky transitions to dusk where the sun’s down but the light is luminous. And then we’re gonna do one with stars, and we’ll blend those three together in post.
So let’s get started and see what we can do.

Hey, I’m back from Idaho. Picked up a bag of potatoes on my way. Who buys potatoes in Idaho anyway? Just about everybody who lives there I guess. It was freezing cold out there trying to do that time-lapse on the Idaho side of the Tetons. I had my son-in-law, Dallin, doing all the BTS. So we were scrambling between the two of us try to make it all happen. Got a little crazy. So let’s break down exactly what happened doing our time-lapse from day to night.
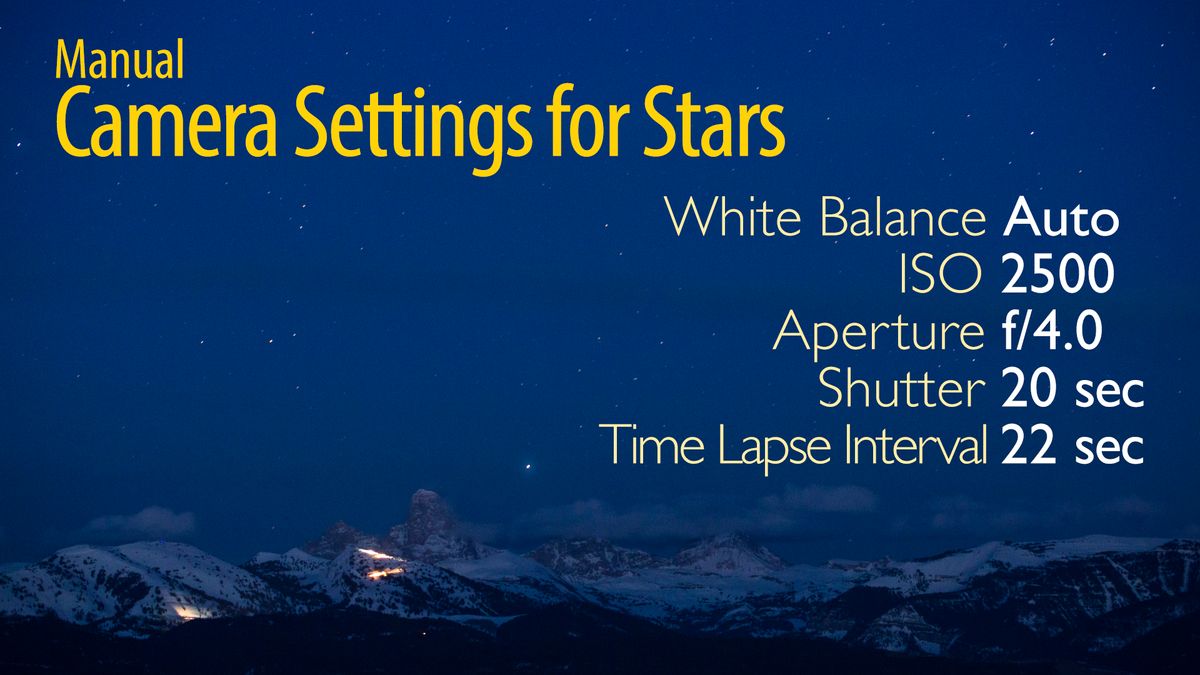
First we set up three cameras to show us how to shoot day to night for time-lapse. We did that so I could show you three different ways you can do this type of time-lapse. To trigger my camera today I’m using my Syrp Genie and my Syrp Genie Mini. I’m also putting my MIOPS in there to do my third camera. The first camera is stationary and it’s going to use aperture priority through the entire exposure from day to night. I’m not going to change or touch anything. I’m going to set the camera to ISO 2500. The problem with this is that when you’re starting in the daytime it can be pretty hard to get a good exposure at F4. But I want to be able to get a shutter speed fast enough to be able to accommodate that, and I can in this situation. So I’ve got 2500 ISO. I’ve got F4 on aperture priority. I’ve got a 20 second interval between exposures. Now I can start in the beginning and it’s going to be shooting at about 3,000th of a second, 4,000th of a second for shutter. But as it goes into night it’s going to get into two seconds and four seconds and six seconds. That’s why I need that 20 second interval. Because it’s got to give me the ability to go into night and not clip the shutter so I can shoot into those long star shots at nighttime. So there’s our first setup. Lock down, turn it on, let it rock and roll, and it’s gonna give us our time-lapse from day to night. 
Camera number two is set up the way I like to shoot time-lapse when you’re going from day to night. I’m gonna combine an aperture priority piece of time-lapse, daytime into dusk, with a manual time-lapse once it’s dark. With aperture priority setting I don’t have to have 2500 ISO. I can back my ISO way back to 600, or 300, even 160 if I want to. I’m aperture priority, F4, with two second intervals.
Camera number three incorporates the way I like to shoot time-lapse, that’s that aperture priority into dark. My manual settings in the dark for doing the stars. But I’m going to add a move with my Syrp Genie and just let it sweep across that horizon. I’ve got a 70-200mm lens on my camera at about 135mm. So I don’t have to have a huge move to be able to have a nice sweep across those Tetons. It’s about eleven degrees. I set it up, I preview it, I like it. I now move it back to the beginning point and I start it on the first aperture priority pass. I’m gonna make three passes. I’m gonna let that Genie pass the first time at aperture priority. That’s gonna take me about thirty minutes, so I’m gonna start about 30 minutes before sunset. It can be as low as one sixty ISO. I’ve got a shutter speed that’s gonna fluctuate because I’m on aperture priority. And I’m on auto white balance. That’s my first pass.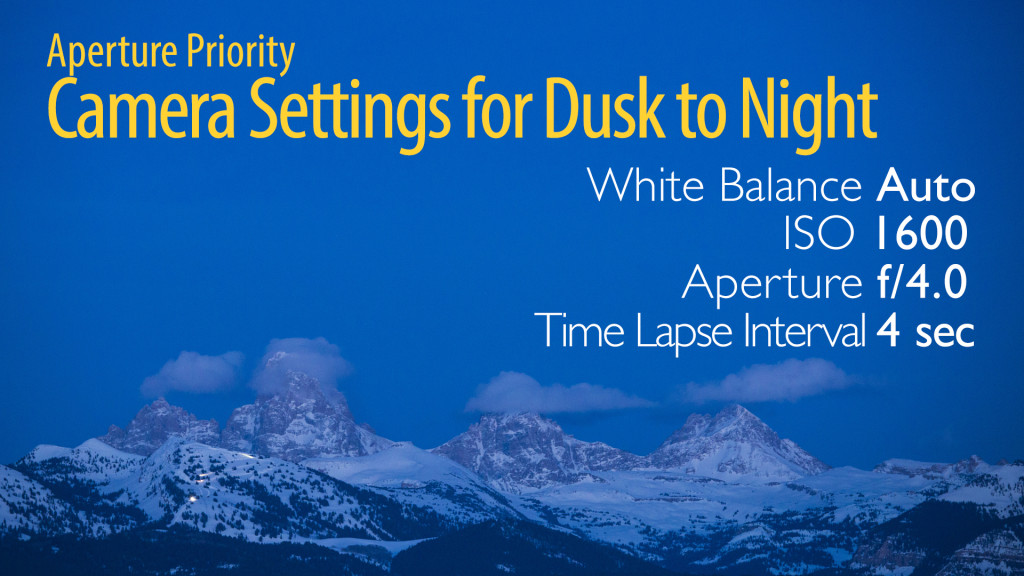
For number two I’ll do the exact same thing. I bring the first sequence into Camera RAW, I process the images with the color that I like. Then I bring the second sequence in and I process those with the process that I like there. I’m gonna look at that color just to make sure that it’s pretty close. Because the ending of one is gonna bleed into the beginning of the next. I want to make sure that the color looks good together, or at least will cross dissolve together. It can change color a little bit, that’s fine, because we’re doing it to dissolve on the timeline. Bring those two image sequences into Premier, stack one on top of the other and a nice long dissolve between the two. You have your beginning to end.
Camera three is going to use the very same process that camera two did, except we’re going to incorporate our move. What happens is we take each of these moves and create image sequences for each one of them. Now we’re going to stack these in Premier. The trick is that we’ve got to line them up so that there isn’t a ghosting look of the Tetons as one goes to the next. They’ve got to lay right on top of each other so we seamlessly go from the beginning, to the middle, to the end. So here’s our example, blending those three different image sequences. You’ll see at the very end of it though it’s got a bunch of flashing lights in it. It was a truck that pulled up. Some guy in Idaho’s going, “What are you guys doing out here?” Which is a pretty legitimate question at one in the morning on some dude’s farm. He was very nice though. And off he went.
I love doing this and I want to do more of it. I want to get better at this and refine this day to night experience. If you’re doing your own, get out there and shoot them. Put them up on our Facebook group. Let us take a look at them. We want to see your time-lapse in our Facebook group. Join the Facebook group on The Slanted Lens Facebook page. You can share your content, images, time-lapse and the things you’re doing. We take a look as a community and help each other grow there. So I hope you enjoyed this as much as I did.
Keep those cameras rollin’ and keep on clickin’.
-Jay P.