

Sign up for my business coaching class download today! 

Hi, this is Jay P. Morgan. Today on The Slanted Lens we’ll show you how shutter speed controls water when you’re shooting time-lapse. If you’re shooting during the day and you want to slow the water down you’ll need an ND filter on your lens. We used Syrp’s Genie and Genie Mini, plus their Variable ND filter. So let’s get started and see what we can do.

We set up a mannequin with an umbrella in our backyard here so we can show how shutter speed controls water when you’re doing time-lapse. We wanted to get in close to be able to show the drops of water to really illustrate this principle. So you’ve got a nice tight shot of this umbrella, rain coming down, and we’re going to change our shutter speed and just see how that affects the water when we’re shooting our time-lapse.
For our rain shot in the backyard with our mannequin, we’re controlling our time-lapse with our Syrp Genie Mini. It is not very hard to get a short shutter speed when you’re outside working shooting your time-lapse. But if you want a long shutter speed that’s very difficult, or impossible to do, unless you use a variable ND filter. Syrp makes a great variable ND filter. It’s a nine-stop ND filter. I usually get mine in 82. I mean, all of my other lenses, 82 and lower. And then I just use step down rings to be able to step them down to my different lenses. So there’s my 82mm variable ND filter from Syrp. That’s how I’m gonna get those long shutter speeds to really blur the motion of the water when we’re shooting our time-lapse.
For our fast shutter speed our camera settings are 640 ISO, 1/2500th of a second and f2.8. 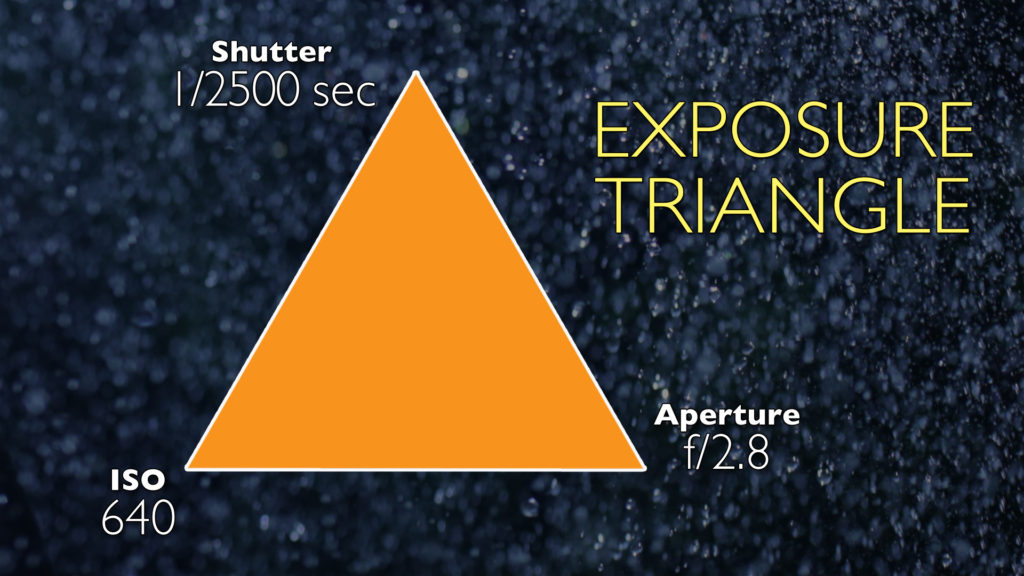
So let’s take a look at a time-lapse shooting at that fast shutter speed. I do have my ND filter on even though I’m going for a short shutter speed. I want consistency for my two examples. I’ve dialed it down to minus one stop so I can get a nice short shutter speed but still have the consistency between the two examples. So the water is very frozen and defined. It doesn’t look fluid like water at all. It looks more like snow than it looks like water. It’s just kind of droplets. Every droplet is frozen in place. Now there’s a time when that may look wonderful. If you want your water to look really angry and to have a lot of action with it then this might be the way to go. 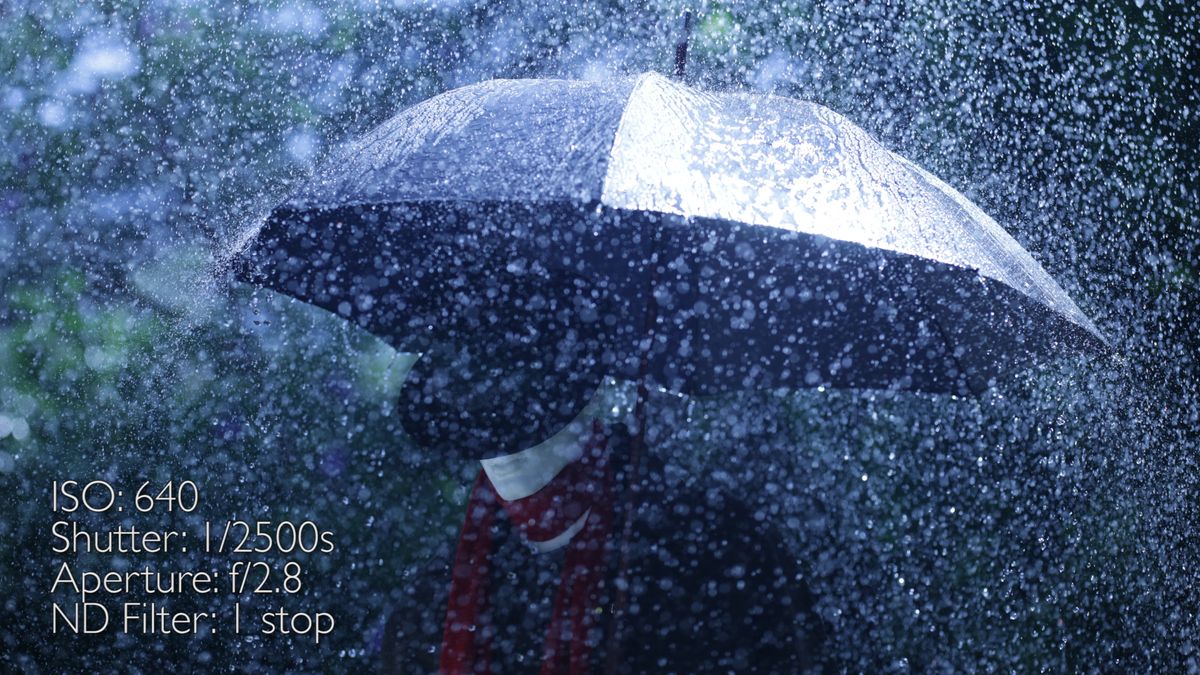
Now let’s look at a single frame with a longer shutter speed. I’m gonna put my ISO at 100. I’m gonna go to still 2.8 at 1/20th of a second.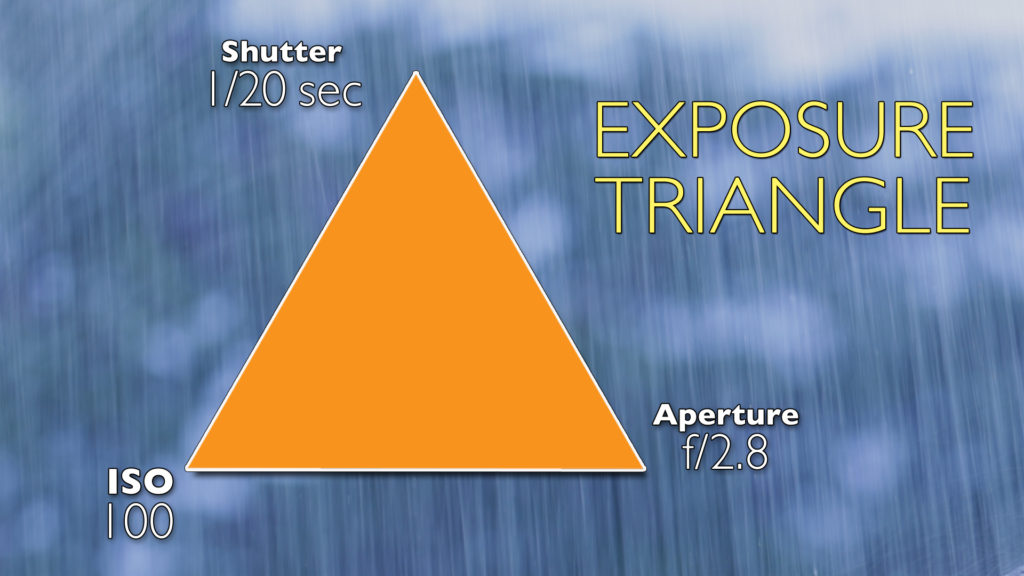
And then, using my ND filter, I’m gonna turn the ND filter to 8 stops of ND so I can really let that shutter be longer. That still image shows a lot of motion. The water’s blurring into the shot. There’s just blurring on top of itself and it just looks fabulous as a single shot. Now let’s look at that when we turn it into a time-lapse. We shot all of our images using that Sryp Genie Mini at 1 second intervals. This almost looks like video more than time lapse. You get that motion of the water. That’s what video is built on is that each frame blurs into the next frame. Well that’s what we’re getting with this time-lapse, is it blurs from one frame to the next. 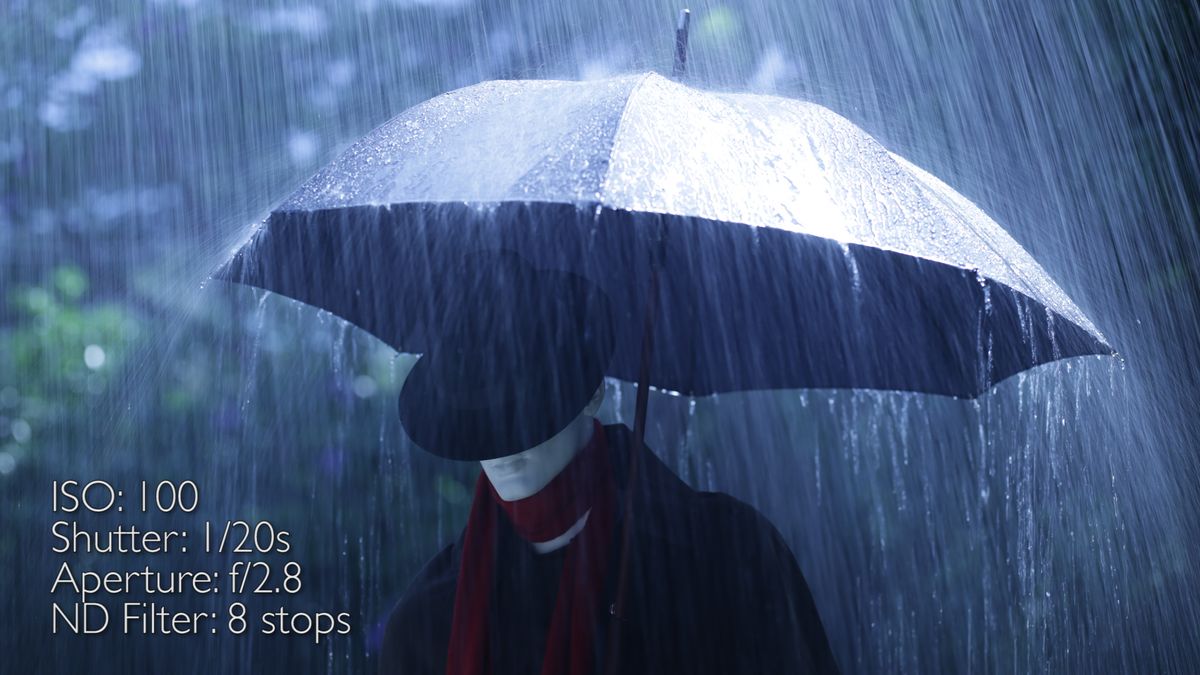
So how does that relate to shooting on location some place other than in your backyard? To illustrate this principle we went out on location to two different fountains here in Los Angeles. We went down to Echo Park. It’s got a fountain that just shoots straight up. It’s pretty powerful and pretty strong and we shot our examples both at a short shutter speed and then at a long shutter speed to show you how that water looks differently with those two examples. 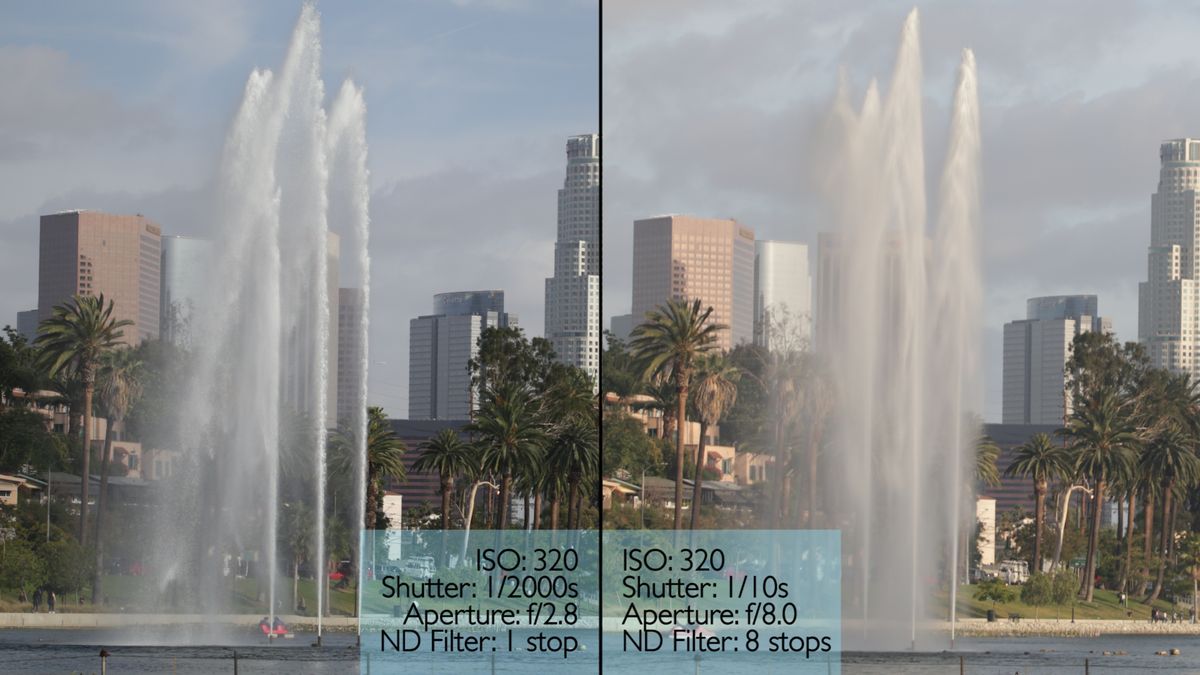
Let’s talk about how our cameras are set up here as we talk about shutter speed in relationship to water doing time-lapse. I played around with some longer and shorter shutter speeds just to see what they looked like. Just to give us an idea of exactly how we can control the water with our shutter speed. If you’re doing time-lapse you really need an ND filter. As the sun goes down and it gets darker then you can get those long exposures without an ND filter. But during the daytime you gotta have one. Having a constant water source like this fountain allows you to decide whether you want it to be dreamy and fluid, or short and choppy. You make that decision as you setup for your time-lapse. My experience at Echo Park was that the water definitely looks better with that longer shutter speed because it blurs a little bit and a little more choppy with the shorter shutter speed. But the example is not dramatic. It’s not like when you have a river and that running water will look really fluid. In this fountain example we didn’t get really the exciting difference that we wanted to. So we headed out to a different fountain. We went down to San Pedro. They had a fabulous fountain. It’s done by the same designer who did the Bellagio in Vegas. They play it to music every evening. And we shot some time-lapse there. I decided to give my camera a little bit of movement so we did a one-axis movement. One camera on the Syrp Genie, one camera on the Syrp Mini. Now remember, time-lapse is about speeding up things that are going slow, or making things go faster. Well this fountain was already going pretty fast. So our examples go even faster when we shoot the time-lapse. But you can see as it got later into the night exactly how this principle worked. Our water was very fluid with that longer exposure, and it was a lot choppier when we started to use shorter exposures. Which is all fabulous. 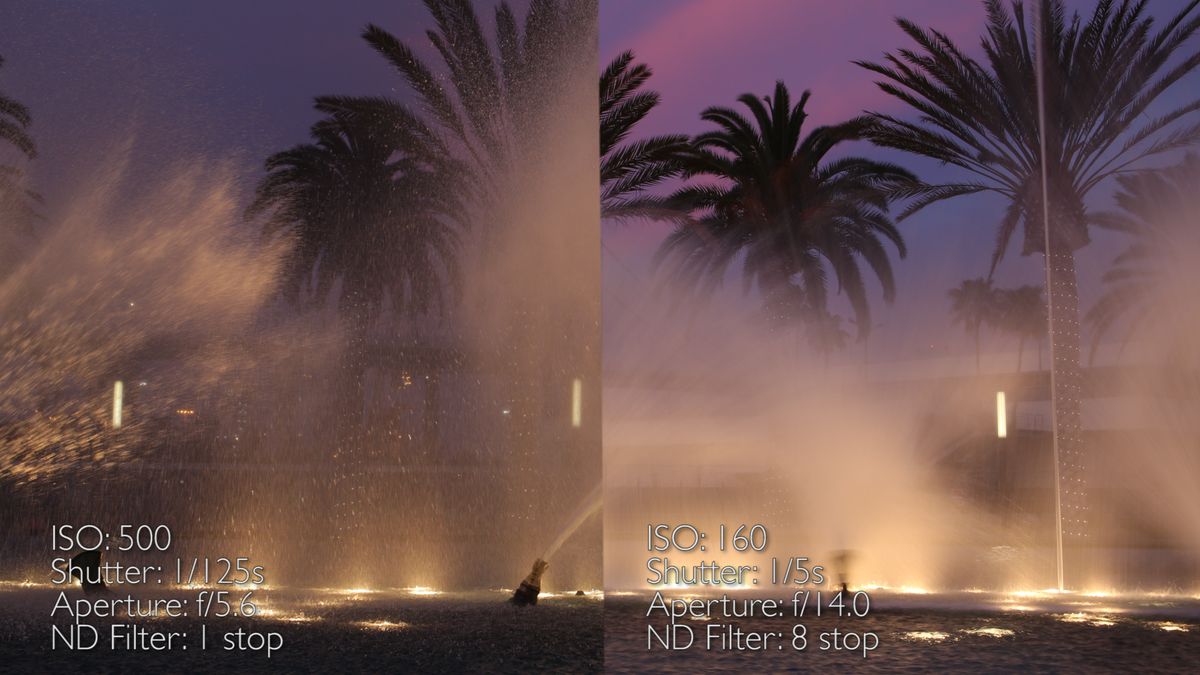
Hopefully as we’re shooting these lessons on time-lapse you’ll begin to realize that you make a lot of the decisions as you set up your time-lapse. You decide on shutter speed, you decide on aperture, you decide on ISO. There’s not a right or a wrong in this experience. It’s just a matter of you need to know and make a decision when you’re shooting water what do you want it look like. Do you want it to be fluid and dreamy? Or do you want it to be more choppy and angry? And that’s a decision you have to make. The tool to get you there is definitely an ND filter. If you want motion with water you’re going to need an ND filter to give you a longer exposure. So it has been great to be down here in Echo Park where we take a look at how shutter speed affects water when you’re shooting time-lapse. So get out there. Shoot some of your own time-lapse. Put it up on our Facebook group. We’d like to take a look at what you’re doing. So keep those cameras rollin’, keep on clickin’.