


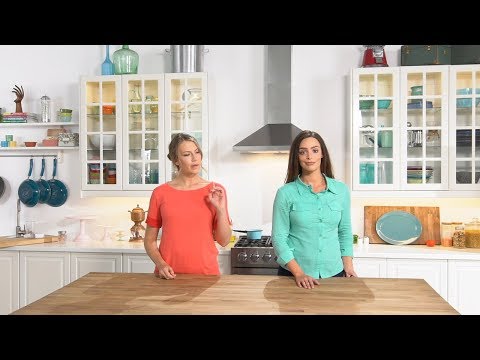
Today on The Slanted Lens we are taking a look at how to mimic window light. So many clients want a bright, happy, naturally lit shot; that’s a little tricky to deliver if your set has no windows! So, if you are trying to produce a shot that appears to be lit by a window, I’ll show you how to do it!
Window Light or a “High Key” Set
What does ‘window light’ actually mean? In photography terms this is a High Key set. High Key typically refers to a bright, airy feel with very few shadows and low contrast. People tend to like high key sets because they exude a happy, upbeat, positive emotion.
Creating Window Light
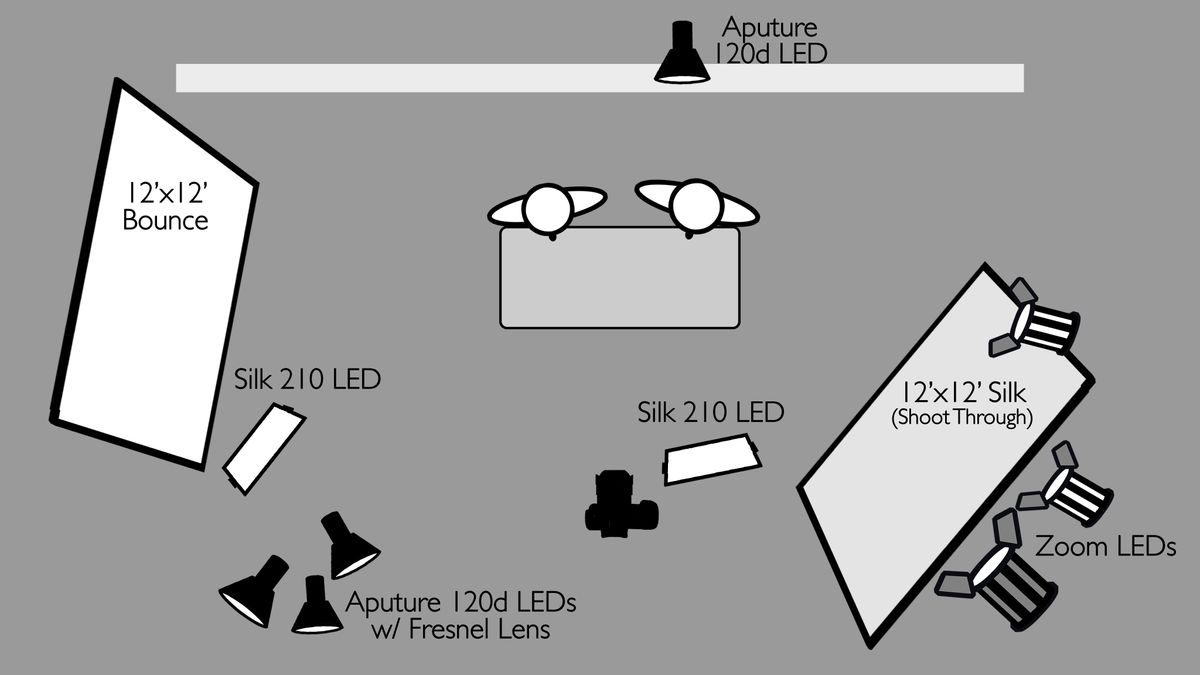
The first thing I tend to do when working on a set as large as the one above is add a big, 12’x12′ Silk sheet. This silk is a huge light source and does a great job of wrapping the light around the room. For this shoot I placed 2 Fresnel Zoom Lights behind the silk sheet. These lights are great because the adjustable focus allows you to fill the sheet entirely. Remember, though, this is a silk and not a bounce, so it is designed for light to be shot through it, not off of it. When you shoot on a smaller set, you can create the same effect with a bed sheet.
Then, in order to highlight the talent’s face more I add one more zoom light. Without this light the shot tends to get a little mushy, so it really helps to add that directional light into the mix.
You can then bring an Ultrabounce in on the opposite side of the set. This is another 12’x12′, but unlike the silk it is not designed to let light through. Rather it is used to bounce light back onto the set. I pushed a Rosco Silk 210 LED right up next to it so that I could bounce light into the shadows on the left hand side of the set.

Adjusting the Lighting Floor
By this point in time your set is going to be looking pretty good. What I tend to do next is evaluate the floor of the room. Now when I say floor, I am not referring to laminate or hardwood; rather I am talking about the level of light and exposure in the room. This is called the lighting floor. To produce an even brighter, more open feel in the room and to increase the lighting floor, I added some Aputure 120d LEDs pointed out into the room.
Finally I add one final rim light behind the talent in order to ensure that they stand out from the background and a roving key light that moves after almost every shot.
Measuring Exposure
If my meter reads F4, then I know I’m going to need to come over at least a stop to a stop and a half. Why? The meter is designed to be 18% gray, but if I am on an all-white set the shot is going to be underexposed! By opening up the camera a stop, the whites in the shot are going to look significantly cleaner.
You can check this by filming a couple of shots and then pulling them up on your computer to make sure that you are neither under nor overexposed.
Keep those cameras rollin’ and keep on clickin’!
-Jay P.