


![]()

Hi, this Jay P. Morgan. Today on The Slanted Lens we’re shooting a fantasy portrait, and we’re using the new GFX 50S by Fujifilm. We’re going to see how it works and if, as a medium format camera, it can hold up to the rigors of shooting fast on the set of one of our fantasy portraits. So let’s get started and see what we can do.

Fantasy Portrait with the GFX
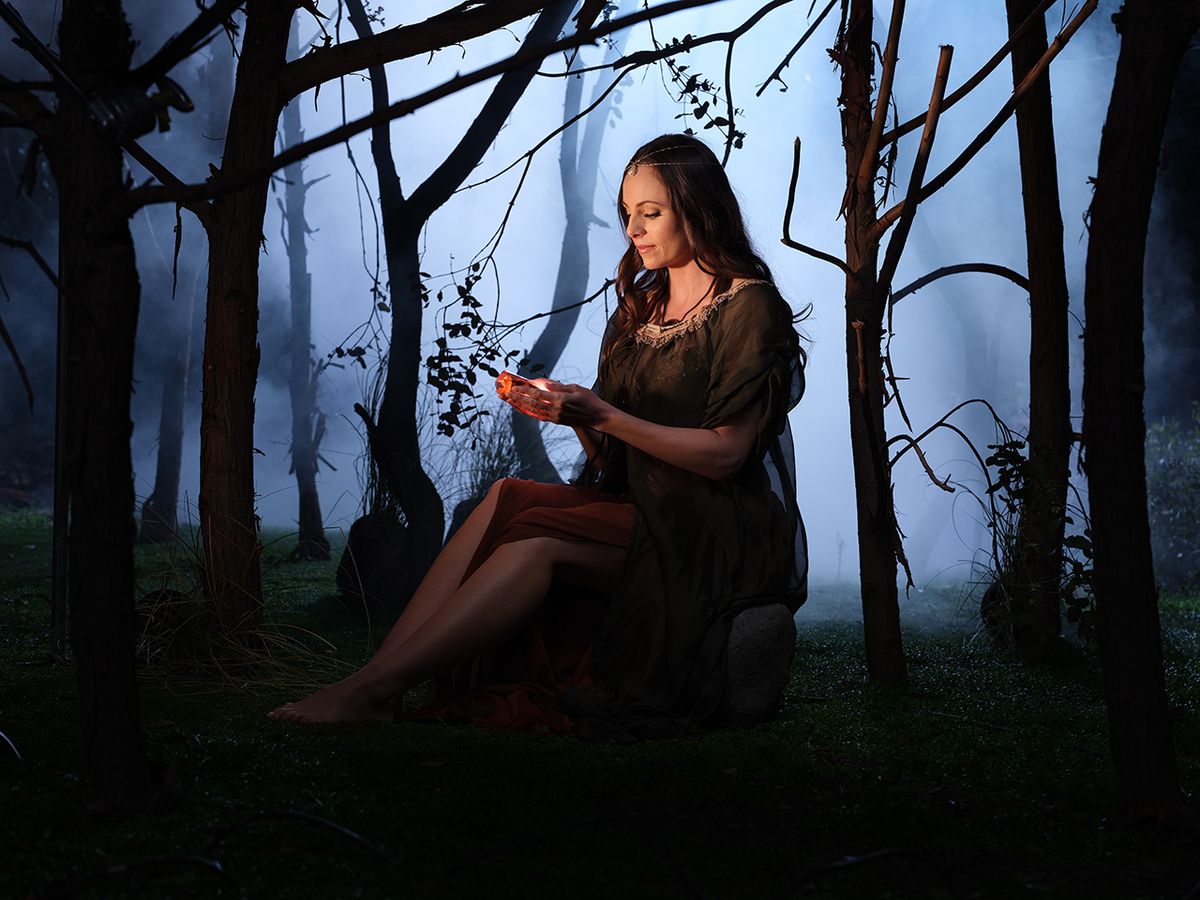
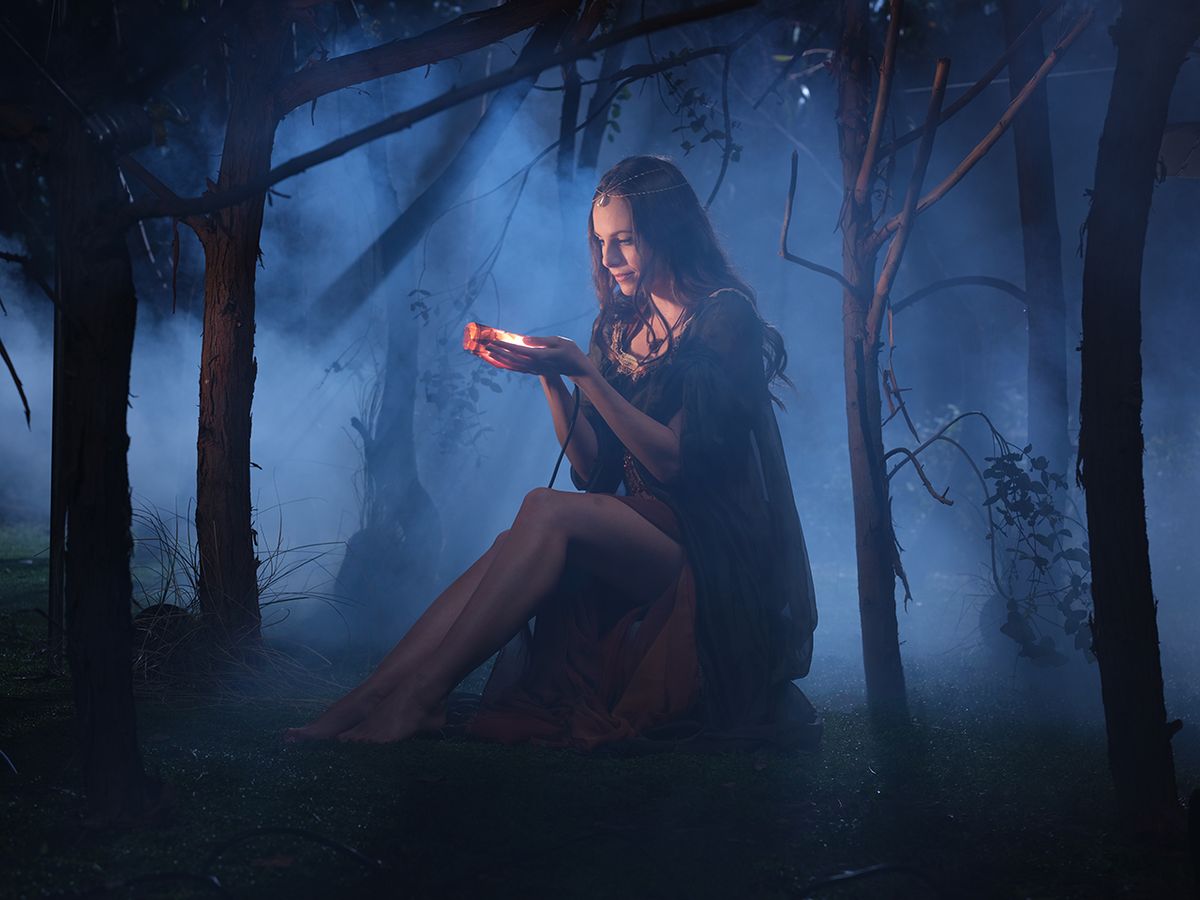
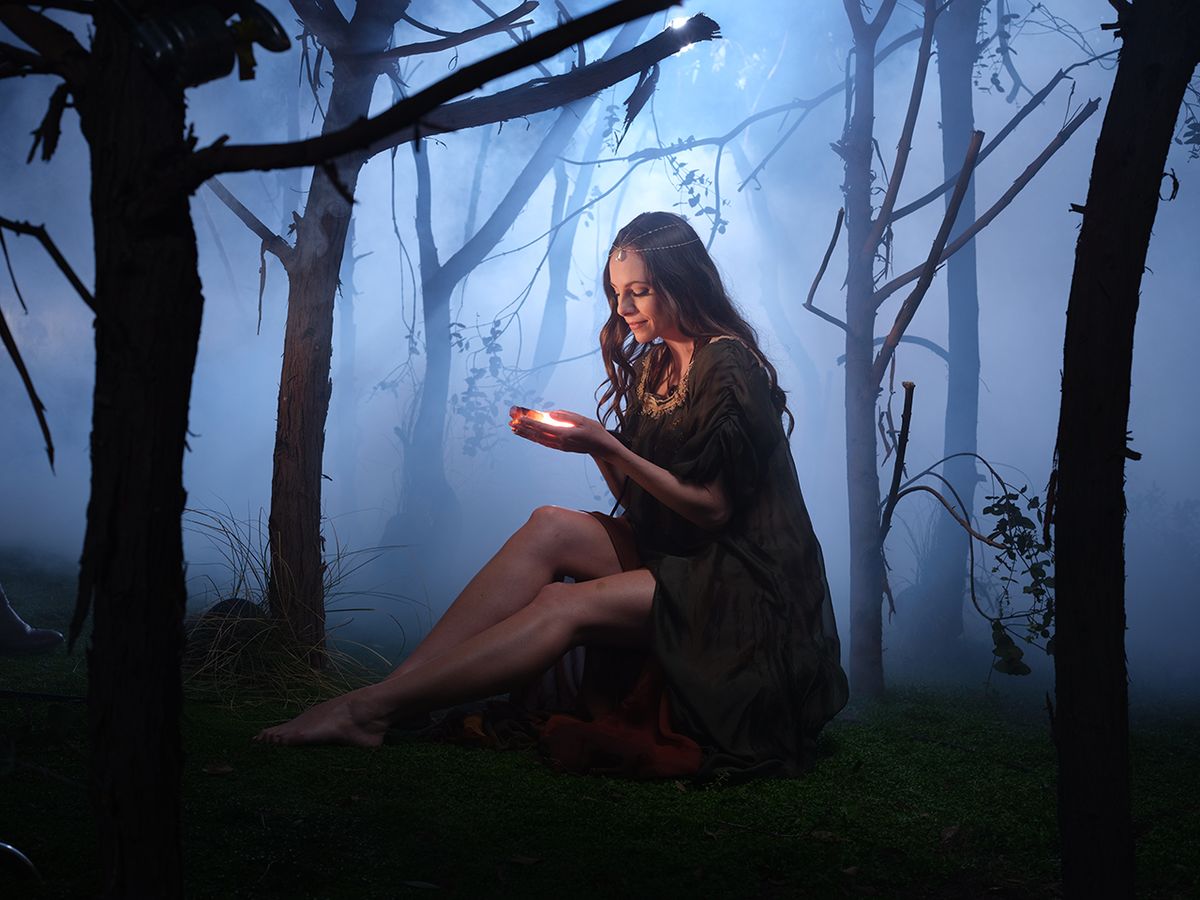
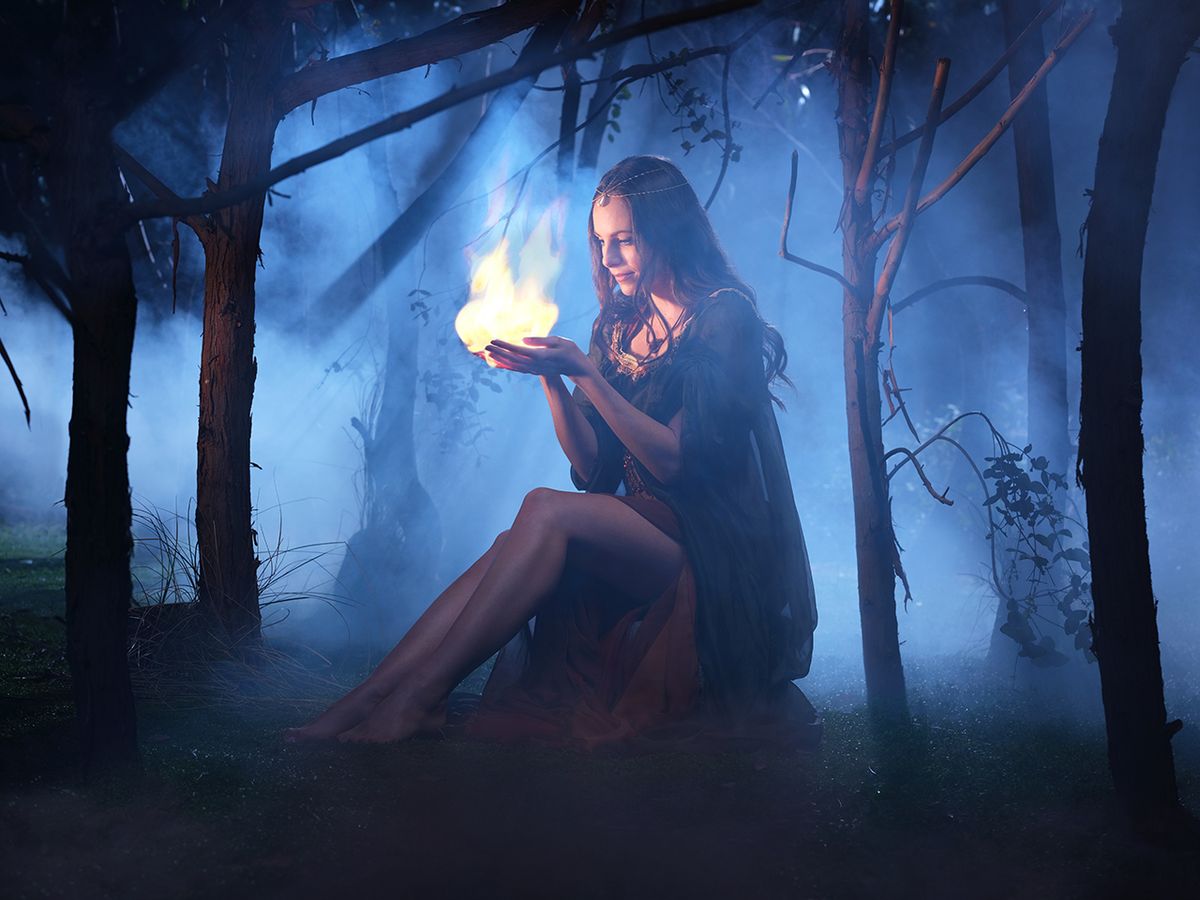
I know exactly what I want in this fantasy portrait we’re shooting with the Fujifilm GFX 50s, medium format mirrorless camera. There’s a woman in the woods, she’s holding a flame in her hands, and that flame is lighting her face. All the trees are backlit so they’re just black lines, with her holding just a flame rod and then we’re going to retouch that flame down into her hands. But we’re going to add light into her hands so it looks real, like the flame is in her hands.
Building a Forest
Let’s take a look at how we put our set together. It’s been raining so hard here in LA that a tree around the corner fell over right in the middle of the street. So, I went up there with my van, I cut all these big branches off, brought them back here and we made our own little forest. Each one of these was placed to camera so we knew exactly where we wanted them, could kind of dress them around her, could create our environment around Loree. We hammered conduit into the ground and attached the branches with fishing wire to make our forest. So that was our beginning point.
Ambiance
Now for our smoke machines. You know, I’ve learned from being outside at nighttime, daytime, it doesn’t matter- there’s always some kind of wind, some kind of current moving around. So, we set up three smoke machines. We put one up front, and we put one on each side in the back. That way we could turn however many of them we needed on, depending on how the wind was blowing. So, if the wind was blowing one way, we’d turn the smoke machine on that side on. If it was blowing the other direction, we’d turn the other one on. And then we’d have the one up front to just push a little bit of smoke into the foreground, because sometimes it doesn’t look right if there’s just all smoke in the background and none up front.
Lighting Setup
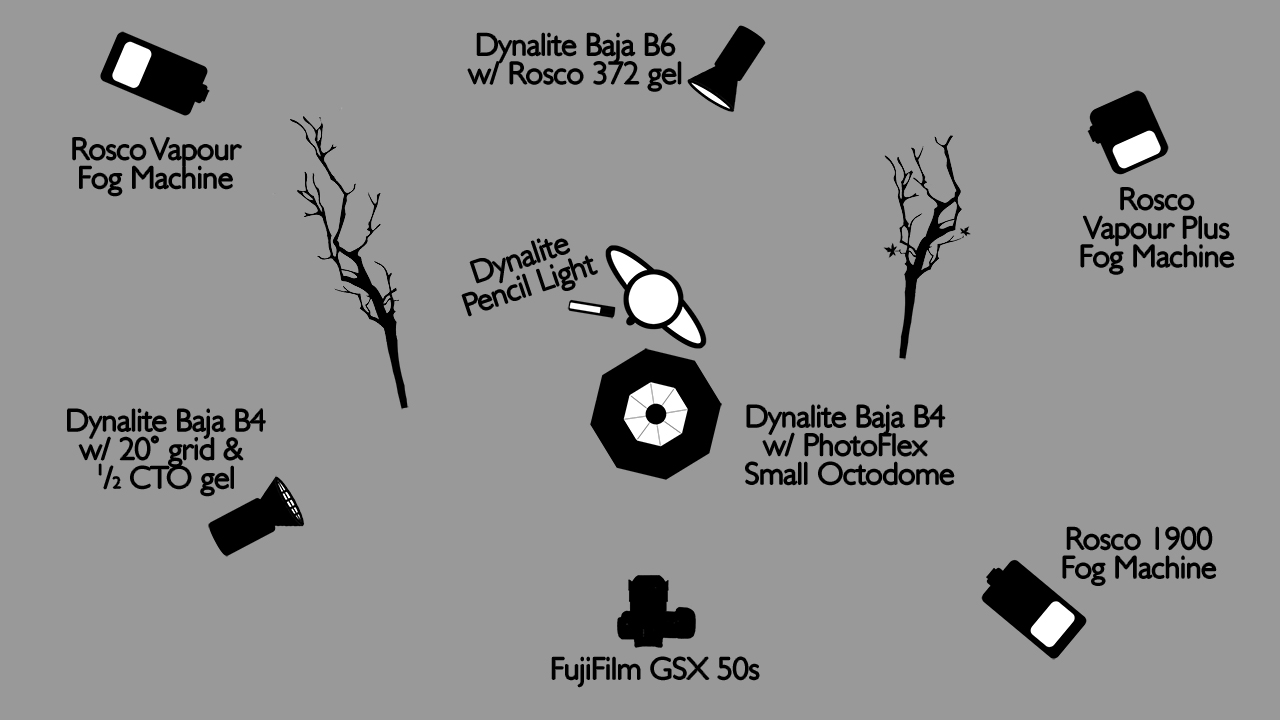
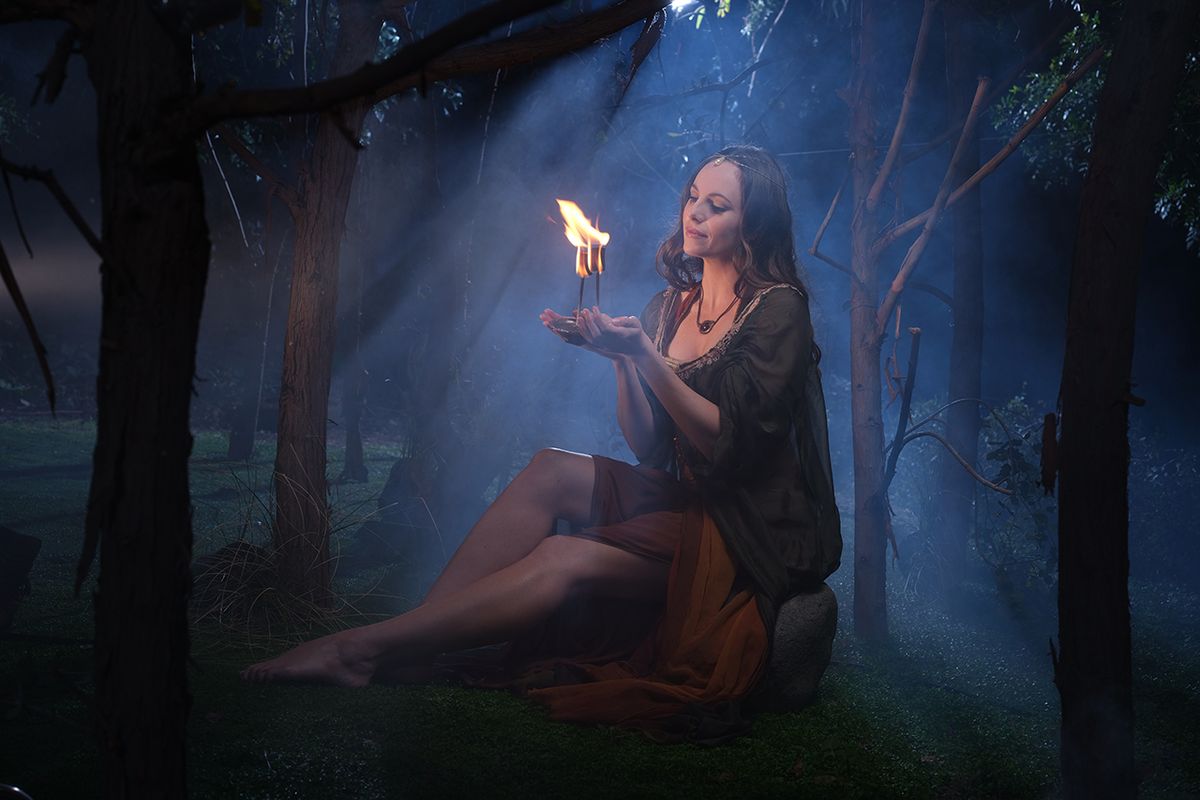
For the second light we added a Baja B4 on the camera left side. It had a 20 degree grid on it, plus a half CTO, so it’s a warm light. It’s going to imitate what that flame will look like in her hand, to give us this warm light on her face. So those two will sometimes have the light from the flame and the B4, then sometimes it will just be the B4. But that gives us a light that looks like it’s coming from the flame. So, that’s our second light.
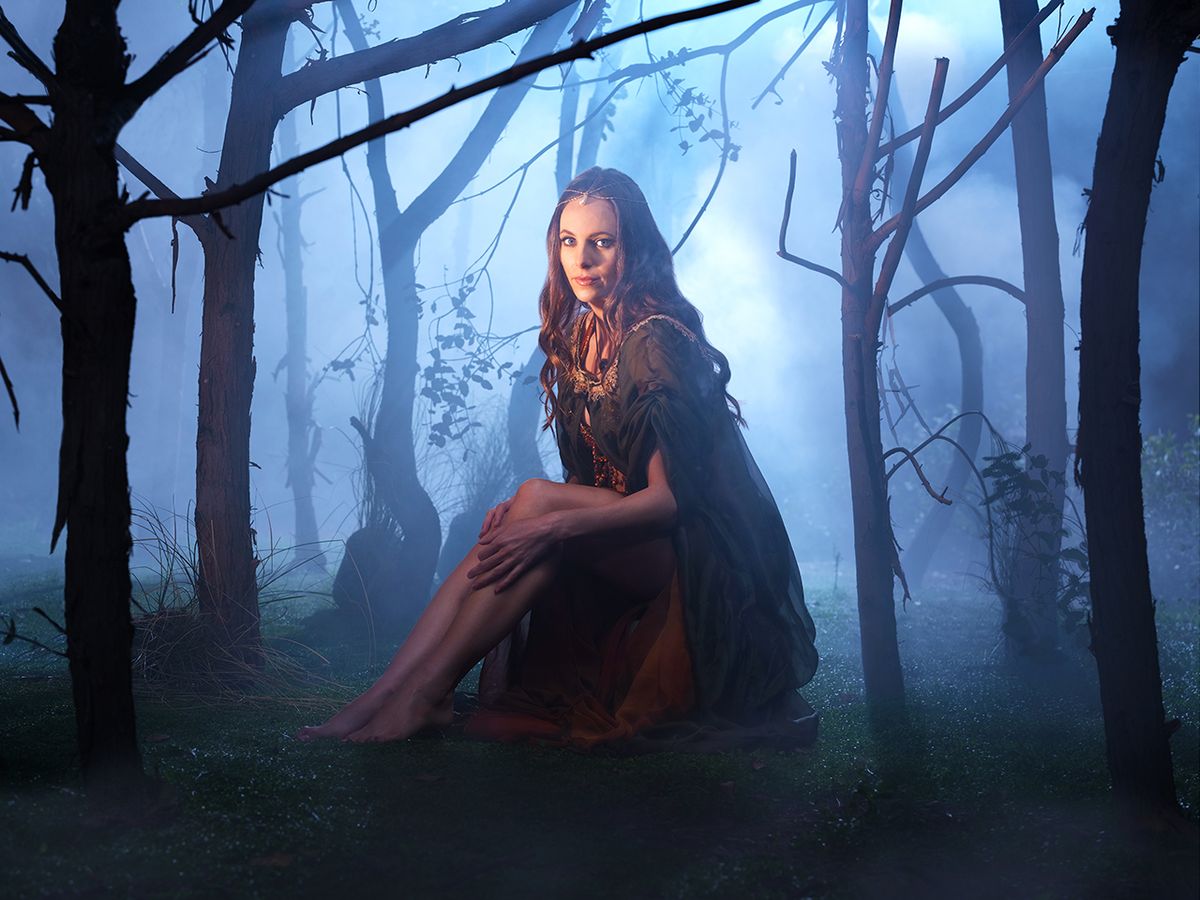
Our third light is a Baja B4 overhead with a Photoflex OctoDome and grid. We want to get a pool of fill light around her legs and around the foreground, but we don’t want to open up all the trees around her. I want the trees to be silhouetted in the shot. We accomplish that with that Baja B4 in an OctoDome overhead pointed down at her.
Finally, our last light is a pencil light that she’s holding in her hand. That pencil light is not meant to light her face as much as it’s just meant to give a glow in her hands, as if that flame is sitting in her hands. We run that pencil light back to a 400-watt Dynalite pack. In that 400-watt pack, we’ve dialed it down just about as low as it’ll go. I just want to see a glow in her hands from that light.
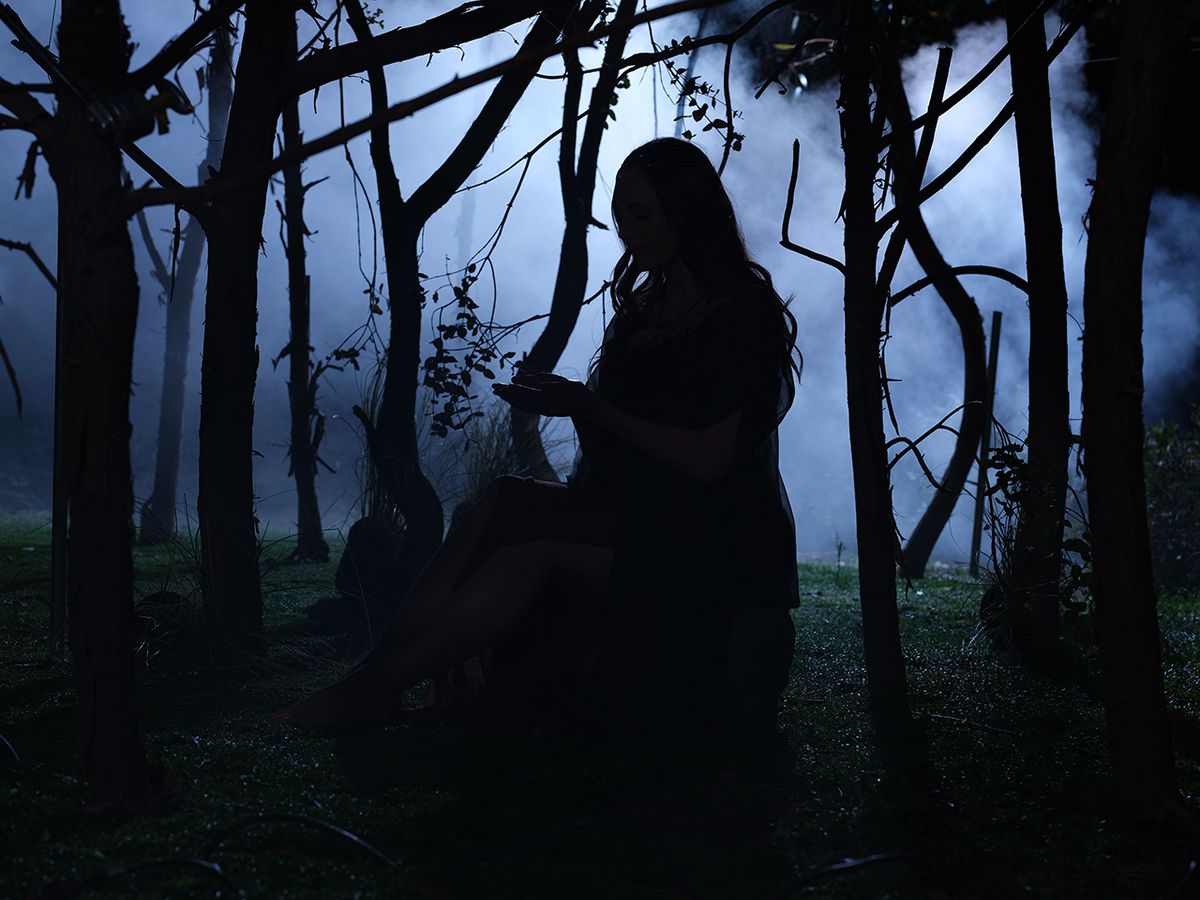
Here’s our first image. It’s absolutely dark out there, nothing to be seen.


Camera Settings
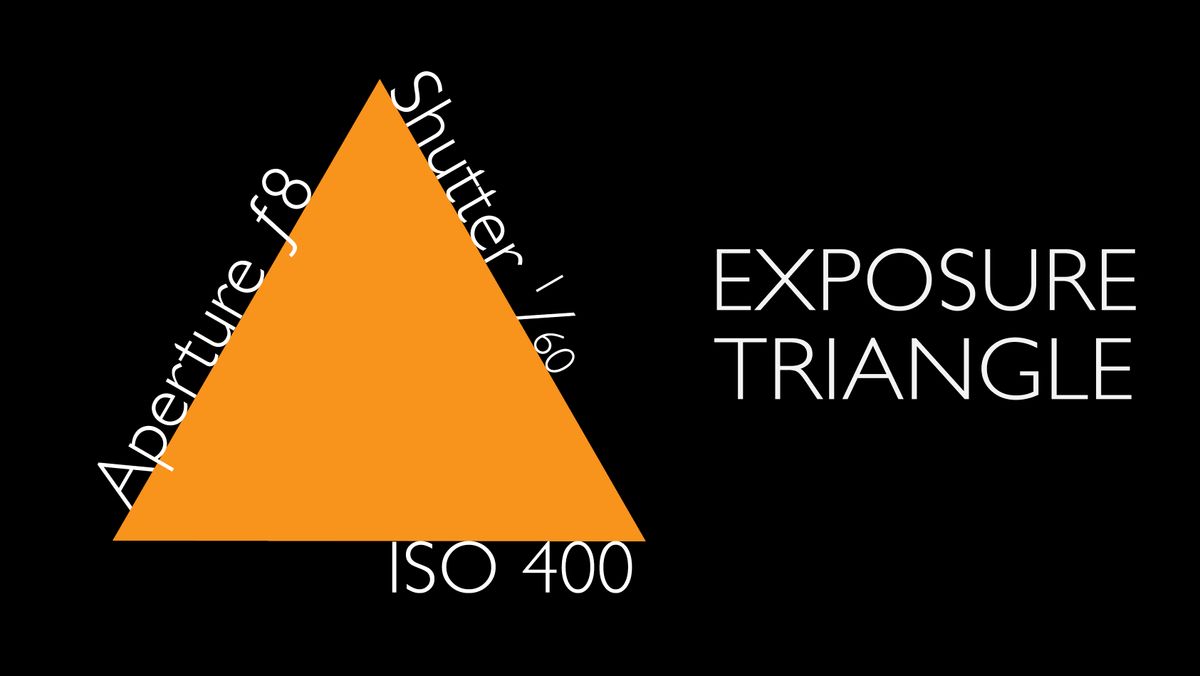
Now lets talk about the camera settings for the Fujifilm GFX. I’m shooting at 400 ISO, 1/60th of a second, at F8. The reason I chose F8 is because on a medium format camera like the GFX, you’ve got a larger sensor. F8, on that larger sensor, is going to give you the same depth of field as F5.6 does on a smaller sensor. So, if I want a little bit of depth of field, at F8, I’m not getting that much. I could have opened up to 5.6 and made it a little shallower, but I felt like, with the trees back there, it fell off nicely at F8.
The Fujifilm GFX 50S
This lesson is not sponsored by Fujifilm. They are not paying us to do this. I just really wanted to shoot on this medium format because I think it’s a gorgeous, large sensor- that 51 megapixels plus. The GFX just has a beautiful sensor. It’s like 1.7, so it’s a large sensor and I just wanted to see what the images look like in that sensor. And if the camera works fast enough and works well enough, then I think this is an incredible option. Add in the fact that this is a mirrorless camera, which makes the GFX so small compared to a lot of medium formats. It’s just really easy. I can put this in my camera bag in about the same space that my Mark III’s take up.
There are a couple of things that I love about Fujifilm’s GFX. It’s set up like a traditional, old-school 35mm camera. So it’s just really simple to get to things and change the settings. You see all the settings come up in the little LCD window on the side, you look through, you can easily change the autofocus. The autofocus was very fast for me. It is a contrast autofocus, which means you have to have a little bit of light for it to work, but it worked flawlessly for me. I had no problems with the autofocus when I was shooting.
The only thing that I noticed was that the buffer started to slow down because I’m shooting so fast. But with files this size you’re moving a lot of imagery, very large images, and that’s to be expected. So, it really didn’t surprise me, you know. I guess I was hoping for a miracle, “I can move huge images and shoot them as fast as I want and it’s not going to slow the camera down.” But that’s just wasn’t going to happen. It did keep up with the recycled time of my strobes. I wasn’t having to wait. It really worked flawlessly with the Bajas.
I did like the fact that there’s various aspect ratios on the GFX, which means that if I want to look at a little more square when you go to the full sensor size. If I want to make that a little more horizontal, I can just switch my aspect ratio on the back of the camera. It immediately gives you a black bar on the top and bottom. So you’re able to compose right in camera.
On my old Hasselblad, I used to put a piece of tape on the top and bottom because it was square format. Doing that I was just looking at what was going to be my ad size as a horizontal or a vertical. In this case you can just change it to the format size that matches what you’re going to be outputting to, or the way you want to use it. Then you just compose to the space that you’re seeing. I thought that was fabulous.
You’ve got a hot shoe for flash. You can sync up to 1/125th of a second, which is a little slow compared to some DSLRs, but it still gives you a sync speed that’s pretty good. You can high-speed sync with it. That’s all coming in the future here, very quickly. We even tested the weatherproof-ness. We had everything set up, all the strobes were in place, and all of a sudden, out of nowhere, the one cloud in the sky burst. And so we had to grab bags to get on the GFX and it got a little bit wet, but it’s weatherproof. And we proved that to be the case. Sorry, Fujifilm. But actually, it worked out great.
Images
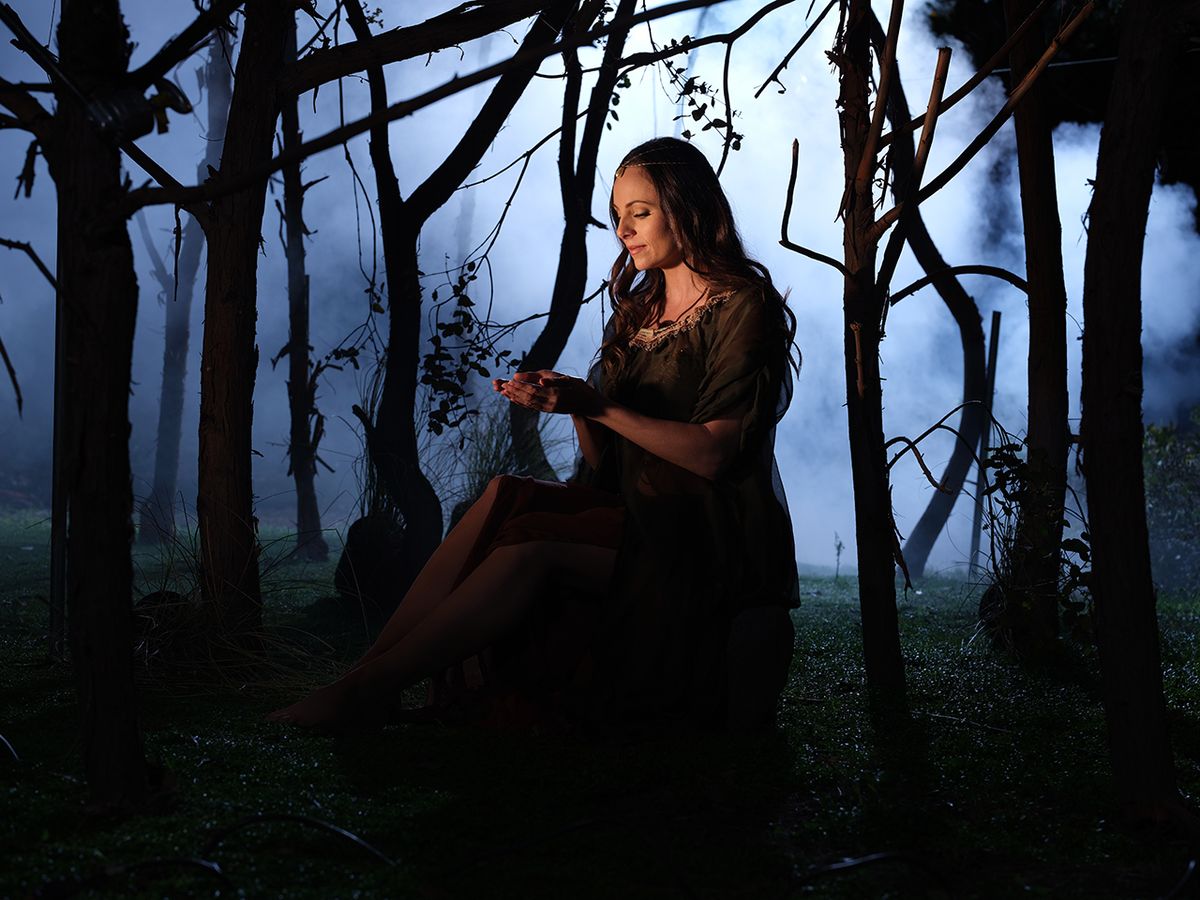
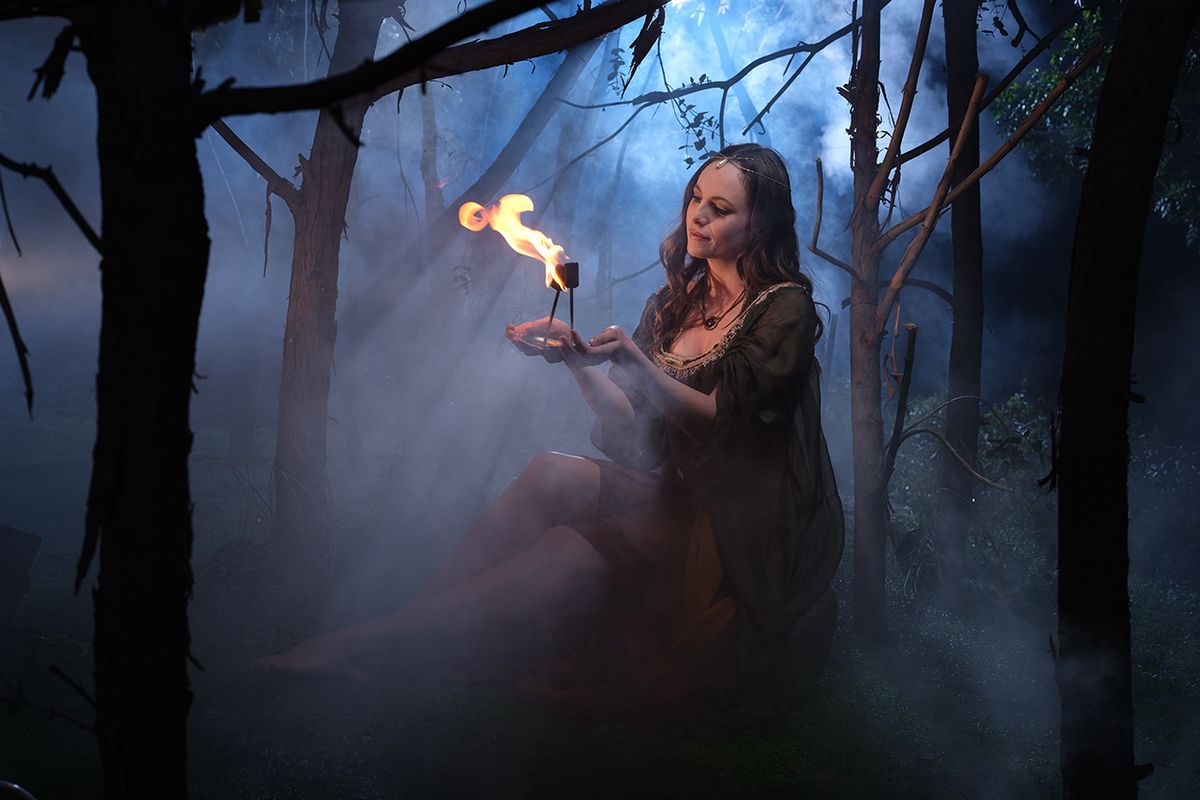
So, here are some of the images we shot before we did any retouching. The ISO range of the Fujifilm GFX 50S is not off the charts if you compare it to, say, an A7S2. But it’s incredible to me that the grain holds together at all of these ISOs. The grain is tight and very pretty. It does not have that RGB noise in it, which I found really fascinating. We shot at 400 ISO. The images straight out of camera are really beautiful.
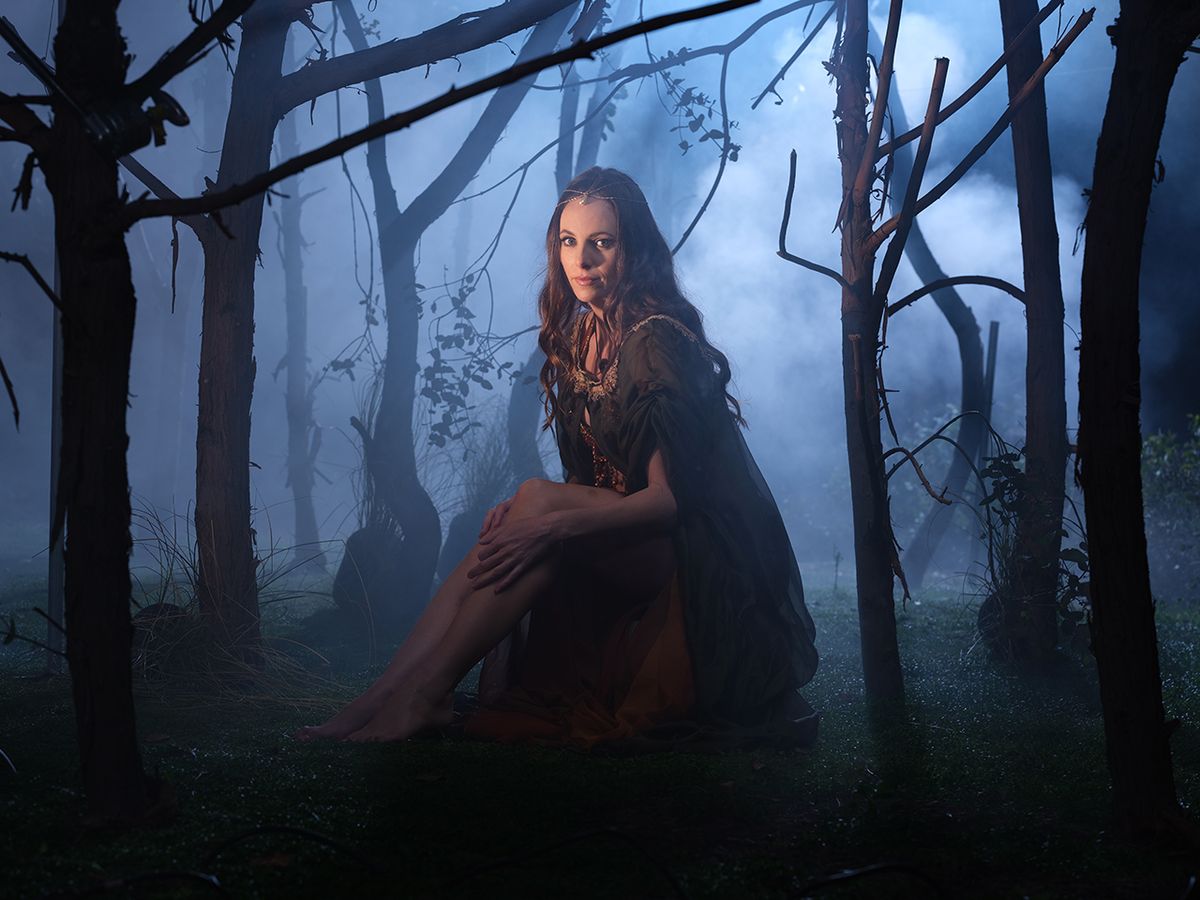
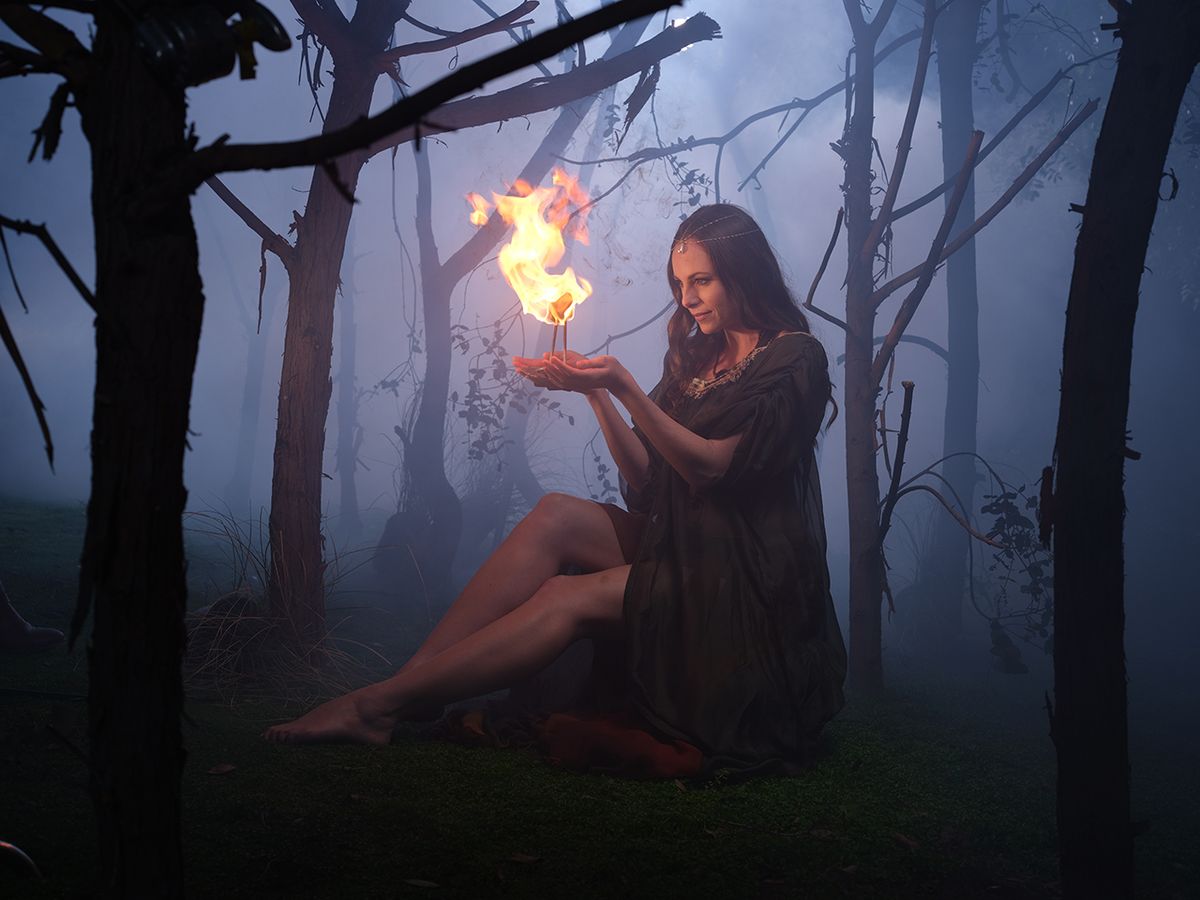
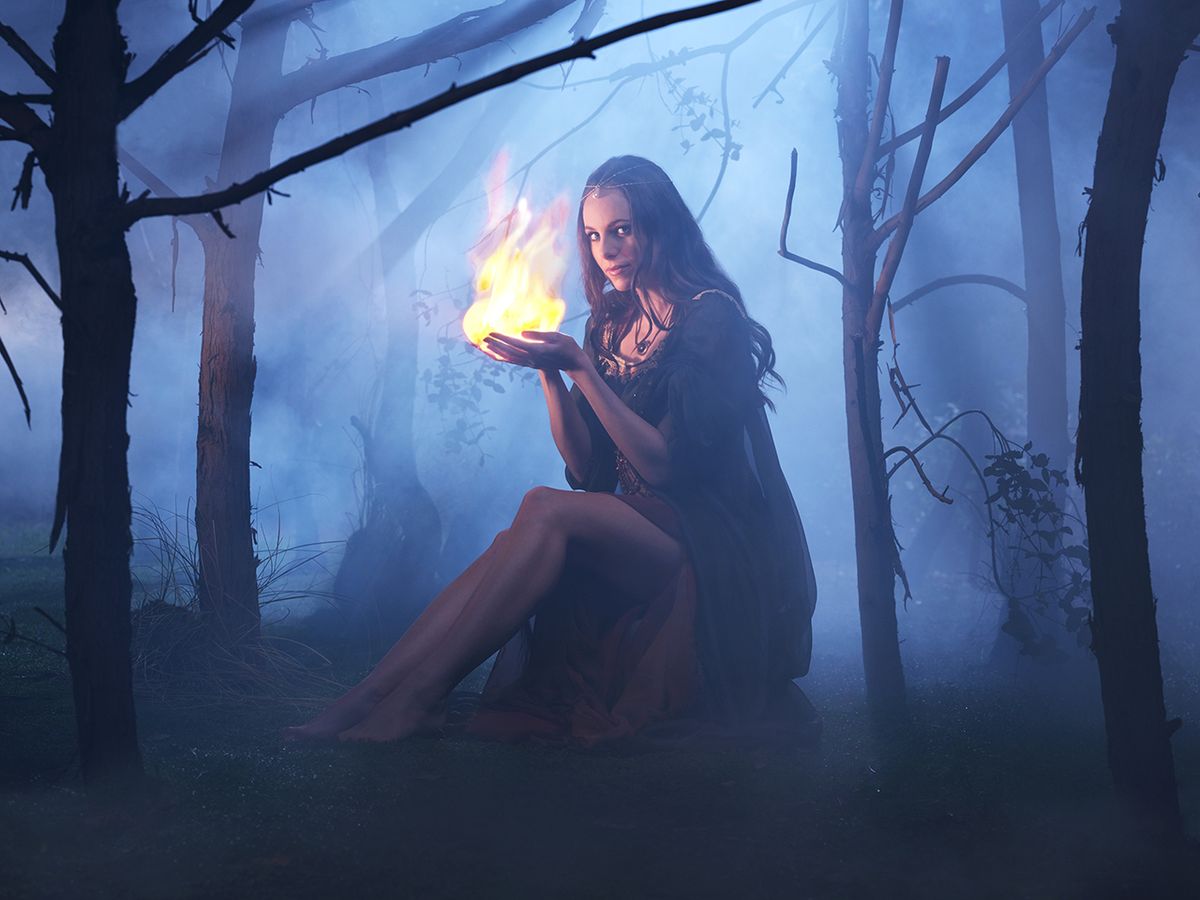
And here are some of our final, retouched images.
Conclusion
So, why would I buy this camera? I would buy this camera because it’s got a huge sensor. And the sensor’s beautiful, it’s clean, doesn’t have noise on it and it works very similar to a DSLR. I’m not feeling like I’m having to give up a huge amount of weight to be able to use this camera, and it’s a great camera on set. So it worked flawlessly for me.
Talk to Me
Share with me why you like this camera. Why would you use this camera? Join our Facebook group and share some of those thoughts there. Tell me why you’re going to use this camera. Tell me what you hope that this camera will do for you. If you’ve got any images you shot on the GFX, get it on to that Facebook group. We want to see those, for sure, so we can see it in different lighting situations. We can have that exposure and we share it with one another. Great camera.
Hope you loved the image, and so keep those cameras rollin’, keep on clickin’.
-Jay P.