Hi, this is Jay P. Morgan. Today on The Slanted Lens I’m teaching you how to shoot panoramic portraits. We’ll do this with and without strobes. I’m using the Syrp Genie Mini on the Sony a7R II, with both the Tamron 35mm and 85mm lens. So let’s take a look and see what we can do.
Thank you for shopping our affiliate links, your purchases help support new content.
Panoramic Portraits
Julene and I traveled to New York in the fall, and while we were there I shot some panoramic landscapes. You can see that lesson here. I loved doing those, but I also thought it would be great to add people. We were driving down the road and I saw a guy out working in a field, pulled over, and asked if we could photograph him. So that was my first panoramic portrait. A farmer out in front of those beautiful NY fall colors.
 Equipment and Setup
To shoot these panoramic portraits I used my Syrp Genie Mini. I had an L-bracket attached for shooting vertically. Shooting vertically allowed me to get the most detail as I stitched these together in Photoshop. My camera of choice was the Sony a7R II. I shot in 3:4 mode so I could use the whole sensor. And of course you know I love my Tamron lenses. I started out with the 35mm, so that I would be able to get more of the environment in my panoramic portraits. But as I wanted to get my subjects closer to the camera I switched over to the 85mm. As they got closer I needed a deeper depth of field, so I moved to f8, 11, or even f16 if I could. I sat all these atop my Vanguard VEO 265AB Tripod.
Getting the Shot
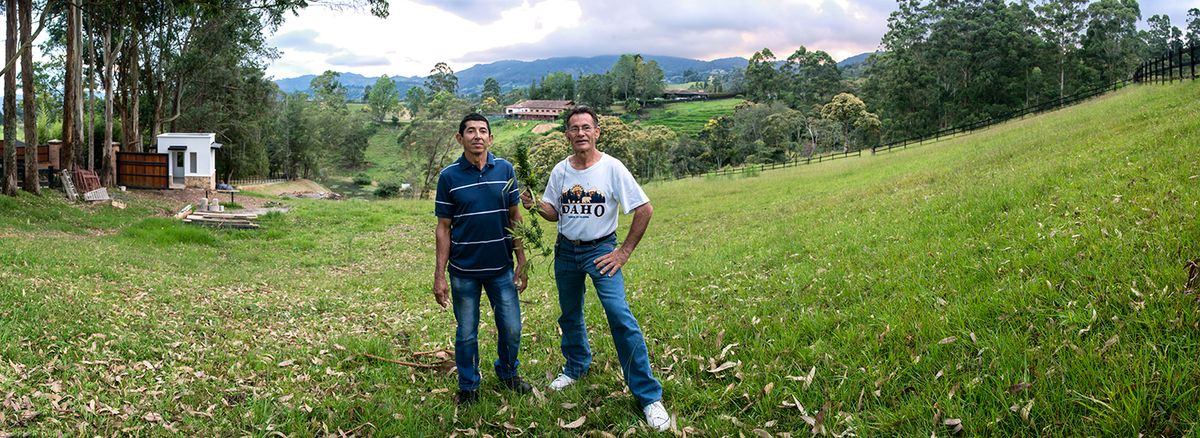
In Colombia I started doing something I hadn’t done before. After I had gotten my panoramic shots using the Sryp Mini Genie, I went back and got several shots of just my subject. That enabled me to have different options to stitch in while creating the panorama in post. I could just go in and choose which portrait I wanted to use to make my panoramic portrait. For a detailed explanation on how put together your panorama, check out my How to Shoot and Edit Panoramic Landscapes lesson.

 Adding Strobes to Your Panoramic Portrait
In Cuba I started lighting my subject with a strobe. I brought a speedlite, but not a stand, so I had my daughter hold the light. I’d start my pan on camera left side. As soon as the camera cleared, she would step up to light the subject with the speedlite.
This first shot we did at night. I used a long shutter speed because, while the strobe was lighting him, there was also tungsten lighting from the buildings that I wanted to capture.
 On these last two my daughter wasn’t with me, so I’d run and light my subject with the strobe myself, then run back and turn off the camera when it was done. I had a shorter shutter speed, but I wanted a deeper depth of field so that I could have focus throughout the picture. It would be a shame to have these beautiful backgrounds and not get any detail in them. I did have to push my ISO to do that though.

 Backing Up Your Photos
It’s important to back up your photos. When I’m shooting on location I like to carry my LaCie Thunderbolt Rugged external drives. I carry two of them, and then Julene, or whomever I’m traveling with, will take one, and I’ll take the other. These make it easy to back up my photos. I also leave all of the files on my cards. Whenever possible, I don’t erase those until I get home. Now they’re backed up in three different places. It would be awful to travel, spend all that time, money and effort, and lose your photos because they weren’t backed up. Speaking of traveling, I’m putting together another trip to Cuba. To get on the interest list, email judy@theslantedlens.com and let her you know you’d like to stay updated.
 I hope you enjoyed this lesson on creating panoramic portraits. Watch the video below, and check out our related content as well. Keep those cameras rollin’ and keep on clickin’.
-Jay P.


Leave a Reply