

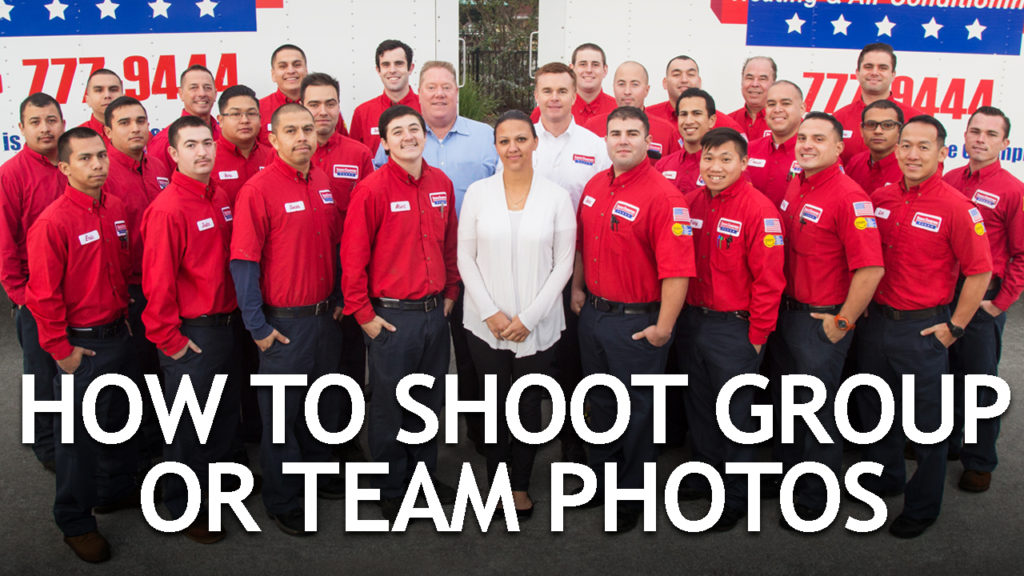

Hi, this is Jay P. Morgan. Today on The Slanted Lens, we’re going to talk about how to shoot a corporate group portrait or a team photo. This is a formal portrait. This is people standing shoulder to shoulder, looking at the camera, in order to display the employees for the business. I love shooting group portraits. They’re a lot of fun. I’m going to teach you how we set them up, how we light them, plus a few tips and advice I’ve picked up along the way. So let’s get started and see what we can do.

Time Your Group Shot
Number one for me is to shoot these early in the morning. I’ve just found that to be easier. Have everyone come into the business slightly before they would normally start their workday. You’re going to get your photograph done, and then send them on their way. If you try to do these in the afternoon…and I’ve tried that before…it’s just difficult. People don’t show up, they show up late, they’re at other sites. It just doesn’t work very well.
Set Up Before They Arrive
Number two, set up before they arrive. This kind of depends on the time of year and the business you’re working with. For this particular company’s group portrait, I get there really early, at 5 or 5:30am. We’re going to shoot at 7:00am because the sun is just coming up and I’ve got a little bit of ambient light. I don’t want them to ever stand around and wait. The minute they arrive I start getting them in place. As a result, they feel like this process is always moving down the tracks- it’s not stalled or waiting at any time.
One reason to get shooting our group portrait so quickly after they arrive is that I don’t want to take away from company billing time any more than I have to. I want the company to feel like I respect the fact that these people all need to go to work. I’m there to do my job, do it quickly, and get them back on the job.
Choose the Background
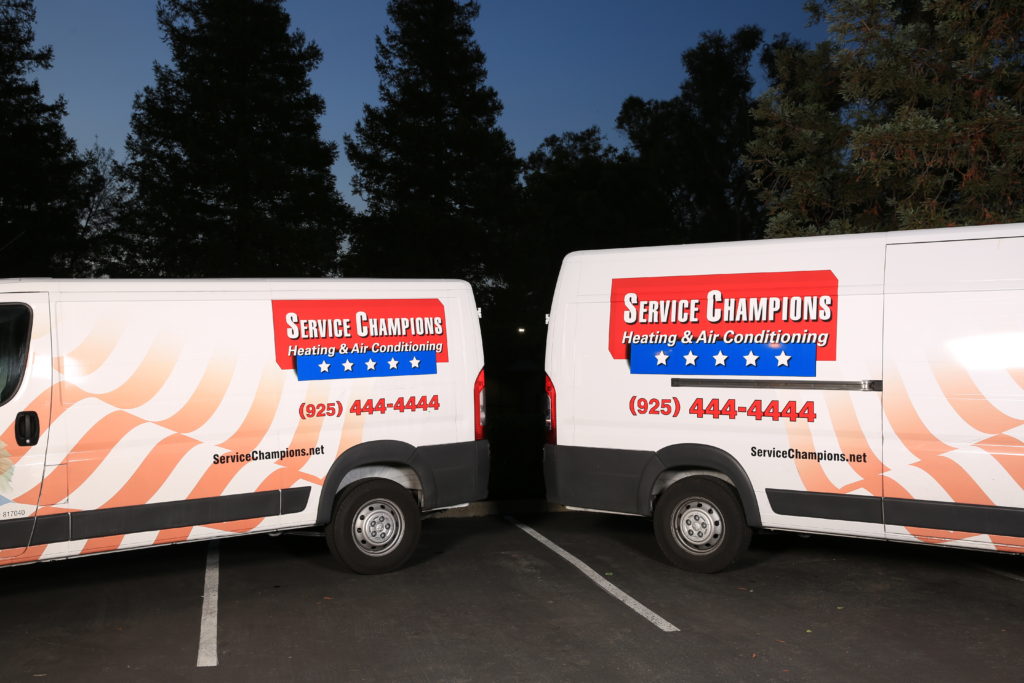
The first thing I do when I arrive is choose my background. This kind of goes with the next point and that is get rid of the sun. I want to choose my background so that when I’m facing my subjects I’ve got the sun either off to my right or left, in the background and coming up towards me. I don’t want it over my shoulder because it’s going to start to light my people and cause problems for me. I don’t want it to come in hard from the side because it’ll do the same thing. I want it on my far right or far left so it’s kind of away from what I’m doing. That way it won’t light them in the front. It’s going to throw them into shadow and then I can light them with my strobes. In choosing that background, I’ve got to consider that. I’ve got to make sure the sun is going to be in the right place.
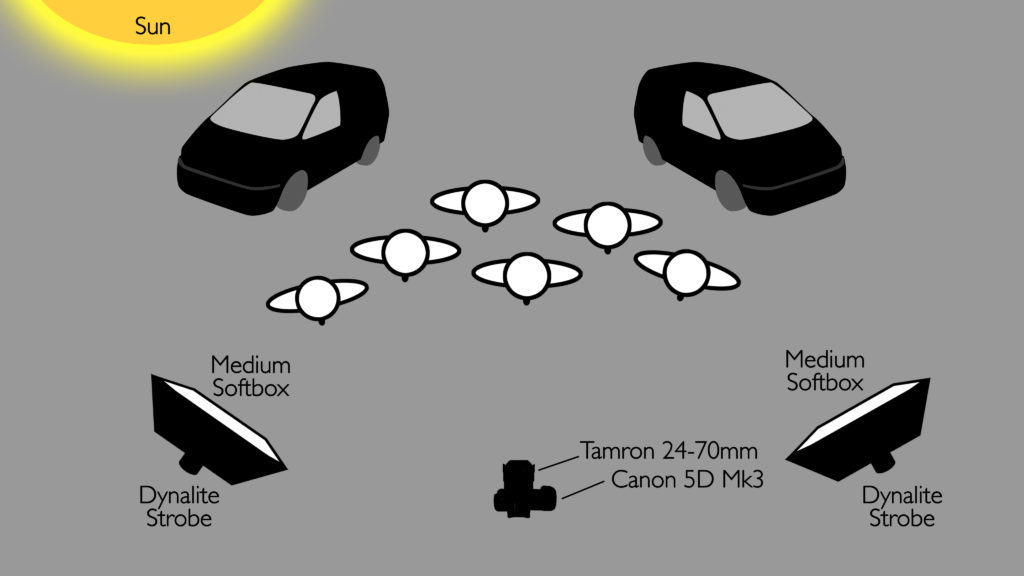
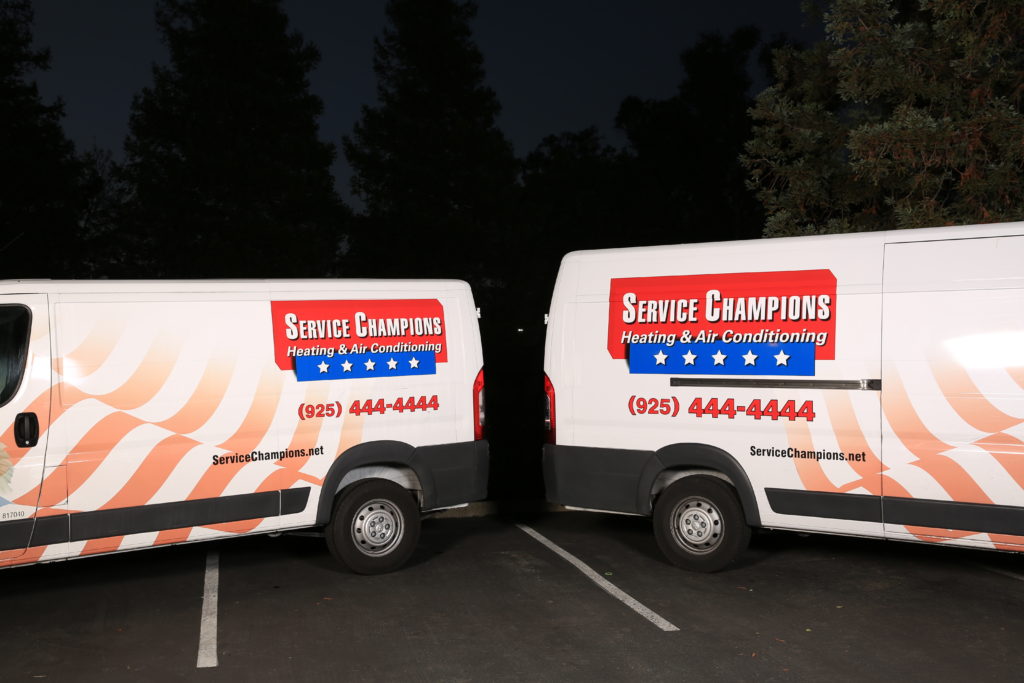
In this portrait I put the company trucks in the background. That gives me a nice background, little bit of trees in the back behind that, and then the sun’s going to come up on my left or on my right and I’m ready to go. That’s kind of my standard formula for getting your group or team shot organized first thing in the morning in the dark.
Location Scouting
It’s always nice to look at the location the day before so you know exactly what it looks like. Light changes at different times of the year and you want to see exactly what you’re going to be in for. Looking at the light at the location a day before is always a good idea. Not always possible, but a great idea.
Lighting Set Up
I normally use a Dynalite Baja for this type of shoot so I don’t have to worry about power. Since they’re battery powered I can just put them up and turn them on and off we go. But I sent the Bajas with Andy to a second unit shoot. He was shooting another group the same morning. So instead I’m going to use the packet head system. I’ve got 2 heads, 1 800-watt second pack, and I’m going to plug those 2 heads into the same pack, which is going to give me about 400 watt seconds for each head.
I’ve got my lights up, one on each side. Now I’m going to take a meter reading. But I know with these strobes on this pack at full power, that’s 400 watt seconds each at about that distance, I’m going to get roughly about F8. That’s where I would start. I usually just put on F8 and take a shot. But I’m going to say I take a meter reading because that would be a really photographic intelligent thing to do.
So I’m going to set my aperture at F8. I want the aperture on my camera to match the output of the strobes. That’s what you always do. Match your aperture to the output of the strobes. That’s going to be F8. I’ll now set the shutter at 1/80th of a second. It’s in the dark. I’m not going to see any ambient light here whatsoever.

There’s my first exposure. The background is really dark so I’m going to lengthen my shutter to 1/15th of a second and I’m going to take another exposure.
I’m going to keep shortening the shutter as the ambient gets brighter and brighter so I always have a correct exposure on my people. Any time you’re shooting out on location, that is always the challenge. Strobes on location equal having to control strobes with the aperture and ambient with the shutter.
That sky looks a lot better now, but Kenneth is just a little too bright so I’m going to change my aperture to F10.
That’s going to bring Kenneth into the right exposure and I’m going to have a nice background. It’s still a little dark in the background, but I know the sun is coming up. It’s going to get brighter and brighter, so I’m going to wait for a few minutes and watch that start to happen. Then I’ll chase that sun with my shutter speed.
The shutter doesn’t have the ability to change the strobe light at all because it’s too slow. It’s like the two are doing their own thing. Strobes are lighting the people in the foreground and the shutter’s allowing enough ambient to bring up the background. So the ambient light can become bright enough that it starts to affect the light on people’s faces, but generally speaking, it’s going to take a long time to get that much ambient light. So you’re going to be able to use the shutter to control your ambient in the background, and your strobe power on the people in the foreground. Those two together are going to make a nice portrait. So here’s our final image of the group before any retouching is done. It’s a little dark, but we’ll open it up in Photoshop.

Separation
Now let’s talk a little bit about posing. I’ve done this a lot of different ways, but the easiest thing to do is simply line tall people in the back, shorter people in the front, and then bring in a ladder. If I get them lined up nicely so I have those two or three rows and I get up on a ladder, I can slowly climb that ladder to where I see the separation from each row and then I can start to do my pictures there. That’s one of the reasons I get my lights up so high is because I want it up high enough to be able to light their faces, I’m going to come up on the ladder and look down at everyone, and they’re going to look up at me and that gives us a nice separation.
The only thing to watch out for is make sure your lights are not up too high, but high enough that you’re not throwing shadows off from one person’s head onto the face of the person behind them. That’s a difficult thing to balance, so take a look at that when you take your first picture. It’s something you’ve got to be very aware of.
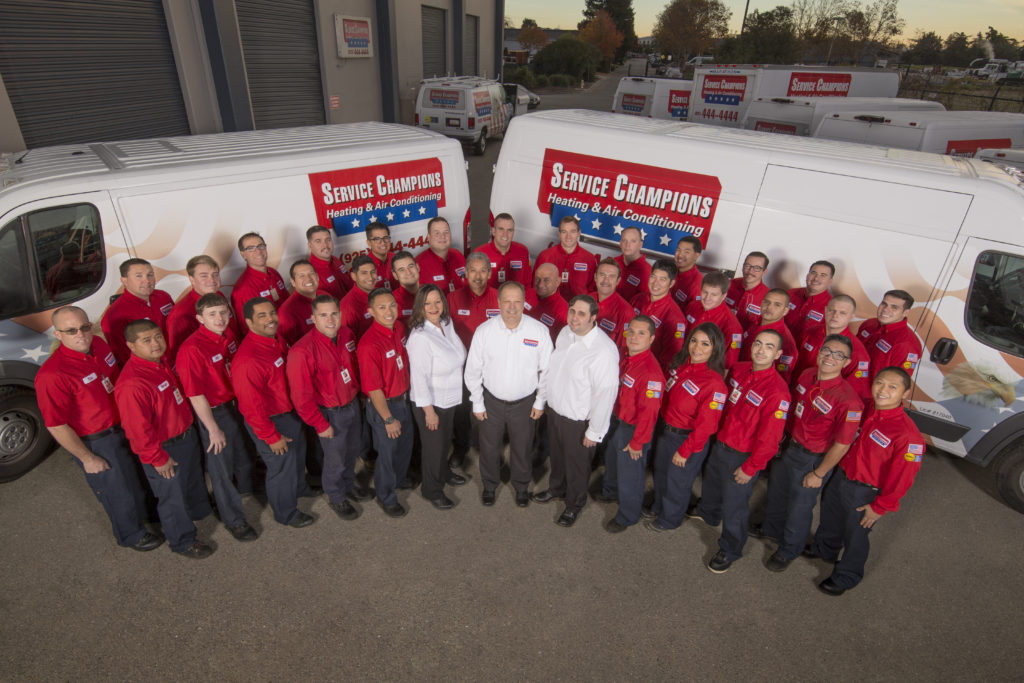
Uniformity
Make sure they all come in the same uniform. Some companies have three or four different uniforms, long sleeve, short sleeve, blue shirt, white shirt. Just make sure everyone comes in the same uniform. You can put that on a call sheet, and the company can post it for the employees so that they can see exactly what they’re supposed to wear for the group shot. It’s always a good idea to ask management to bring a few extra uniforms so they can match the look you’re going to have that day. That way if someone shows up in the wrong uniform, you’ve got one for them right there.

Watch the Hands
Watch their hands. When you have a group of people, when they cross their hands in front of them it’s, “I have to go to the bathroom.” When they take their hands and put them behind their body, it’s, “I have no arms.” Get them all to be the same, either drop to the side or in their pockets or one hand in the pocket. Just try to give some uniformity to the experience. Now you may have a different view about that. You may want to do it differently, but that’s my experience.

Take Control of the Shoot
One of the most important parts of this process is to be in charge. Your clients look to the photographer to take control and to be in charge of this experience. Don’t look to the management or to the boss. You be in charge. You stand up there. You get it organized. A megaphone can help, but the reality is you’ve got to be in charge. Don’t be mean or rude, but you need to have a sense of authority that this has got to happen, it’s got to happen in the time frame.
I always say to people, “Okay, everybody, let’s move along. We’re all going to freeze to death out here if we don’t all get together. Everybody listen here.” I’ll say, “I can’t go ahead if everyone’s going to keep talking.”
If they all are talking, you just stop and you look. They’ll all stop. And once you get them back with you, you can move forward. Remember to be nice about it. You don’t want to be rude, because then your clients won’t like you very much.
These are my tips on how to shoot team photos or group photos. You know, this is a great place to start your business, a great place to get work because every company needs team photos. It’s a way to introduce you to them and get work at that level that will allow you to move up and do work for them in other areas.
Keep those cameras rollin’ and keep on clickin’.
-Jay P.