
The Concept
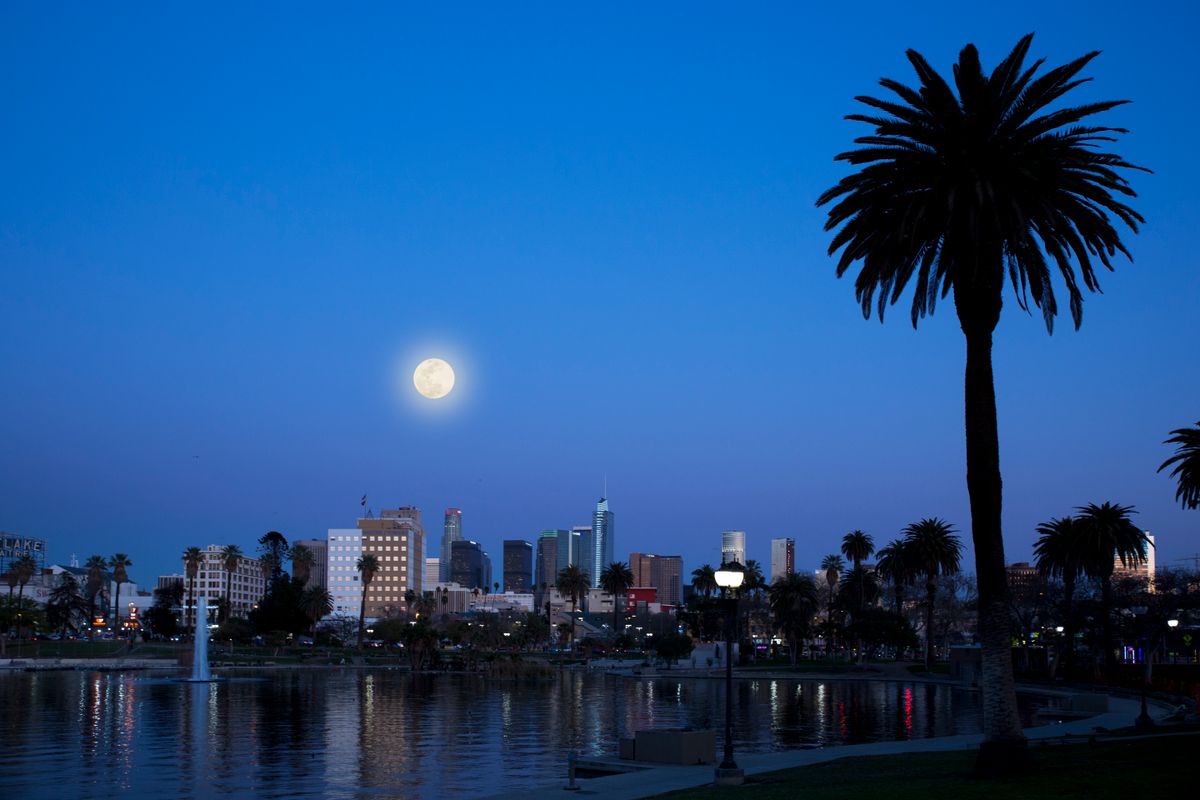
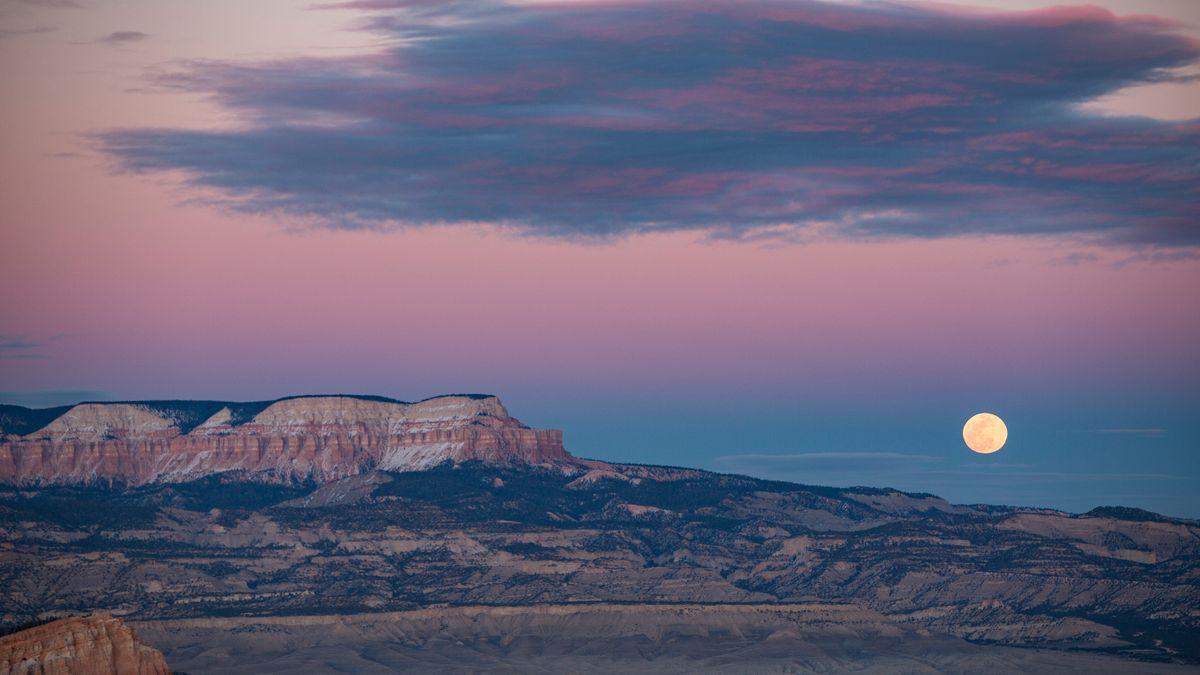
While we were in Bryce Canyon, we stumbled upon a great scene when the moon was just coming above the horizon as the sun was setting. The low moon blended nicely with the landscape and the setting sun.
Instead of it being a happenstance, we wanted to see if we could predict where the moon was going to be and replicate our experience in Bryce here in LA.
#1: Find the Moon
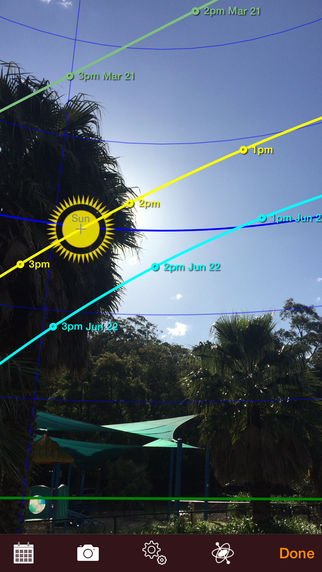
The first step in achieving this is to find the moon. It’s easy to do if you have an app. I used Moon Seeker which is available on Android and iPhone. It’s not the best by any means, but it does the job well enough. I used it to track where the moon would be in my frame. So I scouted the park where I thought the moon would be and started from there.
It turned out that my frame was completely wrong and I had to change my shot. It’s good to plan ahead so you don’t run into problems on the day of your shoot.
Note that the moon position can change drastically if you move a few feet. You should also be prepared to move your entire setup once the moon starts to peak its head over the horizon. You have a very small 15-minute window to shoot the moon before it’s too high in the sky.
#2: What Time is the Moon in Your Shot
Once you find out where the moon will be, it’s time to find out what time you need to be in your location to set up your shot. Moon Seeker will show you a graph of where the moon should be at a specific time so you can plan accordingly.
#3 What Time to Show Up
You need to give yourself ample time to set up and be in the right location. Do step one and two a day before your shoot so you can come prepared.
Exposure
Win: BlackRapid Retro Strap
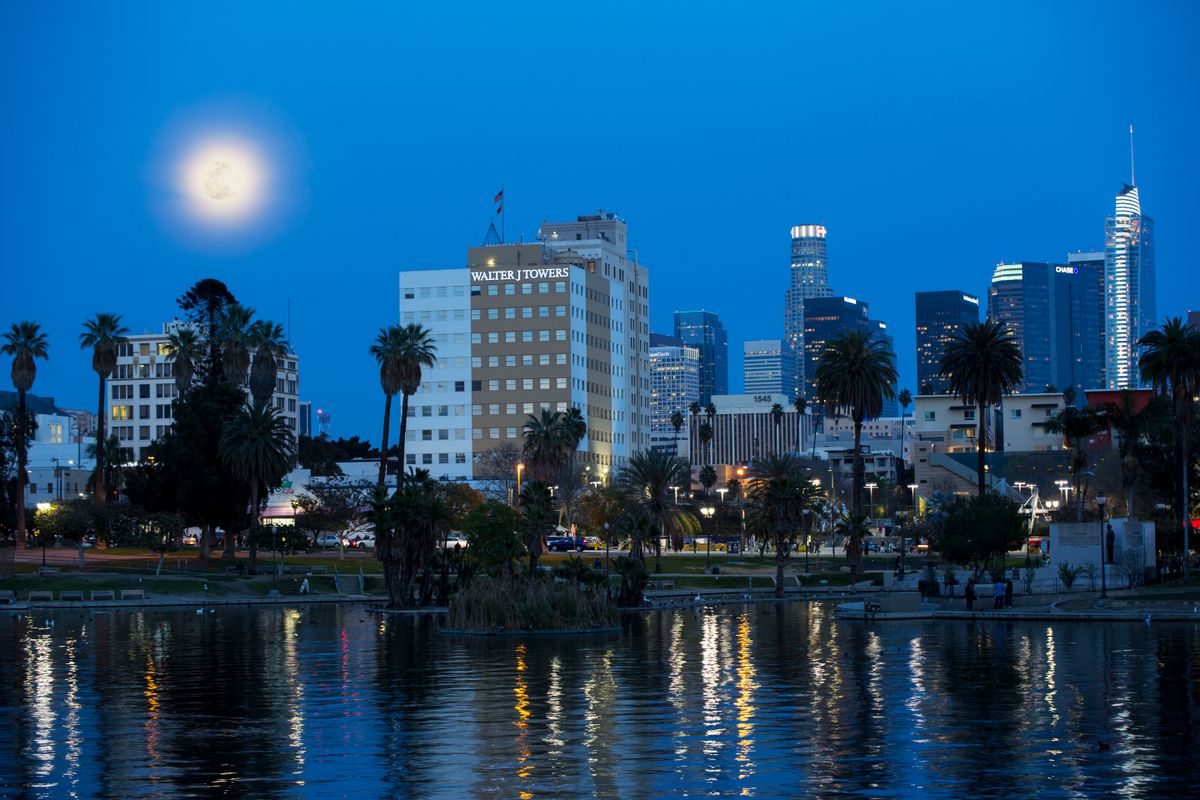
The moon is going to get brighter the higher in the sky it gets. When it’s low, it has to cut through more atmosphere and will be the same exposure as the city (most of the time). As the moon goes higher in the sky, the brighter and more blown out it will appear. You’ll have to make a choice to expose for the moon or the cityscape.
Alternatively, you can do a composite and expose for them separately and combine the two images in post. These usually give you the best results.
I’ll set my camera on aperture priority and auto white balance. Most of the time when you’re shooting RAW, white balance is something you can recover.
Because we’re shooting at night, my aperture is open all the way but that means both the buildings and the moon won’t be in focus.
Getting the Shot
We’re going to use two cameras to get two different angles. Like we mentioned before this is a one-shot opportunity. There won’t be another full moon for a month. So we’re taking all the steps necessary to ensure we get the shot.
One tripod I’ll have a 70-200mm lens grabbing a tight shot, while my other camera will be on a 50mm, getting a wider shot.

#4 Use a Tripod
It’s important that you use a tripod on these shots to minimize shake and to get a steady shot. Especially when you have a heavier, telephoto lens, it will help your images be sharp.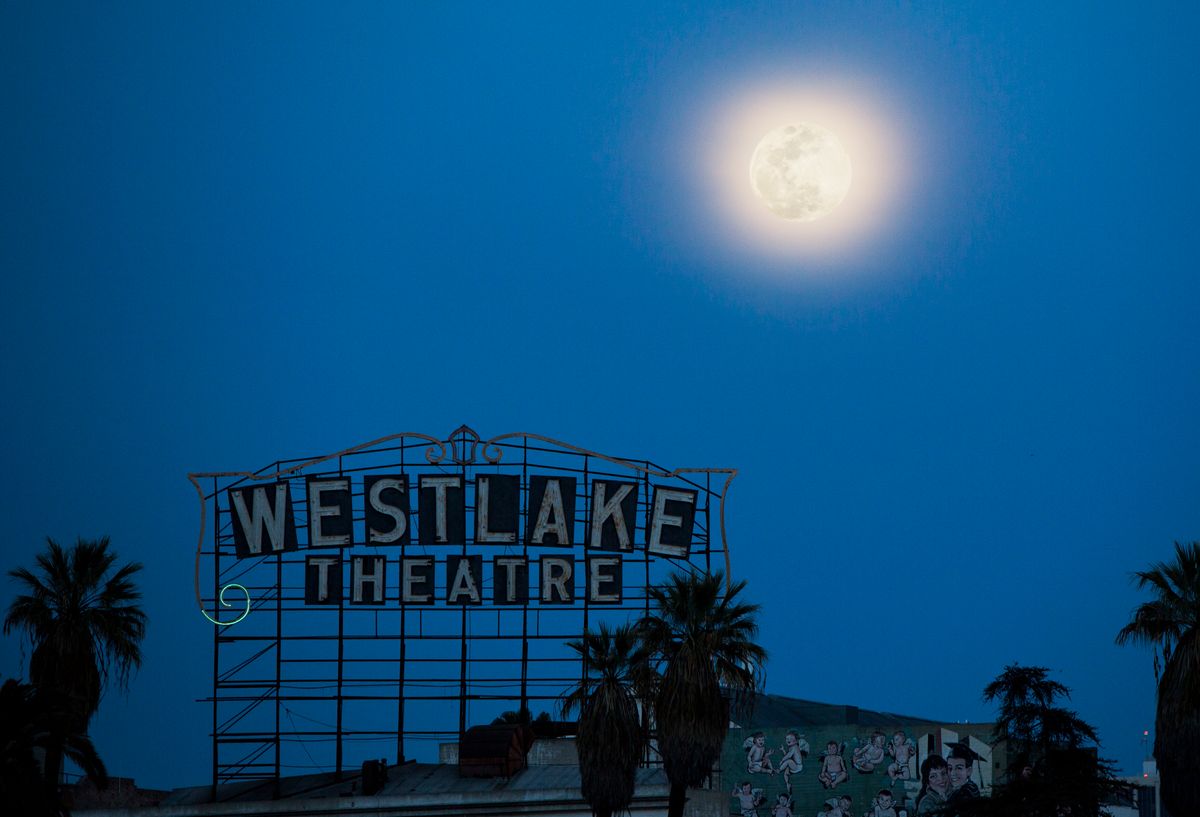
#5 Use a Trigger
Use some type of triggering system. This will allow you to be hands off with your camera and minimize shake. When you get into the lower shutter speeds, this will also help you get sharper images.
I use the MIOPS Mobile device because I can also set intervals and use it for other things besides a trigger.
If you don’t have a dongle piece, you can also set your camera to a timer. It acts as the same thing, but it gets quite annoying waiting that long to take a picture.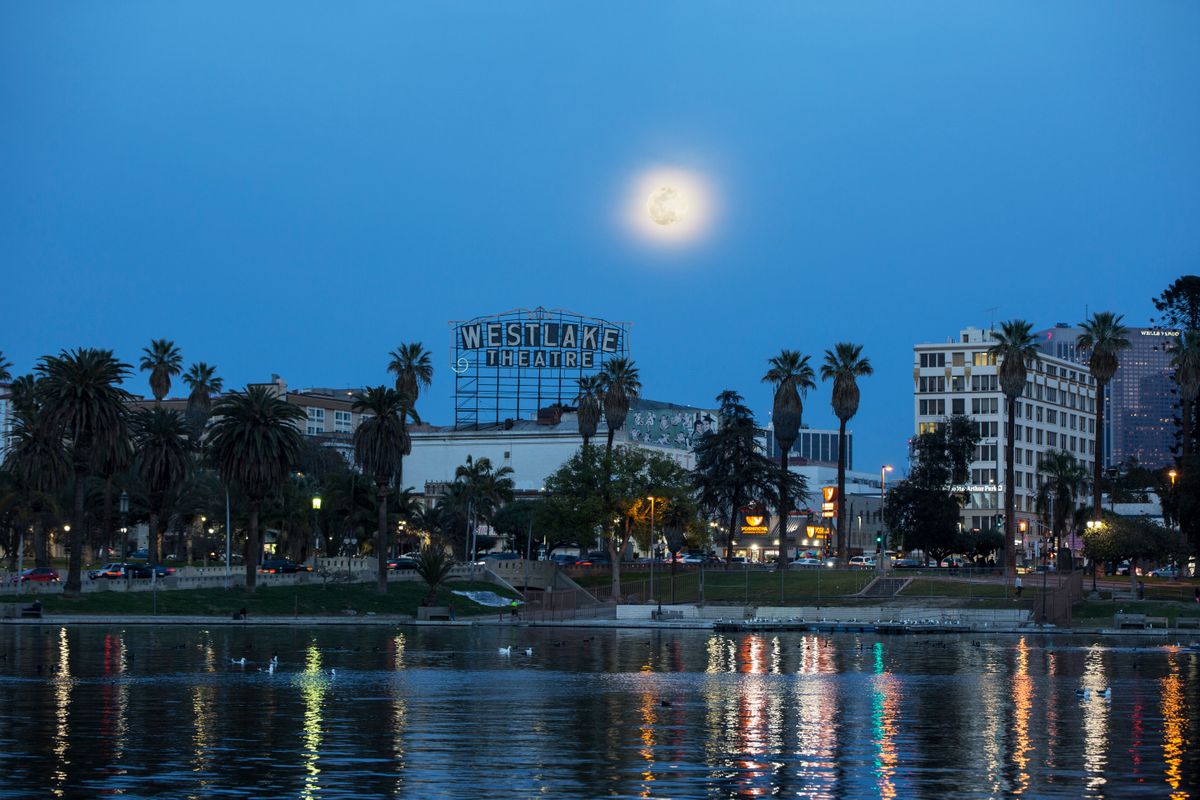
Cloud Coverage
Before we went out, the weather said there could be a chance for clouds. Clouds are one of the things you can’t control. Don’t let it discourage you though because sometimes slight cloud coverage can make your scene pop. So just stick it out and see what happens.