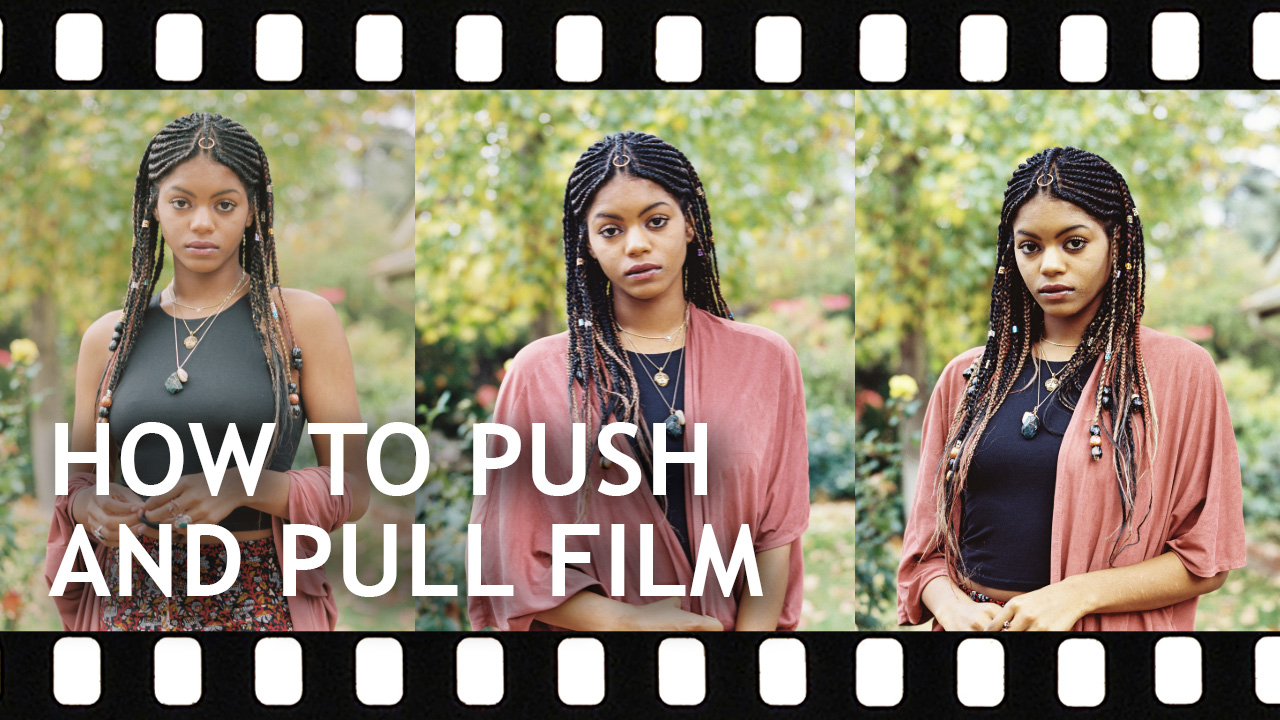
We are here today to learn how to push and pull film. For those of you who are unfamiliar with that term, it’s really simple!
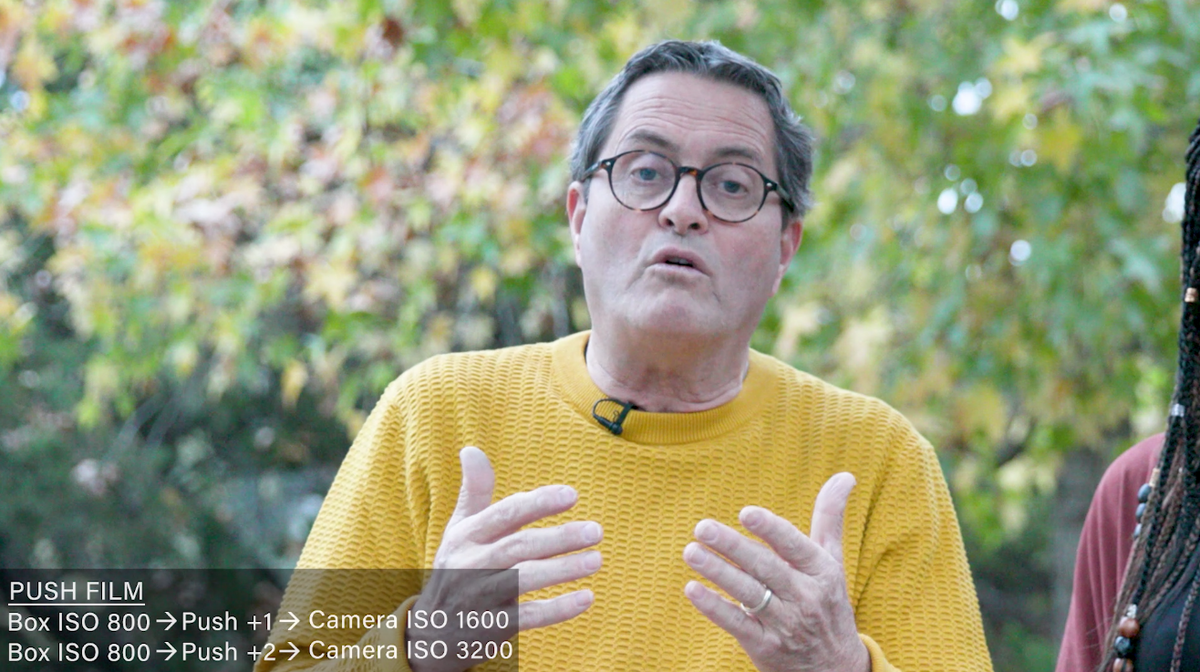
Let’s take a Portra 800, and set the box speed at 1600 instead, we are underexposing the film by 1 stop. So when we are processing the film, we have to increase the film by 1 stop, which pushes it back up to the normal exposure. We may have gained a stop in exposure, but the film also changes! The push film tends to gain contrast and grain onto the negative.On the opposite side of the spectrum, when you pull your film that means you are overexposing your film by 1 stop. Now when you go to develop it, you are going to cut that time, so it won’t be too dense. By pulling the film, we are decreasing contrast and grain in our photos.
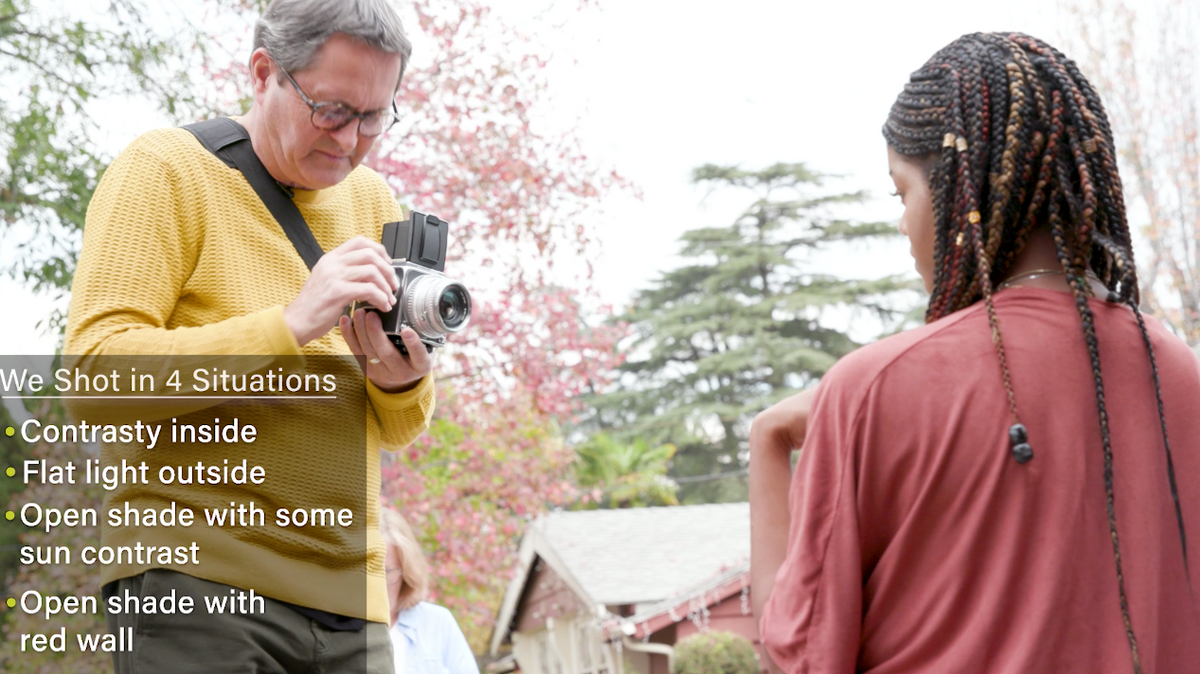
Pushing and pull film is more about contrast and grain, it’s more of an artistic style than a way to save film or give you more exposure. For our shooting environments, we chose 4 different types in order to see how pushing and pulling affects the film.
For this video, we are using Fuji Pro 400H, Portra 400 and Portra 800.
Fuji Pro 400H
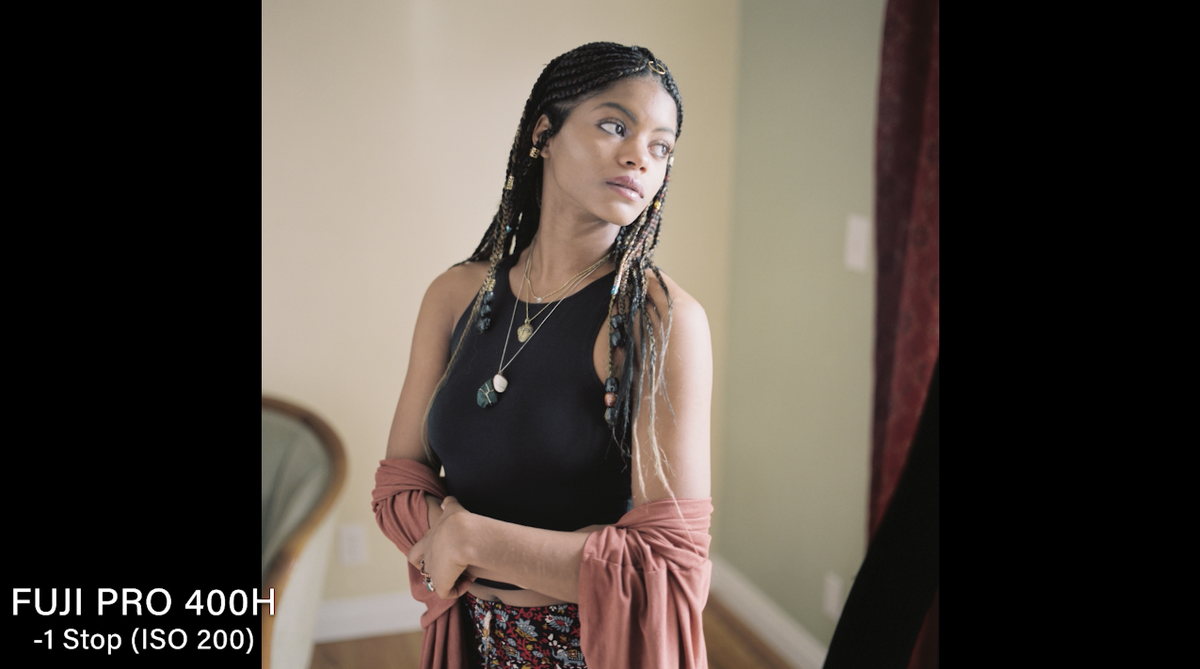
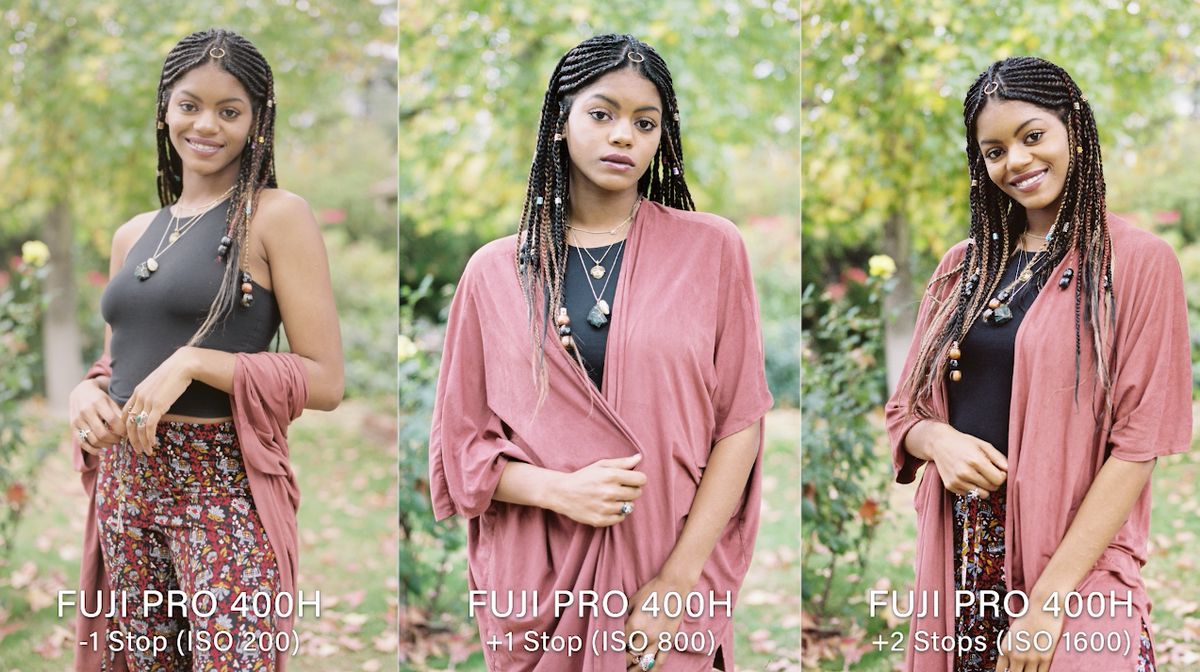
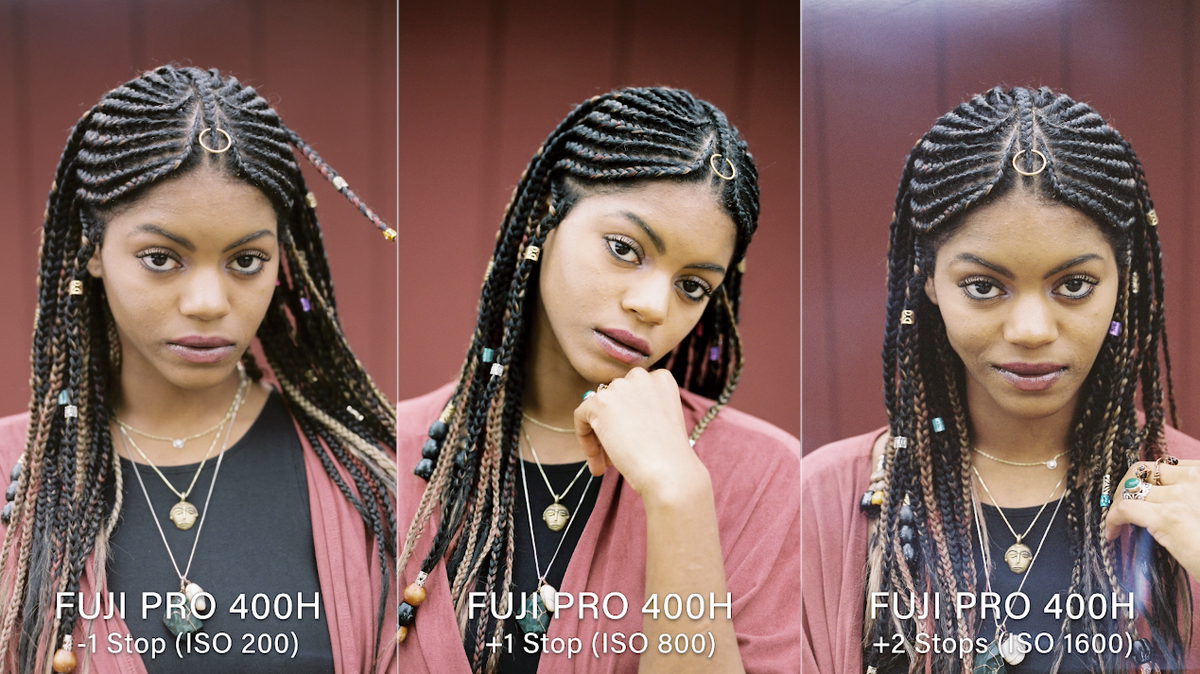
Inside Contrasty For our first image we are looking at the Fuji Pro 400H film that is pulled 1 stop, so it’s shot at ISO200. By pulling the film, we reduce the contrast and grain, which makes the film a little flatter. The shadows are pretty open, and the highlights are pretty bright hitting her face.
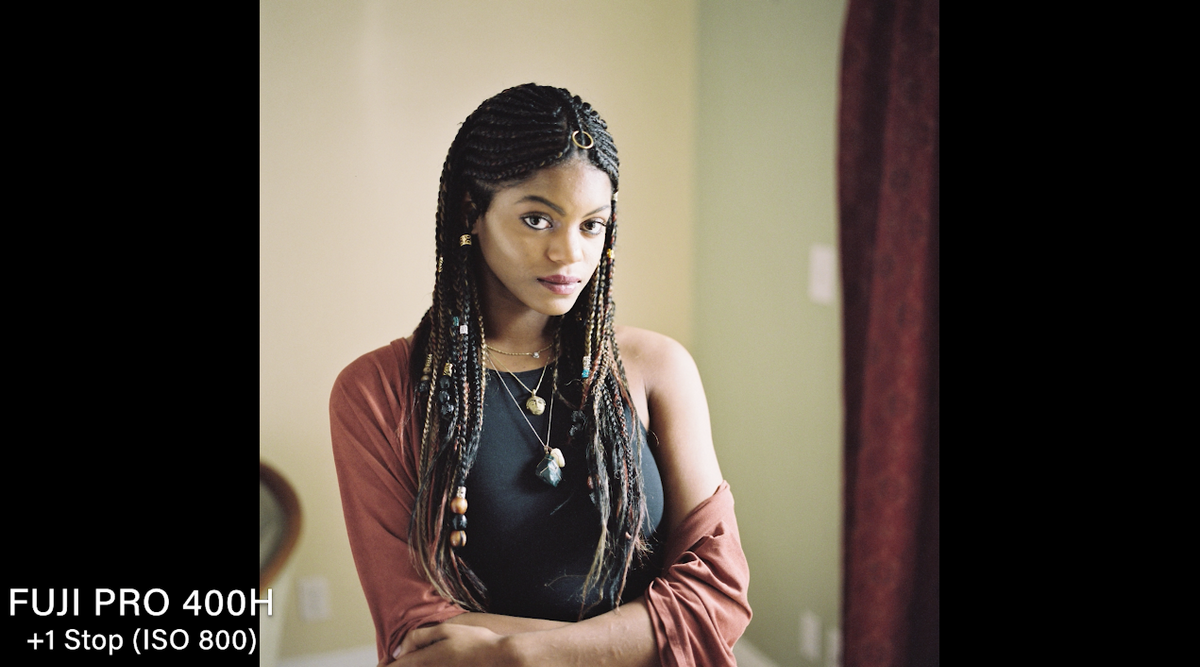
By taking a look at the Fuji Pro 400H that is pushed 1 stop, we can see that the grain and contrast have built.
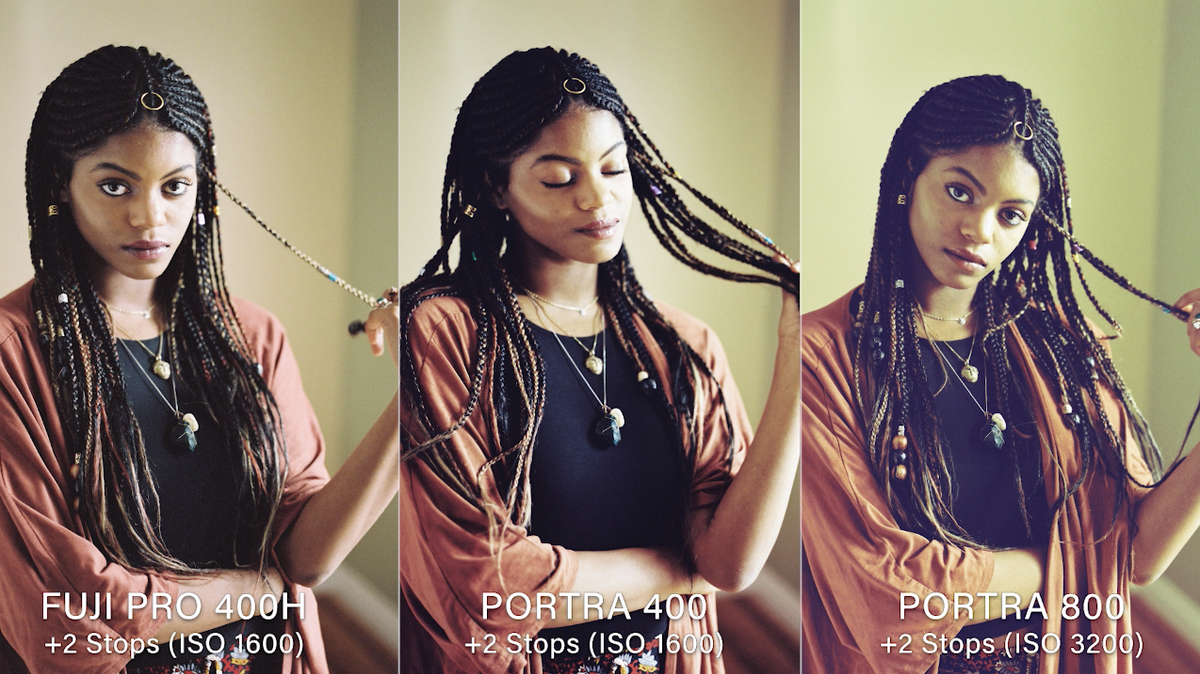
+2 Stops (ISO 1600) When we push it two stops, which means we increased the amount of time in the developer, you can see that the exposure is a lot more contrasted.
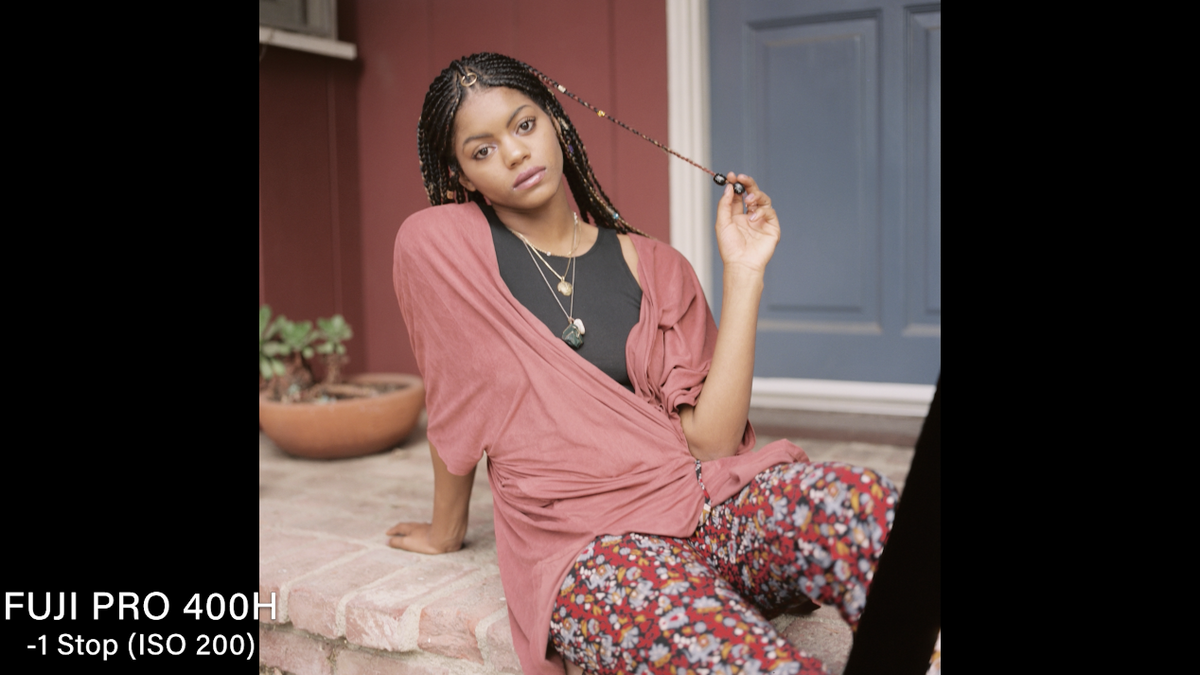
Outside Flat LightFor this outside shot that we have here, pulled 1 stop appears flat to the eye. There aren’t any dark shadows or bright highlights.
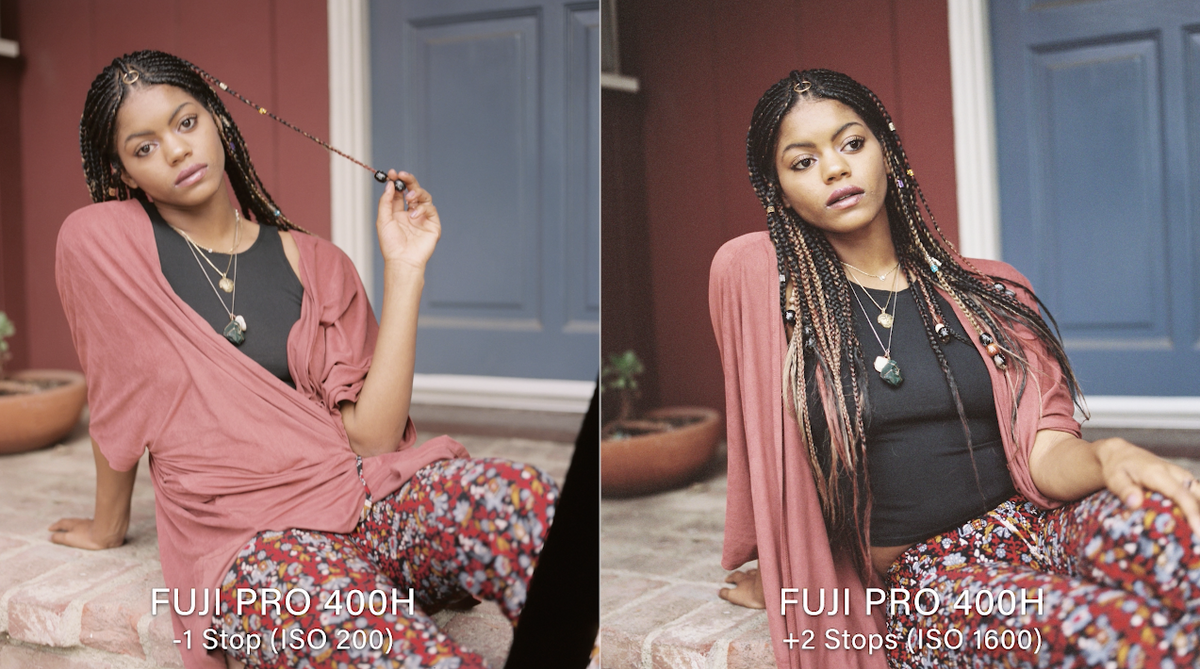
+2 Stops (ISO 1600) Even when we push it two stops, it looks nice in this environment because there was very low contrast, to begin with.
Open ShadeNow when we look at the photos in open shade, we can see a nice highlight coming in from the side. It seems like the +1 Stop (ISO 800) is a little bright in this comparison. The +2 Stops (ISO 1600) has a pretty nice look to it because we are in a pretty low light situation. The color stays consistent through the three shots.
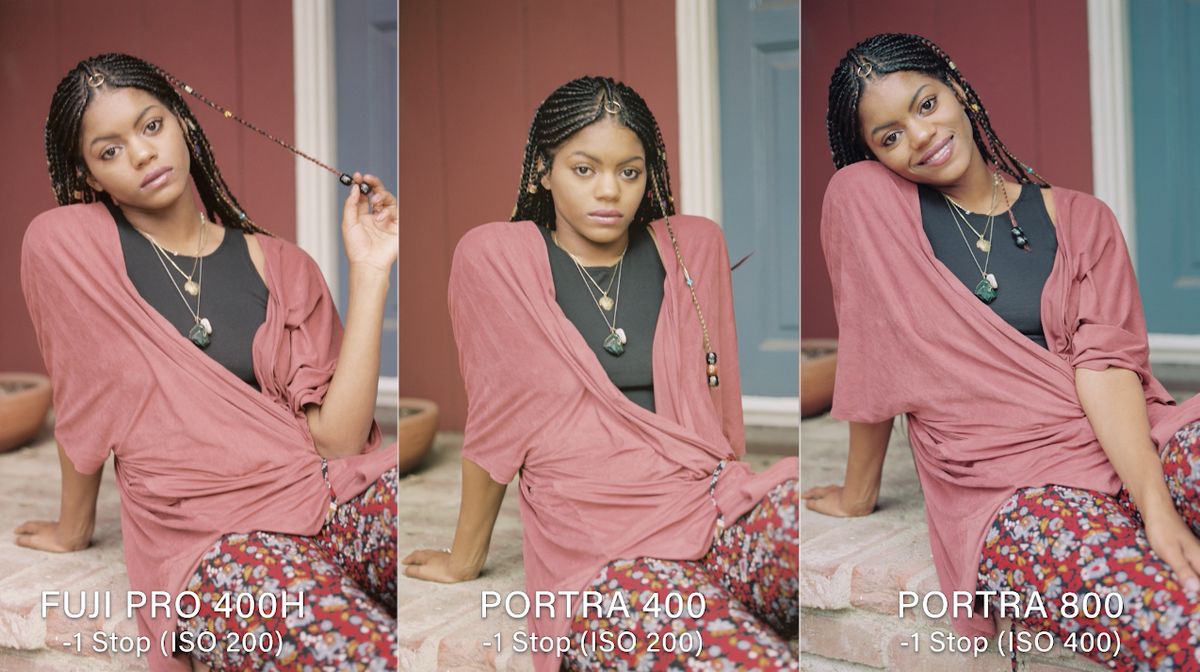
Open Shade with Red Background-1 Stop (ISO 200) is a little warm, but it’s not bad. The +1 Stop (ISO 800) is even warmer, and the +2 Stops (ISO 1600) starts to cool off.
Portra 400
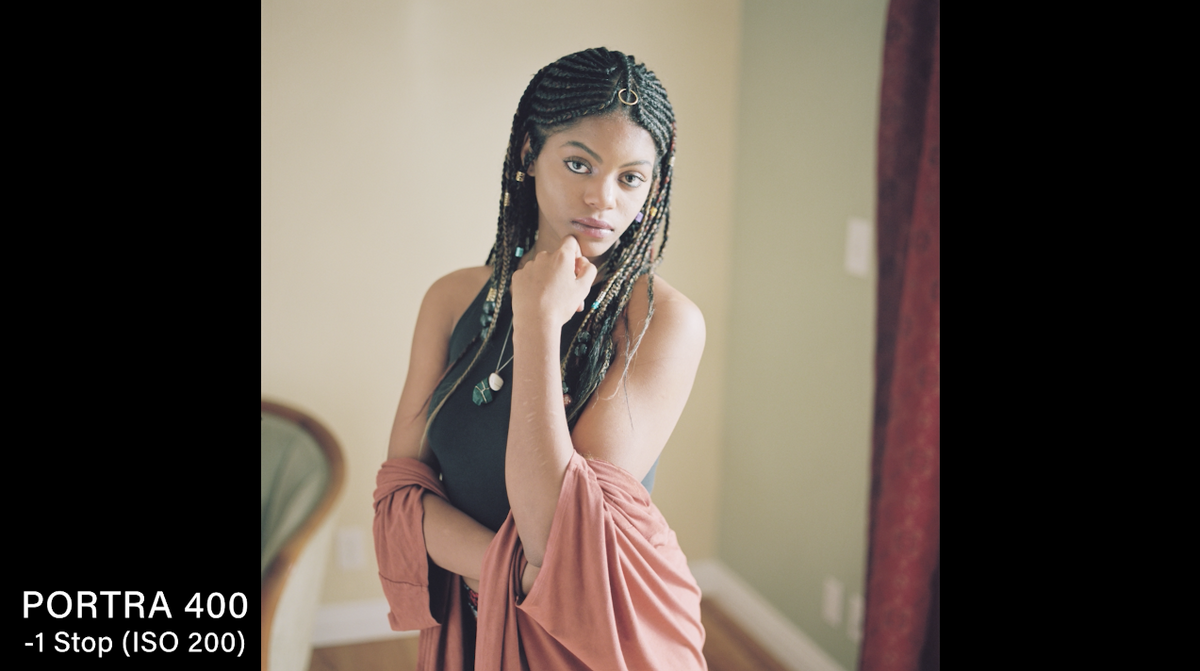
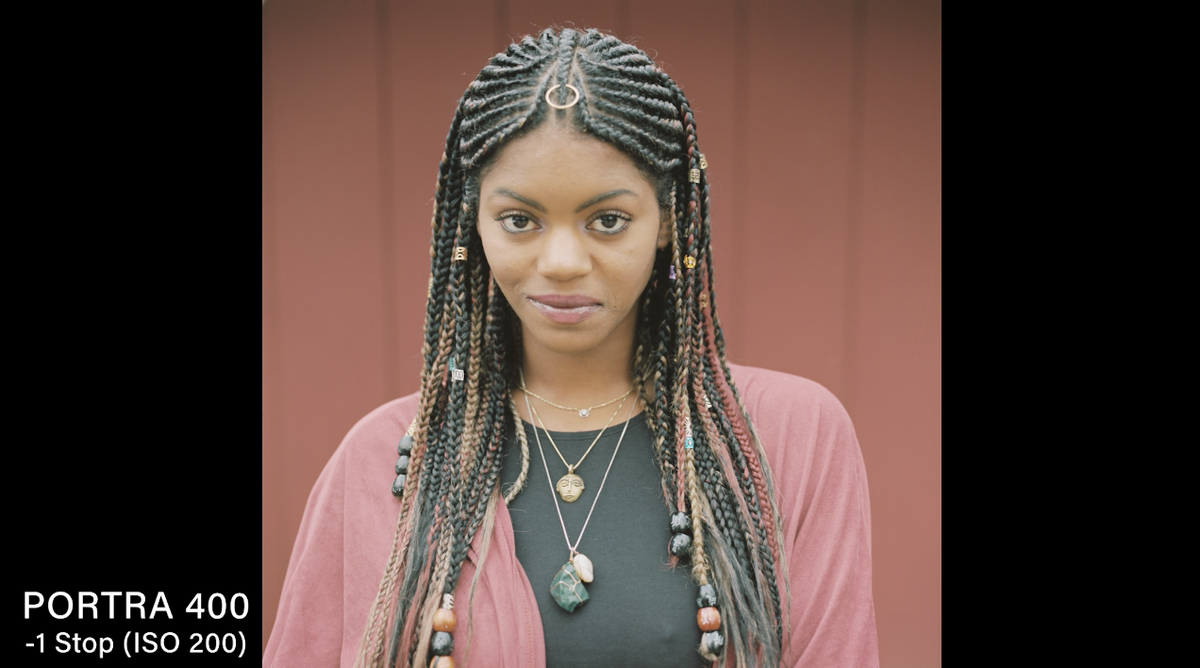
-1 Stop (ISO 200)
This film pulled one stop seems incredibly flat even in an inside contrasted situation.
Even outside in the open shade, the image seems quite flat. It seems almost milky to me.
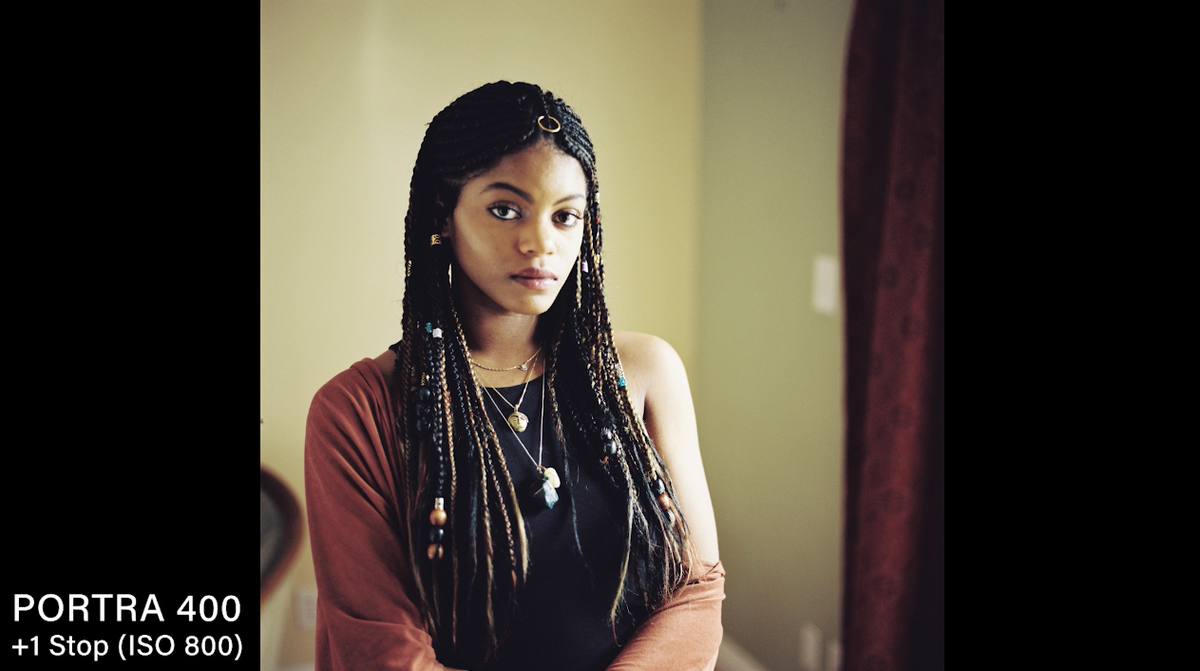
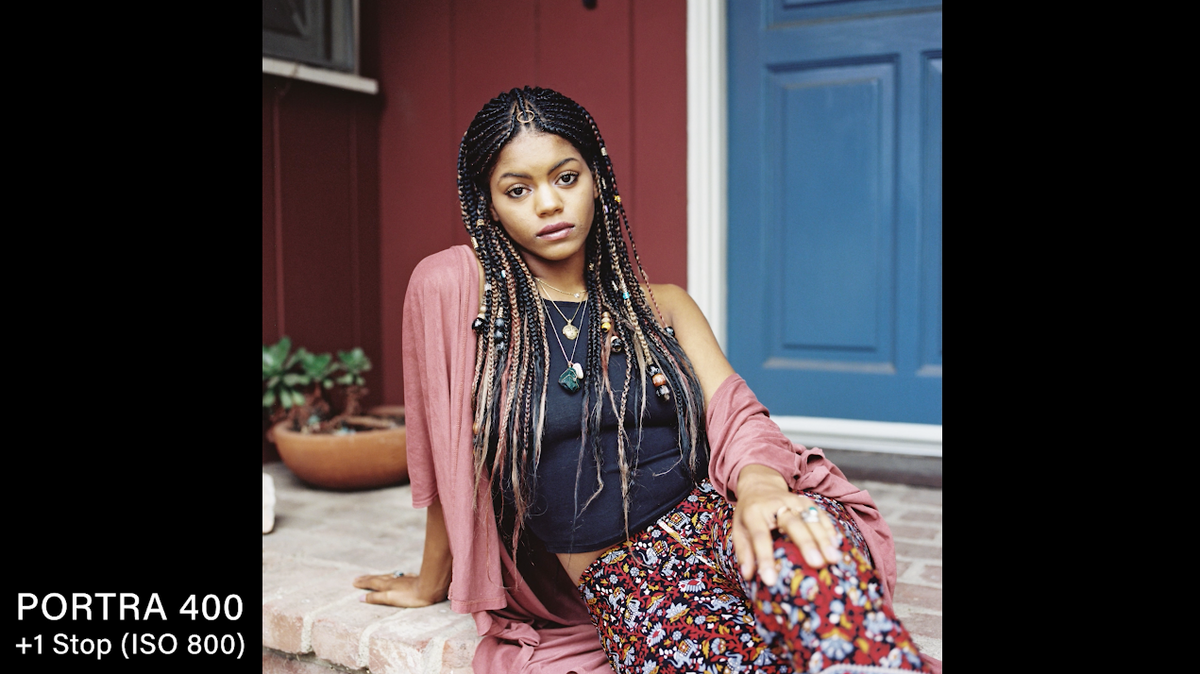
+1 Stop (ISO 800)
By pushing it one stop, it goes the opposite direction. Just as it was very flat when it was pulled, when we pushed it, the image has a lot of harsh shadows and bright highlights.
It seems to really sing because it has gained a lot of contrast and made the photo richer in color and light.
Portra 800
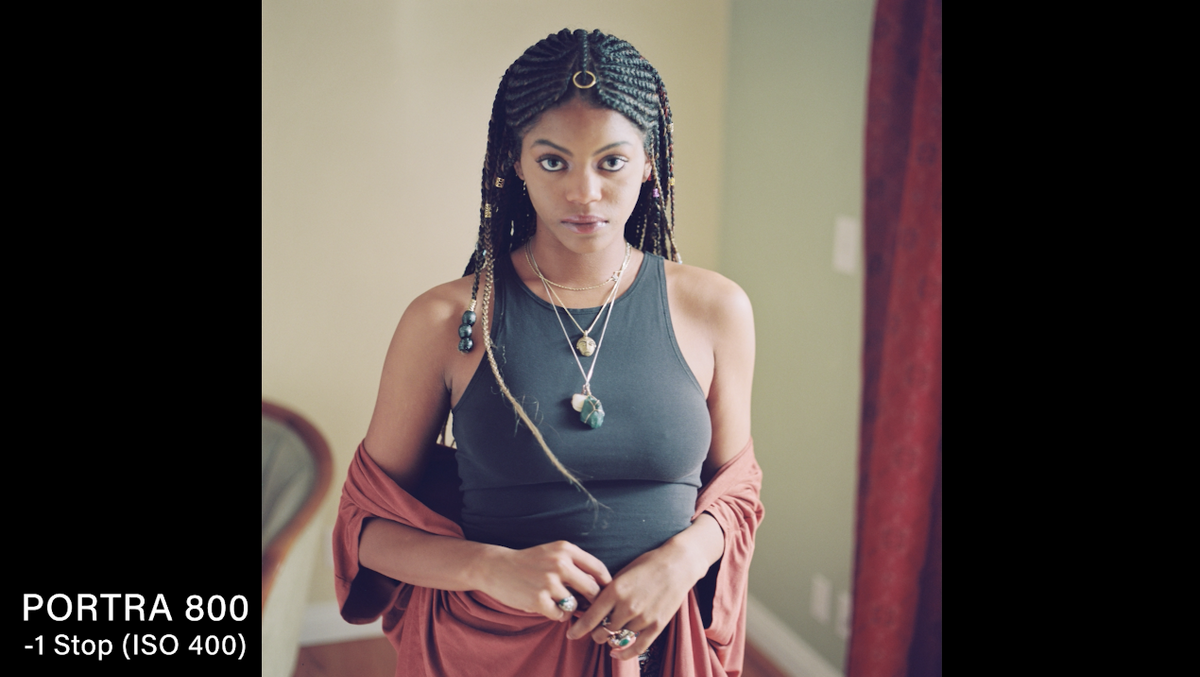
-1 Stop (ISO 200)This image still looks pretty flat. It wasn’t as flat as the Portra 400, but it’s definitely losing some contrast. Outside as well, the image is a little flat, but with slightly more contrast.
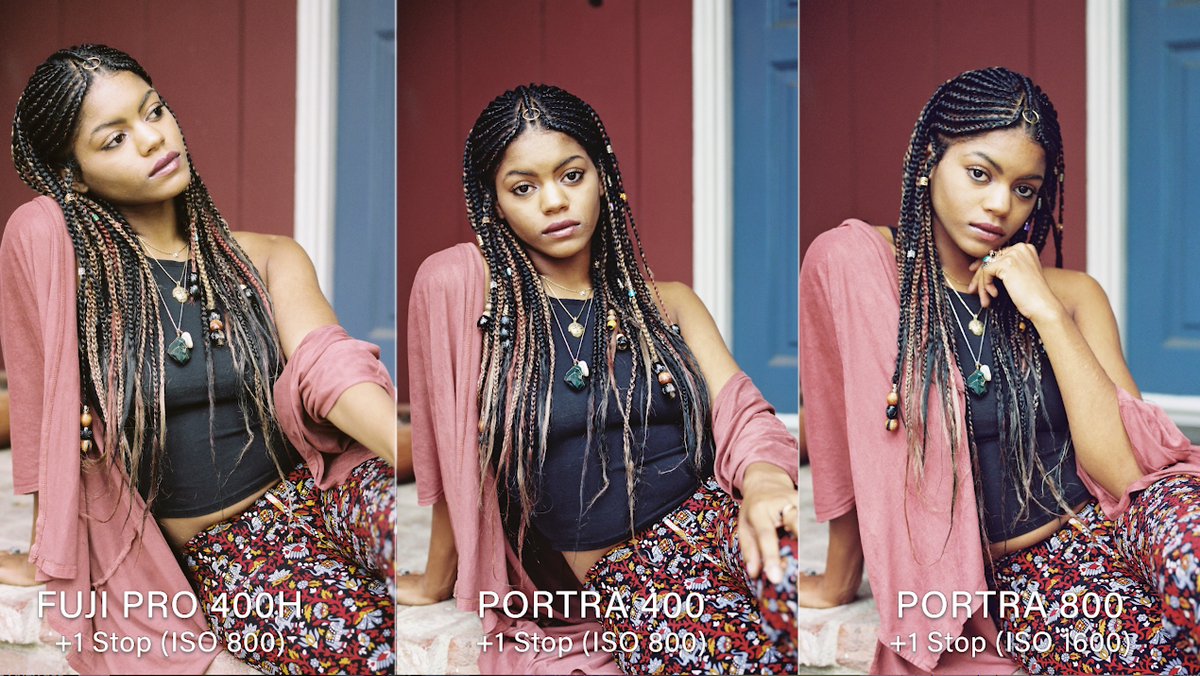
+1 Stop (ISO 800)With the shot inside the house, the grain starts to build a lot. There are very dark shadows with nice highlights on her face. The outside shot is very nice because the contrast really sharpens the image with the beautiful highlights on her face. Same with the shot in the trees, the blacks are really helping us out and giving us good contrast.
Comparison
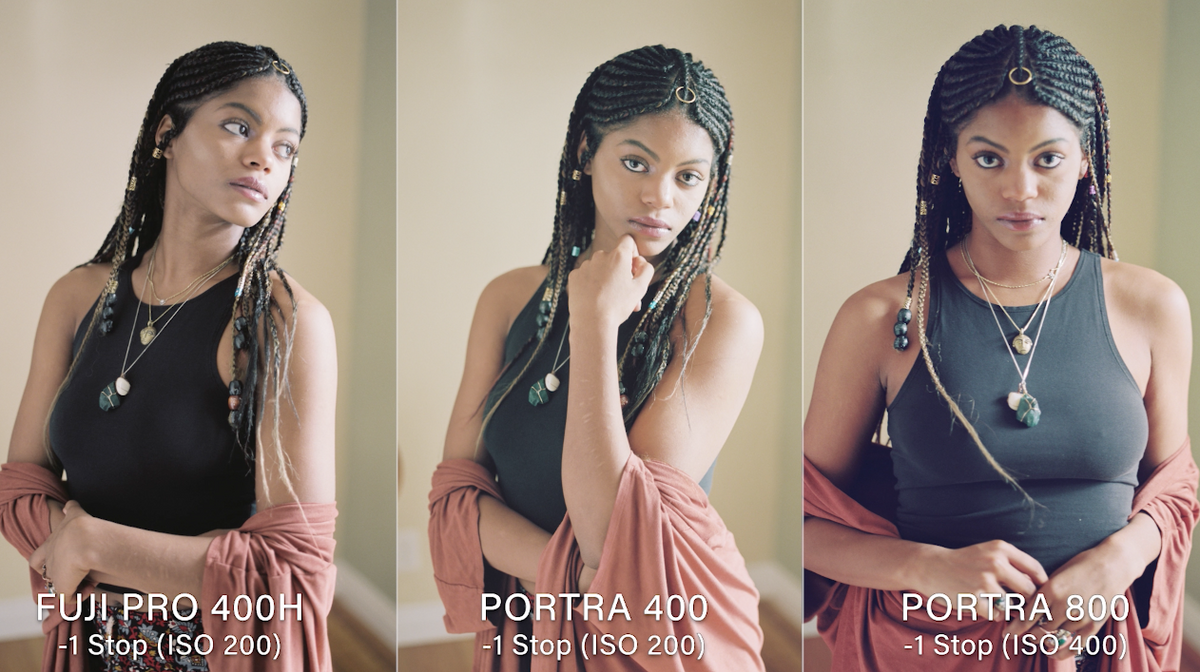
-1 Stop (ISO 200)The contrast on these 3 films look pretty similar. The color on the Fuji 400 seems a little cleaner to me, and the contrast on the Portra 800 looks the heaviest.
-1 Stop (ISO 200)Between the 3 shots, the Portra 800 has the most contrast. Most of the images still have a very soft, flatness to the images. The Portra 400 looks a little yellow on her face.
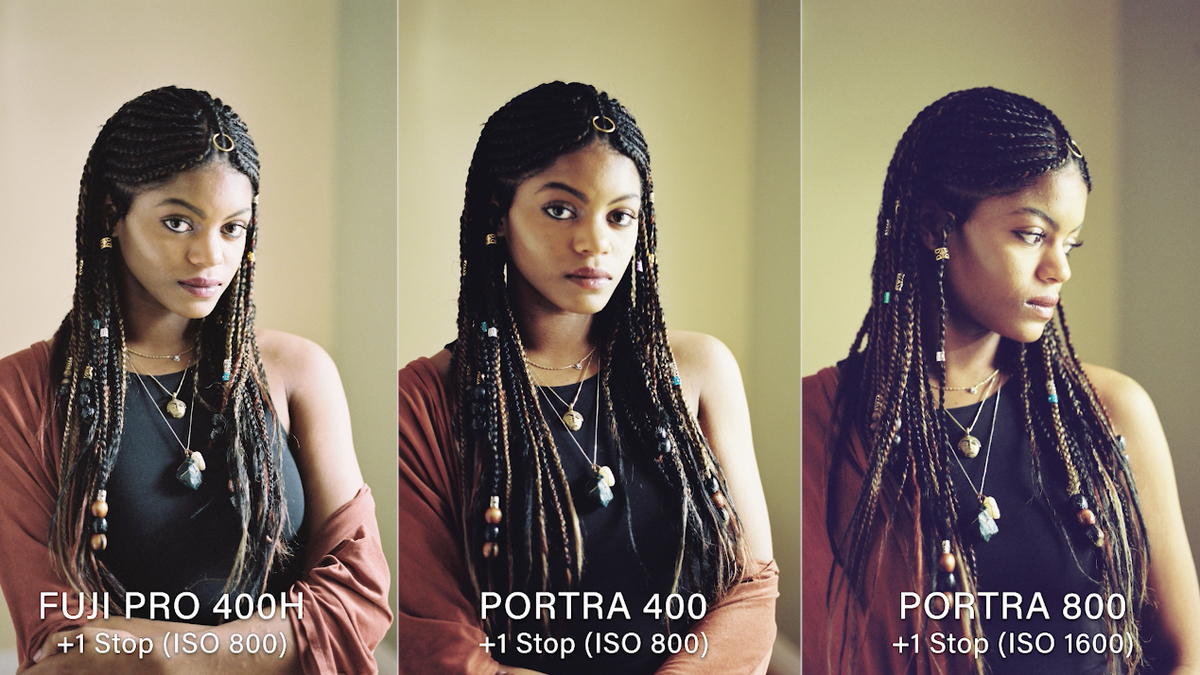
+1 Stop (ISO 200) Inside ContrastThat Fuji at +1 has given us a great amount of contrast in this situation and looks the cleanest in terms of color. The Portra 400 is just clogging up in the dark shadows and the Portra 800 is extremely heavy. It looks like the Fuji is handling the +1 very nicely.
+1 Stop (ISO 200) It’s interesting to me that they all look very similar. The color rendition is really nice on all of them. I really like the contrast level and color of the Fuji 400 the most, whereas the Portra 400 looks a bit heavy in contrast. I like the skin tones on the Fuji a lot, the Portra is starting to look a little blotchy on both.
+2 Stops (ISO 1600) Out of the three shots, the Fuji 400 is looking the best because the grain and contrast isn’t as heavy as what you are getting with the Portra 400 and 800. The Portra 800 is shifting green in a pretty bad way.
+2 Stops (ISO 1600) Taking a look at the shots outside, only the Fuji 400 and Portra 400 have been shot at 1600. The Portra 800 has been shot at 3200, so it’s really been pushed. The Fuji 400 has a softer look with some contrast and grain building in the background. The Portra 400 is definitely a sharper, stronger contrast. While the Portra 800 is yellow on her skin and lost its color rendition.
Final Concluding Thoughts
So what did I learn from this shoot? I learned a lot about the Fuji 400 and that it’s extremely flat when you pull the film. I enjoyed the look of the Portra 400 and 800 when pulled instead. When you pushed the Fuji 1 stop it was really beautiful. If you like heavy grain and contrast then the Portra 800 pushed 2 stops is really the film for you. There really is no right answer for this comparison. It’s a matter of your stylistic and artistic decisions with your film.
Share your film photos with us online @theslantedlens. We’d love to see what kind of shots you are taking and how you are pushing the limits of your creativity!