
Portrait Lighting
The five portrait lighting positions are the key to being successful in the studio. You can also apply these principles on-set as well. When you’re just starting out, the five lighting setups we’re going to talk about today will help as a jumping off point for your own creativity.
Tamron 35 mm f/1.8 Instagram Giveaway
Rembrandt
Rembrandt lighting is the first one we’re going to talk about. Rembrandt was a painter but the name Rembrandt talks about the lighting in his painting. Most of them were moody and was great examples of a type of lighting style that creates a triangle in the talent’s eyes.


With a fill card, you can modify this look to be a little softer, use the card as a hair light, or a board on the bottom to even out the dark neck shadow.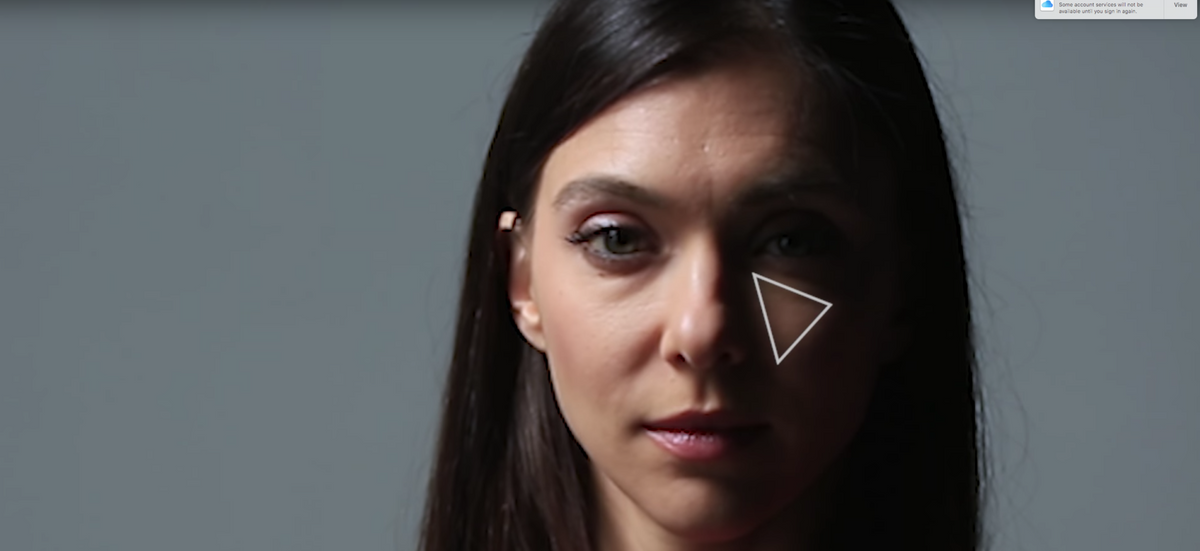
Split Light
A split light cuts the face in half, one completely in shadow, the other lit. To do this we moved the light so it would be parallel to our model.
Broad Light
A broad light is when the lit side of the subject is facing camera instead of the shadow side. If the model turns slightly from the split light position, they will be in a broad light. It’s very easy to transition from the split, broad, and Rembrandt lighting positions. This can work in your favor if you’re trying to pump out portraits in a short amount of time.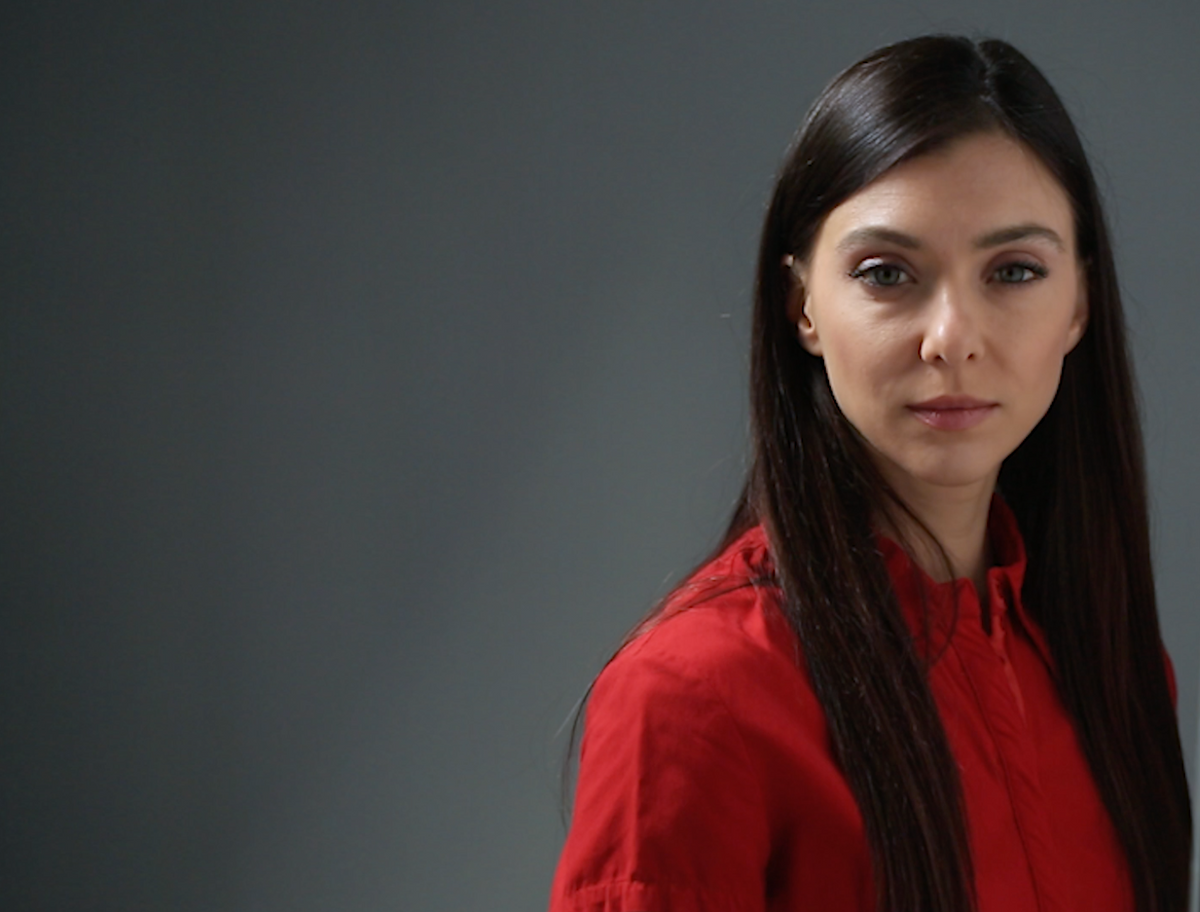
Paramount Light
The paramount light or butterfly light is a very popular lighting setup for women. It accentuates the cheekbones and is a very flattering look on most people. The paramount light was used in old Holywood and some actresses had contracts to only be photographed in a butterfly light!
It’s a very easy light to set up. You want it high and next to the camera. Not so high where the nose will create an unpleasing shadow on the talent’s upper lip, but not so low that it becomes a front-on light. This usually flattens out the face and is not flattering.
If I’m trying to light fast, a paramount light is the way to go. It’s also great in a group setting. All the other lighting setups that we’ve talked about so far are side lights, which won’t expose each person in the group the same. So a paramount light will help us in that scenario.
The chin shadow is the one most people worry about when you’re doing these lighting setups. Most people will have a softbox or smaller light source from the bottom while they’re shooting to alleviate this problem.
Loop Light
A loop light doesn’t close the shadow that’s on the side of her face like a Rembrandt or split light. It creates a loop near her nose. You can do a loop light on either side of your talent.
This is another flattering pose. You want to position the light to be in a high position to create that shadow on the talent’s nose. If the light is too low, the shadow it creates won’t be interesting at all.
In all of these lighting scenarios, you can use a foam board to bounce light from the bottom, side or back of your subject for some interesting looks.

One Light to Rule Them All
You can’t expect one light to work for everyone. All people look different and it’s your job as the photographer to experiment and try new things. Look at your talent’s face and go from there. Don’t get stuck in one position or one style. All of these lights will also convey a different message and tone to your viewer. A butterfly light could come across as more innocent, whereas as split light is more aggressive and conveys danger. The not knowing what lurks beyond the shadows thing.
Right now we are just working with one light. But you can expand this concept to cover two, three and four light setups. One light is good for more dramatic shadows and is a great learning tool when you’re just starting out. By using one light, you can see the direction of the light clearer and hopefully, this will give you a better understanding of light overall.
Hard vs Soft
Most people will go with a soft light when shooting portraits. When we call a light soft or hard, we are talking about the transition from shadow to highlight. If it is gradual, then the light is soft, if it’s defined, then the light is hard. If you have a smaller light source, the shadows one your talent’s face will be more pronounced. A larger source will generate a softer light.
If you are using a hard light, shadows will become more apparent which is something to keep in mind. You can always soften a hard light with diffusion, but know that you’ll be losing light. It’s difficult to harden soft light – and usually a lot more work than it’s worth.
Gear Used
Aputure Light Dome – B&H / Amazon