


Sunsets
Ah, sunsets. They are wonderful and a great time to shoot. But sometimes you end up fighting for light and not getting the shots you want. Well, fret not my friend. Strobes are the solution. And I know you think they’re scary, but once you master this technique, you’ll be capturing the moments that are going to look great in your portfolio.
1. Pick an ISO
Before you start shooting, pick an ISO. It doesn’t have to be anything crazy. I usually stick with ISO 100 for minimal noise, but do what works for you and adjust from there. The ISO will affect the ambient and the strobes equally.
2. Pick an Aperture
Now you want to pick an aperture setting that matches your strobe strength. If you want everything in focus, pick an aperture like f/11. For shallow depth-of-field, pick something like f/2.8. Take some tests shorts and make sure you’re getting correct exposure with the aperture that you’ve chosen.
TSL Platypod February Giveaway
3. Pick a Starting Shutter
The shutter is how you’re going to compensate for the setting sun. So this will be the variable that changes in time. The shutter will control the ambient light or the sun in the photo. So if it’s too dark, I’ll lengthen the shutter all the way to one second if I have to. If the sun is too bright, you can shorten the shutter to compensate for that. As the sun goes down, we’ll start at 1/60th of a second all the way to 1s. If you get down to a second long exposure, you will start to notice some black silhouettes on your talent as he/she moves. Something to keep in mind.
Best Time to Shoot?
Civil twilight! It’s 20-25 minutes after the sun has set. The sky will go bluish but it won’t be night yet. So there’s still some light left! I’ll leave my camera on auto white balance while shooting in RAW so I can adjust later. What this gives me is some blue in the sky and retain the warmth in her face.

Tools
We used the app ‘Sun Seeker‘ to help us see where the sun would set. It was a little finicky and we had to adjust ourselves a bit. We also had a chill box that we pumped with some fog to give the image a bit of ambiance.
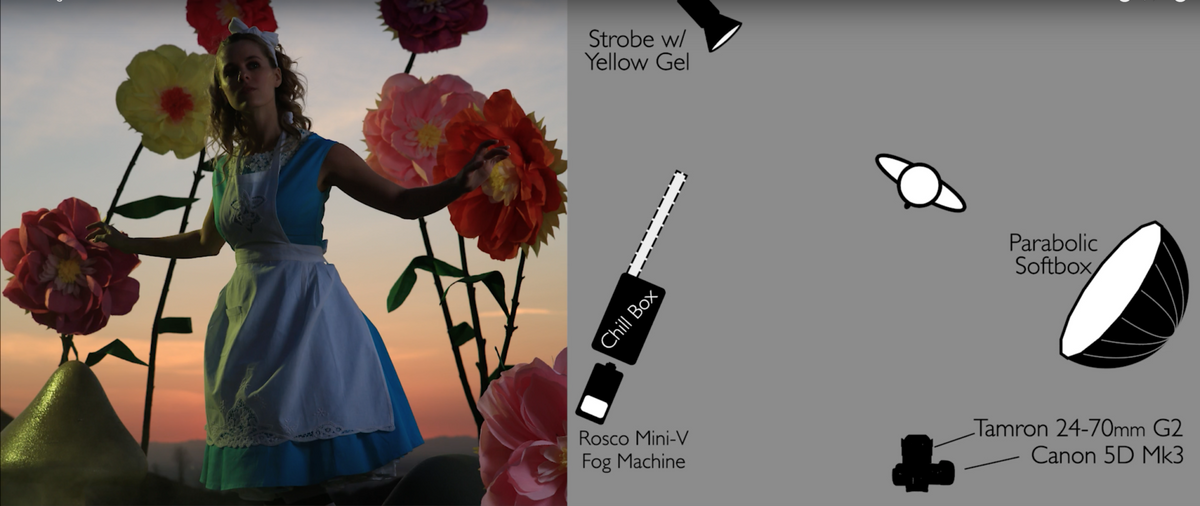
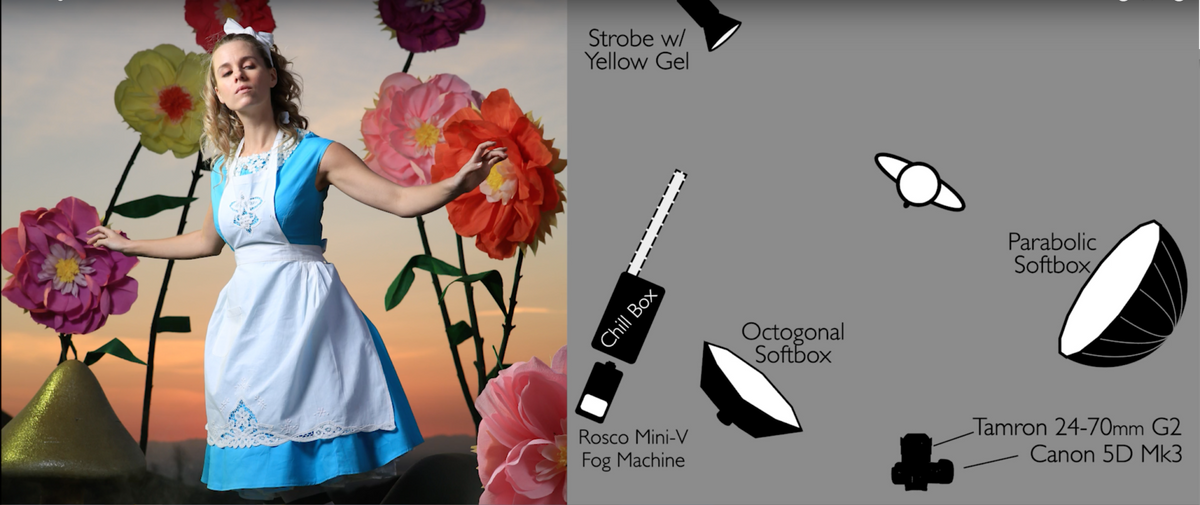
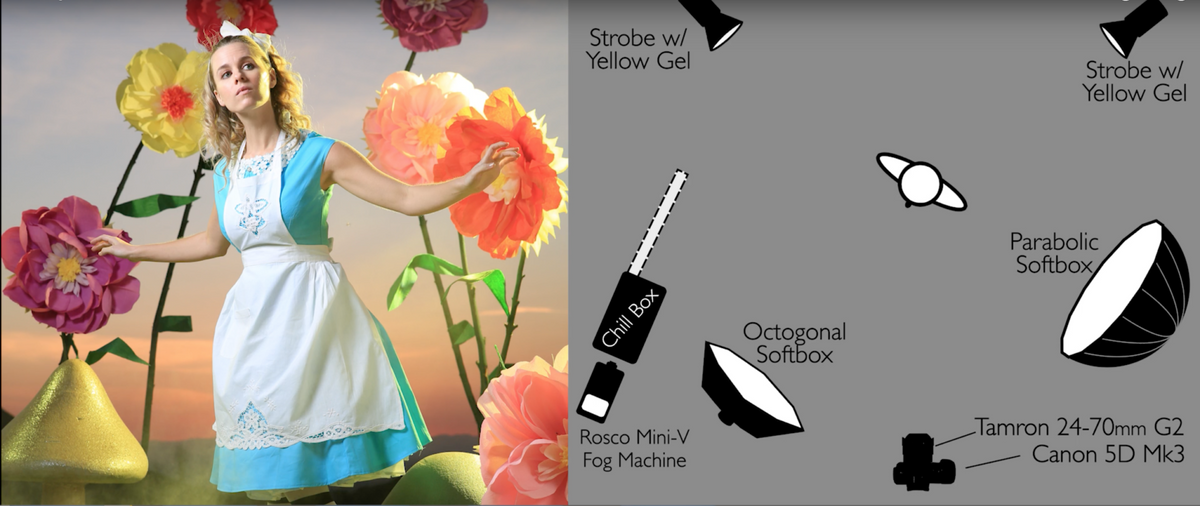
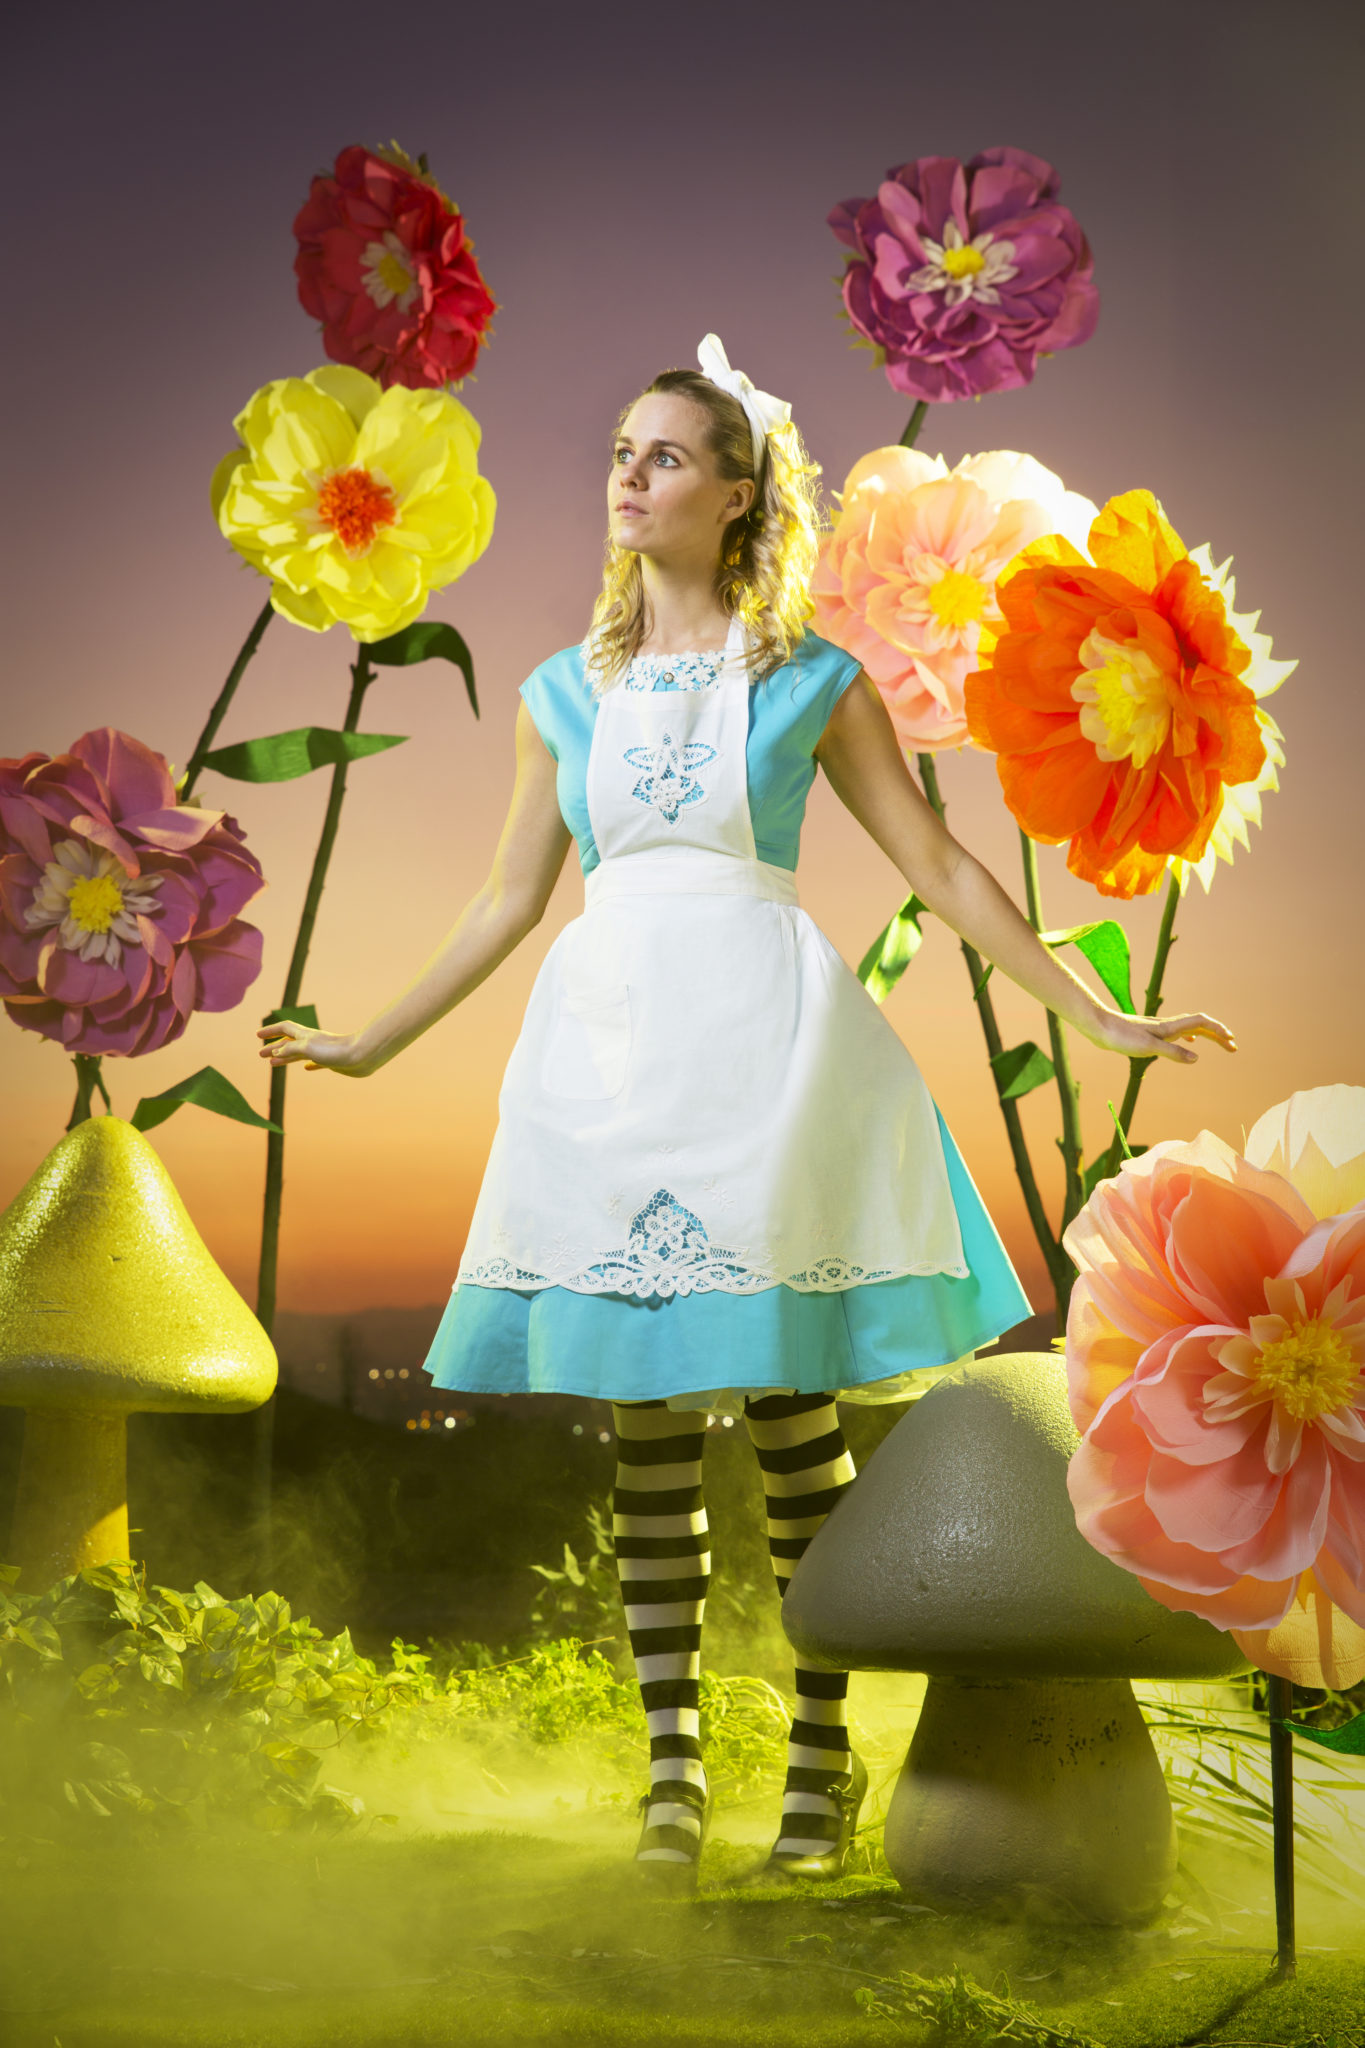
For the key light, we used an octogonal softbox on top of our strobe to create this nice wrap-around feel. For a rim light, we slapped on some yellow gel on one of our strobes to act as the ‘sun’. It’s going to catch the side of our model and some of the mushrooms. This will help separate our talent from the background. Once the sun sets, we’ll move our strobe in and it will simulate the sun feel.
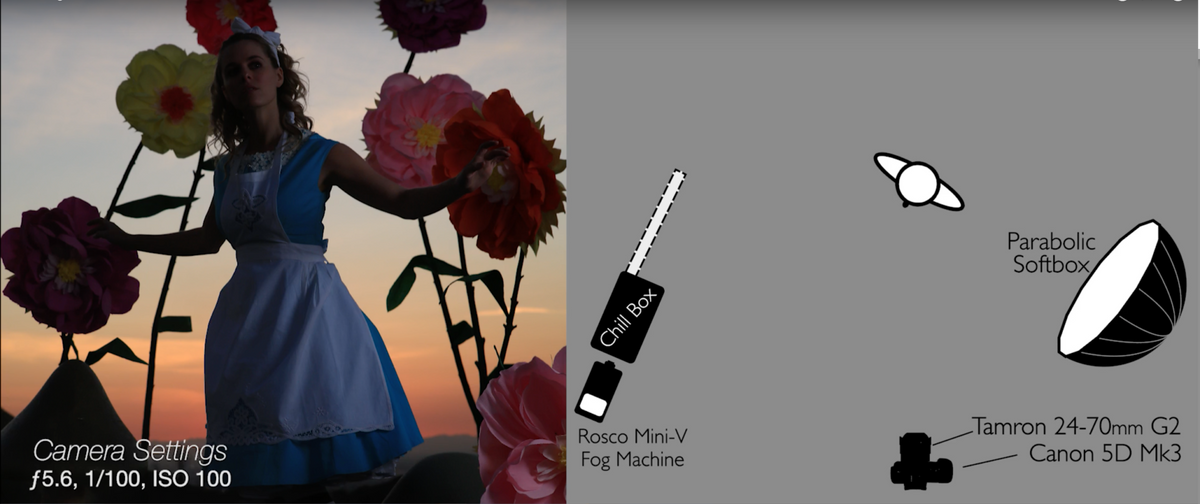
Lighting Breakdowns
Take a look at these images to see what we did to create this setup! We’ve got a rim light, key light, fill light. Simple! 
Using Your Shutter
So now that the sun is setting, we’re going to start lengthening our shutter speed.


In these two images, the ISO is at 100, the aperture set at f/5.6, and the shutter is at 1/20 and 1/10 respectively.
In Closing
There are many applications that you can use strobes in. These three rules will help you use strobes at any time of day. It’s a great skill to have in your arsenal.
So keep those cameras rollin’ keep on clickin’
-Jay P.
Gear we used
CANON 5D MARK III – B&H / Amazon
VANGUARD TRIPOD – B&H / Amazon
DYNALITE BAJA B6 – B&H / Amazon
ROSCO MINI V-FOG MACHINE – B&H / Amazon
CHILL BOX – Amazon
PARABOLIC SOFTBOX – B&H / Amazon
ROSCO LIGHT GELS – B&H / Amazon
OCTOGONAL SOFTBOX – B&H
LACIE EXTERNAL DRIVE – B&H / Amazon
SUN SEEKER APP – App Store / Google Store