
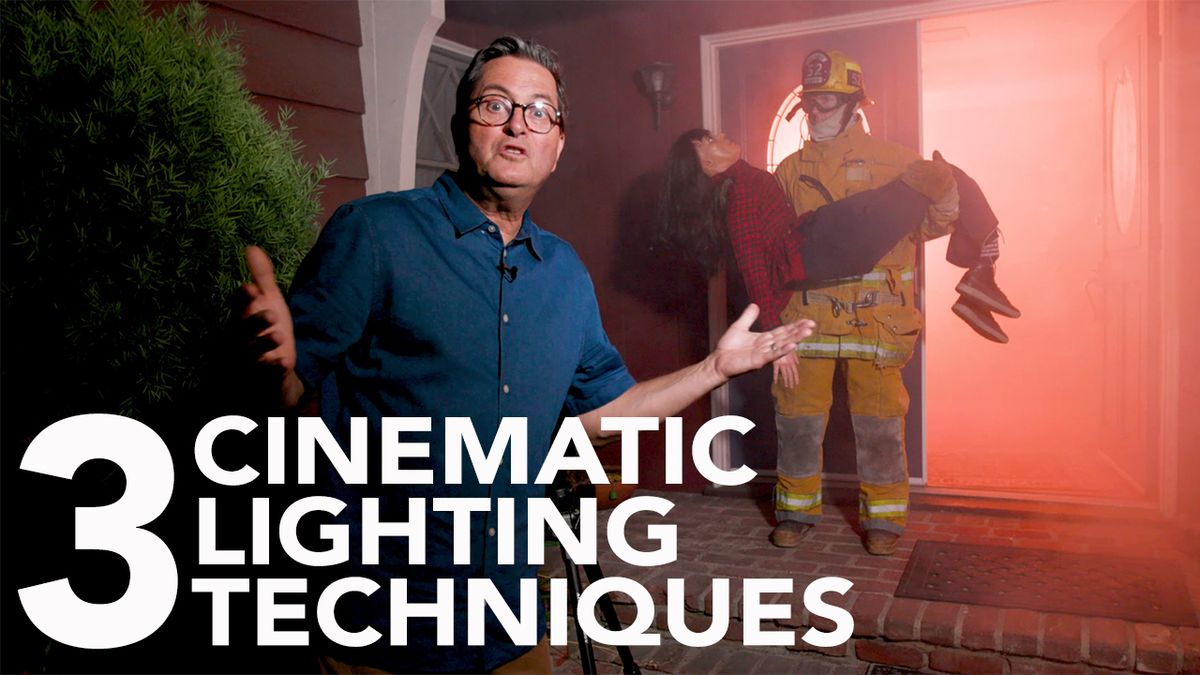

Today on The Slanted Lens we’re going to take a look at 3 cinematic lighting setups using LEDs from F&V! Let’s get started!
Watch the video by clicking here!
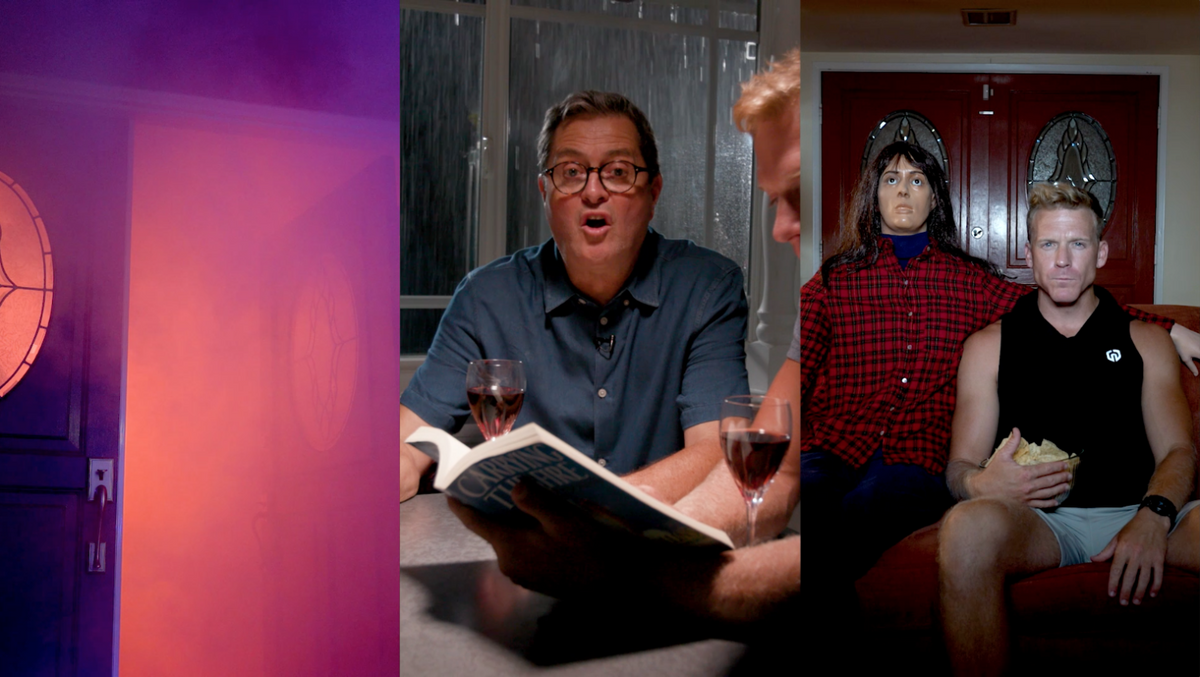
Fire Effect

The fire effect is one of my favorite effects! I’ve done it in fireplaces, I’ve done it in stoves, I’ve done it in rooms, I’ve done it so many different times.
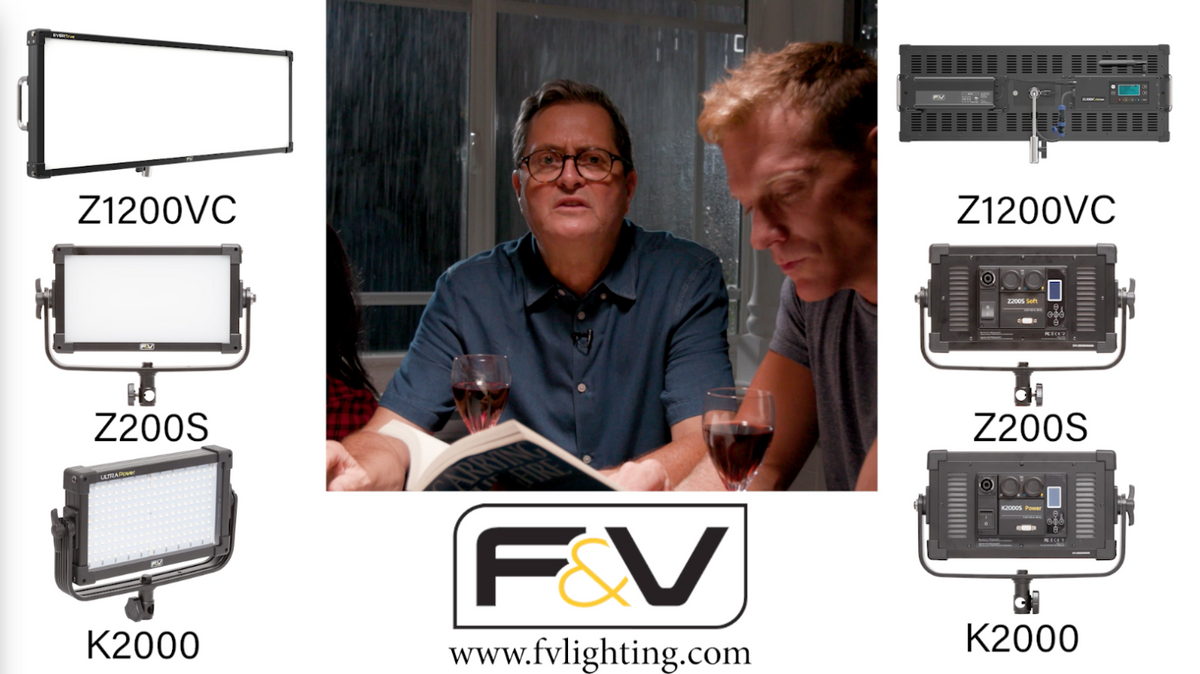
With an RGB light is it soo simple to do; with that Z1200 it has a fire effect! It’s blinking, giving you different color temperatures, sparking that sense of fire going on and when you put that smoke behind it, it really looks lie you’ve got a fire inside.
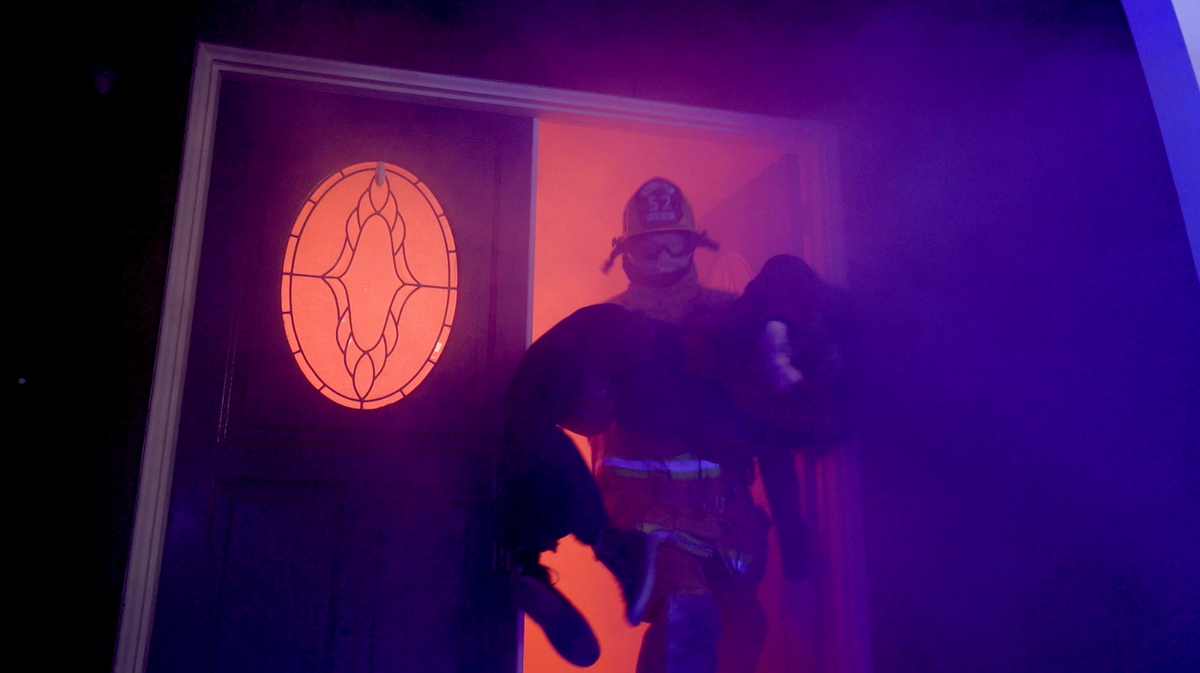

Outside here, we’ve got a cop car! It’s just a red and blue light blinking so it looks like there’s a fire engine or a cop car going in the foreground.
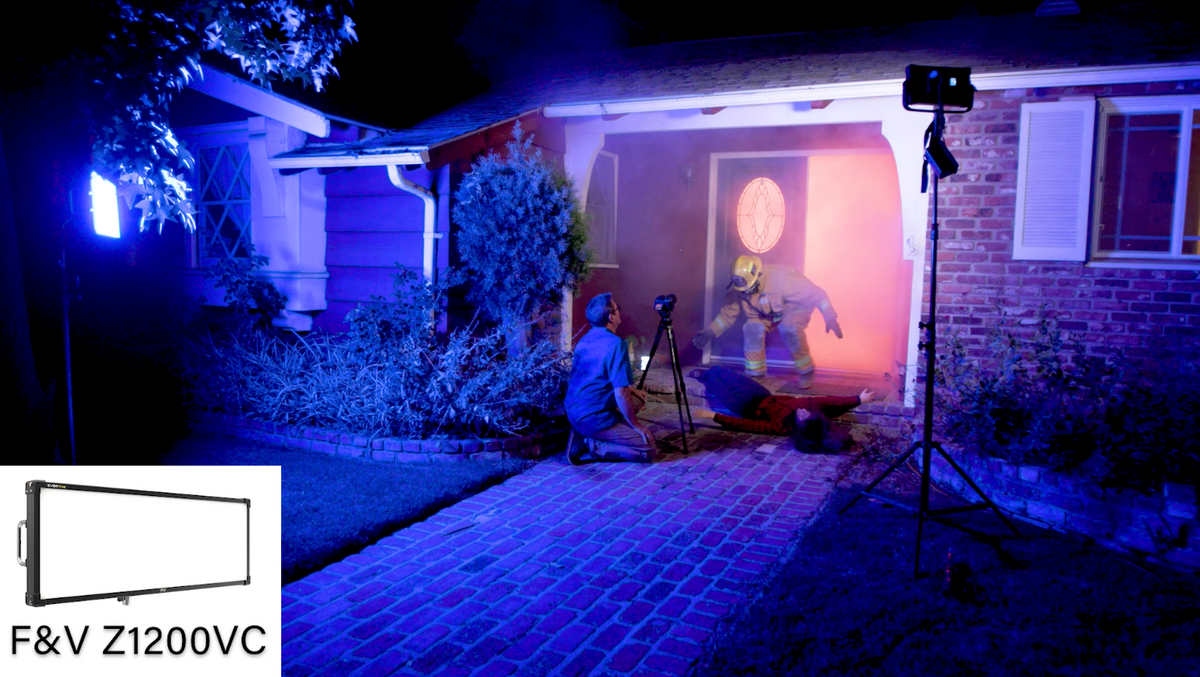

The last light we’ve got is a clean light, the K2000. It’s there to open up the shadows a little bit and give us a sense of what’s going on here.
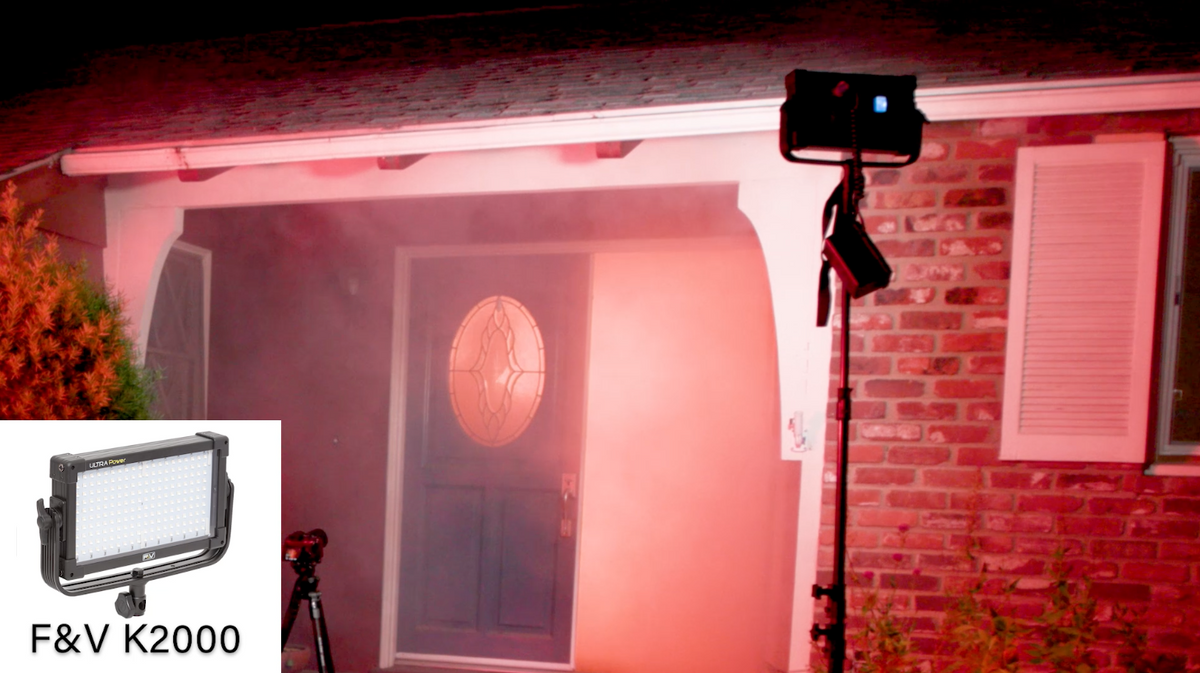

And that’s all it takes! 3 lights and some smoke and you’ve got an amazing fire effect!
The advantage of this gooseneck type of mounting system is that I can just loosen this and go to vertical and it’s just that simple! It’s so nice. Try doing that with a sky panel!


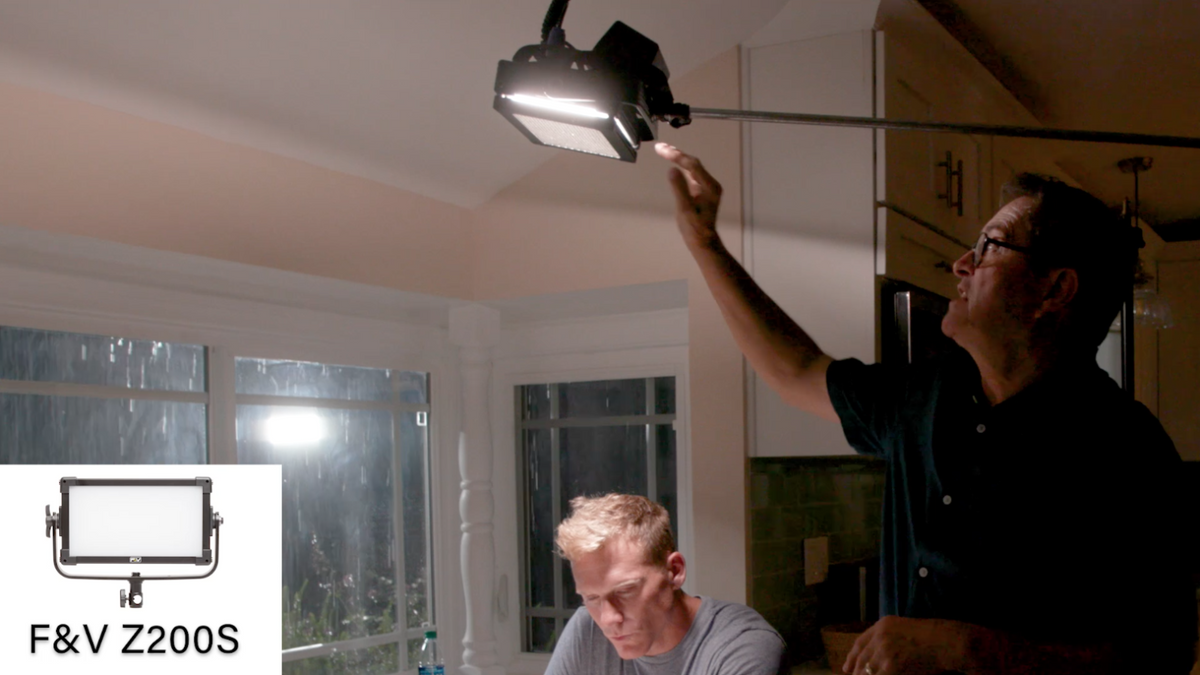
TV Effect
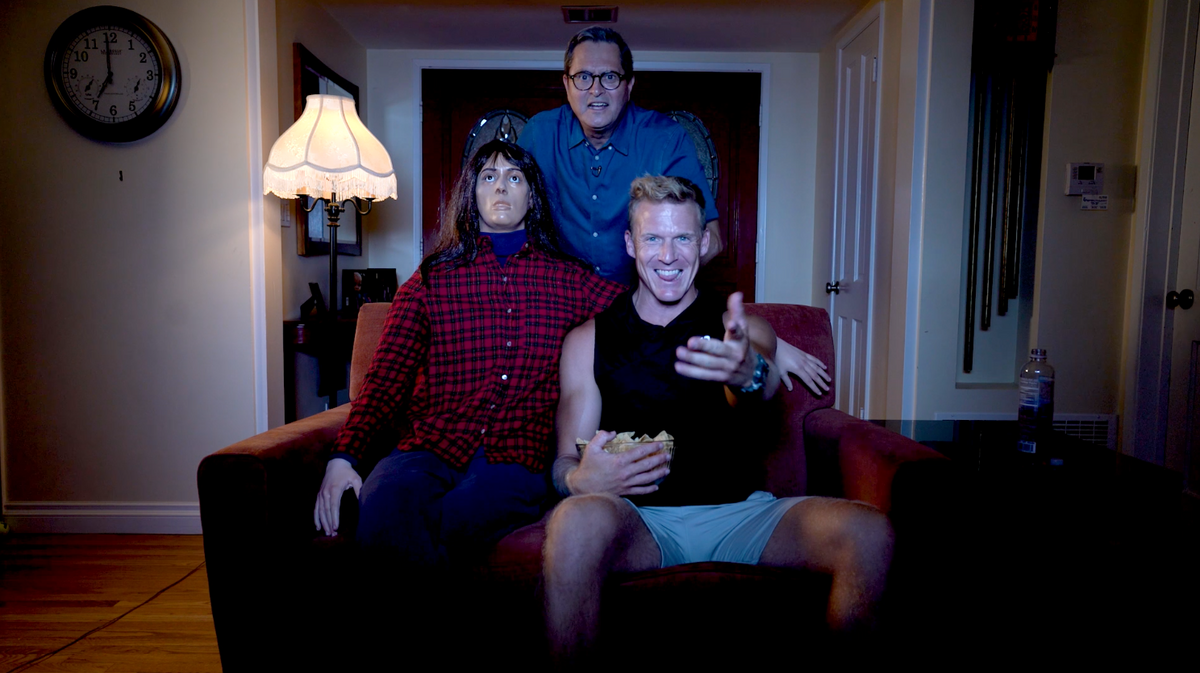

This is a cinematic effect I’ve done a million times; it’s the blinking, flashing TV look! The camera right now is at POV of the TV and the light above the camera is just giving us that blinking flashing light that just looks like the television is on. When do you use this? In any room, looking from outside so it’s flickering in the window, or in this situation where you have the camera as the POV of the TV, with the light above it.
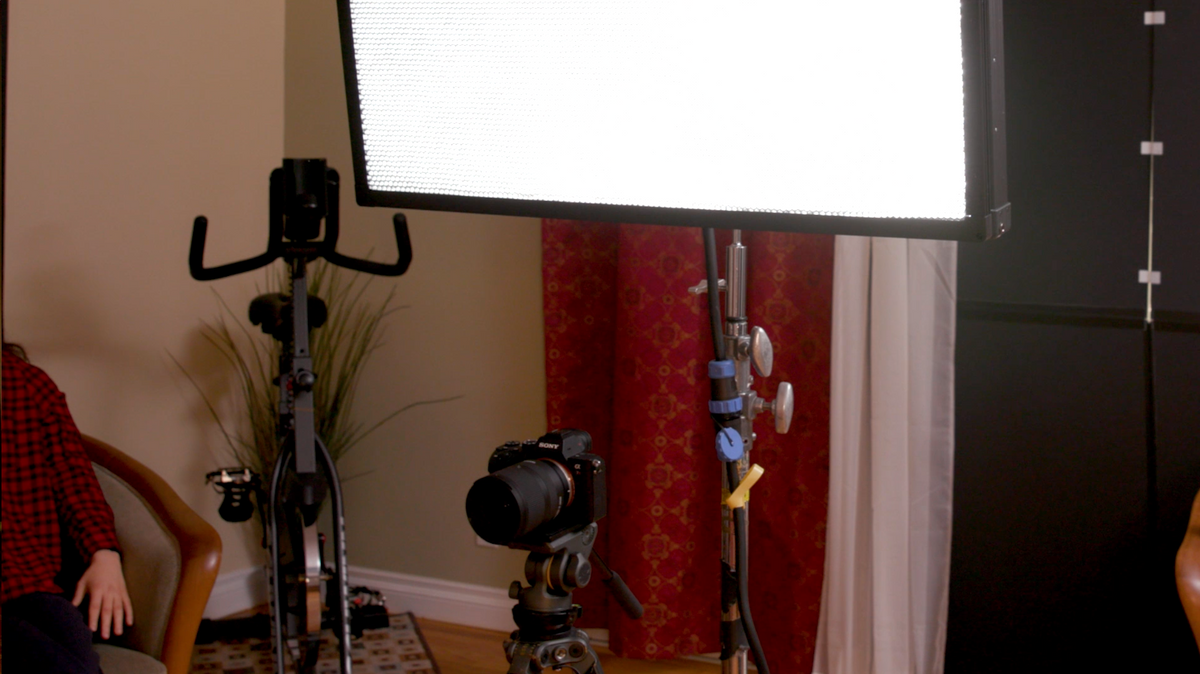

You can take this grid off very easily because it’s got these little buttons. But without the grid it’s wayyy to much light, so we keep the grid on to light the couple just enough, and it looks way more like a television!
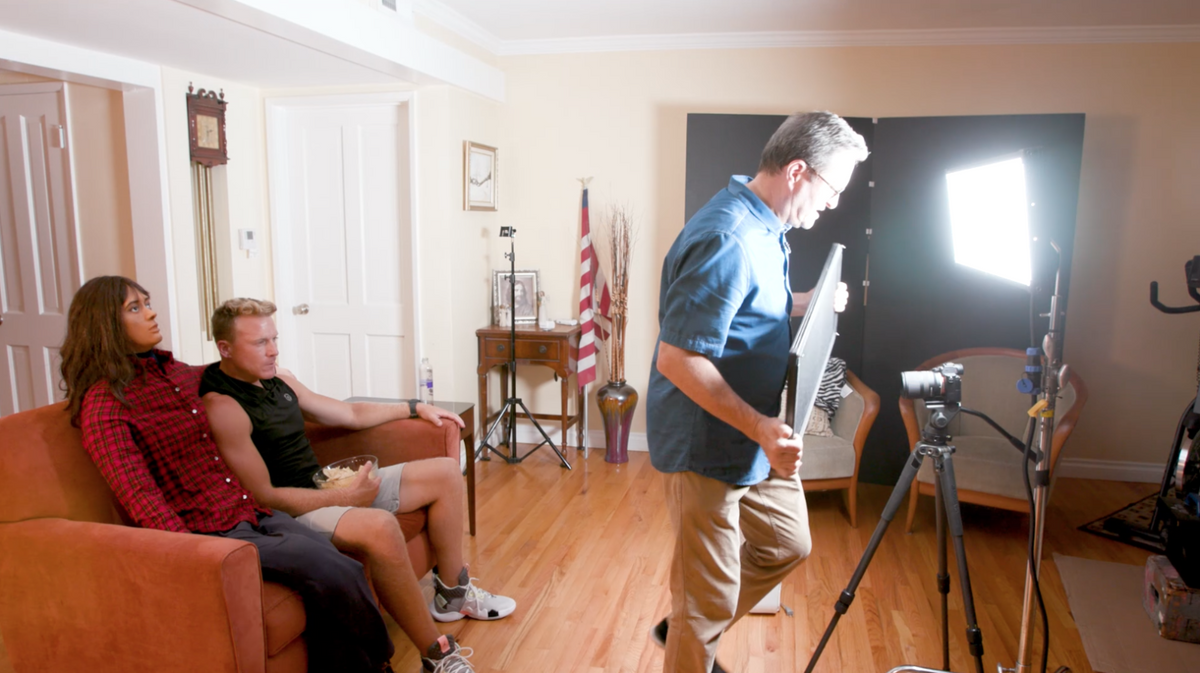

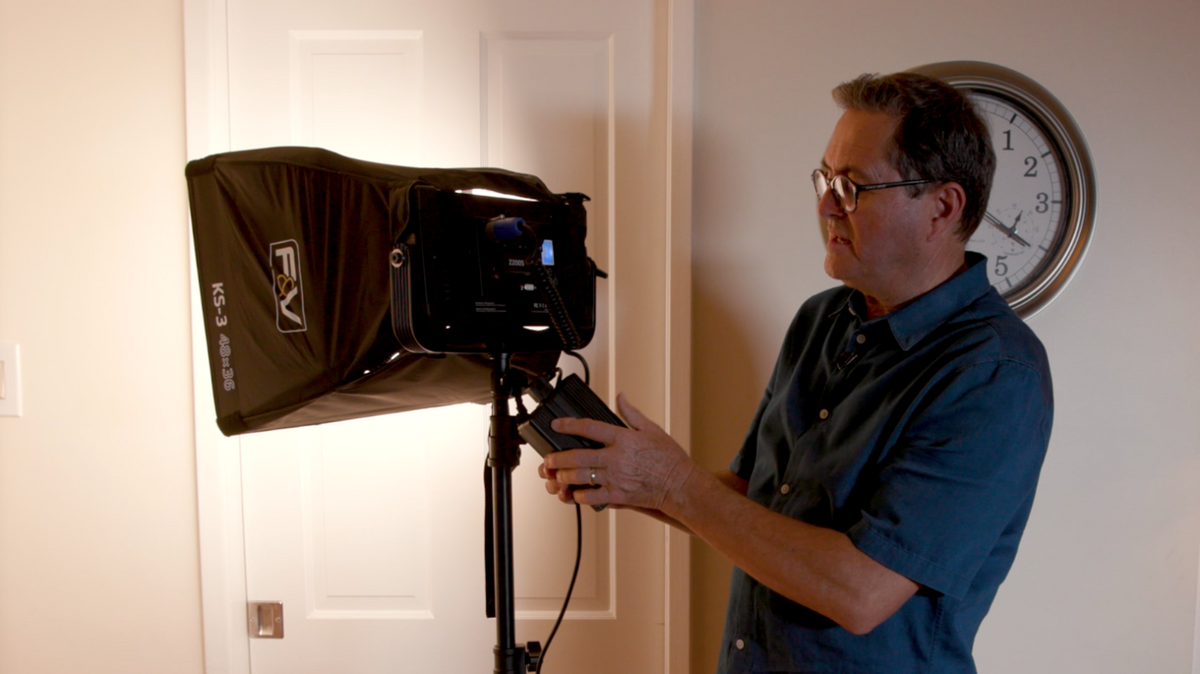
This is the Z200S we’ve got for the lamp in the shot . We’ve got a KS3 softbox on it, with a single cover in the front so we’ve got the softness of the light in the back, the box gives us the ability to feather, but it still has a nice soft look to it. Then on the back, I like the way this is set up; you’ve got your dimmer, your color balance right here, we’ve got this on 3200. This right here is a Zmount battery plate, but it’s got an AC adapter on it. It’s basically a dummy battery for a Vmount!

Rain Effect
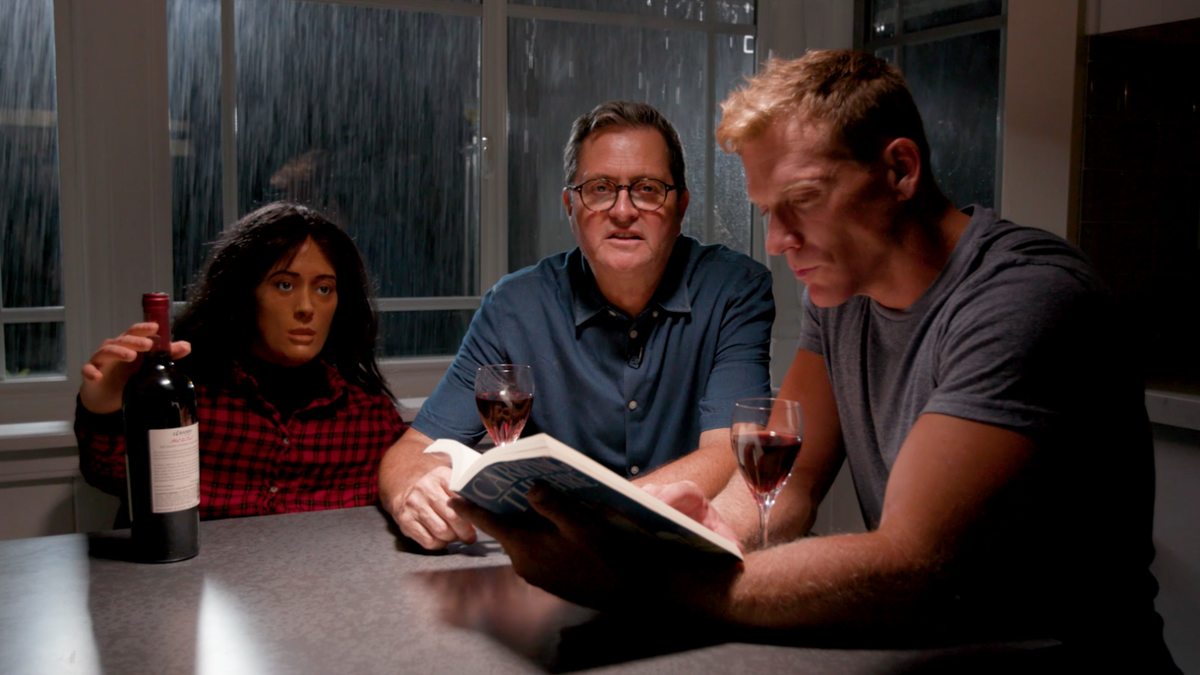

This third effect is not one I’ve done as much, but certainly comes in handy, and that is lightning! if you want to have that lightning effect, it’s really easy to do with one of these RGB lights. The Z1200 gives us the ability to make that lightning happen, and what we’ve done here is have ourselves set up inside at about 400-300 degrees and outside we want the windows a little bit blue so they’re at 5600 degrees, then we have lightening on the far left side that flashes in on Casey’s face and throws a shadow on the wall behind him, and gives us that hard light from the lightning effect.
So we’ve got the Z200S overhead with just the grid in it, so it’s got that soft face which softens it already, but it’s got that grid to kinda narrow that beam so it becomes our key light.
Outside we’ve got 3 lights and a garden hose! The garden hose just has a sprinkler head on it, and that’s going to spray straight up in the air and then fall down. You can’t aim them down; it’s just not going to do you any good. You’ve got to spray them straight up in the air and then have it fall down on the window, giving you a nice rain pattern.
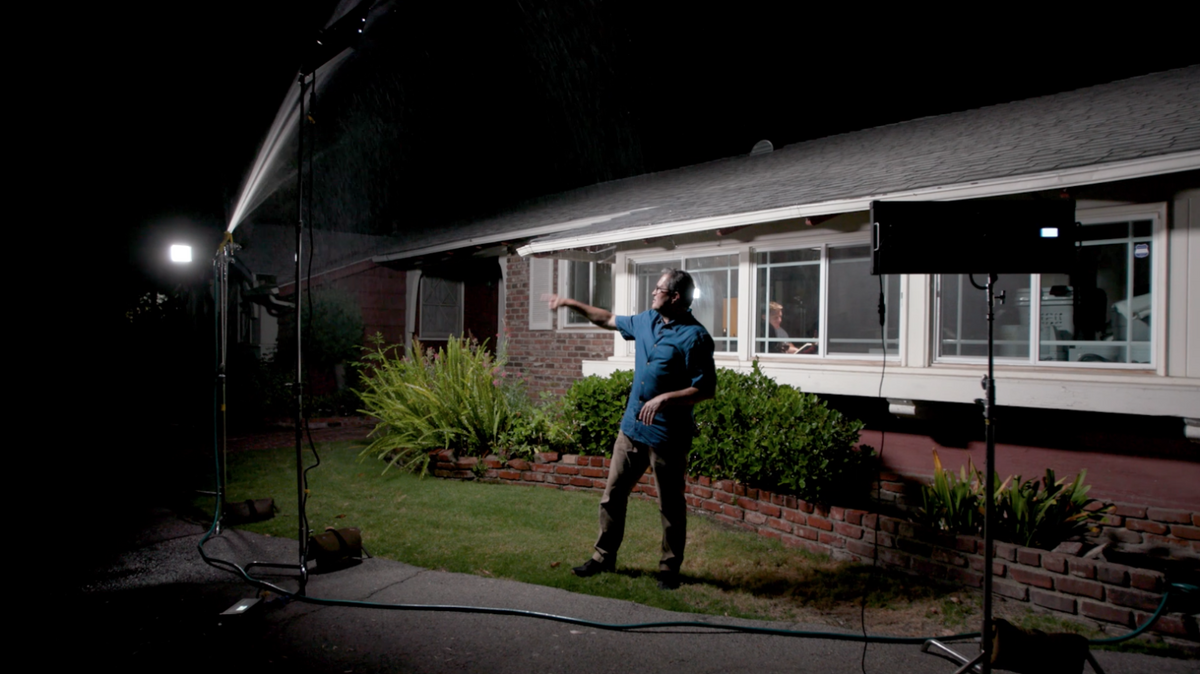
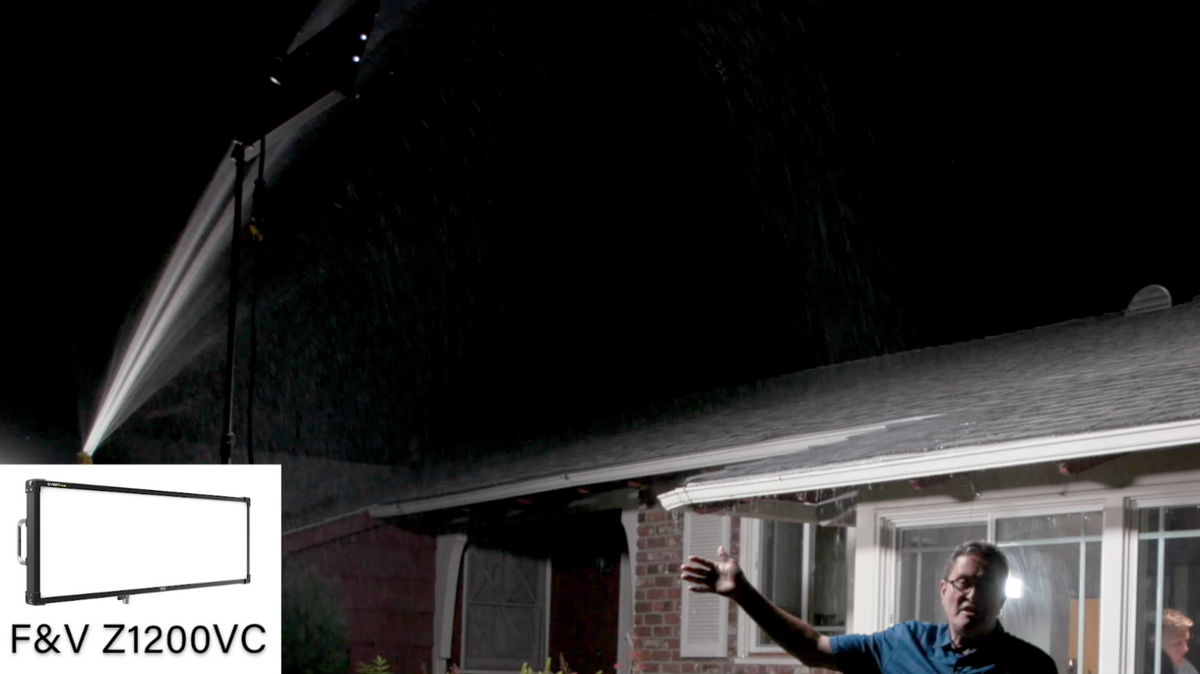
You won’t see the rain unless you light it from behind, so we’ve got a Z1200 here just on straight daylight just because we’ve got a 4200 degrees inside, so that straight daylight is going to look a little bit blue outside the window. That is on a horizontal like just above the roof light so it’ll light the rain.
Then on the far left side we’ve got the K2000. That’s a harder light that’s also on daylight. That’s gonna be a little bit blue as well and will light the rain on the other side. You’ve got to have a lot of light in order to make rain work. It’s gotta be lit from different spots, so that you have an even amount of light!

Last of all we’ve got a Z1200, which is set on that lightning effect, and that lightning goes off every so often with the timing set to be irregular. We might even do a little manual assist to make sure it’s really random.
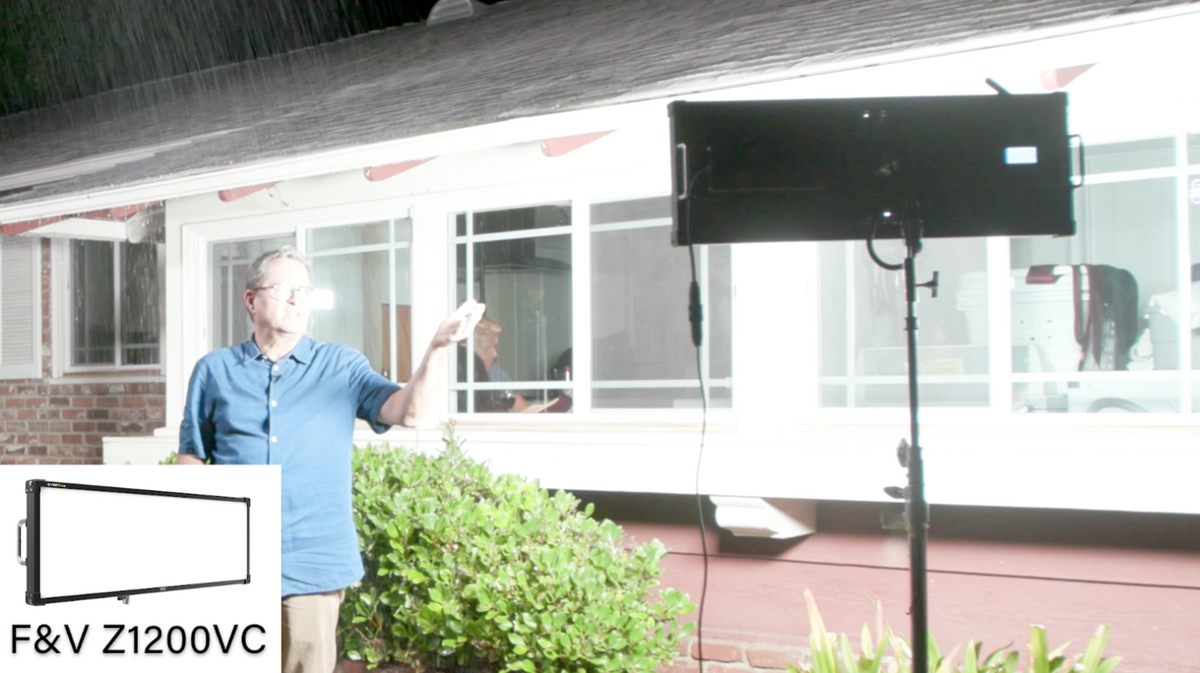
So on the back of the Z1200 you can put a plate that holds 2 Vmount batteries because it’s going to take 2 batteries to run this. So if you want to take it off and run it off of just batteries, you can, but we’re running it off of straight now right now.
Conclusion

So there’s a look at 3-4 lighting effects you can get with those RGB lights; that Z1200! You can do everything from lightning to fire to a nice flicker when you’re doing a TV setup. I use these kinds of effects every time I shoot with a fireplace, a room, and someone’s face from outside. These techniques can really add depth to the images you create.
There’s way to use these kinds of lighting setups to create tension, create the story line, or give you an idea of what’s about to happen next. You can use lights to strengthen your story and using a good RGB light that has those effects and you can just put them up and shoot, makes it a lot easier for run and gun kinds of situations and you don’t have to spend all day setting these lights up.
I hope you’ve enjoyed this! I love working with these F&V lights as they’re just great lights from their high end 1200 RGB light to their smaller less expensive lights at 200 to 2000.
Thanks for watching, reading and being a part of the TSL community.
Keep those cameras rolling and keep on clickin!
GEAR USED
F&V Lights:
Z1200VC https://www.fvlighting.com/z1200vc-ctd-soft-1×3-led-panel-light-studio-pack.html
Z200S https://www.fvlighting.com/z200s-soft-ultracolor-bi-color-half-panel-led-studio-light-with-ac-adapter.html
K2000 https://www.fvlighting.com/k2000-power-daylight-led-half-panel-v-mount-1.html
F&V Grids https://www.fvlighting.com/hg45-4-honeycomb-grid-45-for-z1200vc-ctd-soft-1.html
Camera
Sony a7 Riii
B&H: https://bhpho.to/2DZYHut
Amazon: https://amzn.to/2Zbv7QK
Tamron 28-75 2.8
B&H: https://bhpho.to/2FsWNno
Amazon: https://amzn.to/2L2V2A5
Tripod
Vanguard
B&H https://bhpho.to/2GAu5Si
Amazon: https://amzn.to/31YzYBO
Platypod
B&H: https://bhpho.to/30rqHlp
Amazon: https://amzn.to/31Wr4og