

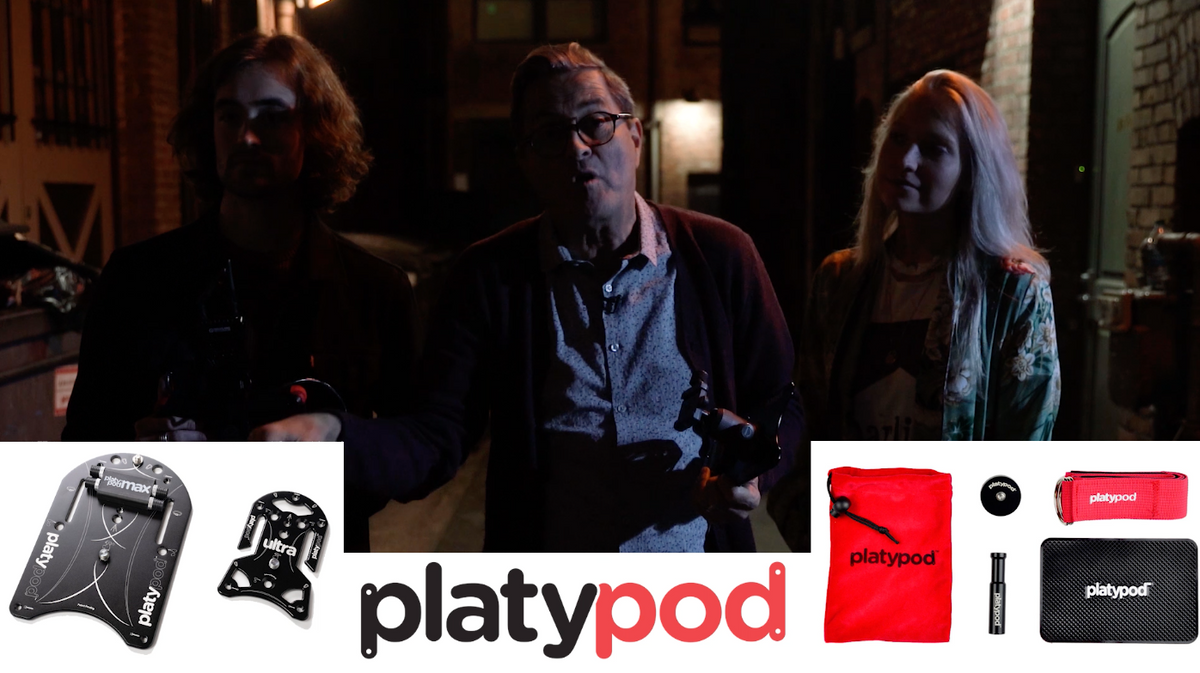
With the help of our Platypod stands, we were able to light this ally way and demonstrate how to create dramatic pools of light for subjects to move through, making for a cinematic look that gives the scene much more depth and intention.
Characters don’t stand still, they move through the scene, and you want to light to allow that to be an experience that really creates drama, action, and interest to the viewer!
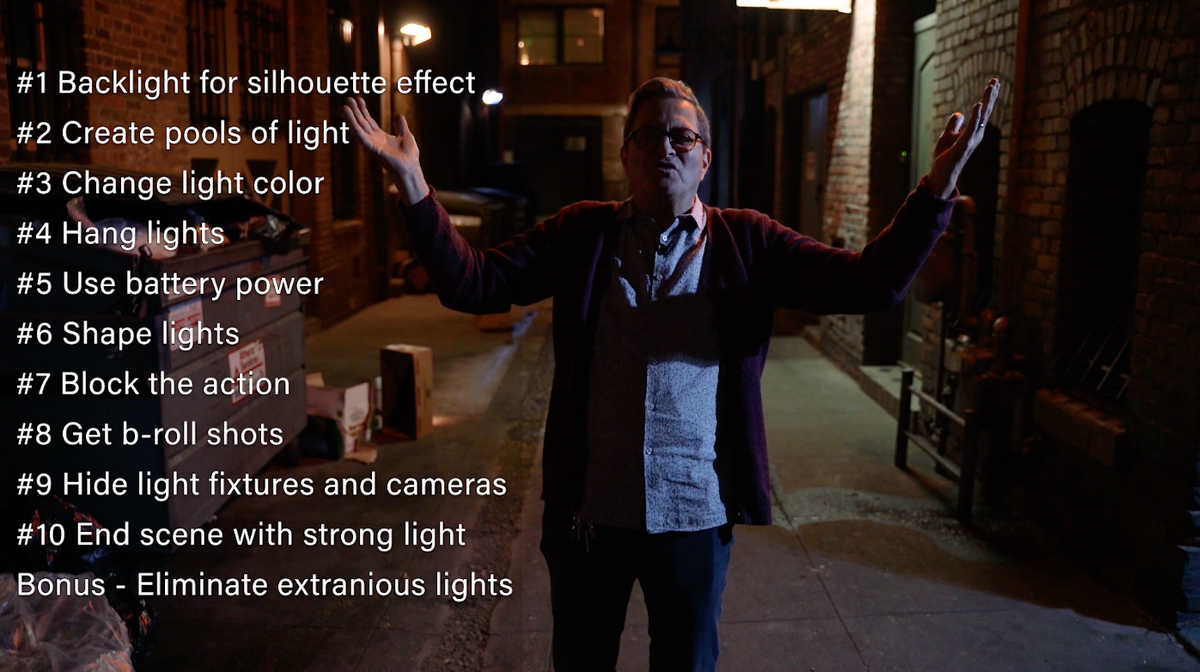
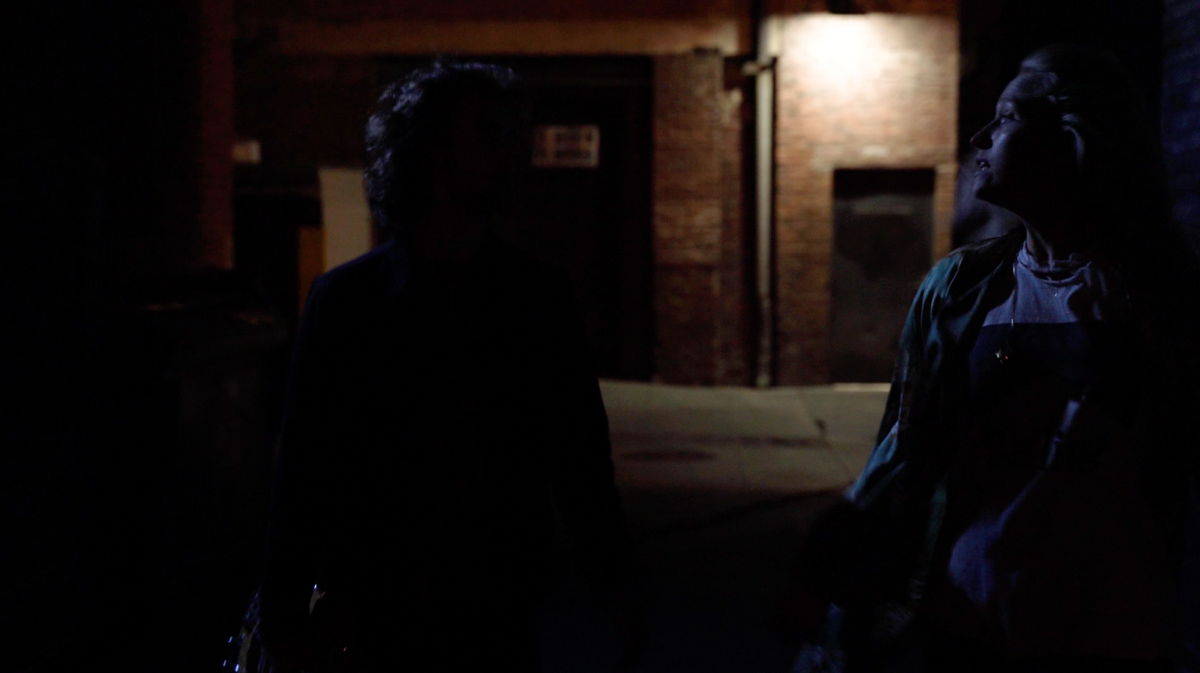
#1 Backlight for silhouette effect
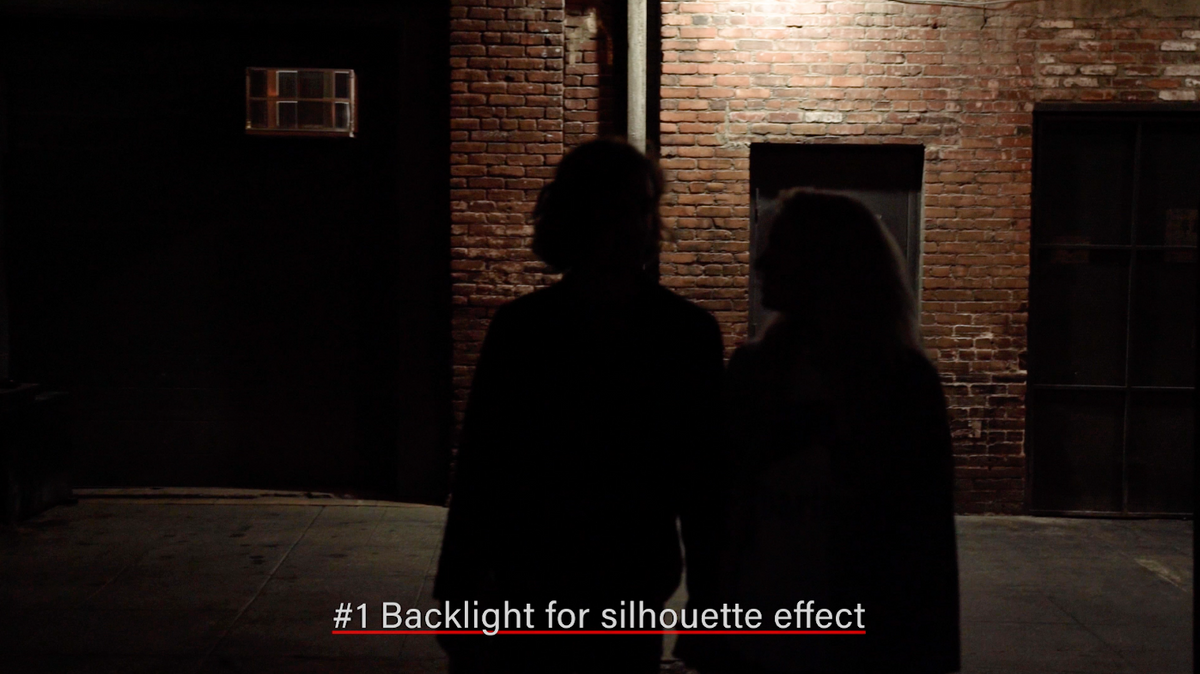

I’m going to start with the light behind me. I want a light on the wall back there that allows me to paint a silhouette, but my face isn’t lit, so this is kinda an introduction for the character. I’m dark with light in the background but then I’m going to move into a pool of light.
#2 Create Pools of Light


Create a pool of light further down the ally that gives the actors a place to move into and create depth.
#3 Change the color of the light


I’m going to change the color of the light now so it’s not that neutral light, we’ve now got a colored light. Having a colored light allows me to move into something that feels interesting and my actors can have a moment here as they go through their dialogue.


#4 Hang lights
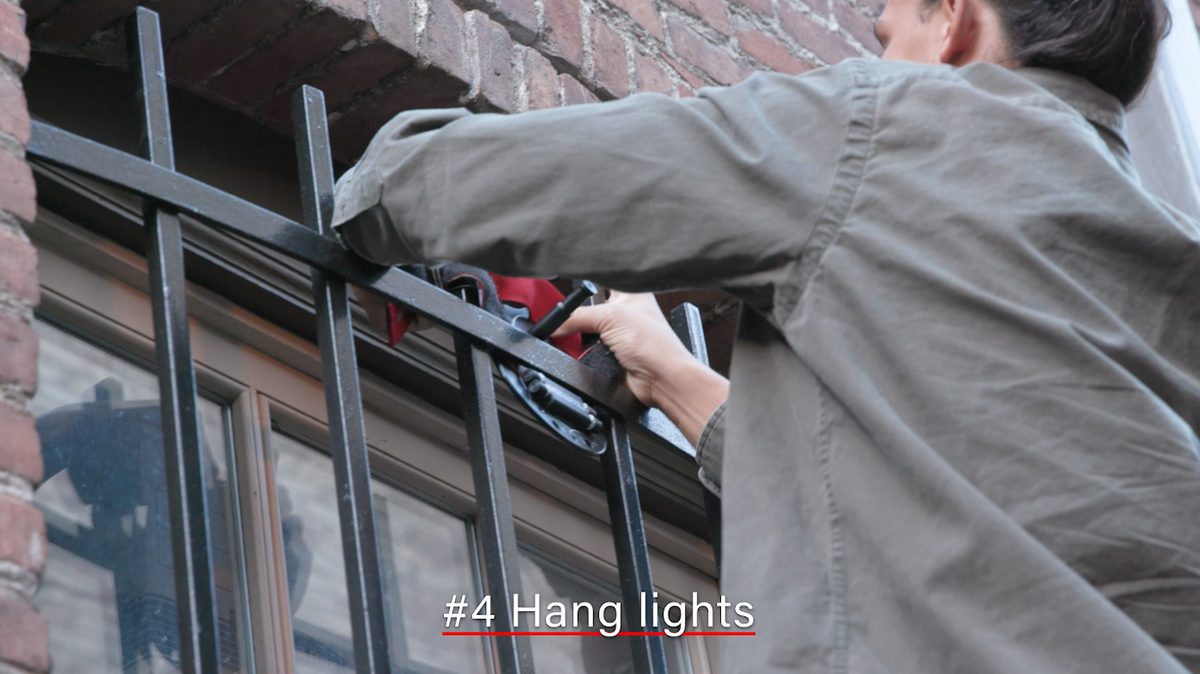

We are hanging out lights up on the walls here with the Platypod MAX, so we can strap them on to a pipe.
#5 Use battery power
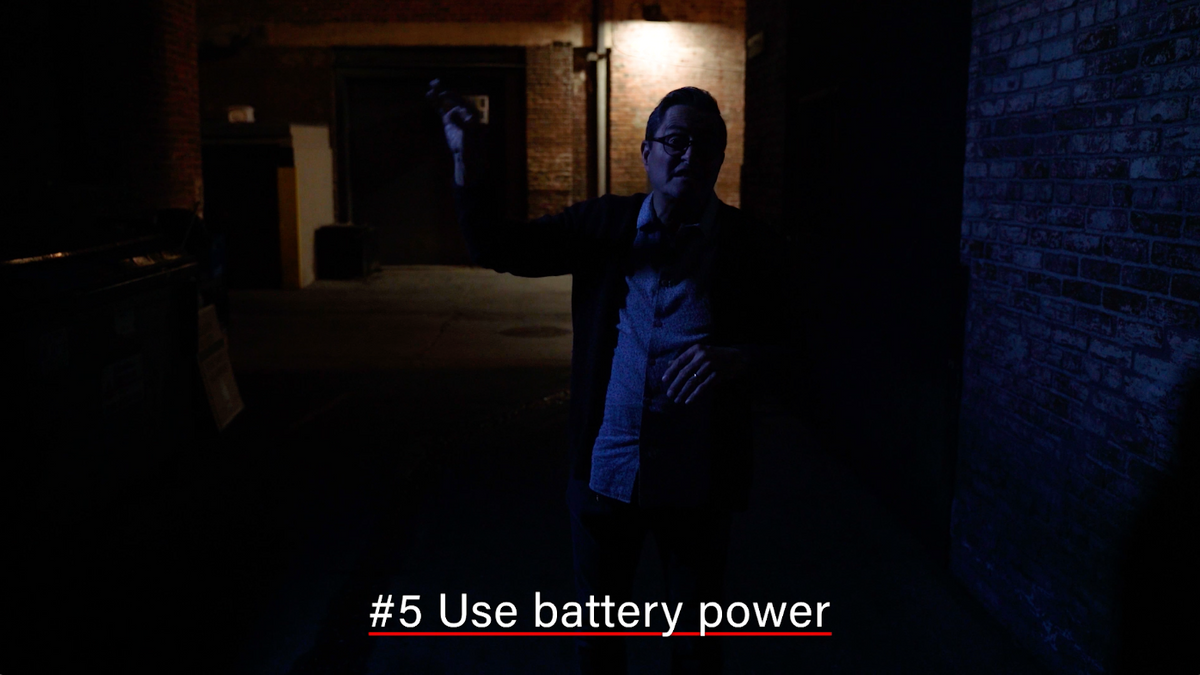

We power the lights with a V mount battery so that we can set these lights up without having any stands on the ground, so you can just get the up and away without having to run power to them. It’s just a very easy way to work when you’re lighting in an ally like this.
Changing colors again; we’re going to move from that blue to a nice warm light.
#6 Shape lights
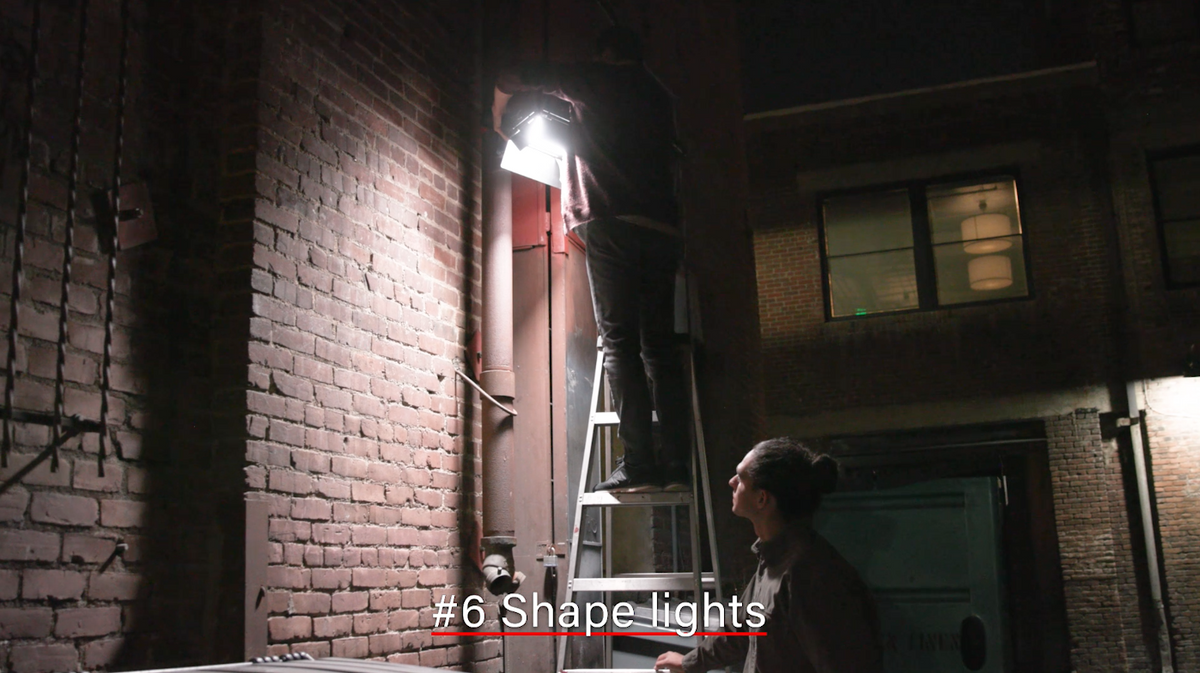

I’ve started to shape the lights so that they integrate with the scene. I want them to look like that shaft of light on the wall or light coming in from a doorway, so that they feel like they’re integrated with the scene and giving me a sense that the lighting is naturally here. I’m going to be using bits of cardboard in this case, or the doors or a grid in order to keep those pools of light. I don’t want to floor the whole scene; I don’t want to flood the whole ally, I just want it to be lit in some small places.
#7 Block the action
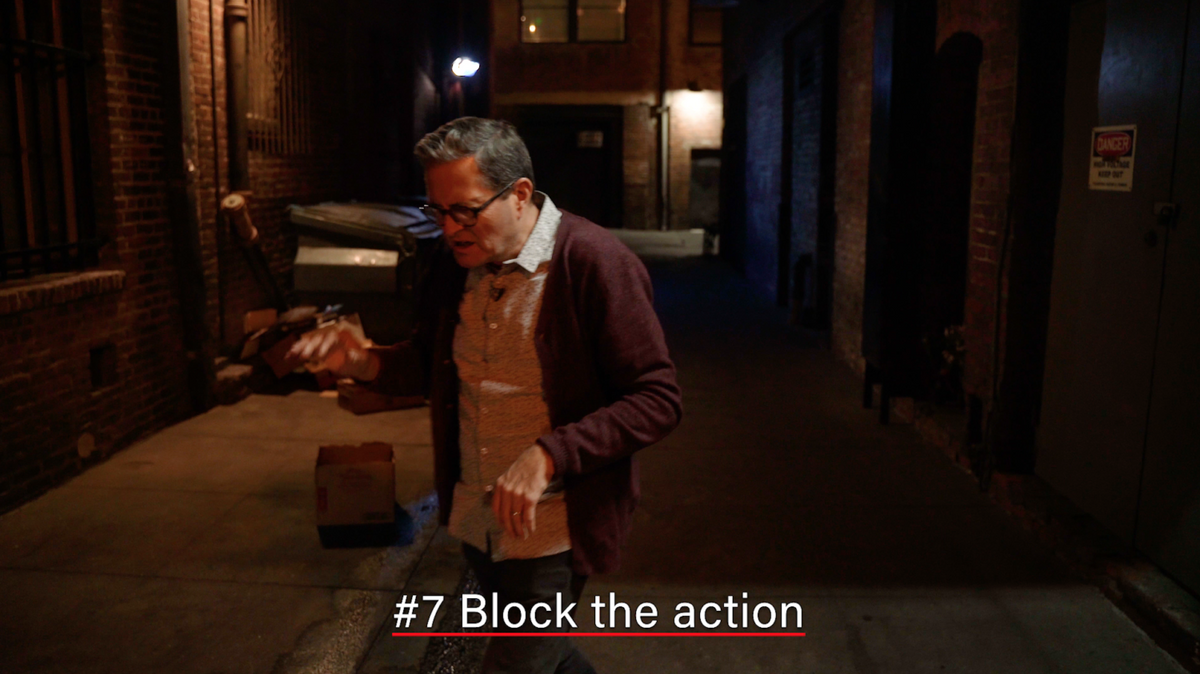
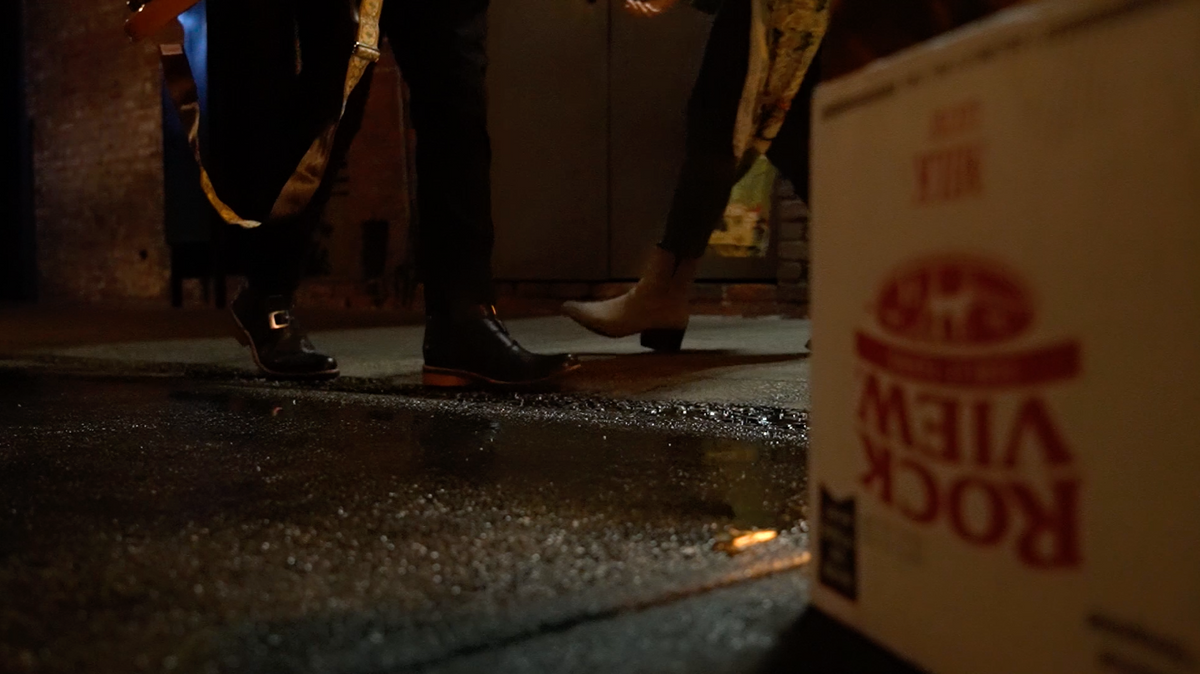
Make sure you know where your actors are gonna be. If they step into the shot here, I’ve set it up so you can get a shot of their foot hitting the water.
#8 Get b-roll shots
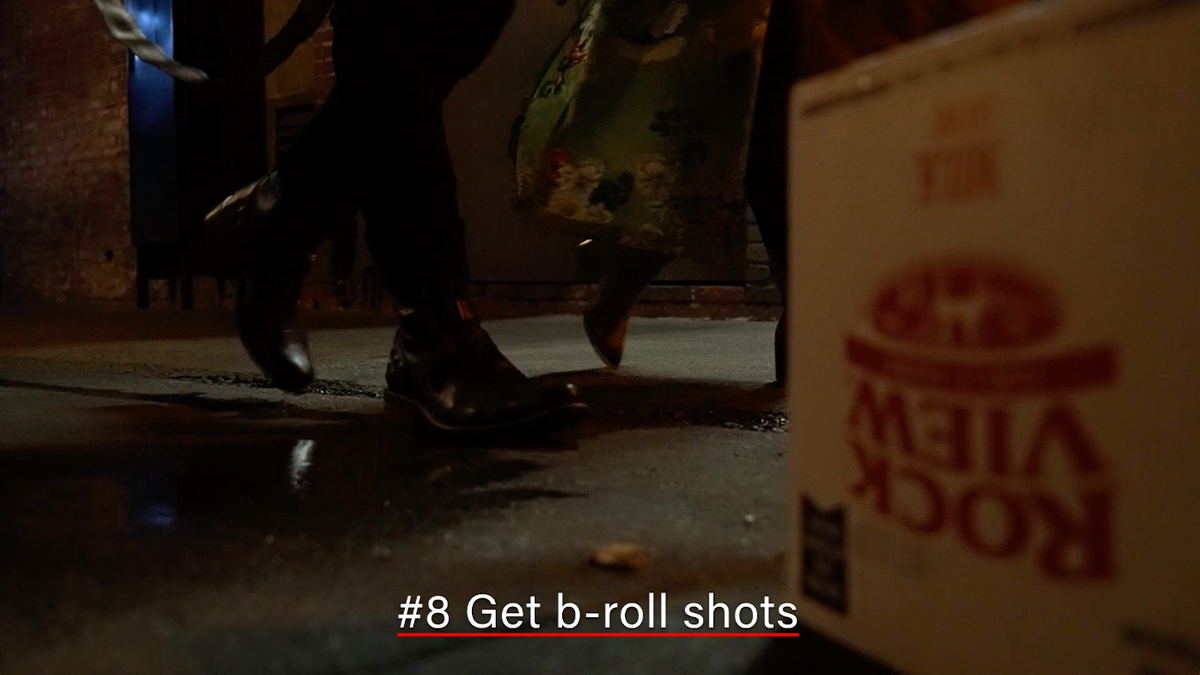
Now I know that I want light there as well, so we’ve put in a small light to hit their foot as it hits the water. This gives us a nice sense of where they’ve been as they move down the ally.
#9 Hide light fixtures and cameras
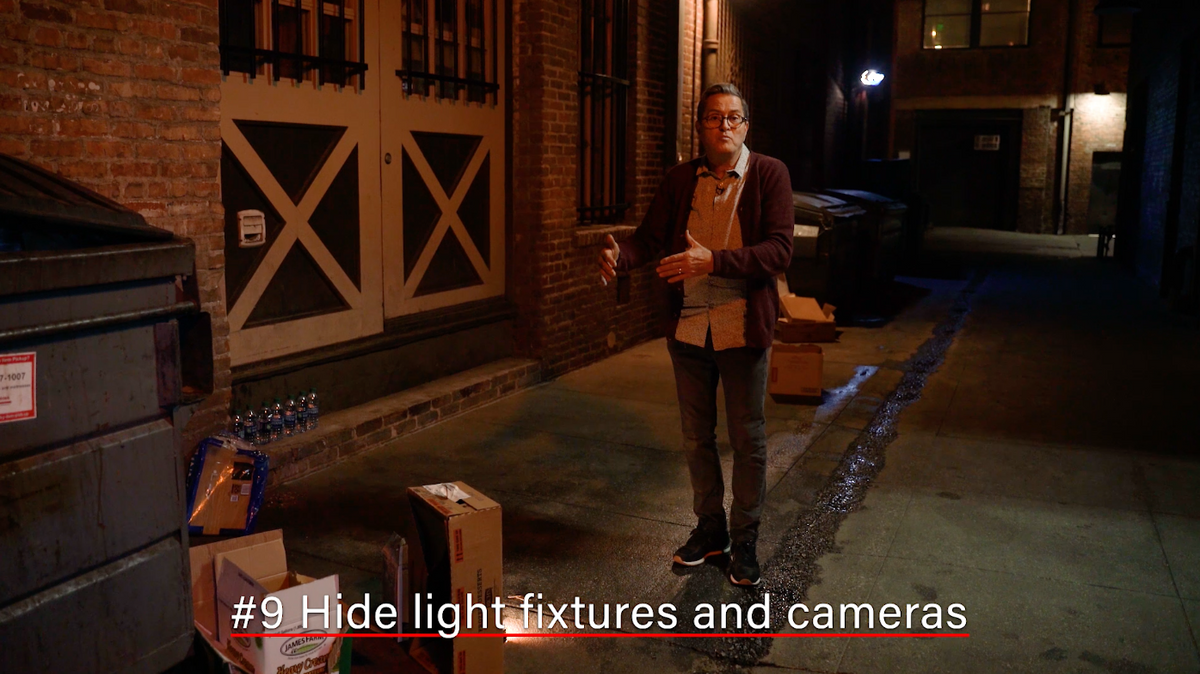

Also, I’m going to hide my lights with cardboard boxes, trash or doorways in the ally, so that as my camera goes down the ally, the doorway and boxes and things hides the lights, hides the cameras on that b roll shot and allows me to move down the ally without revealing my lights or the camera.
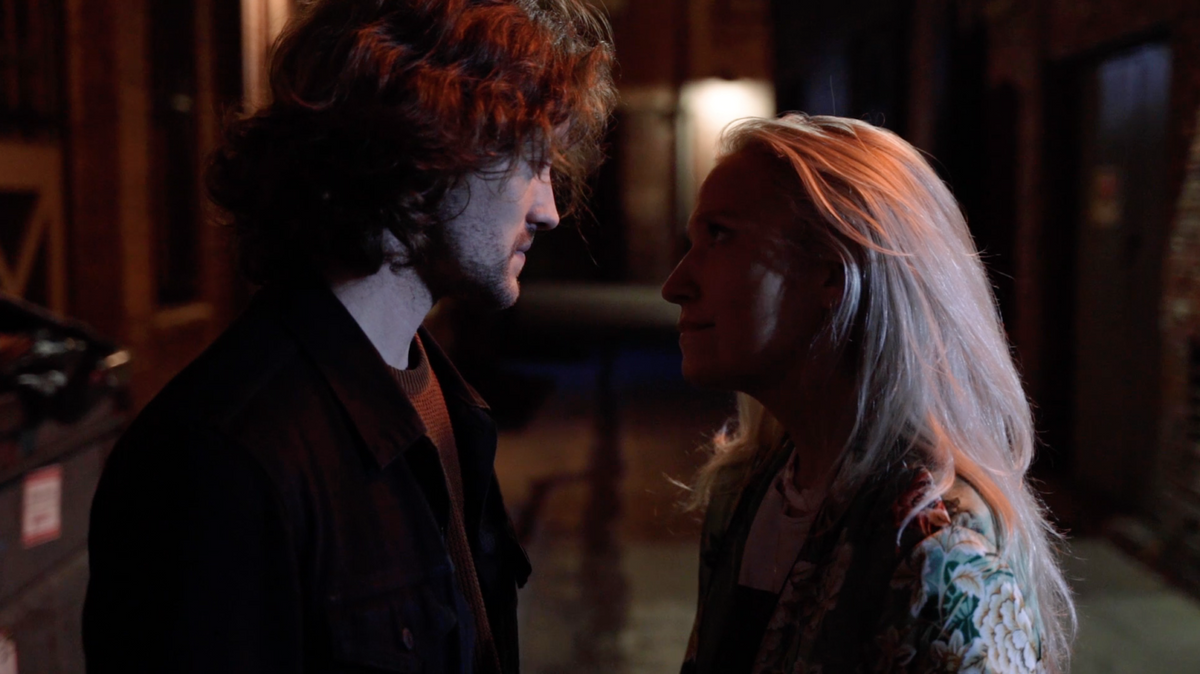
#10 End scene with strong light
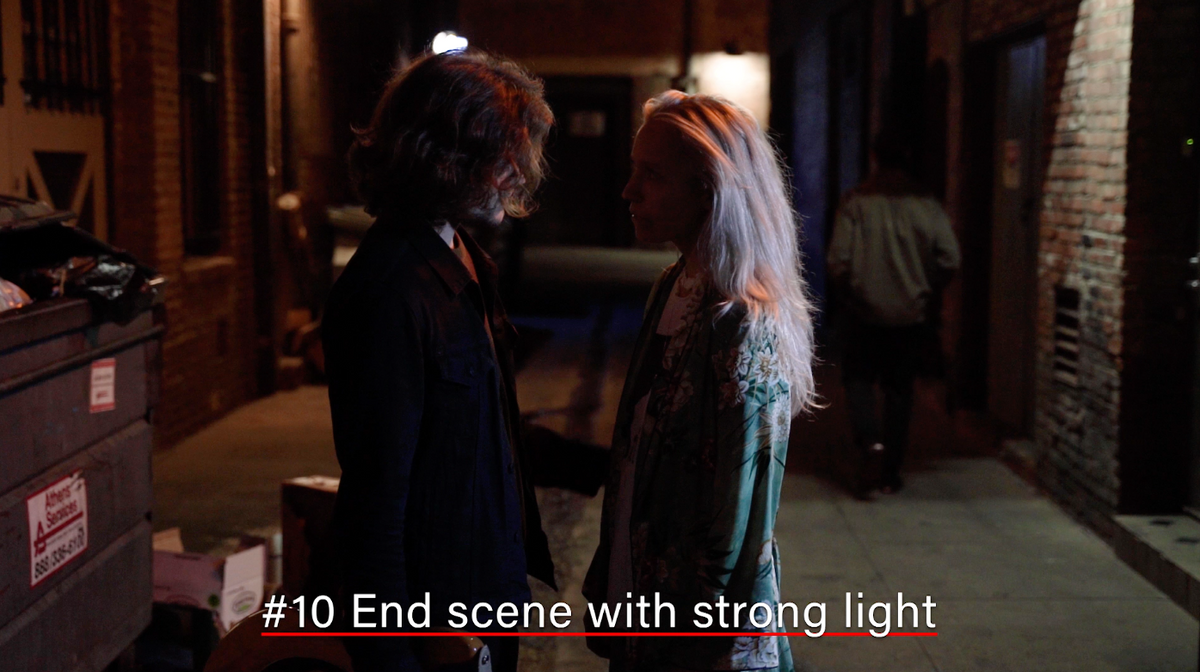

This gives us a moment here where the scene comes to a climax, you see them more fully in the light, they start to make up, but I don’t put the in heavy light and light them from both sides. I’m going to let her fall in the shadow a little bit. She’s not sure, an then she makes that decision and then they walk out of the scene and it’s just a nice way to end the scene right here. So block and know where your blocking is, so you can set your light for the key points as they walk through the scene.
In my last shot I would just move beyond the camera and out of the scene.

Bonus – Eliminate extraneous lights
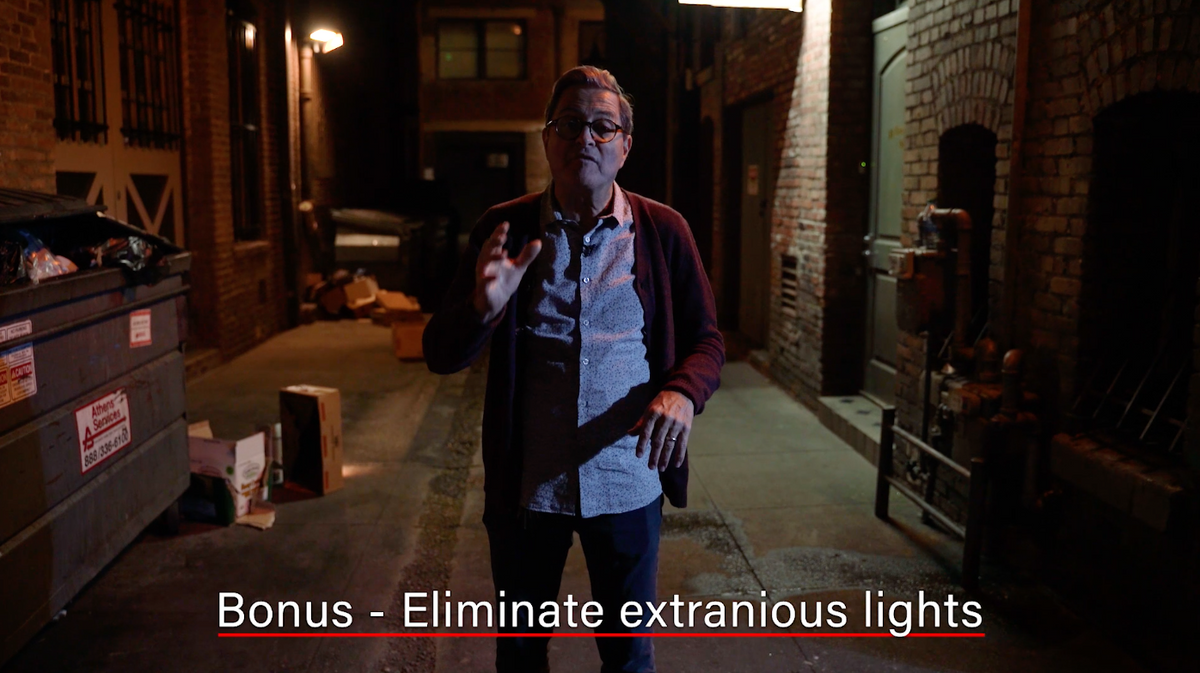

Make sure you get rid of all the light in the scene so you have complete control. We turned off every single light, took bulbs out of the lights, the only one we kept was this LED here that we put cardboard on to be able to shape it.
Way down at the end we did use that little light that’s on a lamp as our silhouette light, but most of the light in the scene, we’ve created by putting our lights in place.
So there are your 10 steps for lighting motion! It’s such a fun thing to do because your light becomes a character in the scene! It really gives you dimension, excitement and mystery, and then it gives you that moment where they reveal themselves. Using the right light creates drama, tension, and your light itself becomes a character in the scene.

Savannah and Sean were our amazing talent today and they did a great job helping us demonstrate.
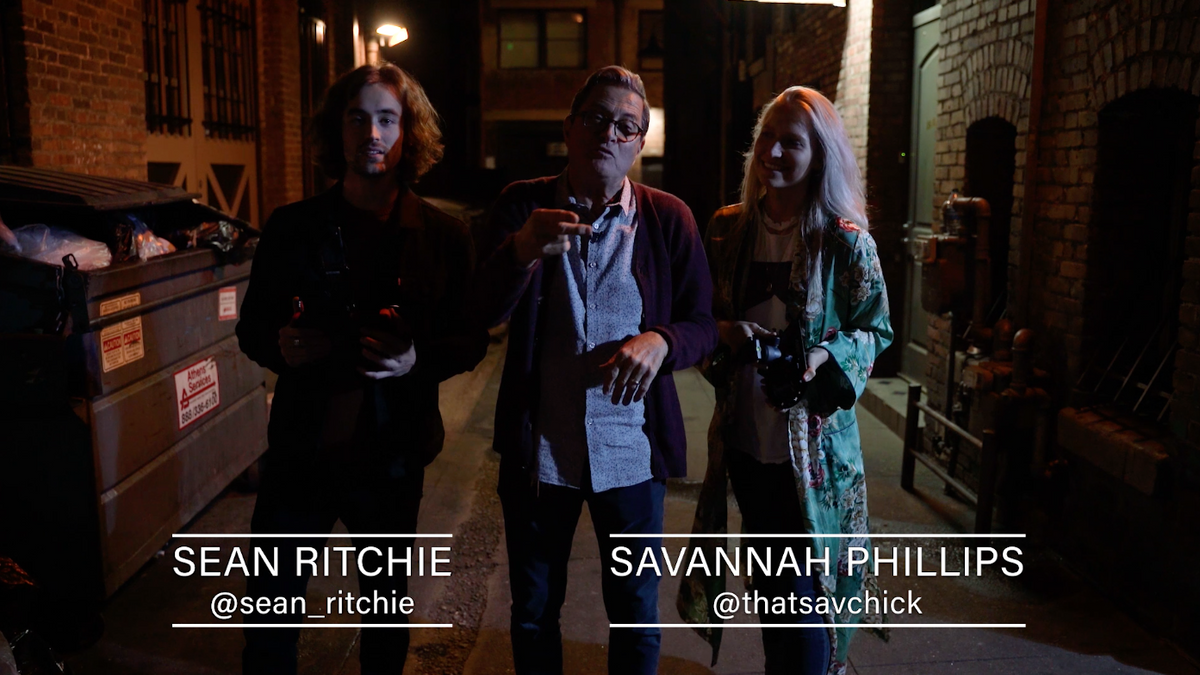

So let’s watch this scene of them moving through pools of light we created.


Lastly, we want to thank our sponsors Platypod which we used to put all the lights up on the walls and for our camera on the ground!
And of course, we used the Hollyland Technology to get the monitor off the camera and have a wireless signal, which is really helpful in a situation like this.
The lights are F&V lights. We used the 200S and the 200, which were both great lights to be able to light our scene here and give us all the things we needed to create those pools of light.
Last of all we used 1 Apture 120D.
Keep those cameras rolling, keep on clickin!
GEAR USED:
Platypod tripods https://platypod.com/
B&H: https://bhpho.to/2FLE3mp
Amazon: https://amzn.to/2nxN8XP
Canon C200
B&H: https://bhpho.to/2Crtkr8
Amazon: https://amzn.to/2VwFl9c
Sony A7 III
B&H: https://bhpho.to/2tudps8
Amazon: https://amzn.to/323KJTv
Atomos Monitor
B&H: https://bhpho.to/2HoMrFA
Amazon: https://amzn.to/30ZscGF
Hollyland Mars
B&H: https://bhpho.to/2M4S93u
Amazon: https://amzn.to/2VrK63U