

Today on The Slanted Lens we dive into easy product lighting with 1 and 2 lights! It’s amazing the different effects you can get with just 2 lights!
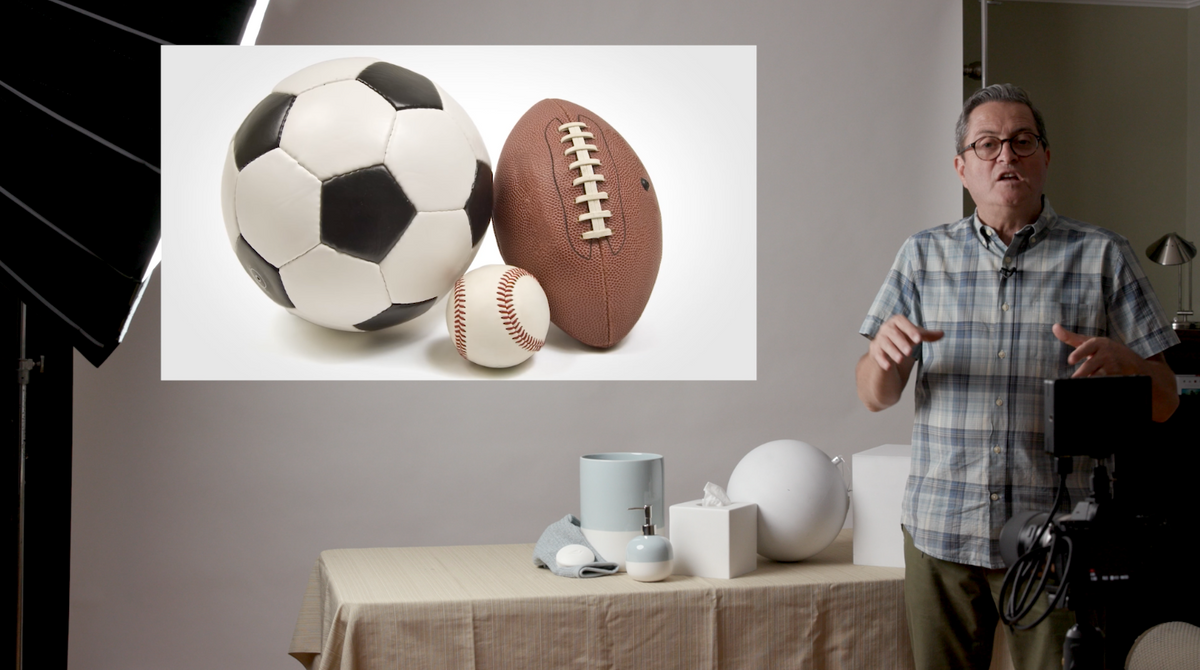
In this new episode of The Laws of Light we’re going to move from the ball and cylinder to subject matter. Objects that you photograph all relate to the ball cube and cylinder. So let’s see exactly how they relate, how you can get the right light for a subject that is not a cylinder, it could be a toaster, a cereal box, or something that we’re going to photograph on set.
So here’s a look at product photography, from the Laws of Light.

Let’s start with a quick recap of the ball and the cube.
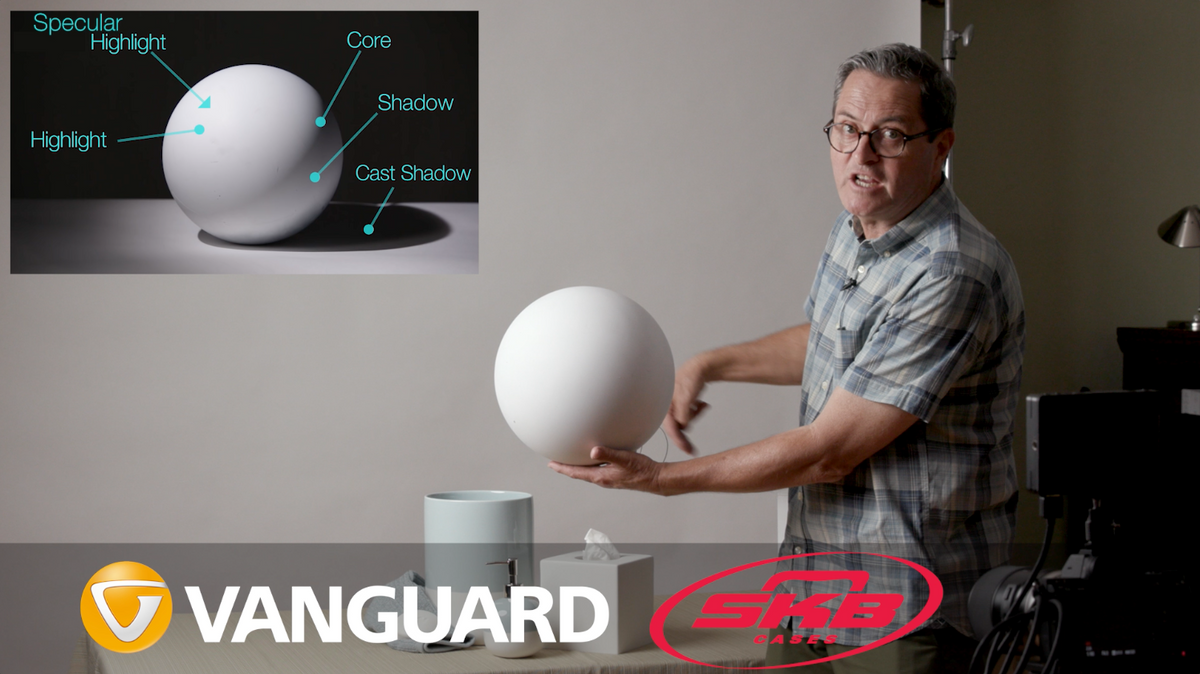
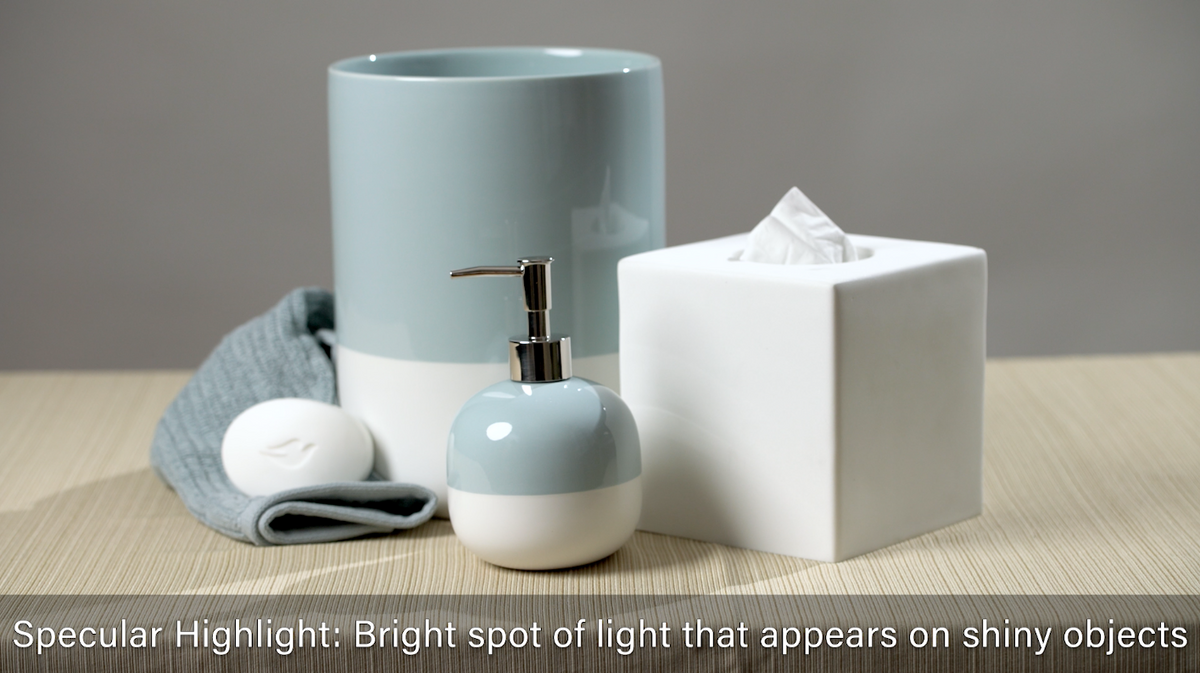
Remember when you turn a light on a ball, 5 things happen. You’ve got a highlight, specula highlight, a core, a shadow, and a cast shadow. It doesn’t matter where this is at, where the light is aimed, those 5 things will always happen if a light turns on. So we’re going to use that to our advantage as we use products together in this quick product shot.

Now with a cube it’s really important that we understand that when we turn a light on we’ve got the highlight side, the shadow side and the top. We want all 3 of these to have different values. If you want to learn all about lighting the ball, cube and cylinder go over to watch each lessons in the laws of light series, and you’ll learn exactly how to light each of these.

Now we’re going to learn how to light a product shot with a ball, cube and cylinder as our guide.
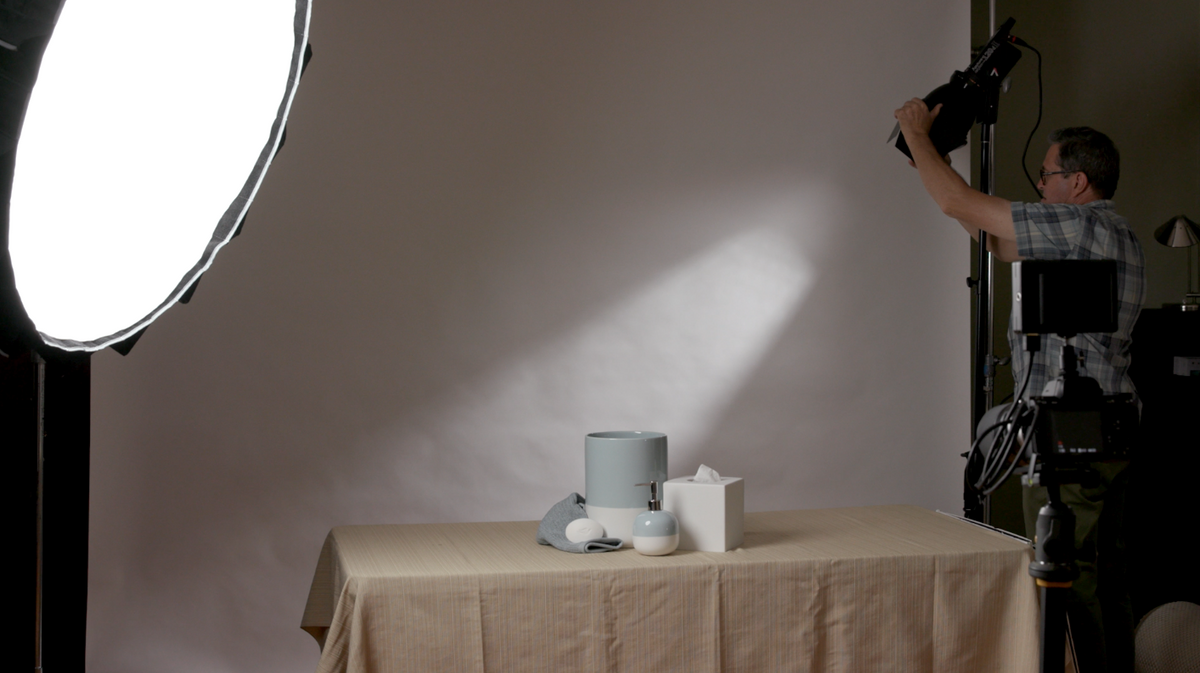
Single Light Source
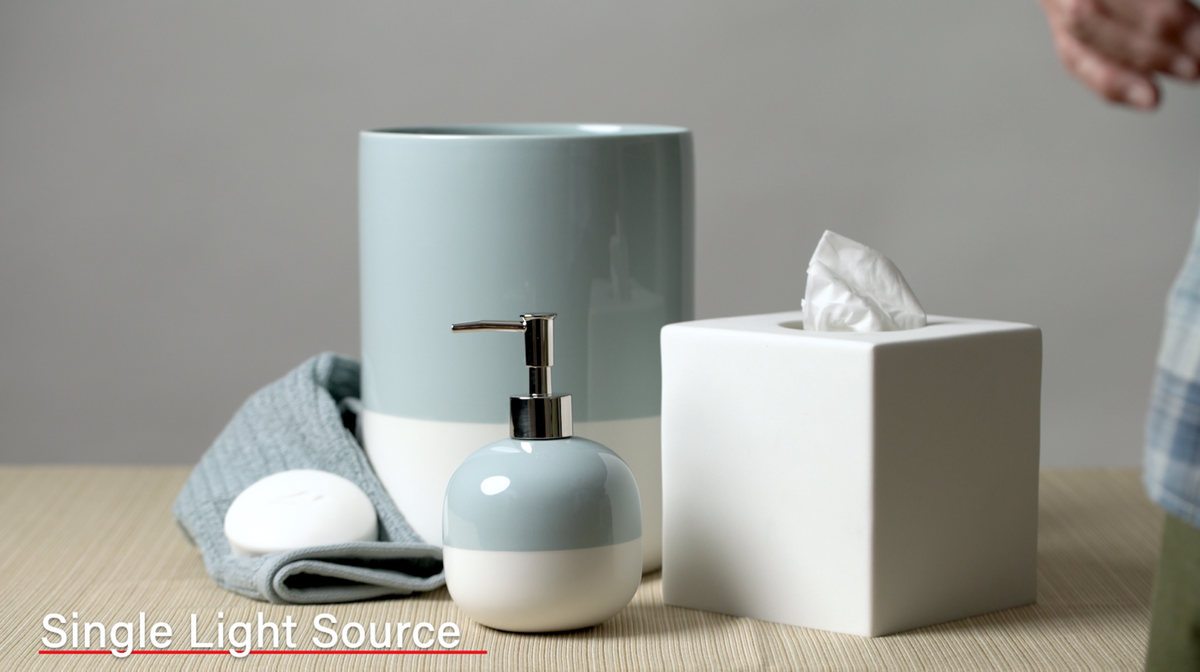

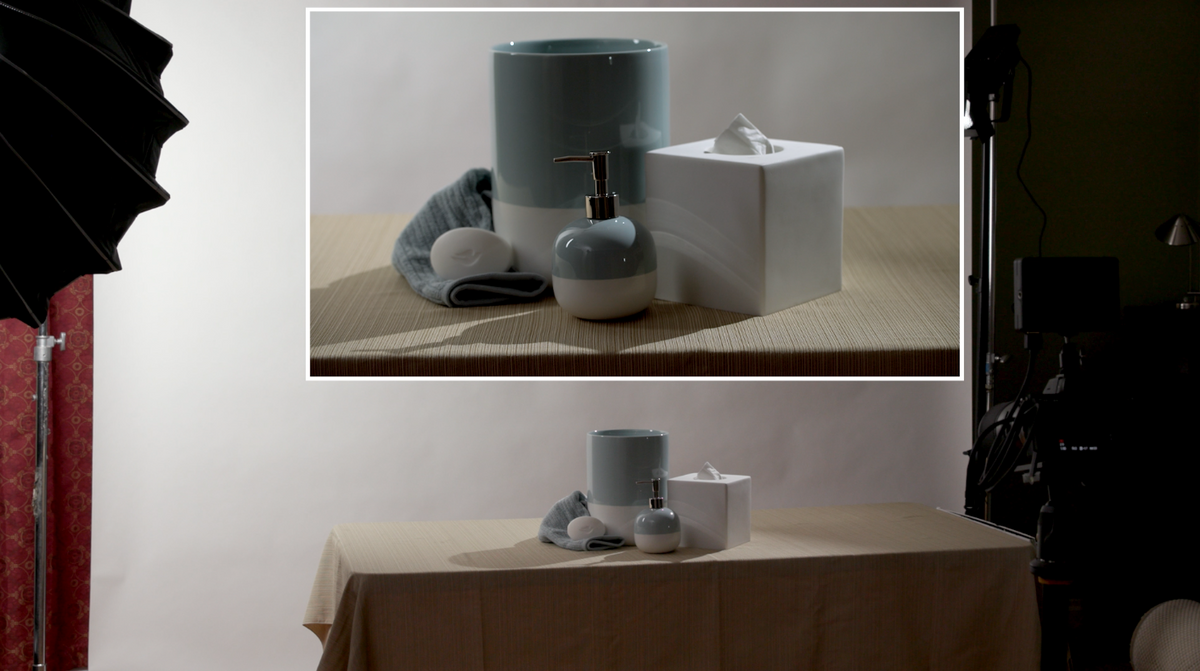
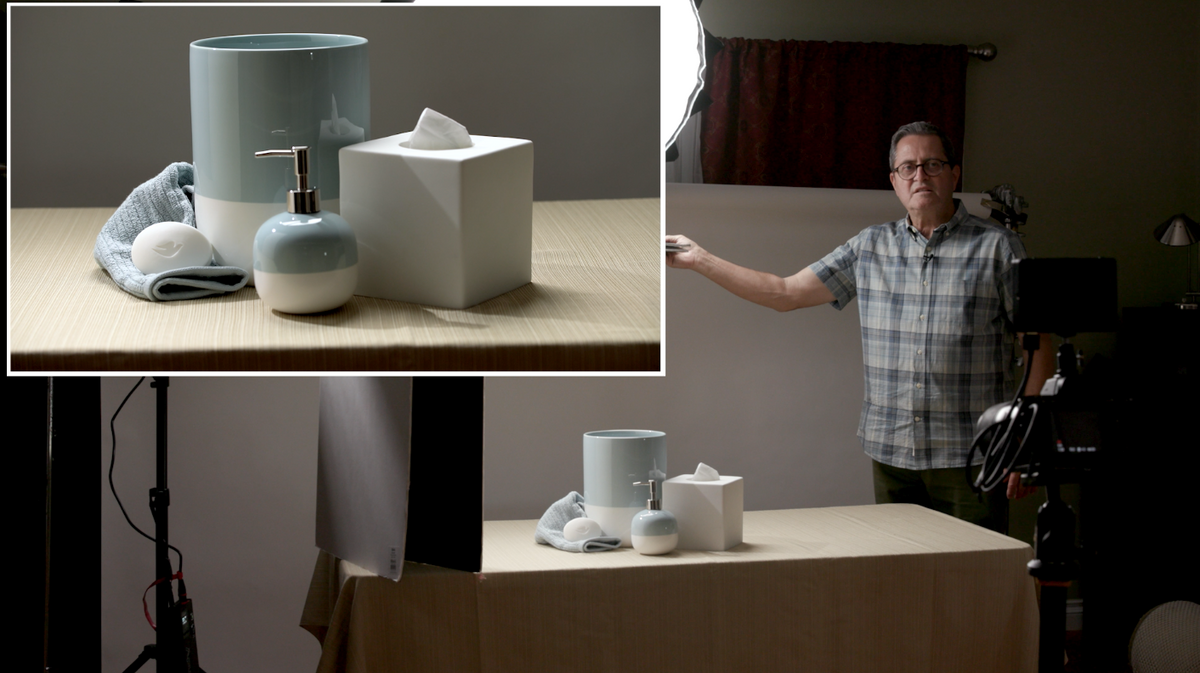
Everything in life is a ball cube or cylinder. Sometimes objects are a combination of a ball, cube or cylinder. Let’s first take a look at our subject here and see exactly how to light it as a product shot to be able to give us the best separation and depth. We’ve got to take a 3-dimensional world into a 2-dimensional experience and make it look like it still has depth.
First off, my camera is a little too low. You can’t really see the top of this Kleenex box, so first off I’m going to move my camera up. I want to be up high enough to be able to see into all 3 sides of the cube. I’ve also got this cube aiming straight at the camera, and I should just adjust a bit to decide if I want more of the highlight or the shadow.
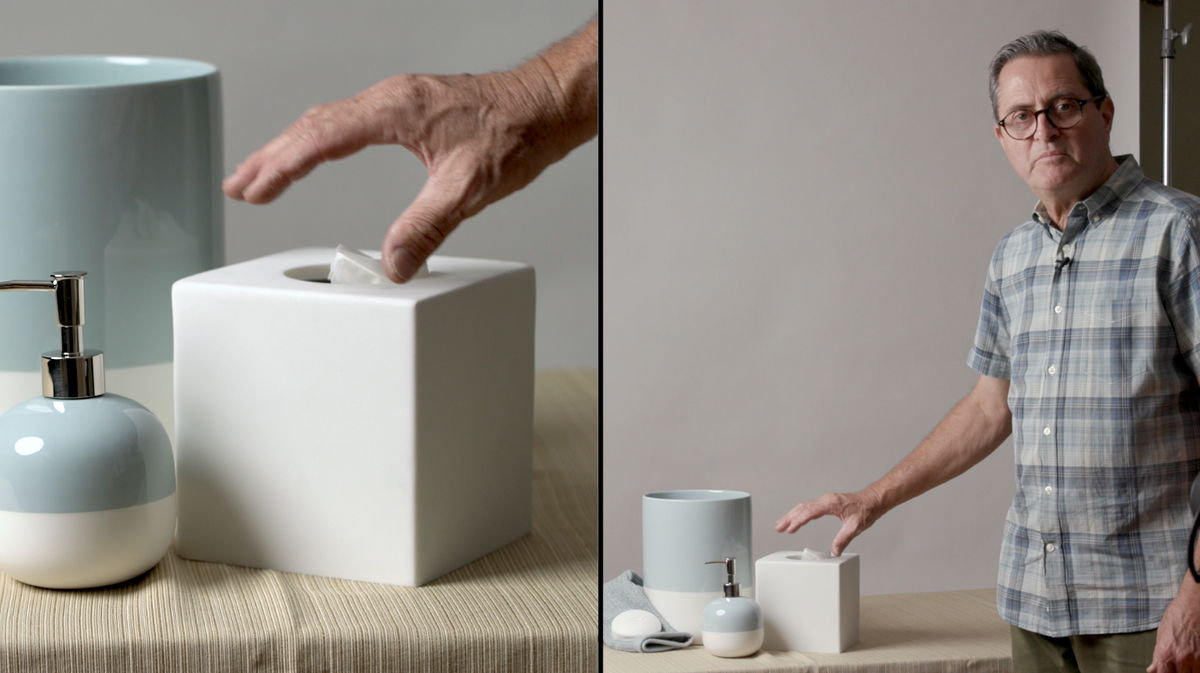

This cylinder has a night highlight that rolls into as shadow and it gives us the highlight of our cube in the shadow of the cylinder. This cylinder has a very reflective surface so that shadow may not be quite as distinct, but it’s there.
Now we have our ball in the foreground and it is doing exactly that. It’s going to fall into the shadow from the background. We’ve got the cloth off to the side around the cylinder and then out dove soap sitting on the cloth. This is our Dove soap ad, and on there, if I move that soap and aim it straight towards the camera, there’s no more logo on that Dove soap. It’s completely washed out, but if I move it this way and tilt it up towards me, I now get that highlight and shadow across and can see the logo no problem.
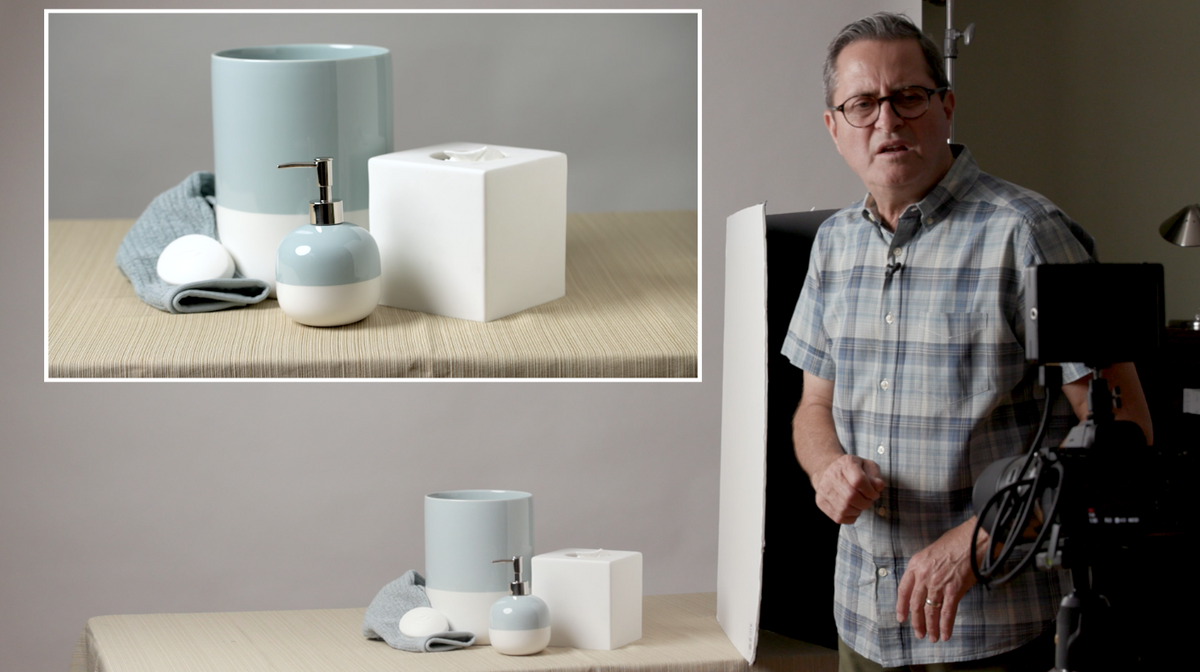

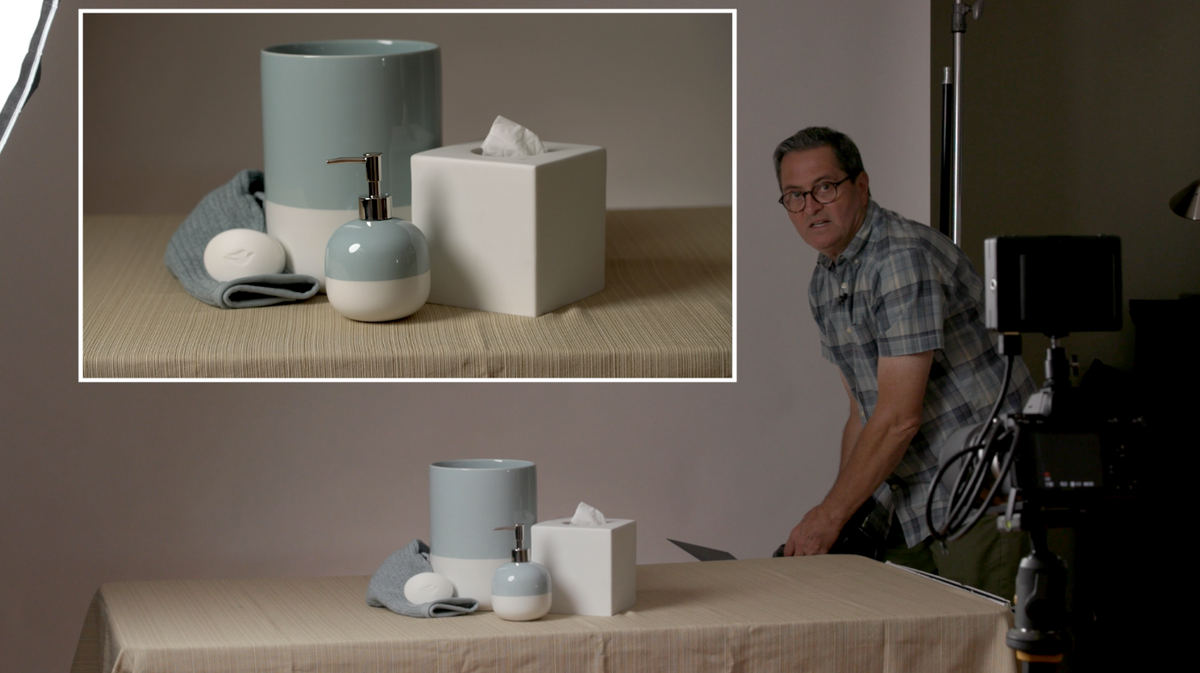
Now I can simply bring in a card and I can decide how much shadow I want! If you want there to still be a difference, just back the card up a bit and get the exact amount of shadow you need.
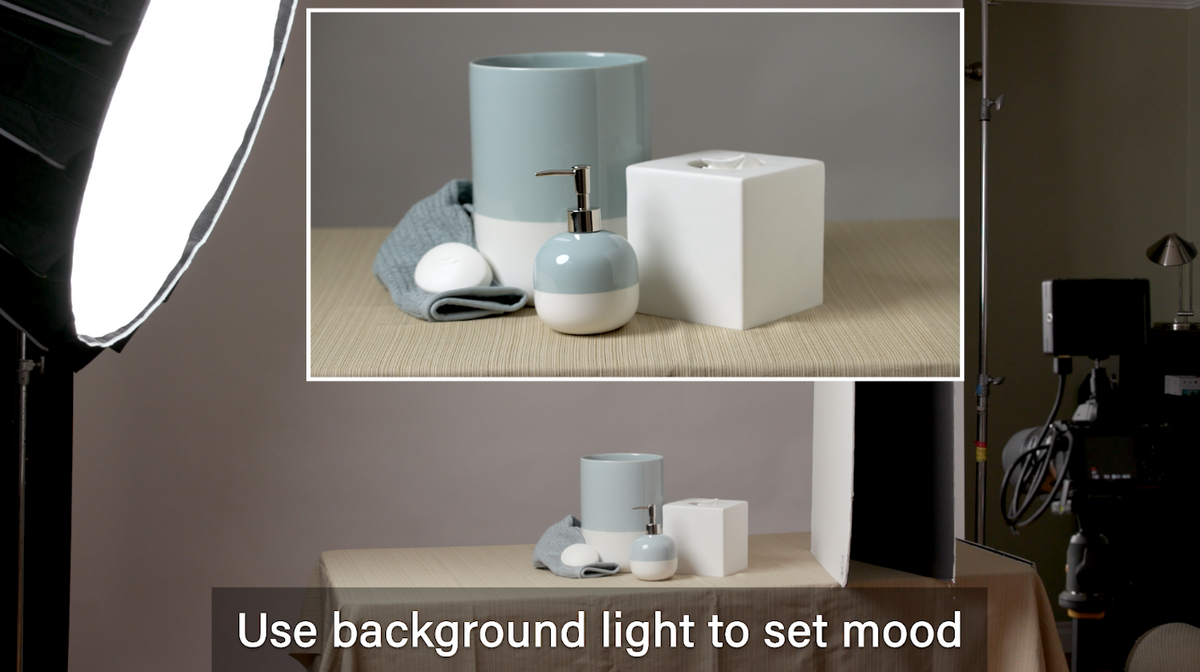

Now I get to play with the background, cause if I look at the background here, I can do one of several things with it. If I tip this light away from the background, the backdrop is going to be much darker, and have more separation. You can see my subject matter separated from the background a lot more easily. I can pull this card out to create more depth or I can pull this in.
If I decide I really want my background to be brighter, and I want my subject to maybe be just a little moodier, I can aim my light directly at that background and give myself a much stronger highlight on that background.

Two Light Sources
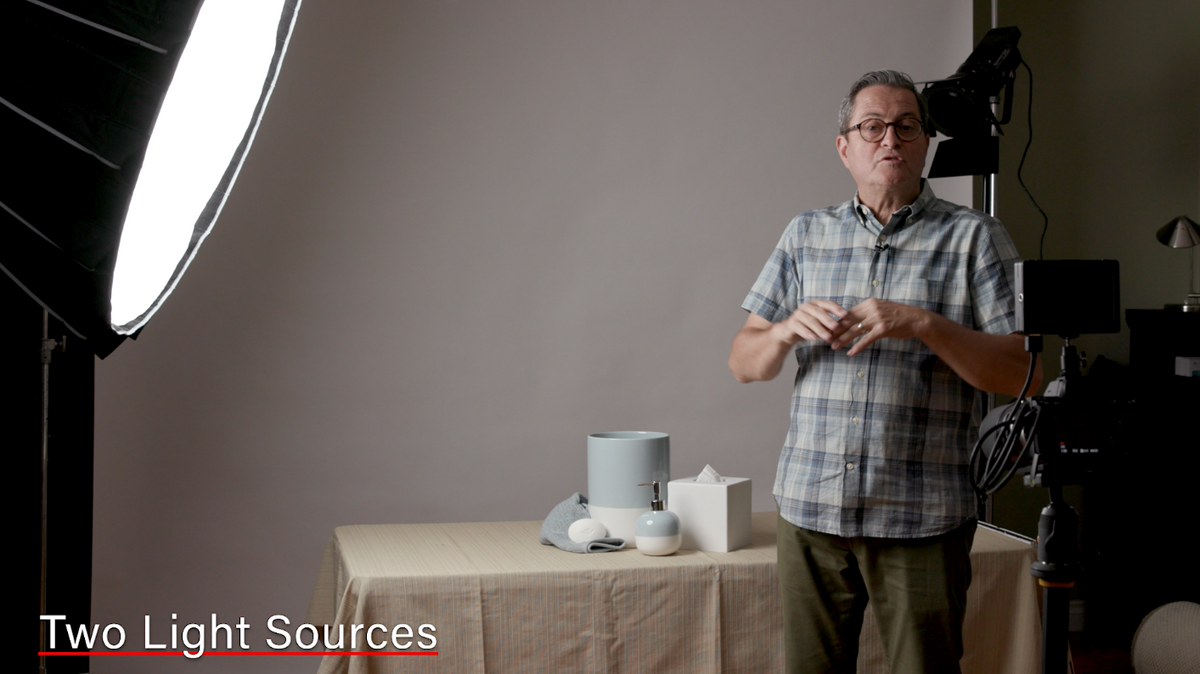

So far I have been really working with a soft light source. It’s considered a soft light source because it wraps around and then also has the cloth. We want that light source to not be quite as hard. Sometimes when you mix a harder source with a soft source it can create a really nice look. Now in the back I’m going to add a second light. This second light is going to give us some highlights on the tops of these surfaces and right now it’s a little too much. Right now we need to close some of the barn doors on this harsh light to control it a bit so it’s not so harsh on everything.

Now that we have this secondary source, it gives us the ability to go back to our main light and again we can decide if we want this to be a more direct light on our objects or a little more moody.

Now we have a really bright background with a little more shadow in the foreground, so I’m going to come back to where we were up front here, and let’s see what it looks like if we come way up front here!
I’m feeling like I’ve got a nice dark background, play with the shapes a bit and then can grab a card to add a bit of fill, to cut a bit of my hard light. But this gives us a little more dimension, a little more depth than we had with the single light. We’ve got that hard light in the back that defines and the soft light in the front that just wraps.

Now another thing we can do with that second light is we have the ability to light the background and the foreground separately. I can take this back light and take it completely off my subject matter; I can totally separate my background, make a highlight on one side, or I could take this of and play with a grid with a soft glow from behind.
This gives us a nice separation for the subject matter from right to left, you can get a nice glow in there! I can put this up here and create interest by just making a shaft light across the back here. This looks great if you have a textured wall back there that you can just drop out of focus. Just gives you a nice amount of depth in the background with a little bit of heavy light.
Backlighting
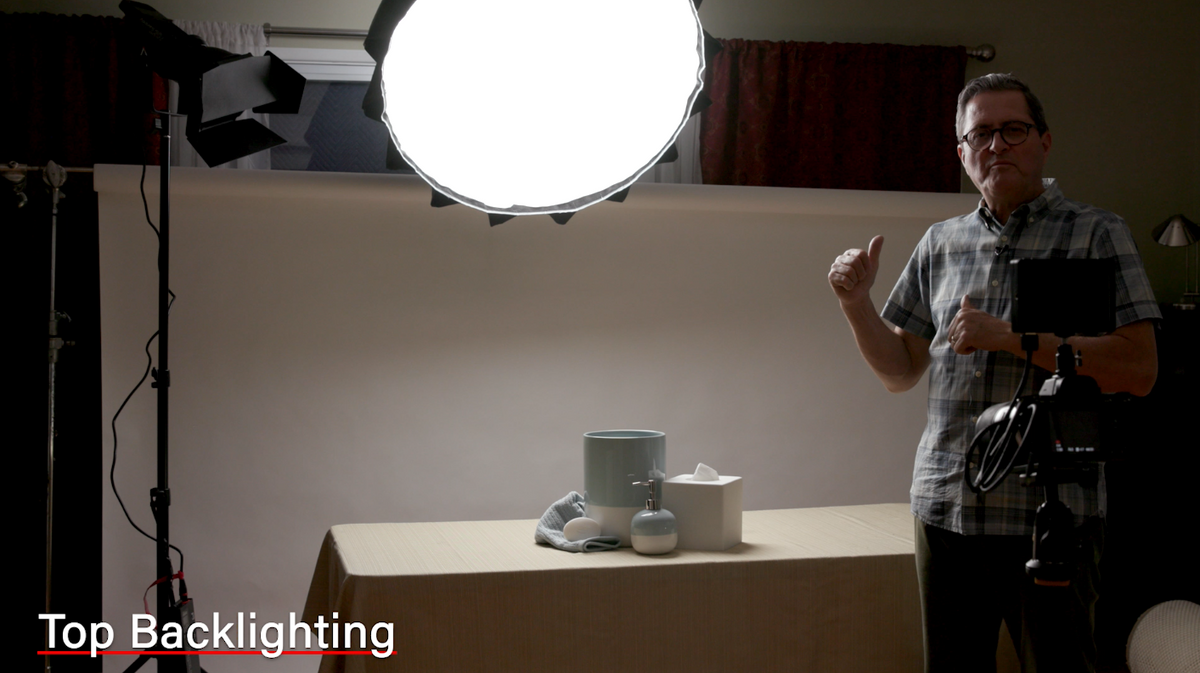

So I just moved the light behind our scene here and this is one of my favorite setups and it’s still going to have all the same principals as the ball cube and cylinder, but it’s called the talk back light. The light is up and behind the subject matter. What the talk back light does is gives us nice separation on the top it shows the rim of this cylinder here and shows the top of our ball here. Each one of those shapes is giving us a nice shadow, but all of the shadows are now falling from the top towards the ground. Our shadows are deeper here at the base and it’s falling forward. Now we can paint in and create each one of those surfaces with cards to get exactly what we want. We can decide just how much light we want on the sides here. I can diminish it and make it more directional. I can bring the fill up front which makes it flatter or bring it back which gives us a bit more shadow.
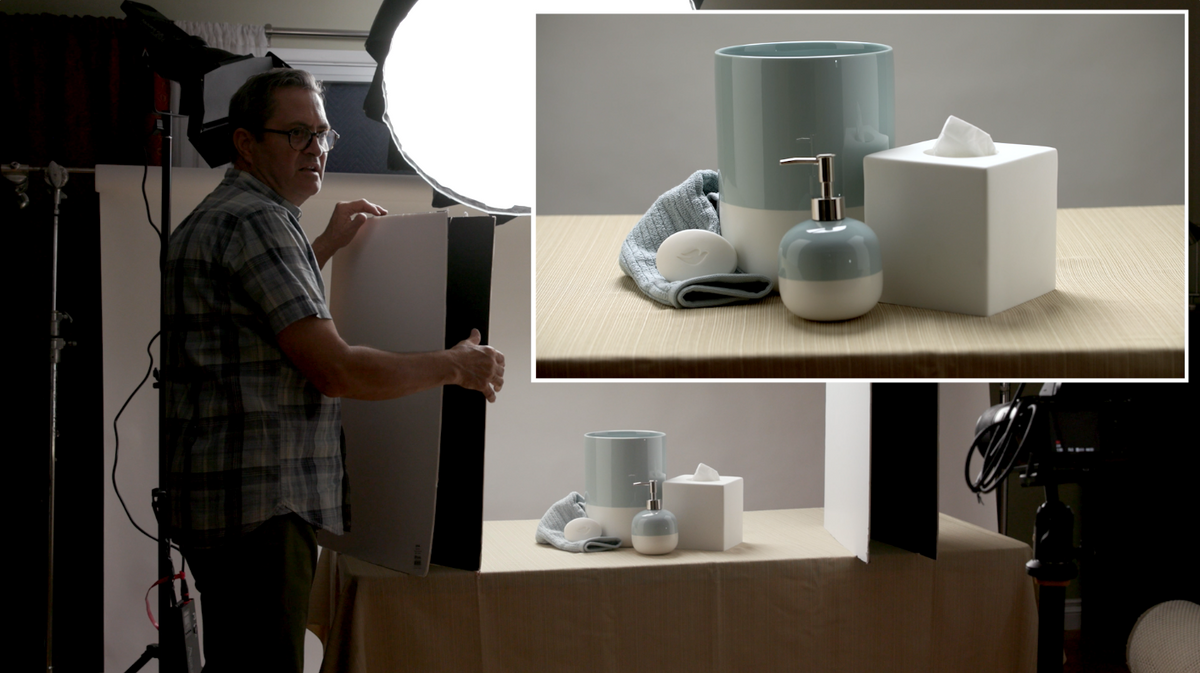

I can also turn on a secondary light; this light is a hard light and it’s going to give us hard light on our soap, on our subject matter and as we turn that light on it gives us definition to a lot of the subject matter. You can also use a small little mirror if you want to give it a kick across the soap.
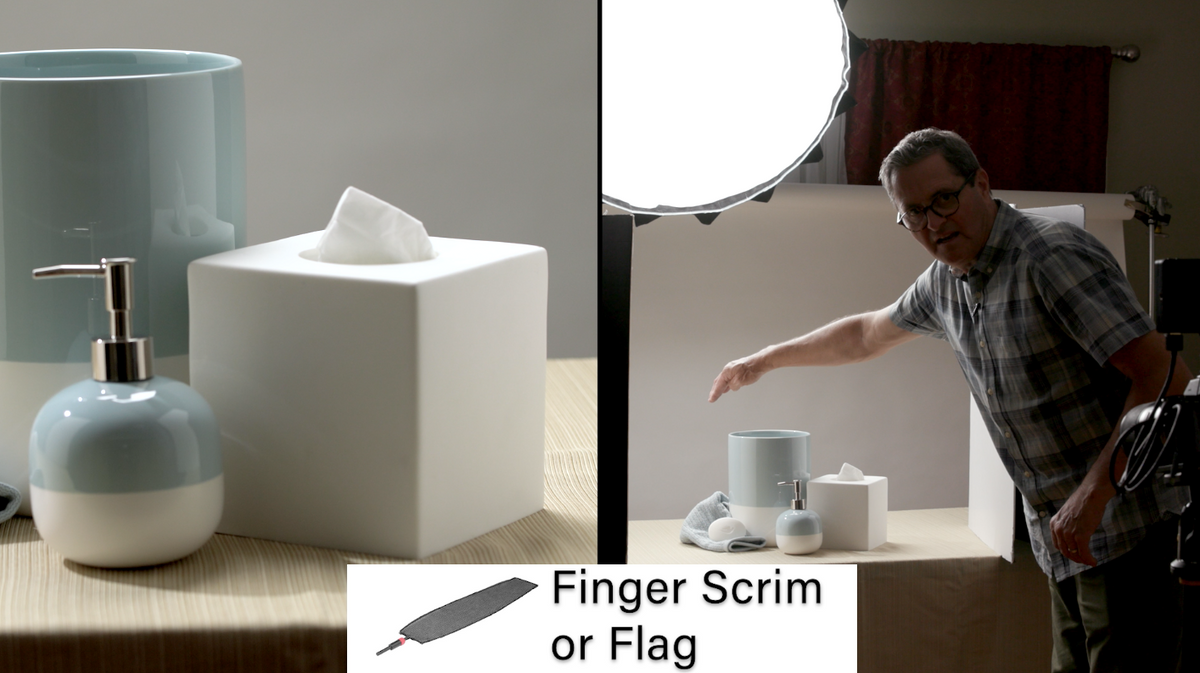
The only thing here that I’m not loving right now is this light right here across the cube. So I would probably cut that by bringing in a flag or a Finger Scrim.

So this really is a fun and exciting way to light things. Food loves this kind of photography; from behind coming forward. This is a great way to shoot so many products with the light from behind moving forward. It’s really the best way to light and capture products. If I wanted to make the background darker, all I need to do is cut a bit of that light with a card.
Conclusion

So there’s a look at the ball, cube, and cylinder and how it relates to photography. Remember, don’t be afraid of that 180 degrees behind your subject matter and setting your lights back there because it’s a fabulous place to set lights and be able to create interest and depth and make your products look so beautiful.
Get out there and try some of these things, send us some of your images on Facebook!
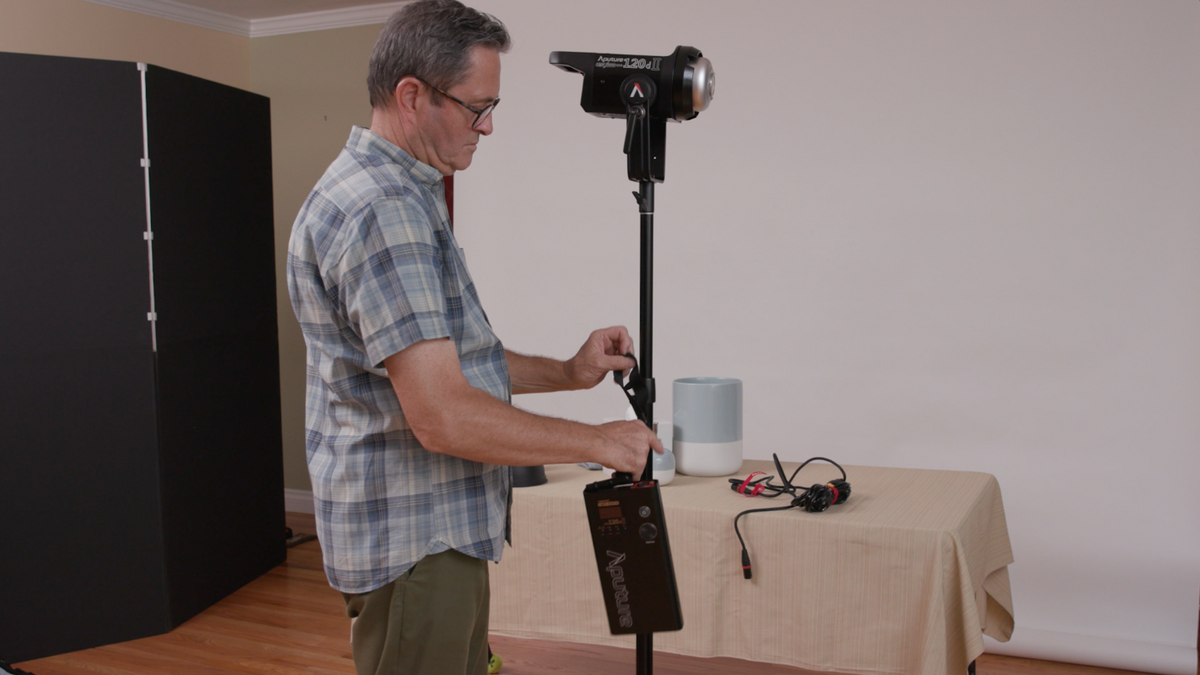

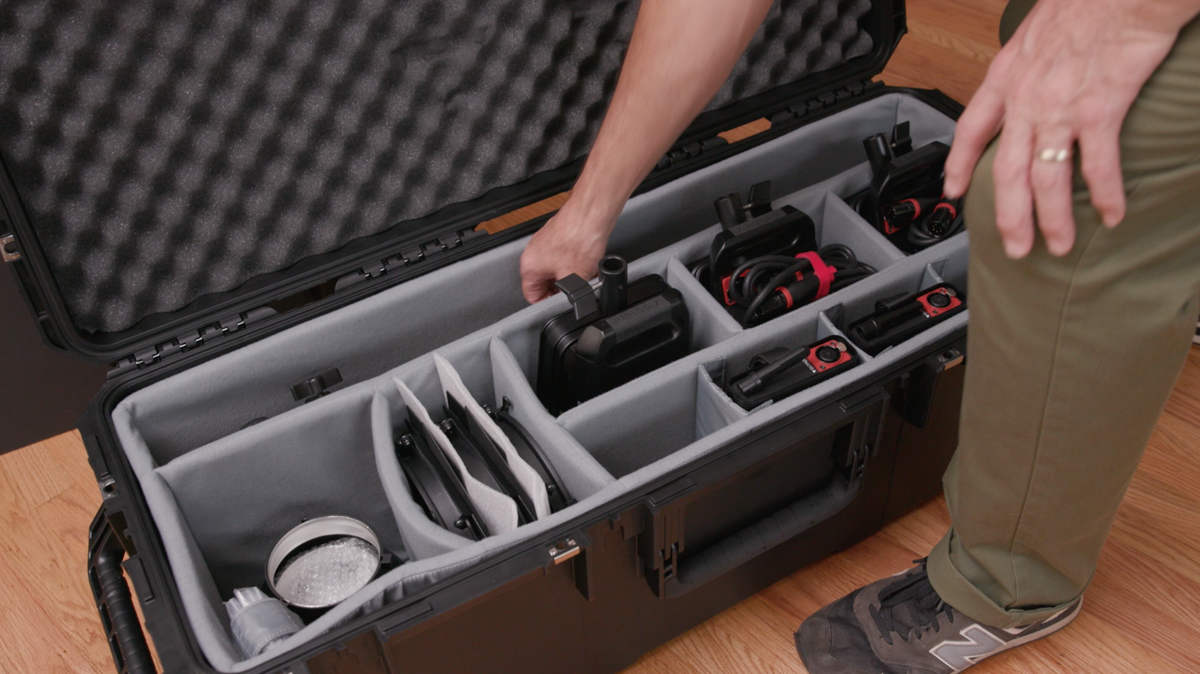
Special shout out to Aputure! We used all of those 120 D2s to do this shoot today. They are beautiful lights and in a great kit that I have here in an SKB case, which you can pick up by clicking a link below both on B&H or Amazon!

Also, we have a studio strobe download that will teach you how to do photography and this kind of setup using strobes. It’s really important to understand strobes because when you know how to rule the light you can rule the world.
Using strobes is the easiest way to shoot outside in any lighting situation. It’s the difference between a professional and an amateur, so get over to TheSlantedLens.com/tsl-store to get your course today!
Keep those cameras rolling and keep on clickin!
Gear Used:
Aputure 120 D2
B&H: https://bhpho.to/2MR3vqF
Sony a7 iii
B&H https://bhpho.to/2tudps8
Amazon https://amzn.to/2xs1OJt
Tamron SP 90mm f/2.8 Di Macro
B&H: https://bhpho.to/2m399wR
Amazon: https://amzn.to/2lTGTNj
Vanguard Tripod https://www.vanguardworld.com/
Vanguard discount code: SLANTED LENS