
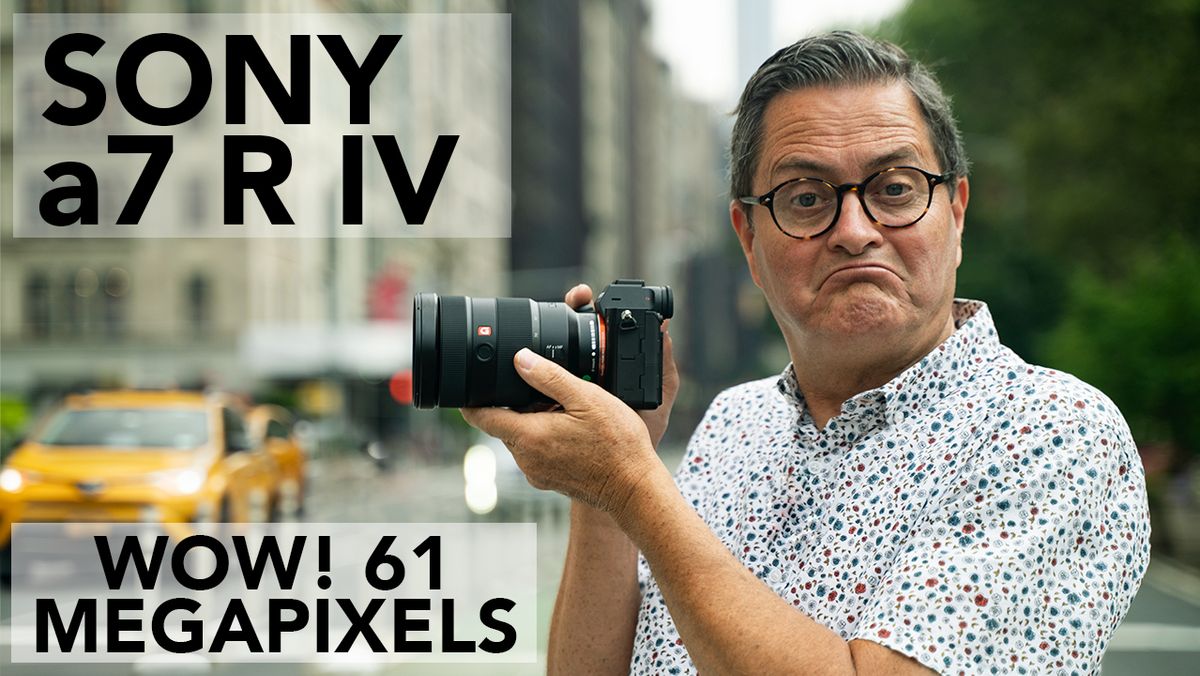

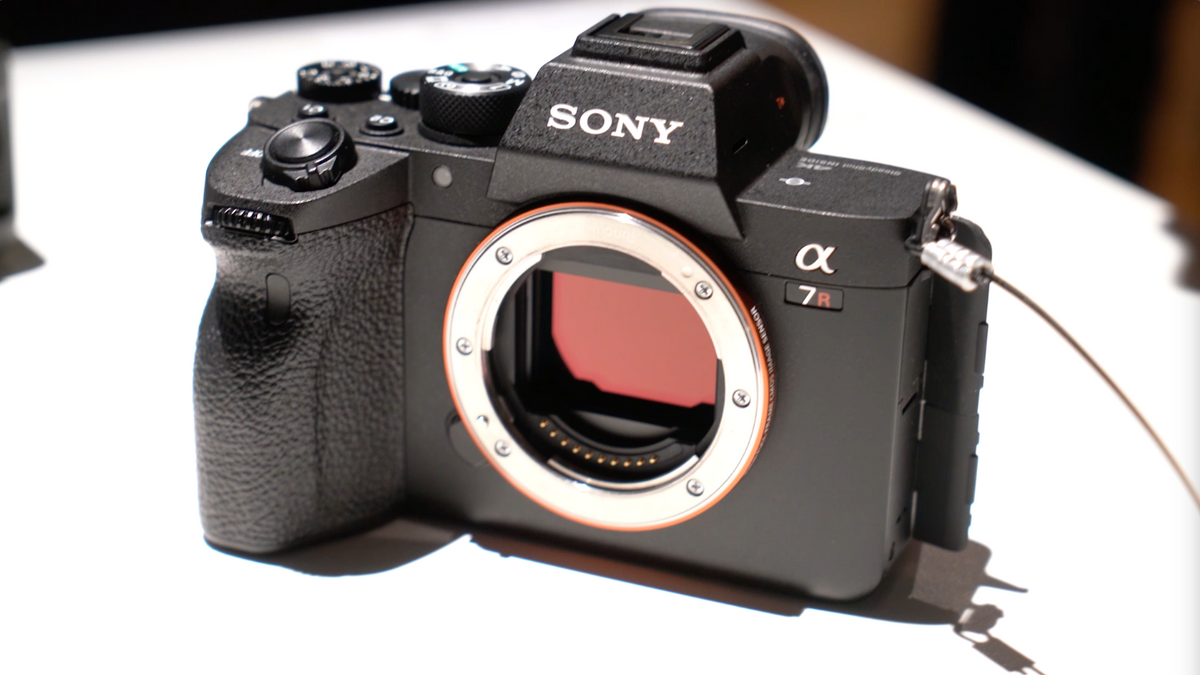
So we just got the announcement of the new a7 R IV and this is what I guessed Sony would be announcing because it’s a great place in the market.
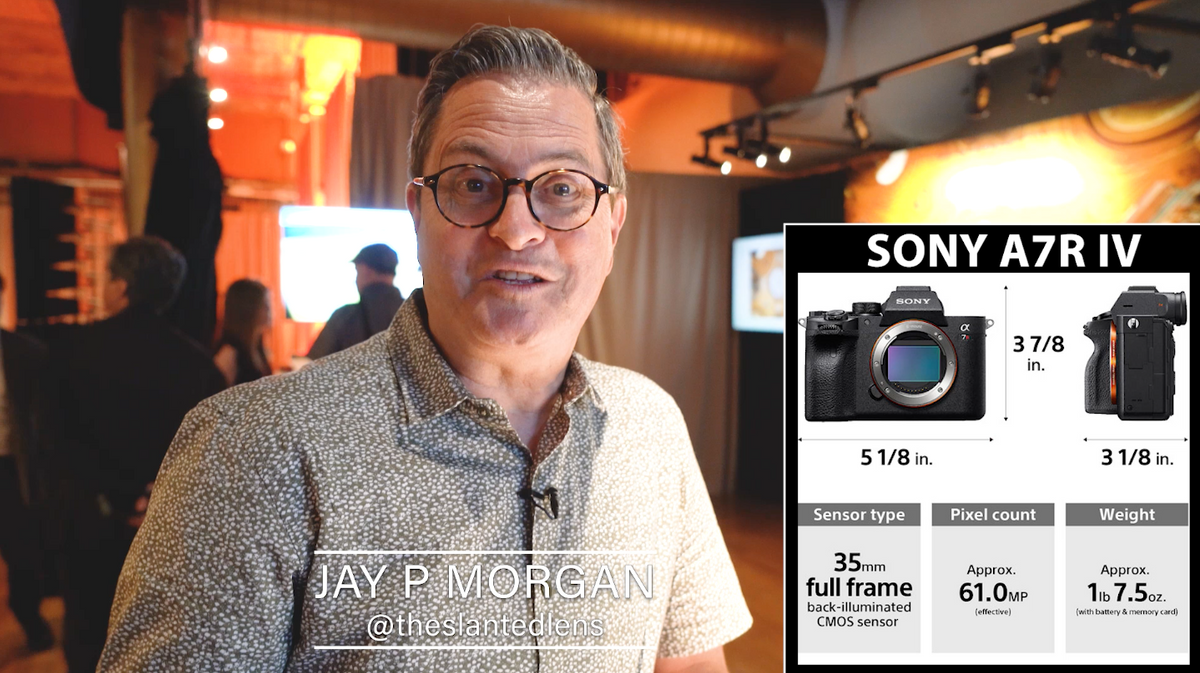
It goes up to 61 megapixels, which is fabulous. It’s got a great sensor and really good dynamic range. We’re going to do an image quality and ISO test, so let’s get started!

COMPARISON
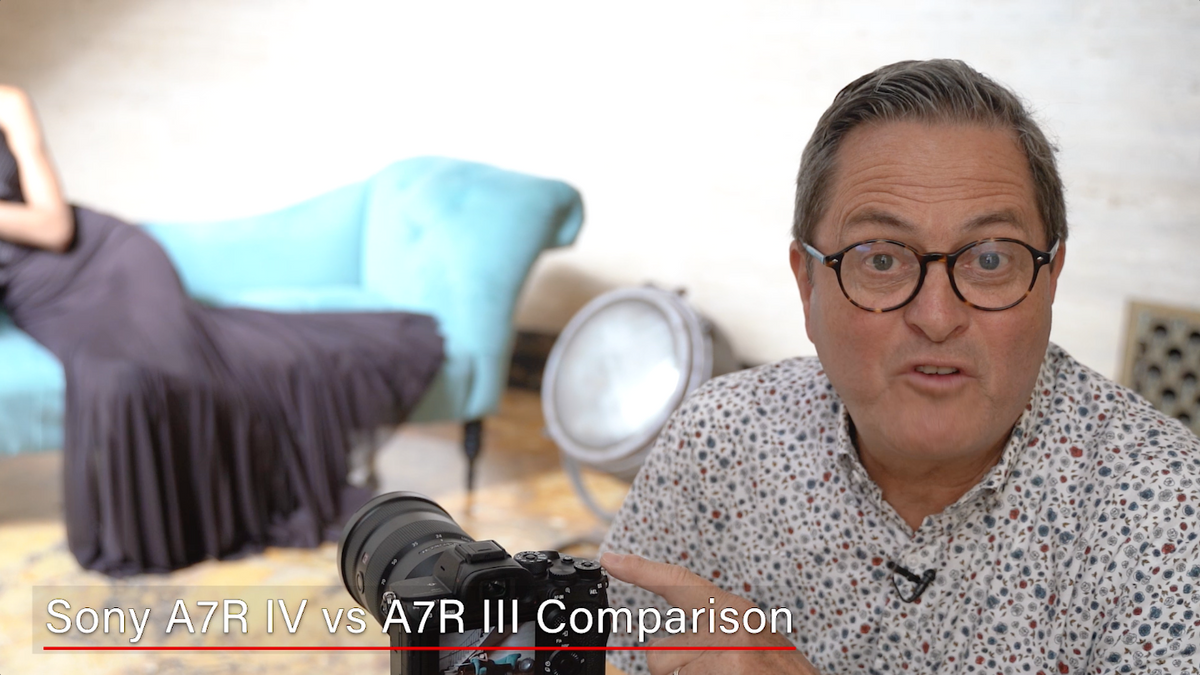

I really want to look at the a7 R IV vs the a7 R III and shoot the same image with the same lens on both of them at 24mm. I just want to look at the 2 together and compare those to see how much of a difference that 61 megapixels makes compared to the old a7 R III.
So I was very excited to compare the a7 R III to the a7 R IV, and I’m so glad I was able to get a hold of image edge to process the RAW images to be able to look at these two cameras comparatively to each other to see how they do.
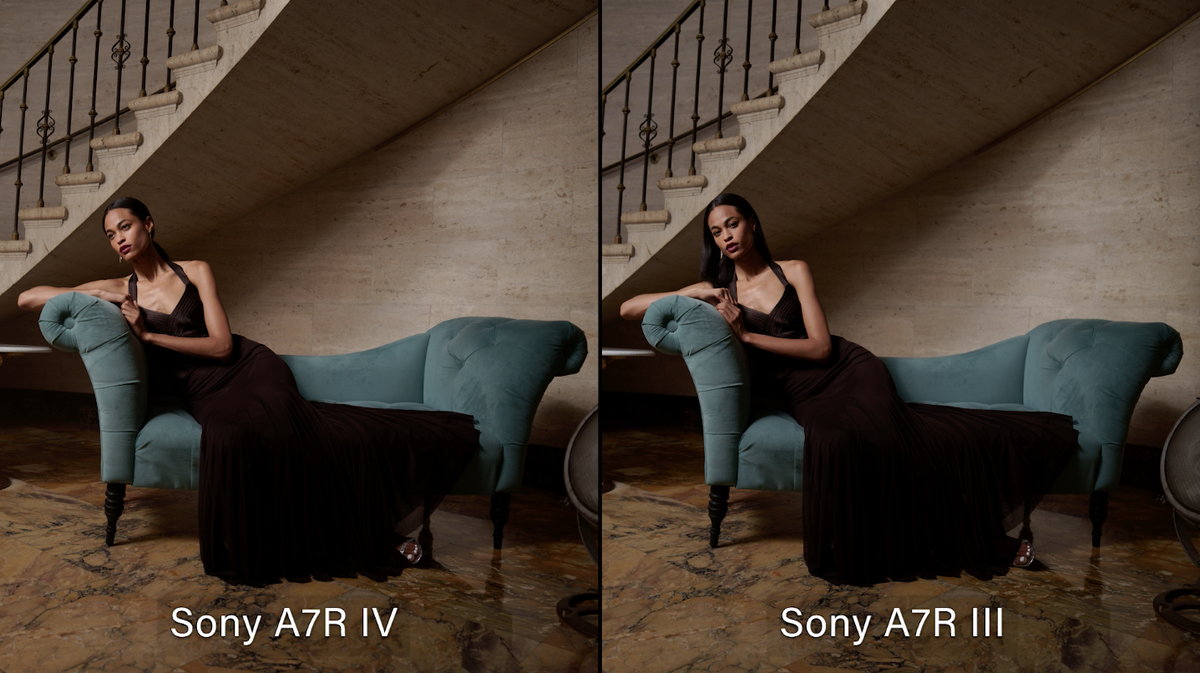

The first thing I notice is that there is a lot more detail in the a7 R IV in the shadows. If I look at the stairs here, there’s just a little bit. Not a ton.

When I blow up the faces on each of these and check them for image quality, I feel like the a7 R IV is definitely sharper. These 2 images were shot with the same lens, the 24-70mm, we just switched the cameras out. Same tripod, same vantage point, and focusing on her face, but I just feel like the a7 R IV is sharper, there’s a little more detail there.
SHUTTER SPEED TEST
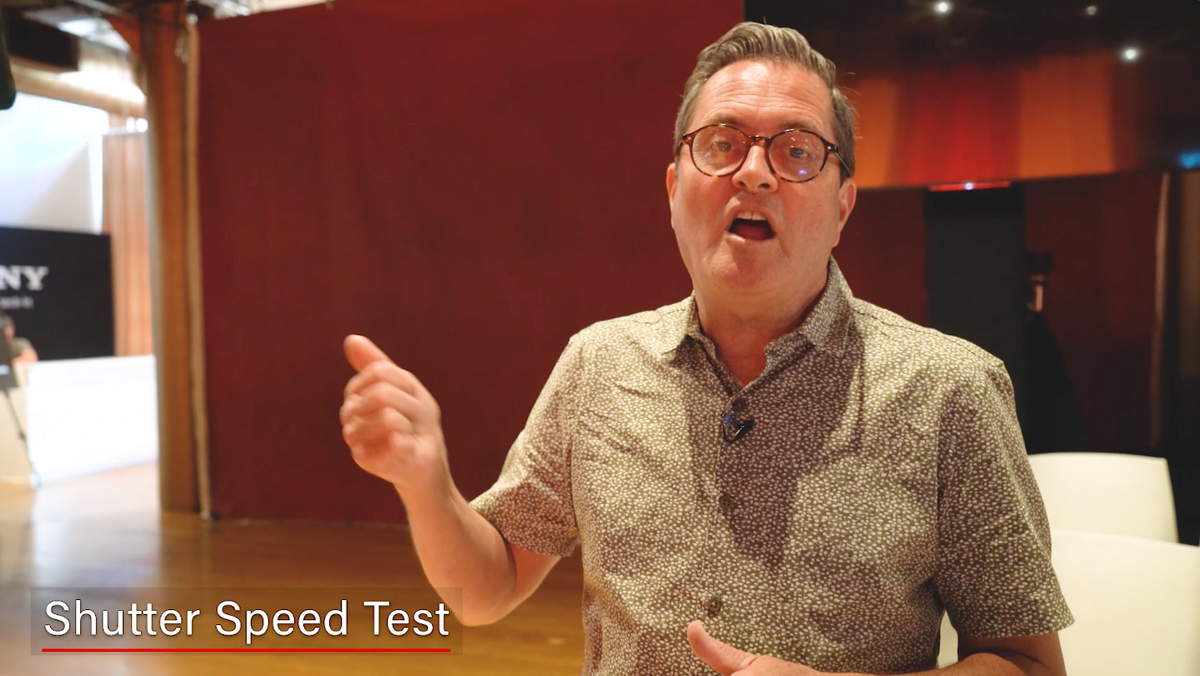

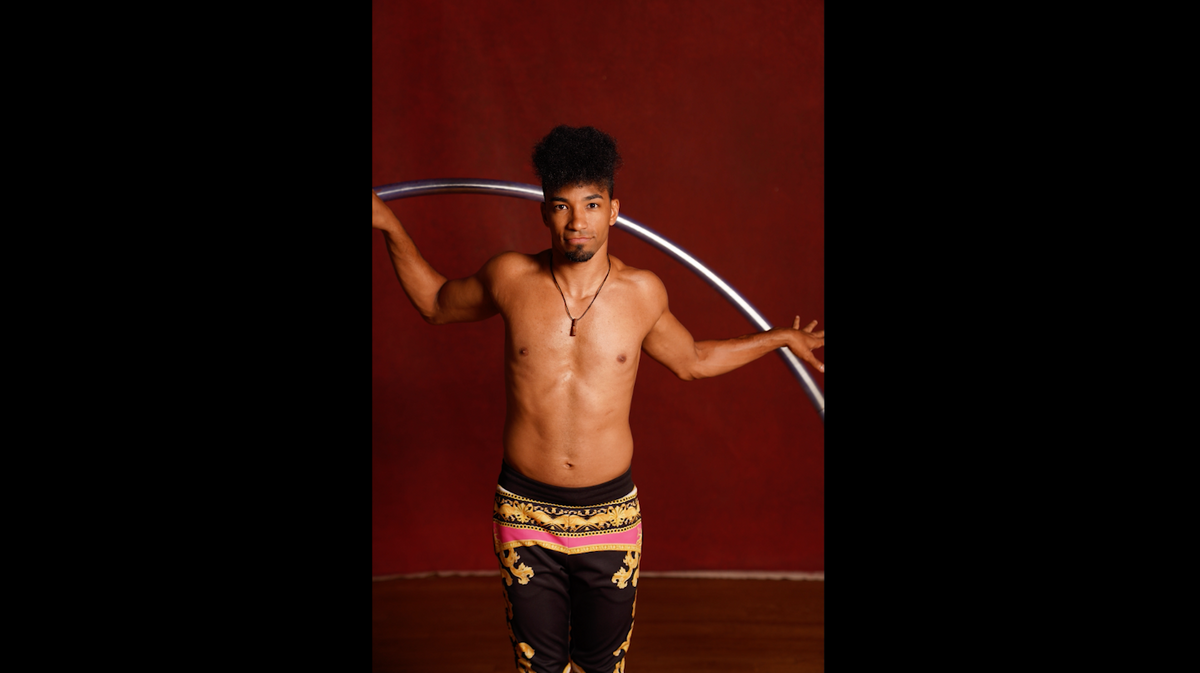
So we just tried some stuff with the a7 R IV on a burst speed, and I think it’s like 8 frames a second we’re doing. It’s keeping up with the strobes and it’s buffering quick but we’ve got very quick cards. We’re getting great images but it’s keeping up and the verse is not holding us up.
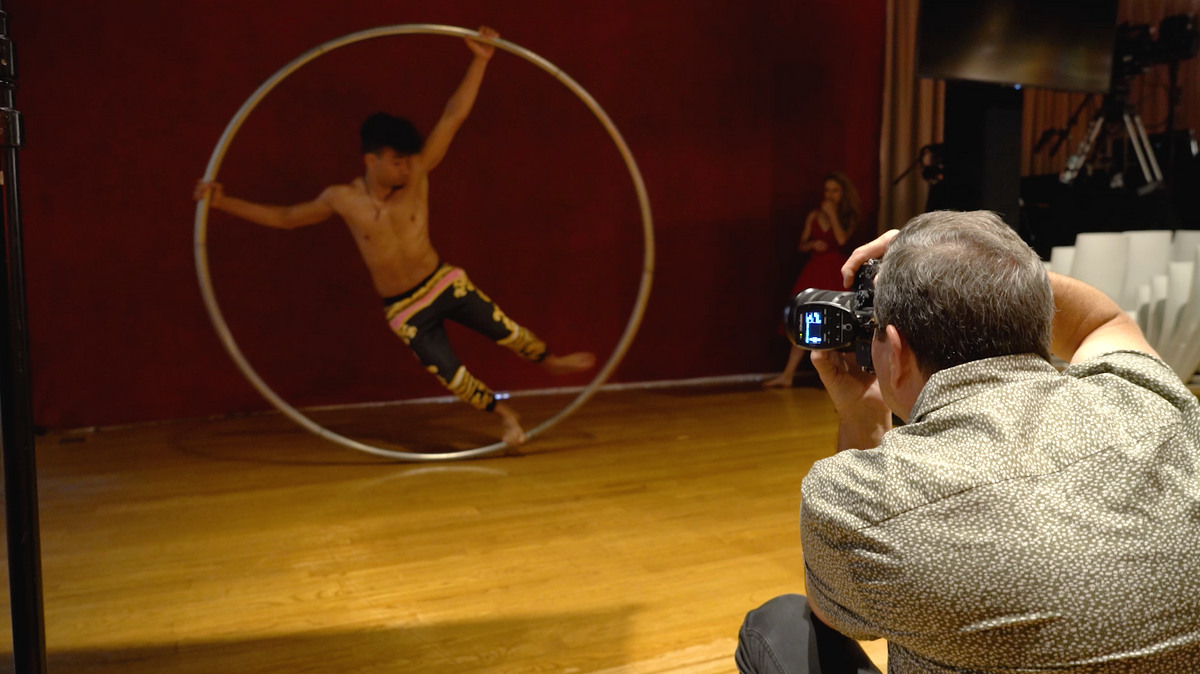

10 frames a second! I mean this is pretty amazing for this to be shooting 10 frames a second because it’s now at the lower end of the a9 and gives you some of the capabilities of the a9 in this body. 10fps at 61 megapixels is pretty amazing!

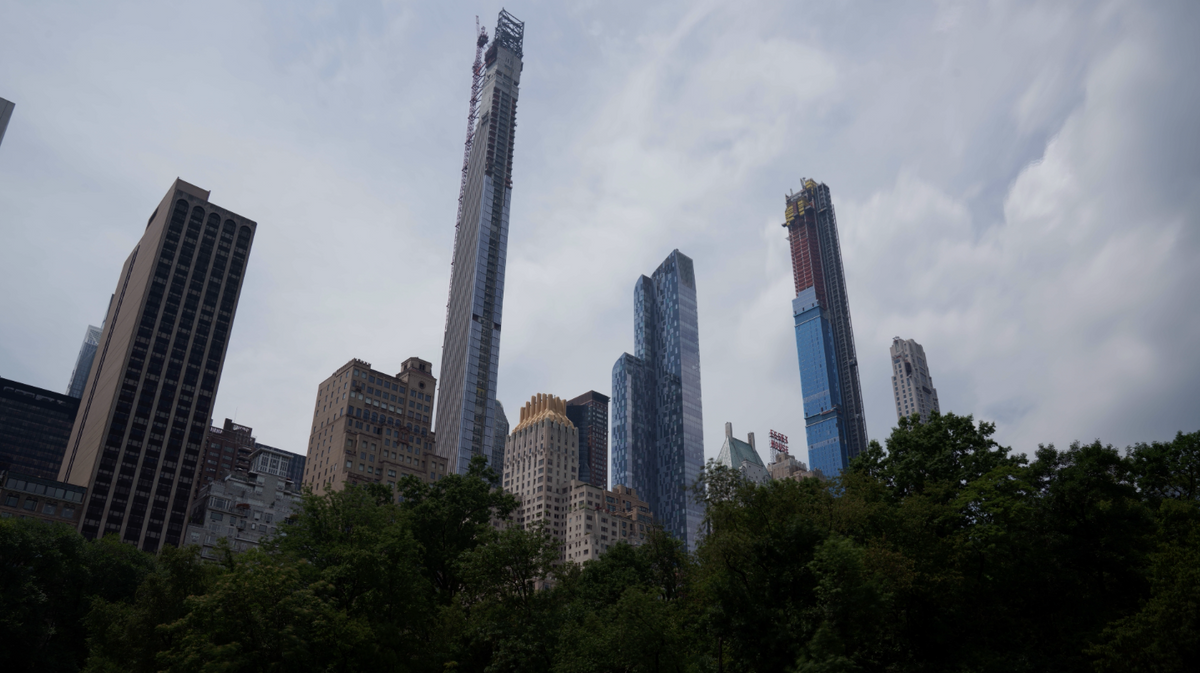
DYNAMIC RANGE TEST
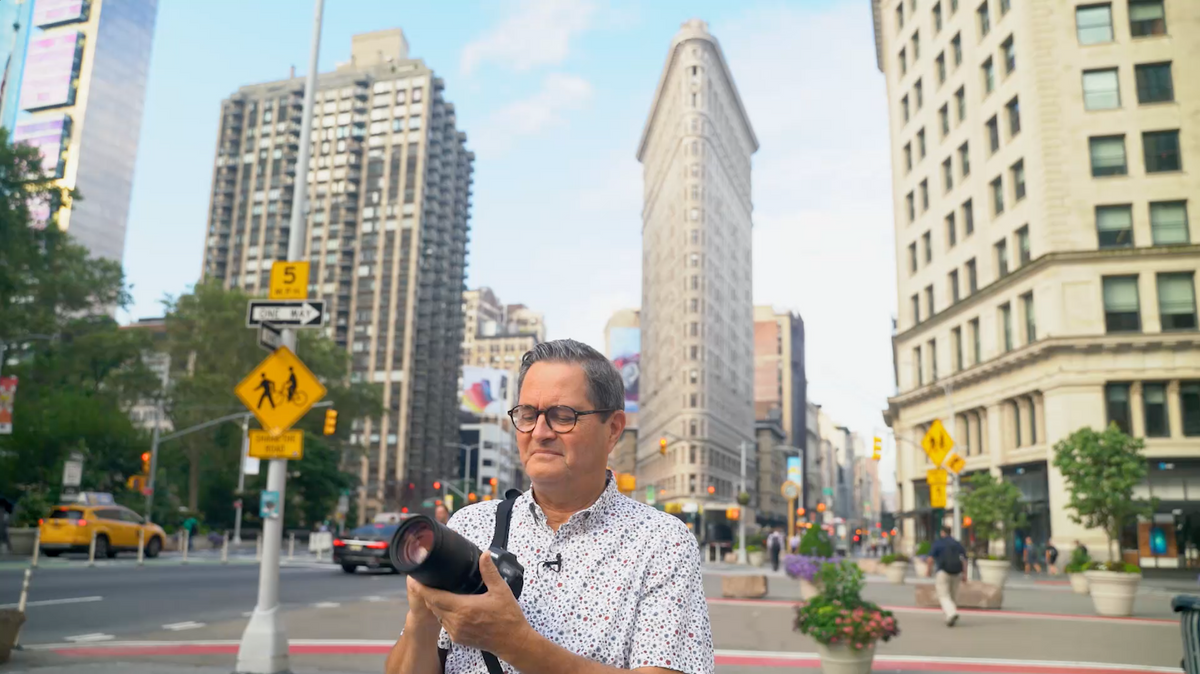

So we shot range test in New York City. I’m standing in the shade looking back at the flat iron building. So very contrasty situation because my face is basically in the shade, pretty heavy shade. But I’m looking back at that flat iron building and it’s got a high hot sun side and then it’s got a shadow side on that building. So it’s an extremely wide dynamic range and now we’ve over and under exposed it and we’re going to try to bring those back.
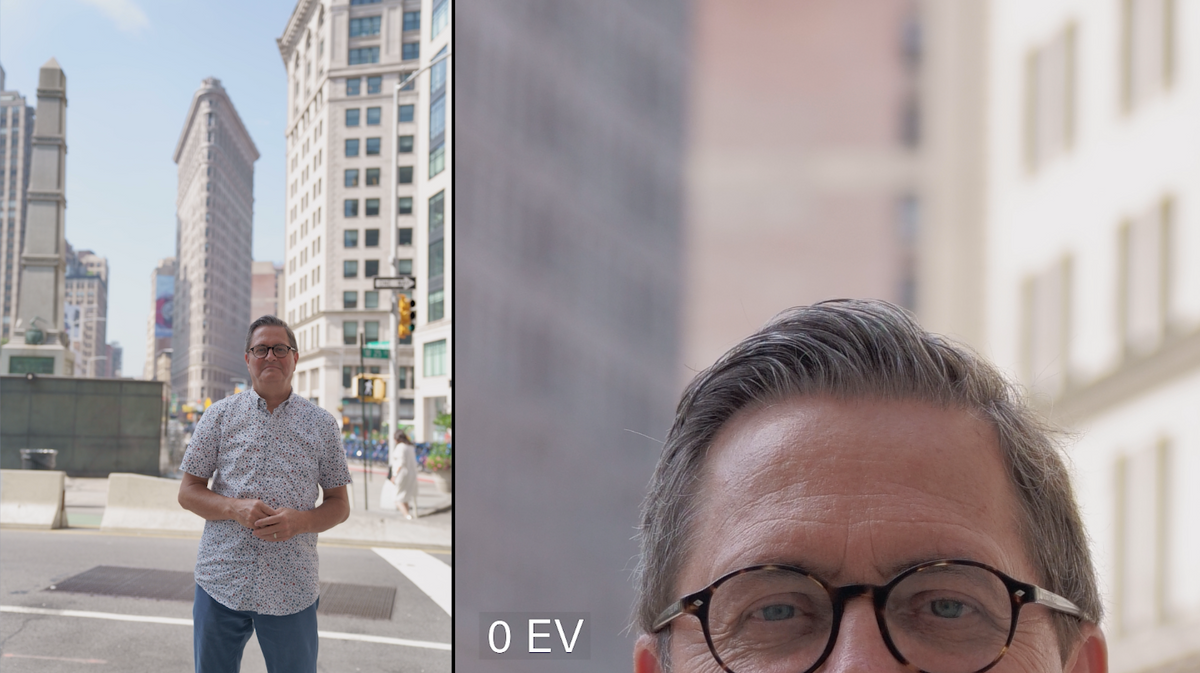
0 EV
So here’s our normal image. My face is a bit darker than I would like, but I’ve got such a huge dynamic range here that that’s about as good as we could get it. But this first image looks really good. I’ve got detail in the shadows in the background, it just looks really good.
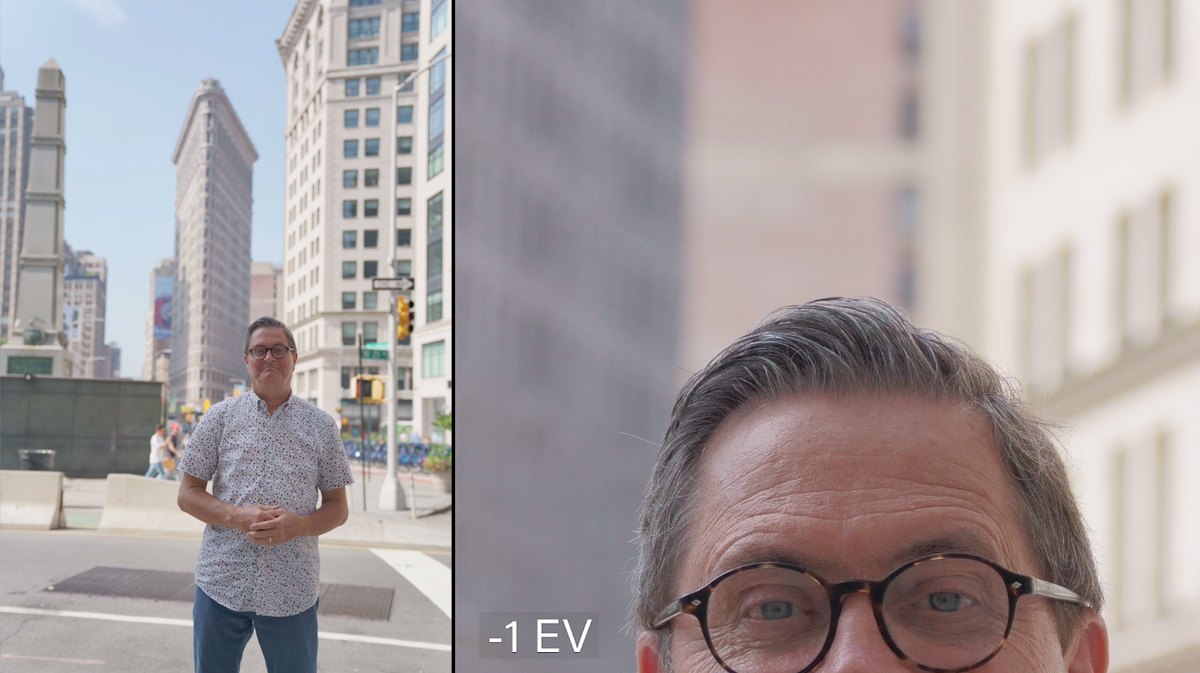
-1 EV
When we go to -1, so we’re down a stop, I can recover this so it looks almost as good as normal. I’m still keeping the same detail in my face, I’m still keeping the shadow detail in the background and the highlights are not blowing out.
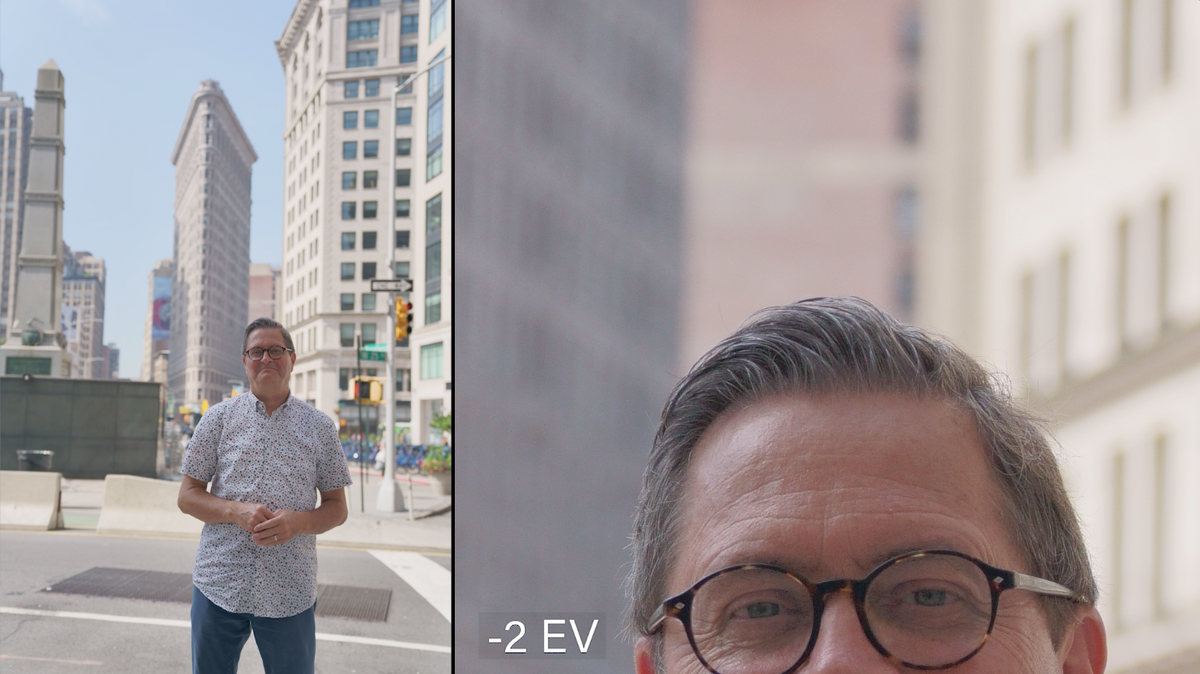
-2 EV
If I go to -2, still I am keeping that same kind of detail in my face. I’ve got detail in the shadow side of the building, the highlights, nothing is clipping and none of the shadows are clogged up.
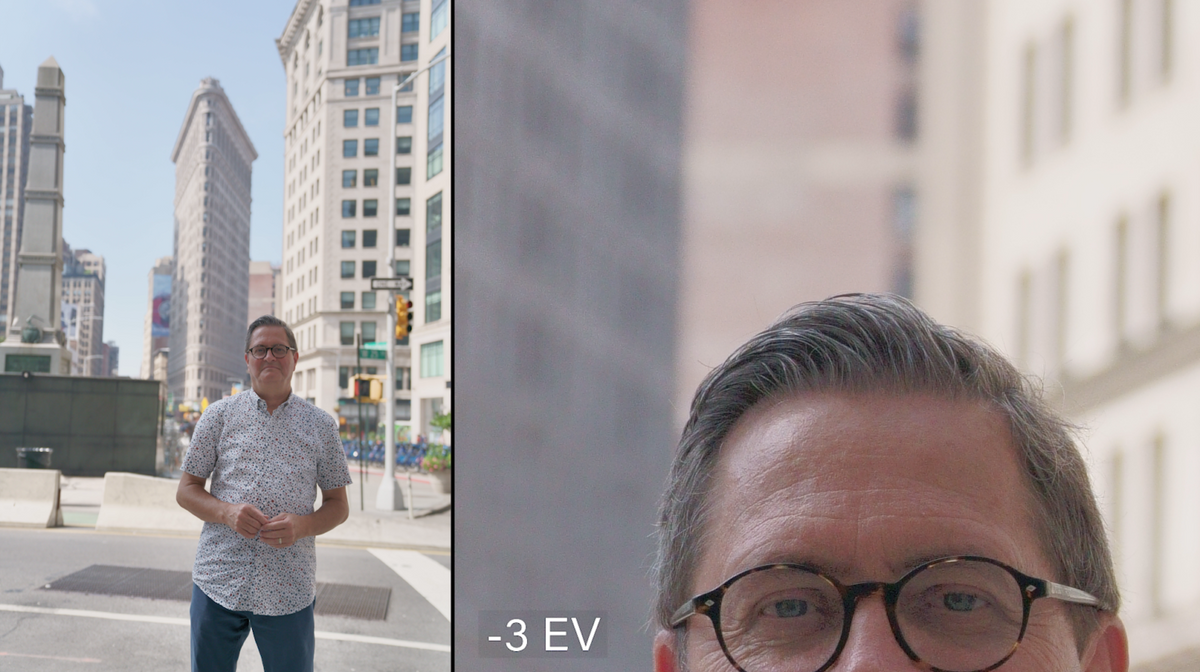

-3 EV
Now the shadows are starting to build just a little bit. In some ways I like the shadows in the background and the highlights are holding. It looks really good!
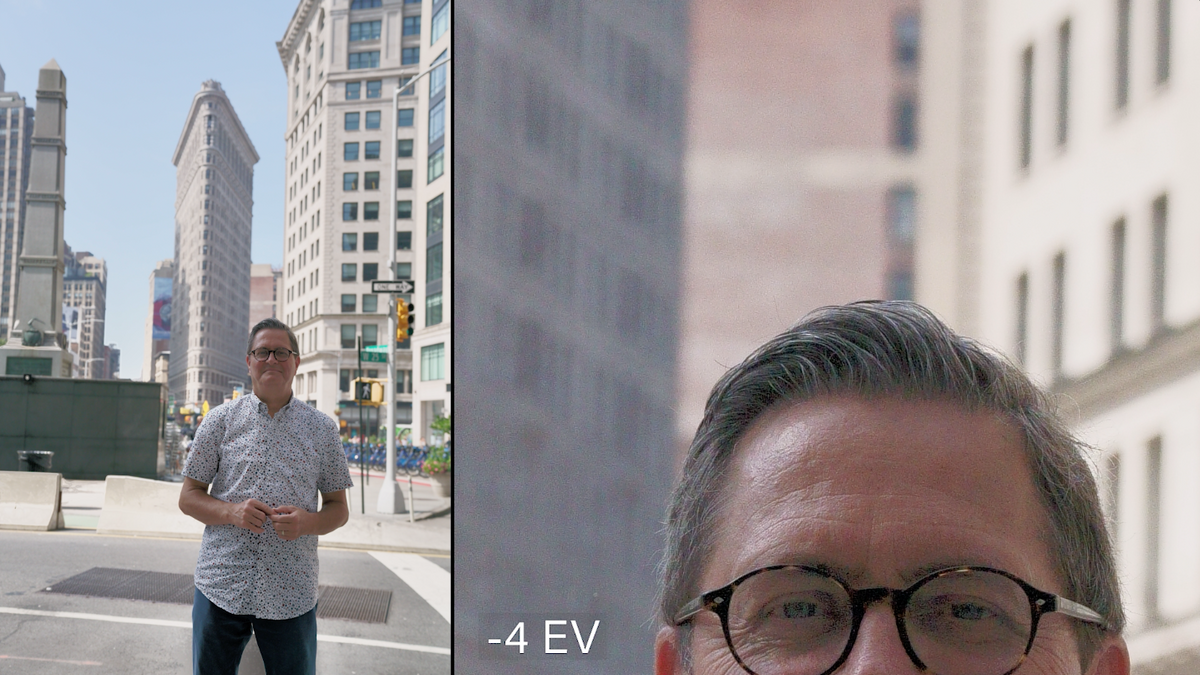

-4 EV
My face is starting to get a little dark in the foreground, but we’re at -4 stops now.
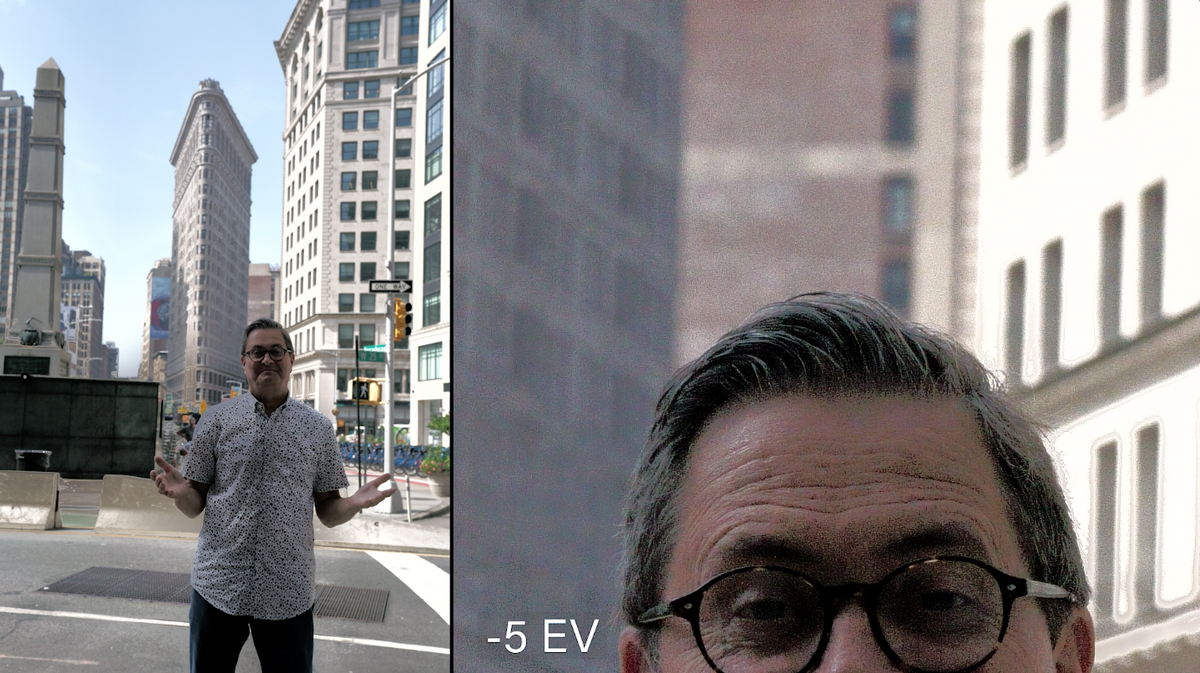
-5 EV
At -5 we start to suffer. I couldn’t recover the blacks, we’ve got a lot of digital noise in the blacks.
So now let’s see what happens when we add exposure.
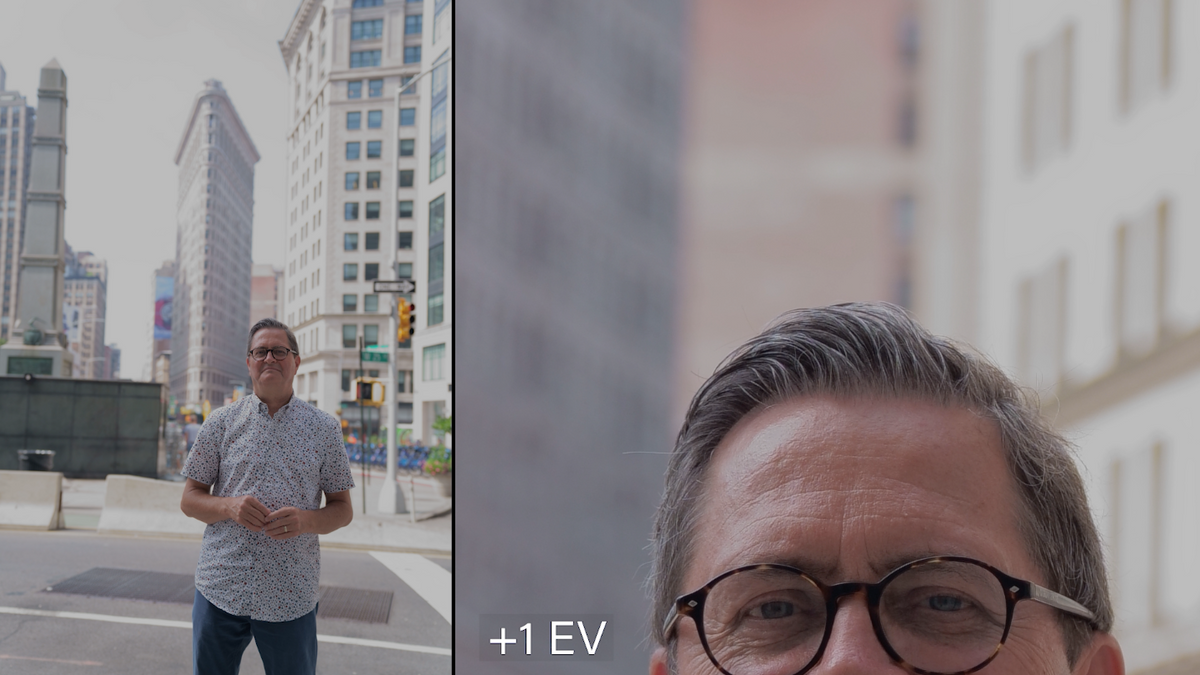

+1 EV
The highlights are starting to drift in the background. We’ve lost all the detail in the clouds back there. The building is kinda just a highlight and a bright shadow side.
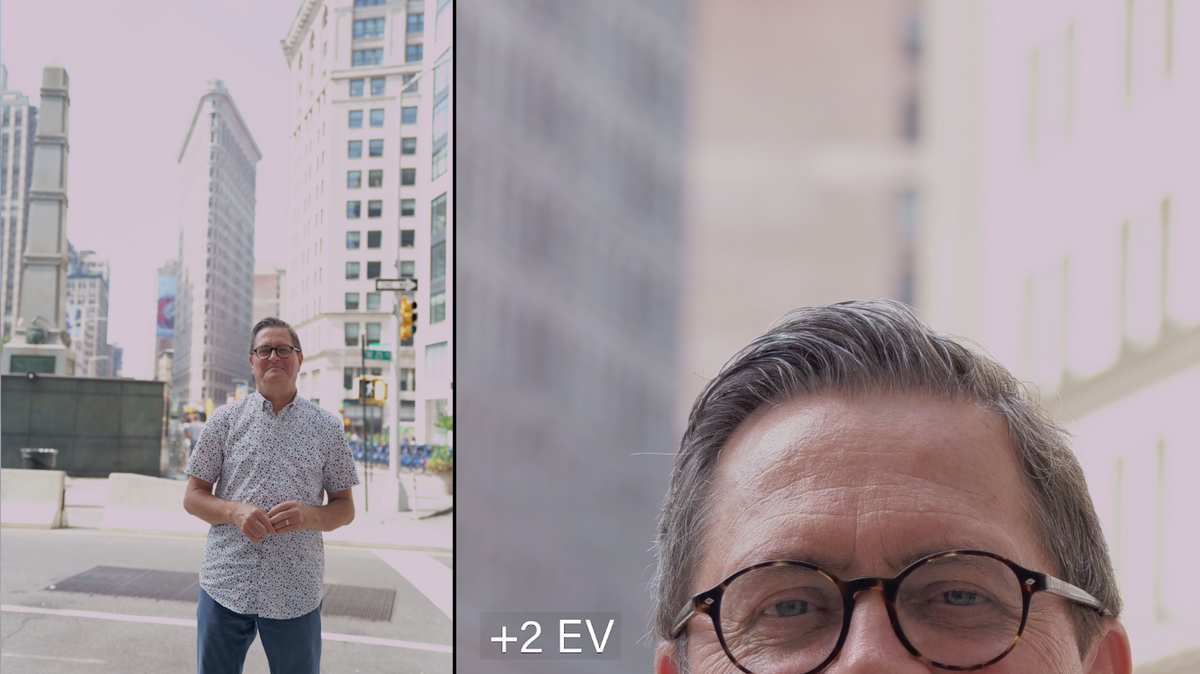

+2 EV
At +2 we’ve lost the highlights side’s clip on the side of the flatiron building back there. The side of the building on the right is just a clip. And if you look at my face, even though there are no digital issues in my face, if you look at the background, we’re just loosing highlights.
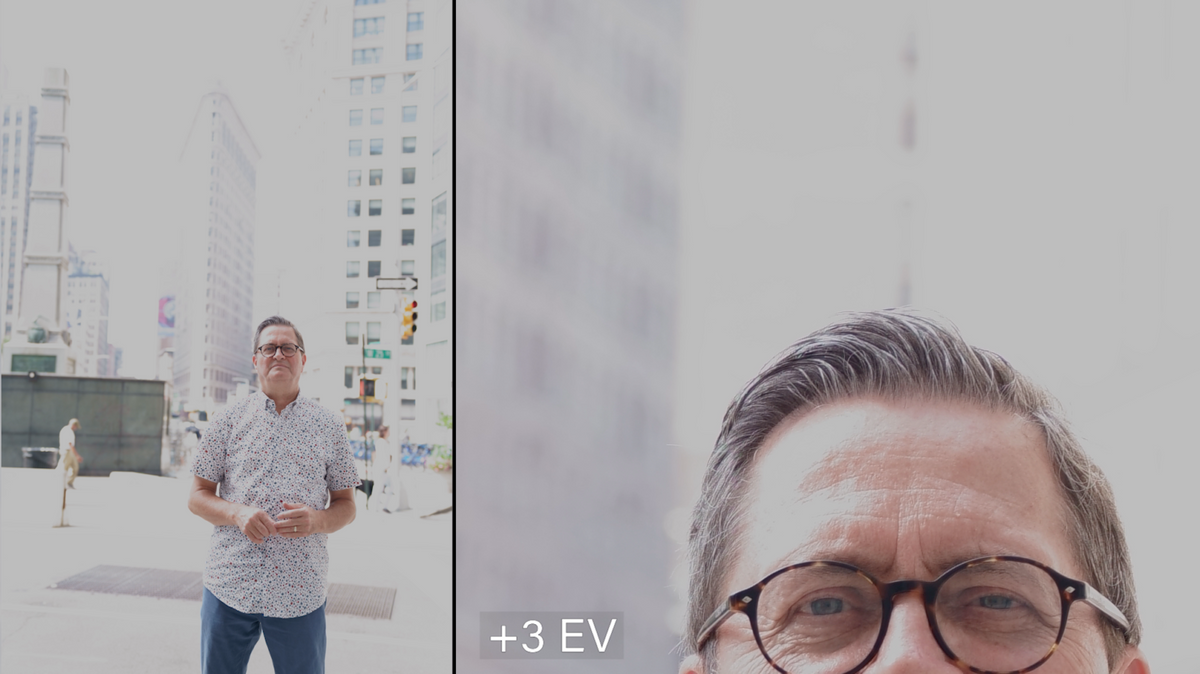

+3 EV
It’s almost a complete white background back there. There isn’t much to look at back there at all. I think the light’s fine on my face, not looking terrible, but it’s completely gone.
So I’m impressed. This sensor has an incredible dynamic range. It’s holding the highlights, but it does like to be underexposed like all digital sensors do.
ISO Test
Let’s take a look at the ISO capabilities. I would guess with a larger sensor that the ISO is going to suffer just a little bit. It’s certainly not going to be an a7 R III, but let’s just see where it falls. So these are RAW images that are processed through Image Edge. It’s just the RAW image.
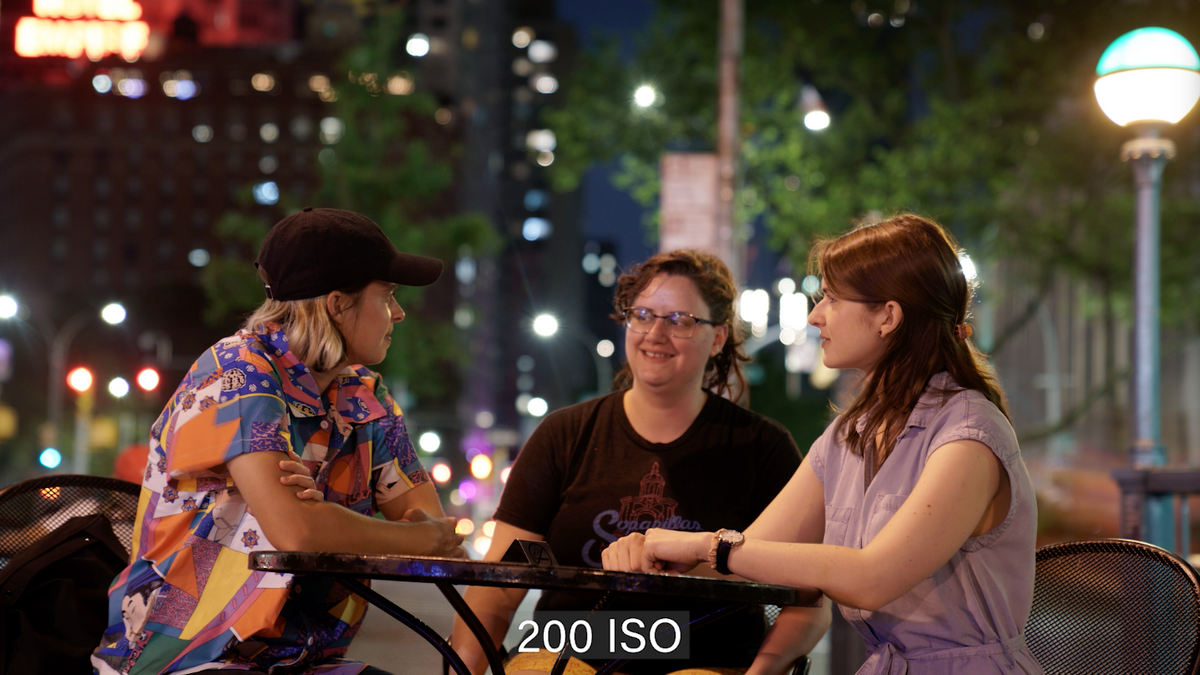
200 ISO
I started at 200 ISO because we know 100 ISO is going to look great. In this we see some grain, but overall 200 looks really clean.
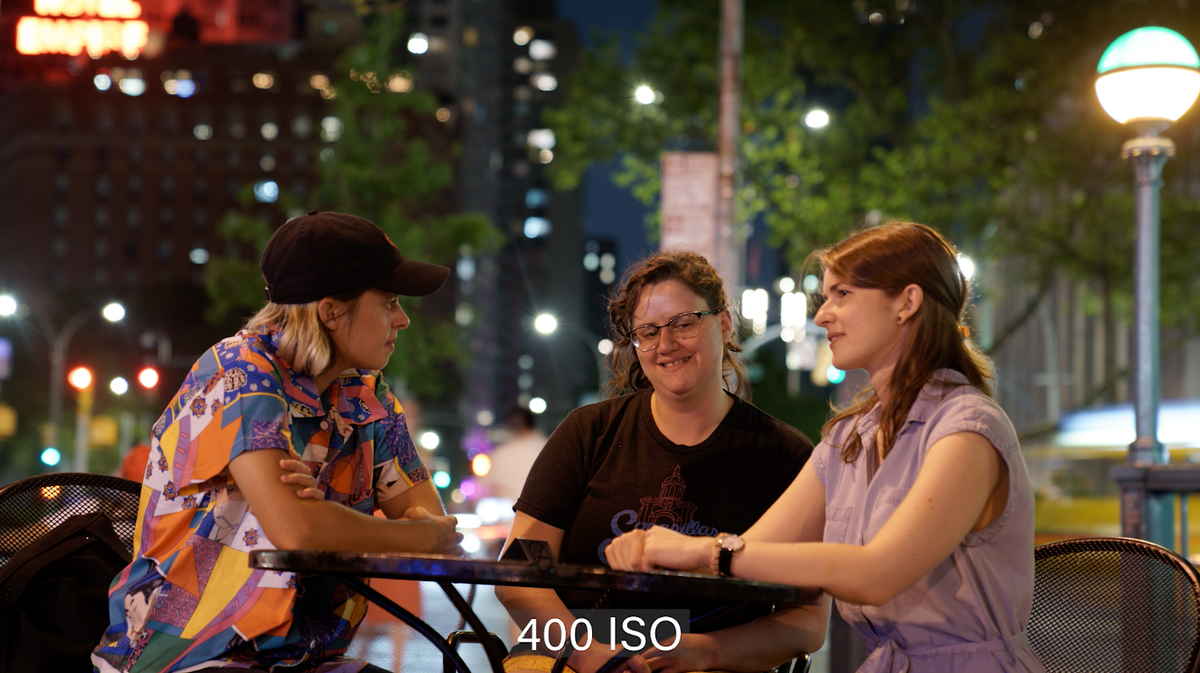
400 ISO
This looks pretty darn good.
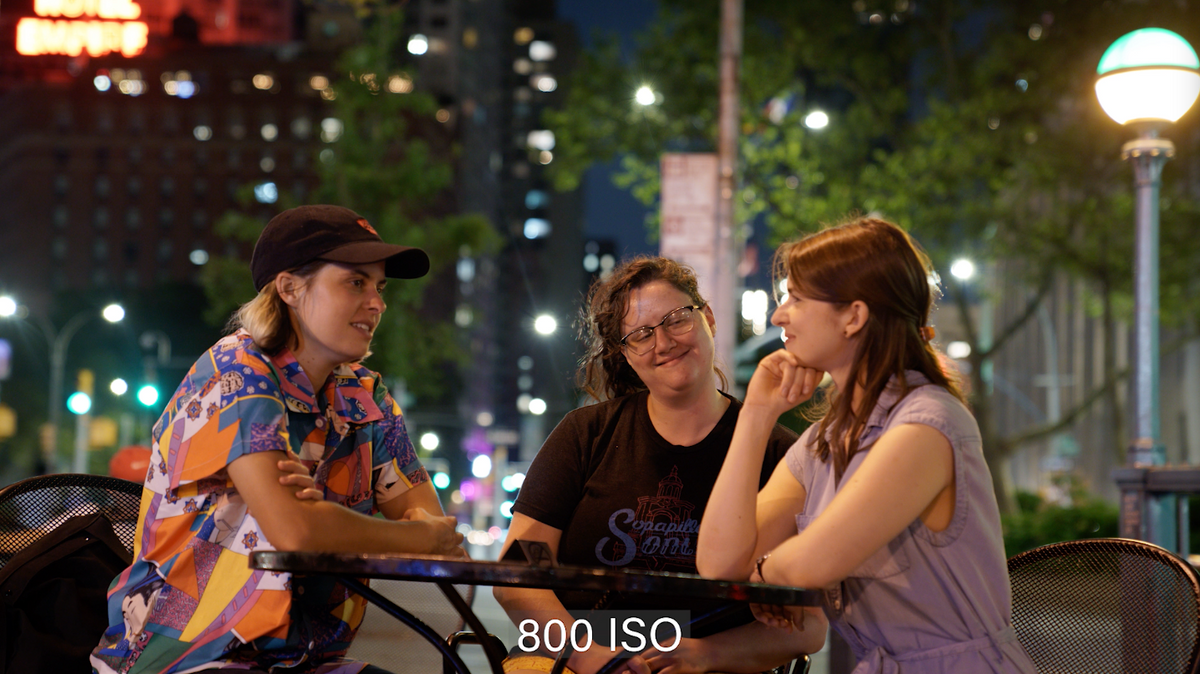

800 ISO
If I go up to 800 ISO I’m starting to see it now. 400 I was like “this looks pretty nice and clean” but when I go to 800 ISO I start to see a lot of greys starting to build in the background.
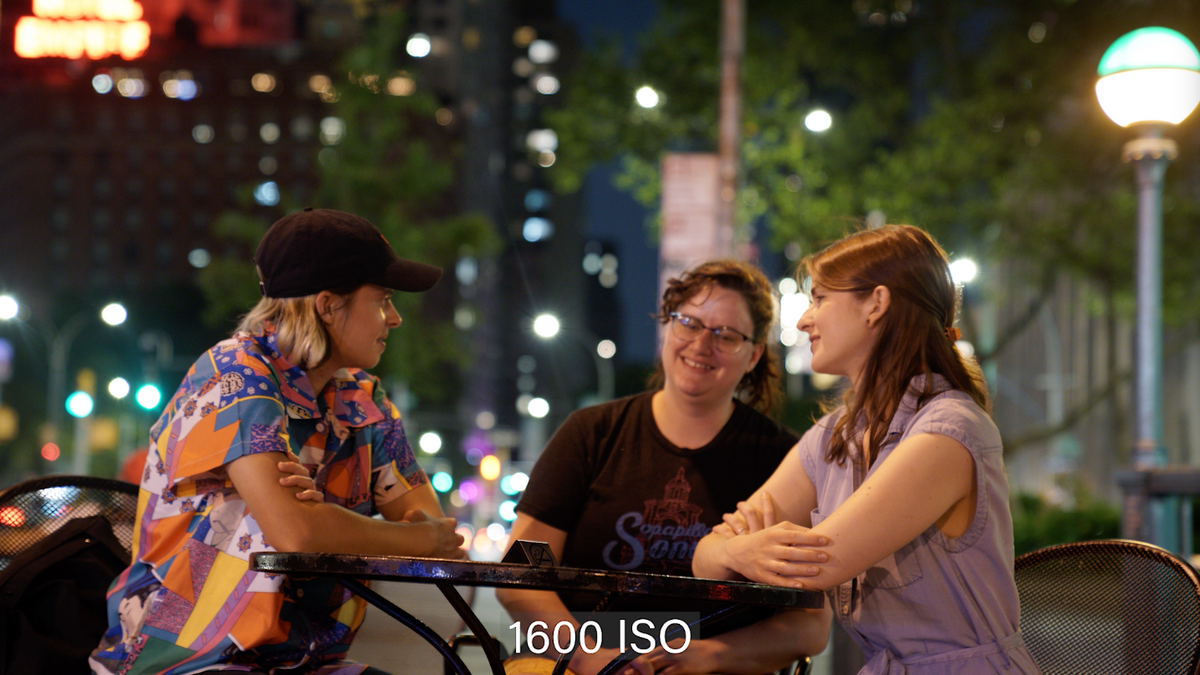

1600 ISO
So when you go to 1600 the digital noise is pretty strong on here. You see this grain like pattern that the sensor is making and it’s just granular, but the digital noise is building. But at this point it hasn’t fallen apart yet. Starting to get a sense that the sensor is struggling because you see the reds shift and you see this pixilation, but the sensor hasn’t given up yet.
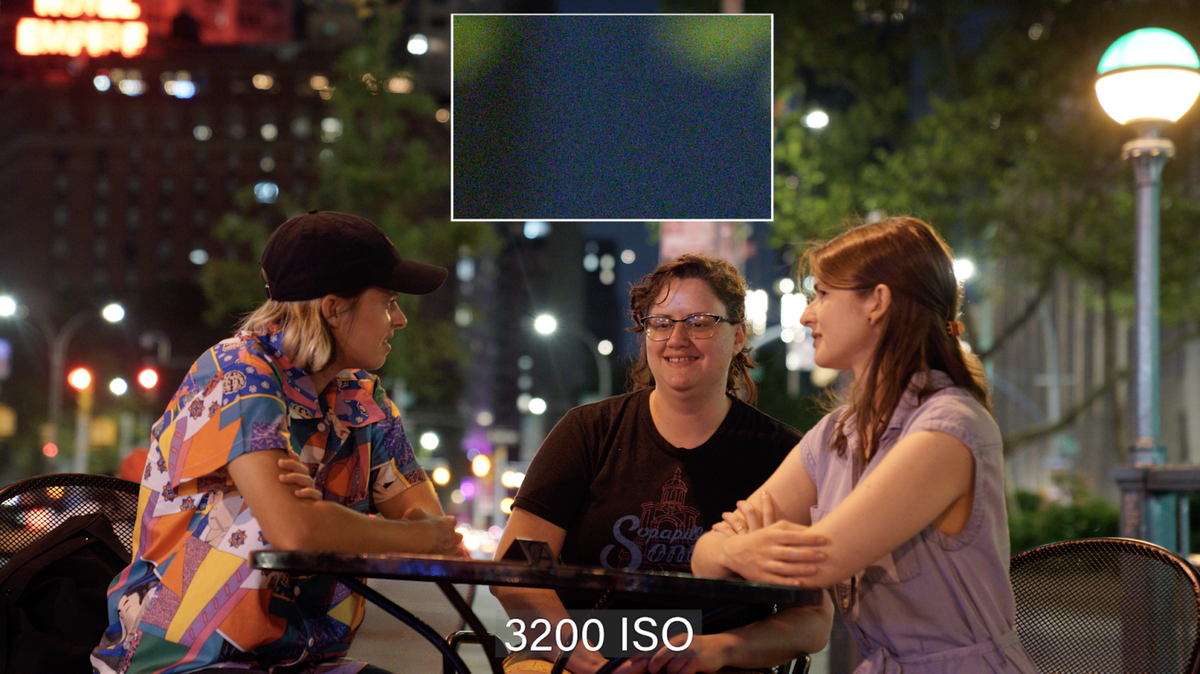

3200 ISO
When we hit 3200, you’re not starting to see this very granular look. I’m seeing reds throughout it at 3200 ISO, there’s just this grain and digital noise pattern that is starting to be pretty obnoxious.
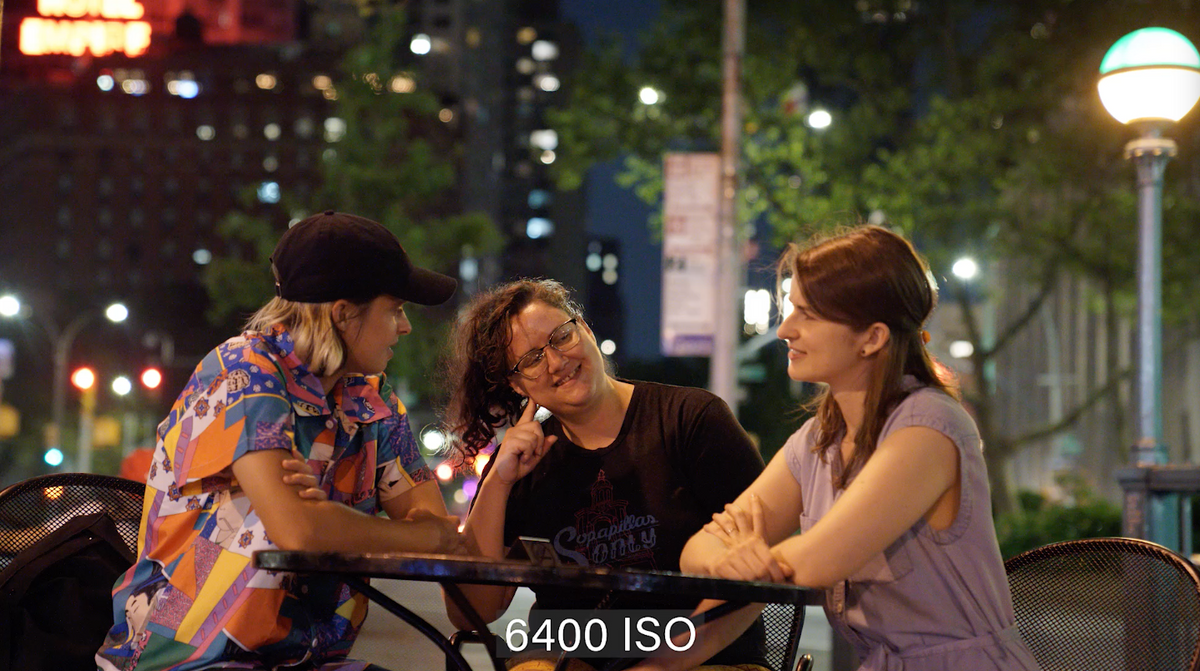

6400 ISO
Now it really is just digital noise. You see the greens and the blues and the reds and it’s just that digital pattern all through it.
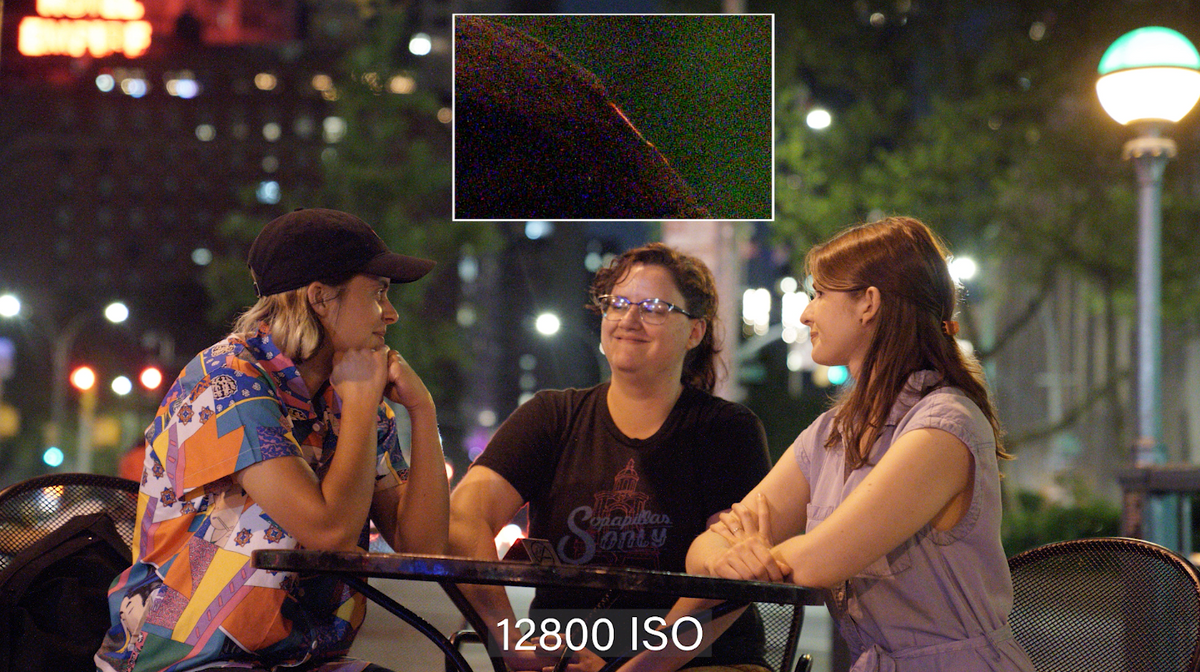

12800 ISO
So when we go beyond that and go to 12800, the pixilation becomes way stronger, heavier. You start to see white artifacts show up. It really is about grain at that point or about that digital noise.
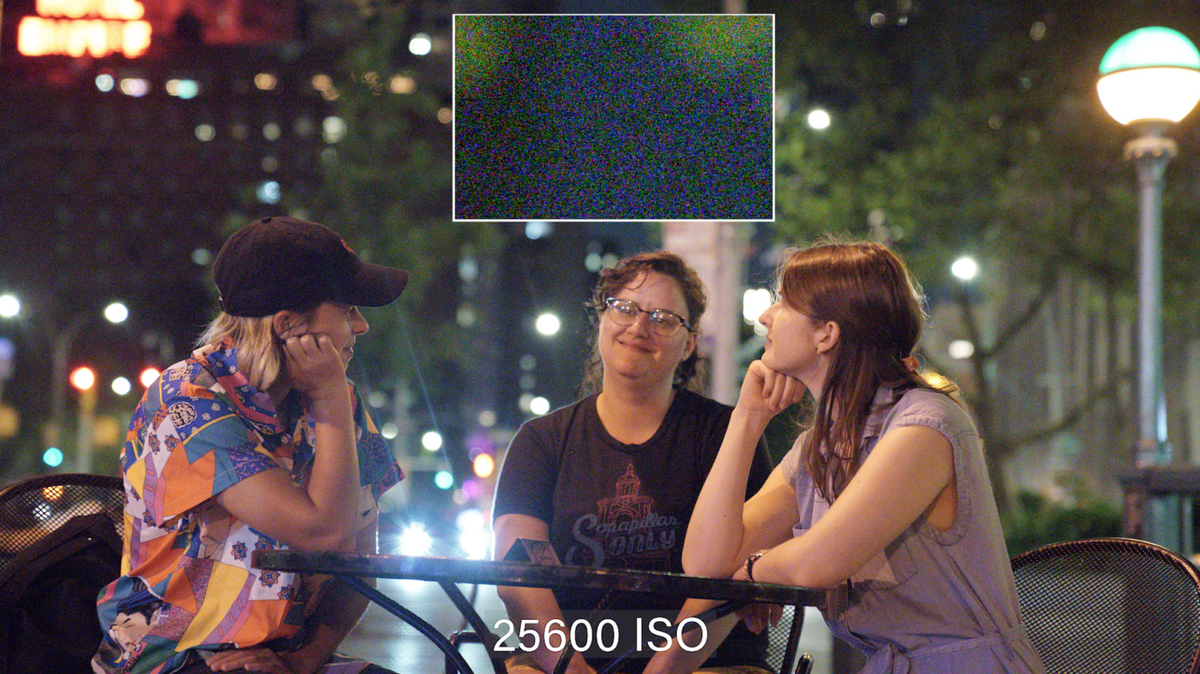

25600 ISO
When you go this high the sensor has given up, it’s done all it can do and it’s just digital noise. It’s just a lot of really heady digital noise. Off of video, I would really try to keep myself below 1600 on digital and I would try to stay below 600 for stills.
This camera really doesn’t fall apart differently than most of the digital cameras that I’ve looked at. I mean, I don’t see that the 61 megapixel sensor struggling more quickly than other cameras have. I feel like it has a nice grain pattern through that 200-400 and it starts to break up like most do at that 1600-3200.
PIXEL SHIFT TEST
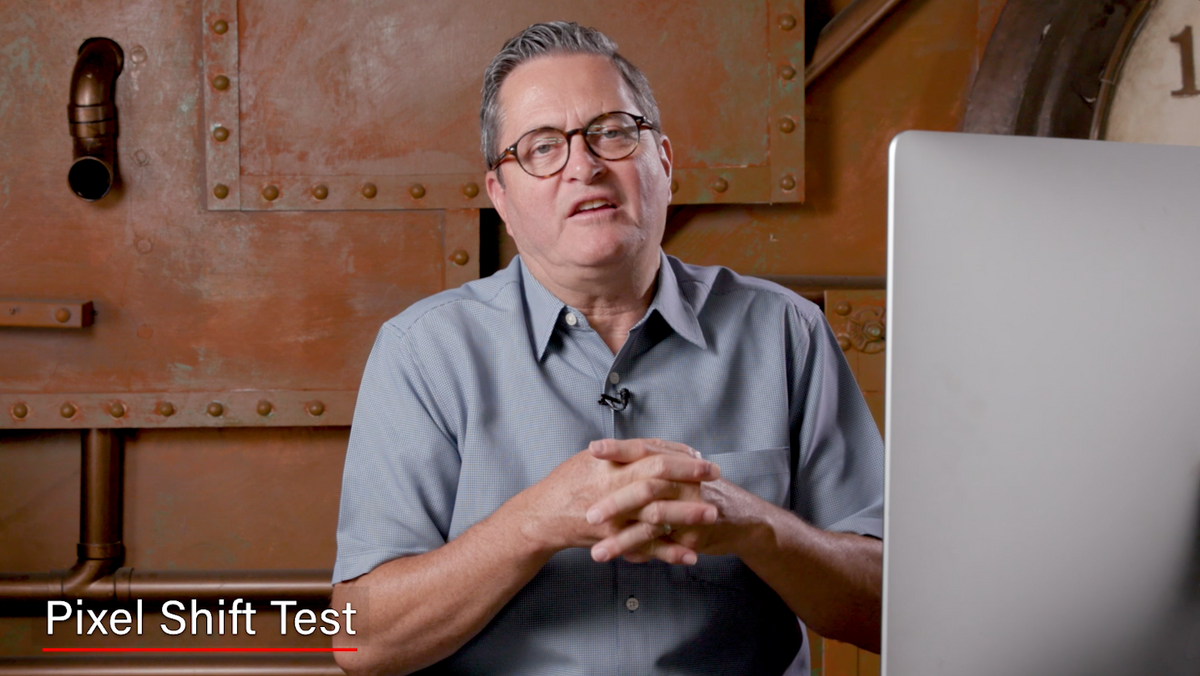

I did some images with the pixel shifting. I was just curious to see how it worked, what it did. I’m not an expert on it and I won’t understand it very well. I just stitched together in image edge, but I did learn 1 thing. I’m shooting 16 images and its shifting 1 half pixel and so it’s stacking pixels.
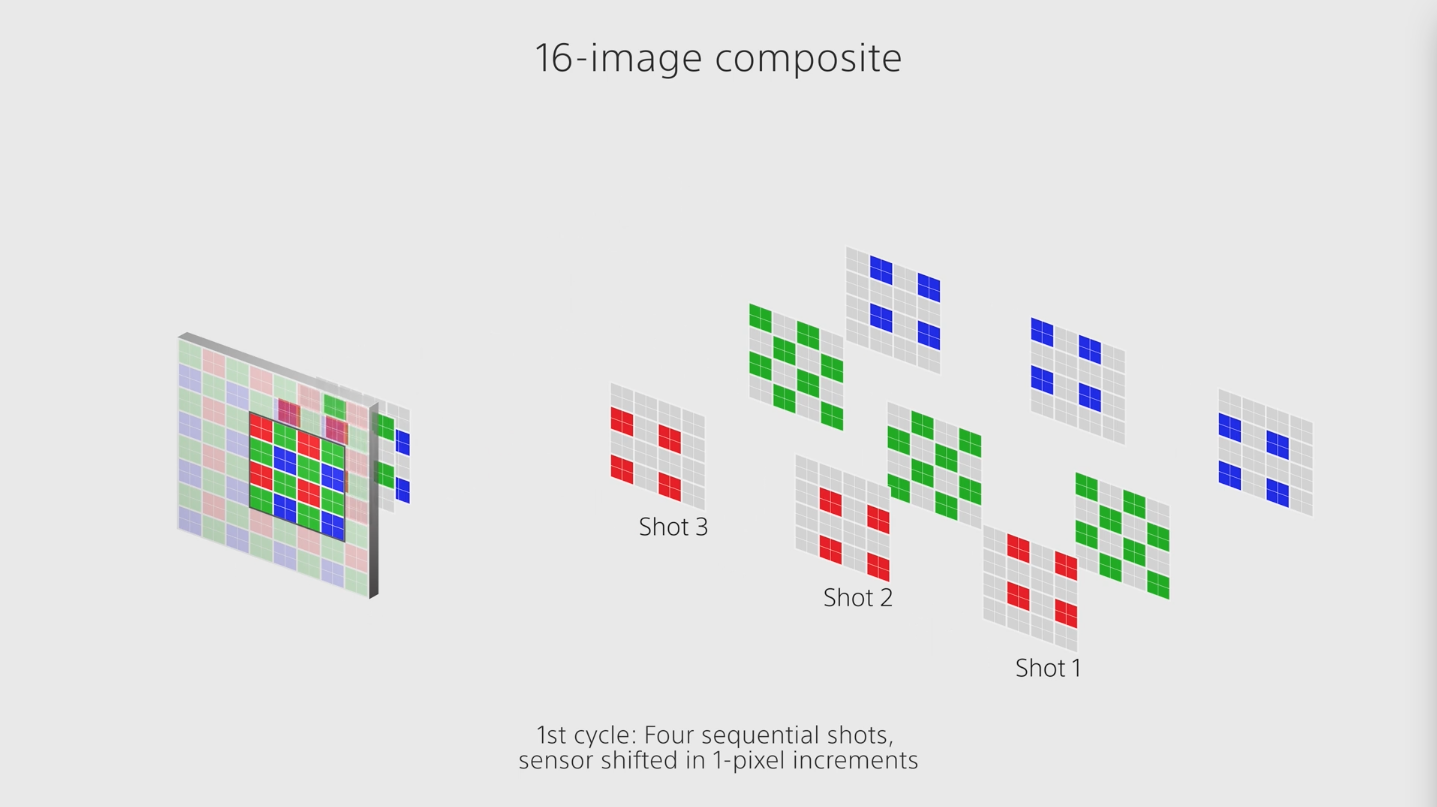
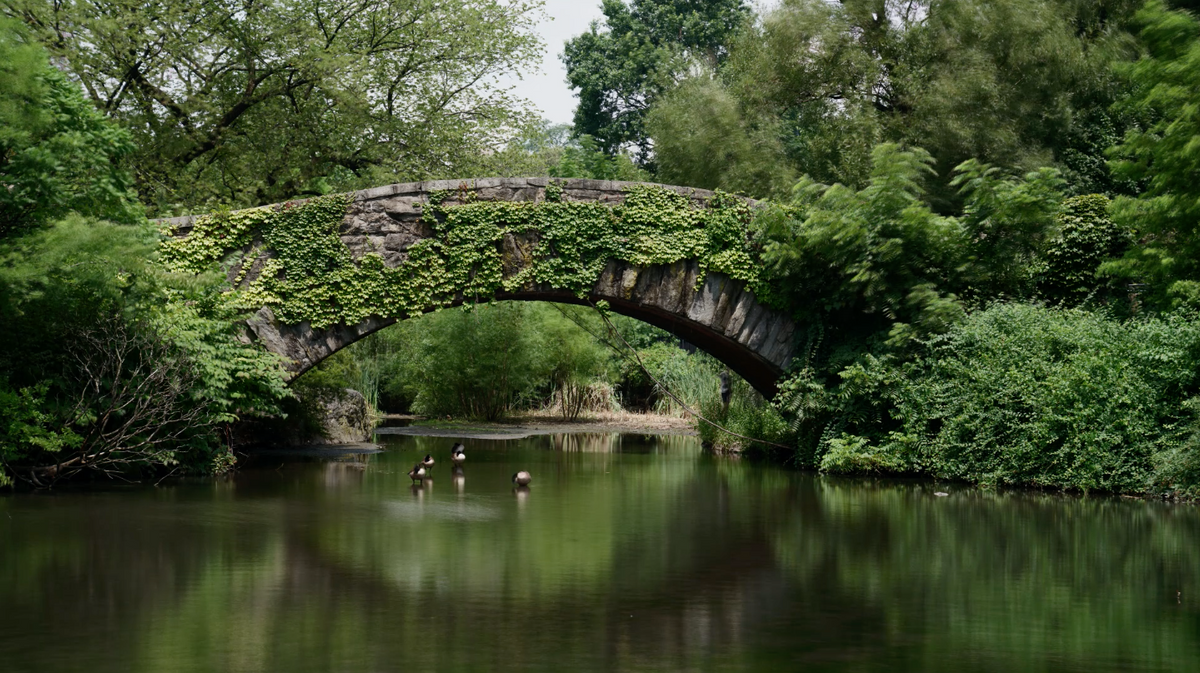
So you have a 61 megapixel sensor, 61 X 16 and you’re now creating this huge file that has all this information. The 1 thing I’ve learned on this is that it doesn’t like movement at all. I’ve got ducks in the water here, and the water’s got this red banding. You can see it in the trees at the top that it starts to give you this kind of cross hash look and didn’t like the movement of the trees and wasn’t able to take in that information. So you’ve got to have an image that is just completely locked down. Nothing can be moving.

I did it again here in central park looking back at these buildings. It’s a terrible image, but so the clouds were moving and there’s all this crosshatching in it. It just looks terrible on these clouds.
So I spoke to one of the gentlemen at Sony and he said the 4 image pixel shift is a great place to start because then it’s only moving it 1 pixel. There’s an application for this I guess is large pre productions, but boy the limitations of not being able to have anything in the image move is pretty restrictive.
VIDEO EYE FOCUS TEST


So this version has eye focus in video mode so we’re going to test that out and see how it does, having him turn around a bit to see if that eye focus picks up on his eyes.
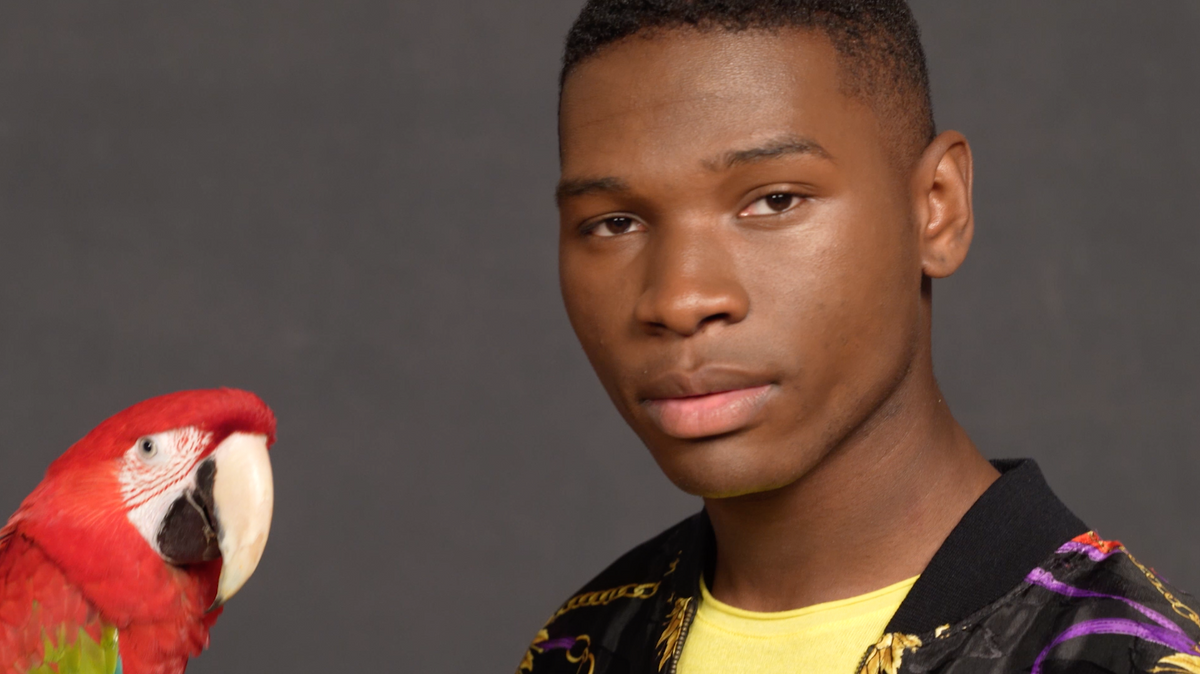
One of the really exciting features of this camera is the eye and face detect. That means in video mode it’s going to track the eye and the face. How I’ve got a couple short samples here, the white flash you see in the background is from the set next to us. This wasn’t a heavy test. It was losing a little bit as he turned back around, but it seemed to pick it up. I think it did fairly well considering. I think in a situation where there’s a little more light and it’s a little more brightly lit, I think it’ll do much better.
CONCLUSION
A few things we need to talk about before we wrap this up:
First off we have that high speed continuous shooting at 10 fps. That really is going to start to compete with the a9. And that’s a comparison we really ought to do.
We’ve got 567 phase detection autofocus coming in at 74% of the image area at 425 contrast detection autofocus points. That’s a significant improvement over the a7 R III. It really gives us the ability to cover more of the frame and to give us more autofocus points. That goal really is to cover that entire frame so you can focus anywhere you want and they’re getting closer and closer every time.
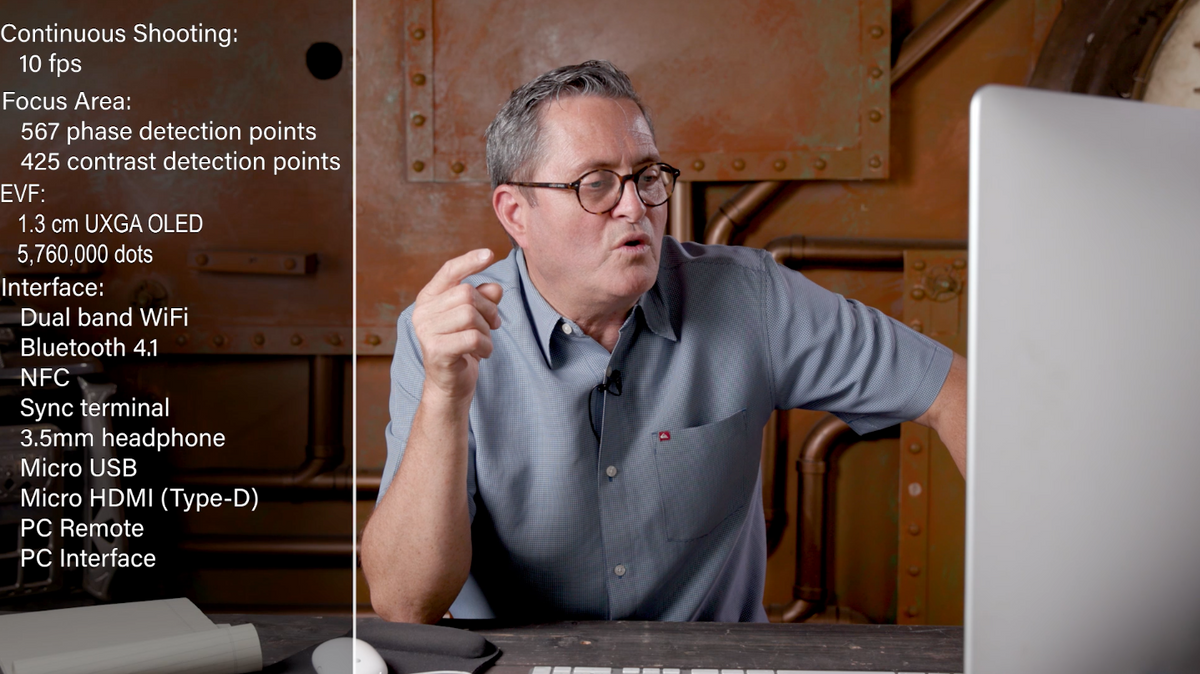
The EVF has gone to that 5,760,000 dots UXGA electric viewfinder. The EVFs have got to get better and they’ve been getting better each and every generation because that’s what you get to see. You don’t see through a mirror and see your exact image, you’re seeing an interpretation of the image electronically. So those are getting better each and every time and this is a bit step forward.
They also upgraded the connectivity for wifi support. This is more the level where you can shoot and have wireless wifi tethering, and this is something we were playing with at the Sony event. This is a great thing for being on set with clients. If you can do some sort of wireless tethering with this camera it’s going to make it much easier to service your clients or to backup your images. That’s something worth looking at and something worth testing in the future.

They also upgraded the body. The grip is a little deeper, a little nicer and has a nicer notch to be able to hold on to it. I felt more secure holding onto it. Was it a million times better than the a7 R III? Not necessarily. You still need a battery grip in order to get a place for that little finger to get a fold of it and to be able to rest it there, and I think with that battery grip, this is actually a winner.


There are several things on there that lock like your exposure composition lock, which is nice because I’ve bumped that before on the a7 R III and knocked the exposure composition out.
Also the buttons are a little better. That back roller button isn’t as buried as with the a7 R III, it’s more on top, easier to get to and just an easier place to be effective.
So those are some of the improvements, some of the things we’ve looked at. We’re going to test this camera again in the future when we really look better at dynamic range and picture quality, and we’ll do that test again comparing the 61 megapixels to the 42 megapixels because I was so astounded with how the 61 looked so I wanna see that again and make sure that that’s exactly the case.
Click the links below to check out the camera for yourself and potentially get one!
Keep those cameras rolling and keep on clicking.
GEAR USED:
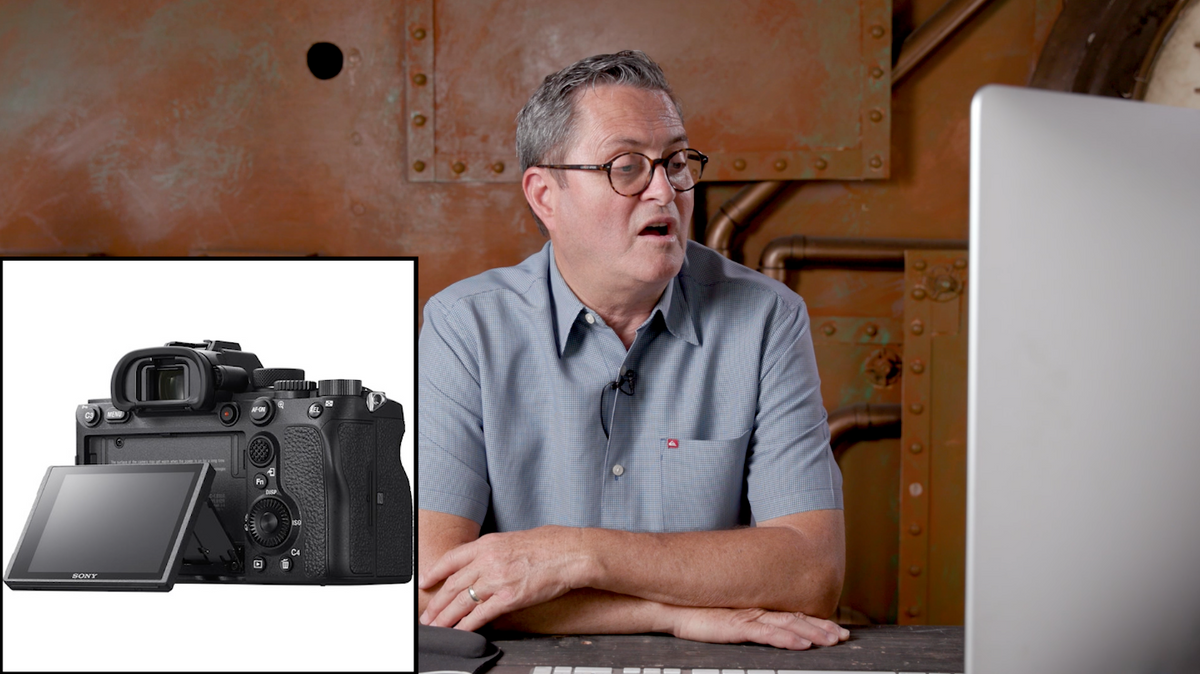
Sony a7 R IV
B&H: https://bhpho.to/2K3a1t8
Sony 24mm Lens
B&H: https://bhpho.to/2K6F0oy
Vanguard Tripods
https://www.vanguardworld.com/
Get 20% off anything at Vanguard with our code: SLANTEDLENS
Shop Jay P’s Gear: https://www.amazon.com/shop/theslantedlens
Jay P’s Gear @ B&H: https://bhpho.to/2ES90Eb