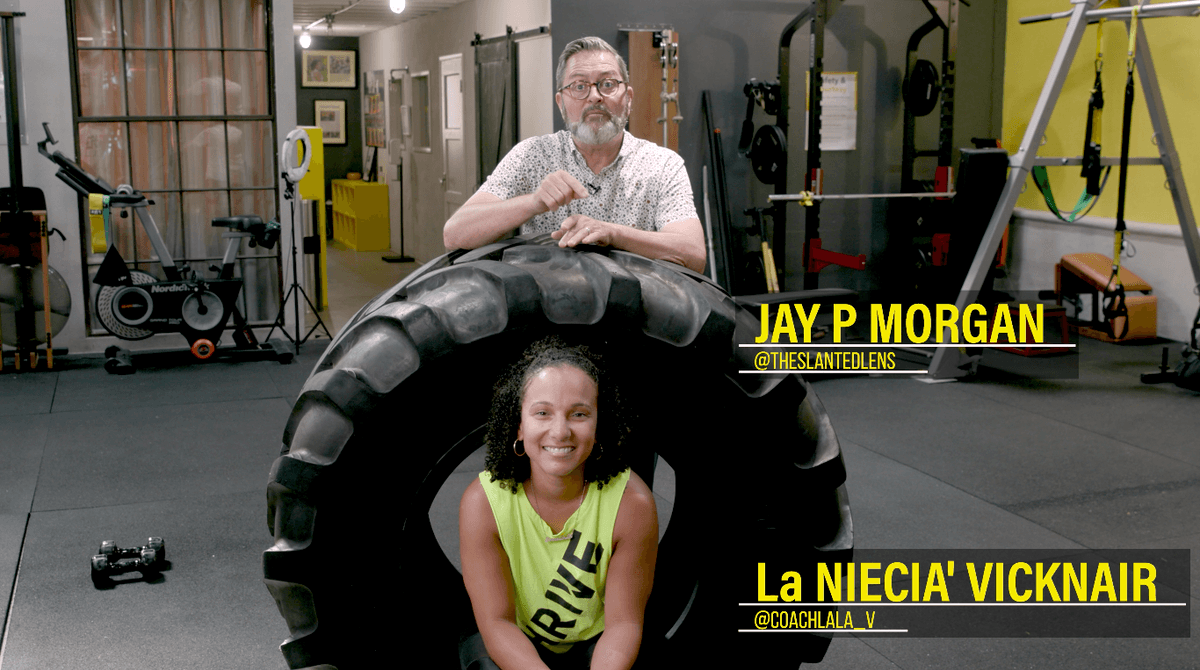
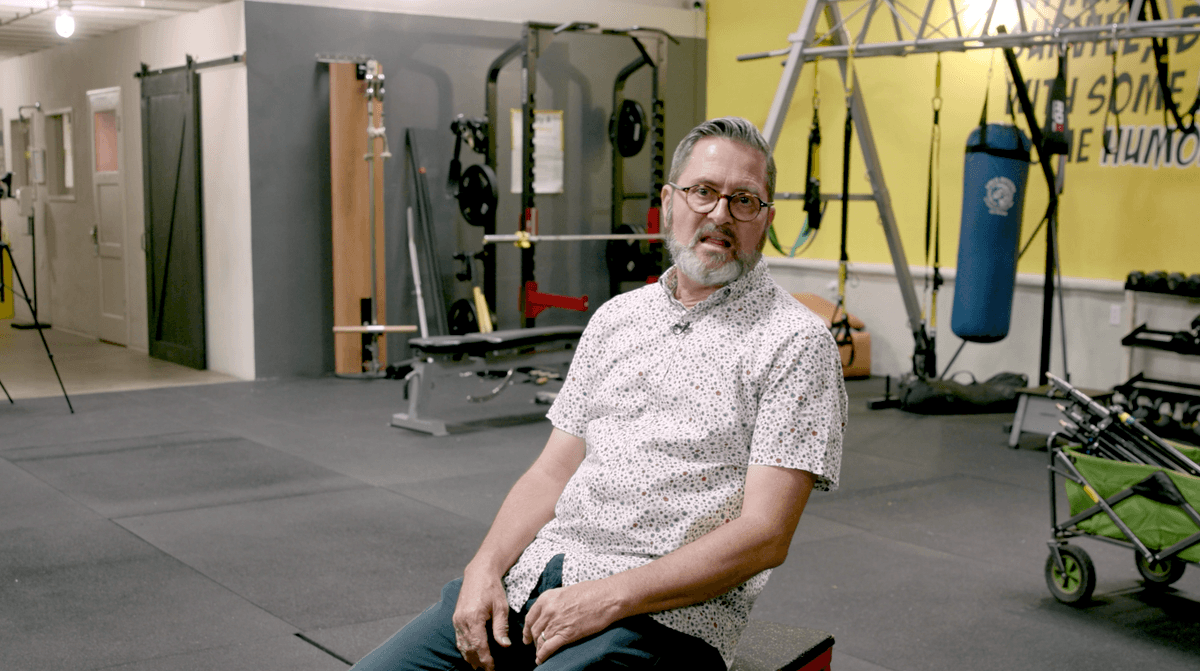
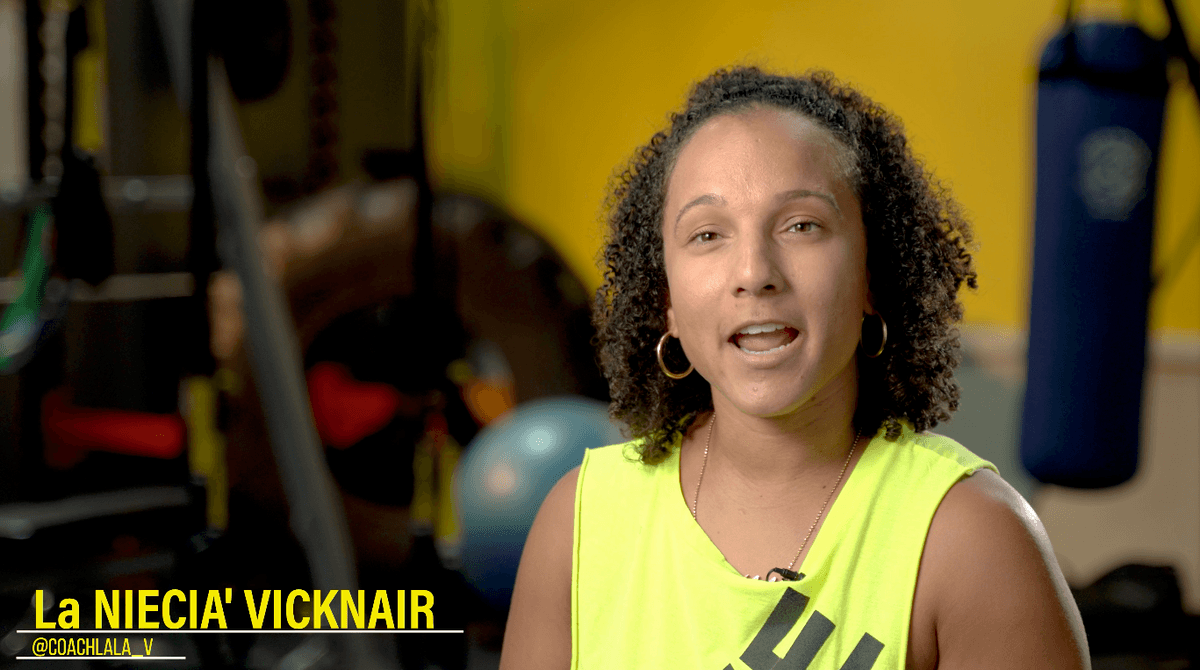
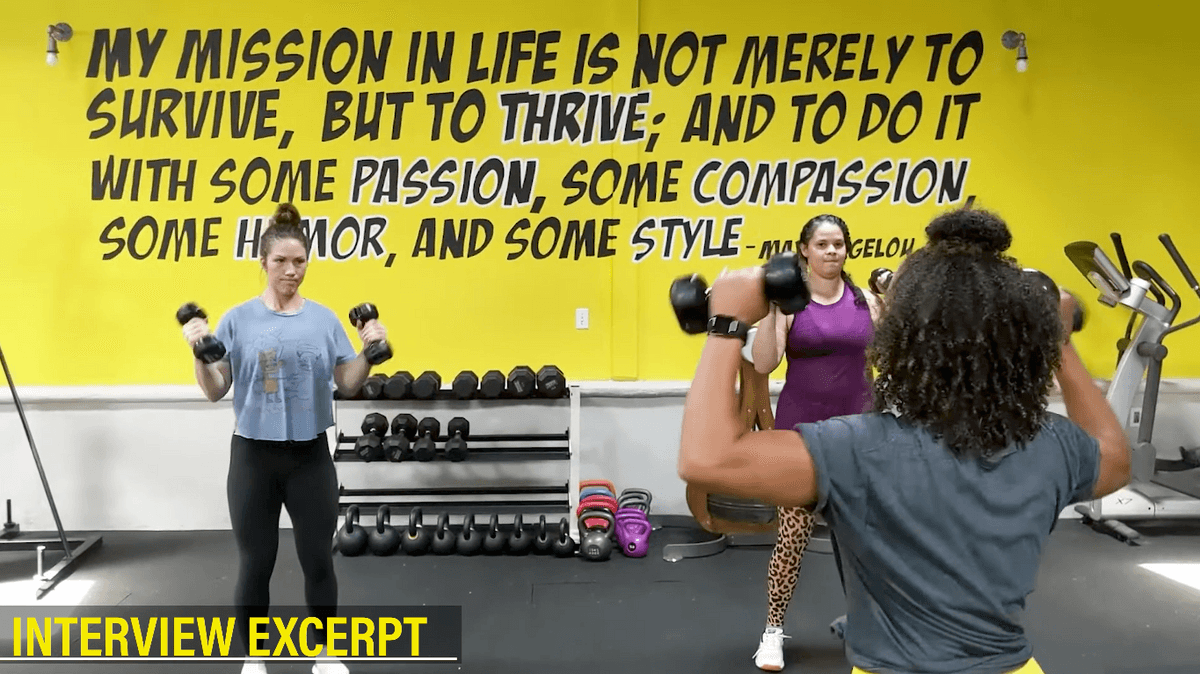
Today on The Slanted Lens we’re rolling in with 12 easy steps to have a good interview. We’re here at Thrive Health Lab. And we’re about to do an interview with Coach Lala. “Hey guys, Coach Lala here in my gym, Thrive Health Lab, I’m so excited to do an interview today.”
So let’s see the 12 steps to a good interview, simple steps to be able to get set up quickly, get a great interview, know where to stand and where to put your lights.
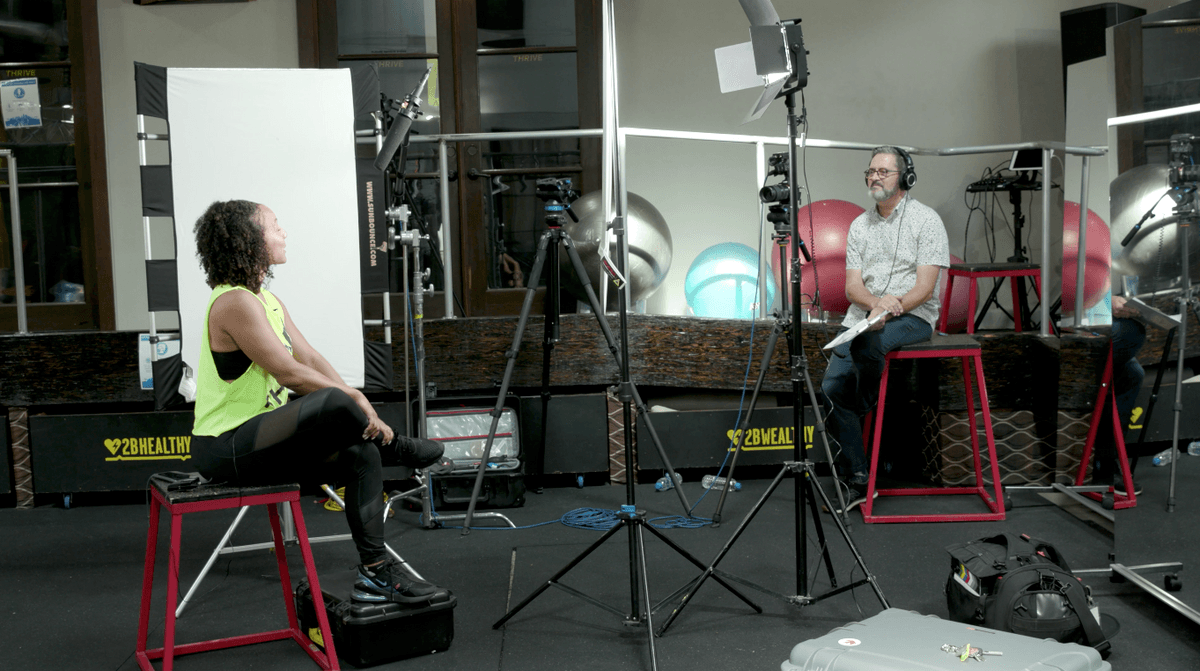
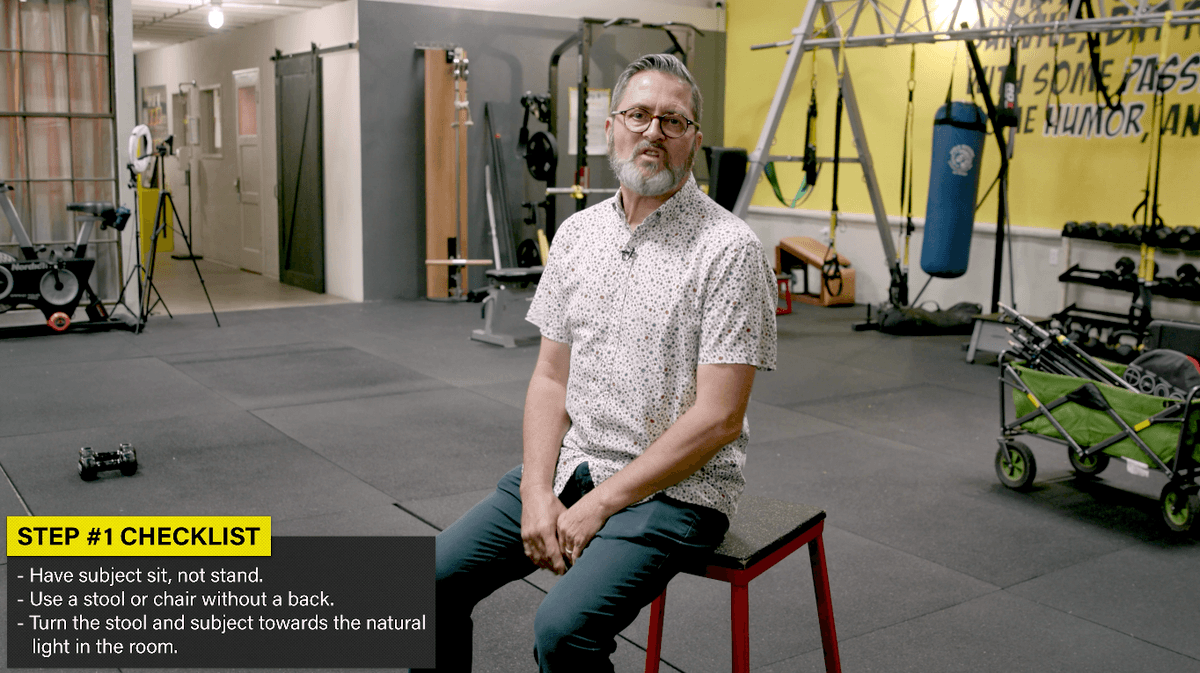
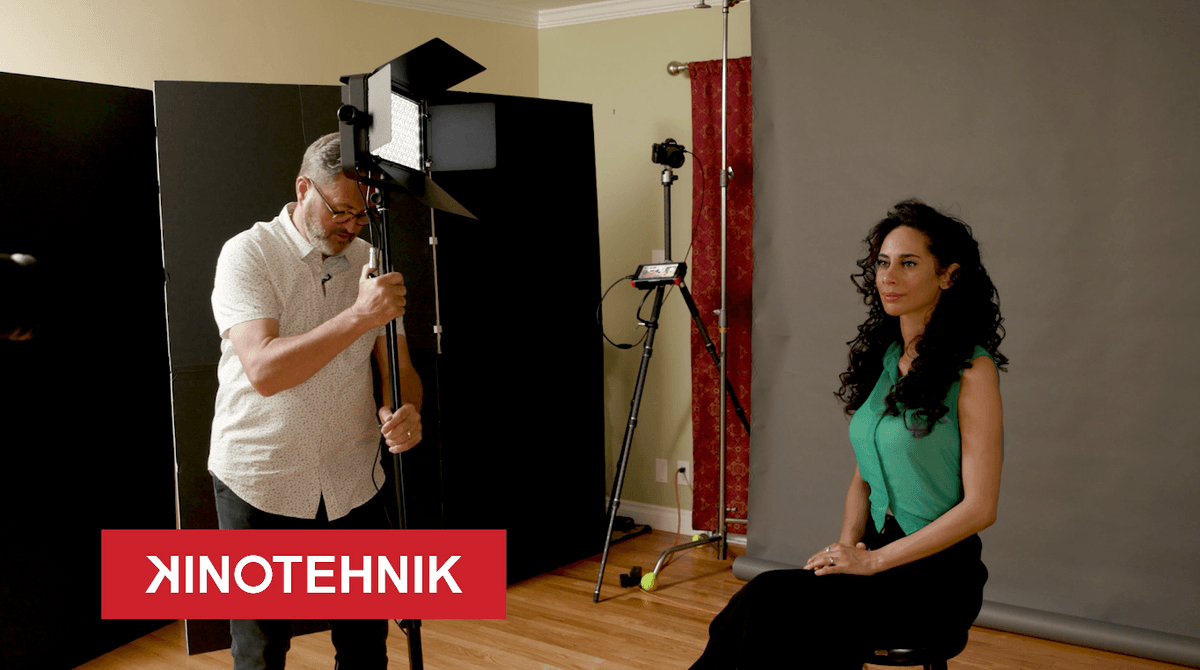
Step number one is you have to have a place for the person to sit. So as I look around the room here, there’s a lot of different things that she could sit on, we have the bench press machine, but I found these over on the side, they’re different heights. They aren’t really stools. They are some kind of exercise equipment and they work perfect for me. And the reason it’s perfect is because I don’t like them to have something with a back because usually people lean back into that back. I don’t want to use couch or chair with a back because people tend to slouch into the chair with a back on it. I want something that’s going to get them to sit up and feel comfortable. And then I’m going to turn it so it is towards the natural light that is in the room.
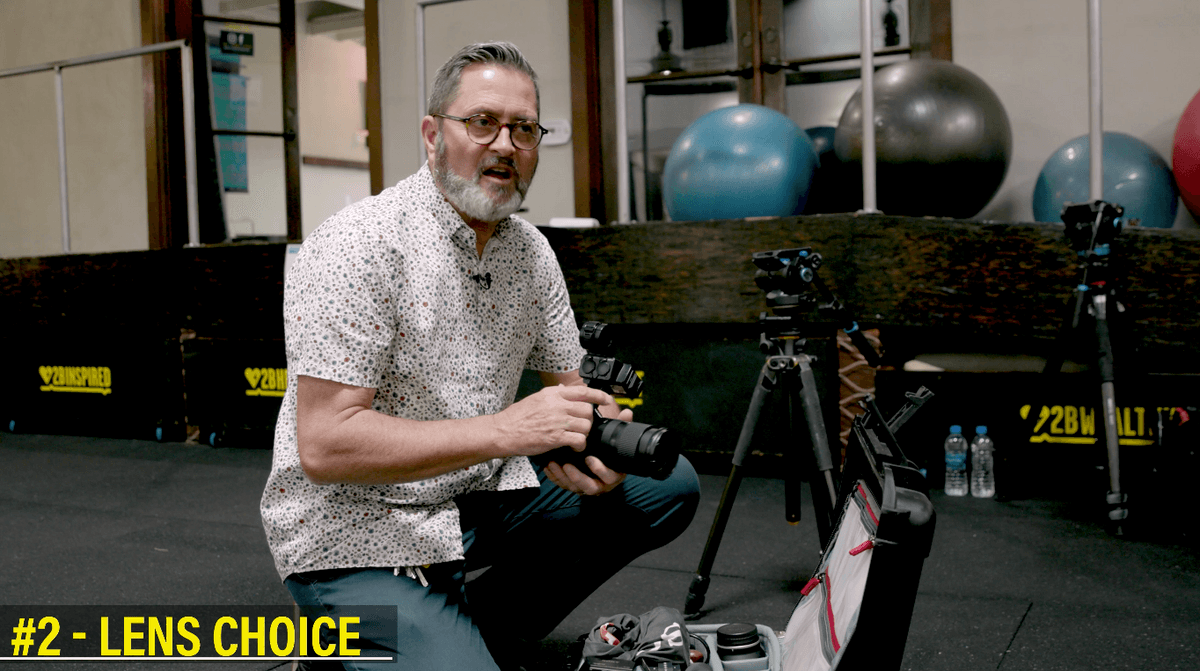
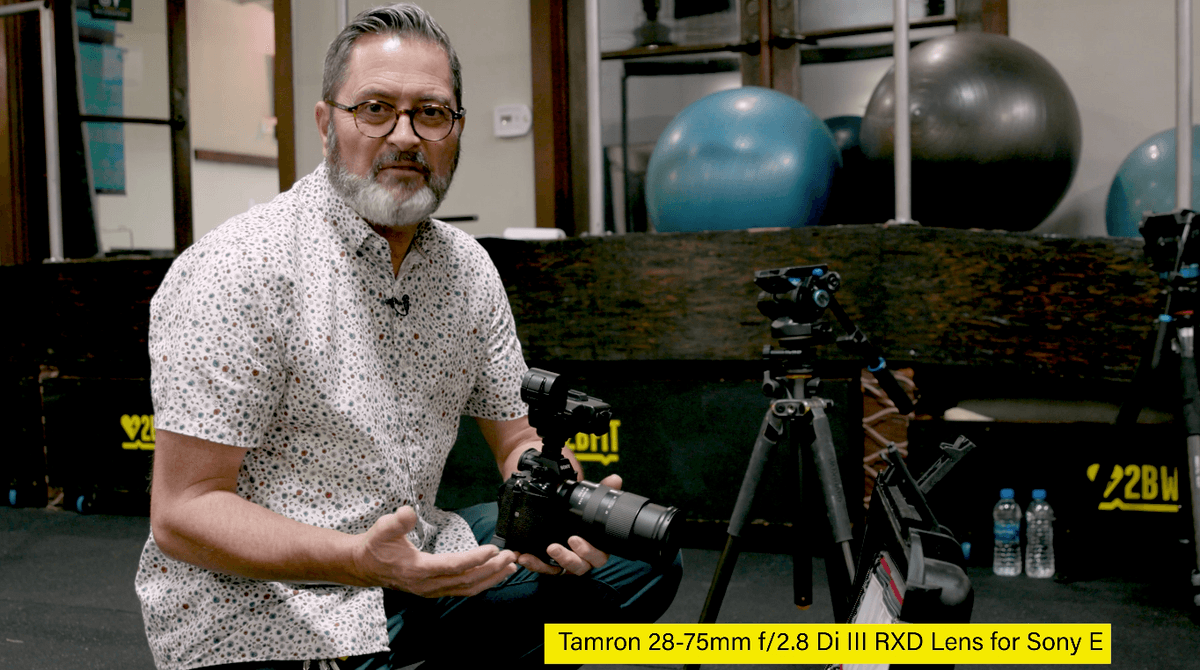
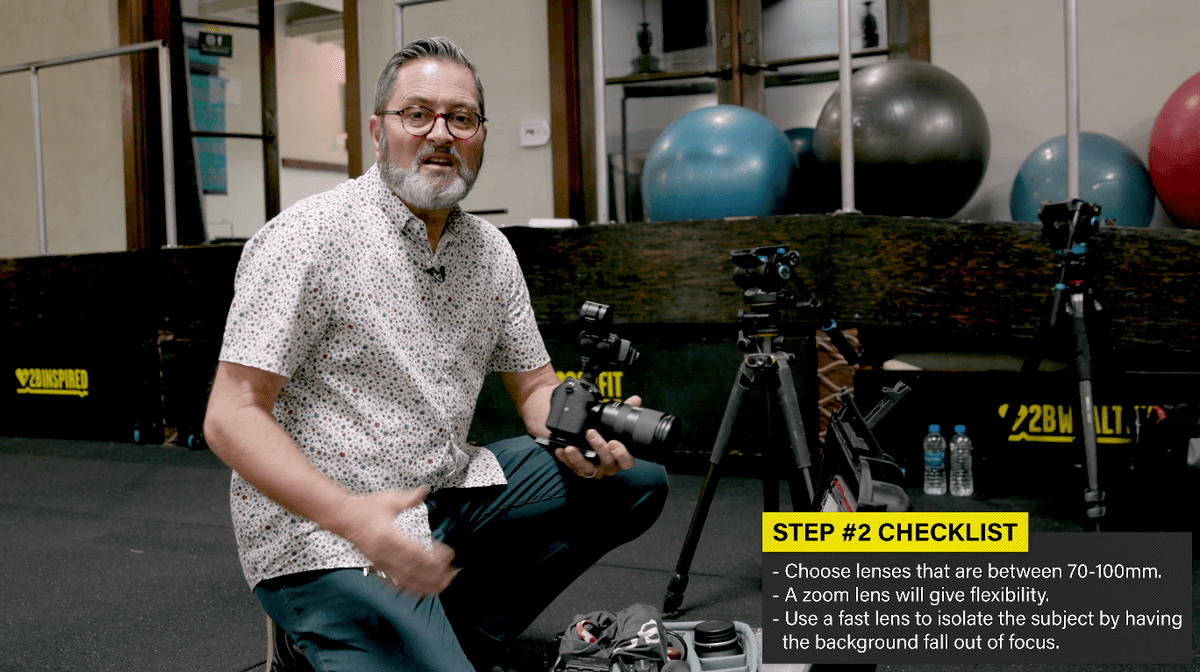
Number two is to choose the lens. I almost always want to use something between 70mm and 100mm, especially on a full frame camera, because I want the background to fall out of focus. And I’m going to need a little longer lens to accomplish that. Then set the f-stop to f/2.8. And I really want to be at the higher end of this Tamron 28mm to 75mm. I’ll shoot this at 75 at f/2.8 and that’s going to become the way I’ll isolate her from the background. That’s my best choice. If I’m doing a biographical interview and I want to see where this person lives, I want some kind of context in the interview so I’m going to go with a little wider lens. But generally speaking, my style is I like to isolate the background, just make it go away.
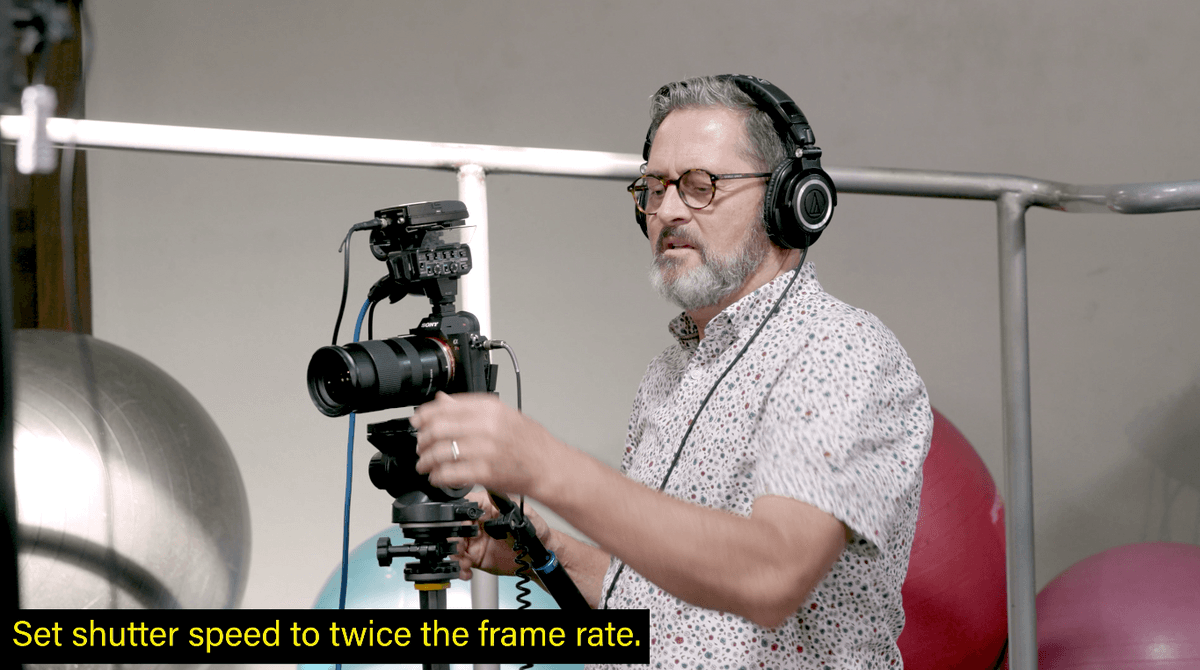
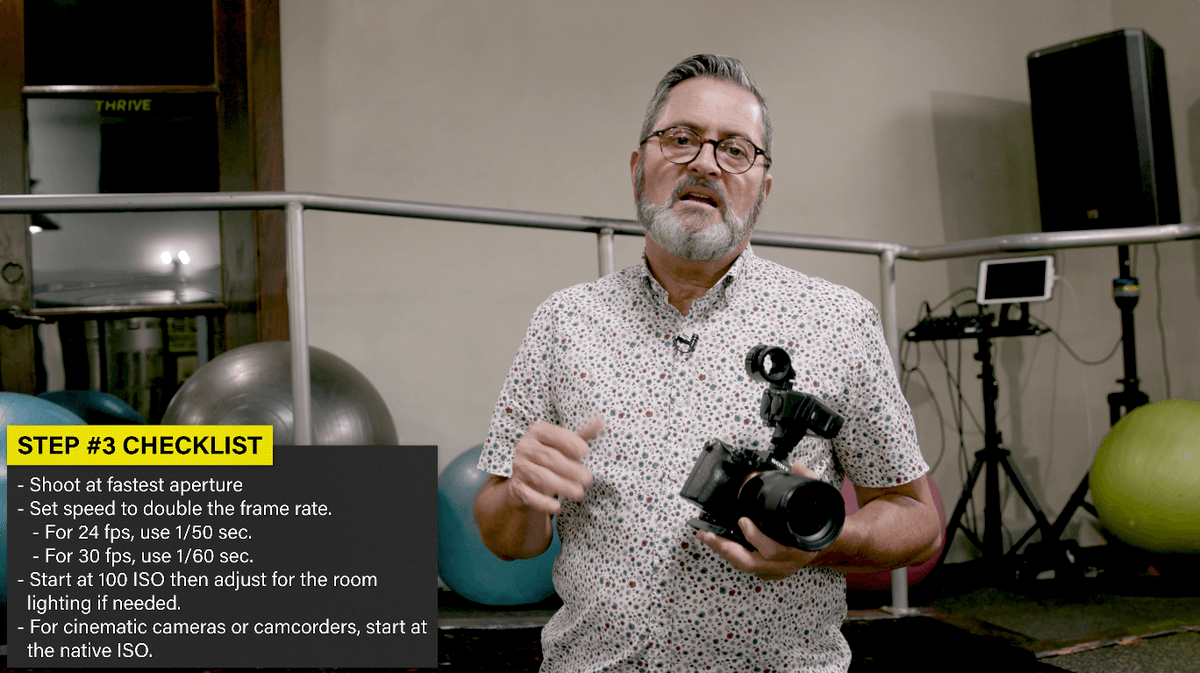
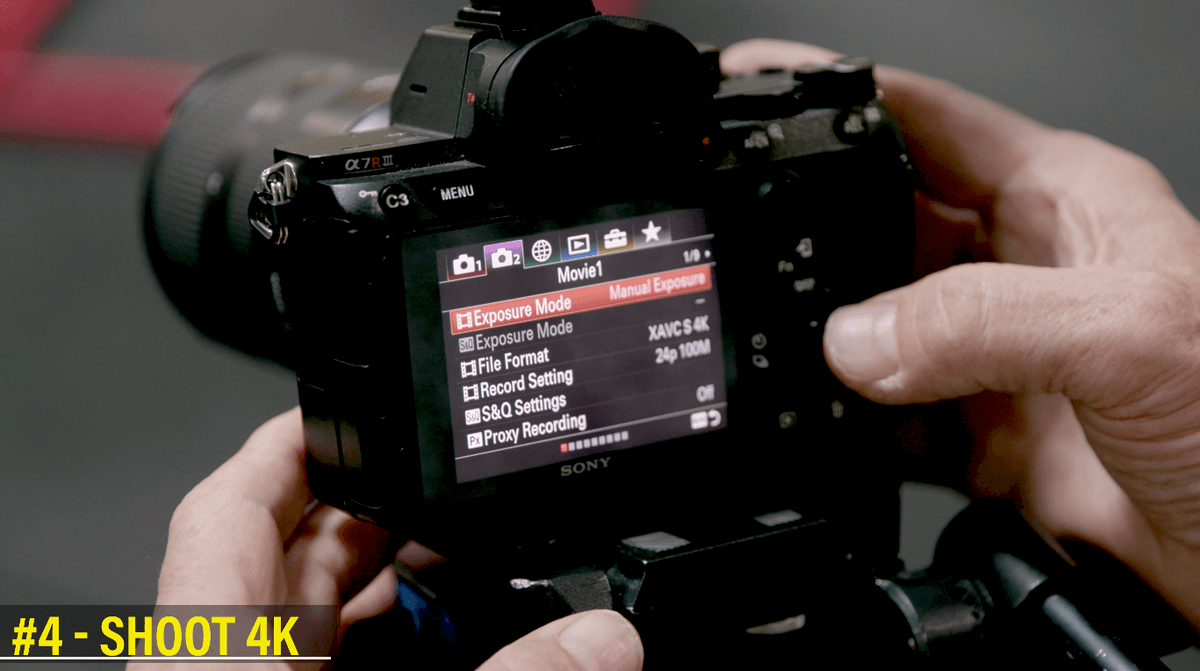
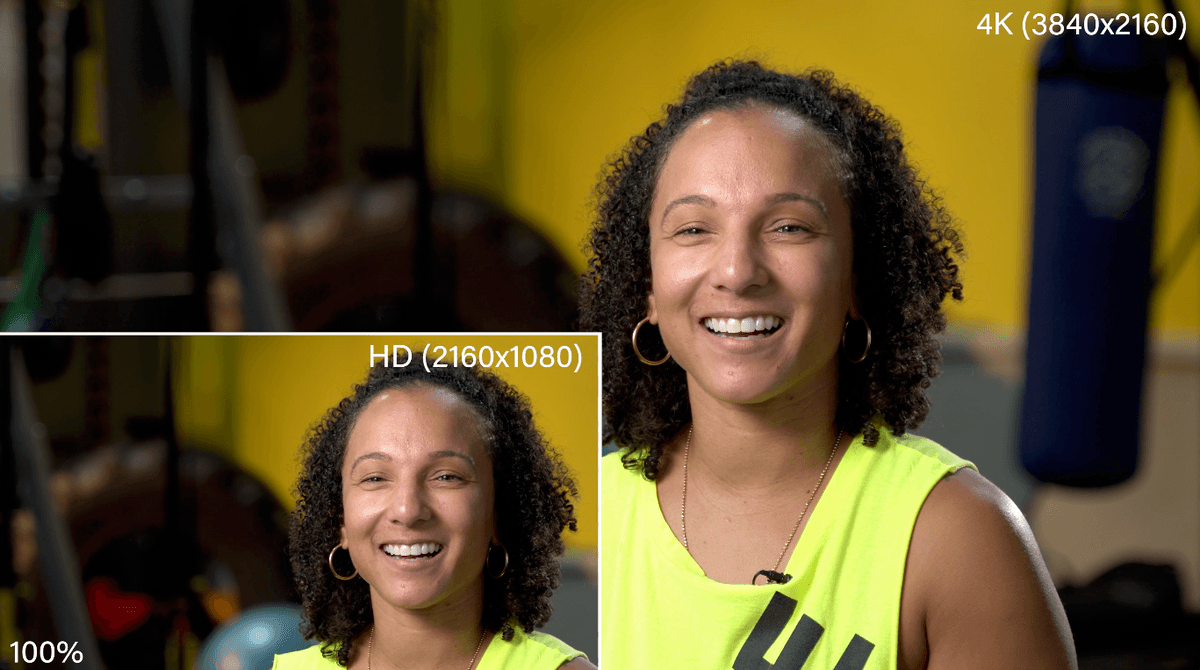
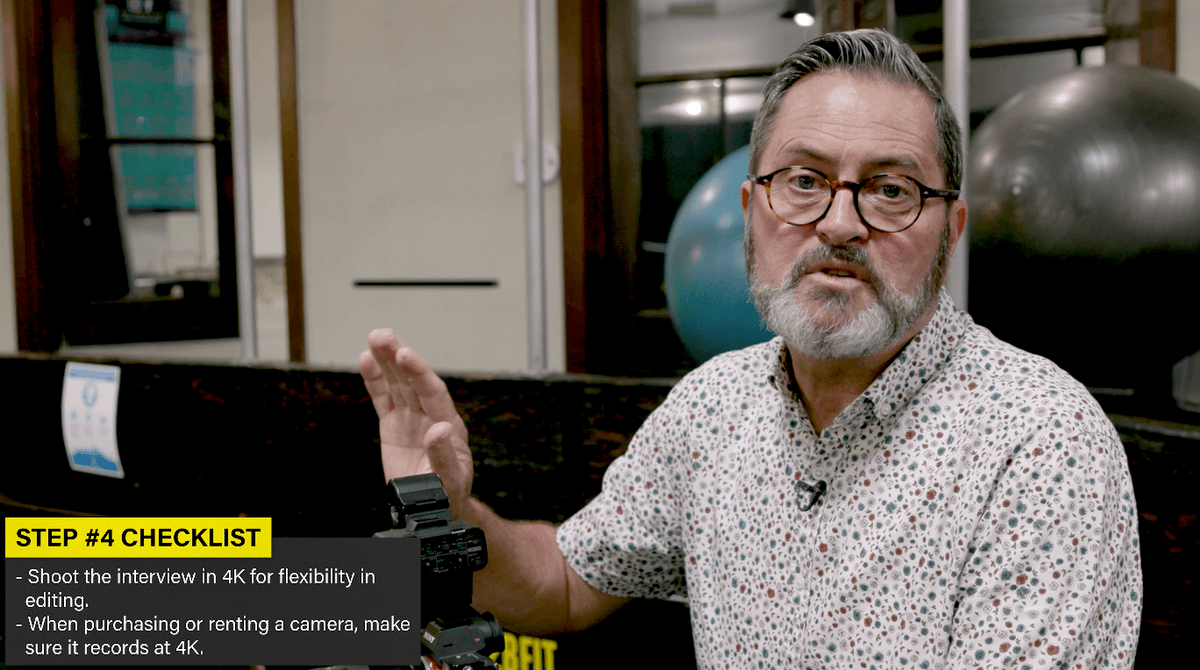
Now for camera settings on my 28-75mm I’m going to shoot at f/2.8. Because I want the depth field to be as shallow as possible. I’m going to use 1/15th of a second because we’re shooting at 24 frames a second, if you’re doing 30 frames a second, you should shoot at 1/60th of a second. I’m going to use 100 ISO because I want as clean a picture as possible. But in a room like this, if it feels too dark, then I’m probably going to push that ISO up slightly and get it up to maybe 320 or 640 if I need to. If you’re filming with a C-200 or something, then you’re going to start at your native ISO which is like 800. But for these kinds of cameras, mirrorless cameras 100 or 120 is a good place to start. If you have the option to shoot 4k, always shoot 4k. If you think, “I really don’t need 4k, I’m going to post out a 1080 P”, it’s crazy not to shoot 4k because it gives you the ability to punch in as you’re editing your interview. And then you can post out at 2K or 1080p. If you’re purchasing a camera for the first time, then definitely get one that has 4k, because it gives you in your one camera interview the option to feel like you have two cameras because you can punch in. And then when you post out at 1080 P or 2k, you still have that great look where you’re punching the camera in and out. Or you can post a 4k and you don’t have to punch in, you can use B roll to make your cuts.
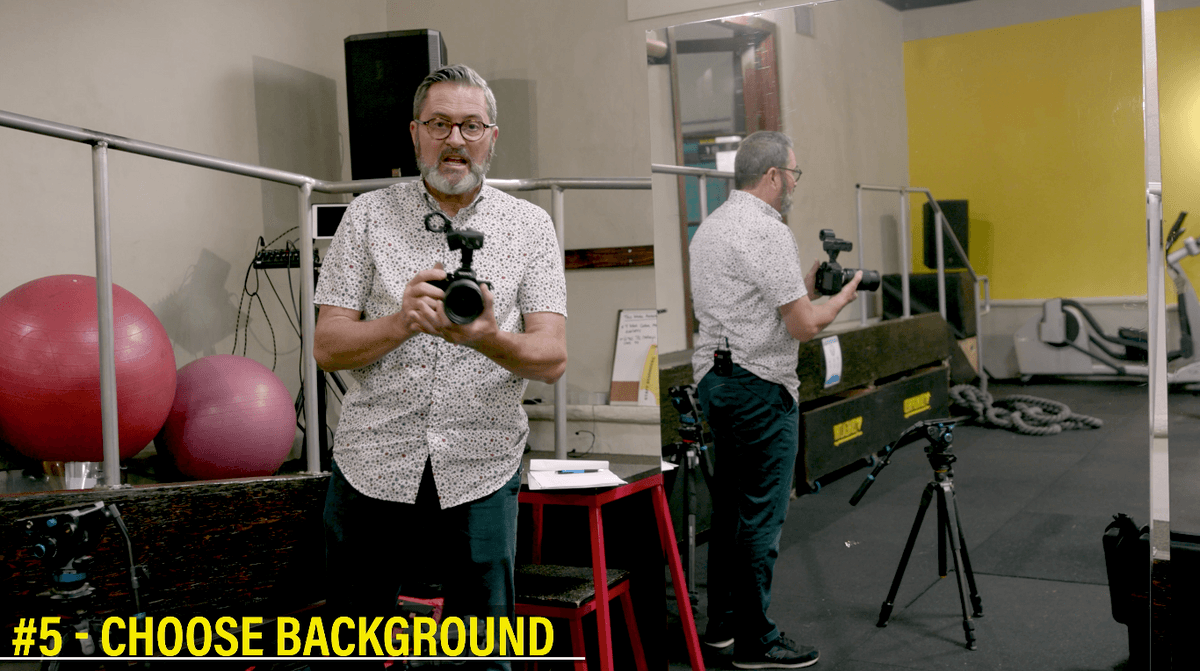
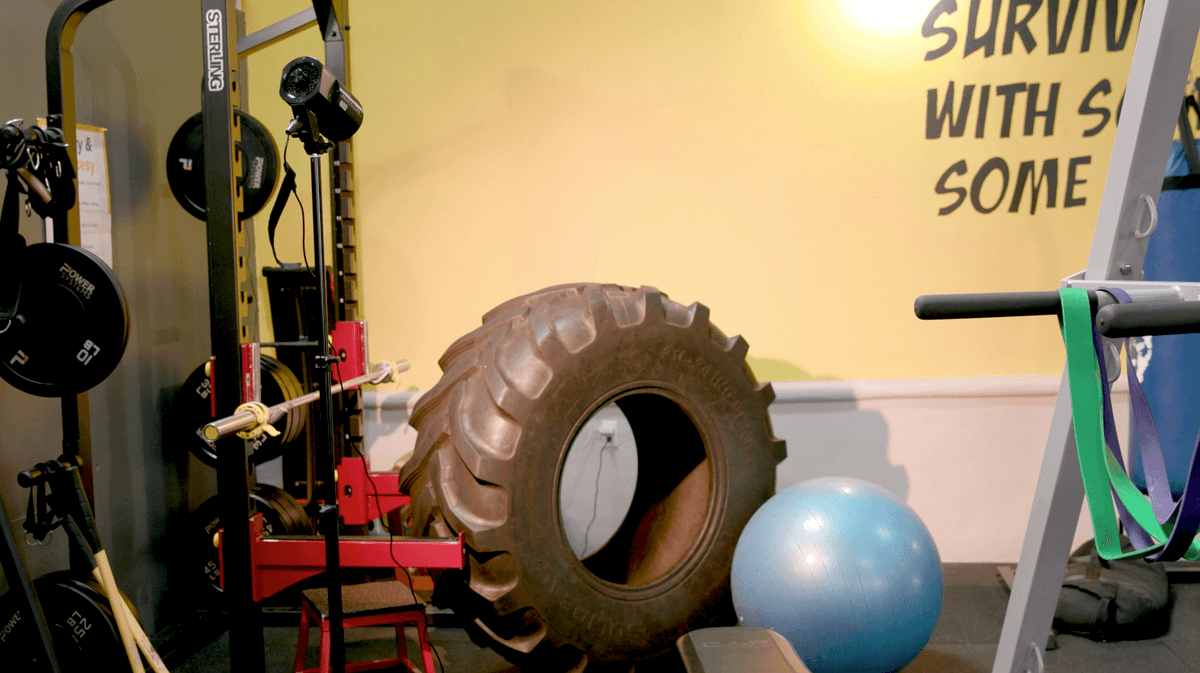
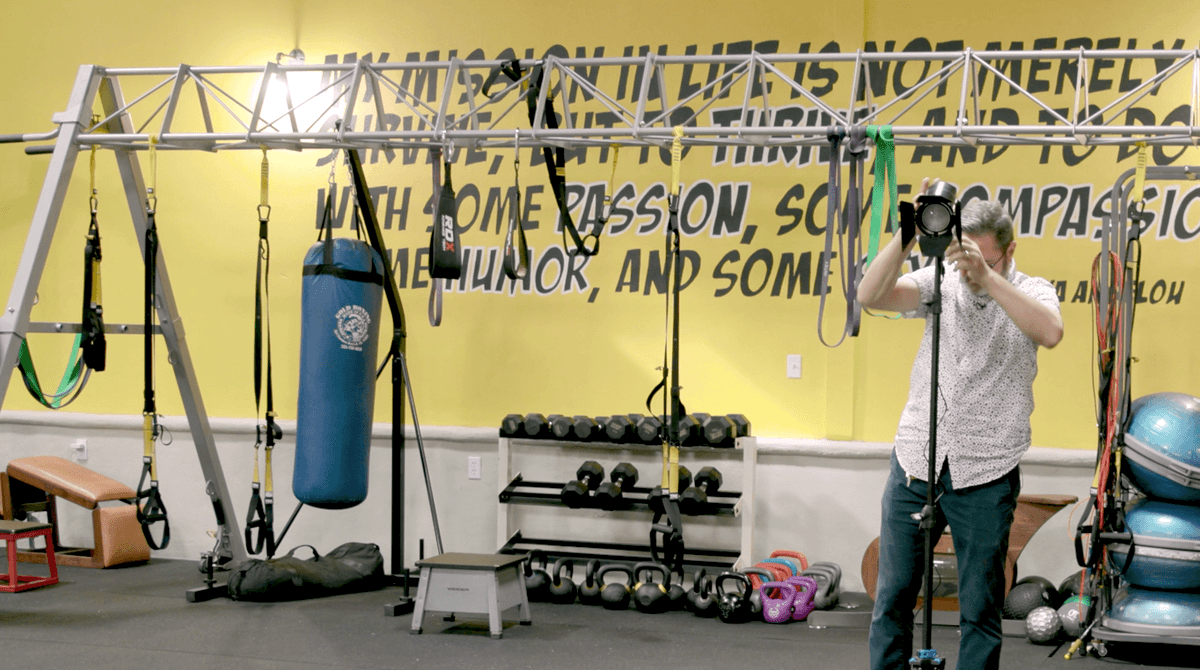
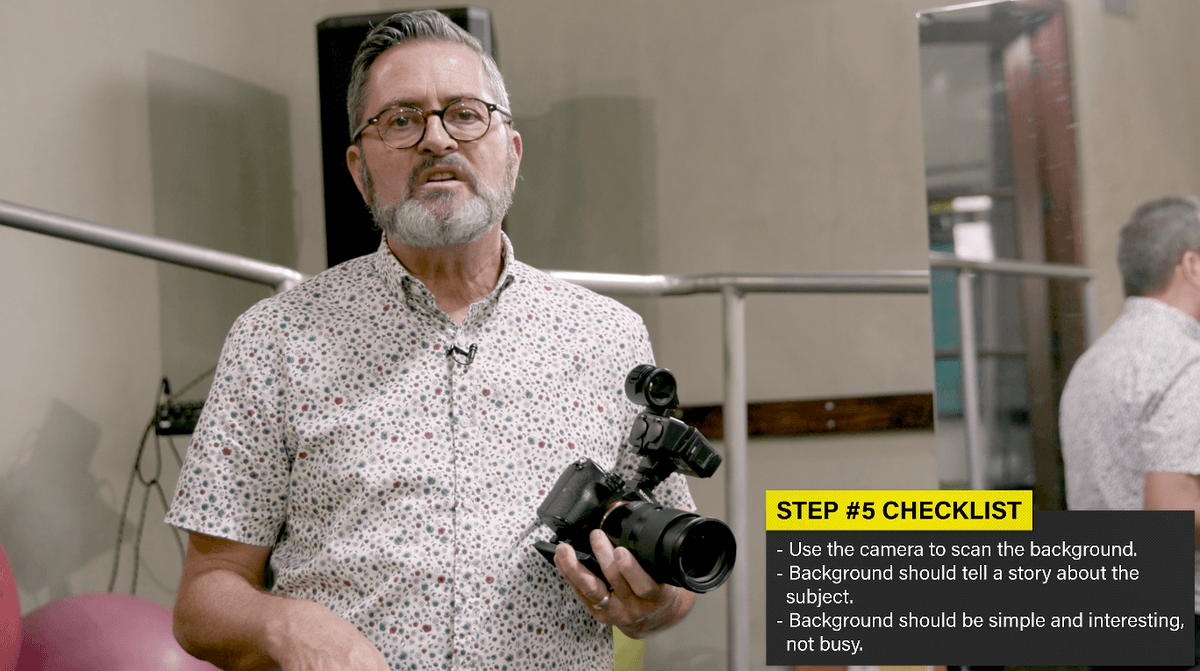
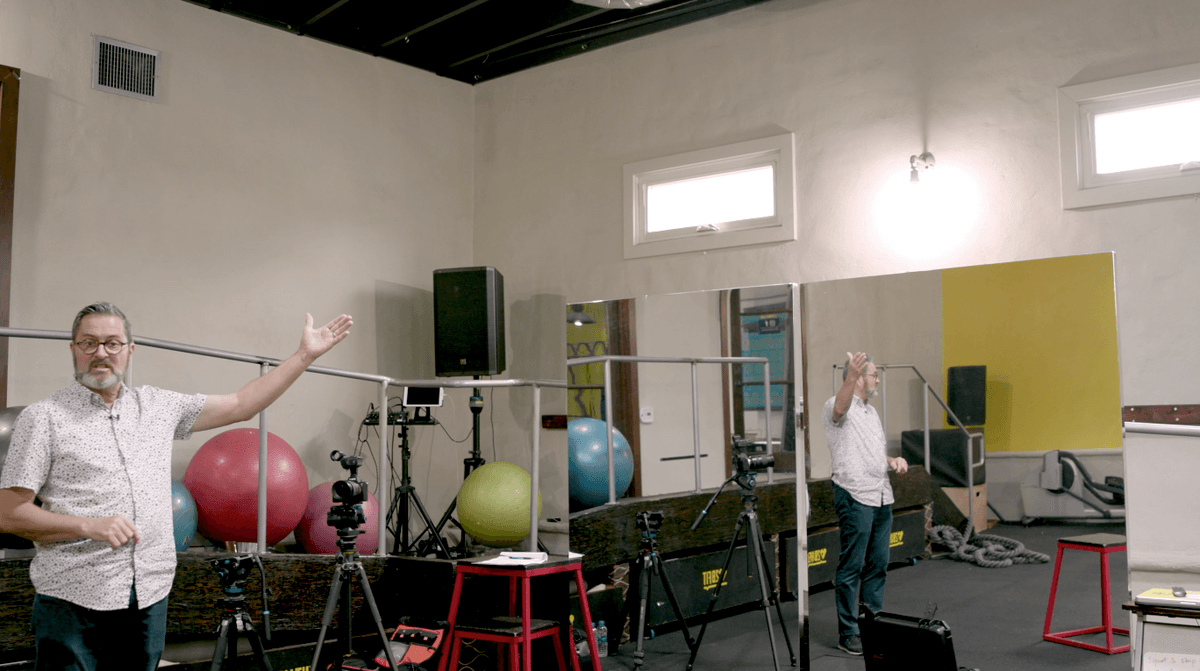
So number five, I’m going to choose my background. I’m going to take my camera, and I’m going to take it off from the tripod. I’m at 75mm, I may go to 70 just to give me a little bit of breathing room in here. And then I’ll start looking at the backgrounds. I’ll focus on the point where my talent is going to sit. And I start looking at the background. Where’s the point I can shoot that’ll give me a decent background. I may need to move my stool. But I’m really looking for this background to fall out of focus and be interesting and simple enough to be able to isolate her from the background. This will give a nice interview and the background tells the story but doesn’t overpower her. So I’ve got a great shot here, I see the punching bag in the background. I see the yellow wall, which I really like. It has some writing on it, but that will fall out of focus. I see some equipment on the left. But the big overhanging a-frame that holds a lot of equipment up is right in the way. So we’re going to move that out of the way to make it a little more simple back there. Then we’ll bring the weights in and kind of dress our background. Part of the reason this is working is because I’m as far away from that background as possible. And that’s working great here in this room because there’s lots of room here. But if you’re in someone’s house or in an office, this becomes more difficult to do. And sometimes you need to be on a lens that’s going to allow you to go to f/1.2 to be able to get the background to fall out of focus. But in here we have a deep background that is going to fall out of focus. Then we’re going to address our background to the frame.
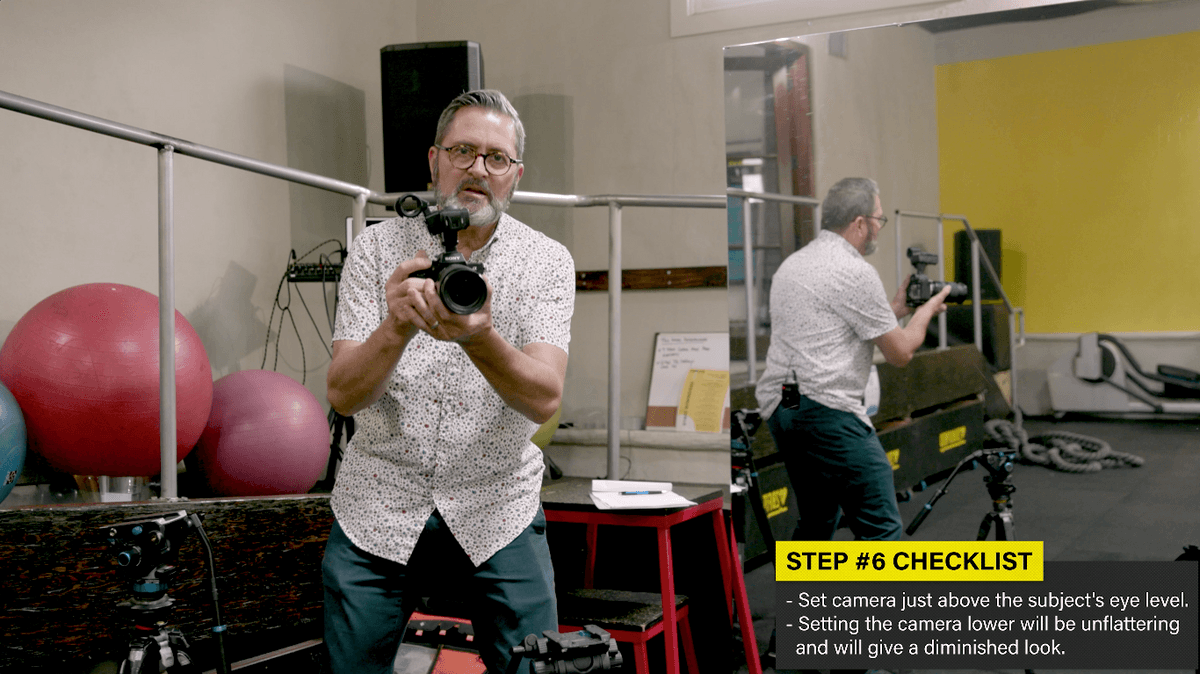
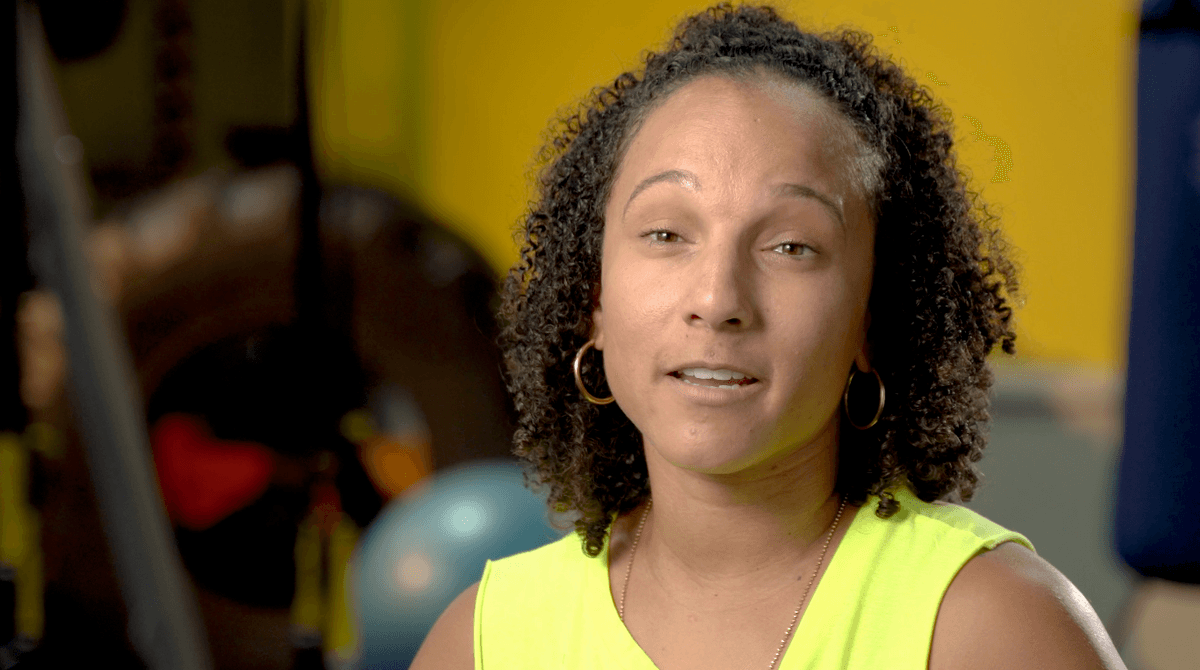
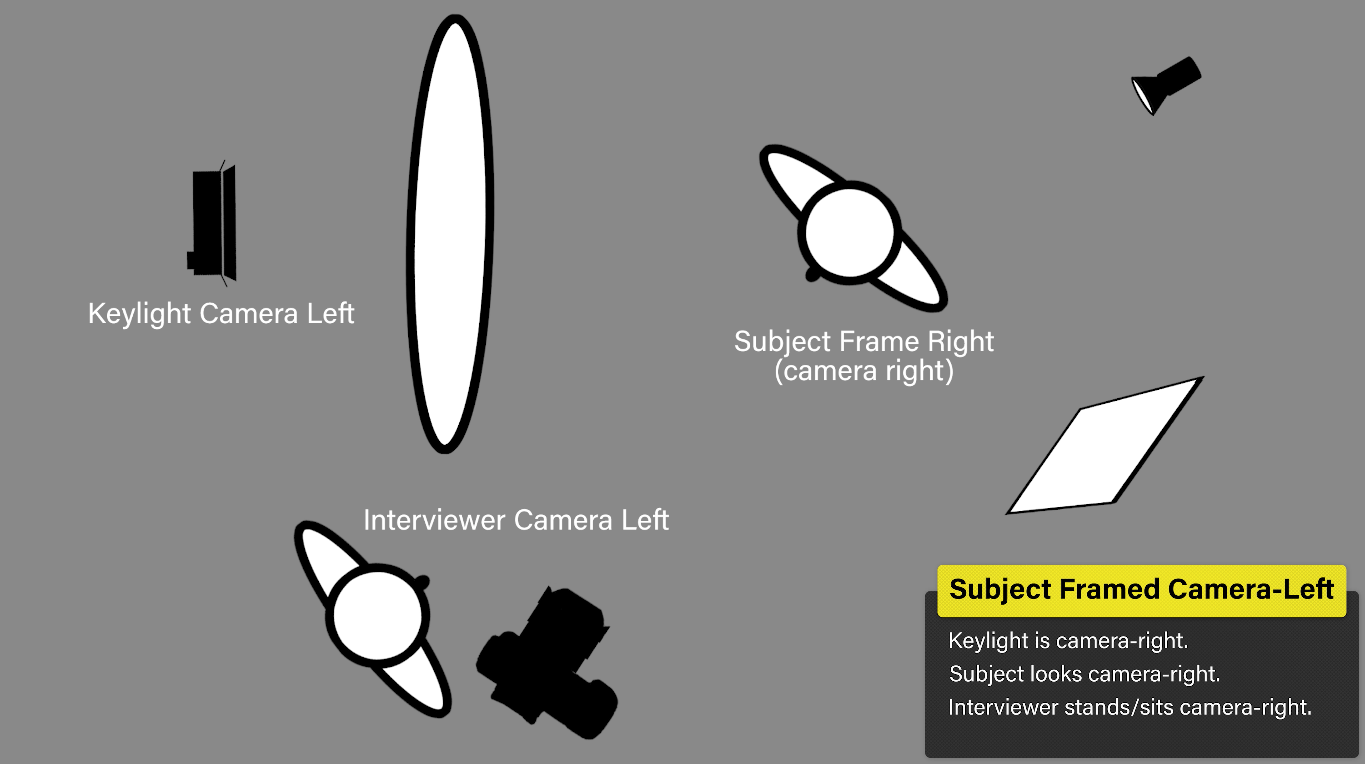
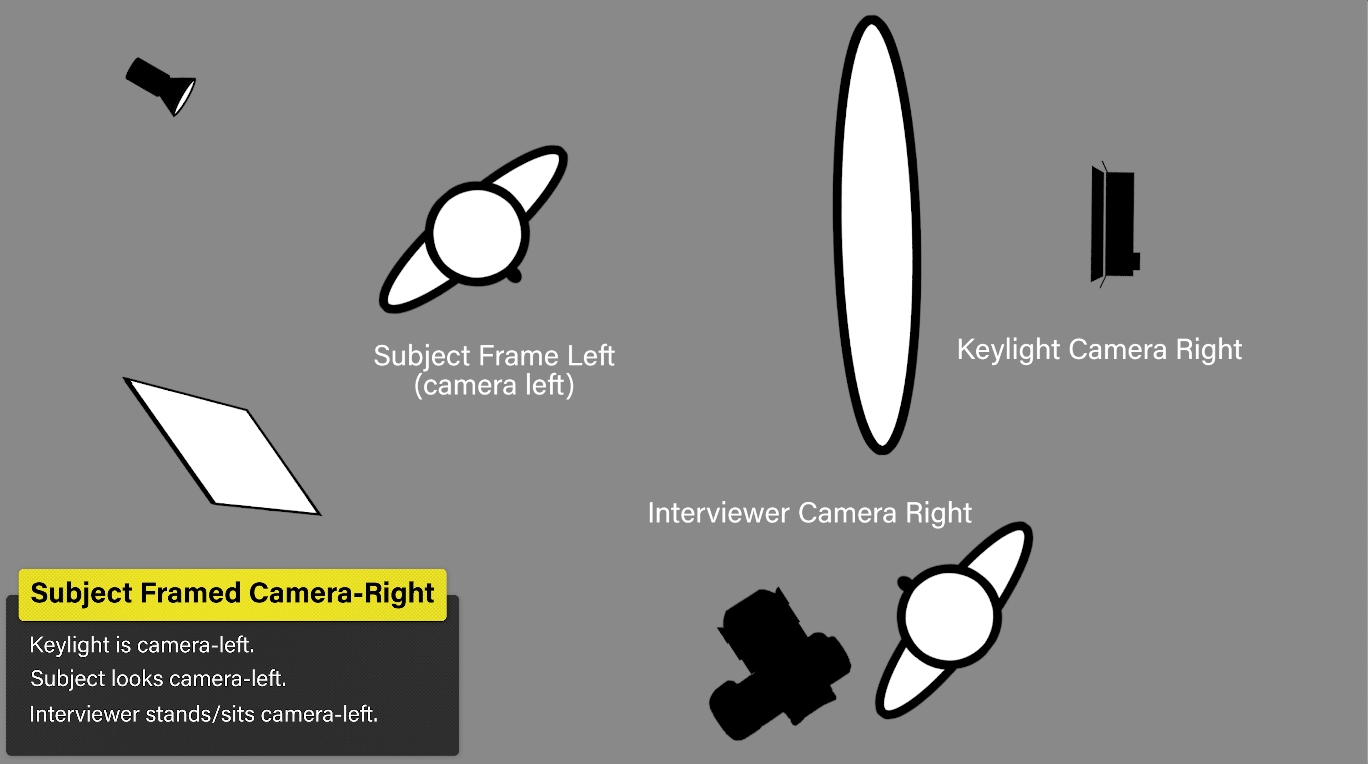
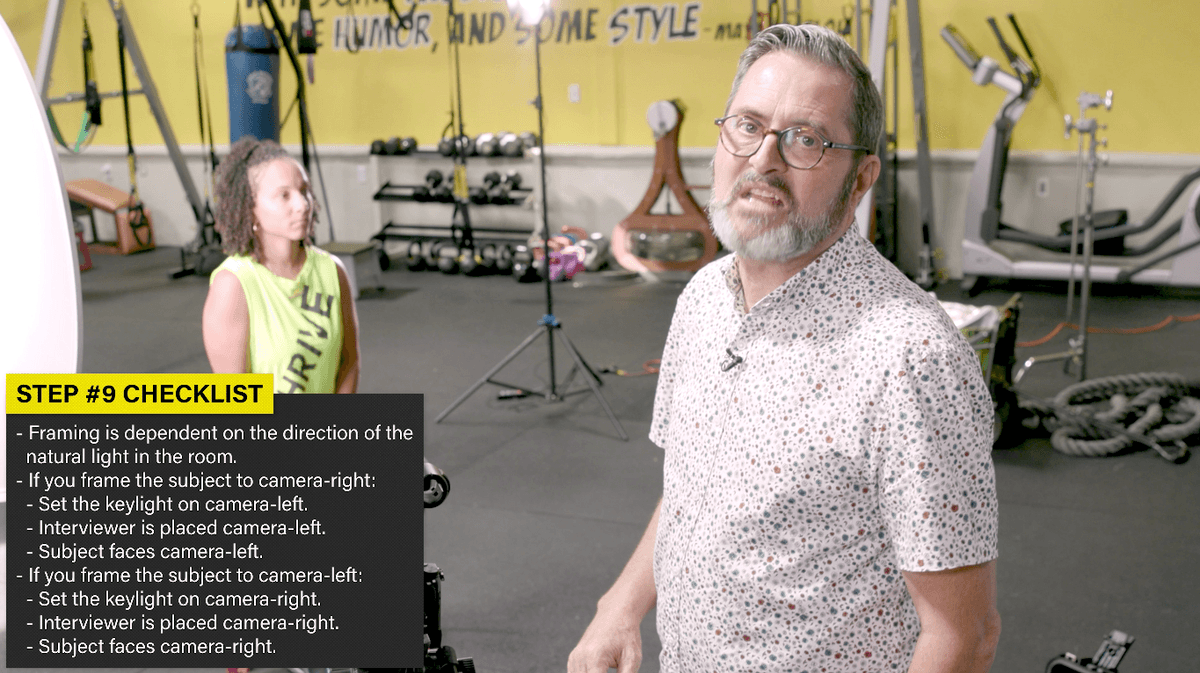
That really brings me to step number six. I want to set my camera height just slightly above her eyes. I don’t want to be looking up underneath her. I don’t want to be way above her I want it to be just slightly above her eyes. So on this bench right here, I’m going to be somewhere in here. And that’s going to give me a nice look at her face. I don’t want to diminish her by being below her. I don’t want to be too high. I just want to be just slightly above her eyes. That’s a perfect place for the camera and I’m going to frame her to camera right.
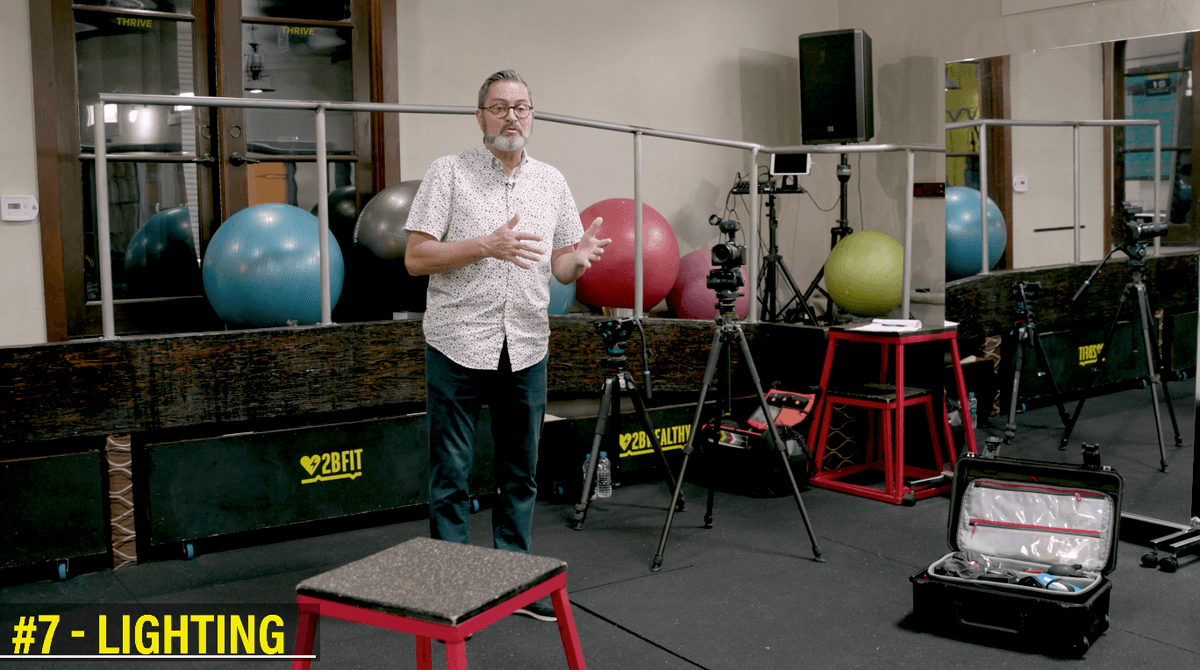
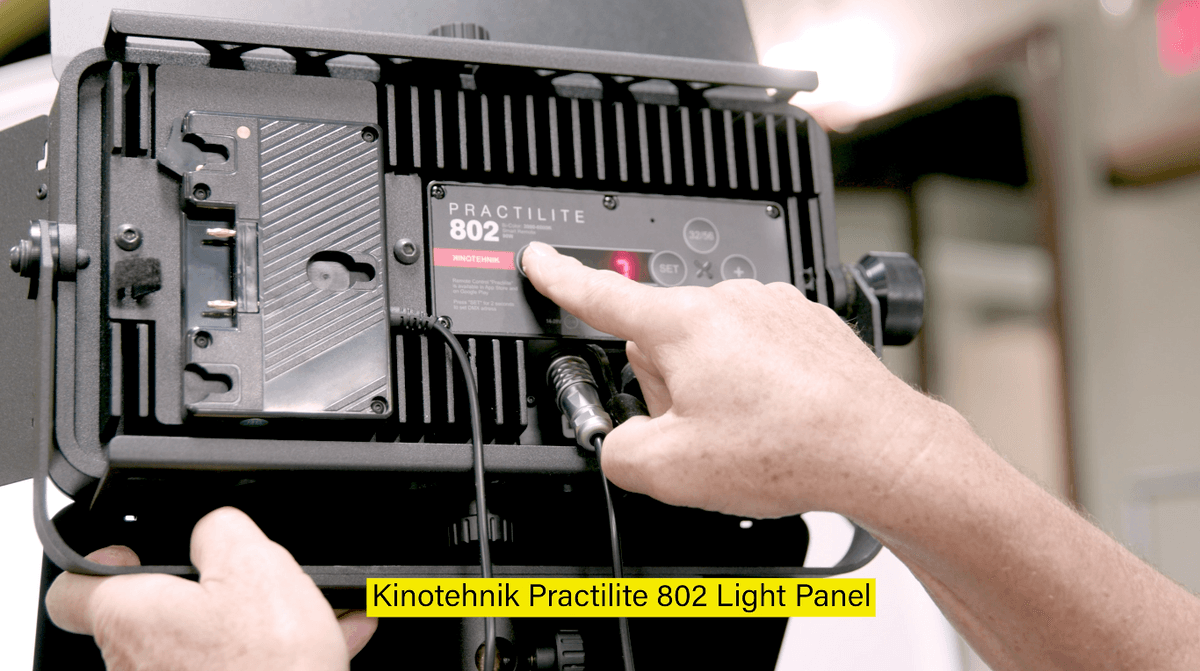
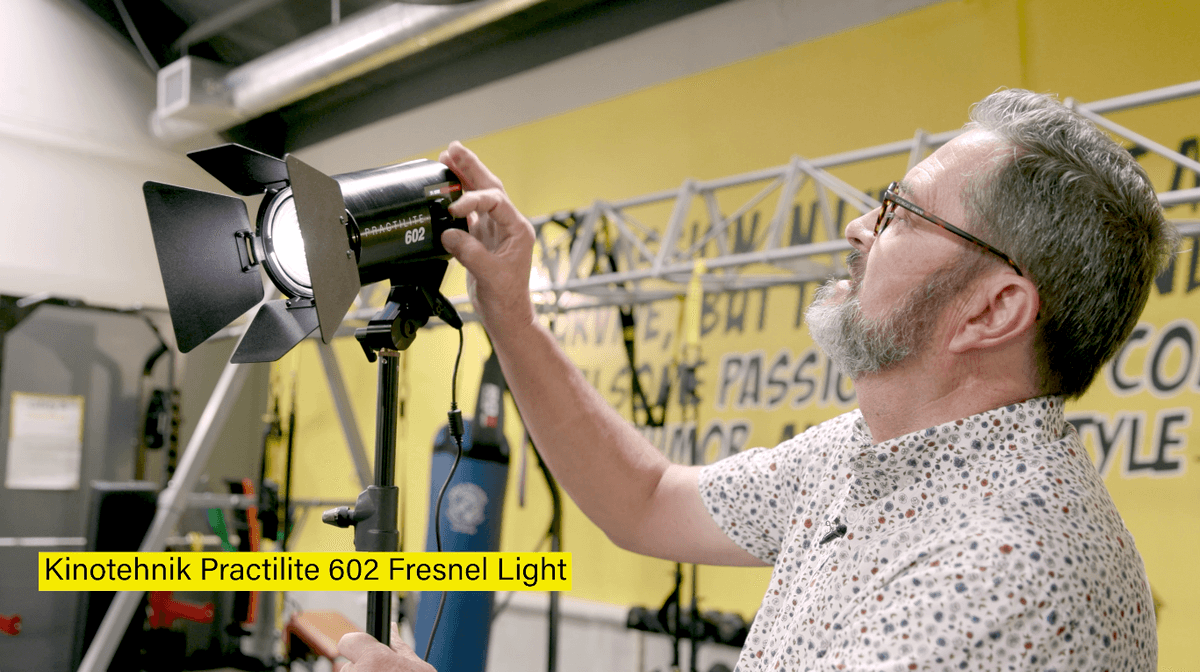
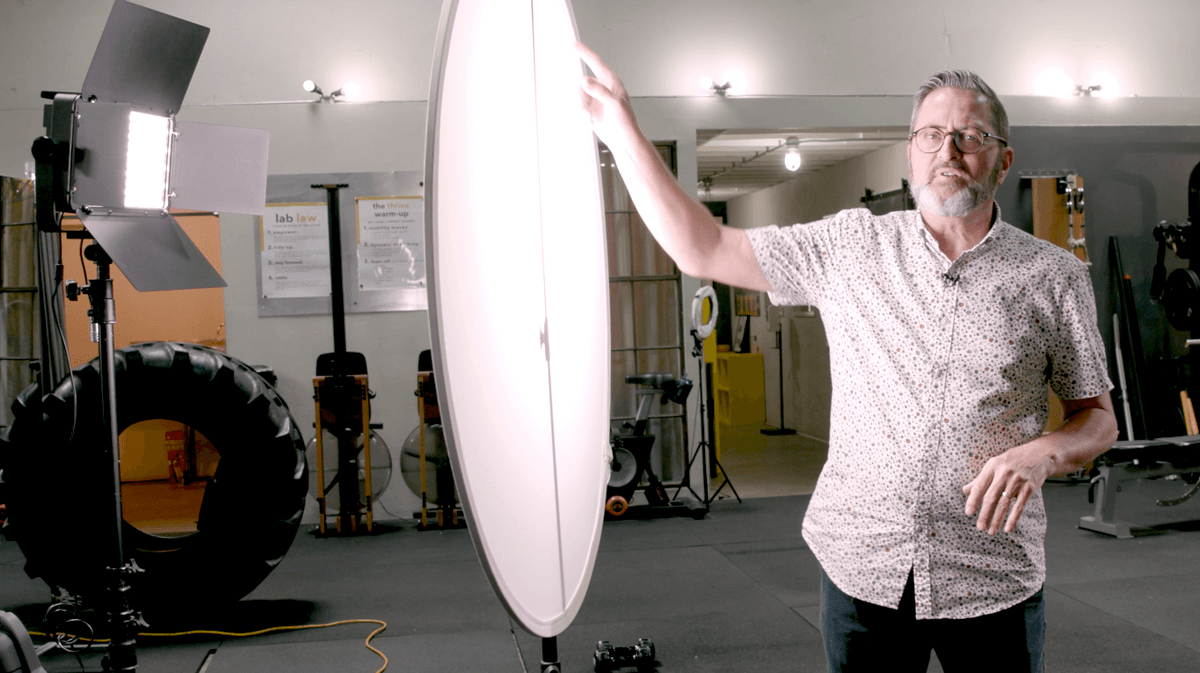
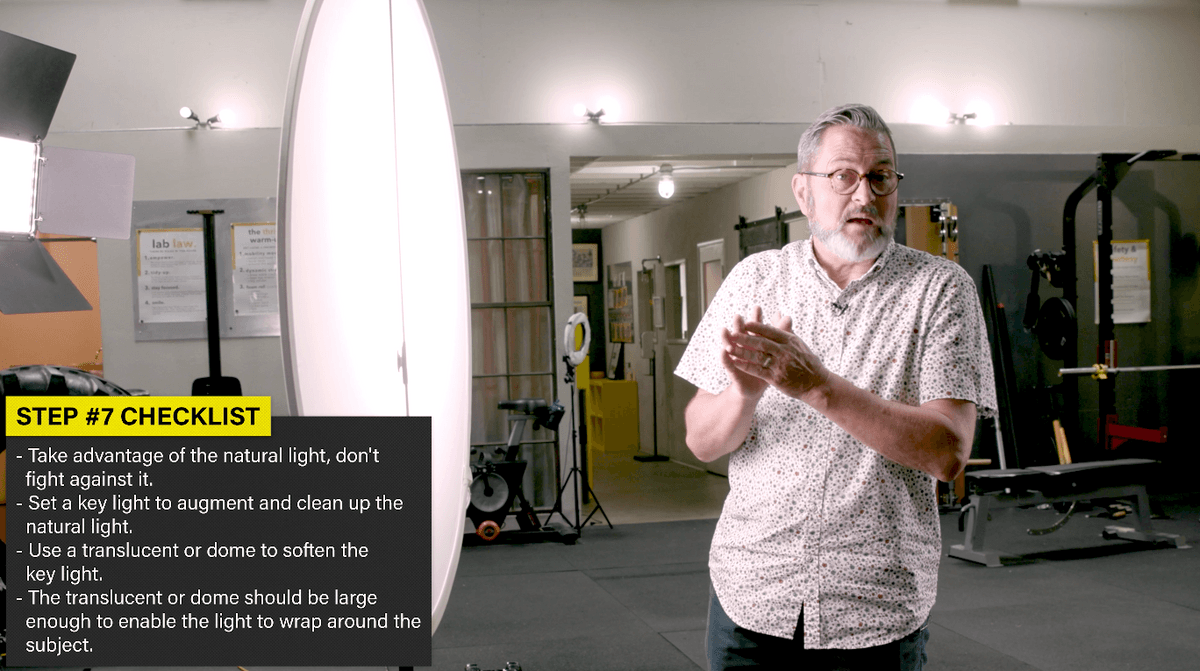
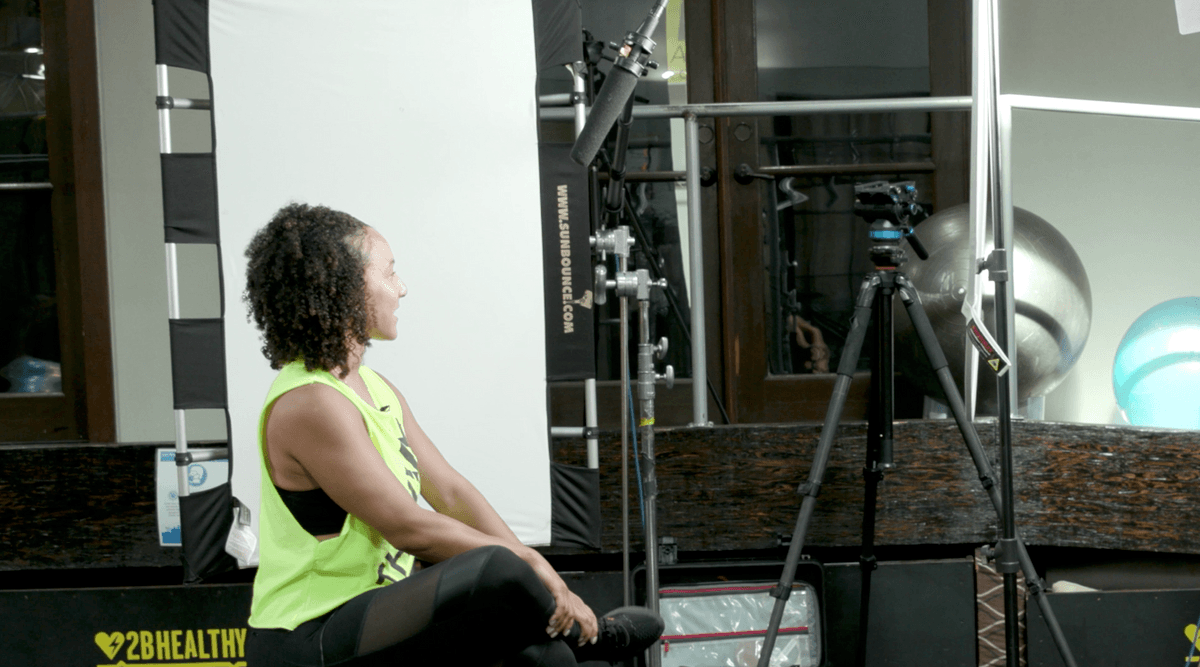
Let’s talk about the lighting. How are we going to set our light up in this room. The natural light in the room really gives us a lot to work with. And I’ve already set my chair thinking about the natural light in the room. I have a window on the camera left side. I have a skylight on that camera left side. So I’m going to set my talent so they turn into that natural light that’s already here. Then I’m going to set my key light on that same side as the natural light that’s already here, because I’m going to just clean it up and make it look a little nicer with my key light. I’m using the Kinotehnik 802 Light Panel for my key light. Now, on my opposite side where I don’t have the natural light, I’m going to set a rim light. This will put a nice highlight on her hair and separate her from the background. I have here the Kinotehnik 602 Fresnel light that I am using for the rim light. And that gives me a nice combination. I’m not trying to fight the natural light that’s here, I’m trying to work with it. So it’s going to look nice on her face. And then I’m going to have a successful experience. If I turn her this way, and I’m trying to overpower the natural light, it just becomes too difficult. It’s better to turn her into the natural light that’s already here. Put your key light on that same side as the natural light and make it look a little nicer with the rim light. I love to shine it through one of these translucent reflectors because it softens out the light and makes a larger source. It’s going to wrap around her face a little better. It’s going to give us a nicer, softer light on her face. I can bring this translucent reflector in closer to my talent. And that makes the source even softer and it wraps around her face. Or I can move it further away and that makes it more directional. That has a nice look as well. So it just depends on what kind of mood you want in the shot. The translucent reflector turns that flat panel LED into more of a soft box type effect.
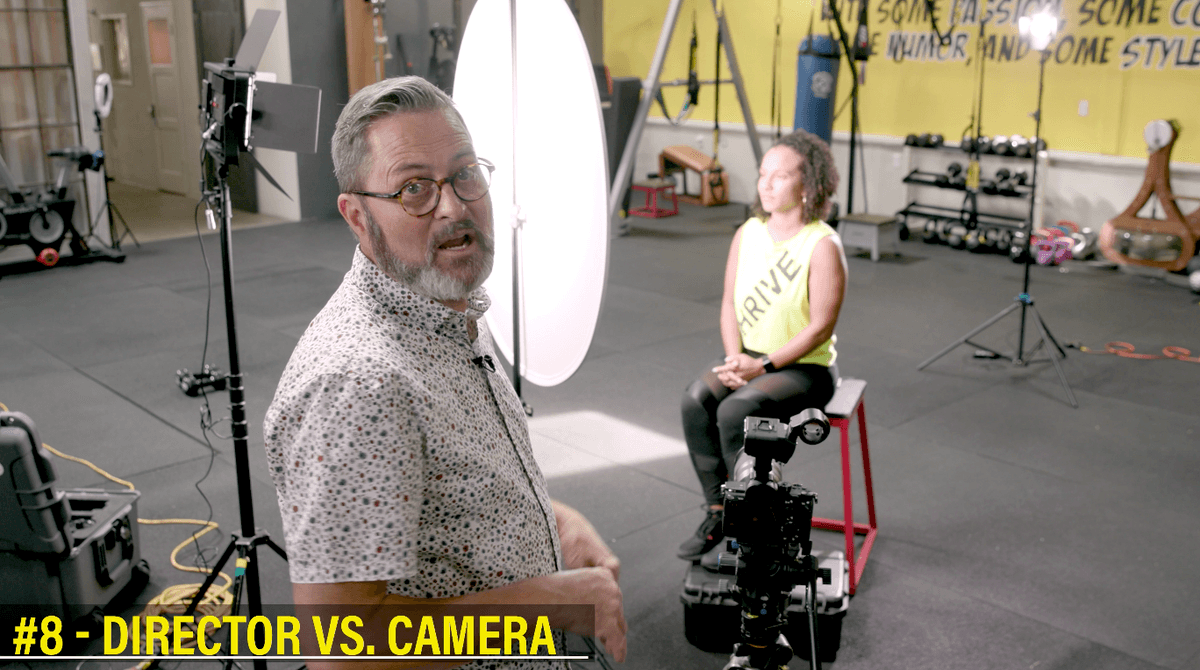
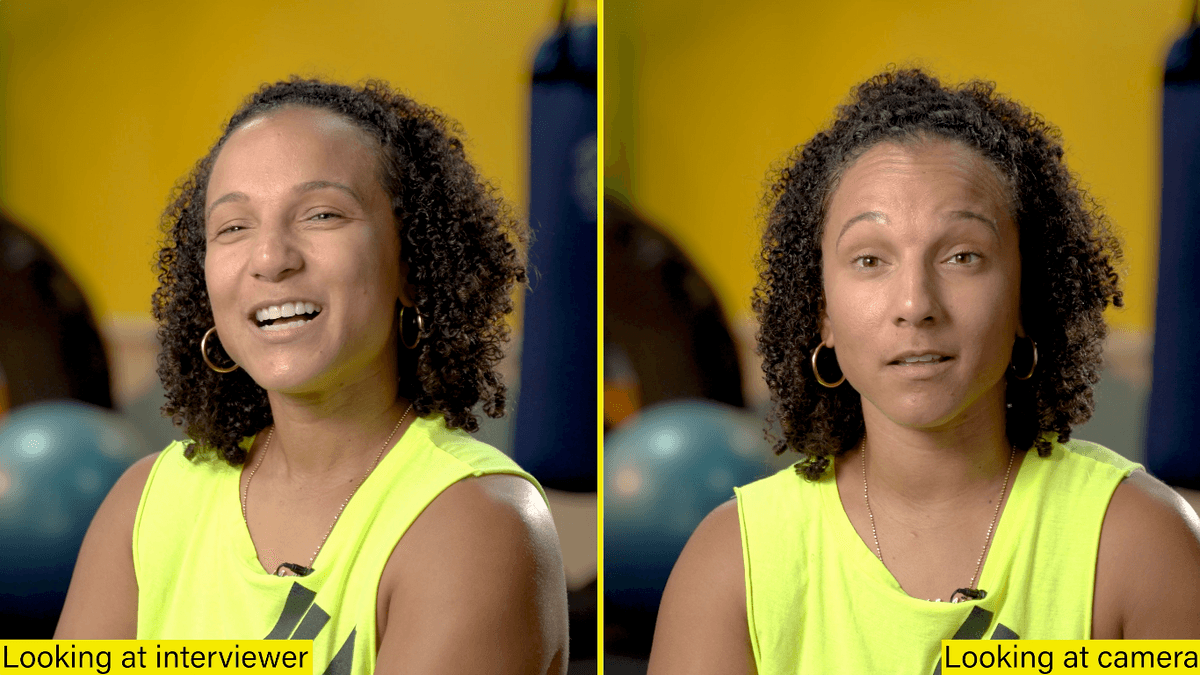
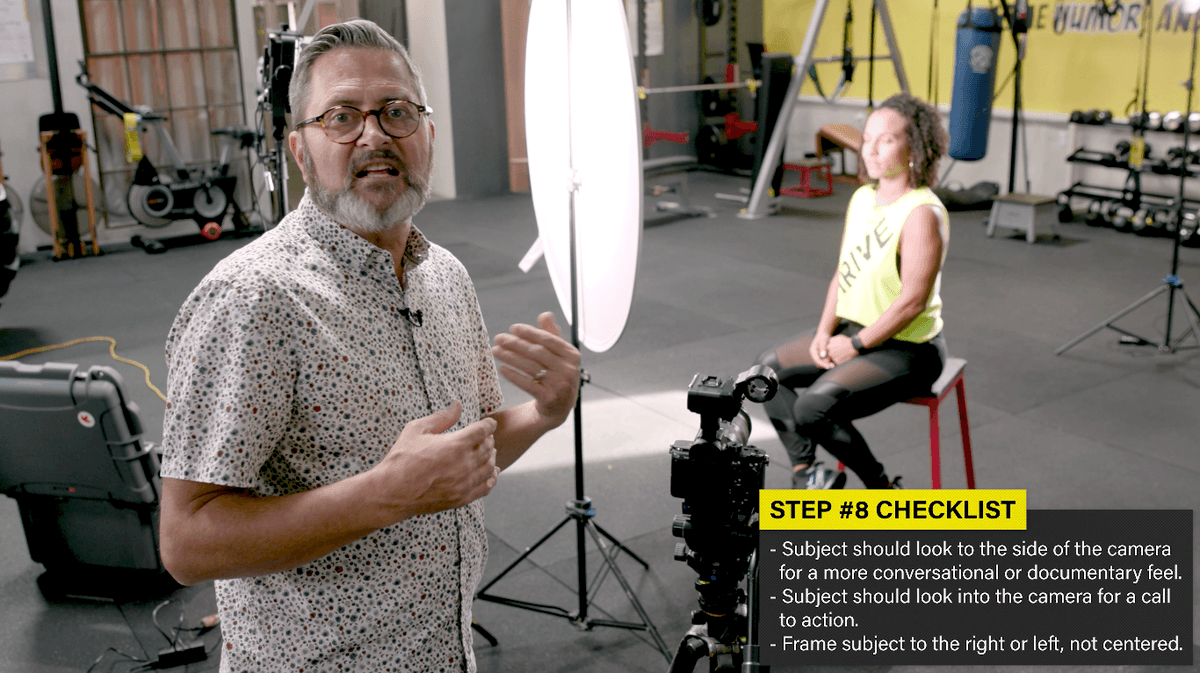
So I have her looking camera left and she’s on the right hand side of the frame. She’s looking camera left, which is towards the natural light in the room. But now you have to make a decision, does she look at the director or does she look at the camera? I’m going to stand right next to the left side of the camera. And in an interview situation, I’ll talk with her and she’ll look at me. Now if she’s in a situation where she wants to really connect with the audience, like a call to action or a sales video than she’ll look directly at the camera. Most people expect in an interview situation where it’s more of a documentary style experience, it feels better for them to not look at the camera, but off to the side of the director. That gives you a sense of the person talking about their life when they look at the director. When they look directly in the camera, it’s more about trying to connect with the audience and either sell something or make a direct appeal to the audience. So those are two rules of thumb as far as looking at the director or looking in the camera. Most of the time, it’s a kind of doc interview where you have the person look at the director off camera.
I don’t put people directly in the center of the frame very often because I don’t think it looks good. The frame is to kind of blah, and it has no dynamics to it whatsoever. It feels like something’s missing. Whereas in this case, I can get a little tighter on her. And I can let the background be behind her on the camera left side. This gives me a great place to put some titles.It also allows me to punch in on her face. And it’s just a more comfortable way that she’s looking across the frame. So you do include the viewer, as you look across that frame. Because she looks to me and it’s like she’s crossing the viewers look. And it feels that they feel a connection there.
So here’s the setup, this is the equation that I use. If I have her looking to my left, I’m going to put her on the right side of the frame.So she’s on the right side of the frame. When you put the talent on the right side of the frame, then everything goes left, left, left. She looks left, the key light is on the left, and the director stands to the left of the camera. So when she’s on the right, it’s left, left, left. Left for the key light and left for the director. If I turn to this side where she’s now looking camera right, she’s on the left side of the frame.So she’s looking right, the director stands on the right, and we move the key light to the right. I don’t want to be looking into this broadside of the light on her face. I want the key light to be on the same side that I’m standing because she’s going to be looking at me to the right.So there’s the equation when she’s on the left, right, right, right. When she’s on the right, left, left, left.
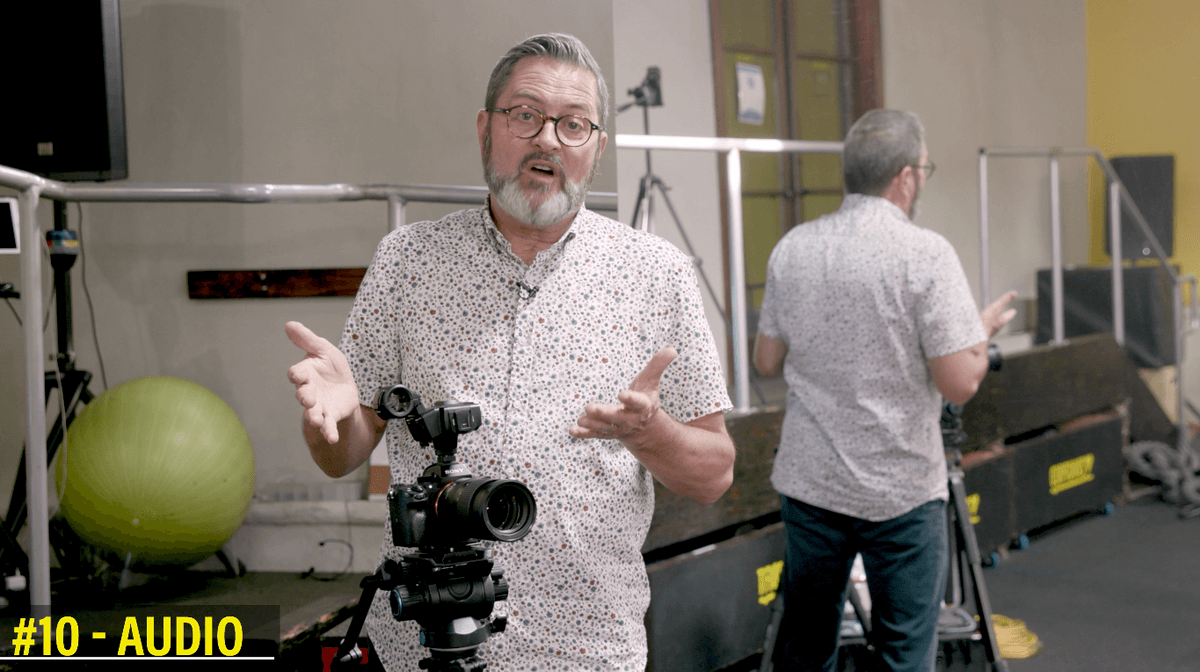
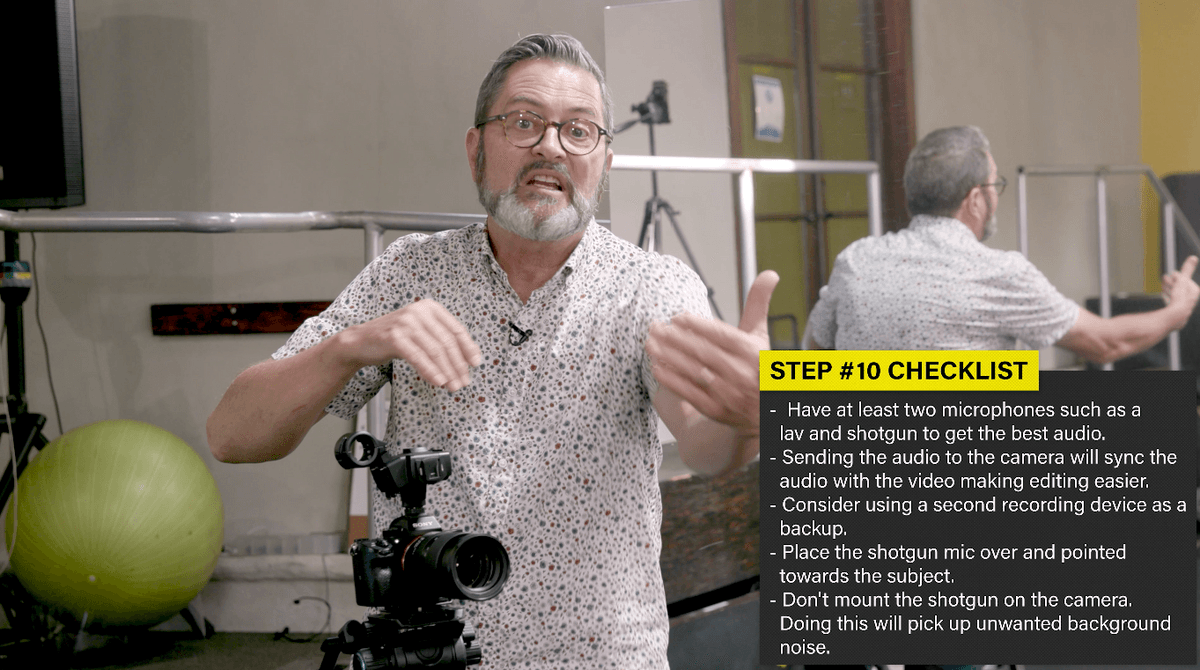
When I’m doing an interview, I want two sources of audio every time. I’m going to have a shotgun mic, and I’m going to have a lav. And I’m going to take both of those back to the device on the camera that allows me to lay those two back to the clip. So when we go into editing, we have those together. It’s already synced and I can easily work on it. If you’ve got a shotgun, the worst place to put it is on your camera. Get a cable for it. Get it off your camera. Get it really directional and close to your talent. That way it really isolates their voice and gets rid of a lot of the room sound and gives you great audio of the person. Here on the camera the sound picks up everything in this room before can even get to your person. So get it close to your talent to isolate that sound. Then if you have a lav that gives you a second source. And now you can mix those two later or if one of them is bad you can get rid of it and you have a backup. Backups are always good.
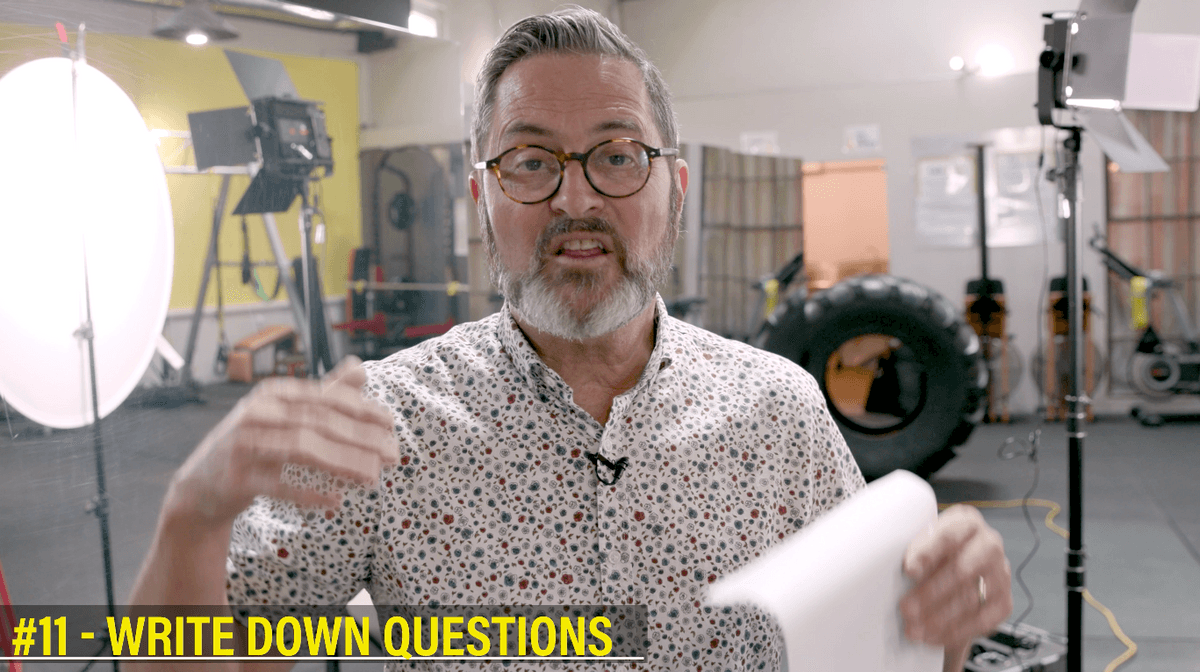
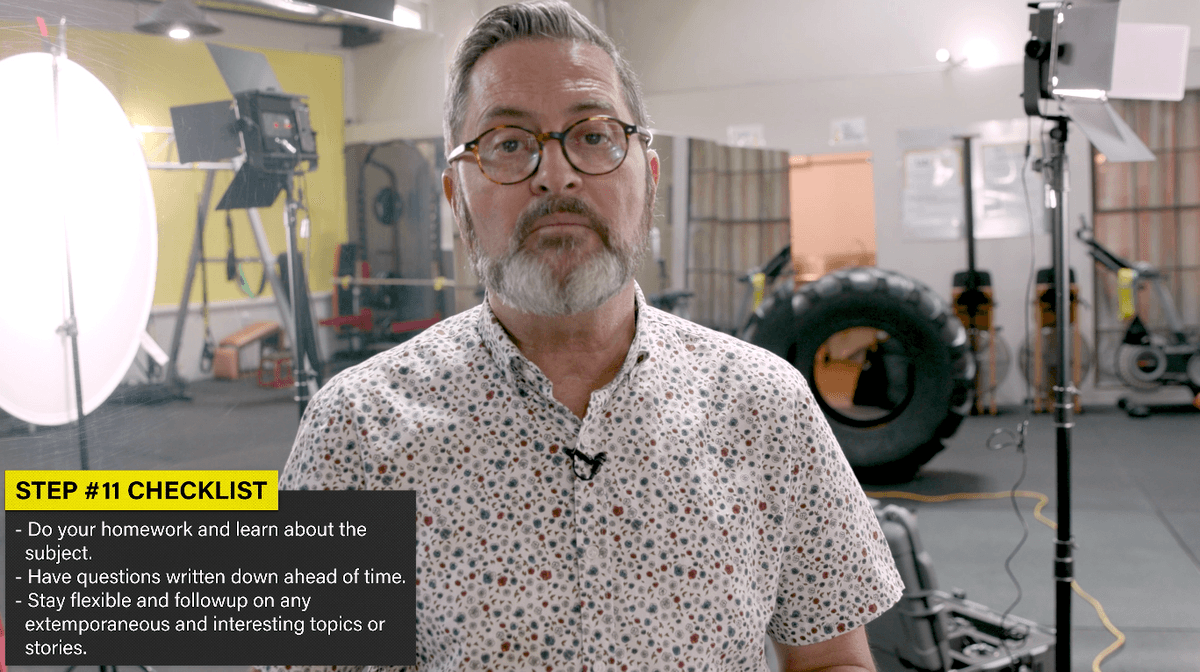
Write out your questions ahead of time. Don’t be sitting there trying to think of things to ask because it just doesn’t make the interview flow very well. You don’t cover all the things you need to get from your person. But if they give you an answer that is interesting, it gives you some place that it wants to go. Don’t be afraid to jump on that kind of line of questioning and ask two or three follow up questions. Don’t get so tied to your list and allow yourself to do follow up questions. With follow up questions to their answers your interview will become much deeper and you’re going to get things from your interviewee that you didn’t know they had to offer.
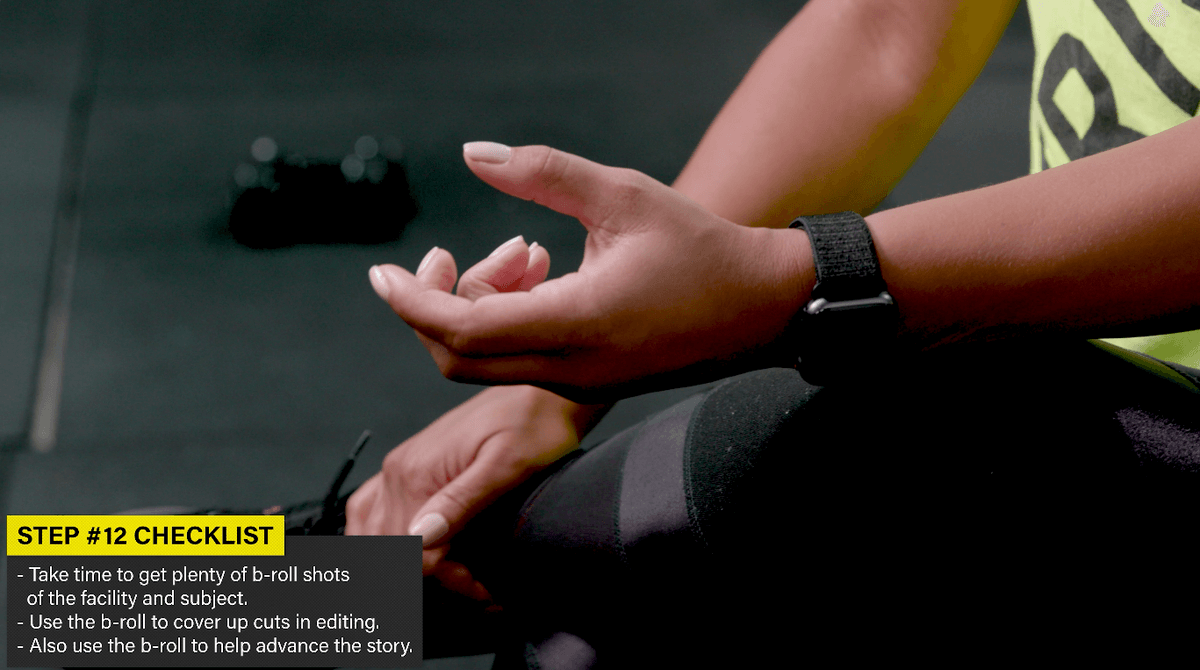
Number 12, get B roll. B roll of her doing things in the gym, things that are completely away from this interview situation because it allows you to cut and to move things around on the edit line. You need B roll. If you can’t get any B roll, if there’s just nothing you can do, then get a shot of her hands or holding a weight or just a nice tight shot of her face smiling. You know, anything you can get that gives you some kind of a cutaway. That will help your editing process.
So there’s the 12 steps of a good interview left, right, right, right and right, left, left, left. That’s it. That’s the equation very simple. Go through those 12 steps of interview. It will make it very simple to set things up. You won’t miss something. It’ll give you a great interview every single time. This is the Jay P. Morgan style interview. I think it’s going to be a great benefit to you. So go through those 12 simple steps. And keep those cameras rollin’ and Click Click Click!