How To Use LED Lights For Portraits In Still Photography And Video
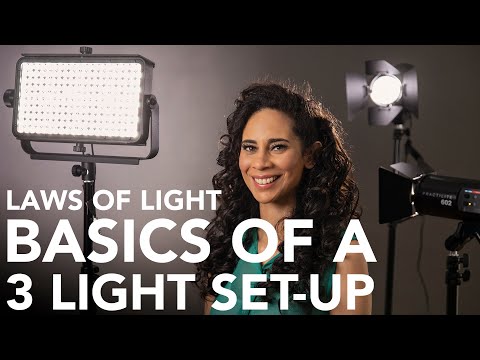
Morgan
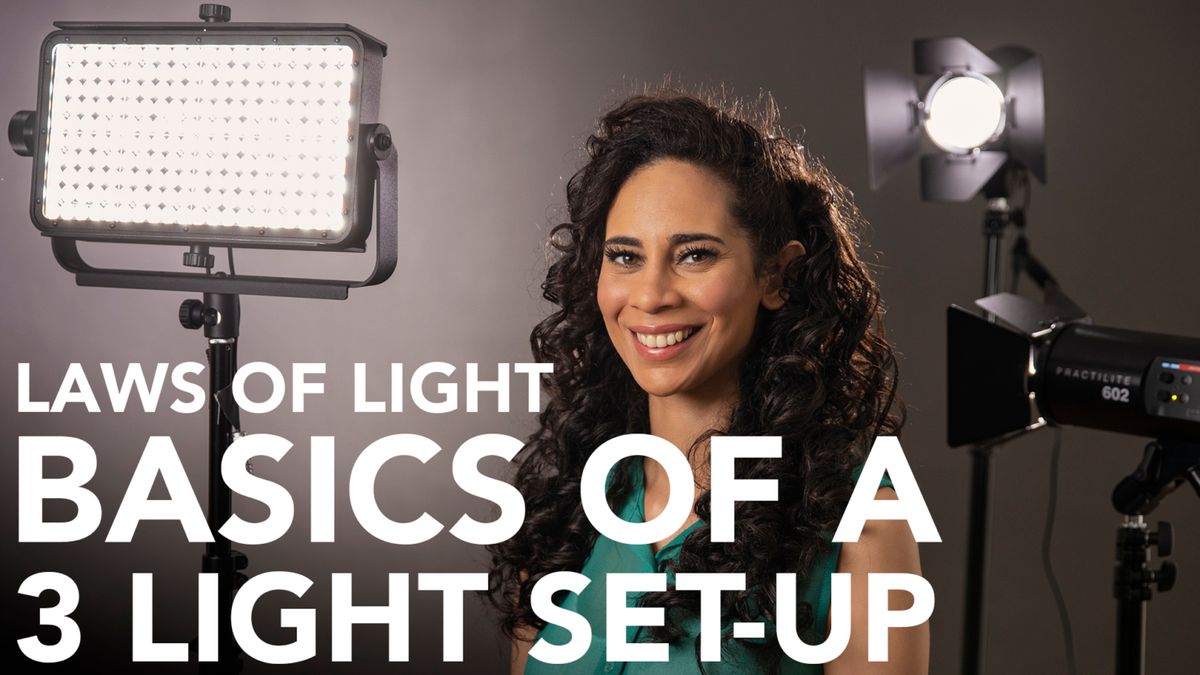
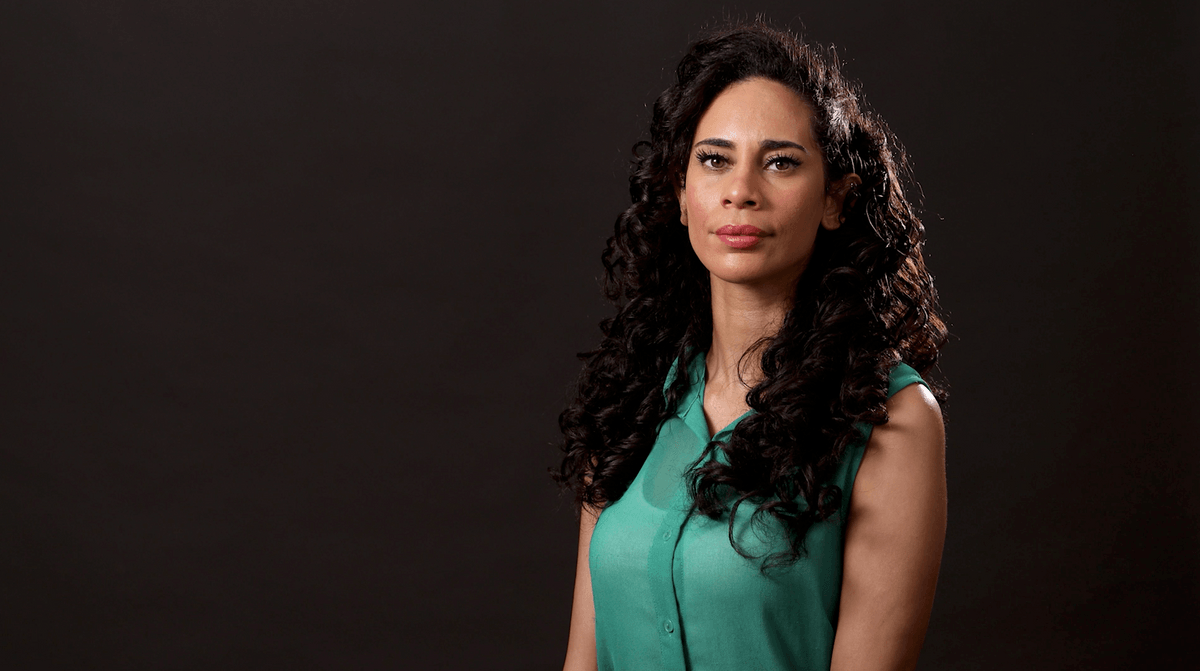
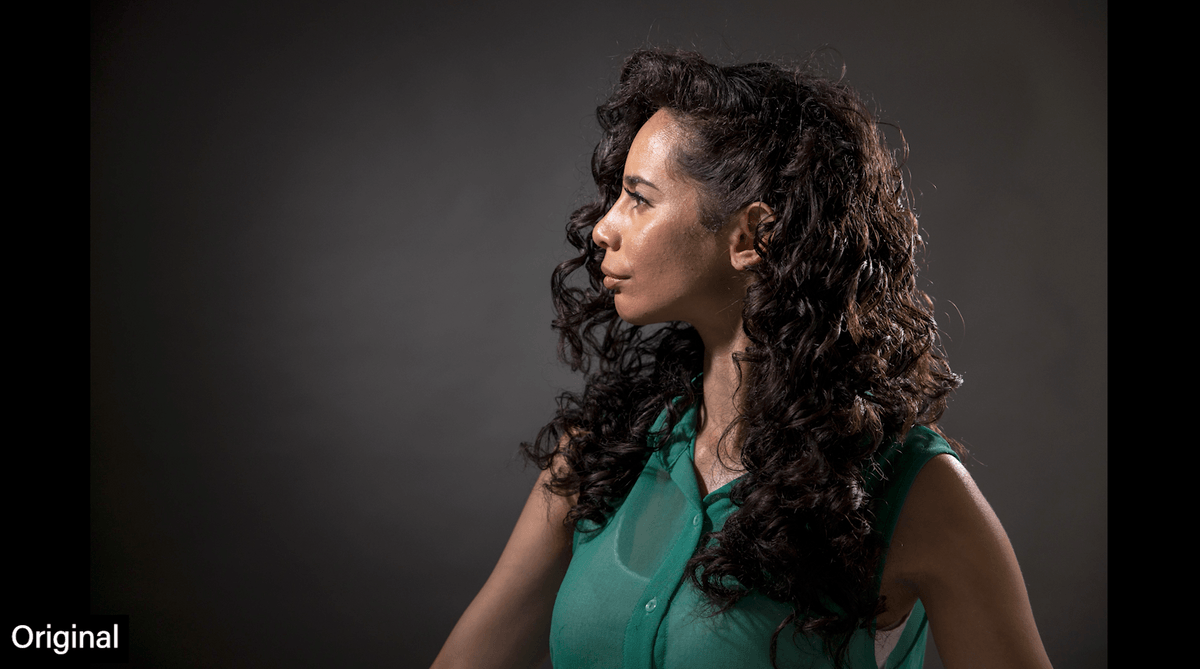
Portrait Lighting with LED lights
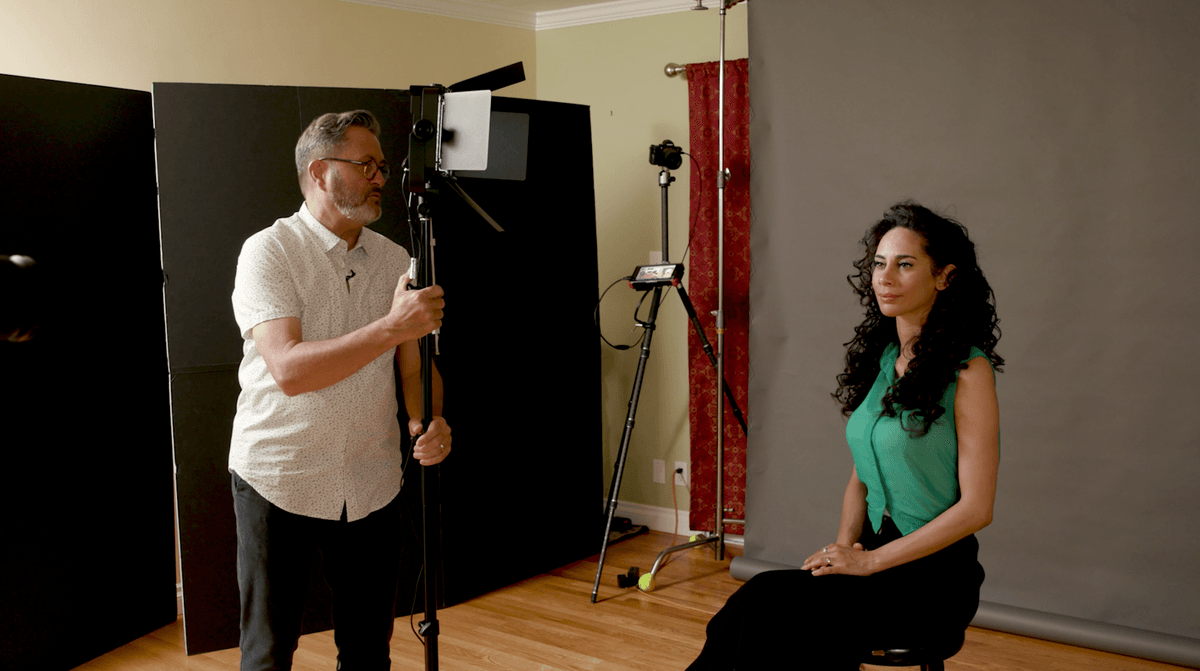
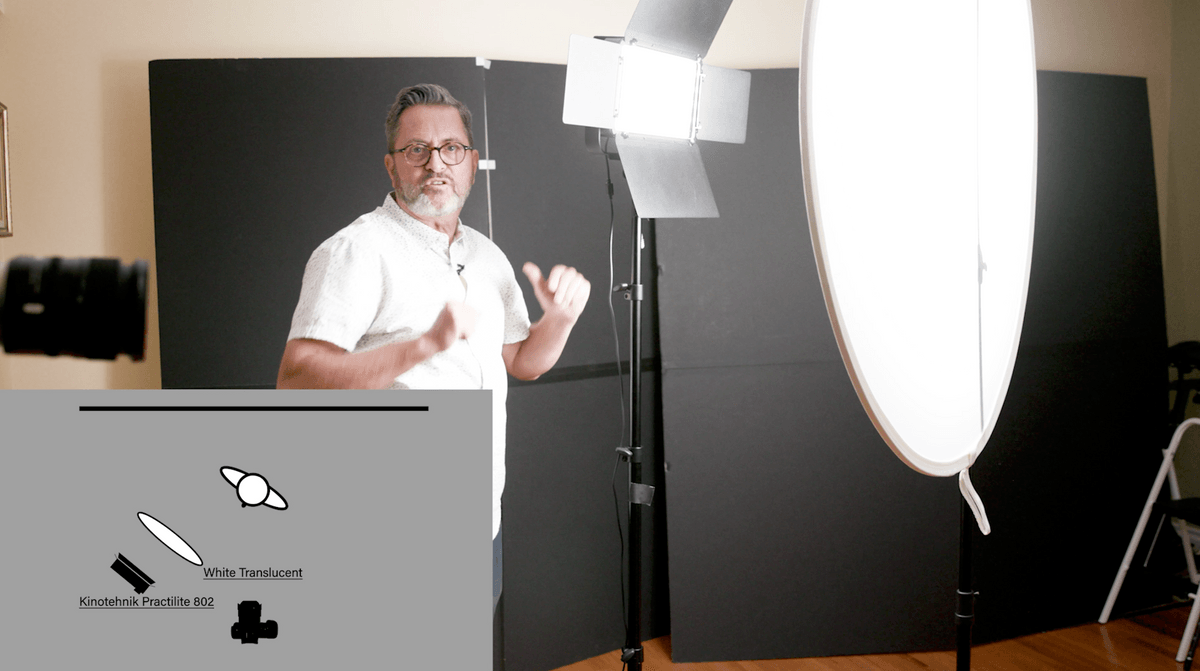
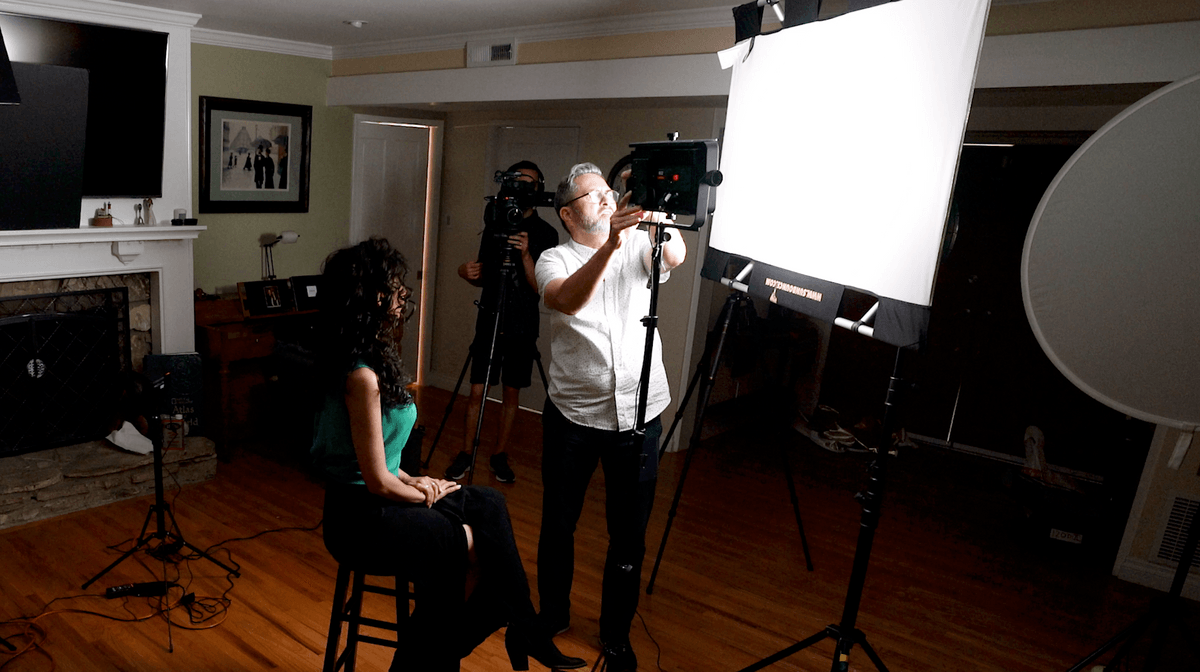
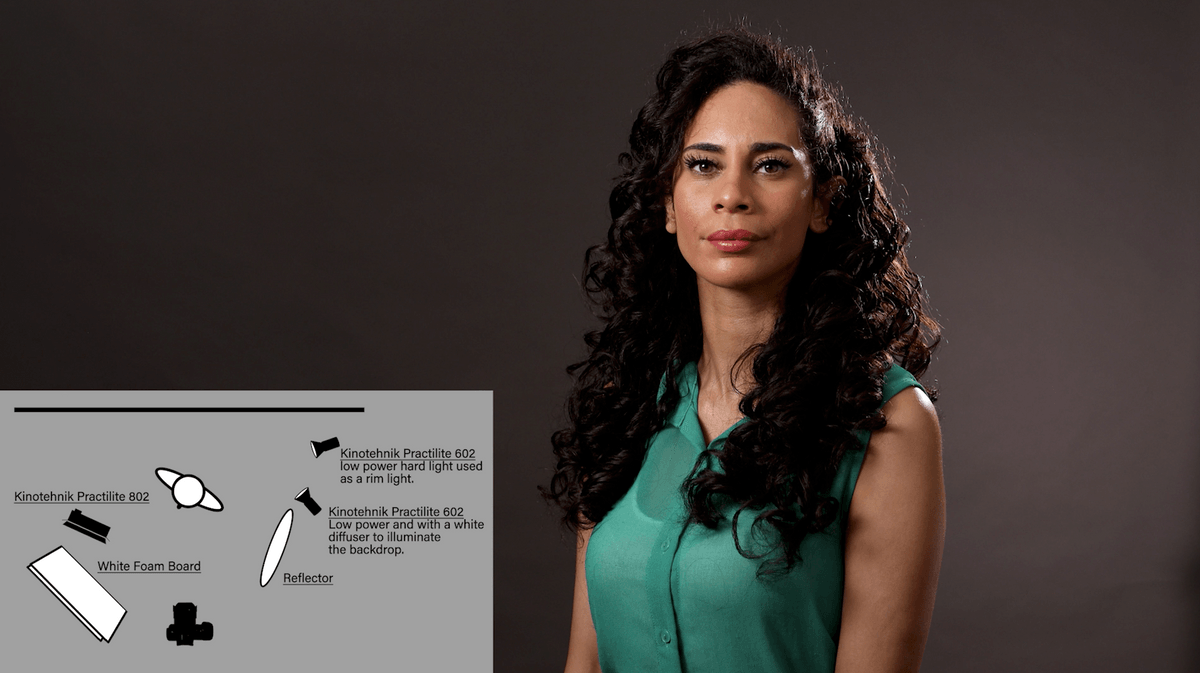
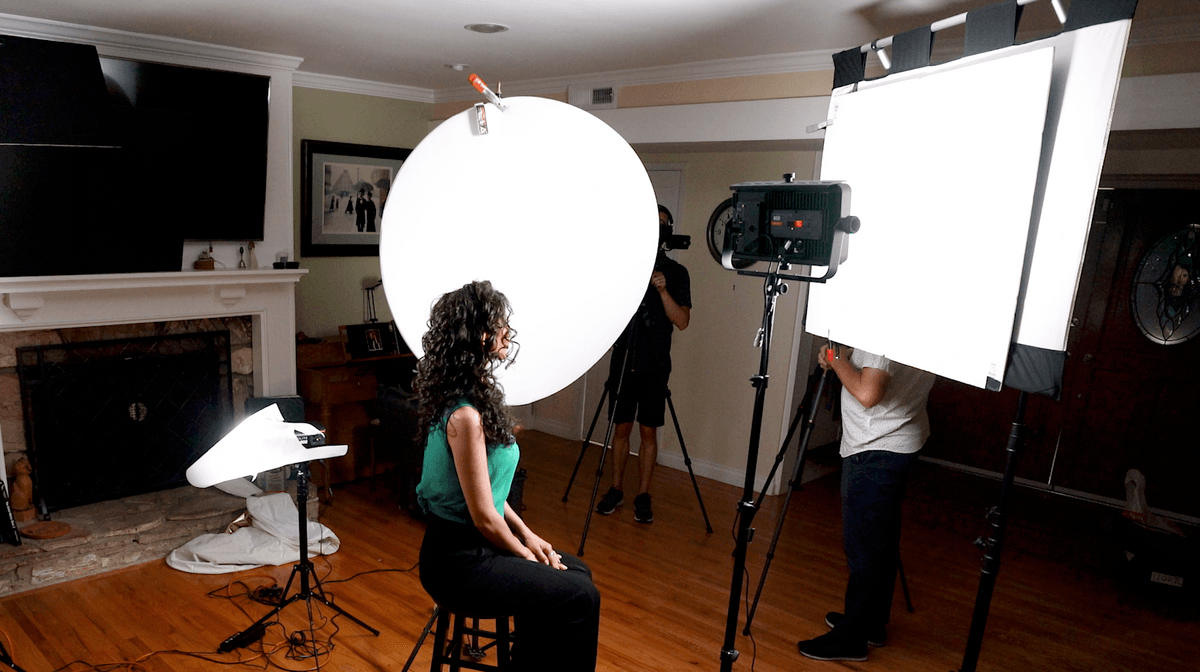
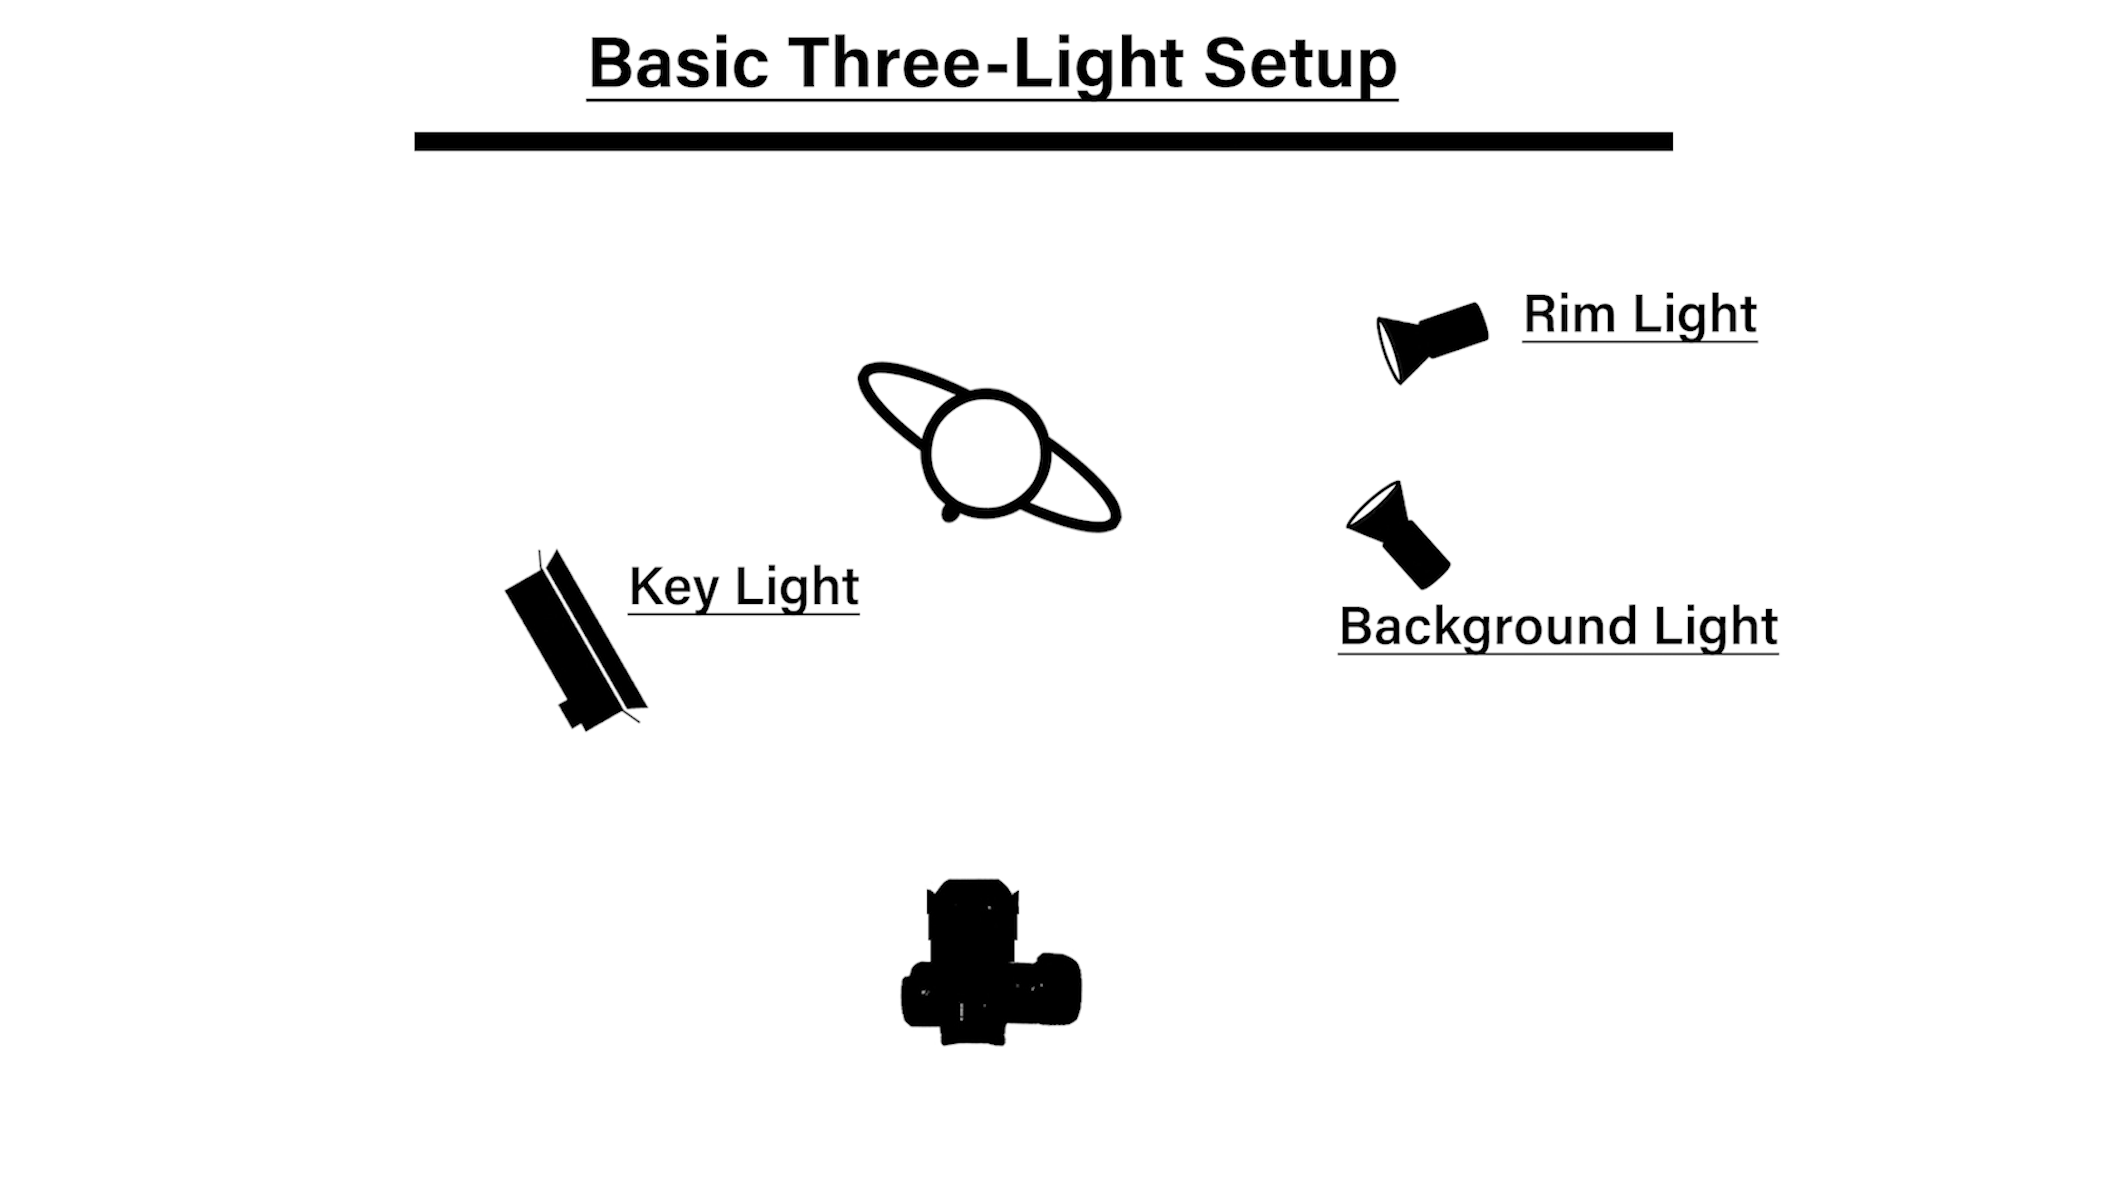
Stop putting the light in the wrong place. Understand these simple basic principles of a three light setup. It’ll save you every single time. Today on The Slanted Lens I have Camila here with me. Camila is going to help us look at a three light setup using LEDs. The reason I want to attack this is because I want to really help myself and you understand how to use a flat panel LED. This is eight and a half inches by 14 and a half inches. We will make that into a beautiful soft light source. Then using some Fresnel lights from this 3 light kit from Kinotehnik I will show you how to get some nice separation on the background and on her hair.
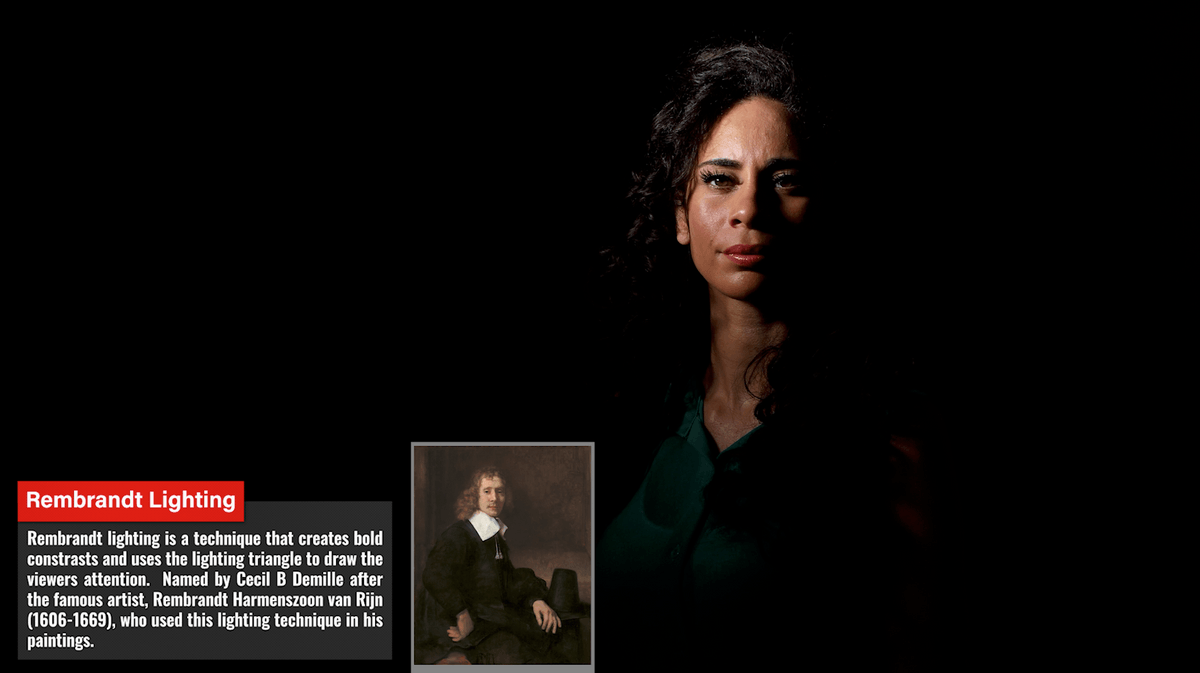
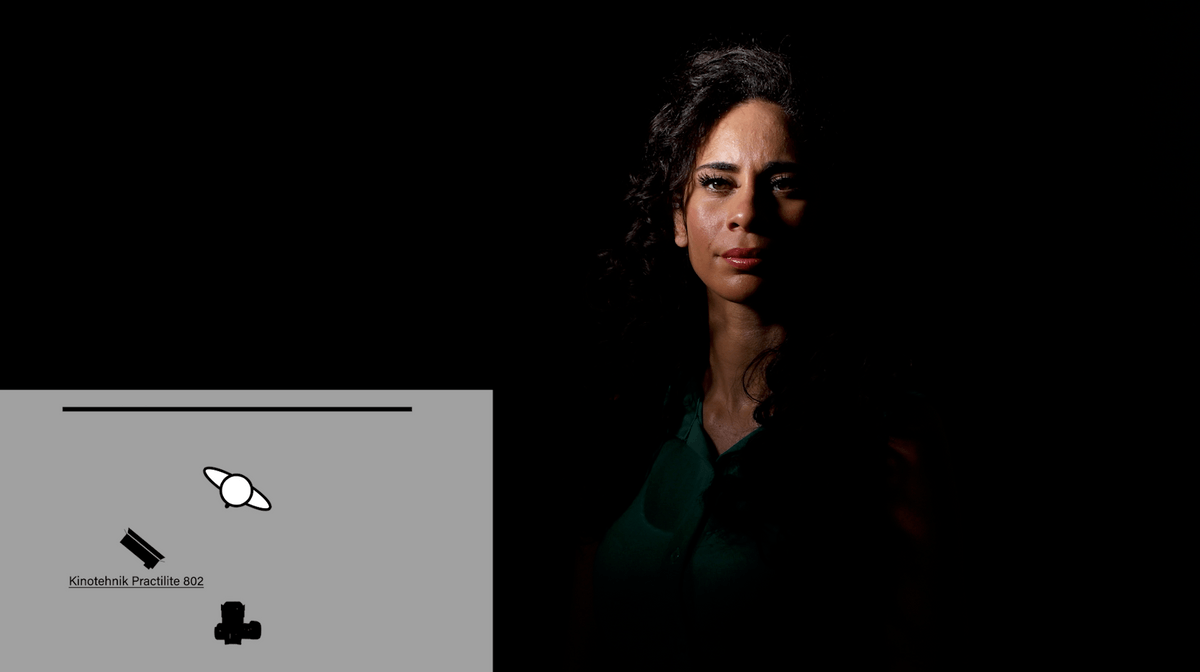
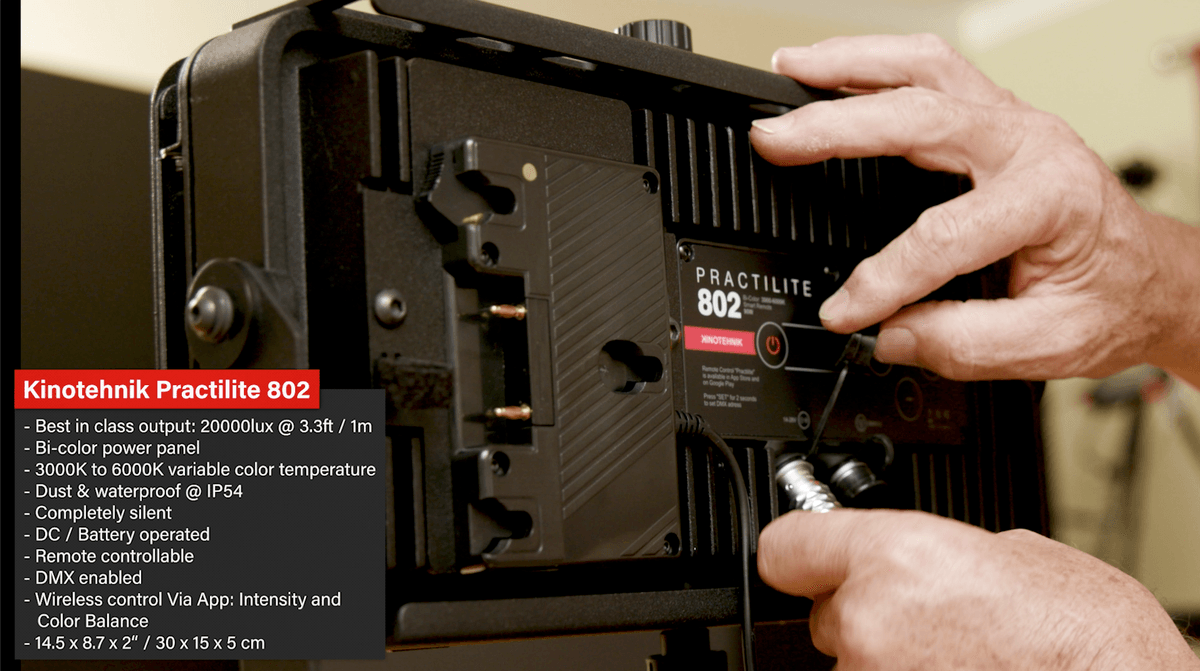
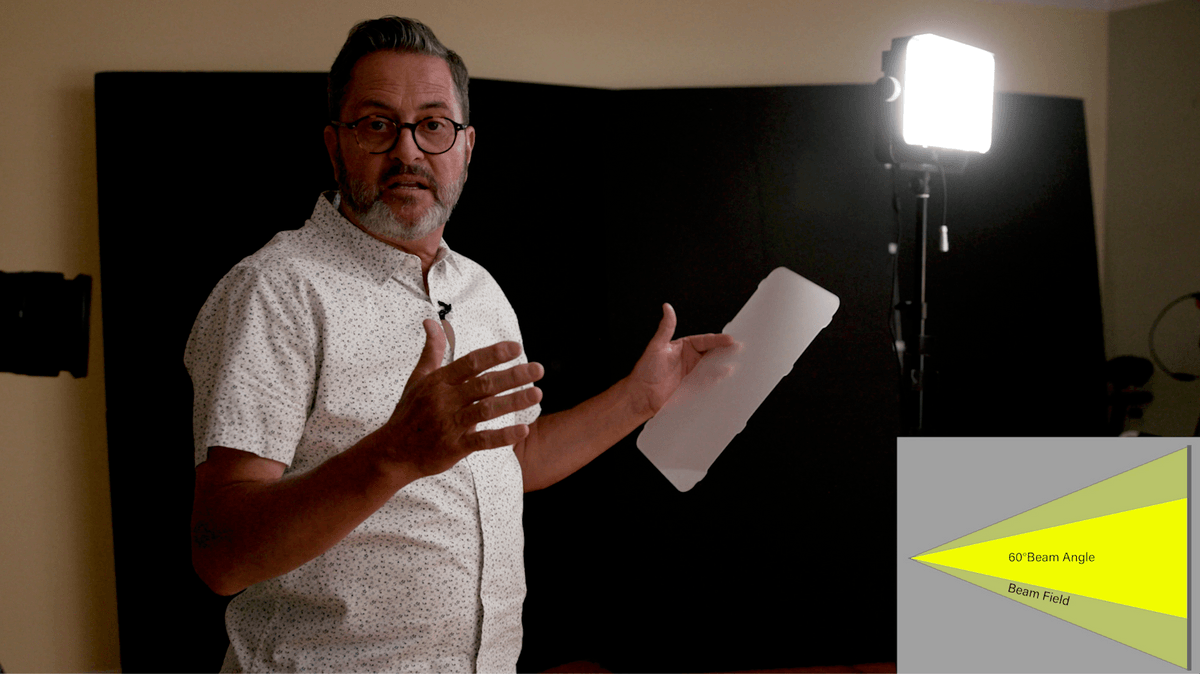
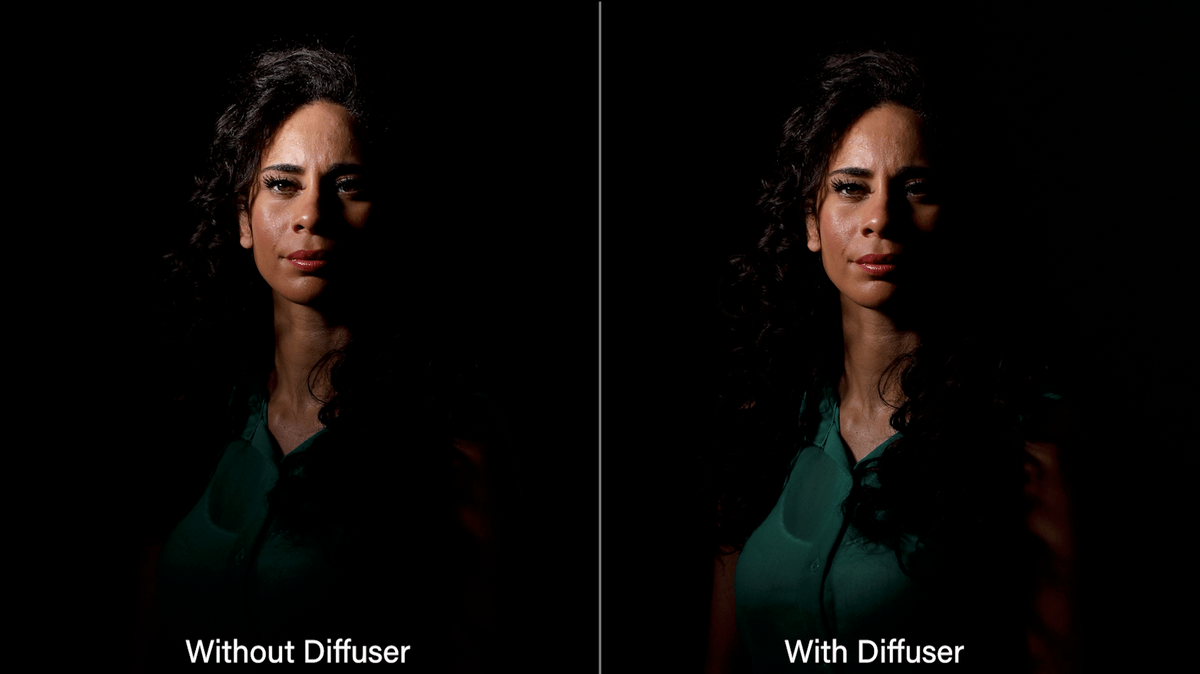
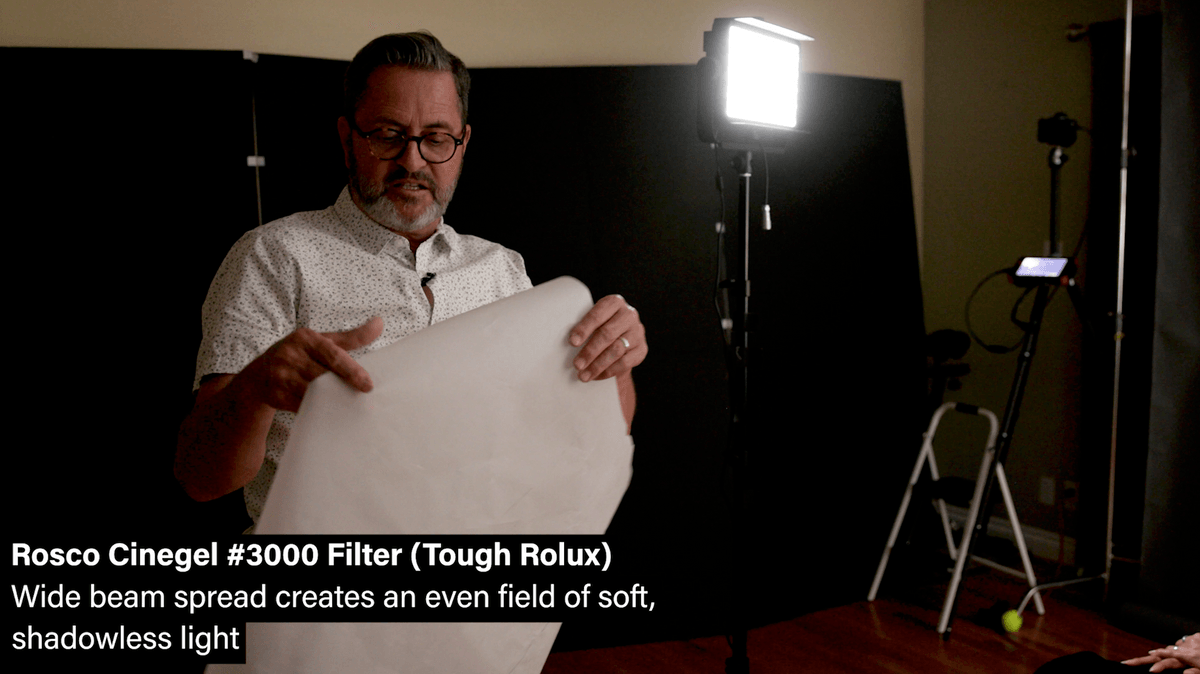
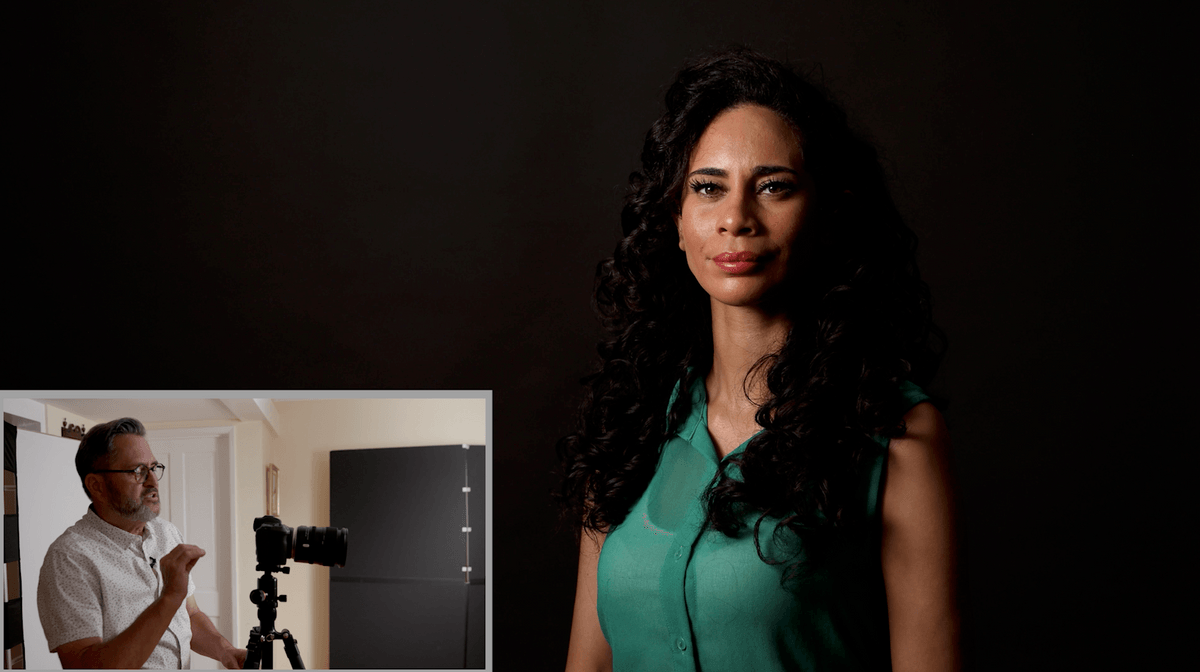
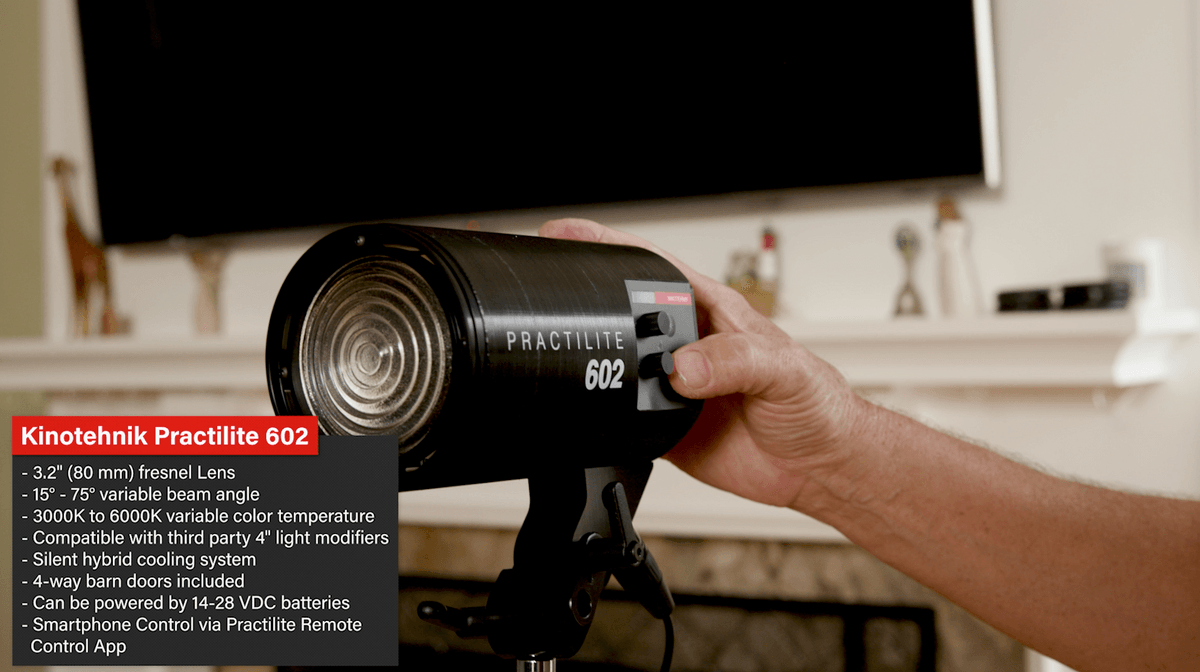
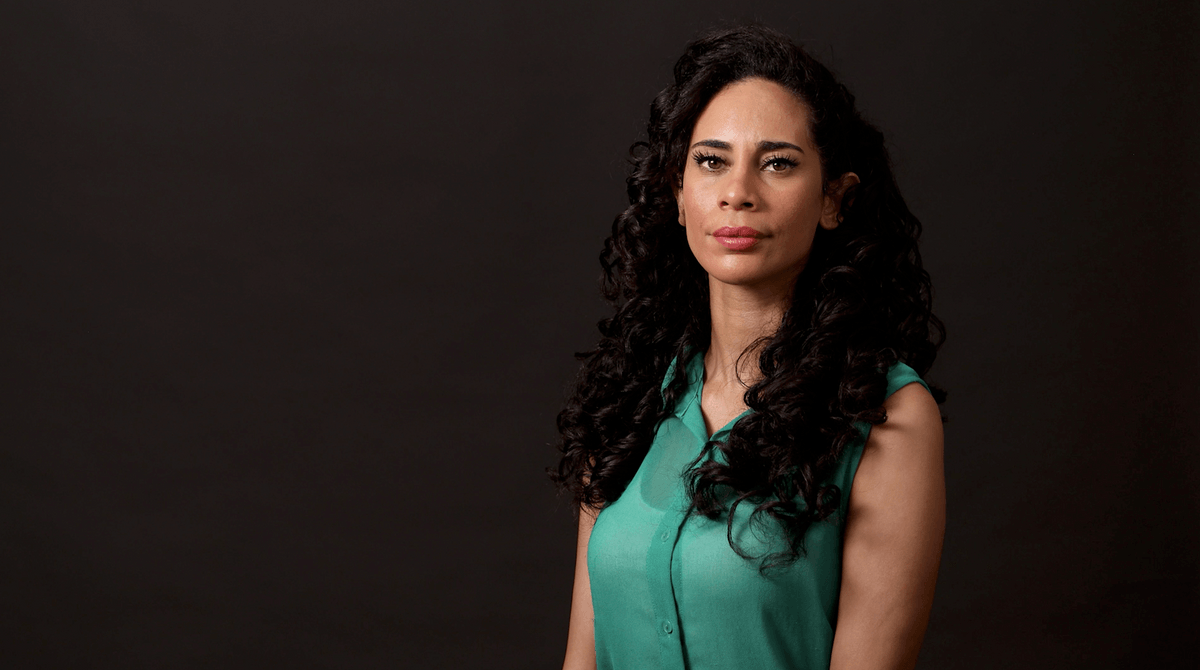
We’re going to start by setting our key light and exactly where to put that and how to make that work. So I’m going to turn off the two Fresnel lights in the background. There’s an entire lesson on The Slanted Lens on how to set this light as far as positioning the light. It’s just the basics and the understanding of that principle. Place the light somewhere between the front of her and almost to 90 degrees. Right around 45 degrees works well. And that’s going to be your sweet spot. You sweep it in this area around 45 degrees from the front. You don’t want to get too far back or it becomes a backlight. If you get too far forward and up, that can work as well. But for now, I’m going to get it just off to her side. I want to get a nice Rembrandt on her face where we get a nice drop shadow on her nose, from her nose on her cheek. And that’s really the best place to set that light. So this is where most people start. They set their light, it’s in a good position. It’s in a loop light. Actually, I could make it come around a little bit more to give us a Rembrandt light. I’ll pan it away from the background. That’s another “Laws of Light” lesson. Place it so it keeps the light off the background. But most people start right here. This is where they drop their light and they say, Okay, I’m done. And it’s in a good position, but it’s not a good quality of light. It’s directional. It’s very hard on her. And there’s no separation here whatsoever. So that’s why we need to do a three light setup. But let’s start by getting our key light to look soft and look nice on her face. This is the Practilite 802. This is an LED panel. It’s a bi-color panel. It is also water resistant. So you can put this outside and you don’t have to bag it in the rain. It can get wet in the rain and it is going to be just fine. The Practilite 802 comes with two pieces of diffusion. I can slip one of these in. And what this does is it increases the area of coverage. It goes from a 30 to 60 degree area of coverage. And what that does is it softens it a little bit, it spreads it out and so we get a tiny bit more light on the background. And it’s going to be a little softer light on her face. I can now take open up just half a stop here. I’m going to go up to f/3.5 or maybe f/3.2. That looks good on her face. It’s opened up a little bit better, but still not a great light on her face. So we’re going to go to a 90 degree diffusion. It’s much softer on her face. The highlights are not quite so harsh and not so specular on her cheek. It is giving me a nicer light around her face. But it’s still a long way from being good, but there’s two steps in the right direction. This is a diffusion material I love to use. It is called a Tough Lux 3000. It’s a pretty heavy piece of diffusion. It’s pretty dense. And I like that because I’m going to shine light straight through it. And I’m going to try to make this into a larger light source. Most people center it right in the middle. And that makes sense in some ways, but I’m going to move it and I’m going to make it go slightly to the right because I want it to be able to open up the shadows on her face to the right. With this diffusion I will turn this Practilite 802 into a small softbox. I tape the diffusion to the top and the bottom. And then I’m going to close these barn doors just slightly and I’m going to make it balloon out. This will make this light open up and wrap around her face just a little bit. So now it won’t be quite so harsh on her face. It’s a much softer light on her face. It wraps around her skin and looks really pretty on her face. I’ve done this a million times on set, it’s a great way to give yourself a quick softbox look. Next I’m going to go another step further. I’m going to pull this diffusion off and add a translucent. I’m going to set that translucent up just out of the angle view. And now I’m going to back this light off to where it starts to fill up this entire circle and starts to become a nice key light through that translucent. It’s almost like a softbox. I’ve lost some light because I moved light away from Camila so I need to raise the ISO.
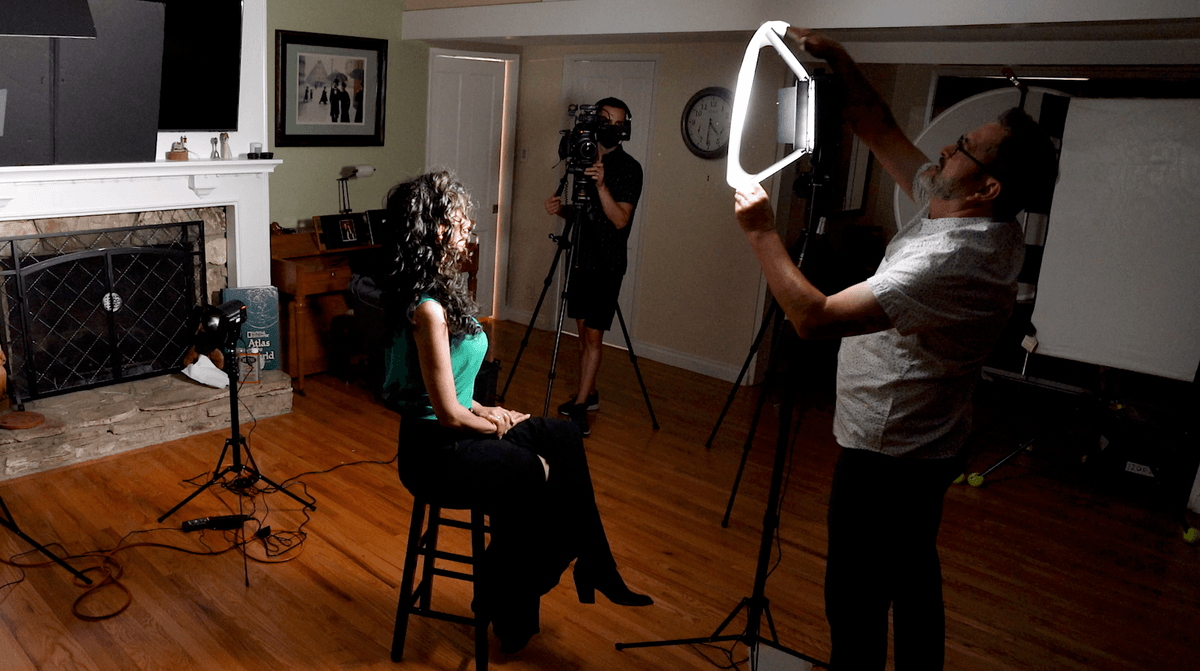
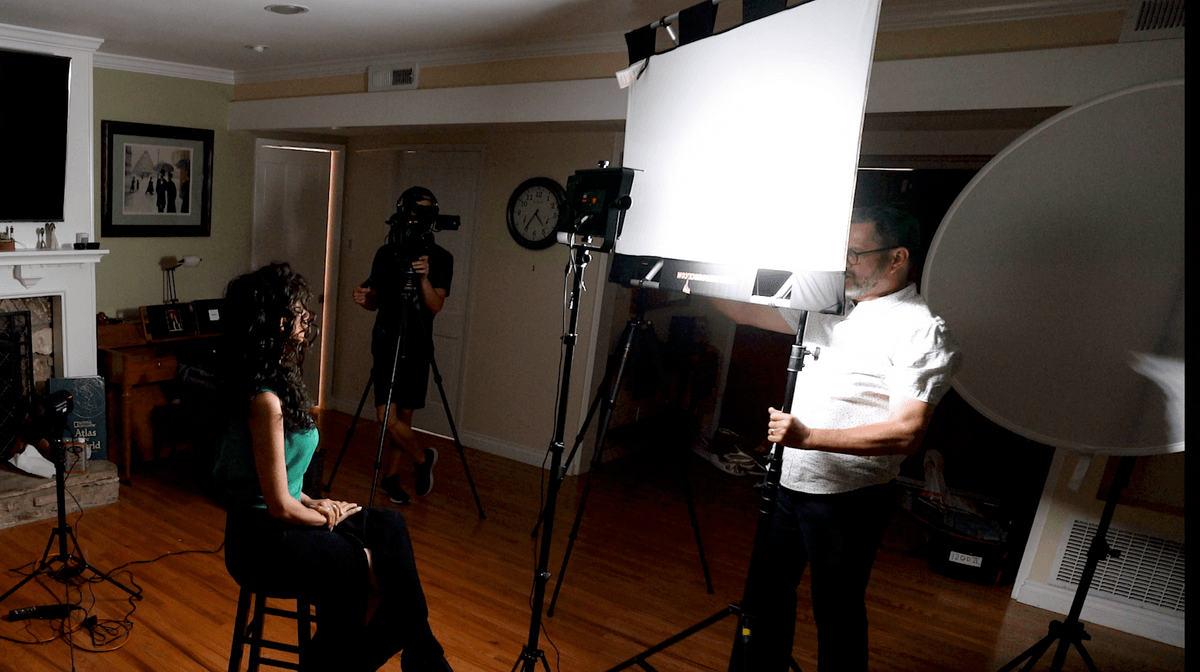
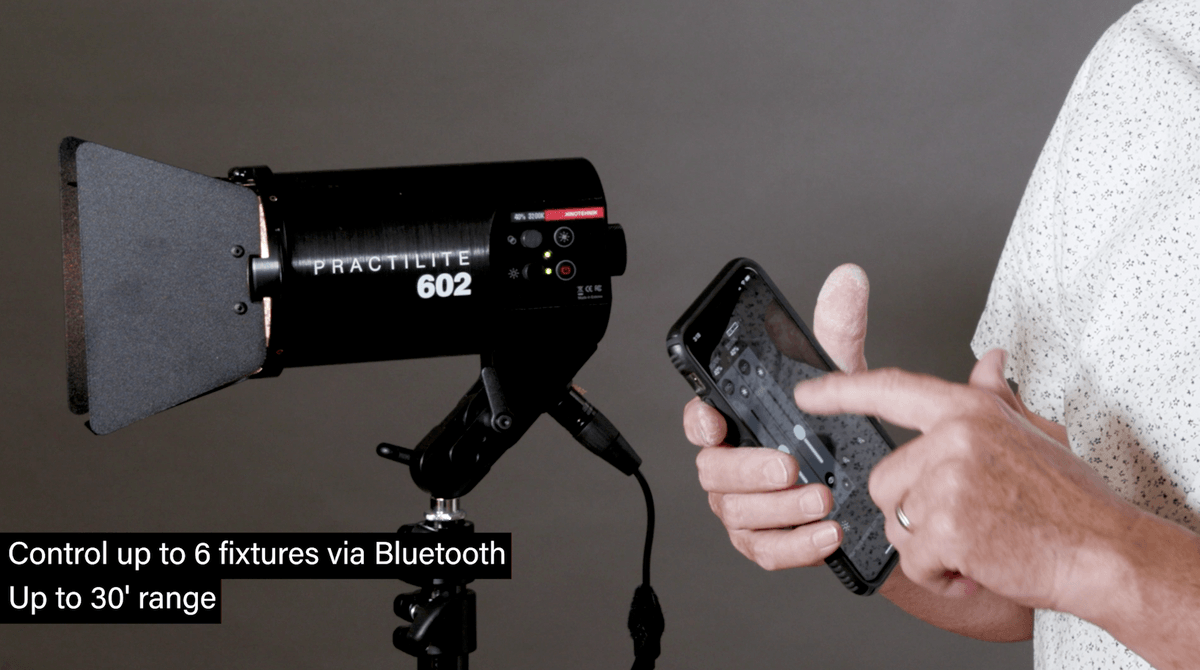
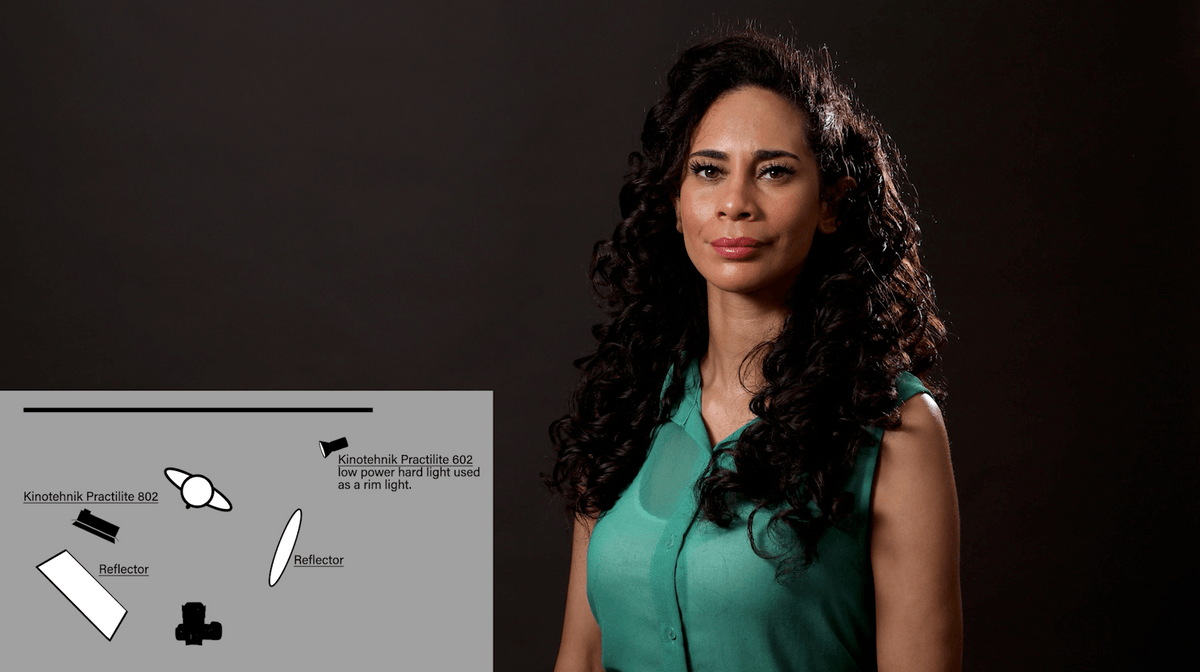
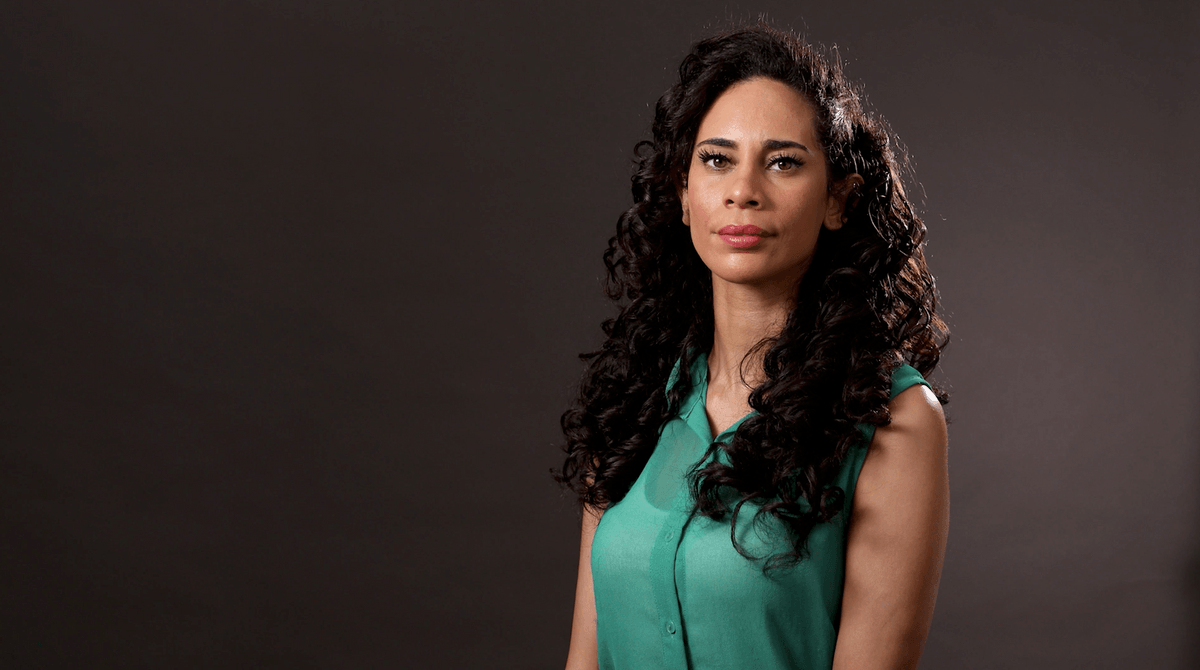
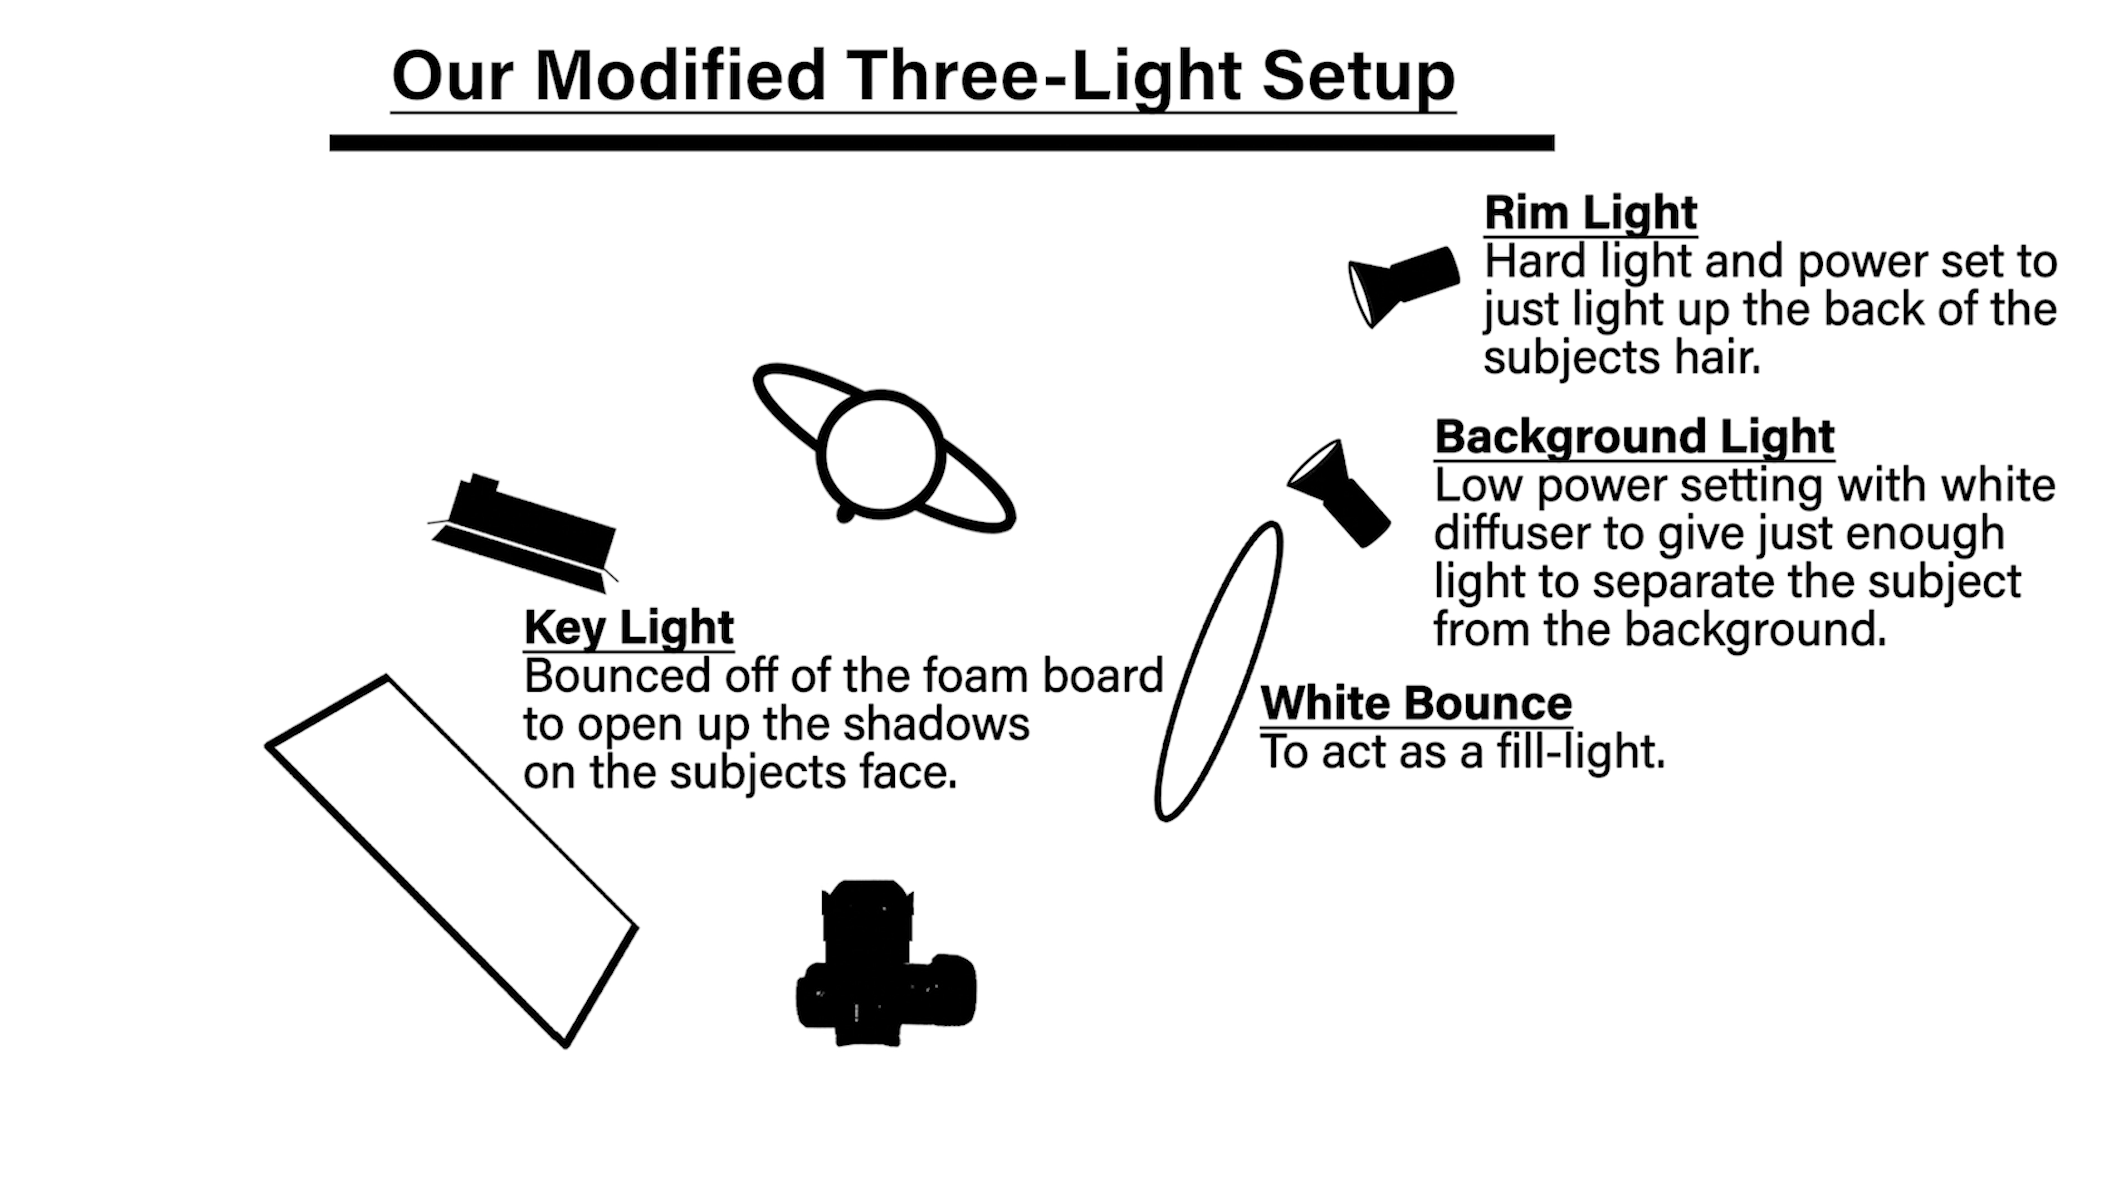
I’ve brought my ISO up a stop because I’ve lost a stop because I backed that light away. It’s looking much softer on her face, much prettier on her face. The last step I’d like to do is to completely reverse this around. I’m going to pull out the translucent and I’m going to change places with the light. The light is going to come in close to her. So it’s going to come just out of camera. And then I’m going to add a reflector to bounce the light back in. Now my light is in a vertical fashion and it’s not wrapping the way I’d like it to. So I’m going to take this reflector and I’m going to turn it horizonal. And now that’s going to give me an area of coverage that is going to start to wrap around her face and you’ll be able to see the light bounce. A secondary bounce will start to open up the side of her face. And we get a much nicer look at her face, a beautiful wrap around her face. I’m trying to use as much of this light as I can, so I’m going to make sure I keep it as full as possible. If I tilt it towards this edge here it is going to bounce more light into the shadow side on her face, it’s going to start to open that up. Now the last thing I would do with this is simply grab my reflector and open up that shadow side of her face just a little bit. So there’s my nice to light setup. We’ve come a long way. Take a look at the very first light we set up. Now take a look at where we’re at right now. Huge difference. So this is the Practilite 602. It is a Fresnel lens light. I love this combination of having a LED panel and then two of these Fresnel lens lights. They do have a smart sync app. With the app you can change these fixtures by themselves or when you click on it you can link them. Then you can change them together. They’re locked together and this allows you to change both lights at the same time.
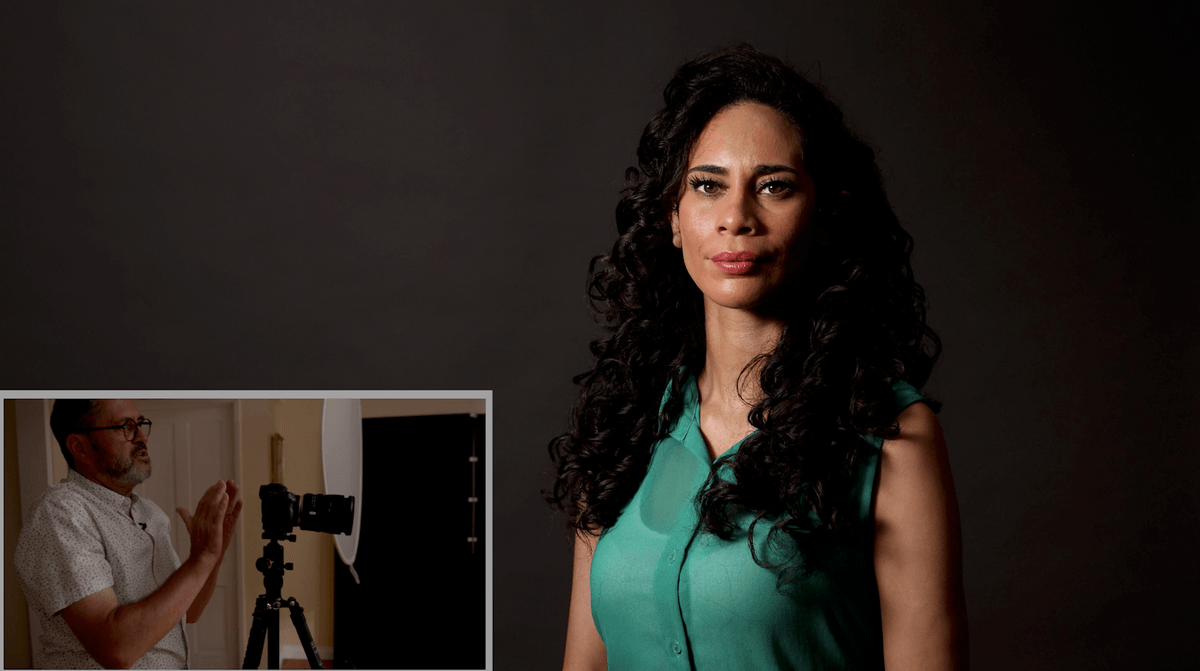
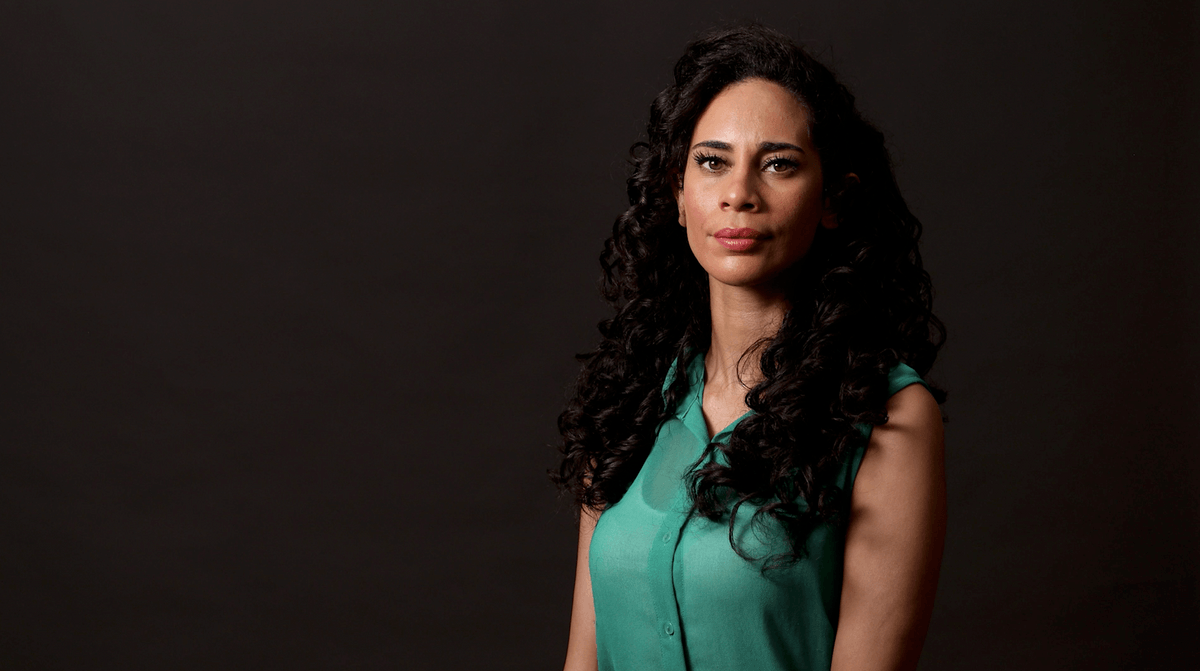
Now I’m going to take one of these Fresnel lights, the 602 Practilite. The app gives me the ability to turn it on and I can give a nice little bit of light coverage on the back of her head. So there’s a great setup with that second light. Now our third light is really what helps us get separation from the background. Earlier she was disappearing into the background completely. But now we’ve got a nice key light on her face. We have a little bit of light on that background because it’s bouncing off from our key light. And we have a nice separation from the rim light on the side of her hair. But now we really want to open up that background just a little bit.
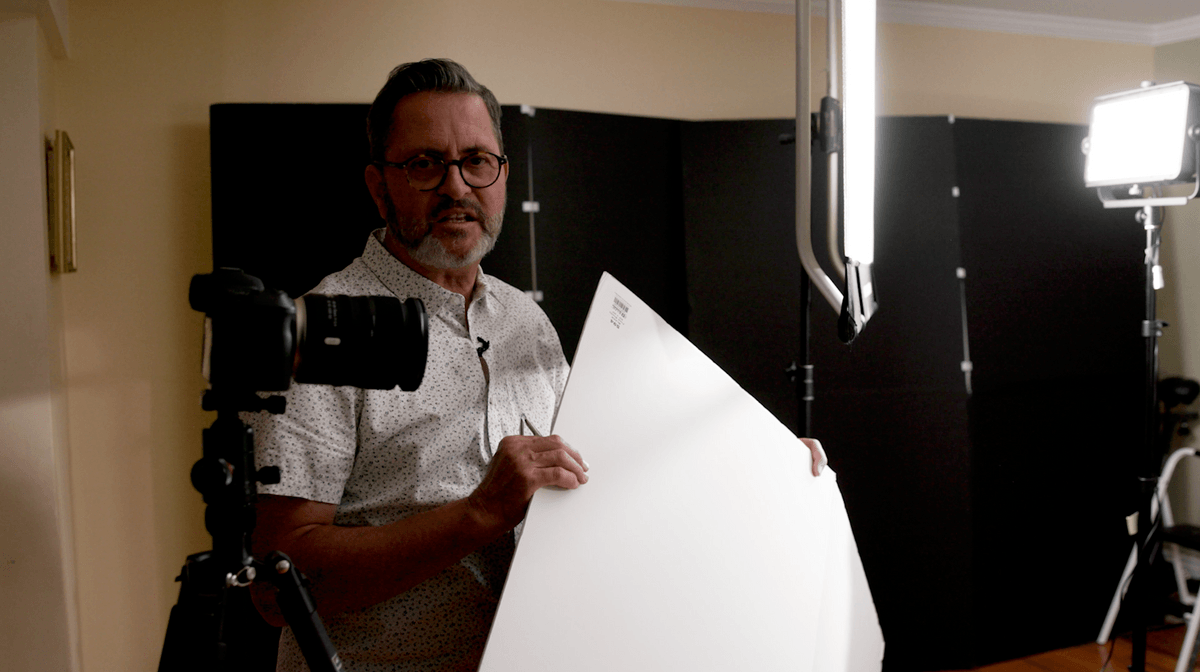
So I can add a third light in several different ways. We switched this up and we have a hard white reflector here and it is going to bounce much more light in and open up the shadows. I think that’s a great addition there. It helps us a lot. I never use a translucent as a fill card because it just isn’t efficient enough. That reflector surface is going to give you a much nicer look. The last thing I’m going to do is to replace this reflector with the hard foam board. This is foam board that I bought from the dollar store. These are $1 a panel. So it’s $2 worth of bounce material here. It’s way more efficient because that hard surface bounces light back more directly. It is going to open up her left side, the shadow side. The foam board also is going to open up the shadow side just by virtue of the fact that it’s more efficient off this corner and it is going to bounce light in the shadow side of her face. If you boil this entire thing down, it’s a stand with a nice piece of foam board and that foam board becomes your key light.
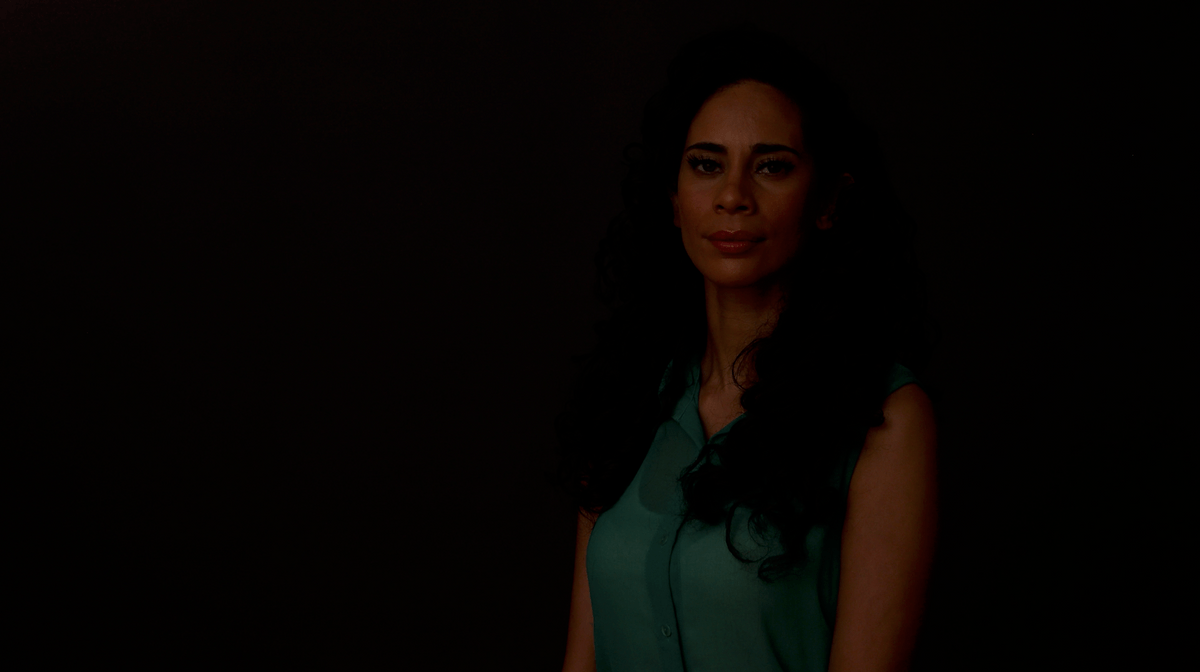
Let’s turn these lights off one at a time. Let’s back out of this and see where we’re at. So first off, we’ll turn off our background light, and we’ll turn off our rim light. Let’s pull our fill light out of there. Last of all, is we just take the foam board away. And there we are. So I’m going to turn all these lights back on and we’re going to wrap this up. Is this the end? No, this is the beginning, we can change the background light, we can make it into a spot, we can put a light behind her and let it rim her entire hair, we can turn off one of the rim lights and just use a background light, we can use a single light where we just turn this foam board deeper into the background and that starts to separate it from the background. This is the jumping off point. This is the foundation of all lighting. You know how to set your 1st, 2nd and 3rd lights. And now you can move around and change them to do whatever you want with them. No rule in the world says you have to have three lights on set. I’ve seen people do this with one light, two lights, three lights, five lights, whatever works for you on set. But if you understand the basics, where to set these lights, it allows you to take that information and to grow with it and start to create your own style on how you light people. So there’s a three light setup using LEDs. Not just LEDs as a panel but also a Fresnel LED. I love that combination of those two different lights because you’ve got a light you can soften by bouncing it and a light that is a little harder. It gives you the ability to control an area of coverage. So using those two together gives you a beautiful portrait setup. So there you have it. Leave us some comments on our YouTube channel. Let us know what you think and keep those cameras rollin’ and keep on clickin’!
SPECIAL THANKS TO OUR SPONSOR: Get up to $200 off Kinotehnik lights through the end of August 2020. See the sale at Kinotehnik’s website: Kinotehnik
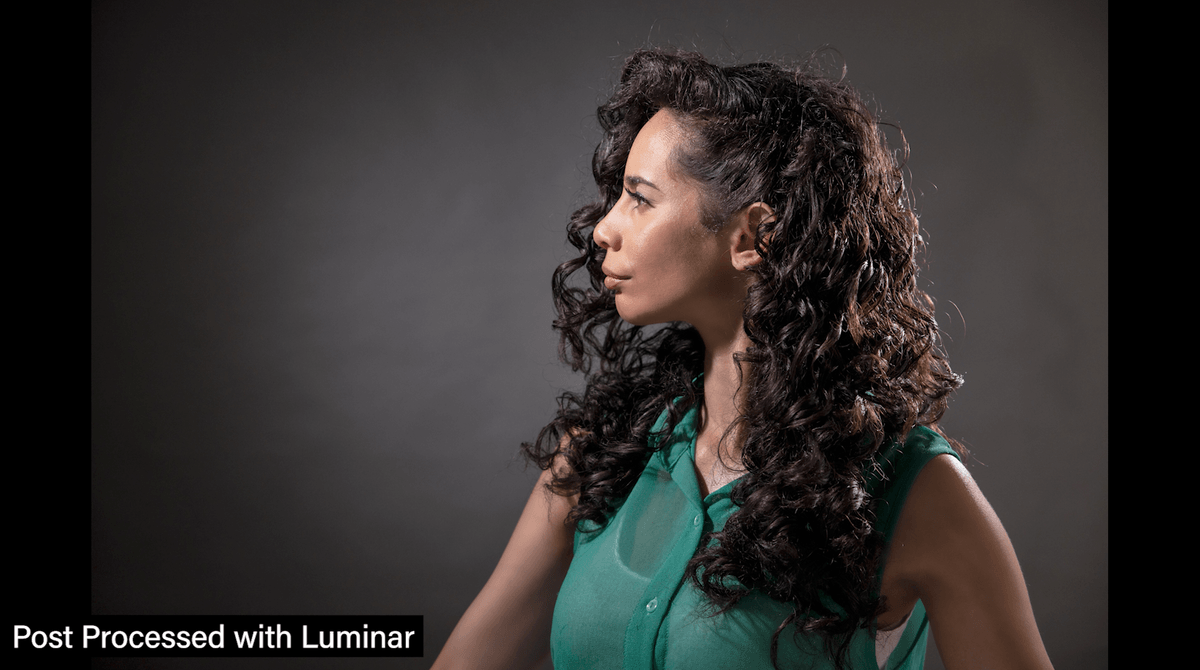
Check out Luminar 4.3 and see how it can up your photo editing! Get $10 off when you use the code LuminarTSL10