

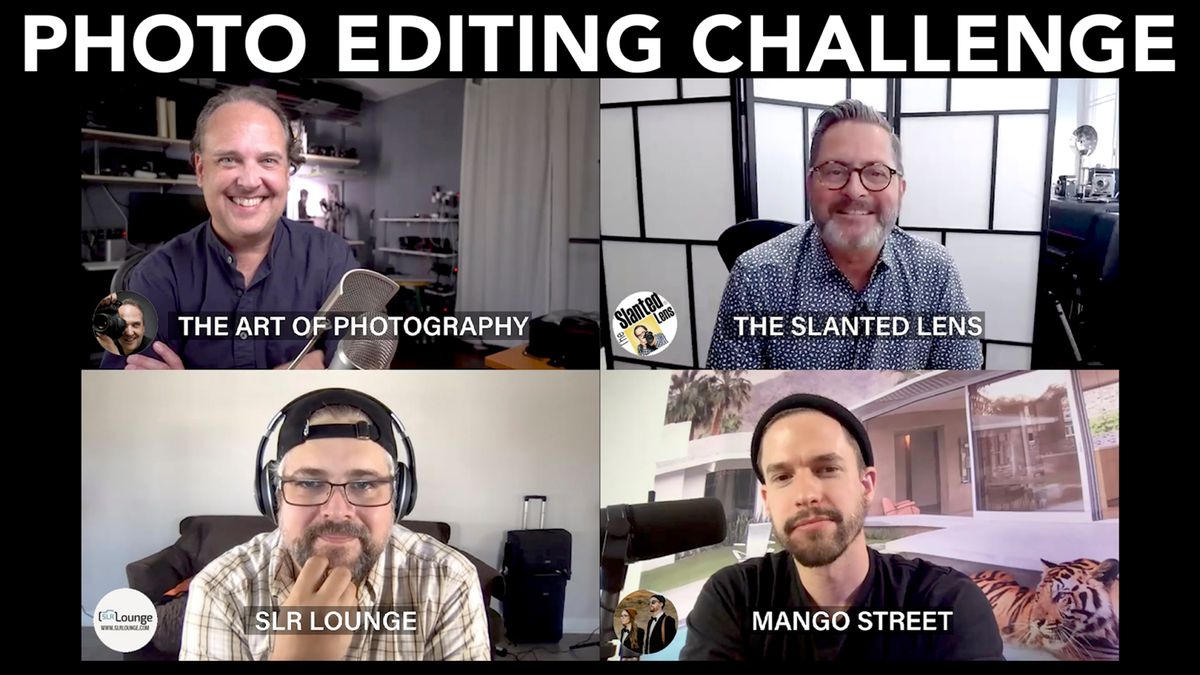
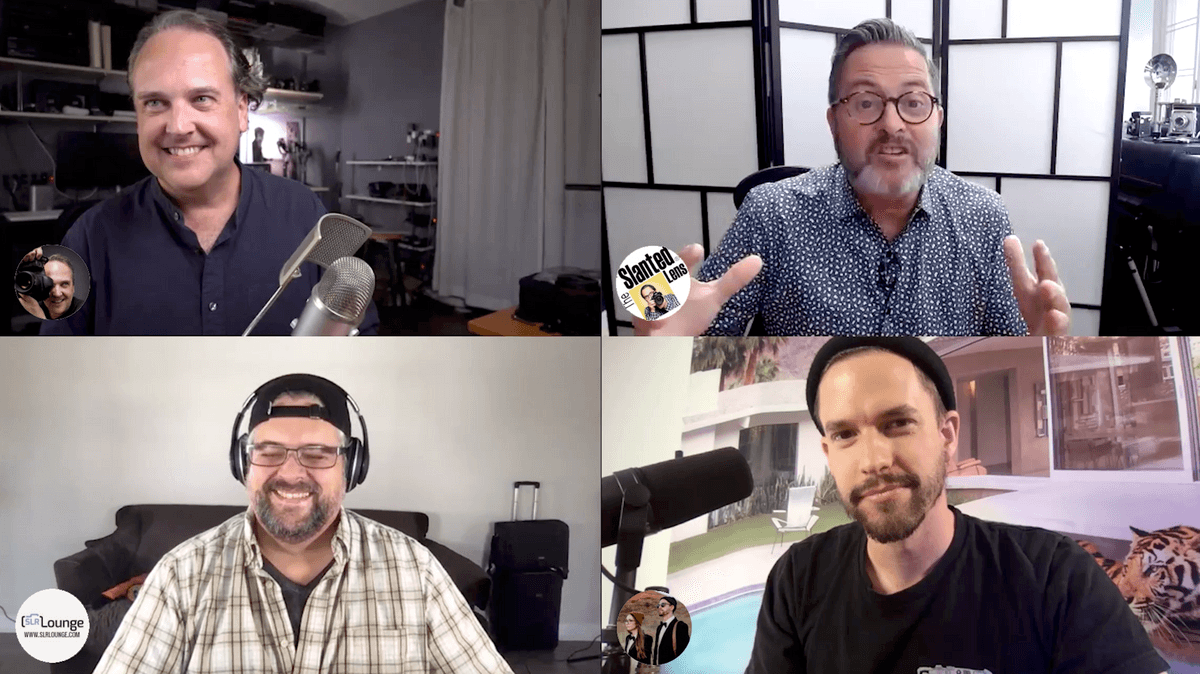
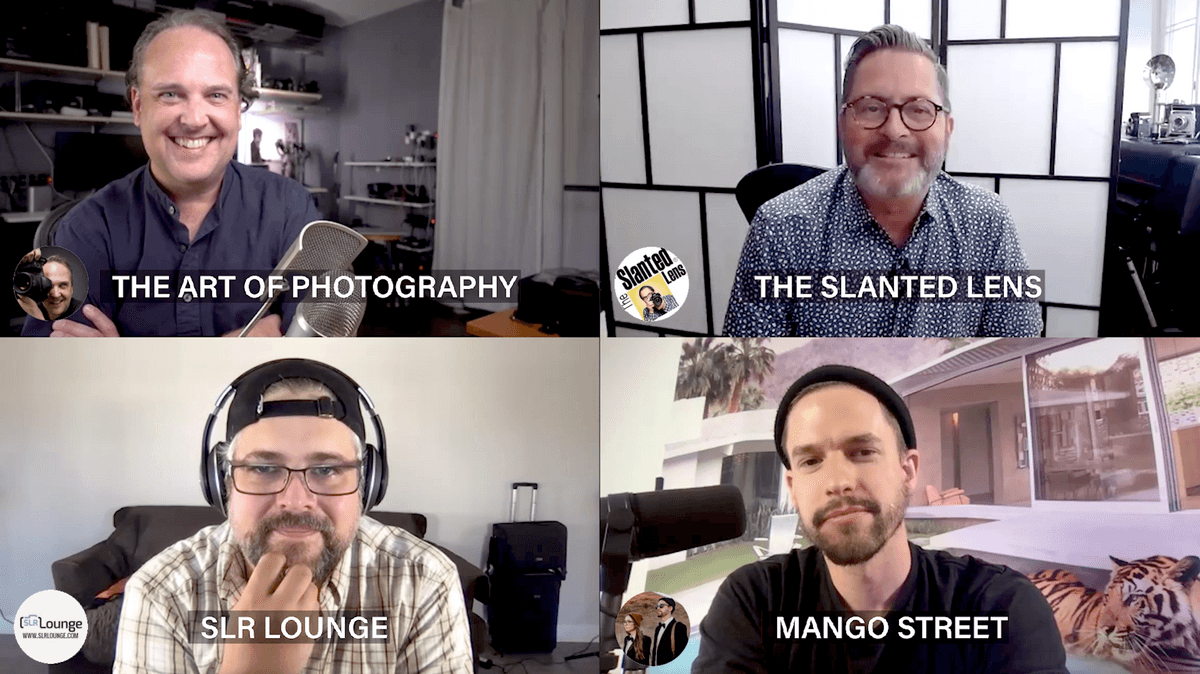
It’s time for our photo editing challenge! Mango Street, The Art of Photography, SLR Lounge and The Slanted Lens, we’re all going to go head to head editing the same image in Luminar.

We have four different individuals who are going to participate. We’re going to edit in Luminar, the same image, and we’re going to see what each person gets. And we’ll see exactly where each person ends up and then we’ll talk about it.

Jay P., “So let’s start here with Daniel, tell us what you’re up to Daniel.”
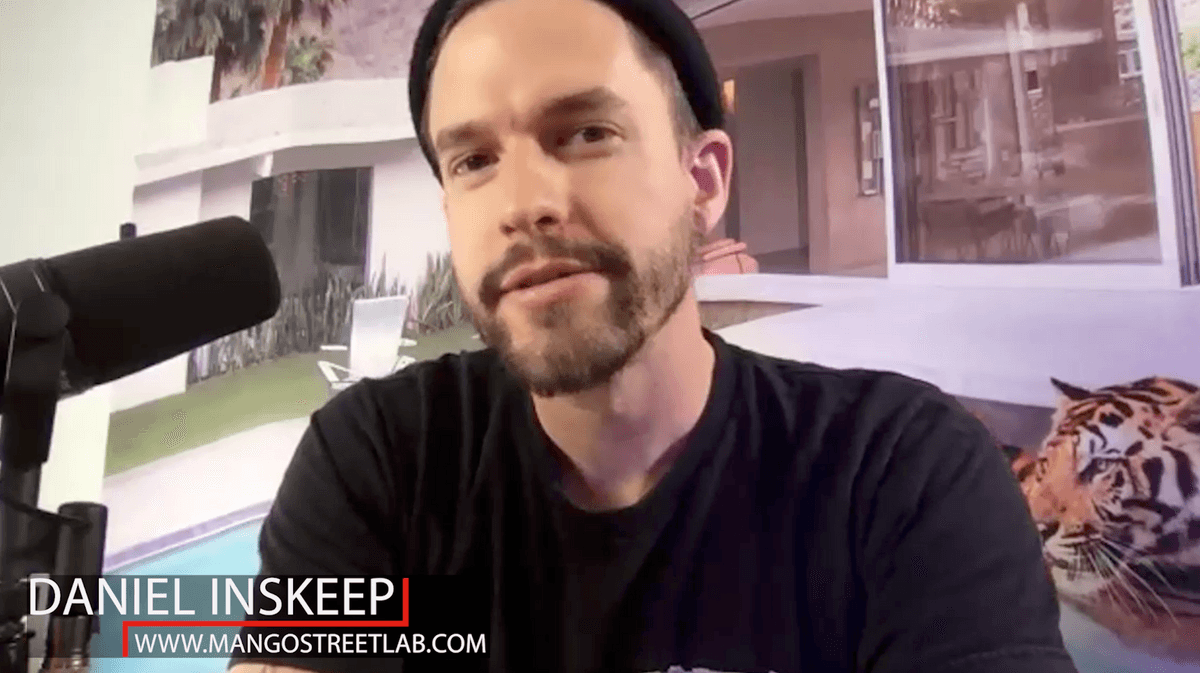

Daniel Inskeep from Mango Street: “Hey guys, Daniel from Mango Street. I along with my wife, Rachel make photography and filmmaking tutorials that don’t waste your time. And yeah, we’re just making the best of the current constraints that we’re in to keep finding creative ways to shoot at home and shoot safely. So yeah, just cranking away making videos.”
Jay P., “And Daniel’s not near busy enough he and his wife have started two other channels as well, which is pretty crazy. From my point of view, I think that’s insane. (Daniel Inskeep, Rachel Gulotta)
Jay P., “David is joining us from SLR Lounge.”


David Crewe from SLR Lounge: “I’m David Crewe. I’m the senior editor for SLR Lounge, which is one of the country’s largest resources free Photoshop photography education. Actually, we share a lot of Daniel’s stuff actually on our website as well and The Slanted Lens. And I’m also a freelance photographer working in the commercial and entertainment industry. Currently just working on SLR Lounge.”
Jay P., “And Ted from The Art of Photography, we bump into each other at Sony events all the time.”


Ted from The Art of Photography: “We do way too often. And when you get Jay P. Morgan and Forbes in the same room, it sounds like we should have like an ETF or something. So I’ve known Jay P. for a while. I run a photography channel called The Art of Photography. I’ve done since 2008. So it’s been a while now. And like I said I’ve known Jay P. for a while. It’s nice to meet everybody else on here and Looking forward to what we’re going to be working on today.”

Jay P., “We’re going to get started here. Each of us is going to take the same image into Luminar. We’re going to retouch it, we won’t see what each other is doing, but we’ll have the opportunity to see the images when we’re done. You’ll get to see it as those images transform. So let’s get started. Start working on your images get into Luminar. We have 10 minutes.”
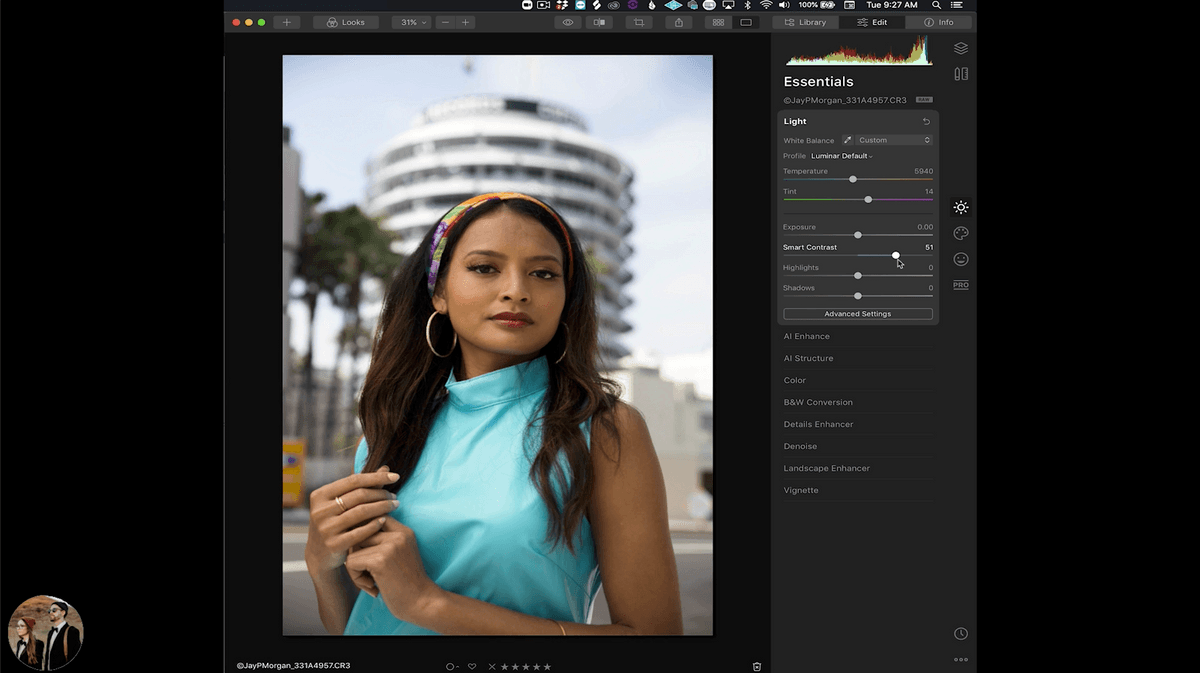

Daniel Inskeep from Mango Street: “It’s looking pretty good. I do like using smart contrast, in Luminar. So I’m going to go ahead and add a little bit of that and crank it up all the way to kind of see what it’s doing, and then pull it back to our liking. So it’s kind of like making a tone curve adjustment for you without all the work.”
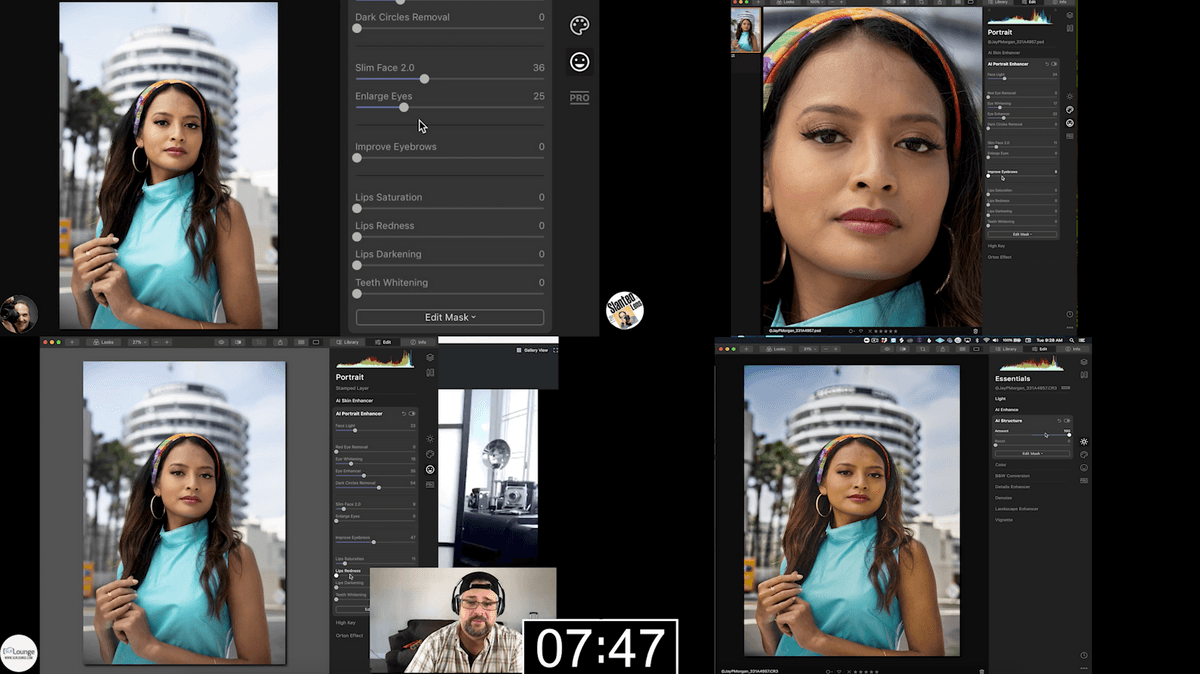
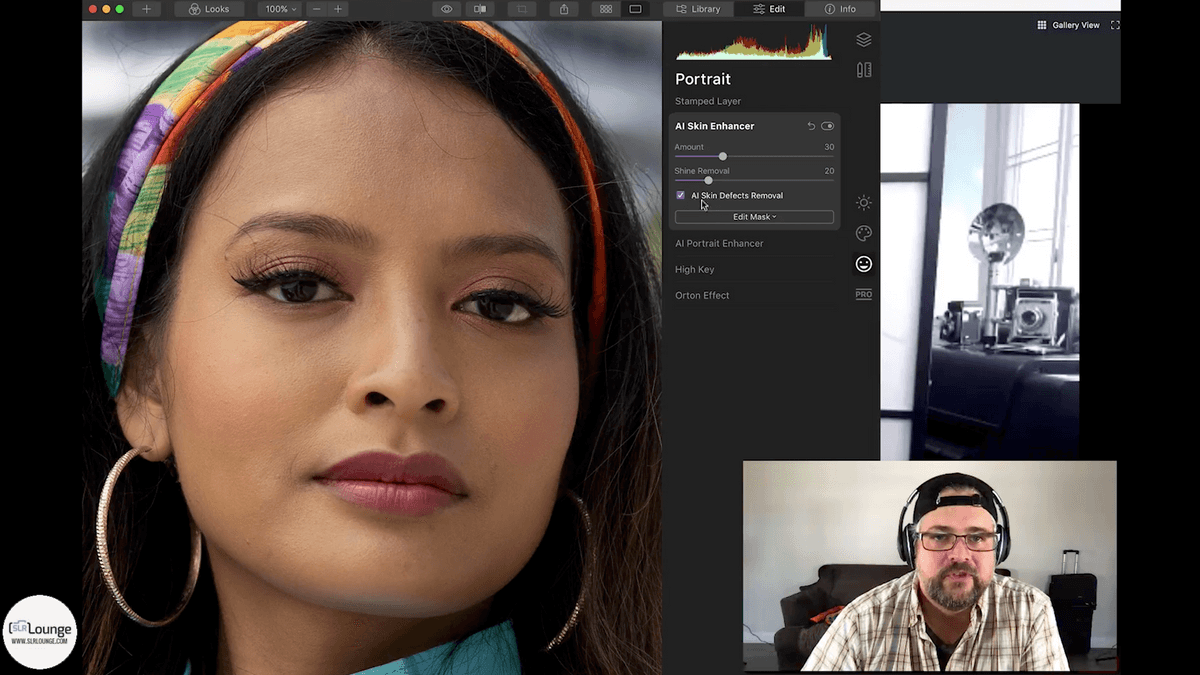


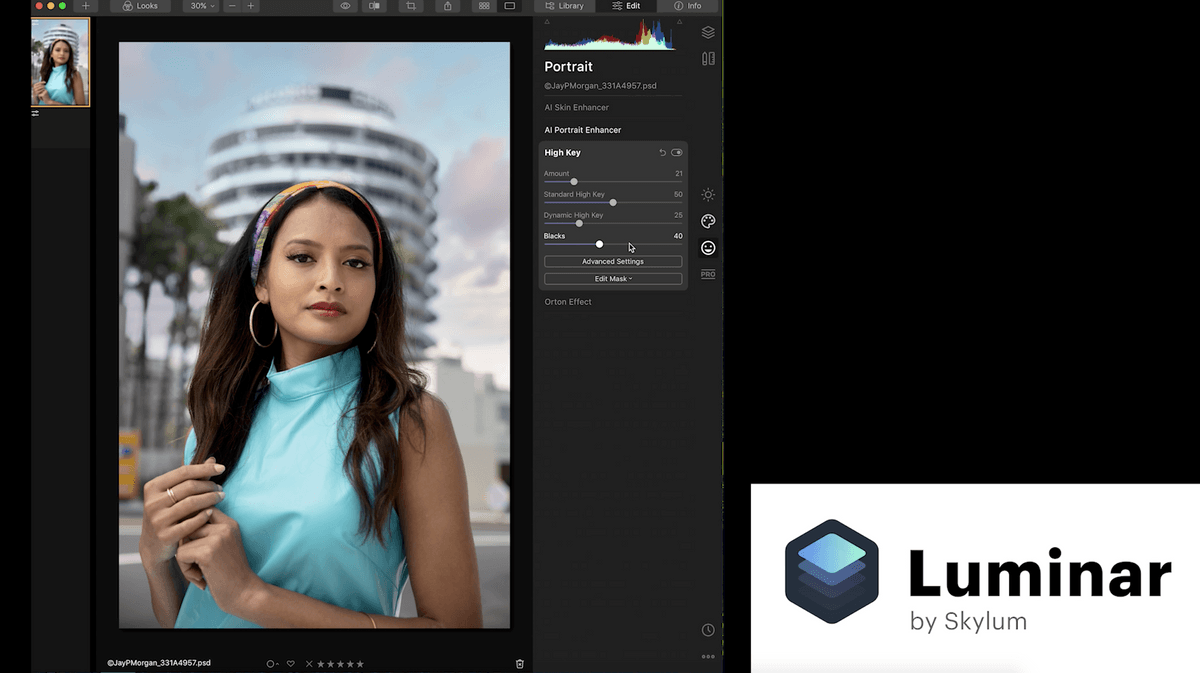
David Crewe from SLR Lounge: “One of the fun things about this tool is the skin defects. It’s actually gotten better every release at identifying, you know, blemishes and makeup chunks and things like that and fixing them automatically. There’s nothing I need to adjust for that. It was pretty fantastic. And then from here we use the portrait enhancer.”
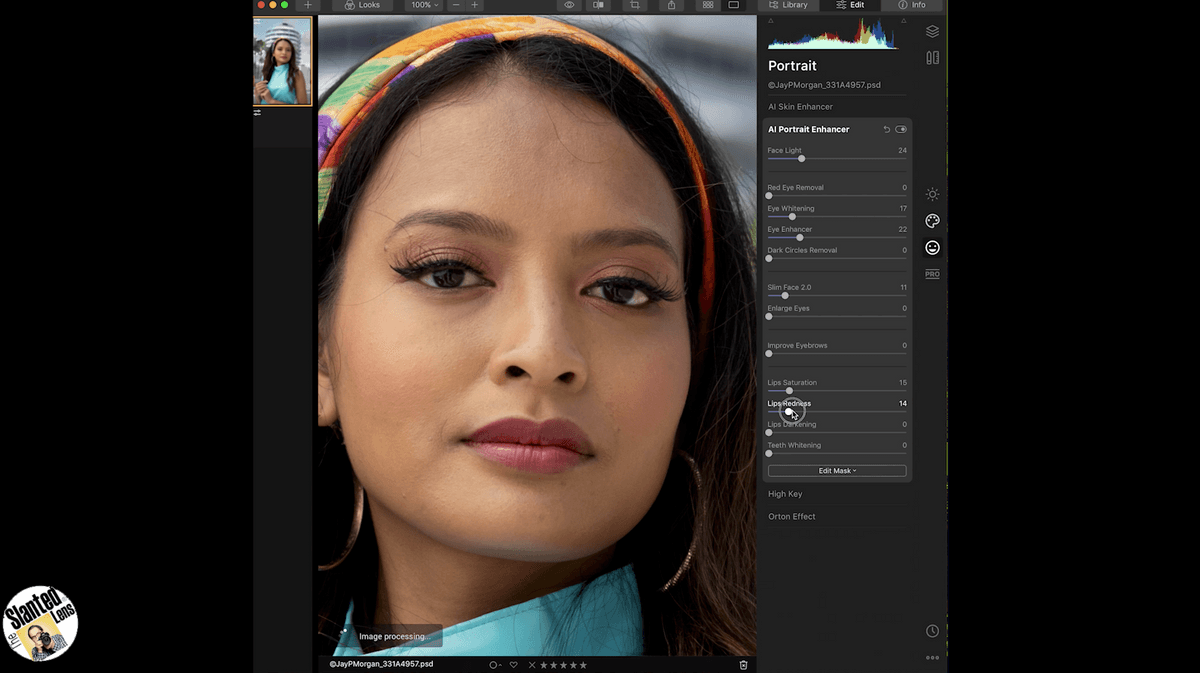

Jay P from The Slanted Lens: “Eye enhancer I love the eye enhancer. I don’t want to do too much with it. I’m going to get a little tighter here so I can see her eyes. I’m going to come up with the eye enhancer here at about 17 or 18. Somewhere in there. That looks good.
I’m going to slim her face down just a little bit. Not too much, just a little bit. There we go. And I’m not going to saturate her lips very much. I’m going to come up just a little bit with her lips, a little bit with the redness.”
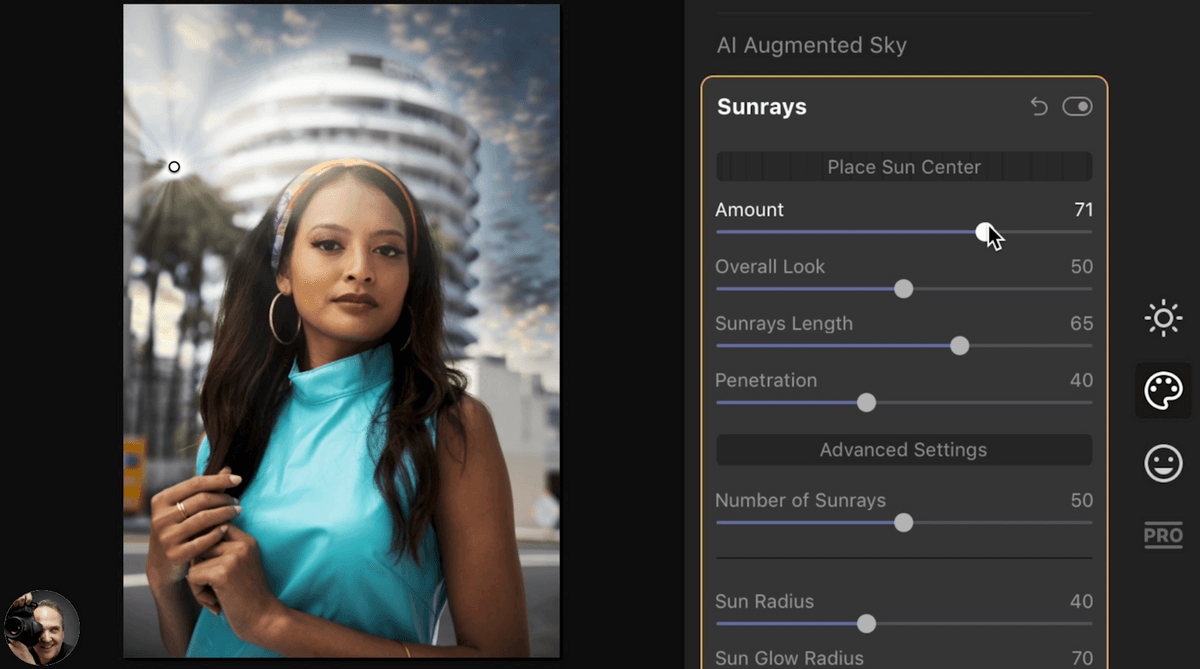

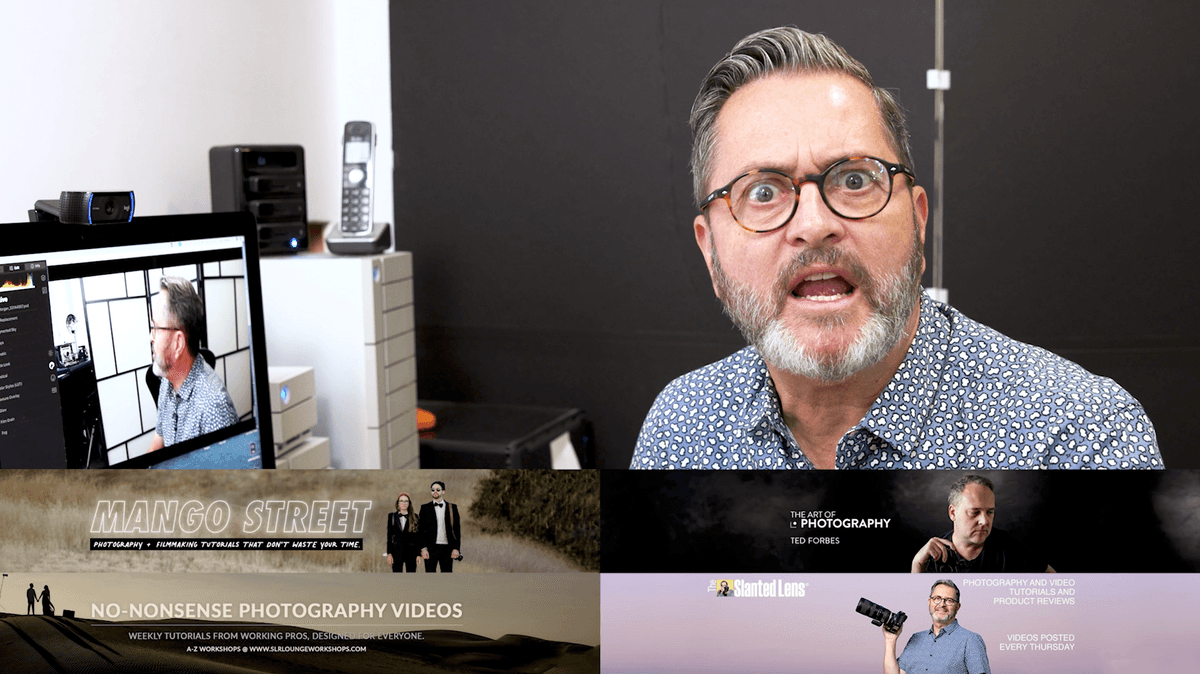
Ted from The Art of Photography: “So we’re going to select Sunrays here. The first thing you do is to Place Sun Center. And I’m going to move this right behind these trees back here. And one of the things when I turn up the amount, this is just the default setting, I really don’t like it when you see the sun rays because that wouldn’t occur naturally within a lens. So let’s bring that around a little bit. I definitely want some haze in the face there a little bit, not too much. We can bring the amount back a little bit, the overall look a little bit, you can adjust the length of the rays, and there we go. But I want to cover the face too much. Okay, so it looks good. The number of Sunrays is very essential, I’m going to bring this way down because when you start seeing a whole bunch of them, it starts to look fake. This was shot wide open, most likely and not with F stop of f/16.”
So here we have it. Here’s what we did, everybody. So go ahead, David, what were you saying about your mask there?
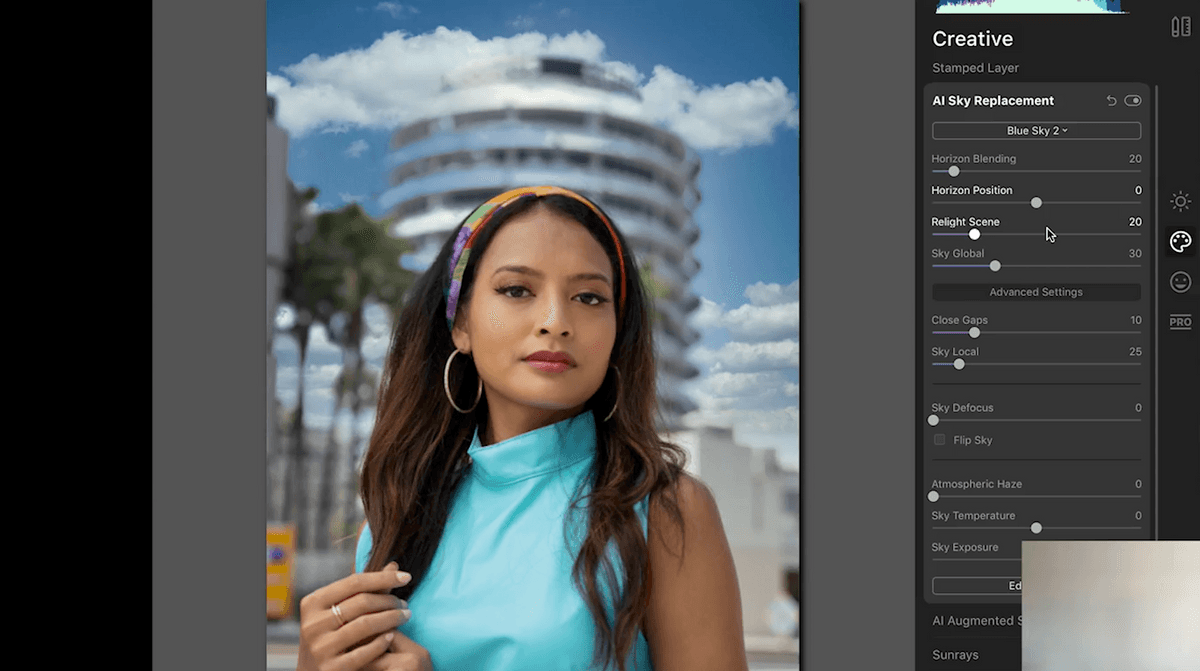

David Crewe from SLR Lounge: “So the last thing that I did was the sky replacement and I was refining my mask when you yell at us to put our pencils down. So as you can tell by my image, the sky is a little bit rough up there and a little edgy.”
Jay P. from The Slanted Lens: “So I took the image, I spent a ton of time removing the Penske rental truck. And for me, it was a 1960’s image. And so it was driving me nuts to have that truck in there. I had to take that out.”
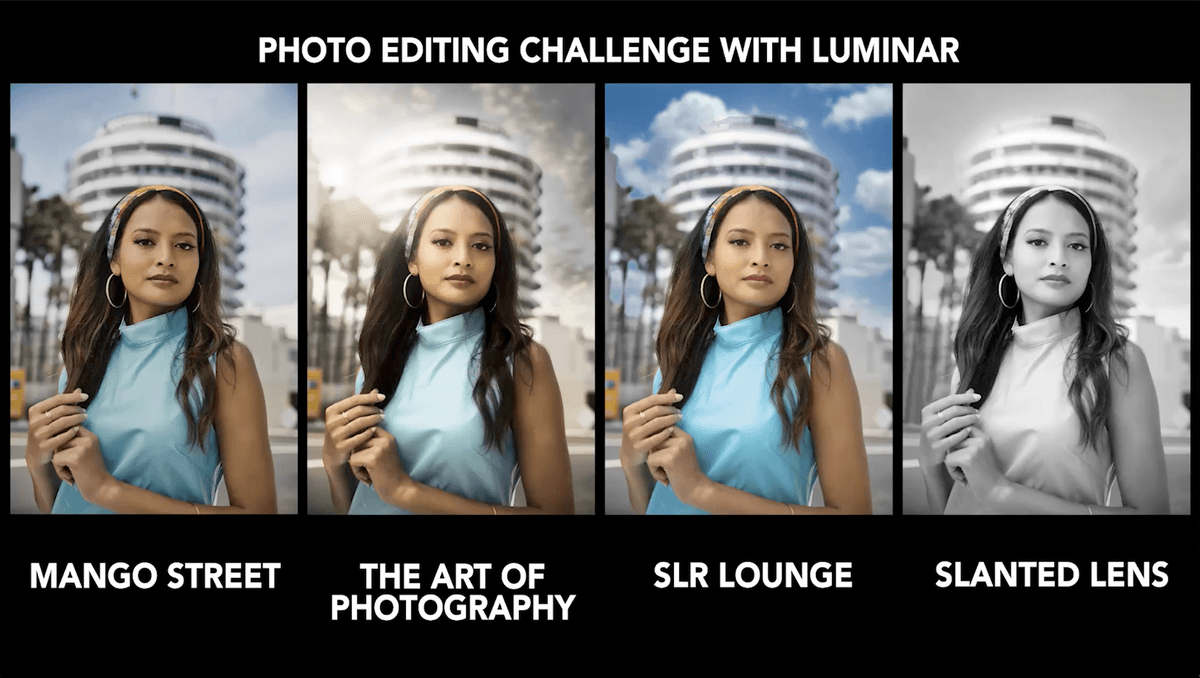

Jay P., “These look so great. They look very, very different. Tell me, Daniel, what was your thought? What were you going for?”
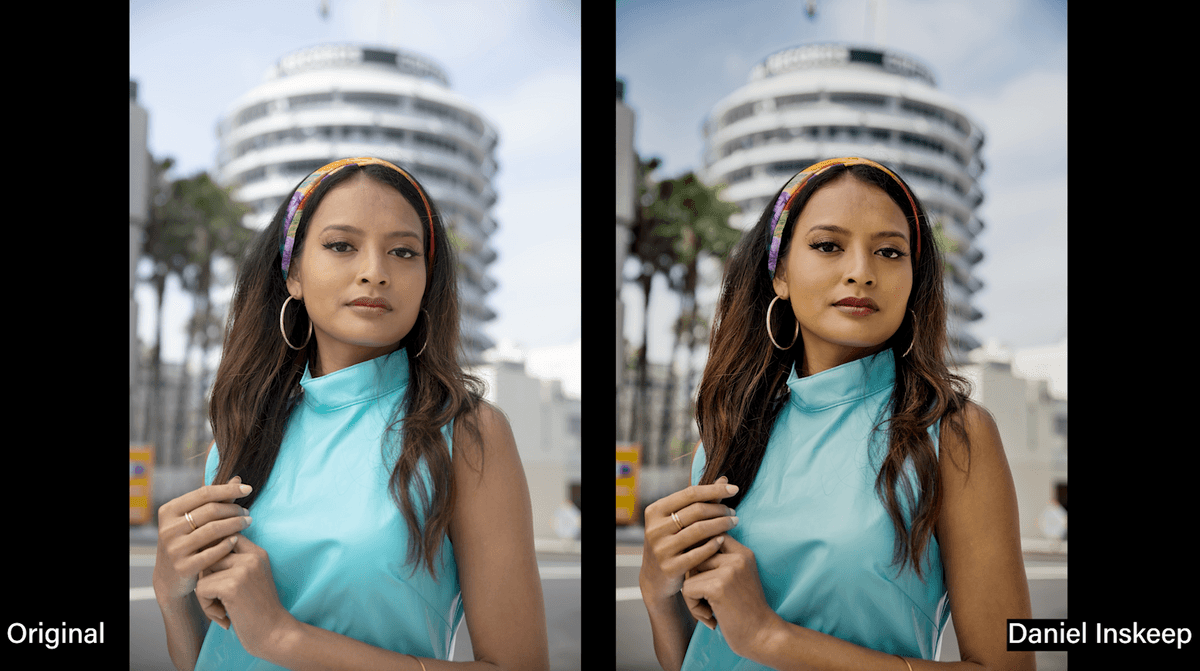

Daniel Inskeep from Mango Street: “So nothing too over the top. I wanted to keep it kind of, you know, within our style, which is not too stylized in any one direction. So I always want the skin tone to look really good. I want there to be enough light on the face, which is already shot really well. So I don’t really have to work too much at that. There’s just some small adjustments. Just make sure there’s enough detail in the shadows and in the highlights, and then kind of just smooth things out.”
Jay P., “Looks great. It really looks nice. And you know what’s interesting is I really like the fact that it has that sense. It’s got a nice reality sense about it. You didn’t overwork it. Sometimes in these things. People overwork things and I like the fact that I don’t feel that and it’s really nice.”
Daniel, “Yeah, I think if I had a little bit more time, I probably would have removed that truck because I don’t like the yellow, you know, kind of competing with our focus. But you know, for just doing a quick edit, I’m pretty happy with it.
Jay P., “For 10 minutes. Yeah, it looks excellent. You went one all out there Ted. You got the star sun in the background.”
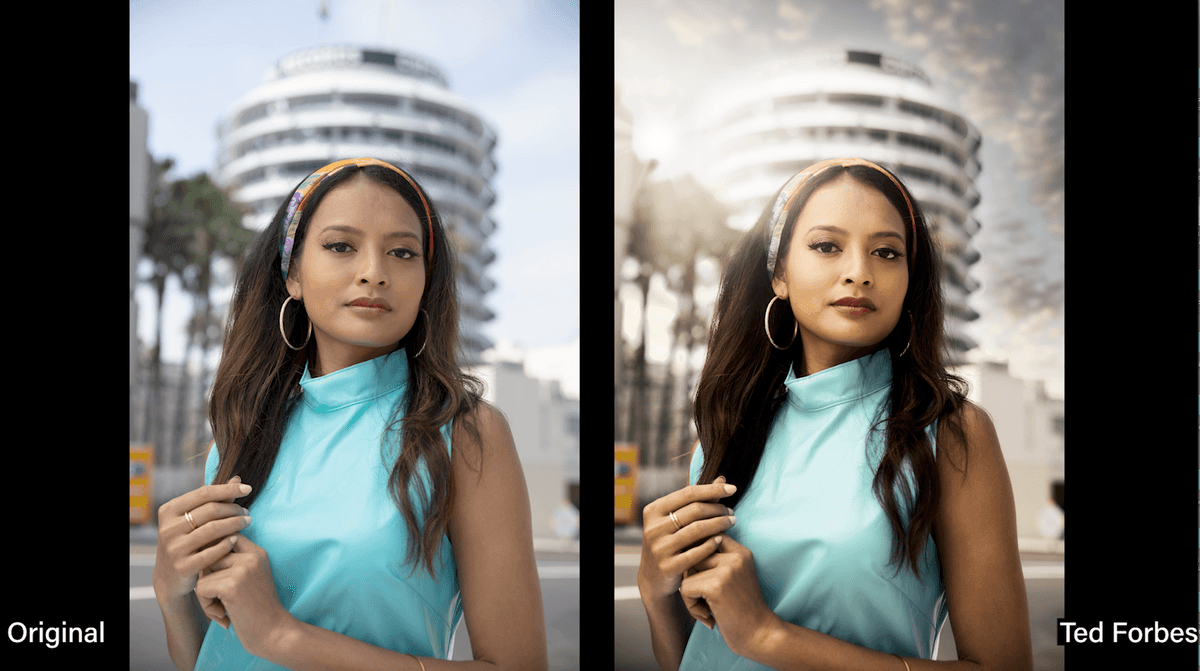

Ted from The Art of Photography: “When you’re in Luminar, you can’t not have the blown out Sunstar. Now the trick is getting it to not look corny. So when I was working on the image, one of the things I love about Luminar is the AI tools you have in there are designed to where you can do things pretty quickly. And so just for the general overall part of the image, I did apply a chrome lut that they had in there just for a look. Then I dialed it back a little bit. Replacing the sky was probably the trickiest part because I did have to do a little mask work.”
Jay P., “Yeah, that out of focus building was hard.”
Ted, “Well, I was able to just cover a lot of that up. I didn’t do the Sunstar to do that, but it did help because I didn’t have to be exact around that side of the image. But and I did some work on the face with the AI tools for the face slimming and enlarged the eyes just a little bit. And I darkened lips and that was about it.”
Jay P., “Well it looks excellent. It really has a fun feeling about it. What you did changes the image completely the look and the sense of it.”
Ted, “It’s LA man. That’s why I had to have the Sunstar.”
Jay P., “It’s LA and it’s even more LA now. Alright, so let’s talk about David What do you have going here?”
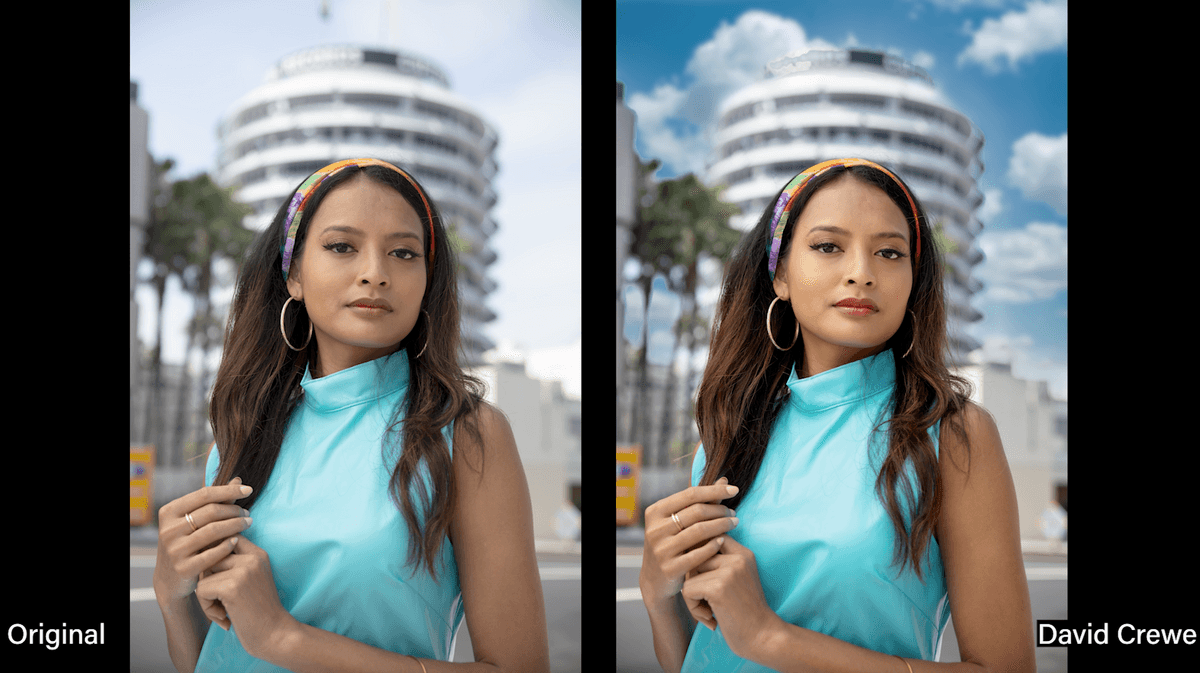

David Crewe from SLR Lounge: “Well, one of the things if you follow any of my work is I’m not a fan of over retouching. I’m not a crazy frequency separation guy or anything like that. I like to keep, anytime I’m doing portrait work, as natural as possible. So that’s what I basically spent the majority of my time doing in this shot which was playing around with the AI tools for the skin retouching and I use that a lot. I do a lot of corporate headshots, so I basically knew exactly where I was going to go with that. And just like Ted did, I basically just brightened the eyes a little bit, darkened the lips a little bit and slimmed up the face a little bit. And lighting wise the shot was taken very well. So the only thing I did was bump up the face light. Which is one of the AI features that I love about this tool. Even if you light it perfectly and you just want that little bit of targeted lighting it’s just a slider you don’t need to spend 10 to 15 minutes with a tablet dodging and burning and making sure that everything is done up. It’s quite nice in that respect. And then as you can see, that’s when I started working with the sky replacement and refining my mask when I ran out of time. I got a little bit too heavy handed with talking and walking through why I’m doing things.”
Jay P., “Yeah, you would have gotten it if you had just couple more minutes. It’s very close. Look at the skin tone, it looks wonderful. I mean the values are all there. It’s just the sky mask is the only thing really.”
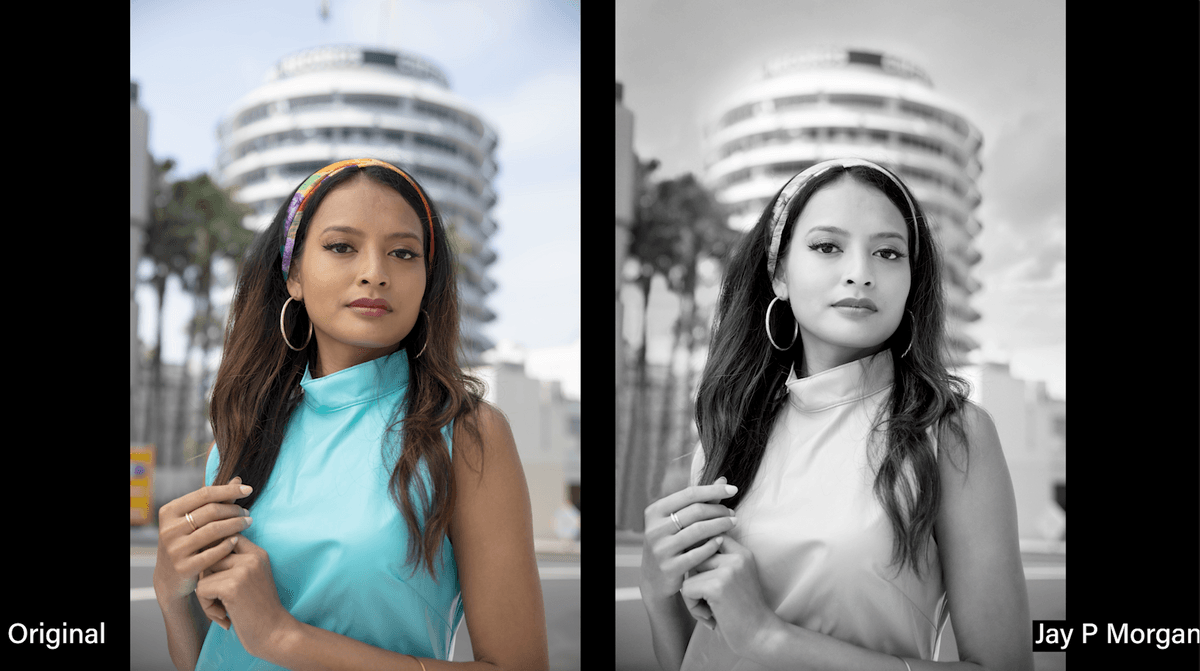

Jay P., “Well for mine. I knew I wanted to do black and white and so I kept trying to keep her face as bright as I could. I love it when you go to black and white in this software because I could go into the cyan and her dress was so Cyan. I could kind of either make the dress bright or stand out. I kind of darkened it a little bit. I wanted it to mostly to be about her hair, the darkness of her hair, and her eyes. And then everything else just becomes kind of ancillary to that. And so I put a little grain on it. I wanted it to look like Tri-X film grain. I could have punched the grain up maybe a little more, I think.”
Jay P., “Well, thank you very much to each of you for doing this. It felt a little stressful to me, man.”
Ted, “I wasn’t stressed, what are you guys are talking about?”
Jay P., “Yeah, you’re walking around having coffee and things.”
You can check out Luminar here: Save $10 with the code LuminarTSL10
Make sure everyone that you subscribe to these channels.
Ted Forbes – The Art of Photography
Daniel Inskeep – Mango Street
David Crewe – SLR Lounge
Talent – Chanda Am @chanda.am
If you look at the combined knowledge, photographic knowledge in these four channels, there’s an incredible amount of knowledge there. You can really access great educational tutorials that will teach you and mentor you and help you to grow. So check them out, even check out mango street’s new channels as well, which I think is pretty exciting. I just think that’s so cool.
So thank you very much, gentlemen, for doing this challenge.”
Ted, “Thanks for having us. This was a blast man, anytime.”
Jay P., “All right well maybe let’s do a Luminar Challenge II.”
So everyone keep those cameras rollin’ and keep on clickin’.

Let’s see what monitors I have in my 1813-7 SKB case!
https://www.skbcases.com/music/products/prodlist.php?c=147