


Hey it’s Jay P Morgan here on The Slanted Lens and today I’m going to show you my editing process using both photoshop and Luminar 4 to edit portraits!


You know, I shoot a ton of people, and because I shoot so many people it seems like I spend a tremendous amount of time retouching portraits. It used to be a very long process, but I’m really excited to see a simplified version from Luminar 4 that allows you to edit portraits and do it quickly to be able to apply some of the same things that take 3 or 4 steps in photoshop. You can do it all very quickly in this program.


Special shout out to Luminar and Tamron who are sponsoring this video. Luminar 4 is really an amazing program. You can save $10 on it by using the discount code LuminarTSL10. As a stand alone product it’s already an amazing price. You don’t need Photoshop or Lightroom to run this program – it can work as a stand alone way to sort your images, edit your images and really give you an experience just like Lightroom and Photoshop in a very quick compact way to apply those edits.
Get Luminar 4: https://macphun.evyy.net/c/2073517/645022/3255
Used my code: LuminarTSL10


Let’s take a look at my process, see exactly how I get an image from Photoshop, move it into Luminar and get an image out of Luminar.
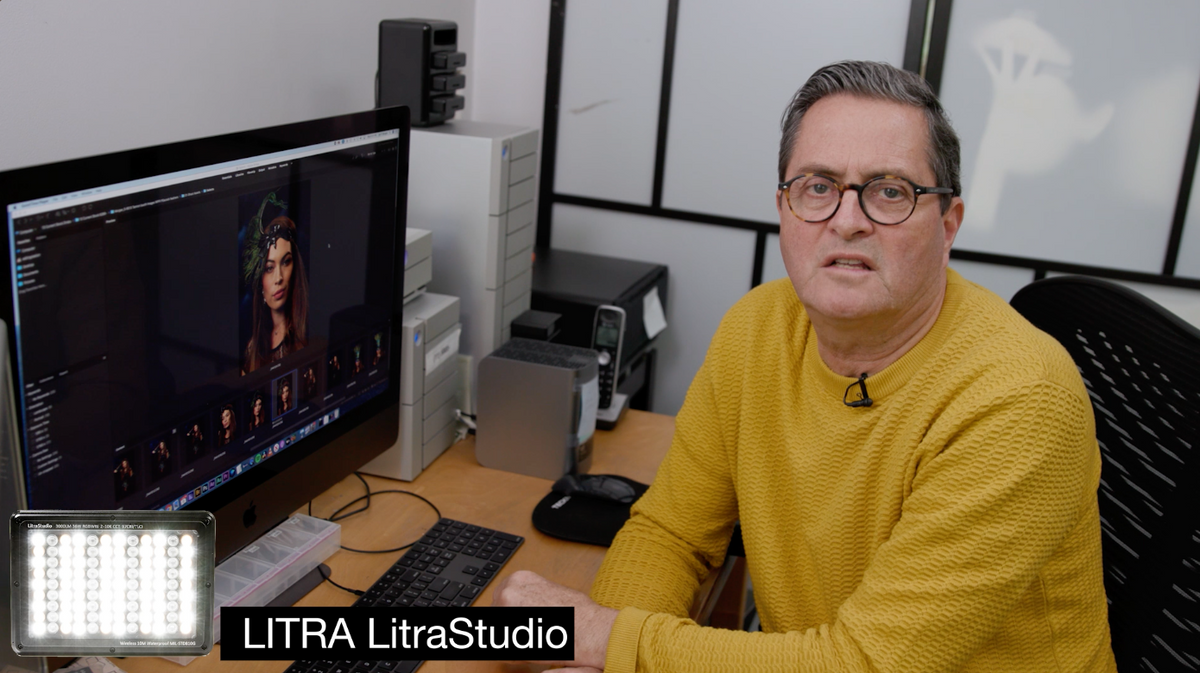

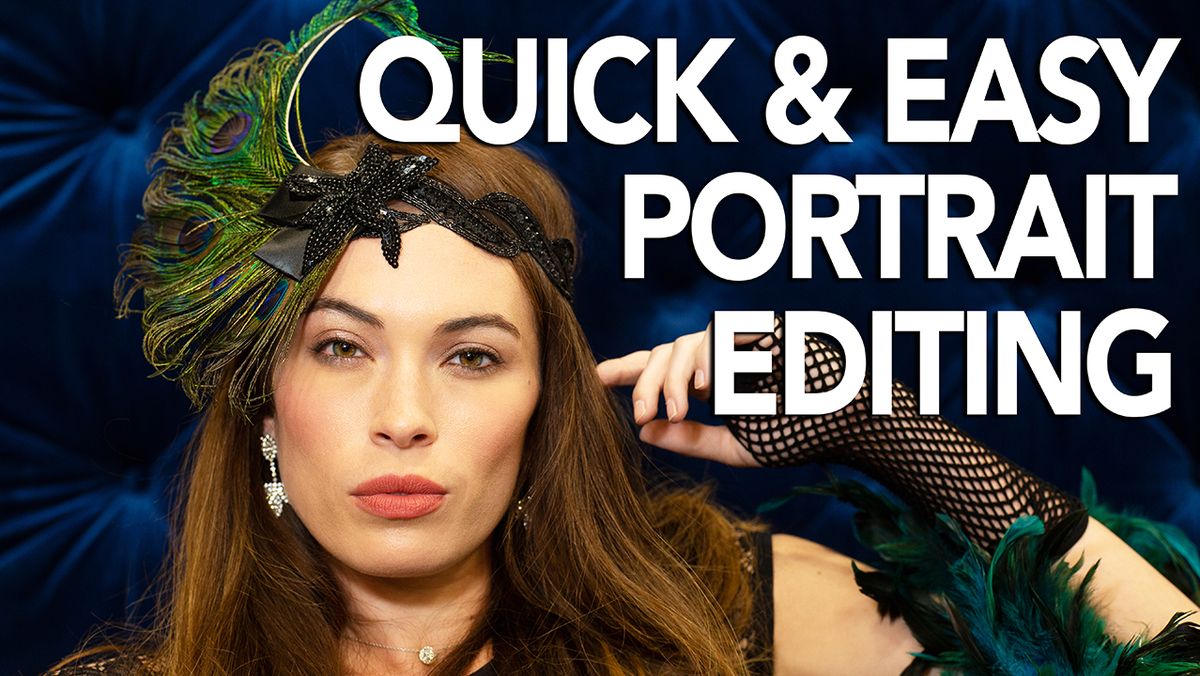
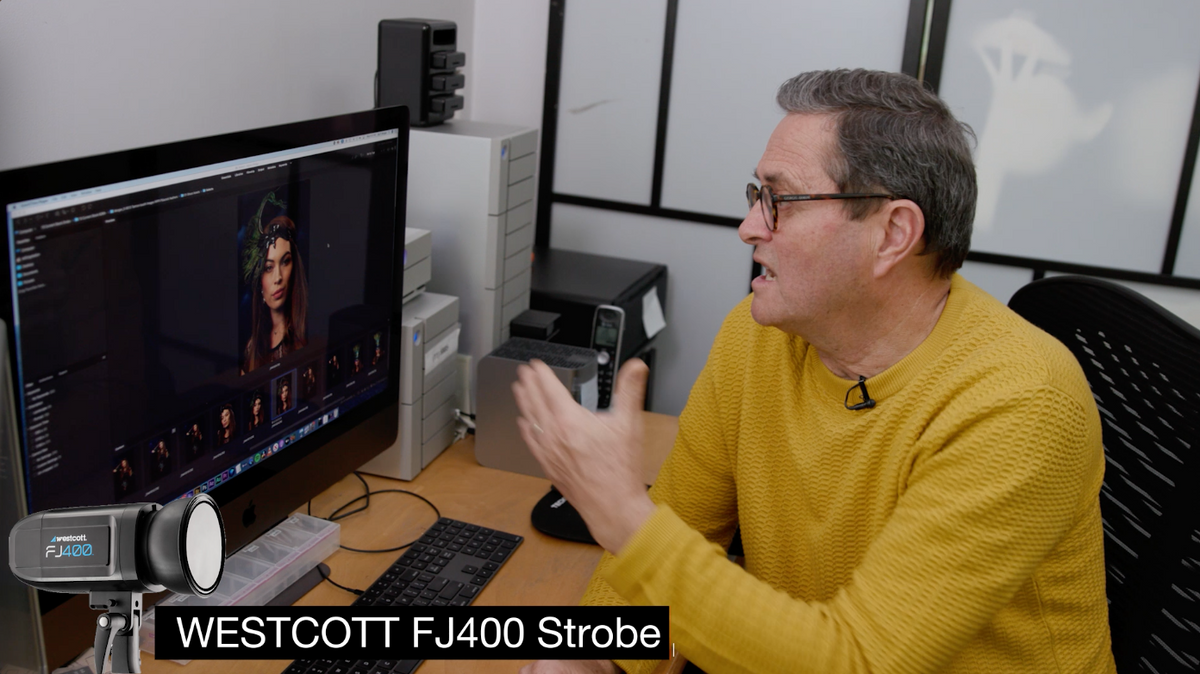
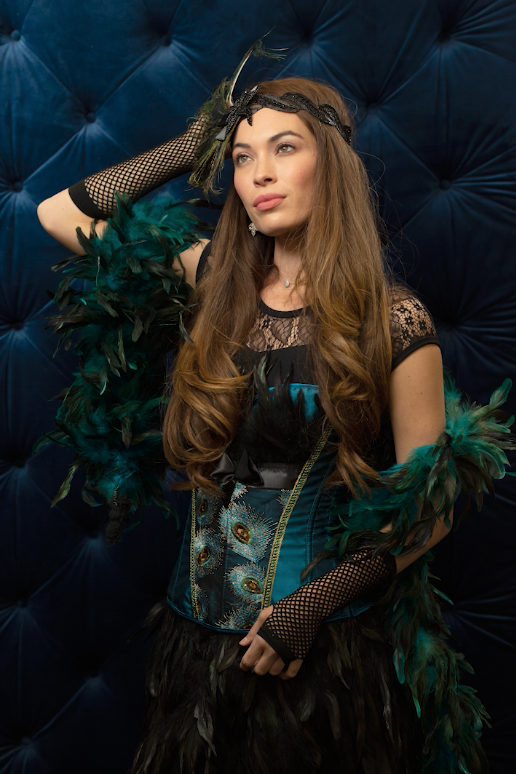
These images are from a shoot that we did at the Tamron booth at WPPI. It was kinda a tough lighting situation because you’ve got all those overhead lights in the convention center. It was difficult to overpower the lights from overhead, but we had a Westcott FJ400 Strobe from behind and then I would bring in a little Litra light to open up her face a bit.


I’m shooting with the Tamron 85mm 1.8 and it gives me a nice kinda look at her face. Definitely a nice lens for shooting portraits.

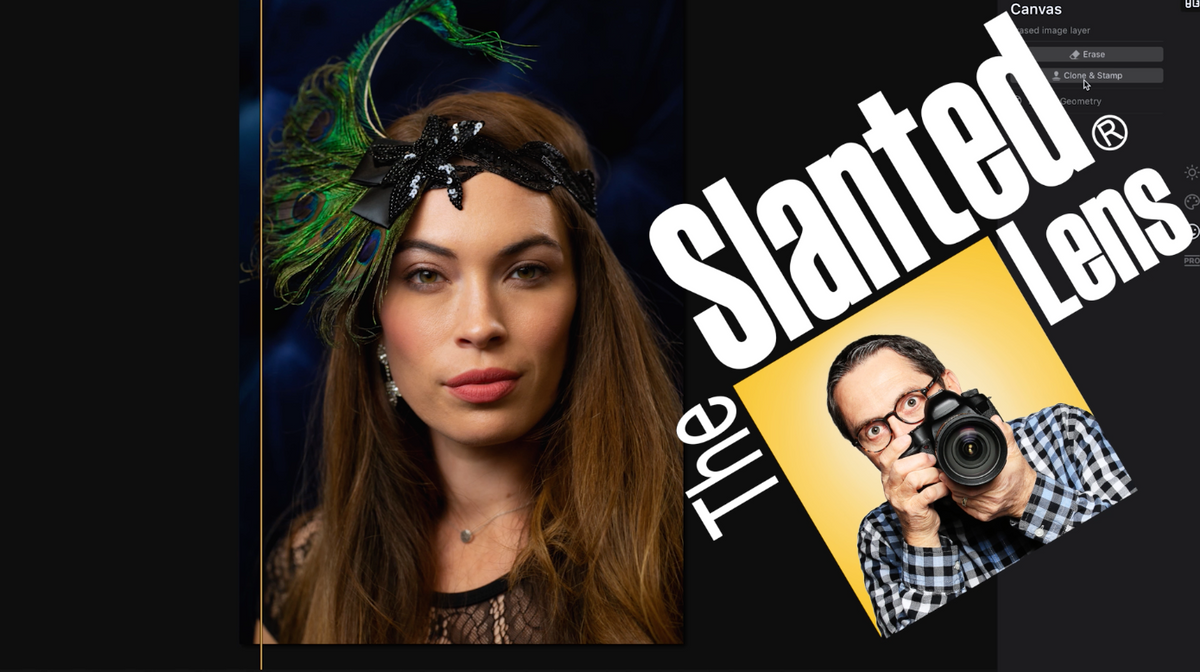
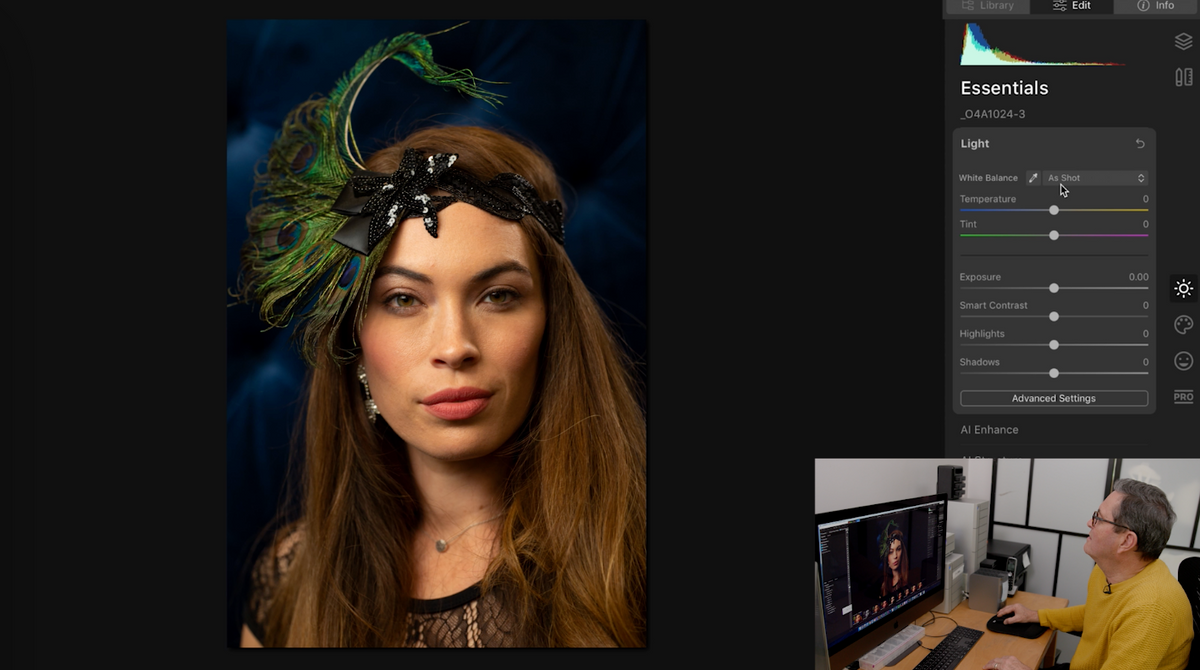
I’m opening up my RAW files into Camera Raw and then immediately going to open this into photoshop. In photos I’m going to select Filter and I’m going to go into Luminar 4. Once I’m in Luminar 4. Once I’m in Luminar 4 it’s going to give me a lot of the same options as in Camera Raw, a lot of the things I love about Camera Raw.


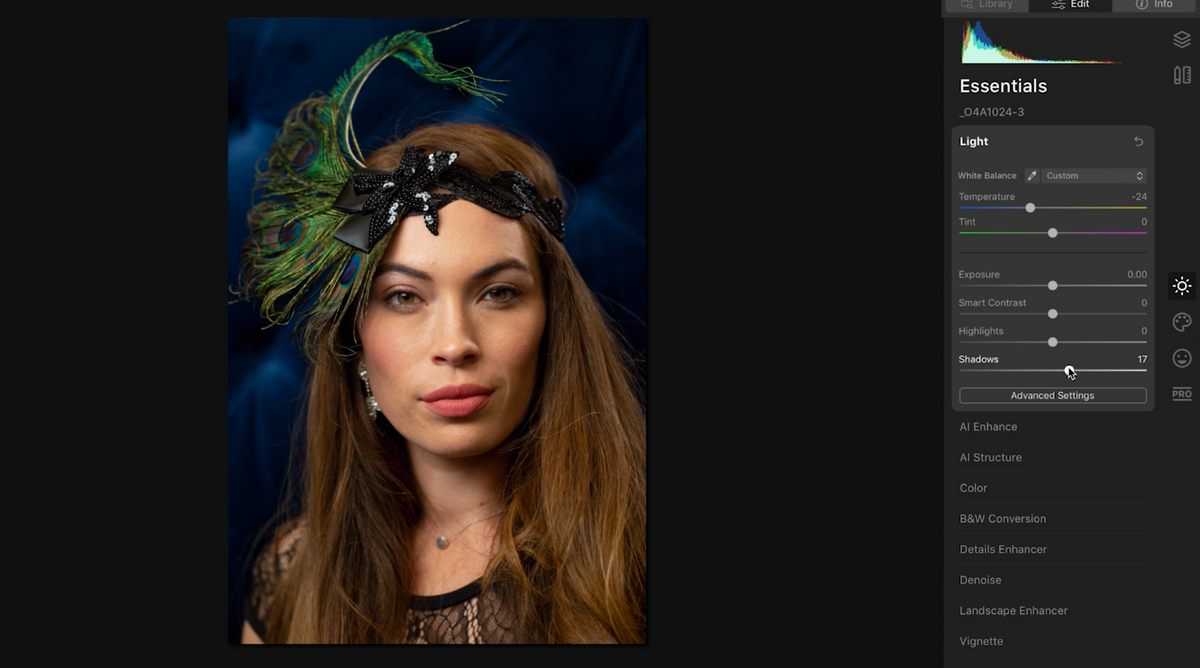
I click on the light option on the top here. Firstly, this image is way too warm so I’m going to add a bit of blue, open up the shadows – I might recover a little bit of the highlights on some of these skin tones on the front of her face.


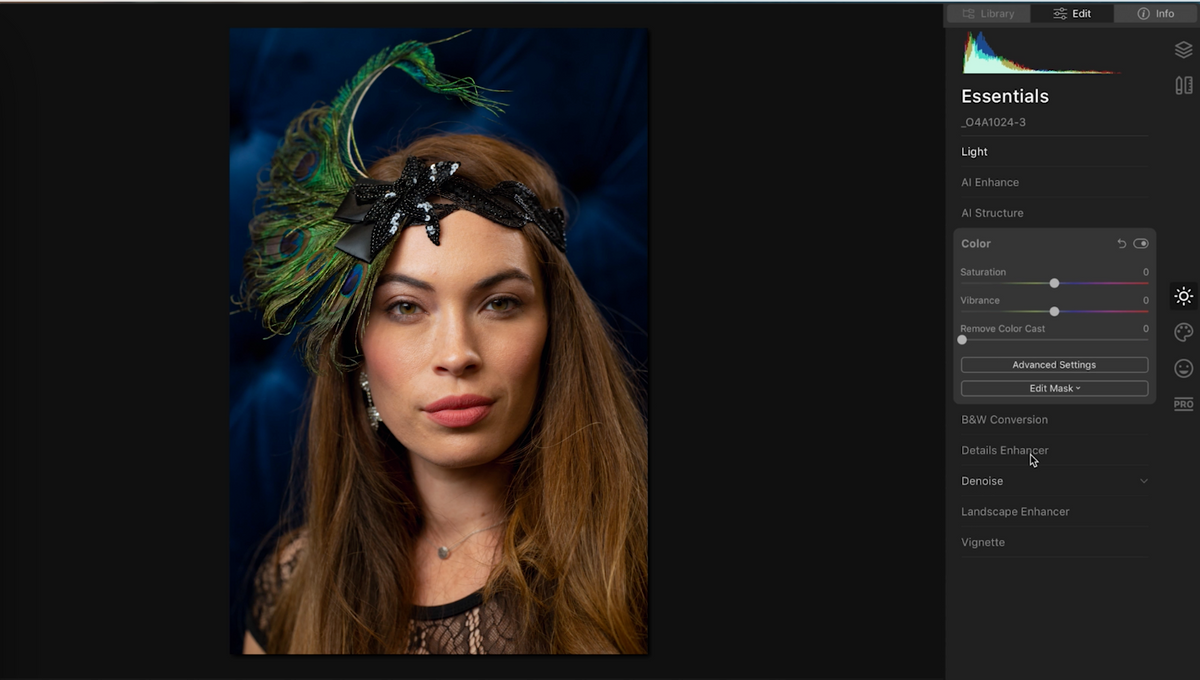
Then I’m going to jump down here to color. I love this advanced experience. I can adjust the hue, saturation, luminance. So first I’m going to select the blue hue and mess with that. I’m going to saturate it a little bit. Pulling the luminance down a bit so there’s a nice contrast between her head and the feather and the face.
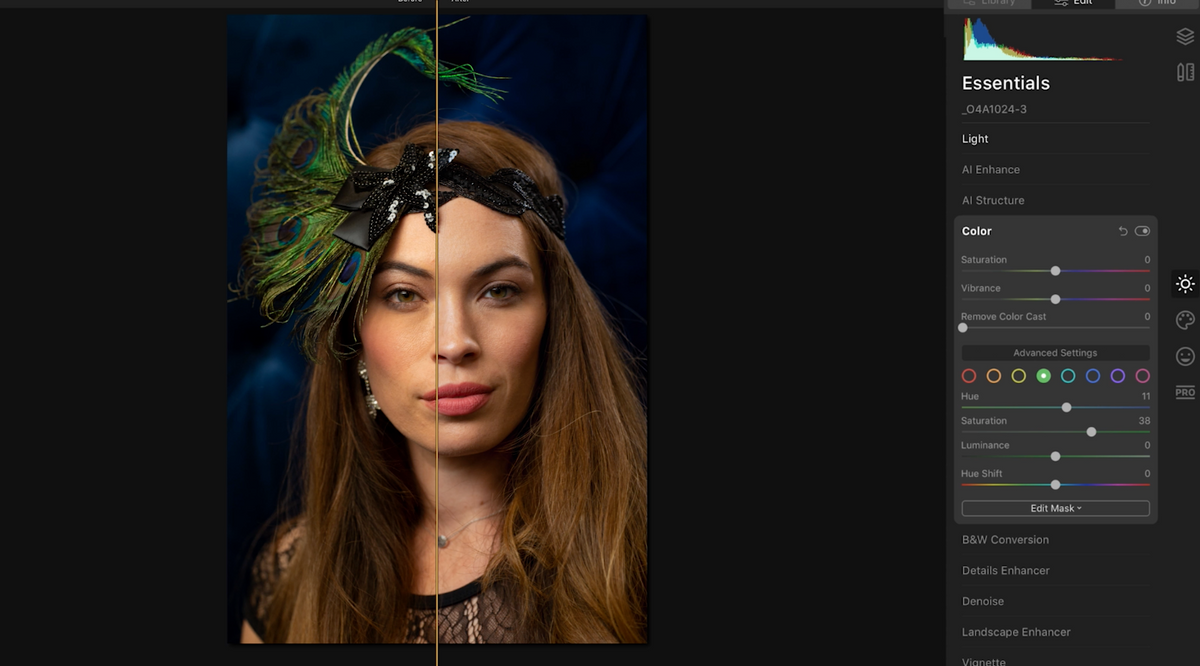

Now I’m going to jump into the green hue and just make the green a little more exciting here. Saturate it just a bit.
You can get a before and after split on the screen. The headdress is looking great!

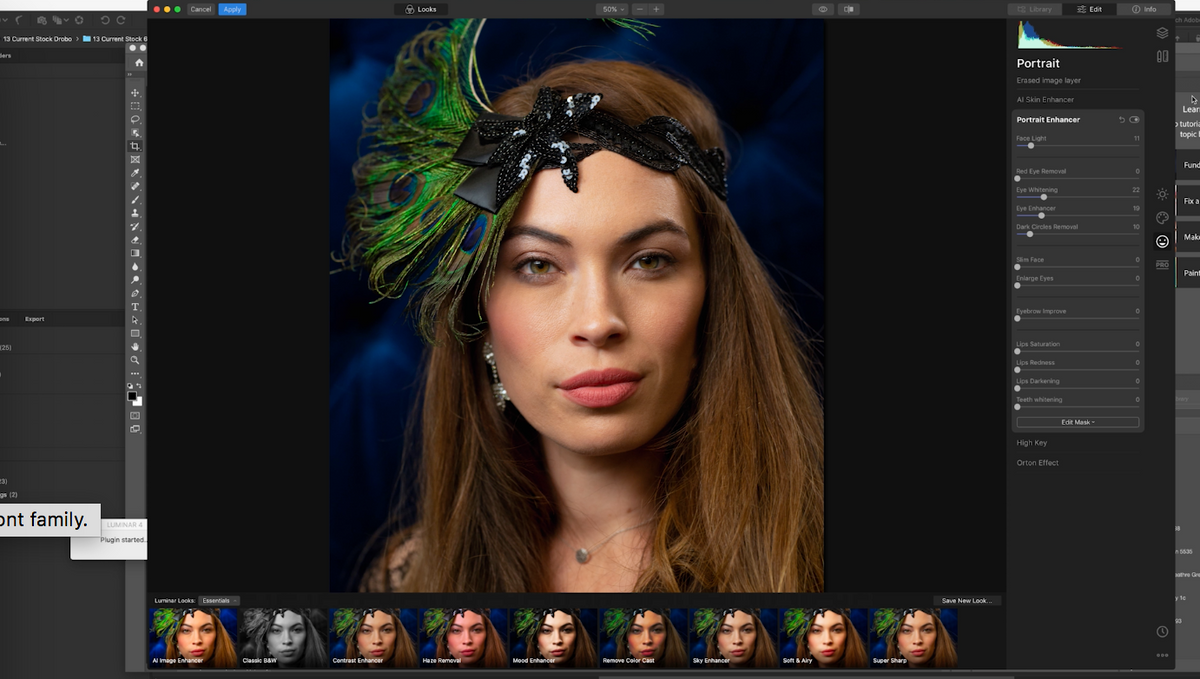
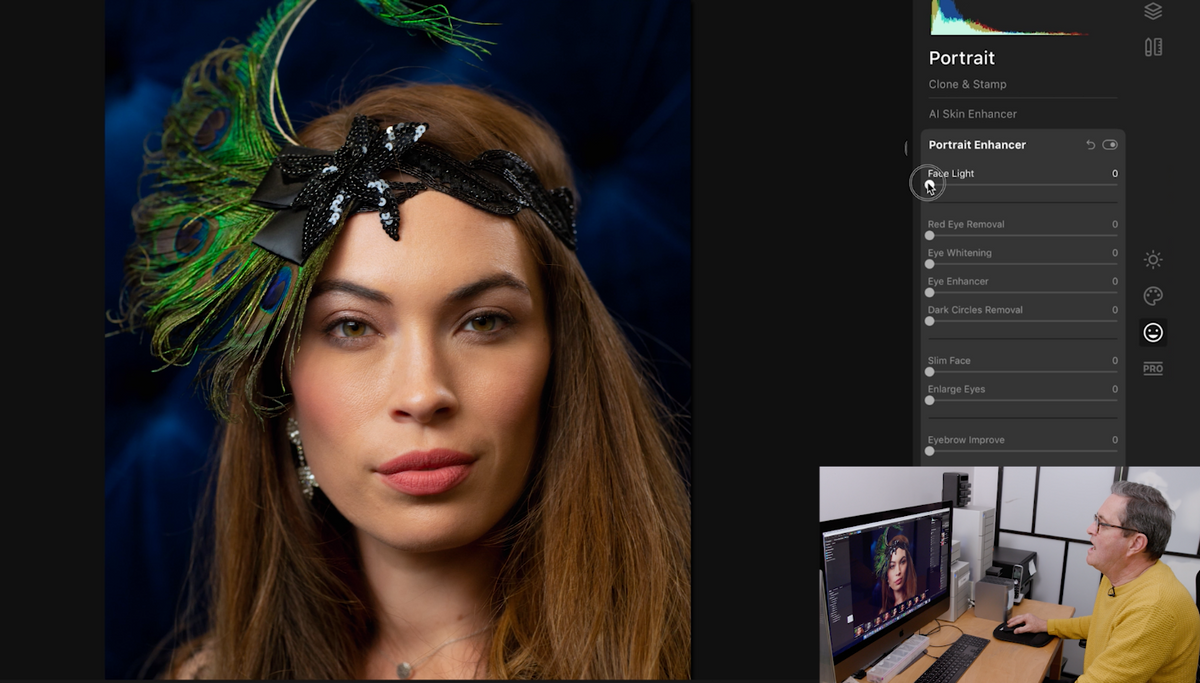
I’m now going to go down to the portrait enhancing module, and in here I’ve got several things we’re going to do.

First I’m clicking this AI Skin Enhancer, I’m not going to go too far with this because if you go all the way it looks like an 80s portrait. So I’m going to go about 35%. It doesn’tt clean up everything. It doesn’t get this hair on her forehead – there are several things in here that it’s just not going to do.
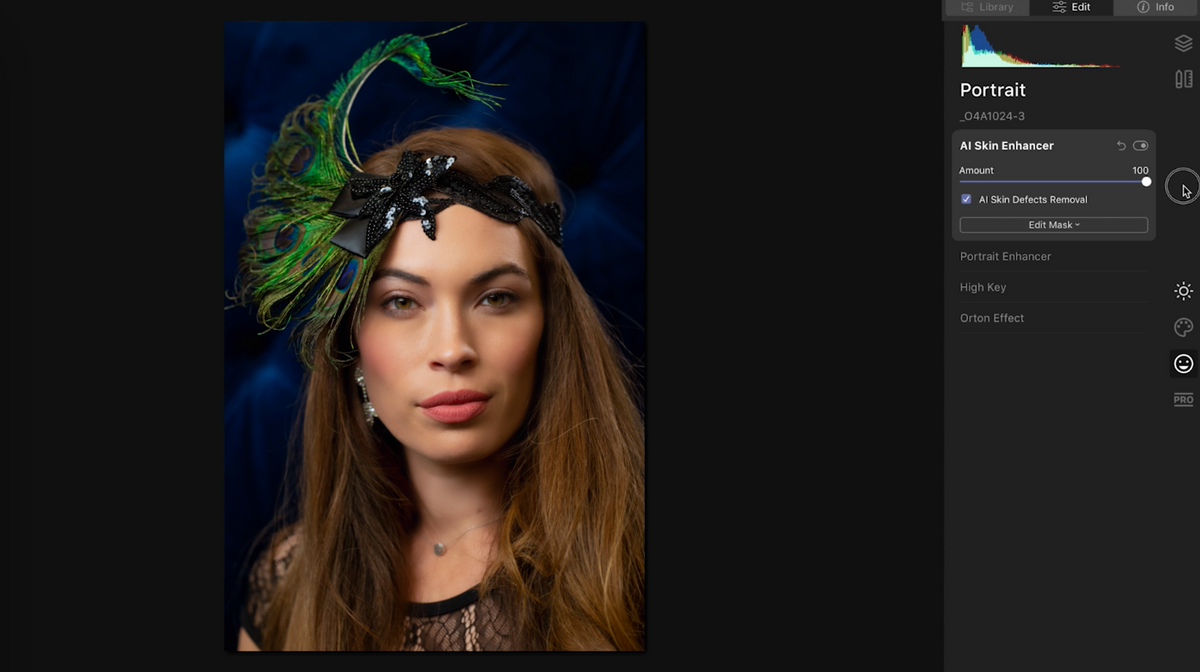


So I’m going to jump up here to the erase tool – now you have erase or clone. I’m first going to use erase. The erase is kinda like a heading brush. It allows me to do some things in here, but it wont allow me to do everything.
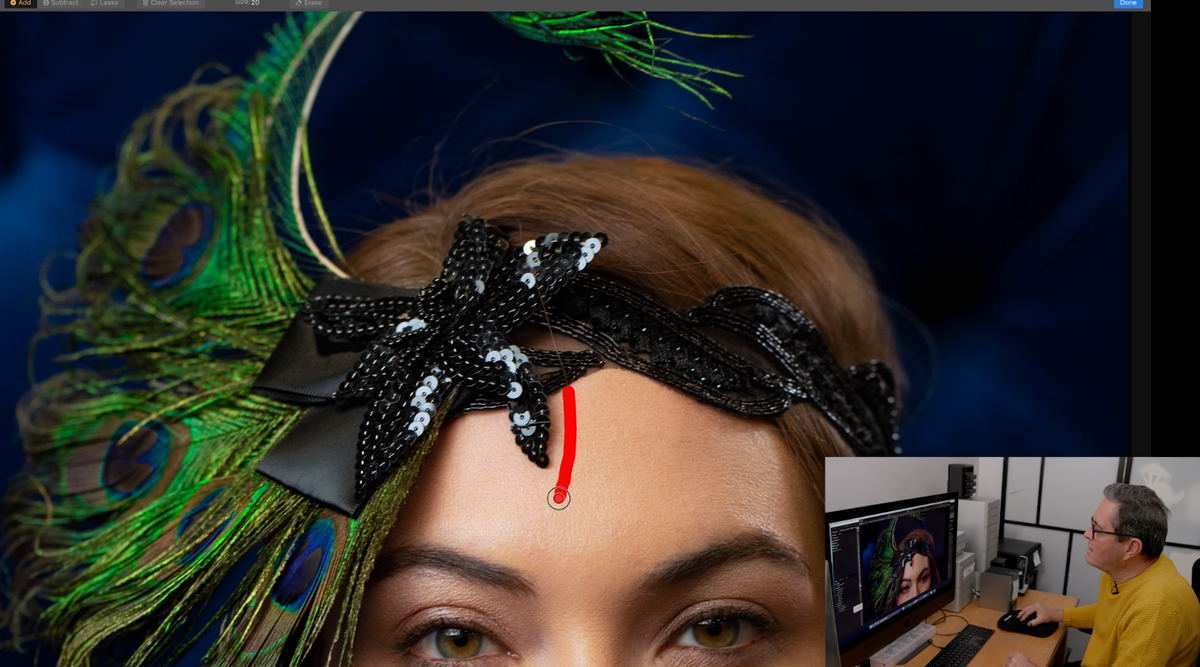

I can get rid of this no problem. And now I’m erasing the hair on her forehead. I’m not going to do everything because removing this hair on top of the other hair would just look funky.
Now there is still one hair here that is bothering me, so I’m going to go into the clone tool and it’s a little more time consuming to use the clone tool but I think it will be worth it for this. So I just paint over the hair that I want to erase and it pulls pixels from other parts to replace where that hair was.
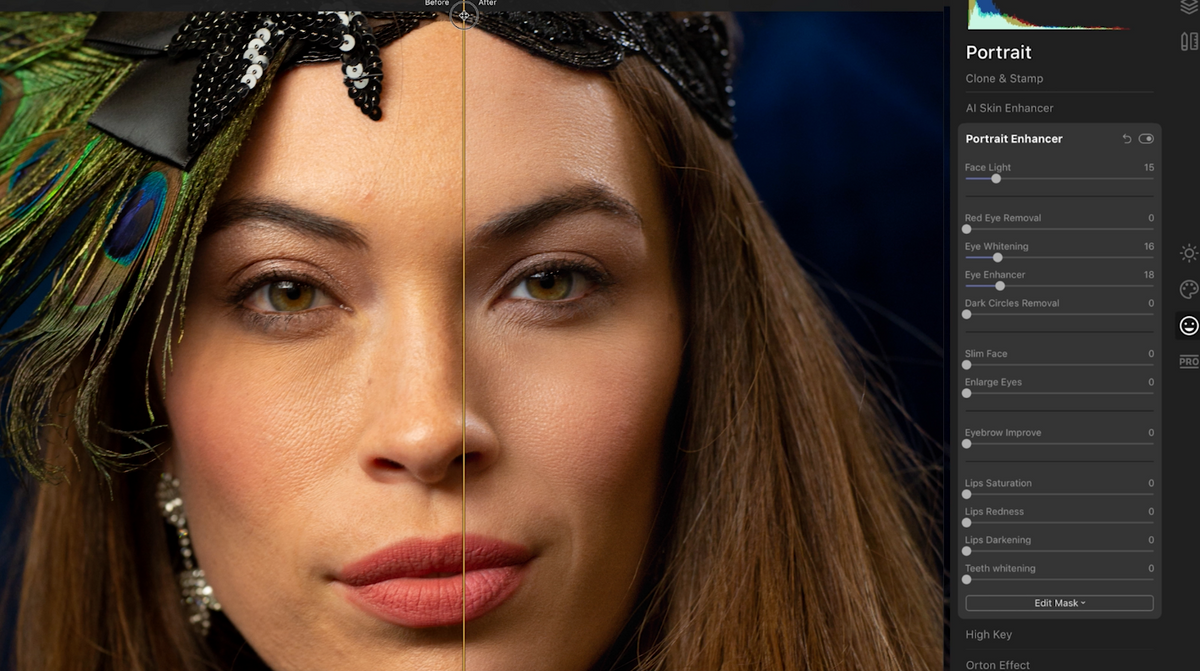

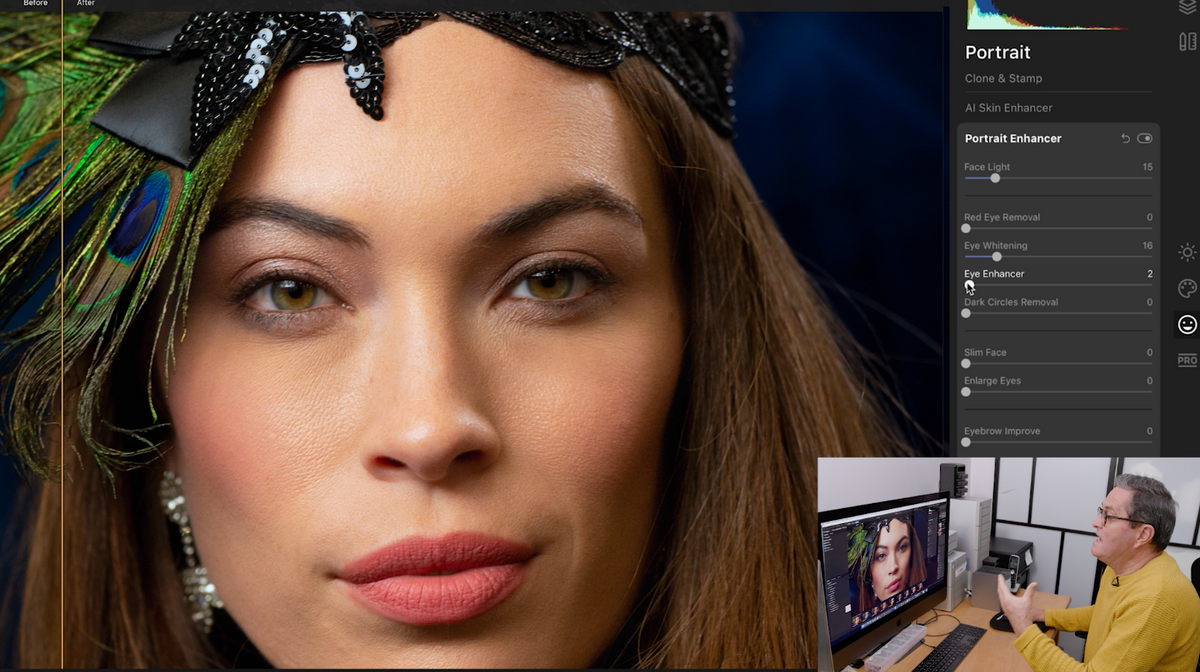
I’m now going to go into portrait enhancer and this has all the tools that you’d really use to enhance an image. Face light, eye whitening, eye enhancer.
You can slim face, enlarge eyes and darken eyebrows – I’m going to do that a bit.
We have 3 things for the lips. I’m going to bring up the saturation, make them a little more red, and darken them a bit.

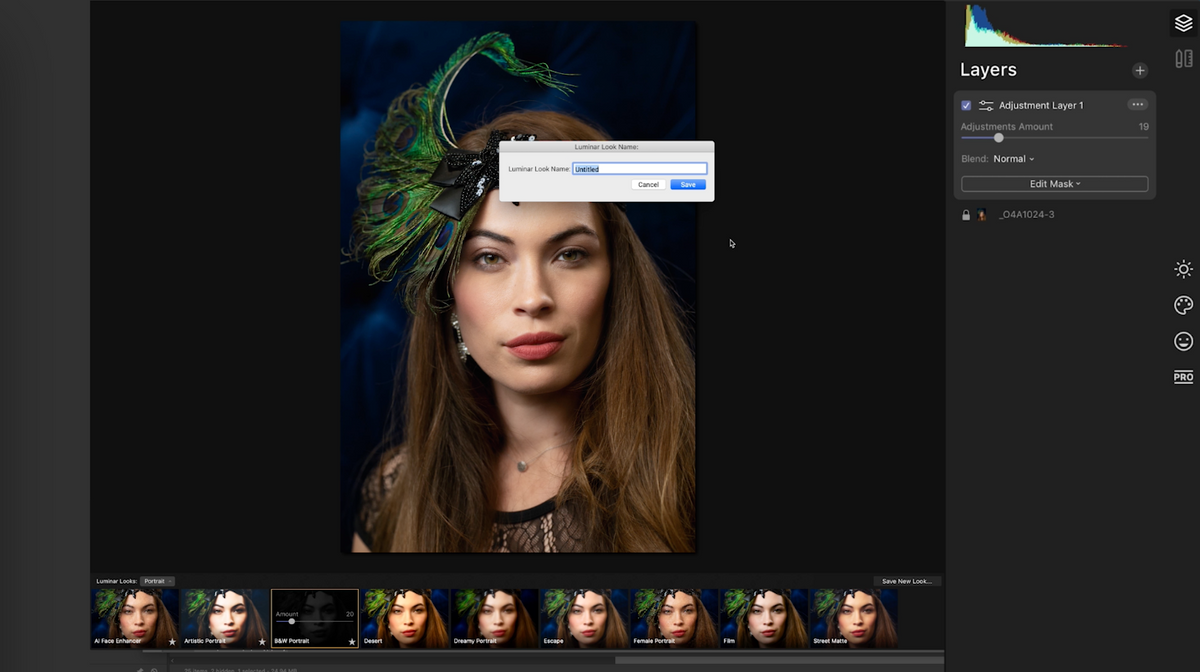
Now I’m going to save this preset here and call it “Peacock 1” and I can jump back to that preset any time.
We’re going to make a new adjustment layer here and play around with the Luminar portrait looks and see what some of these look like. They’re pretty awesome actually and you can play with the amount those filters are applied.
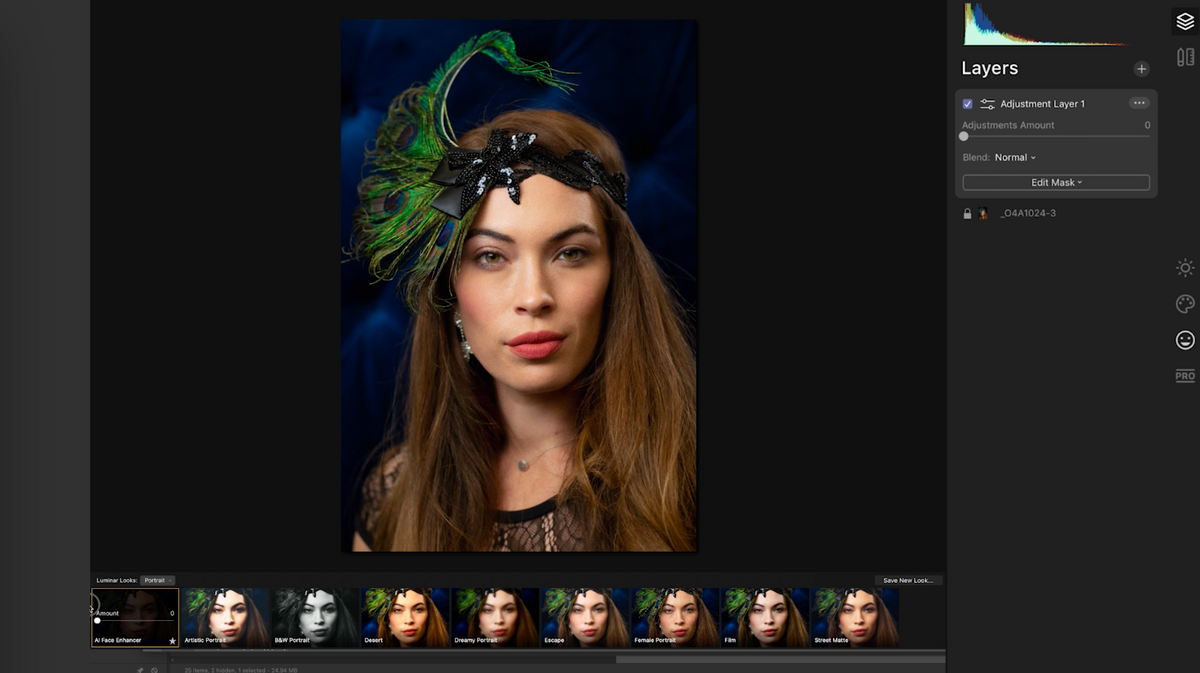

I’m adding just a bit of this black and white filter and it’s going to make this feel just a bit more vintage. And I’m going to save this as another look “Peacock 2”.

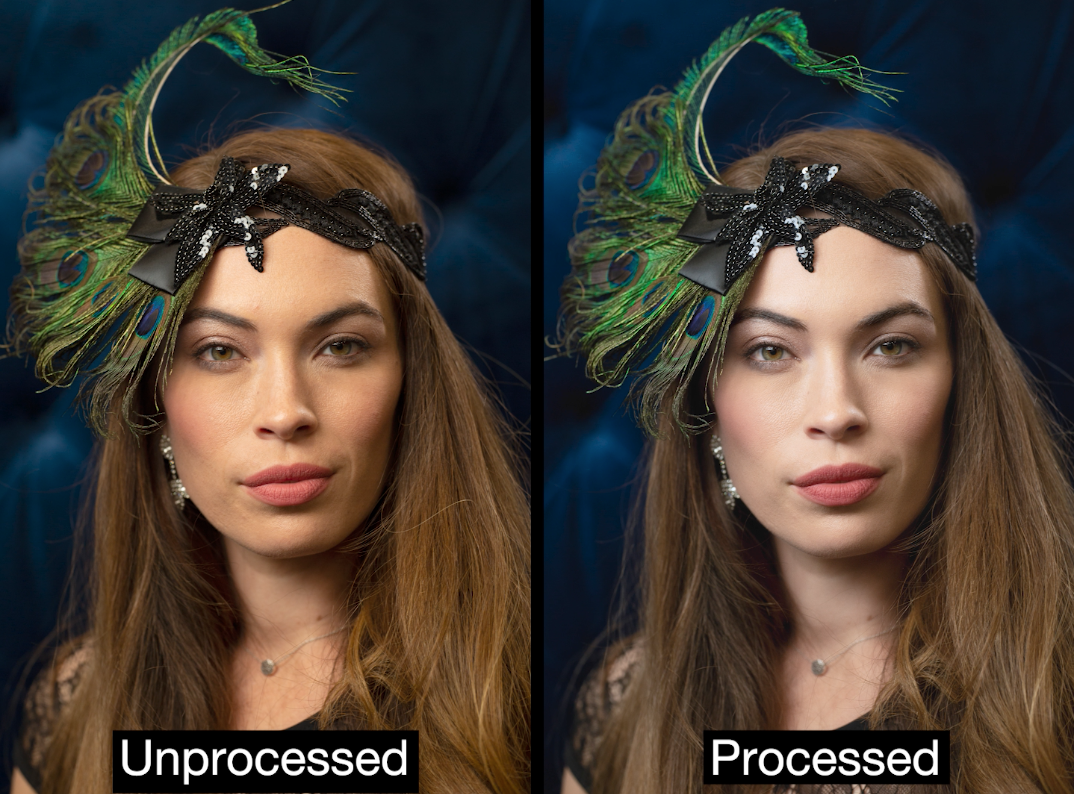
This is a pretty awesome before and after!

So there’s a look at Luminar 4. I wouldn’t talk about these things unless I felt comfortable with them and I have loved Luminar’s stand alone program for some time, I’ve used several versions and this is the best that’s out there! It makes it a simple process to quickly edit a portrait and move on. You can integrate it with Photoshop or Lightroom or use it as a stand alone product.


If you want to try this out, they have a free trial, or if you want to go ahead and get it for yourself, use our affiliate link and use our discount code “ LuminarTSL10 “ and that will give you $10 off and you’ll be retouching portraits in no time.
Get Luminar 4: https://macphun.evyy.net/c/2073517/645022/3255
Used my code: LuminarTSL10
Keep those cameras rolling and keep on clickin!
GEAR USED:
Canon C200
Samy’s Camera: https://shareasale.com/r.cfm?b=1498955&u=1207551&m=61234&urllink=&afftrack=
B&H: https://bhpho.to/2FJaH8d
Amazon: https://amzn.to/34aYAbJ
Canon 24-70 2.8
Samy’s Camera: https://shareasale.com/r.cfm?b=784055&u=1207551&m=61234&urllink=&afftrack
B&H: https://bhpho.to/2OCKjgl
Amazon: https://amzn.to/2O871PH
Sony A7 RIII
Samy’s Camera: https://shareasale.com/r.cfm?b=784055&u=1207551&m=61234&urllink=&afftrack
B&H: https://bhpho.to/2DZYHut
Amazon: https://amzn.to/2QFH0Zu
Canon EOS R
Samy’s Camera: https://shareasale.com/r.cfm?b=1492406&u=1207551&m=61234&urllink=&afftrack=
B&H: https://bhpho.to/2roExVE
Amazon: https://amzn.to/2QEnk8s
Tamron 24-70mm 2.8 G2
Samy’s Camera: https://shareasale.com/r.cfm?b=799819&u=1207551&m=61234&urllink=&afftrack=
B&H: https://bhpho.to/2J2wp4j
Amazon: https://amzn.to/2KCVw0v
Tamron 28-75 2.8
Samy’s Camera: https://shareasale.com/r.cfm?b=799850&u=1207551&m=61234&urllink=&afftrack=
B&H: https://bhpho.to/2FsWNno
Amazon: https://amzn.to/2KJ3rcD
Tamron 17-28 2.8
Samy’s Camera: https://shareasale.com/r.cfm?b=1498957&u=1207551&m=61234&urllink=&afftrack=
B&H: https://bhpho.to/2ItePur
Amazon: https://amzn.to/37qnWVh
KLM audio module
Samy’s Camera:
B&H: https://bhpho.to/2qqbyUG
Vanguard VEO 2 Pro 263CPV
Samy’s Camera: https://shareasale.com/r.cfm?b=784055&u=1207551&m=61234&urllink=&afftrack
B&H: https://bhpho.to/3495qhT
Amazon: https://amzn.to/2KGGiYr
Platypod
Samy’s Camera: https://shareasale.com/r.cfm?b=784055&u=1207551&m=61234&urllink=&afftrack
Spyder Color Checker
Samy’s Camera: https://shareasale.com/r.cfm?b=800647&u=1207551&m=61234&urllink=&afftrack=
Kobra Modifier
Samy’s Camera: https://shareasale.com/r.cfm?b=1492412&u=1207551&m=61234&urllink=&afftrack=