5 One Light Portrait Set-ups – Interactive Lighting Tutorial in 360
Morgan
5 One Light Portrait Set-ups – Interactive Lighting Tutorial in 360
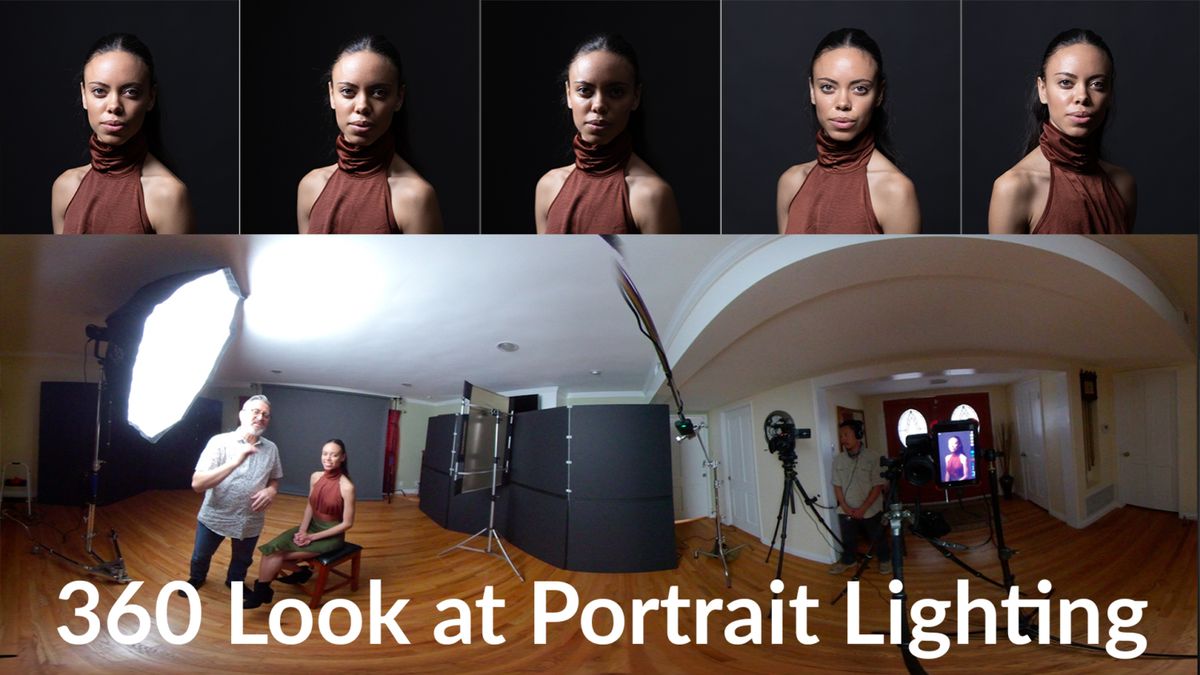
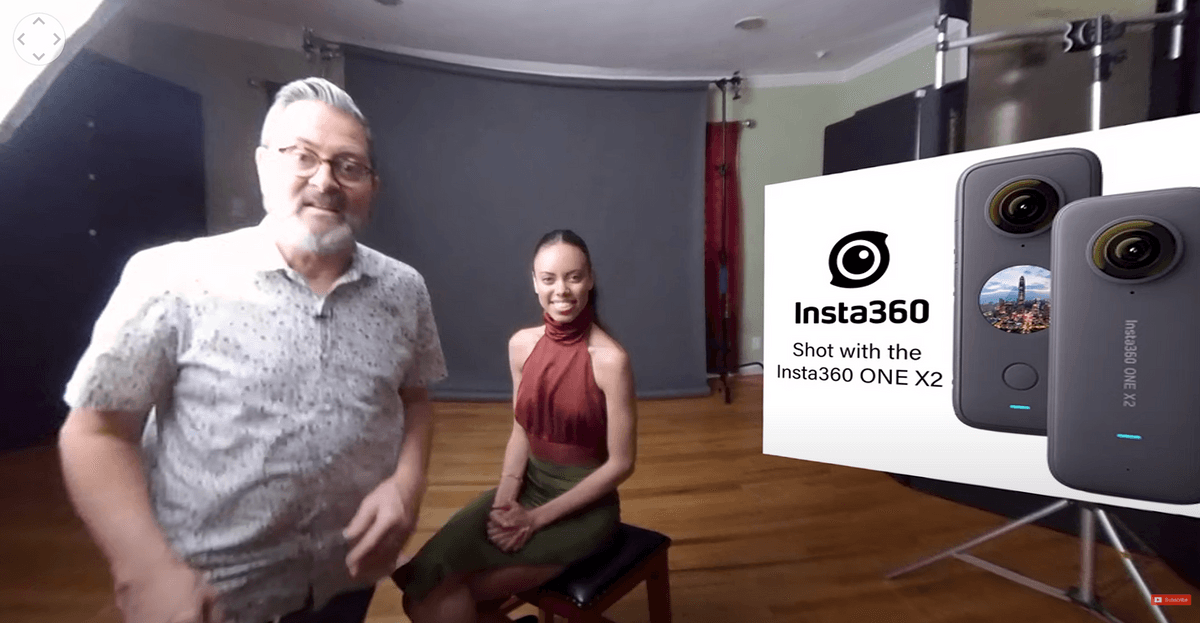
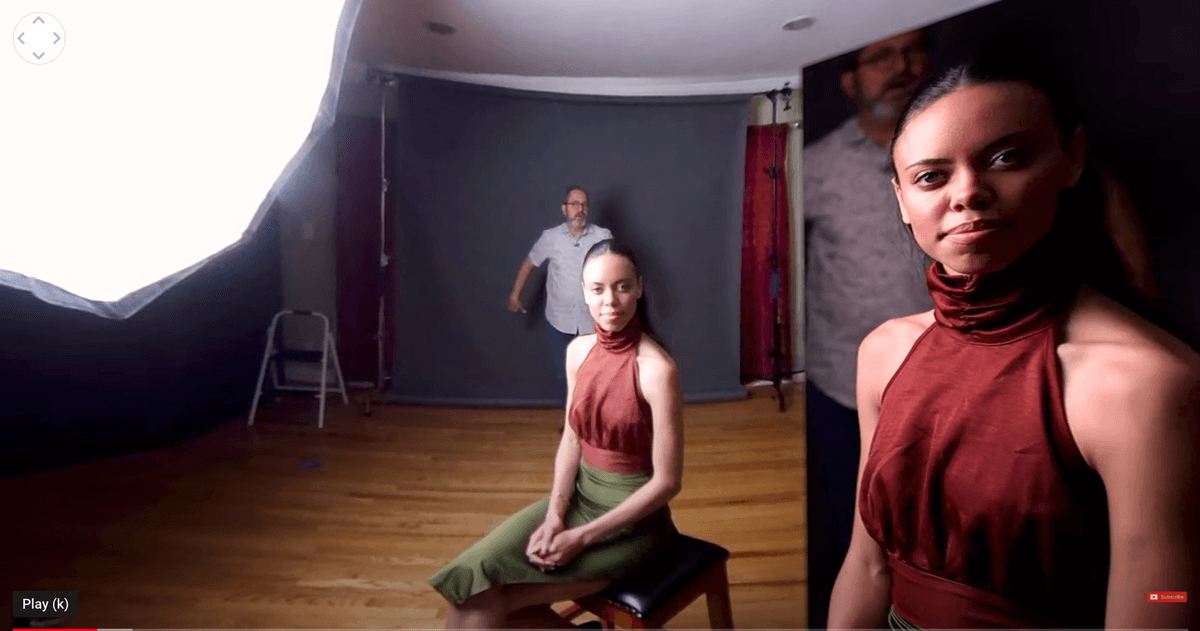
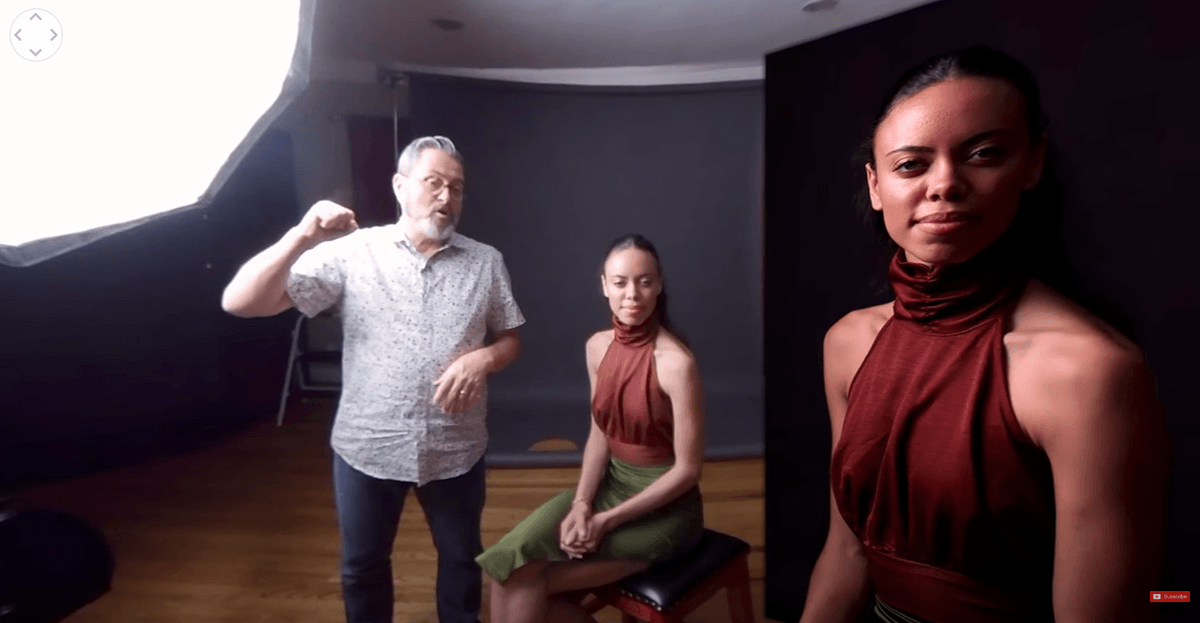
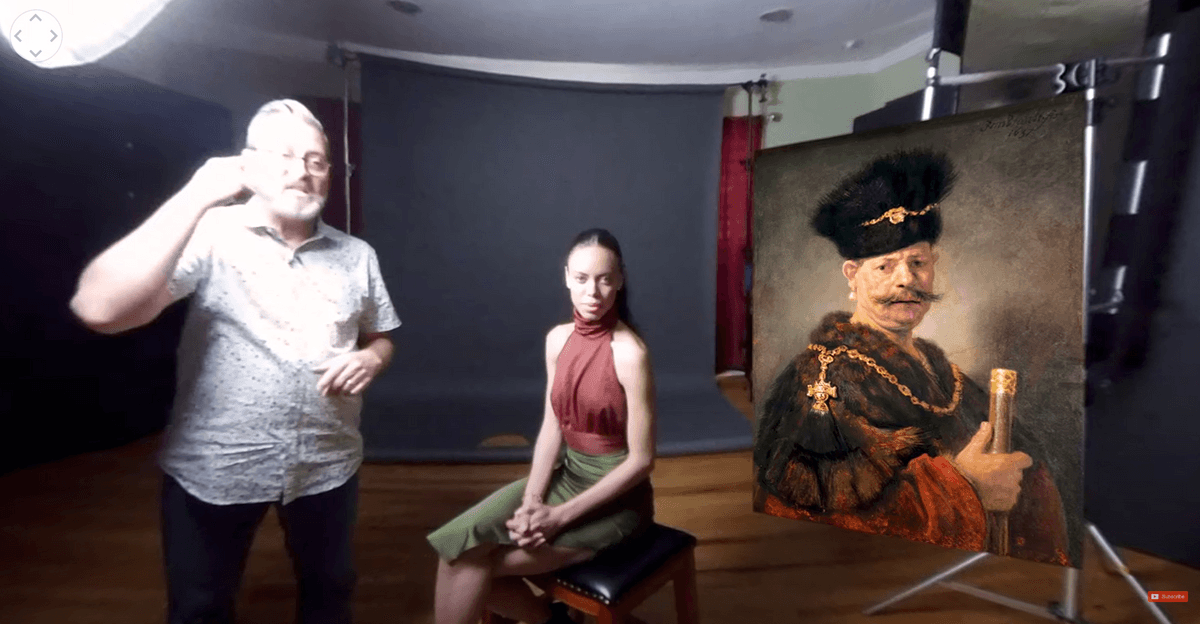
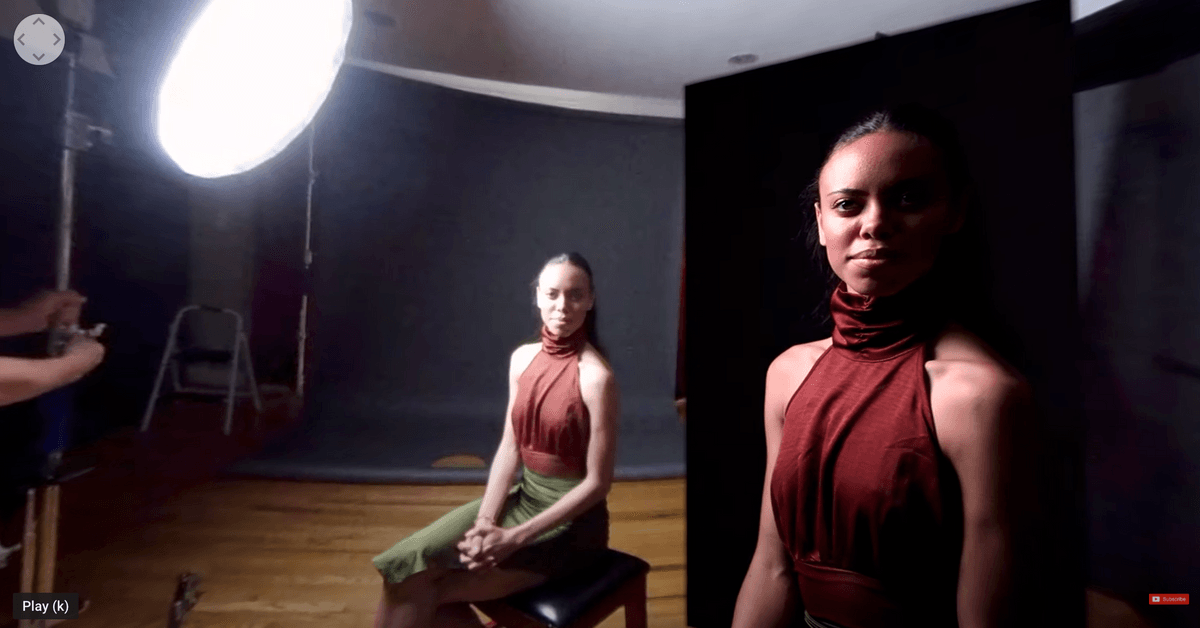
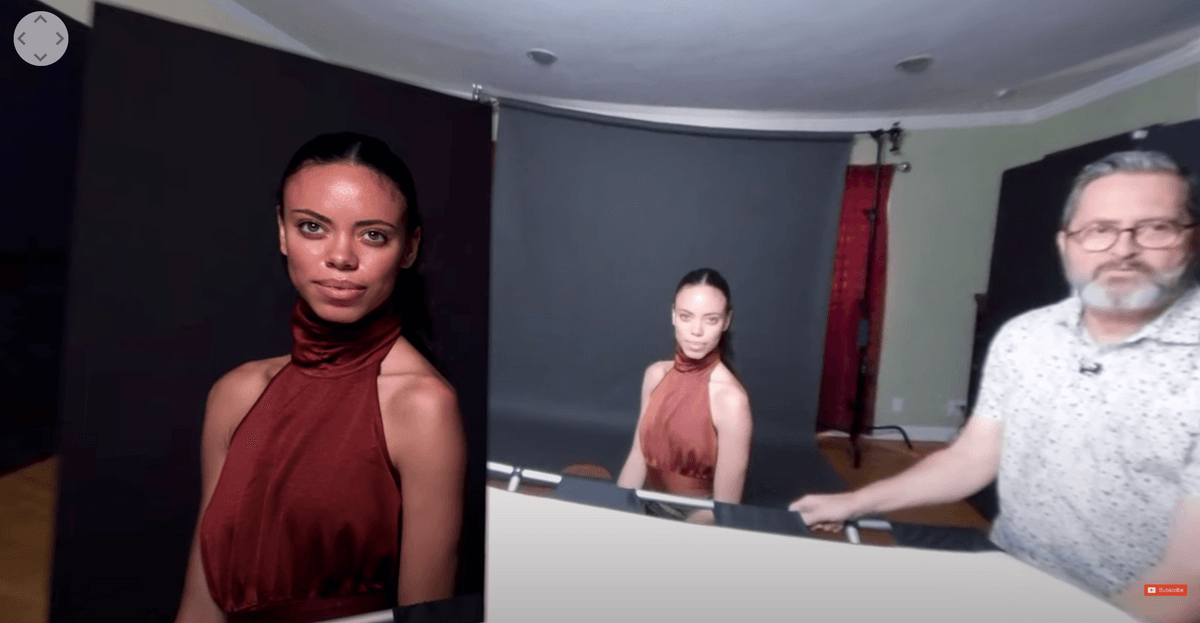
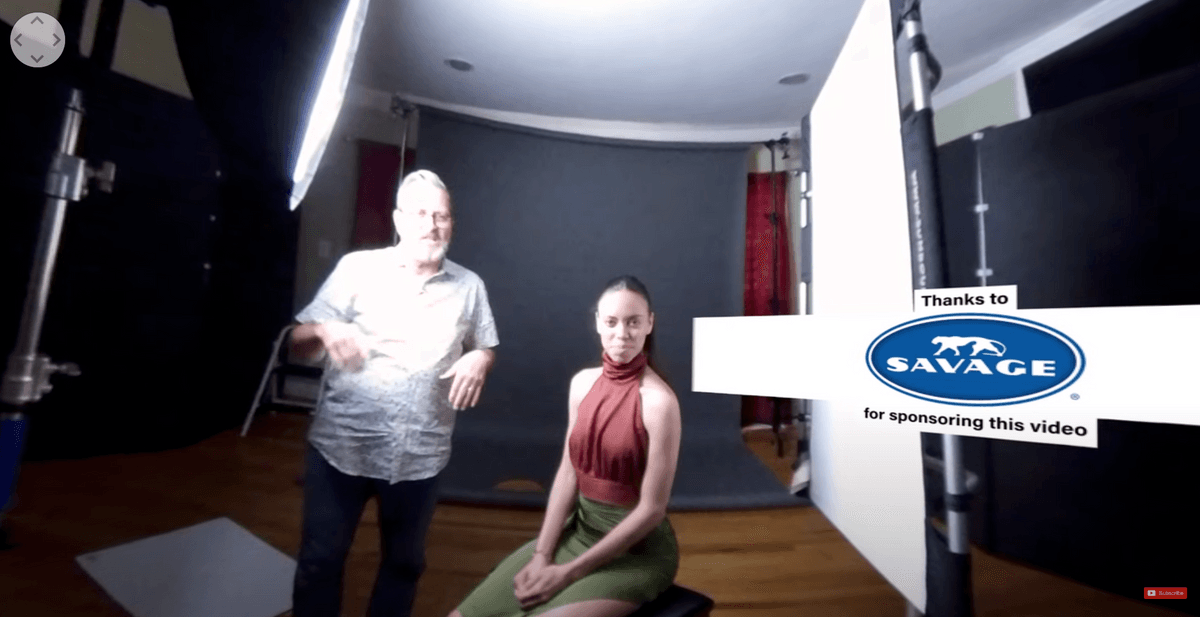
Hi, this is Jay P Morgan. Today on The Slanted Lens we’re going to do five portrait lighting positions in 360. We want you to be able to slip into the scene and to be able to scroll around and see exactly what we’re doing as we set these five portrait lighting positions. This will be a lot of fun because you’ll be able to see exactly where we move the lights and to be able to connect with how high, how low and how we are related and relating to the background. It’ll just be a way to really understand and educate yourself how we set this up. So I’ve got Jenly here with us and she’s going to help us show the five portrait lighting positions. And there are three cameras at play here. I’ve got my BTS camera, the camera I’m talking into now. We’ve got the 360 camera. You can look around and see what we’re doing. And then we’ve got a camera on Jenly here so we can see exactly what the lighting looks like on her face.
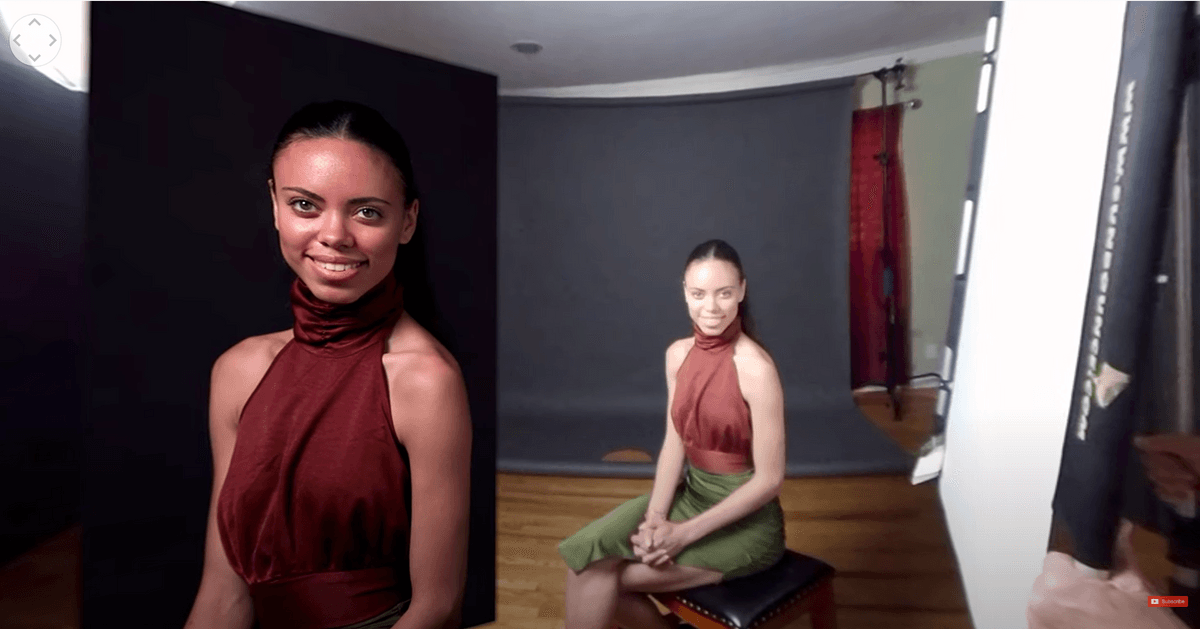
All right, let’s talk about our setup in this 360 view. I think there are some things here you can see and I can explain a little bit that’ll help you understand how this is set up. First off, I don’t have my background very close to the camera. It’s eight feet back here, literally eight feet behind her. That eight feet gives me two things. One, it gives me complete separation of the light from her to the background. When I say complete, it isn’t complete but it’s pretty isolated when I light her face. The light’s going to fall off enough that it doesn’t light the background very much. So that gives me control of the background separate from her. That way I can light her, get the right light I want on her face. Then I can go back and I can light the background if I’m using a second light in order to accomplish that.
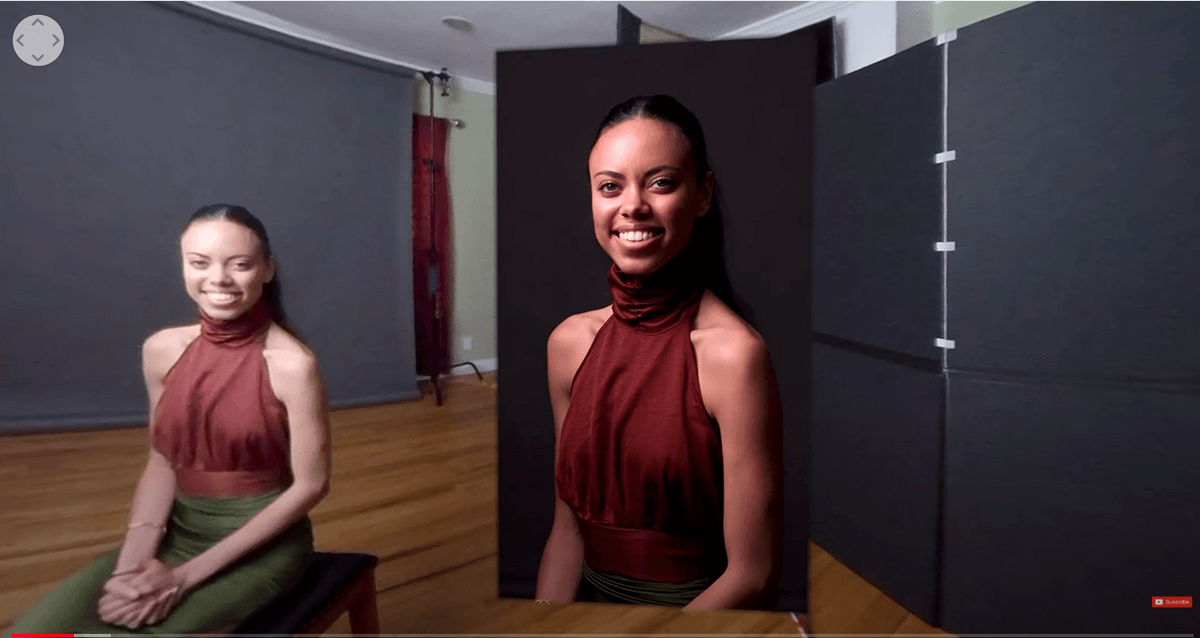
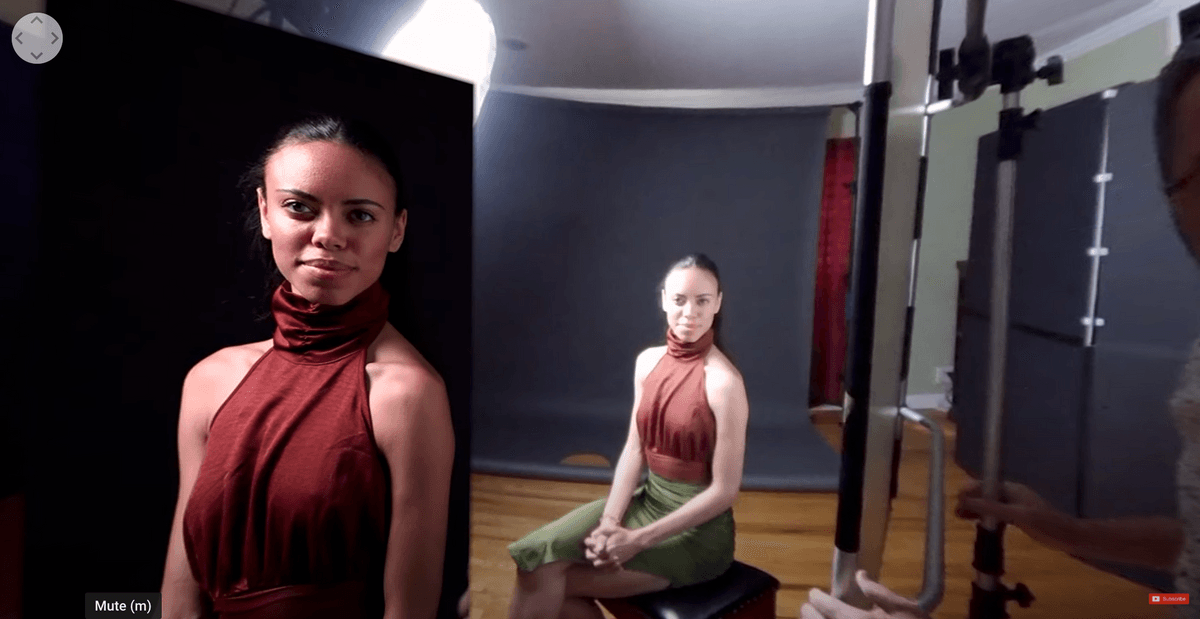
I’ve got an 85mm lens on the Canon R. It’s a Tamron 85mm. That’s going to give me, because it’s a bit of a telephoto, it’s going to bring that background in and give me coverage so I’m not falling off from the background. I am in a portrait mode here. That portrait mode though does have one problem. You can see it on the bottom of the frame and that is that my background, even though it’s high and it’s all the way to the floor I want to be up above her eyes just slightly. That’s the best place for me to be to give a nice look at her. I’m seeing the floor. I’m seeing the backdrop that it ends on the floor. So you want to sweep your backdrop. I don’t just drop it, but I always try to sweep my backdrop forward by at least two or three feet. That gives me a lot of latitude. I can move around a little bit and it gives me a little bit of wiggle room to set my camera exactly where I want and the seamless doesn’t run out.
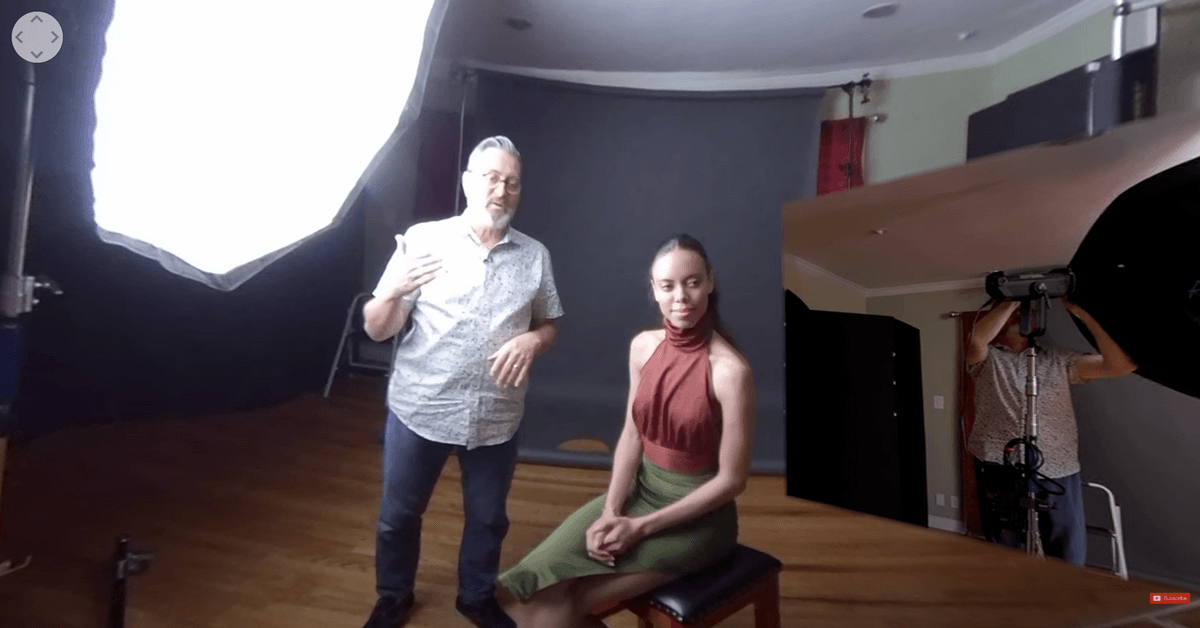
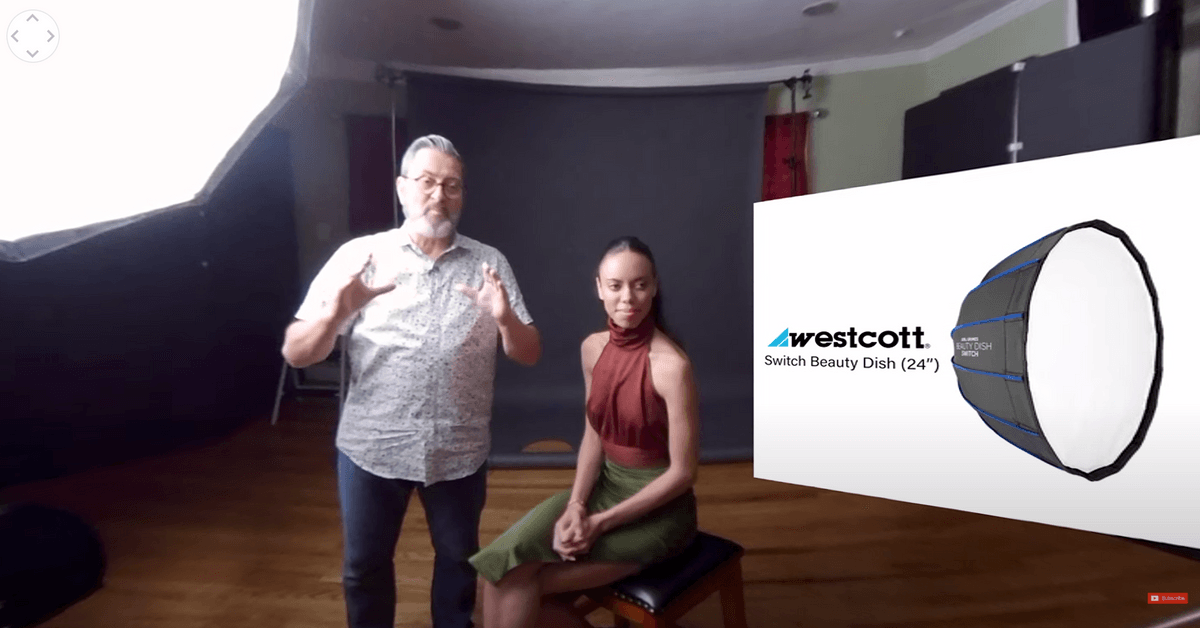
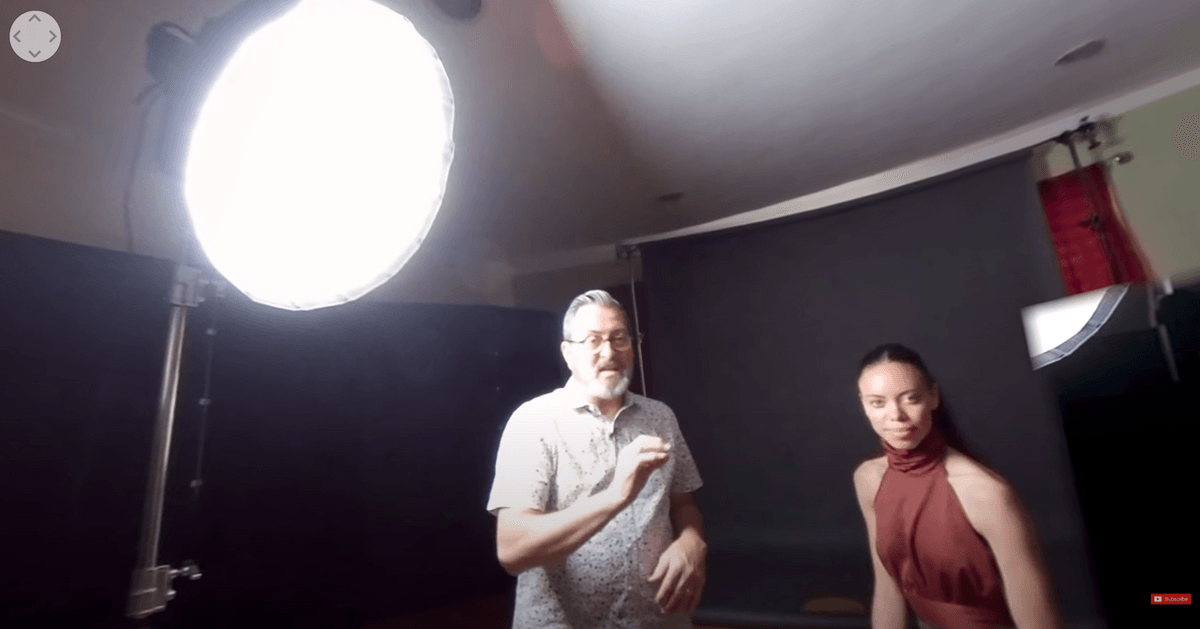
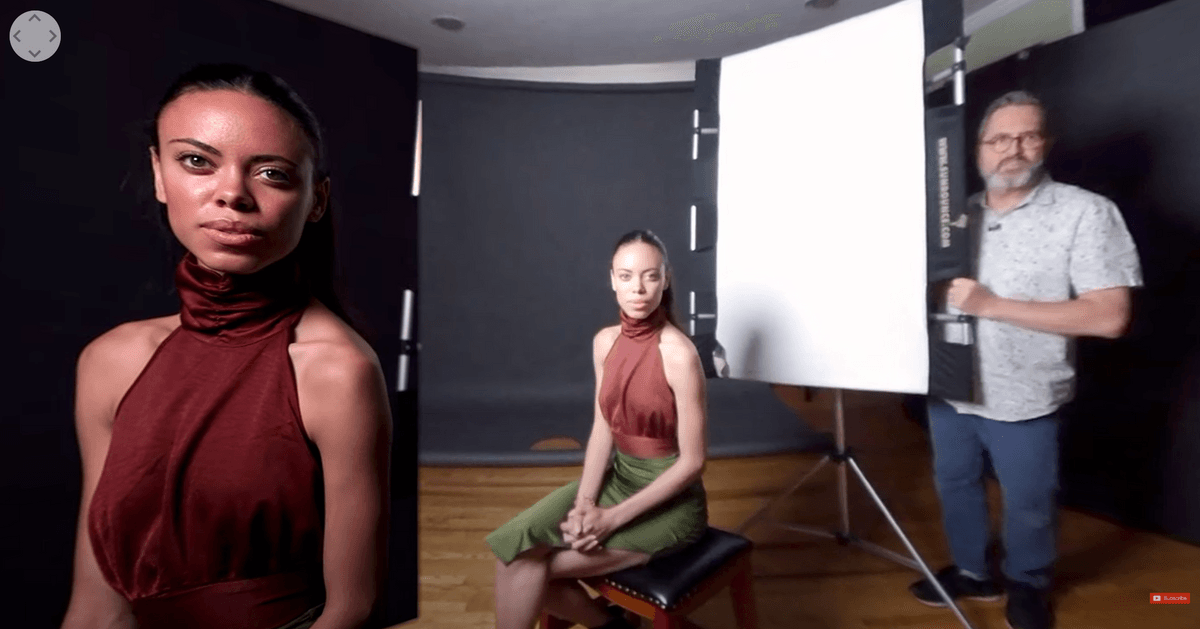
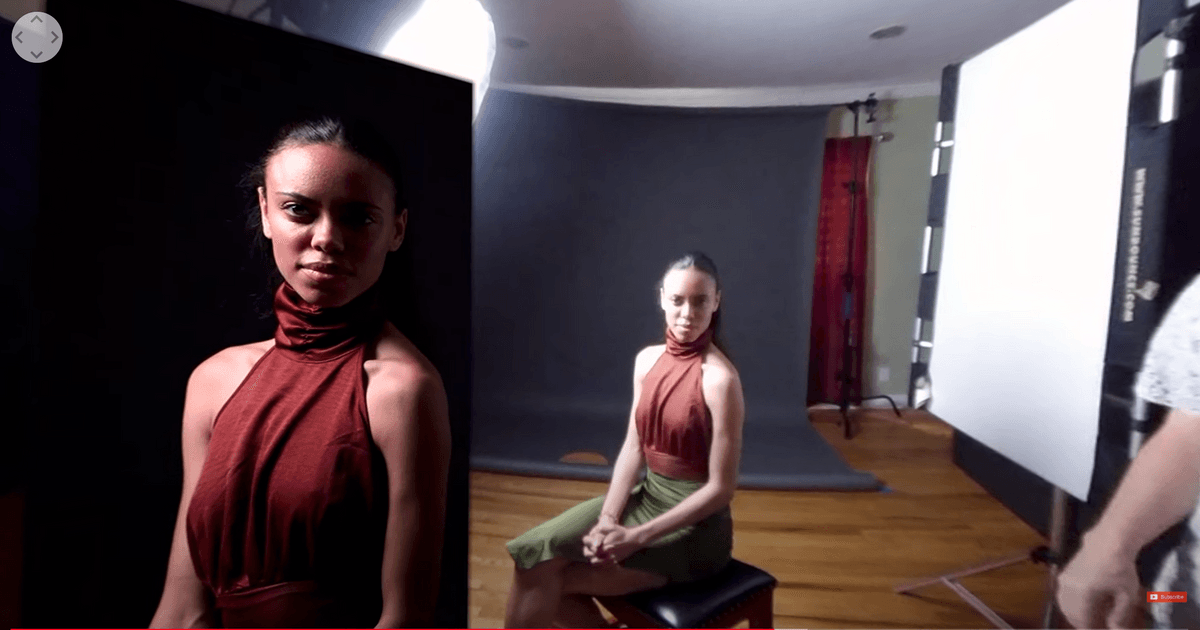
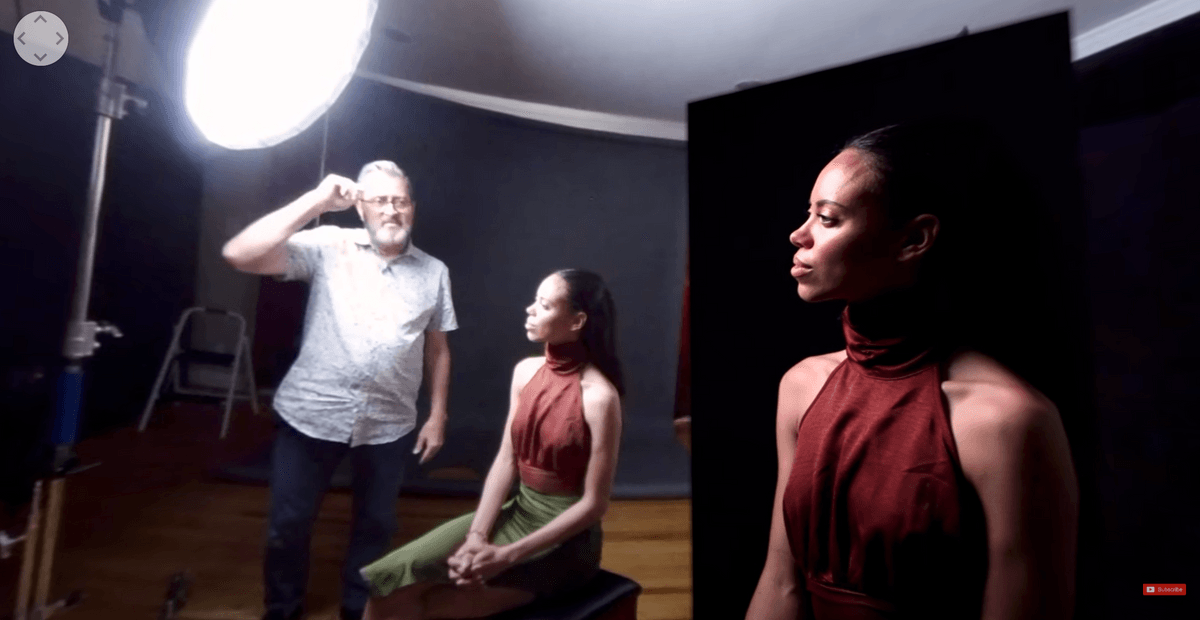
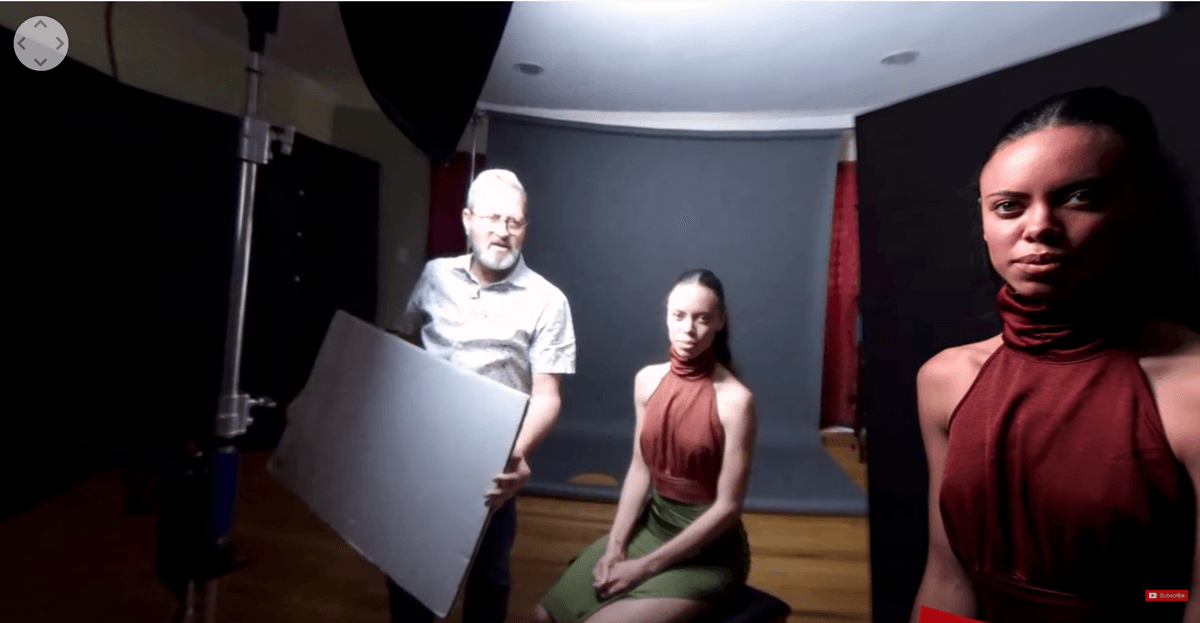
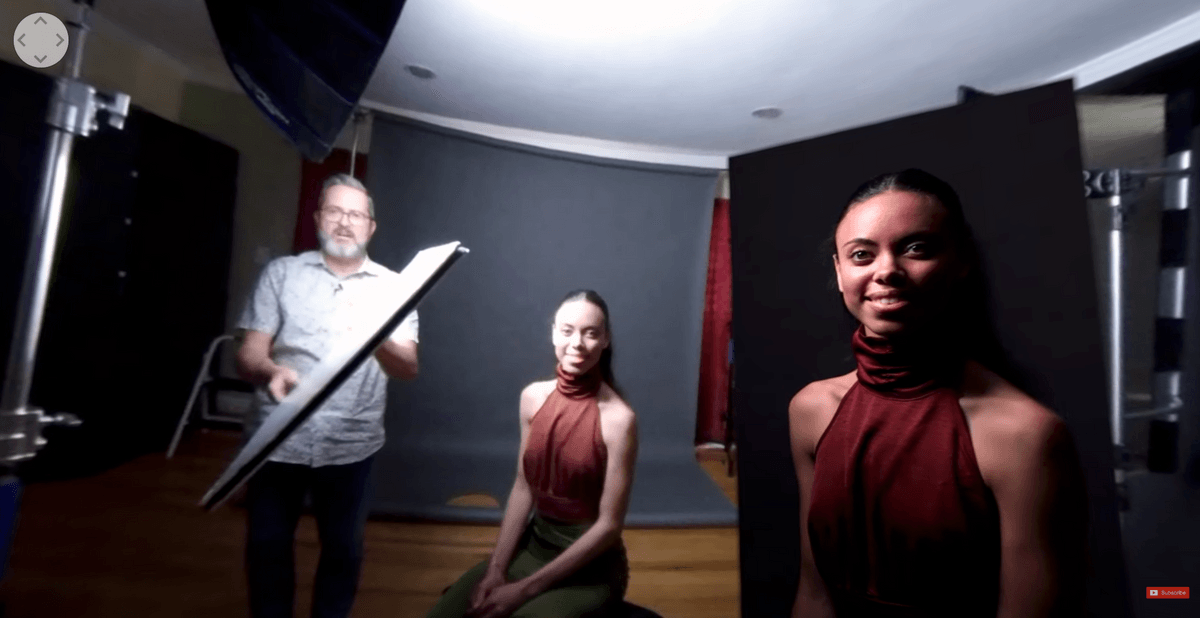
So let’s take a look at our lighting setup here. I am only using this key light. It’s an aperture 300x and it gives me the ability to light her face. But it’s the only light we have on in this room. We don’t have any other light working here today. Just this single light and that’s going to give us a look at exactly what it’s doing in the live view. But it’s also going to have to be our BTS light. So it might be a little dark around us more than we usually have. But I think it’s readable in that 360 view. It looks pretty good. So I don’t want this light too close to the camera. I’m using Savage C-stands here. These are 40 inch silver stainless steel stands. It’s on a rolling base. If I bring this light up front here and I get It up front, if you look at her face there’s something there. But it’s really not that interesting. We’re looking into the broad side of the face. It’s just the light is directional. It’s right at the camera. We don’t have near the interest that we can. So the first thing we’re going to do is we’re going to roll this light way around. We’re going to come all the way back here and I’m going to get it just behind her. Normally I would use this large octa dome because I just love how it wraps and how soft it is. It’s a gorgeous light and it’s really good for someone who’s a little older. Jenly here has beautiful skin. So we can get away with a lot with her. But for demonstration purposes this makes it hard to see exactly how the light falls on the face. I mean, you need to really see that and understand it so you can see exactly where each one of these positions are at. So in order to demonstrate that, I’m going to take this octa dome off. I’m going to use a small Westcott beauty dish. It’s a very pretty light as well. But it’s much smaller and more directional. And the shadows are going to fall very short, more sharply on the face. You’ll be able to see them a lot easier.
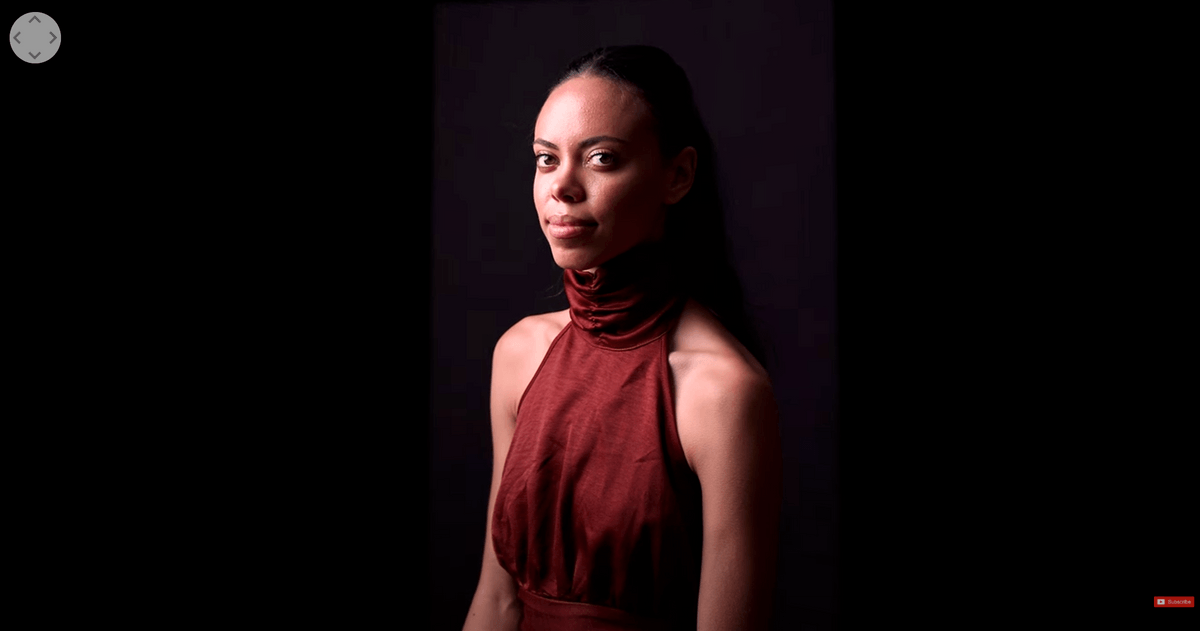
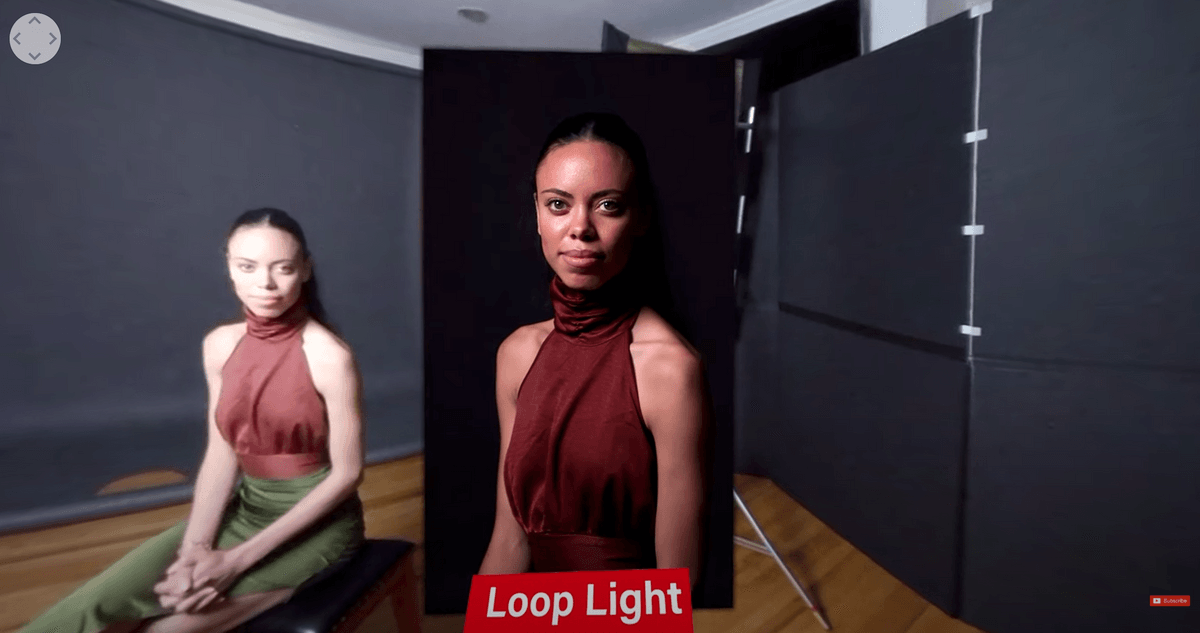
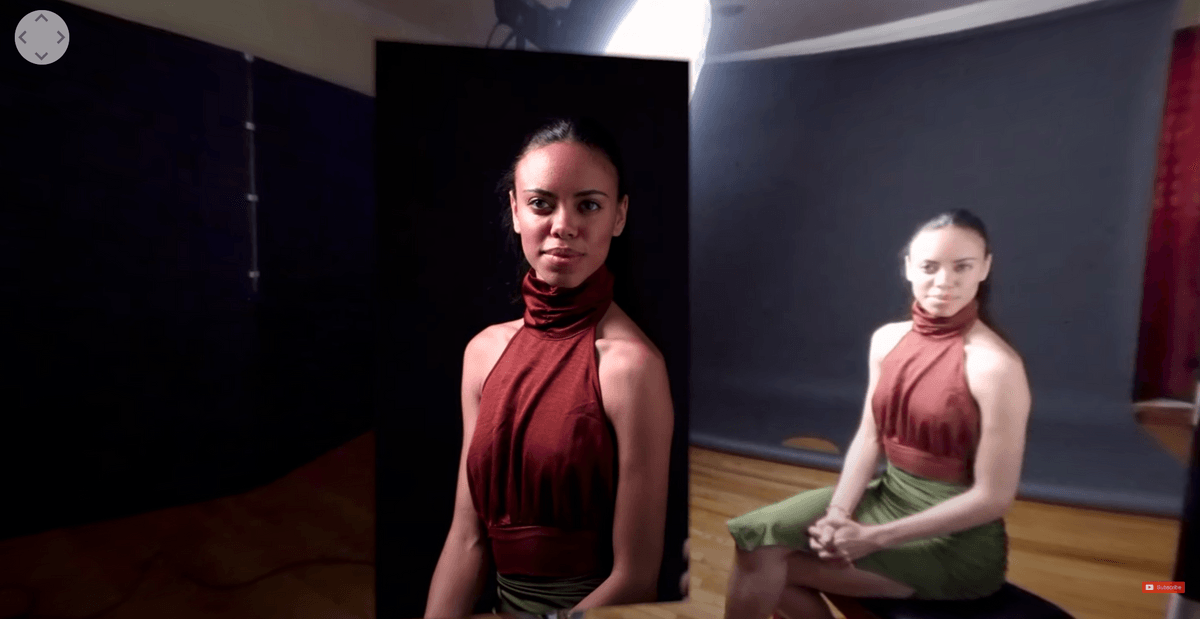
Okay we’ve got the Westcott Beauty Dish Switch here. So it gives us a really a more defined shadow. It’s going to help us see these positions a little better. Let’s start off with taking this light and sliding it way around towards the camera. The further I get towards the camera (I got stuff in the way I can’t really get it over there) the flatter it becomes. It’s really not very interesting. When you have it up front like that it’s just directional and flat. One way it’s interesting is if I get it down on camera view. This is camera view. This is right at lens height. It’s straight in on the face. I mean look at the highlights. Look at everything going on. This just does not work. So you’ve got to get the light away from the camera. If your light is at the camera it’s in the wrong place. The further away you get the light from the camera, the more interesting it becomes. Here’s the problem that most people face when they take this light and they slide it over here to give us our first position. This is a loop light. That’s our first position, the loop light. As we move away from the camera with the light, if you buy an inexpensive stand it is way too low. This loop light goes straight across her face you see it come straight out from her nose. It is not in a very flattering position at all. This light needs to be up higher so you have to have a stand that goes up tall enough. You’ve got to have a ceiling that allows you to get your light up high enough in order to get really nice light on people’s faces. So the first thing I want to do here is I’m going to raise this light up high enough. I’m going to raise this up and there’s my first lighting position. It’s a very distinct loop light. There is a light that passes between her on her cheek here. The loop of her nose shadow does not touch the shadow of her cheek. And so it gives you just a little loop on the side. Now from here I can add some fill. Fill lights are so fascinating. If I throw this fill light back here just out of camera view it becomes a backlight. Basically I’ve got a little rim on the side of her face. It’s actually a pretty look. But if I bring this around that fill light now starts to open up. And as I come closer and closer to the front of the camera it’s going to open up her face and give me a really pretty light there with that loop light.
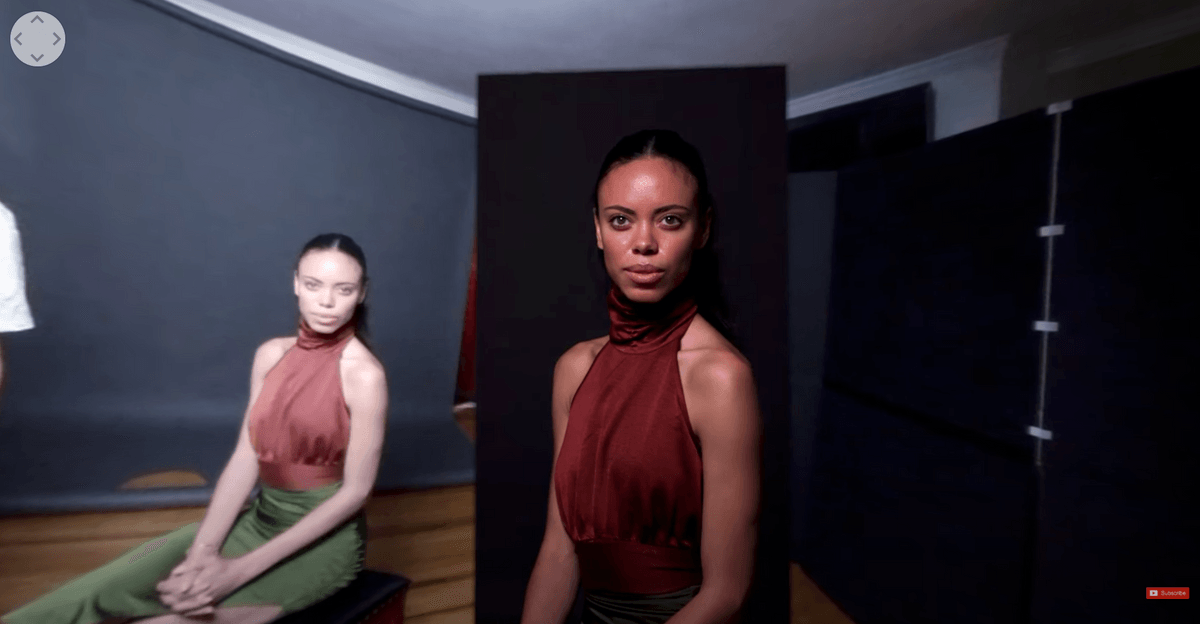
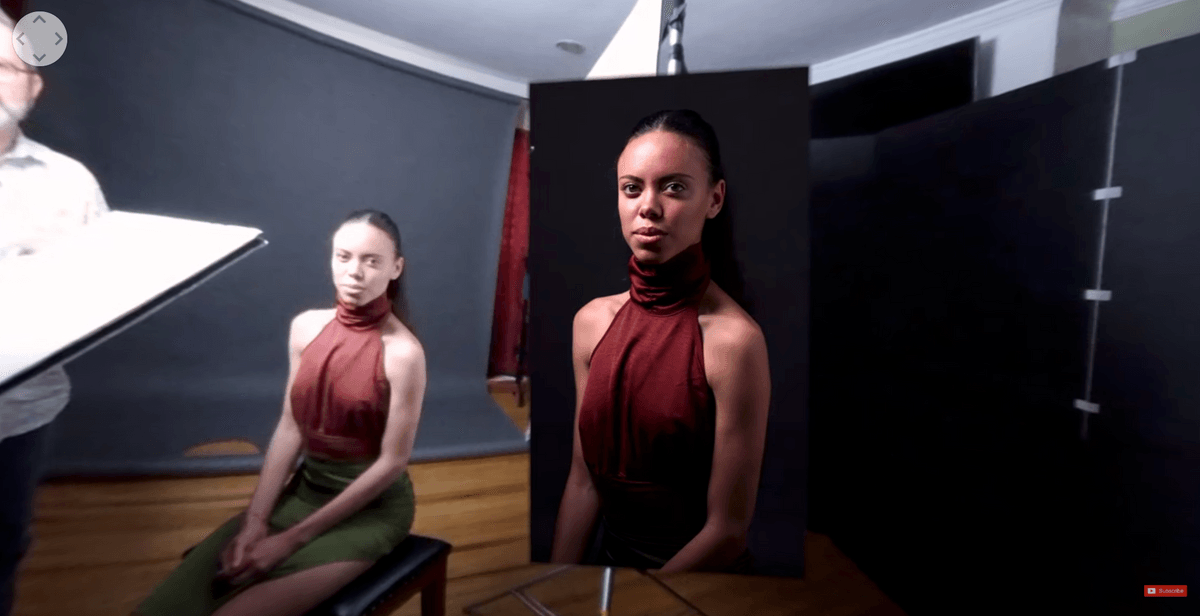
Okay we’ve got her in a loop light here, but let’s talk about another lighting position. This is called a broad light. For the broad light I’m shooting into the shadow side of her face right now, which is generally what I like to do but if she swings around on her chair here, I’m now shooting into the broad side of her face. We’re shooting into the lit side of her face, not the shadow side of her face. And you know what you see? This is used a lot if you want to have a very open light on a person’s face and you want them to not have a lot of shadows. There’s not a lot of depth. If they have a skin issues you’re trying to cover up or what have you, this is not a bad light to use. But it also gives you some mystery because you see the shadows, how they fall off on this back side? It actually follows that loop turned into a Rembrandt. But we’re looking at the broad side of the face.
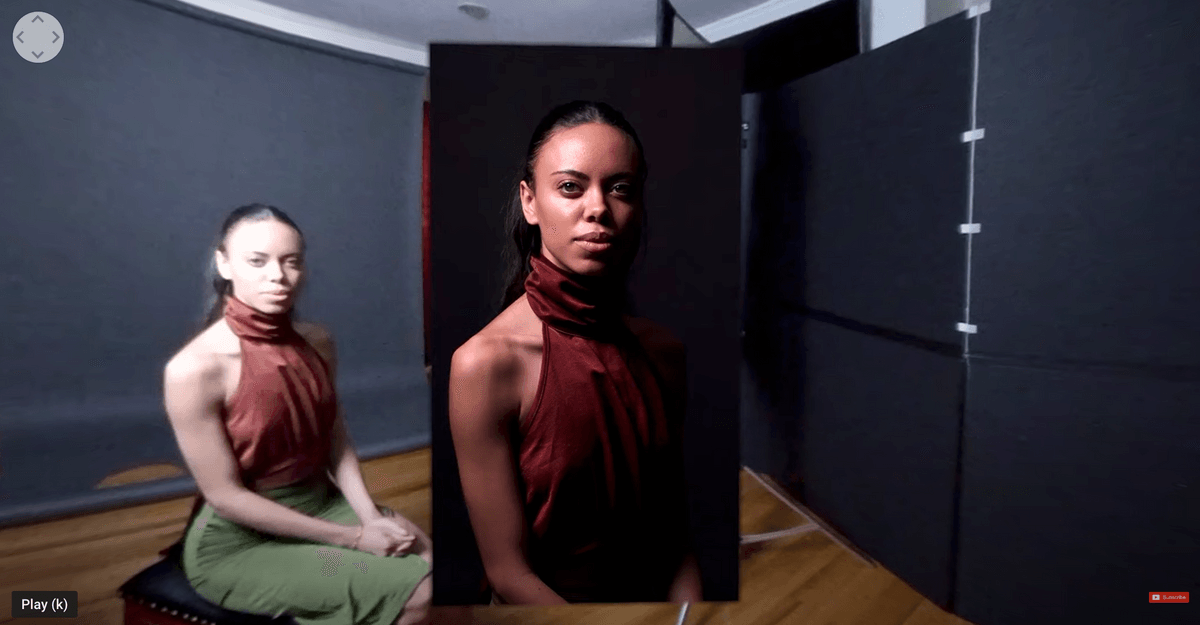
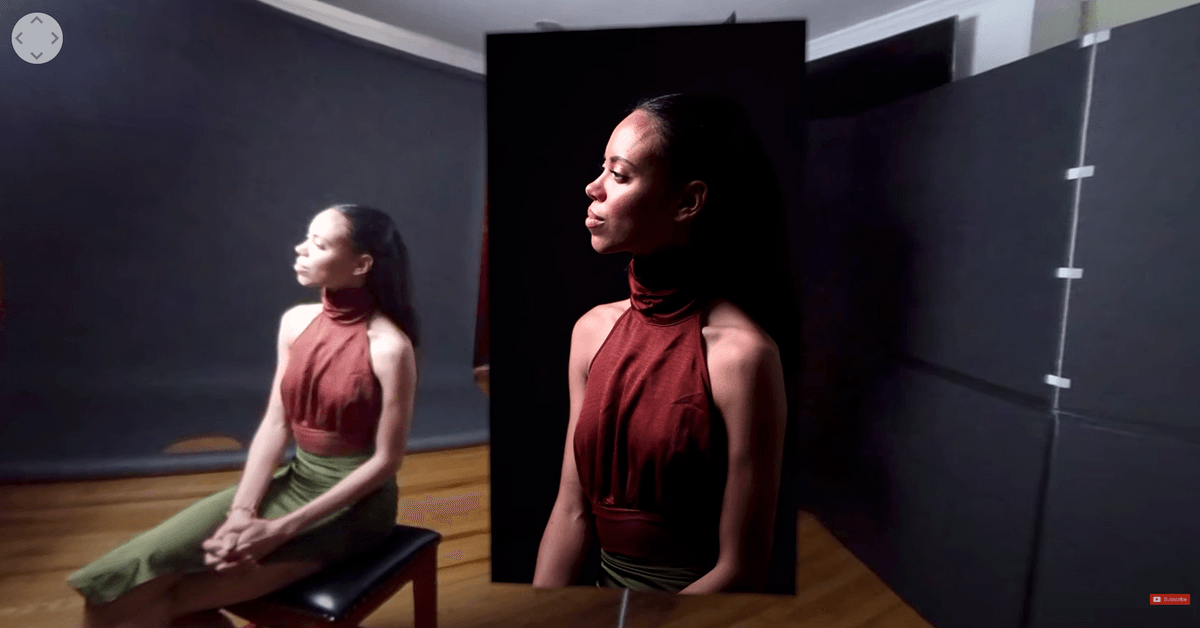
So now as you swing the light back around past a loop light and I move this light further around. I’m rolling the light on that Savage rolling base with the 40 inch c-stand. I have moved to a Rembrandt. This is a classic lighting position. Rembrandt painted this all the time. If you look at his paintings a lot of his paintings have a Rembrandt light. They have this little triangle. He was looking at people’s faces you know in a window and using that window light and moving them to where you get that nice Rembrandt light. So it’s a beautiful light. We see it underneath her eye here. I want this to be up high enough that it doesn’t open up her eye too much. So I like this light to be up pretty high to give me a nice Rembrandt. It’s getting pretty close to a 90 degree off camera here. It’s somewhere around 75 or 80 degrees from the camera. Again I can bring my reflector in. With that reflector I can fill from the back. I can bring it up front and fill from the front. But that Rembrandt is always there. You see that beautiful Rembrandt light on her face.
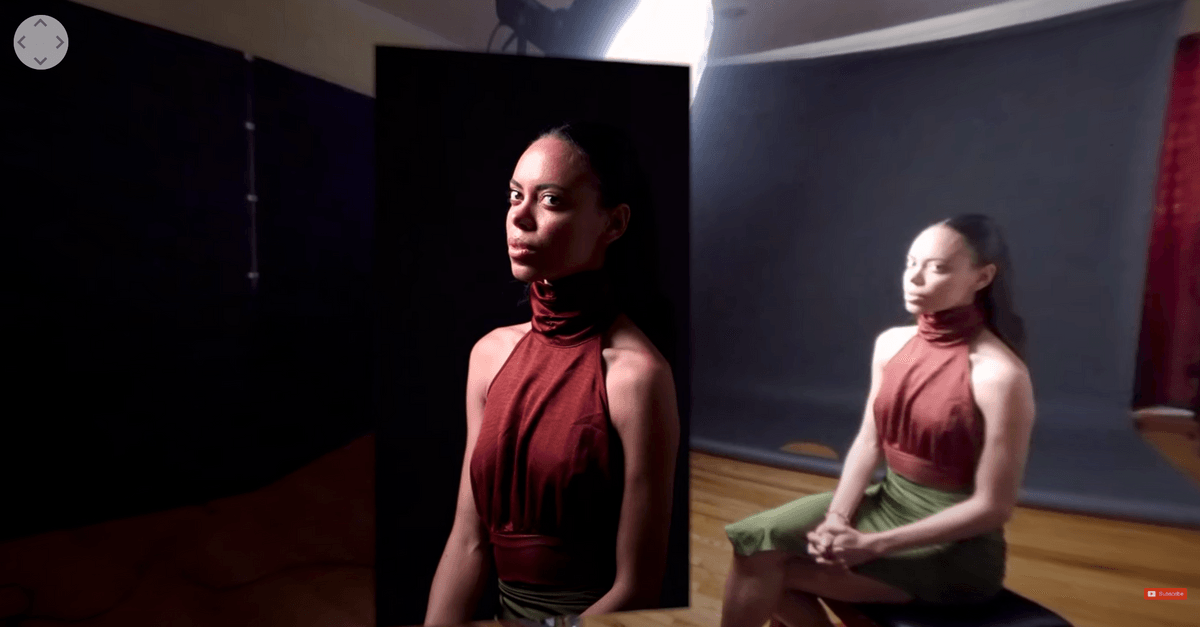
Okay so now we’re moving further away from the camera still. This rolls back into a split light. Split light is a lot more dramatic. It plays more on the face and that is that we have the light at 90 degrees at least. And that 90 degrees now is going to split her face. As you look at the face here, each face is a little bit different. But on her face that light’s too high now because her eyebrow is casting too much of a shadow on her eye. So I’m going to have to bring the light down just a little bit and open up her eye. I’m going to bring it back just a tiny bit. I don’t want to open up the other side of her face. But that’s going to give me a nicer look at her face. If you look at that you may be thinking, “okay, so I don’t see her eye very well”. But look what happens when I bring this reflector in. If I bring this reflector in up front with this split light, I start to open up all the shadows. There is a nice look at the face. It’s way more dramatic.
A lot of people will shoot things like this. This is a perfect position here. I love this position of the split light. Because in this split light position, if she simply looks at the light, it gives you an absolute gorgeous light on the face. So go ahead and look at the light there. And what we get here is we get this beautiful butterfly light which is going to be the last position we look at on her face. This butterfly light hits her face and we’re getting a little bit of shadow. If she moves her chin down just a little bit for me and I come up just a little bit with the light, this is gorgeous. It’s just a little too bright here. Let me bring it down the light just a bit. It’s just such a beautiful light on someone’s face.
So it’s fascinating because if this light is at the right height and you’re using the light correctly you can now swing the light around and you get several different positions. In this position we can shoot her in this kind of profile butterfly on her face. But now she looks back to the camera, go ahead and look back at the camera, we’re in that split light and as I bring it around forward here I go into the Rembrandt and then into the loop. And then I’m going to do the last one which is going to be a little hard for me to squeeze in here to do. But I’m going to squeeze it in here and to get the last light called the butterfly. So she’s looking straight into the camera and now I want this light to fall and the shadows to fall underneath her nose. So I’m in a butterfly position. There that butterfly position allows me to open up her face. This is very much a beauty light. This is used a lot of times when you want directional light and no shadows. Then I would take this reflector and I would fly it in with a c-stand. Take one of those Savage c-stands and I would put the reflector underneath. And I can now open her up from underneath. It gives me a nice open light from underneath. So there’s a butterfly.
This is the most useful lighting tool you’ll ever get in your life that costs 1.50. If you go to a dime or a dollar store in California you buy these for a $1.39. because the dollar stores are not a dollar anymore. But I buy two of these little white and black foam core cards and I tape them together. And now if I want I can come up here and I can cut this light off from her. And just very easily by sliding this in, I’d get my short c-stand there, that 20 inch stainless Savage stand and just slide this in here. Then just cut some of that light. It becomes very moody and interesting looking. So if I take this in and open up the side of her face I cut the light off with this car on the side. Now I get a really interesting portrait. It’s open, yet it’s kind of moody. It gives us nice definition on all of her skin tone. It’s just a beautiful light. Start to use these type of things to shape the light. Start to cut the area of coverage down so you just start to light the pool around her face.
All right, I hope you enjoyed this. I hope it was informational and I hope this 360 made sense. You can look around and just see exactly what’s going on. Because I think this is kind of a fascinating way to look at this type of tutorial, the next tutotial we’re going to do is a three light setup. So you’ll see all the different lights in play on set. That’ll give you the ability to really know how to place those lights and just see exactly what we’re doing.
I hope you enjoyed this. Leave some comments and any thoughts you have on how we can make this better, if it wasn’t informative enough. Did it help you to understand? Help us know what we need to do to make this even better. We’re going to start doing these in the future to be able to teach lighting in that 360 view. So keep those cameras rollin’ and keep on clickin’.
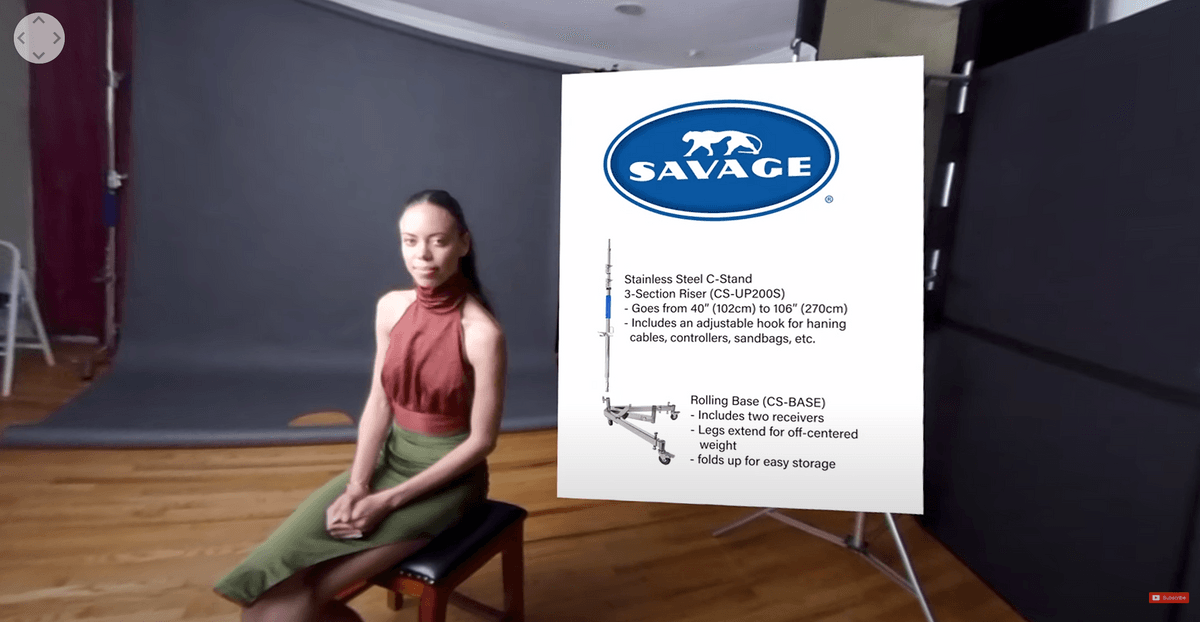
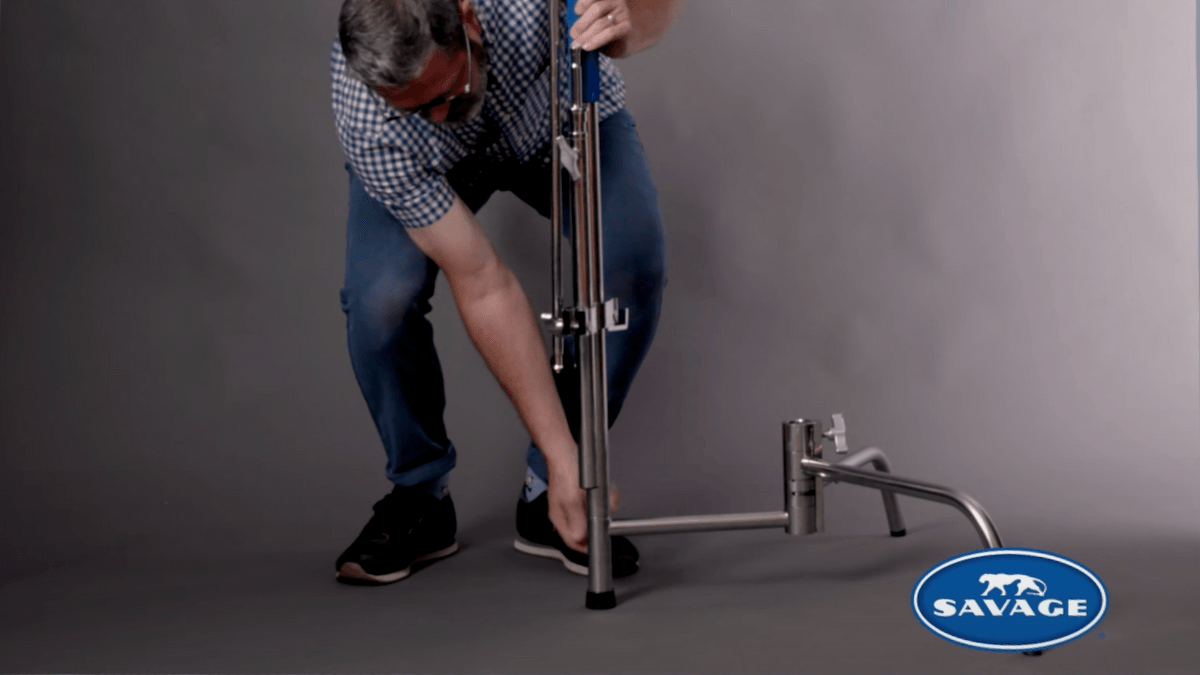
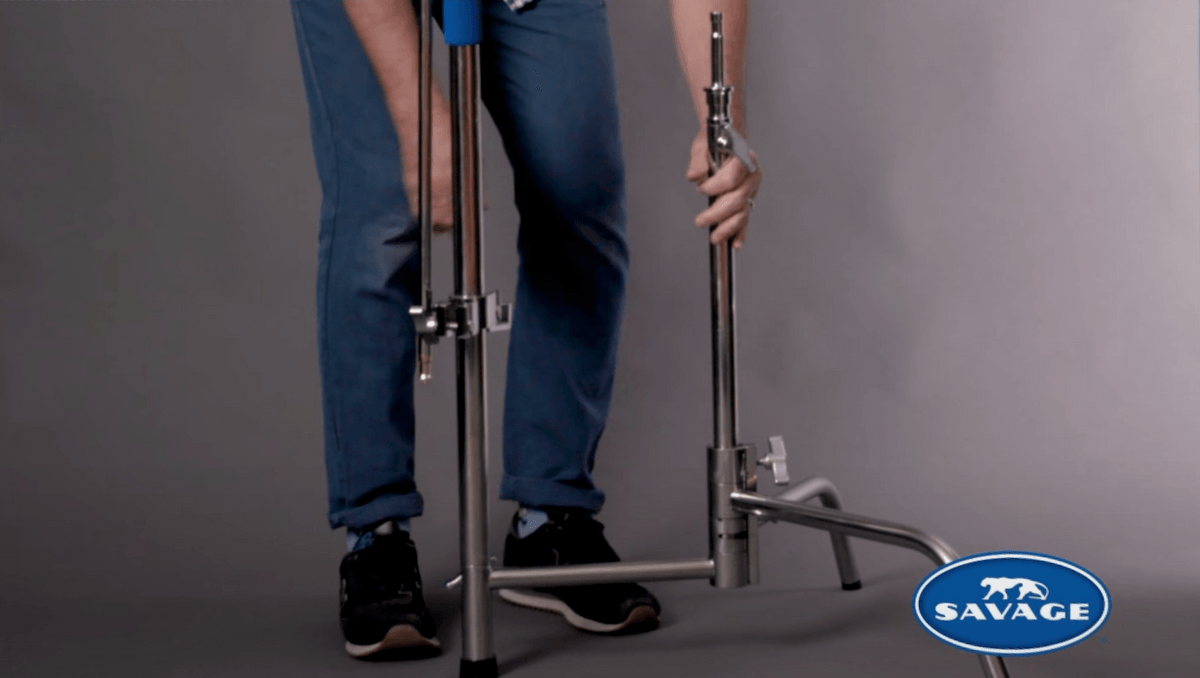
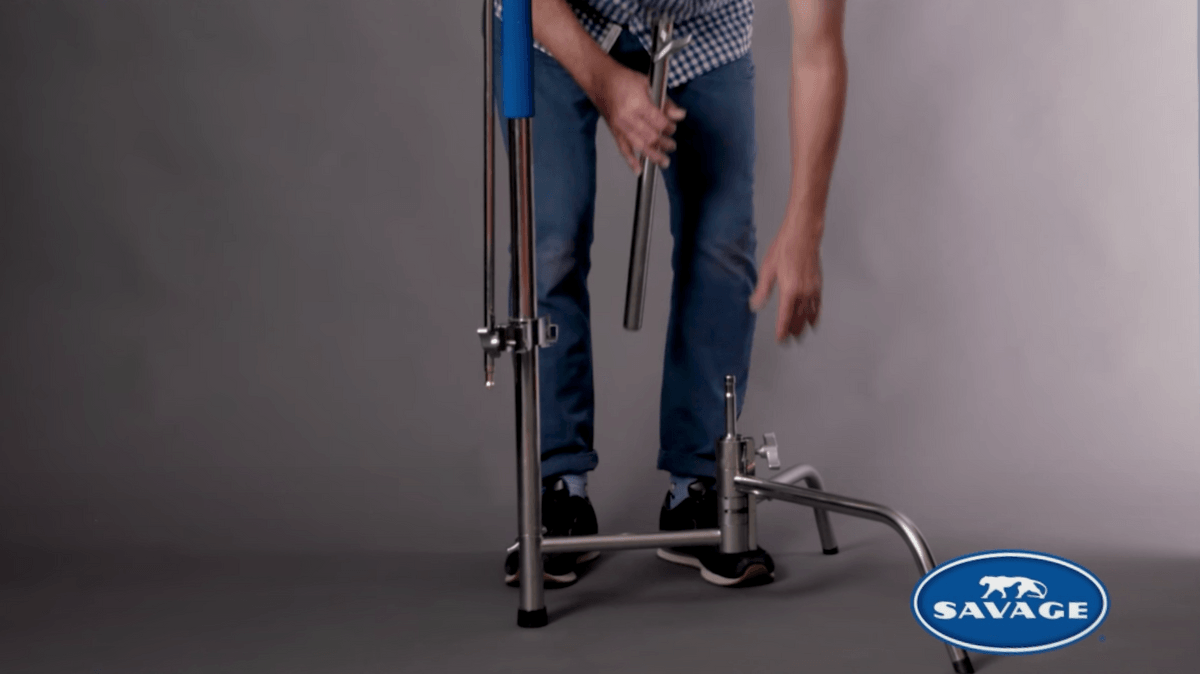
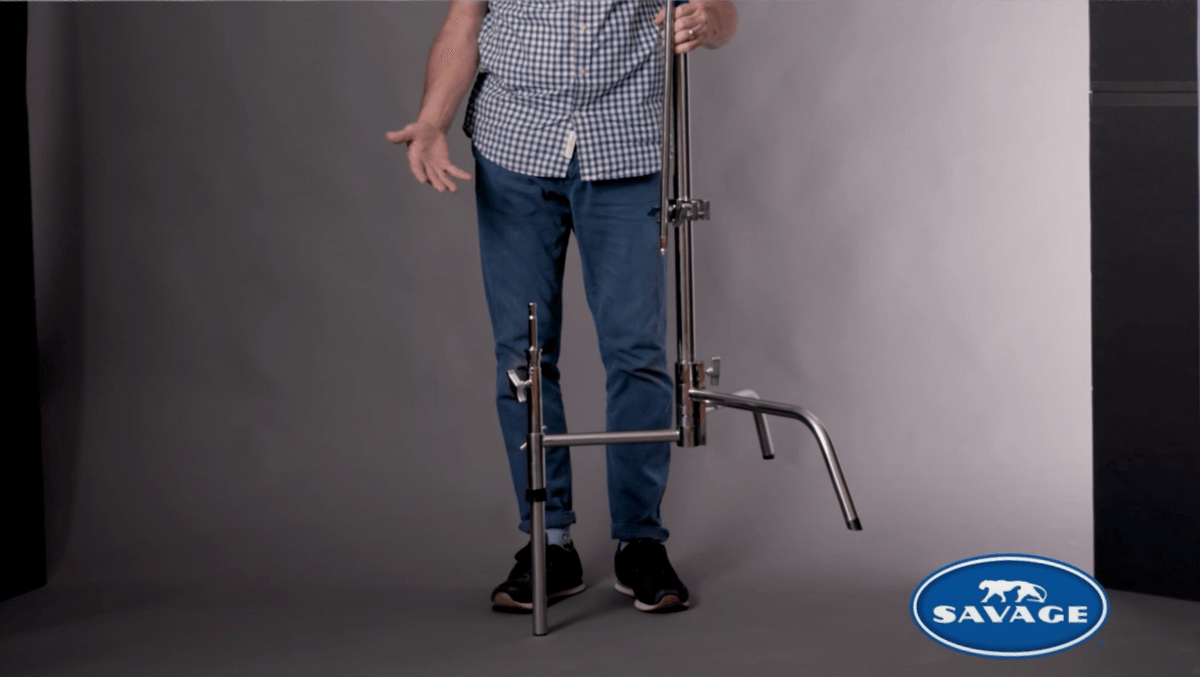
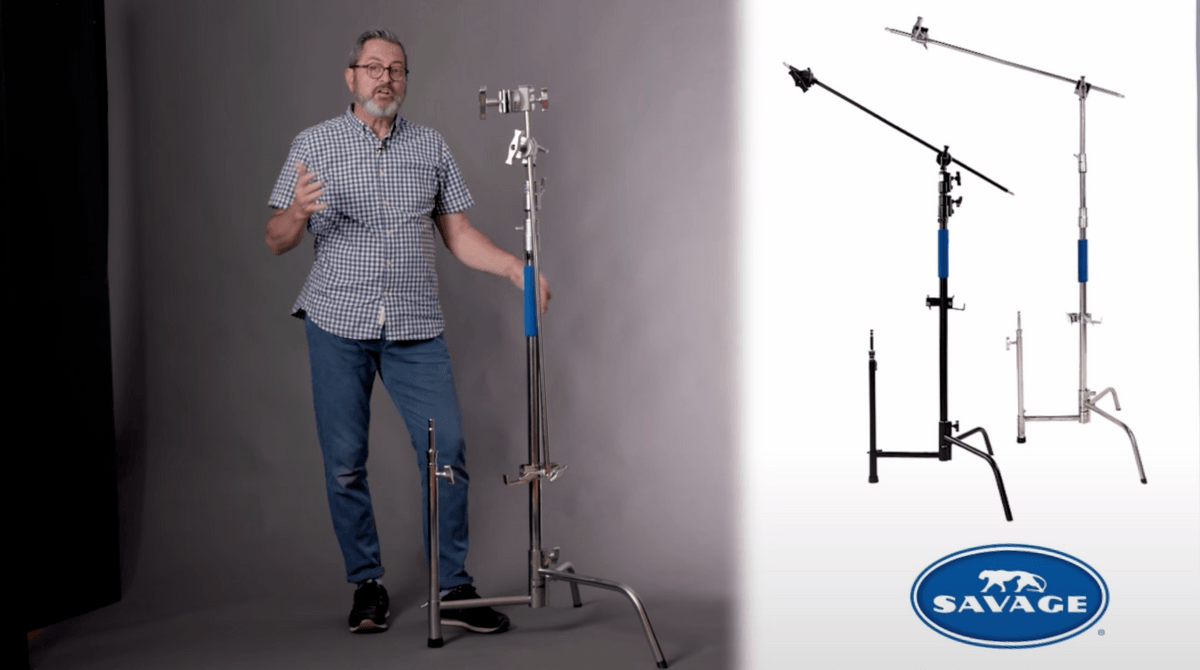
I’m super impressed with this savage 40 inch c-stand. I’ve used c-stands my entire life but this is an innovative kind of a different look at a c-stand. There’s several things about it that I absolutely love. I can take and pop this off right here in the middle and set this out on this post. It’s got a junior receiver on the post. Now take that and shove that in a corner. It comes with a 20 inch riser. I’m basically getting two stands out of one stand. I can put a translucent here and aim a light through it. Or I can put the light here and shine it through the translucent. It just makes it really easy to work with. This has a pin. You want to take the pin out and drop the pin in if you want to get it even lower. Which is really nice. Tighten that out here and now I can put that on a step. So it works like a rocky mountain leg. It comes with a gobo you can set on the end of the arm so you can clamp things like reflectors in that. Which is really nice. It also comes with a standard head. So it’s available with a 40 inch stainless steel and also a black version and it comes in a 20 inch stainless steel and in black. So there’s the Savage c-stand. It’s almost like two c-stands in one.