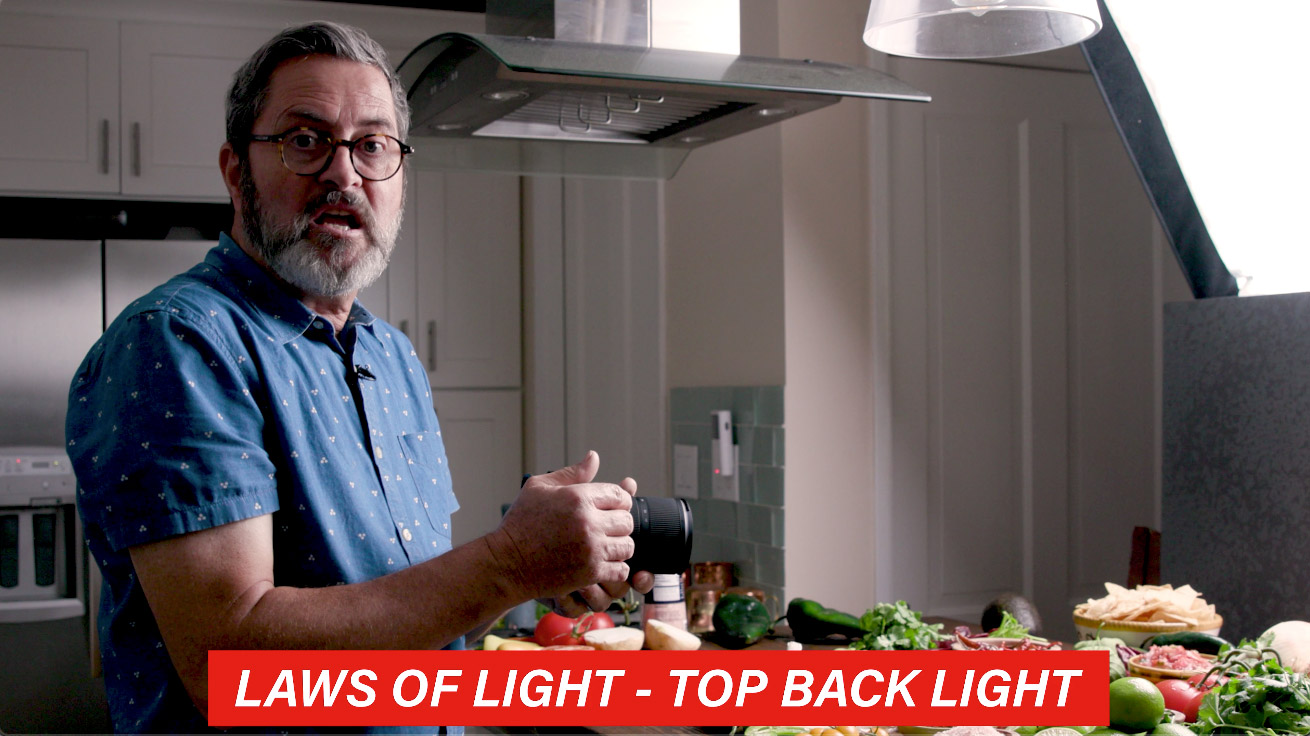
Best Product Lighting – Top Back Lighting – Laws of Light Tutorial
Morgan
The Best Approach to Product Photography Lighting is Top Back Lighting. It is the foundation for all product photography. Learn how to get impressive images from this photography tutorial about top back lighting. This is one of the best ways to light your product shots or food photography. This is my favorite lighting when it comes to lighting any kind of product! Take a look and let us know what you learned!
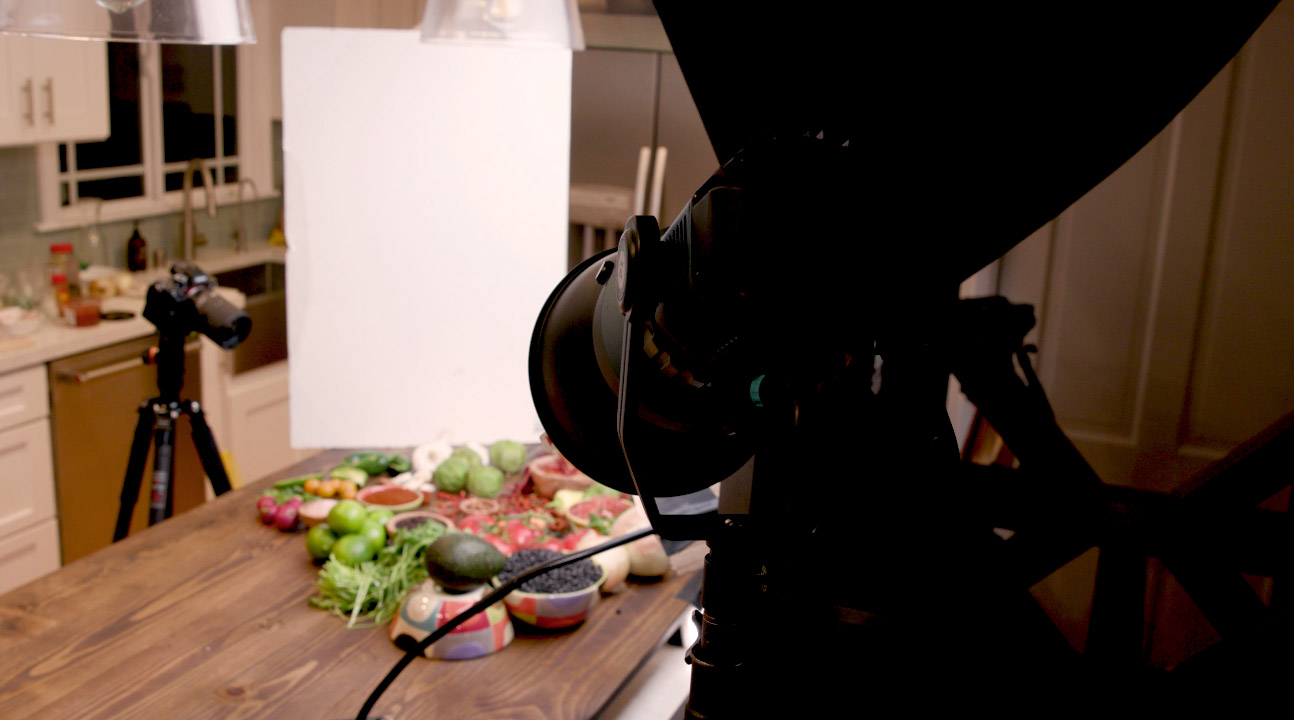
Hi, this is Jay P Morgan. Today on the laws of light we’re going to talk about my favorite lighting when it comes to lighting any kind of product. It’s called a top back light. It’s fascinating because our camera is generally here. This is where we put our camera. And what do we do with our lights? We usually put our lights right next to the camera. It’s the place that makes the image, the product, the things on our set look the most flat and the most uninteresting. Even if you get this around a little bit it just never looks very good.
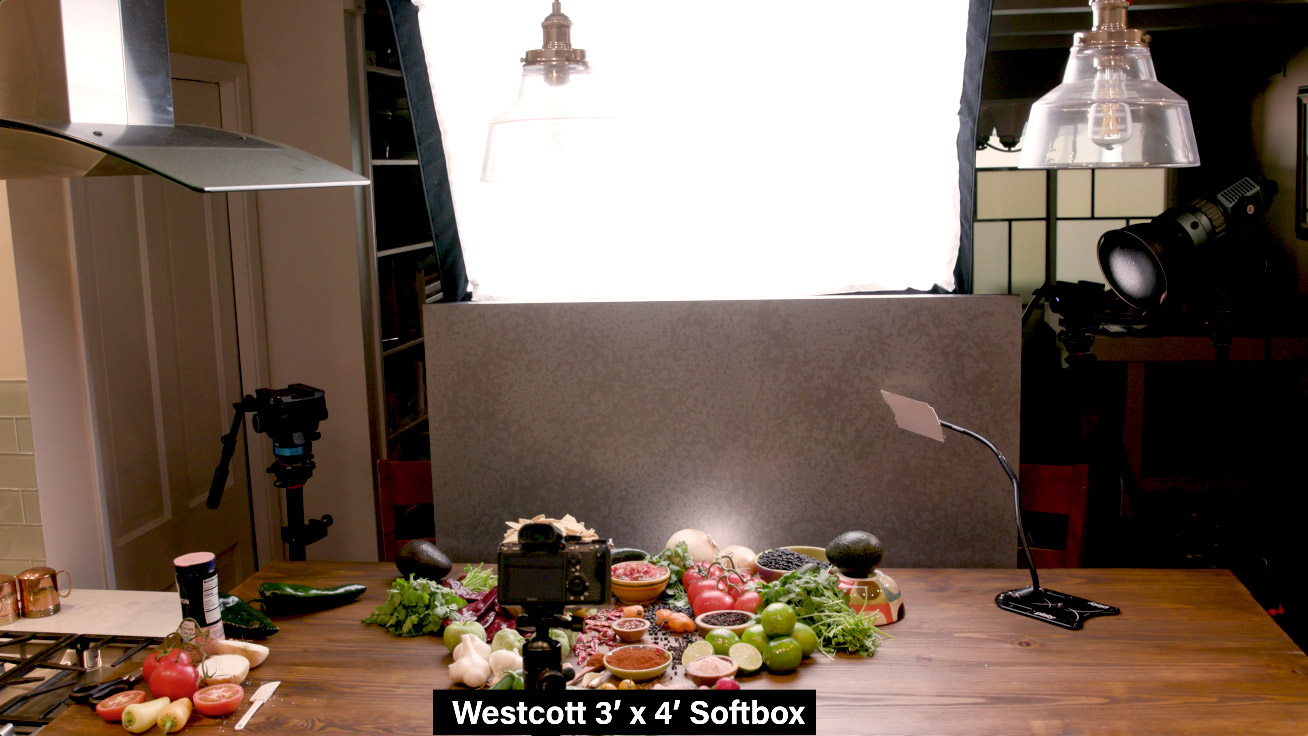
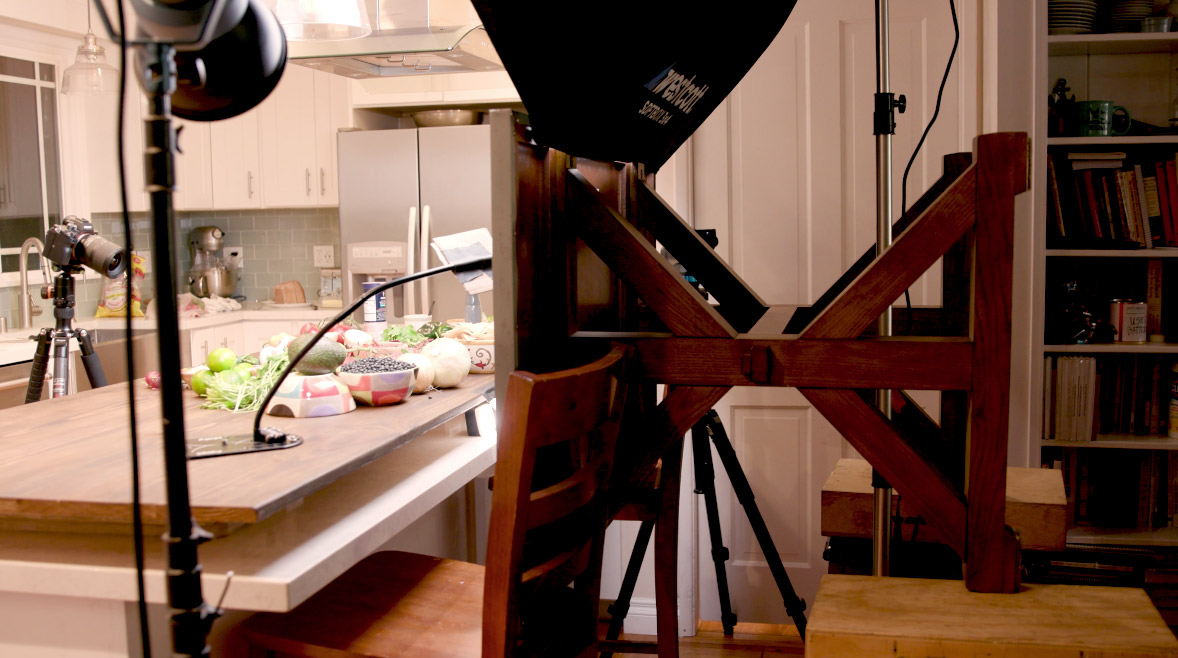
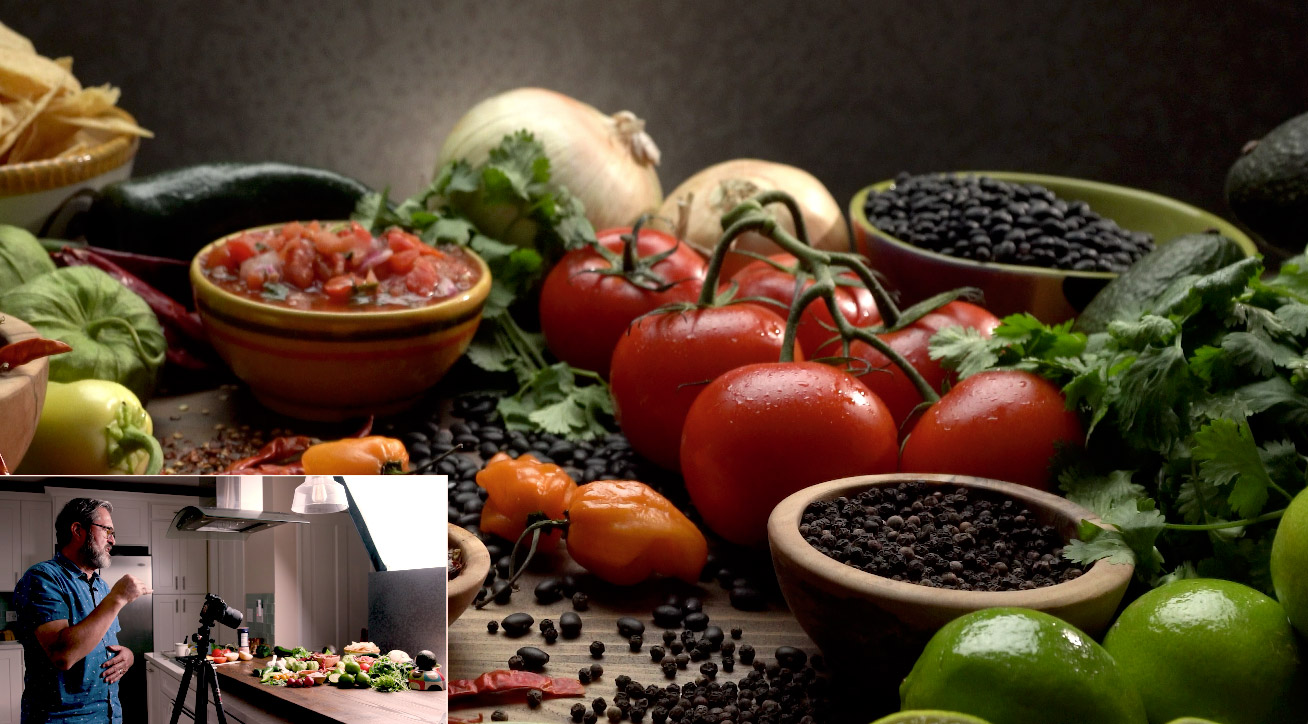
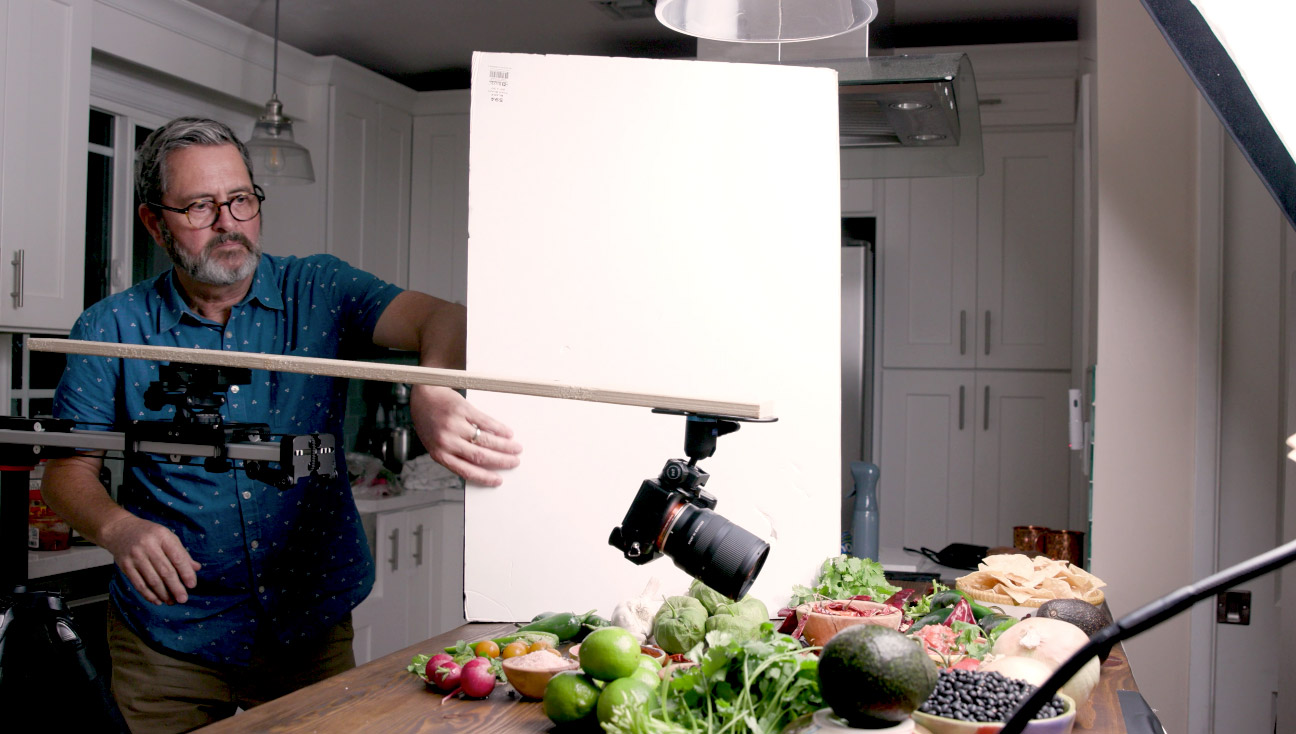
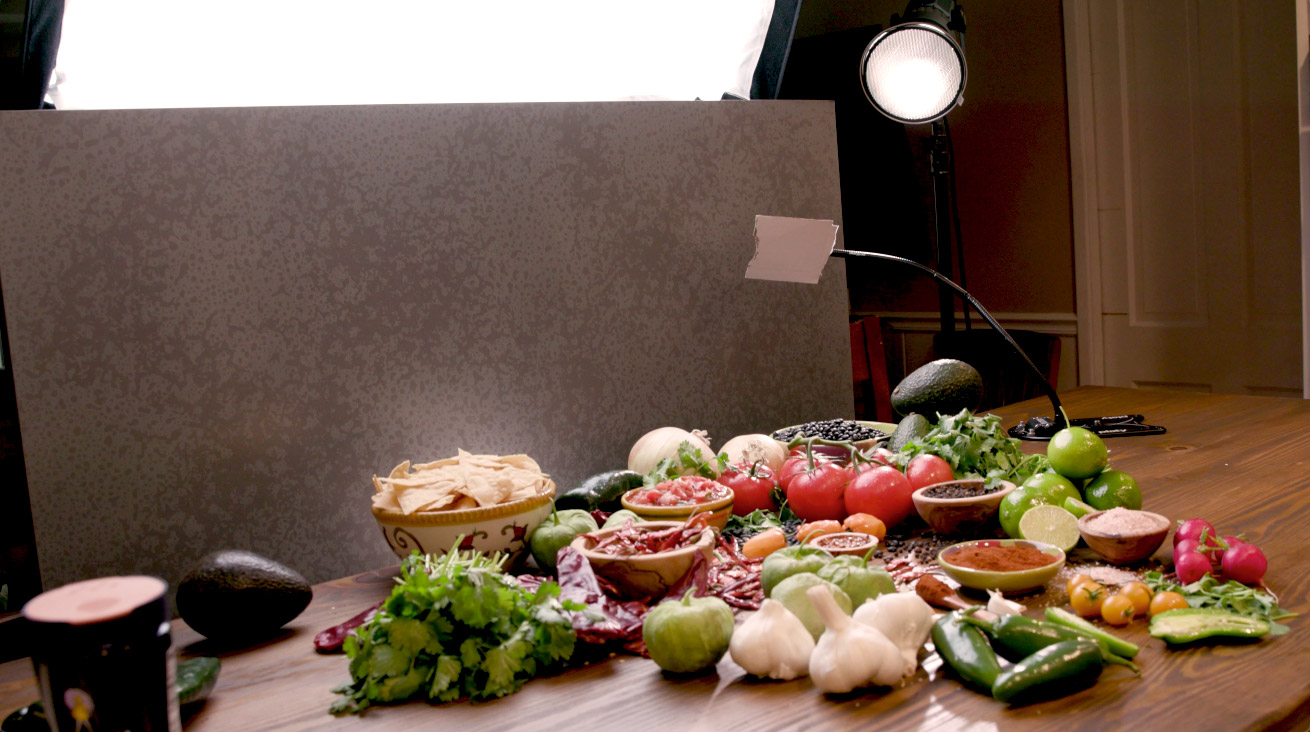
All right, I’m going to set a camera in here so that we can look in real time at what each of these lights do and how we set this top back light up. So first off, we’ve got our Westcott large softbox that’s the 3’x4’. It’s behind, it’s slightly behind our background. So it’s not lighting our background. It’s just behind the background so that on that angle it’s not going to light the background. But it is throwing some pretty significant shadows forward. You see it underneath these little bowls here. You see it on the limes. They have very strong shadows coming forward. You see it under the bowl in the back. You really get strong shadows because the light is fairly low and that gives us a longer shadow because it’s so low. So for my background I literally took the table that usually sits in our corner and set it on a couple of chairs in the foreground and apple boxes and stools in the background. And that became our background. But you know, you could say, “okay I’m done. Let’s shoot.” And that would be great, but is it done? No, it’s not done.
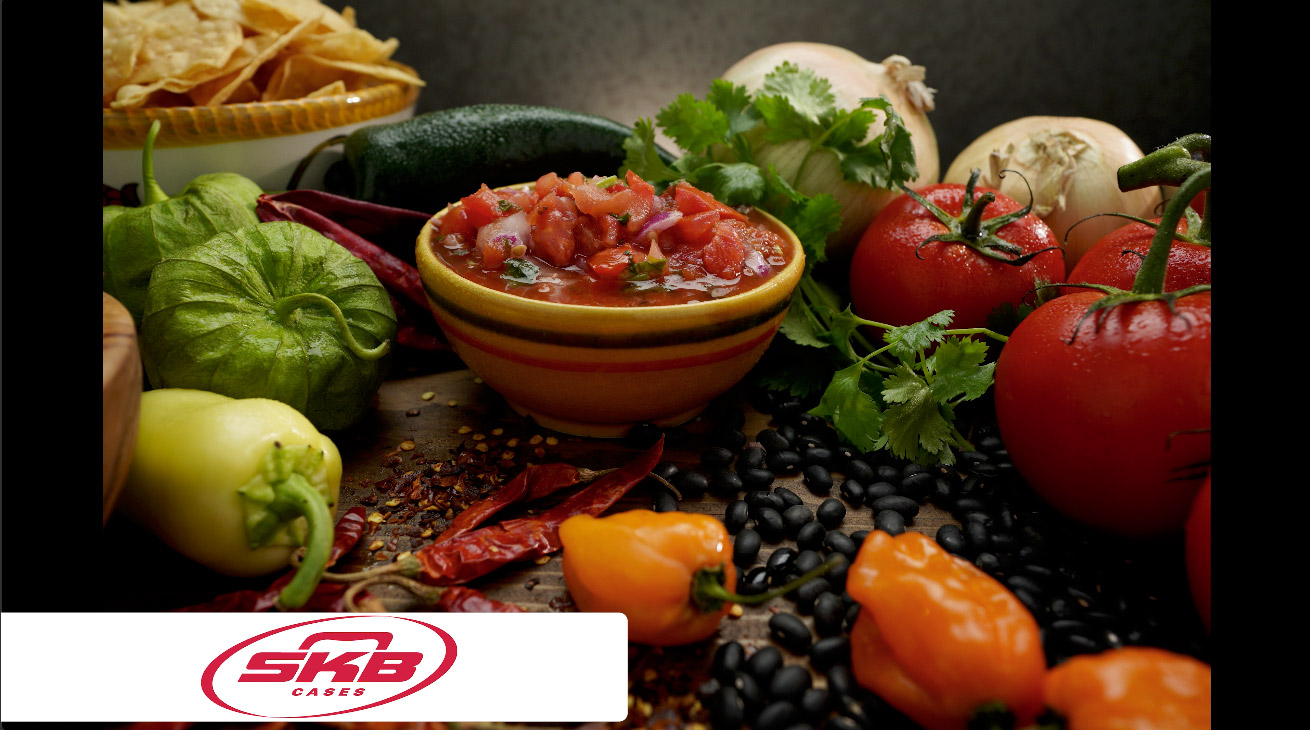
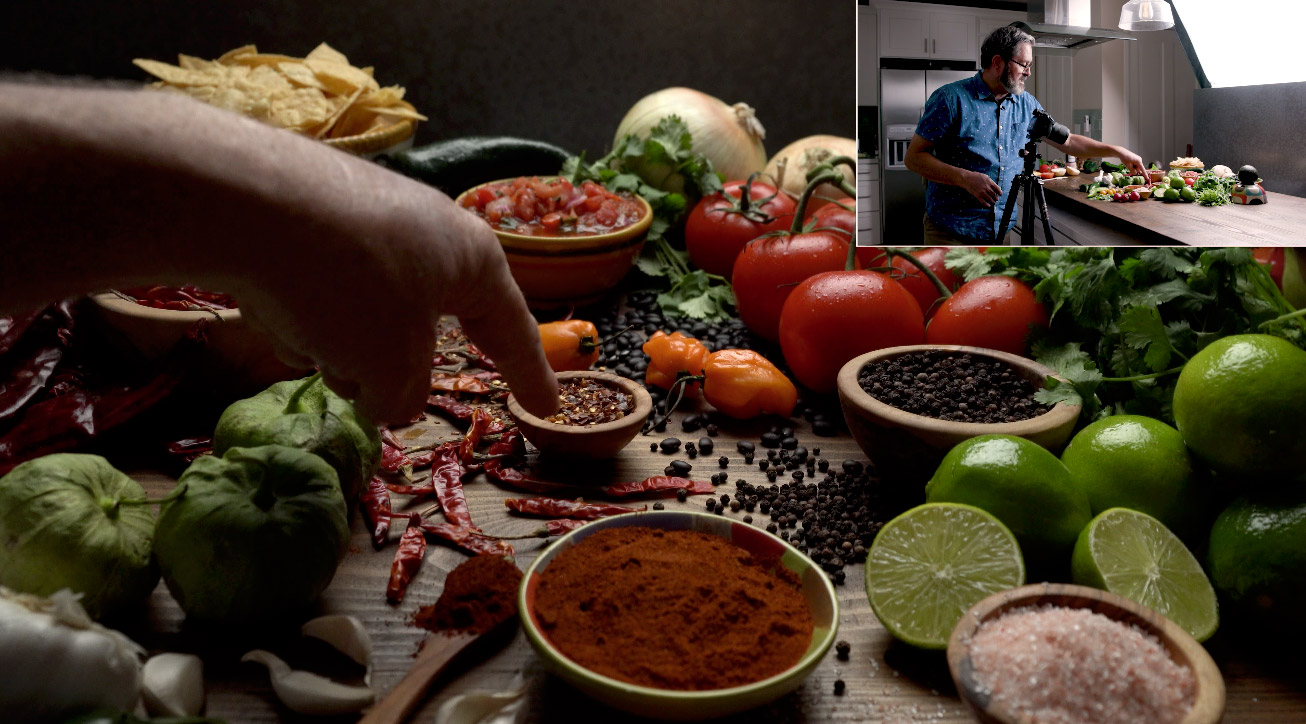
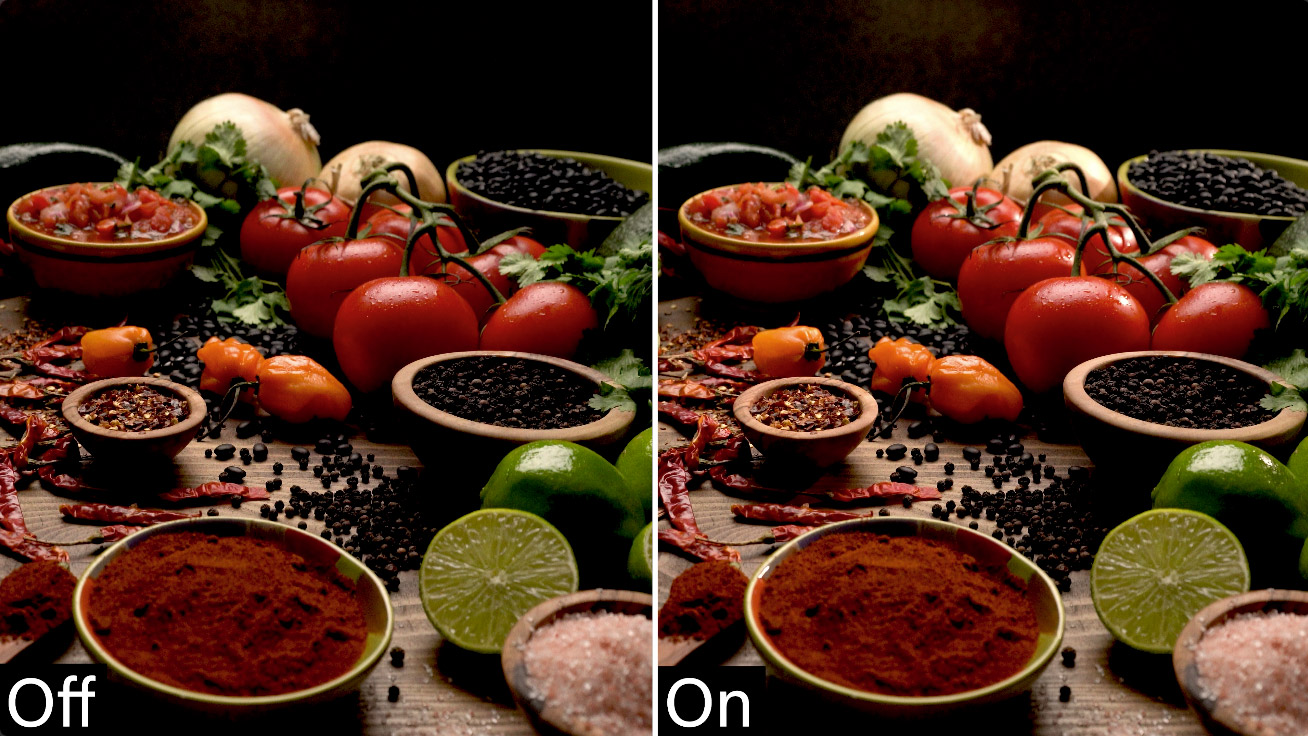
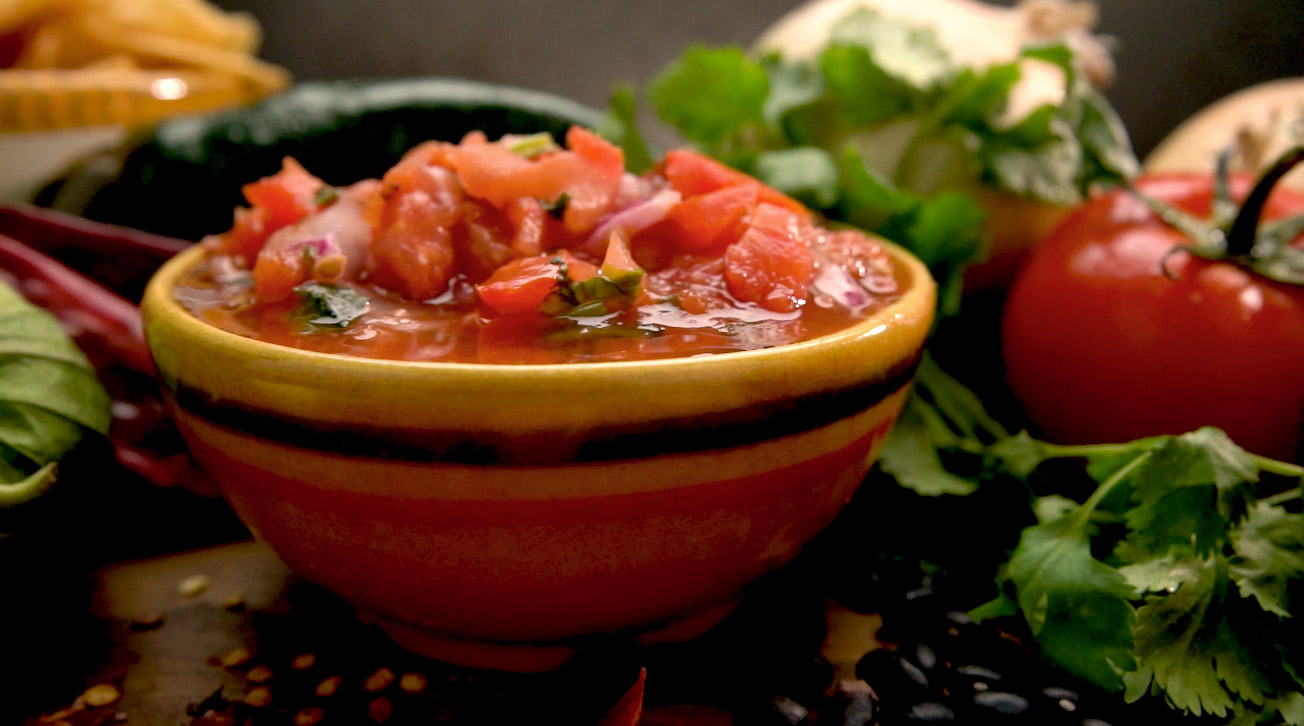
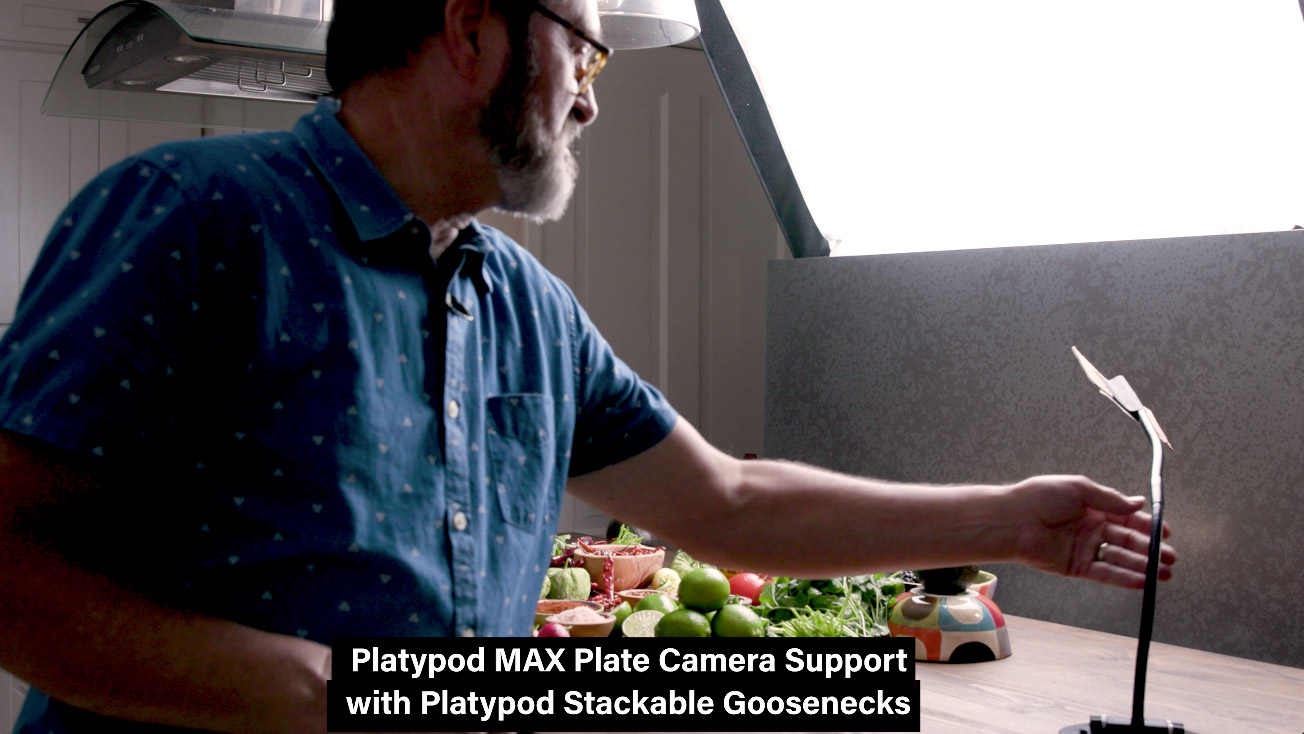
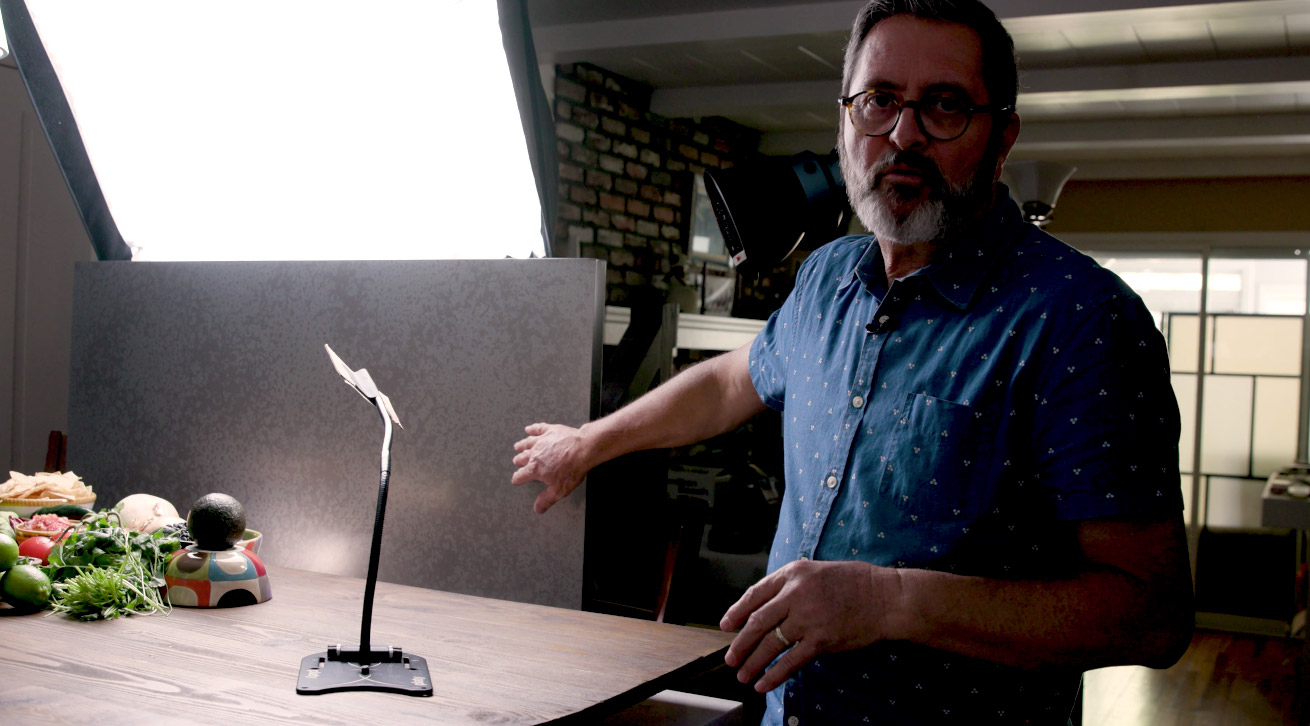
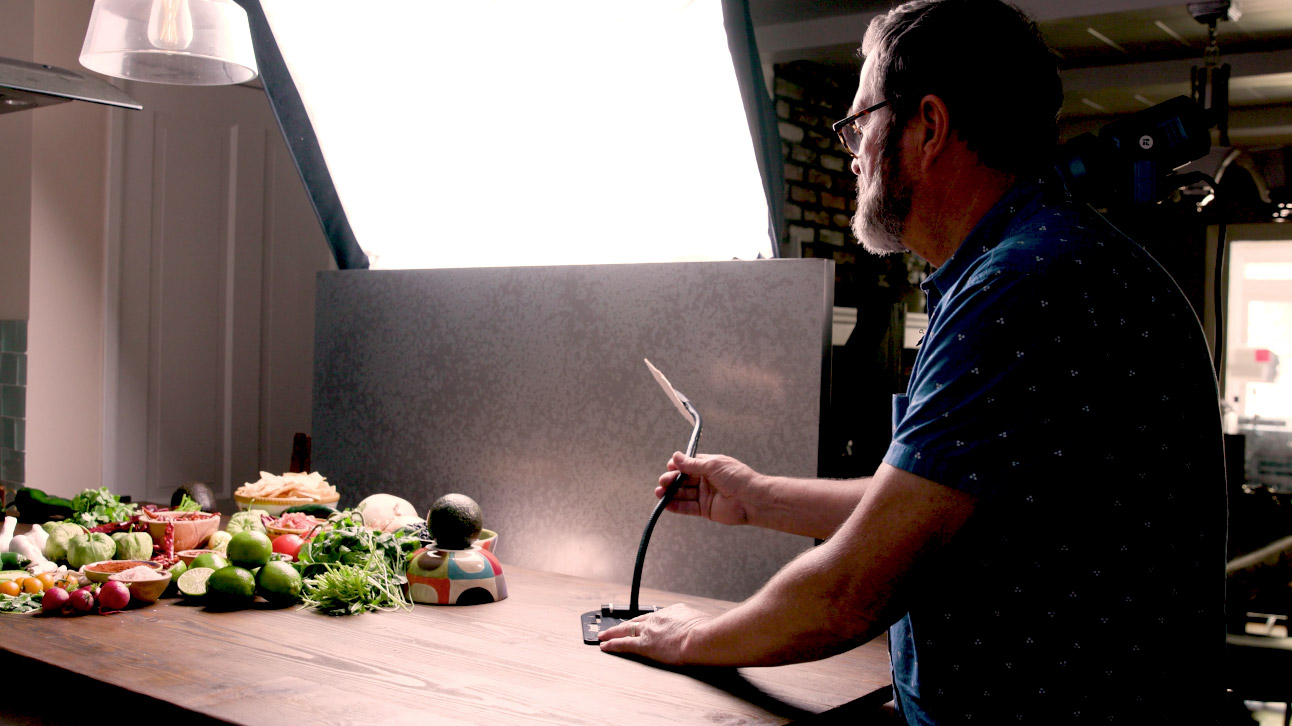
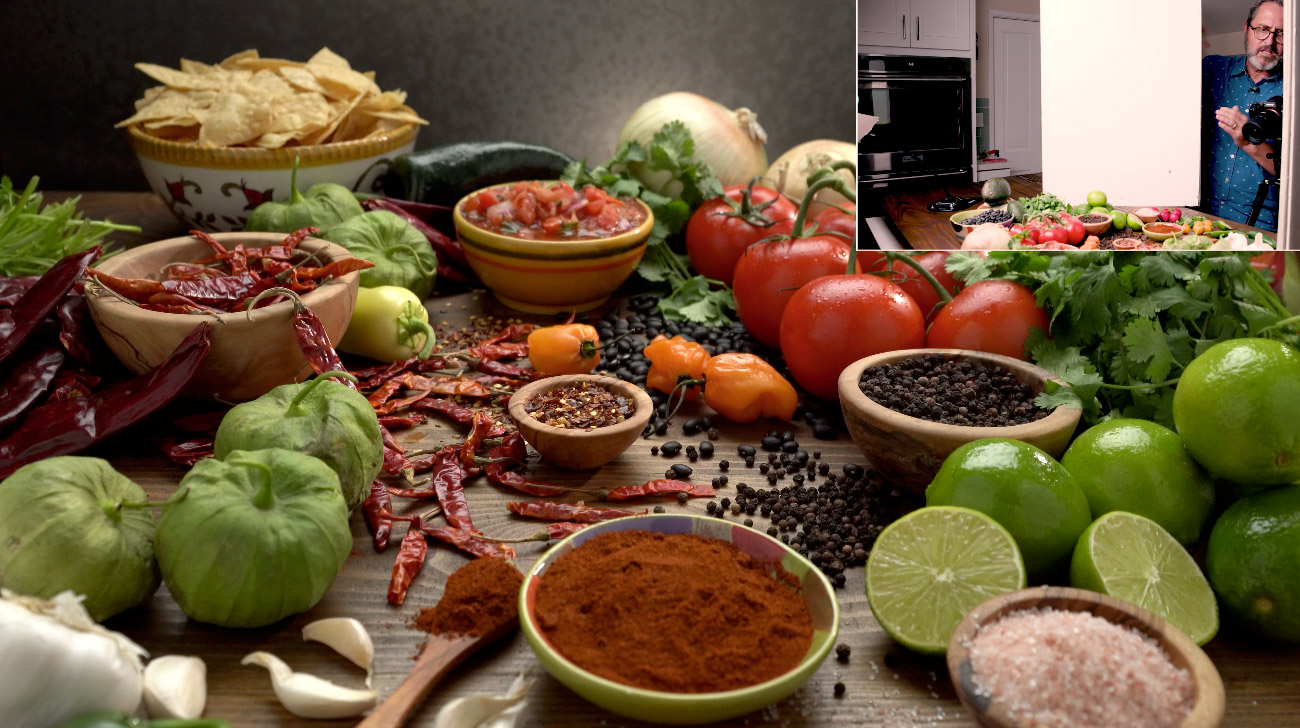
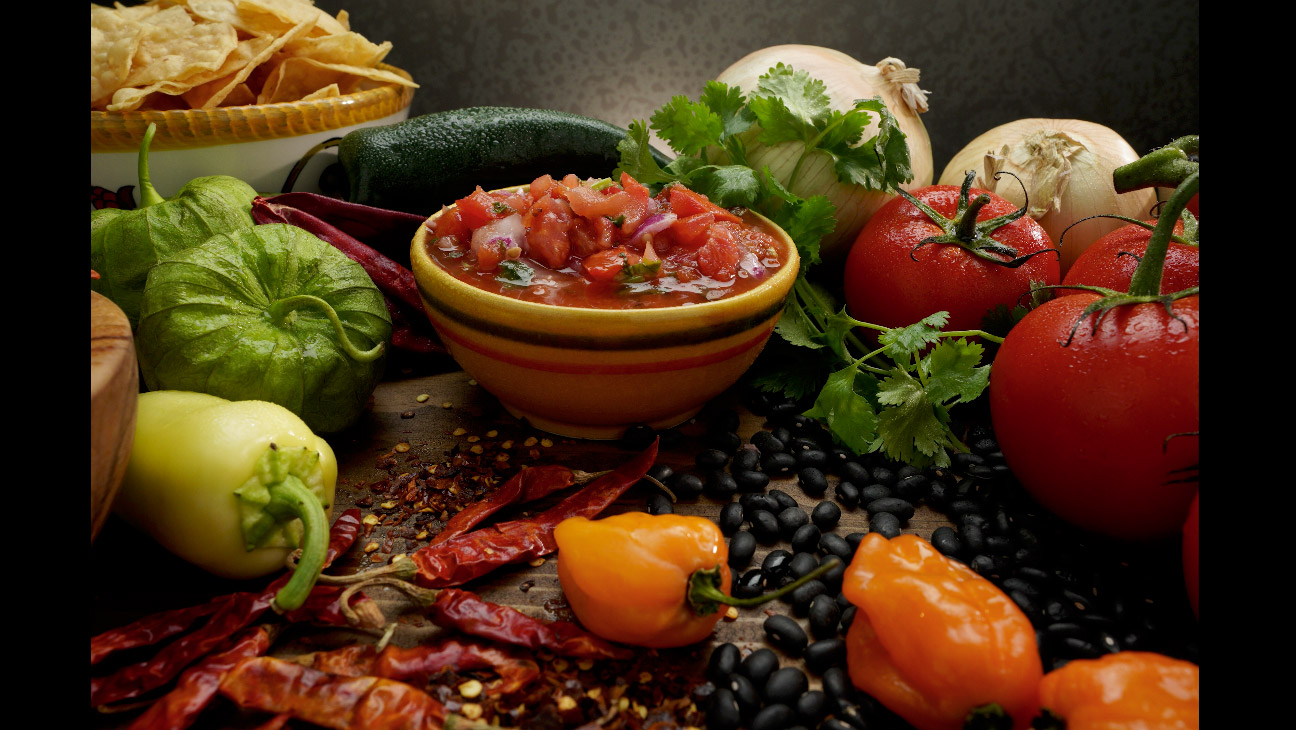
There’s several things we can do to it here. Actually there’s so many things we can do to this. But the first thing is, I love mixing quality of light. And there’s another lesson we did on this on mixing different qualities of light. This is a very soft light to draw all of the shapes. So the next light I have is an Intellytech Light Cannon. It’s got a fresnel lens on it. This is a directional more hard light and you’ll see it in our main image here. The minute it came on we see highlights in the salsa. We see highlights on the tomatoes. We see highlights in an area. I don’t have it covered in the entire scene. I have it just raking across the salsa in the back because in this little video move we did our goal was to end up on top of the salsa. That was our hero and so that’s where I put this raking hard directional light. That gave us just a really beautiful light on the salsa and the objects in the back. I didn’t want to just put it everywhere because pretty soon now it just becomes uninteresting. But if you just create a little shaft in an area it makes that area more interesting. You could now come in here and put a mirror and bounce a little light in on the side of this bowl. You could come in and just with mirrors, and people put them on things like we have here with the Platypod Goosenecks. These Goosenecks are perfect because you can put a mirror on the end of that to be able to bounce a little light in somewhere. And that just gives you the ability to start surgically giving yourself some nice highlights that are different from just the soft light from behind.
So soft light first. Hard light to create some areas of emphasis. And now we want to see some depth in the background. So this is really simple this is just a Litra Studio Pro light. And with this light I have a piece of diffusion back here so that it will diffuse the light. This is a very reflective surface. So I just want a little bit of light back there to give me some horizon. So we see just a little bit. It’s almost too much. In fact, it’s too much in the middle. I’ll bring it over a little more behind the onion. That now just gives us a little something back there. It might be nice if that was even wider. Maybe put a couple of them together with a piece of diffusion back there. That’s going to help to spread that out a little bit better.
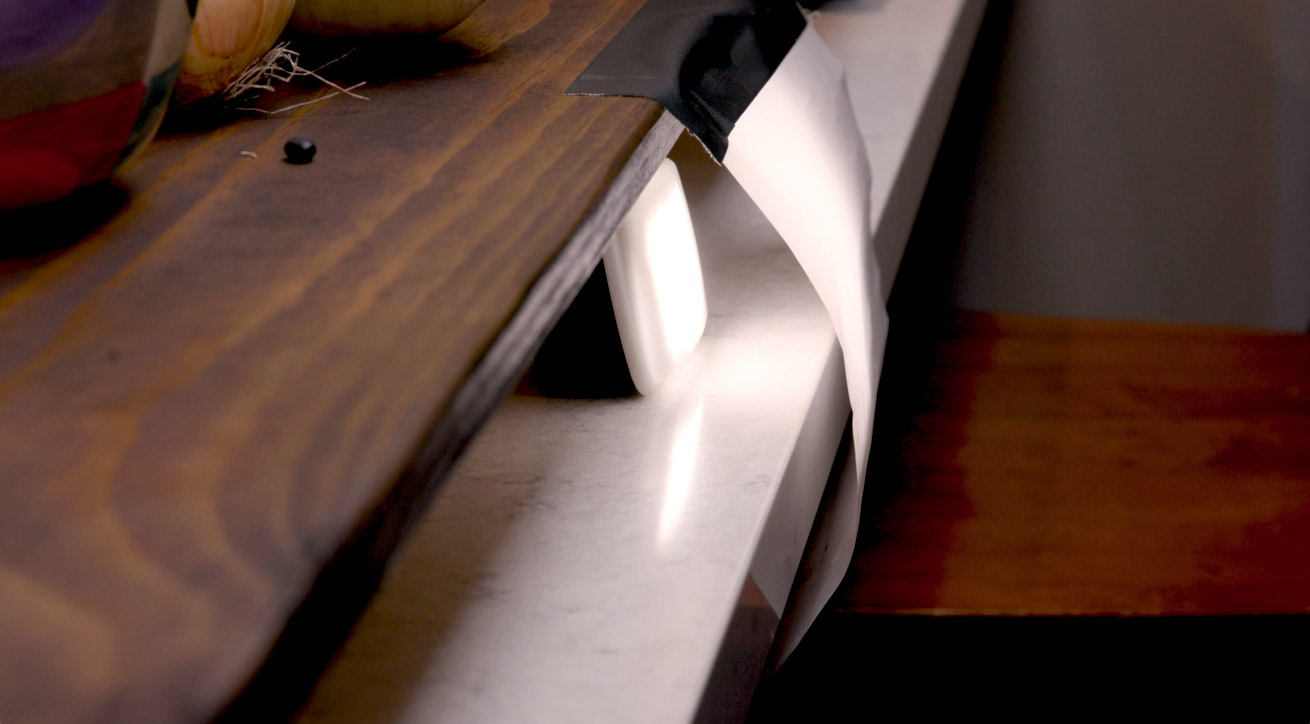
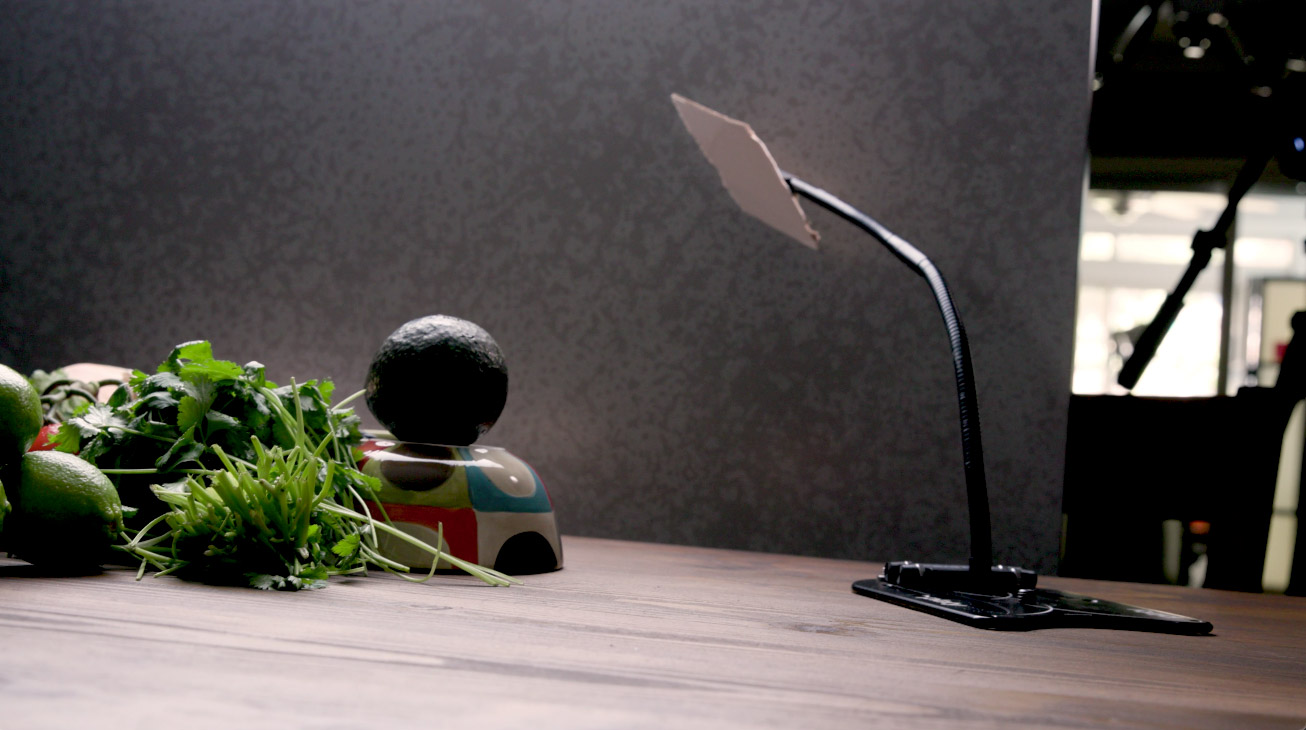
So now as I look at this scene that onion in the back is very, very pronounced. It’s light colored. I’m getting a really hard kick on it from that fresnel directional hard light. That fresnel light in the back is really hitting that onion pretty hard from the camera right side. So I’m going to flag that fresnel light off and I’m going to cut it off from the onion. I’m going to use a Platypod Max here. It’s got a gooseneck, double gooseneck with just a piece of cardboard I’ve taped on there. I’m going to come in under here and I’m going to not take it off from the salsa. I’m just going to try to take it off from the onion. There it is and I’m going to just take it off just a little bit right there and knock that onion down just a little bit. The reason I show this is because, even though I have set a hard light here, and this hard fresnel light is really giving me pools of light, don’t be afraid to cut it off from different areas that may become too pronounced. Too prominent and you want them to recede a little more. So you start getting cards or maybe a piece of netting, you know, so that it can just take it down a little bit and not just knock it off completely.
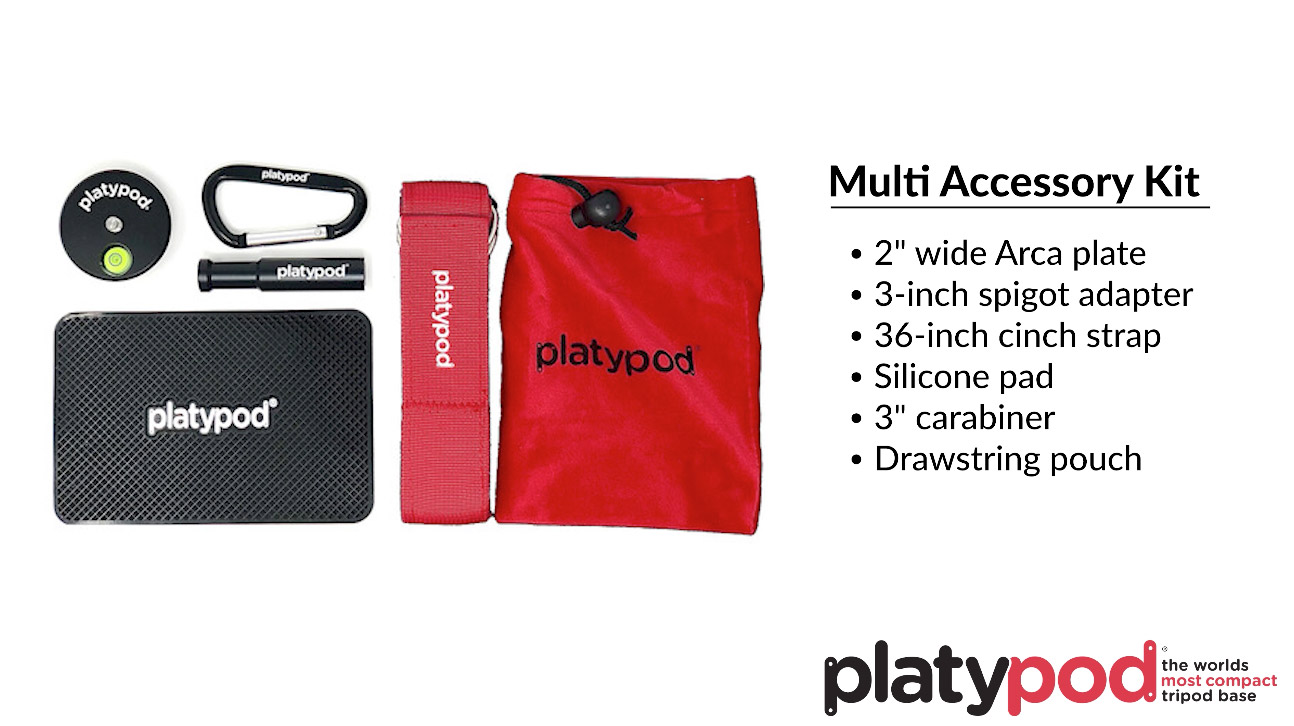
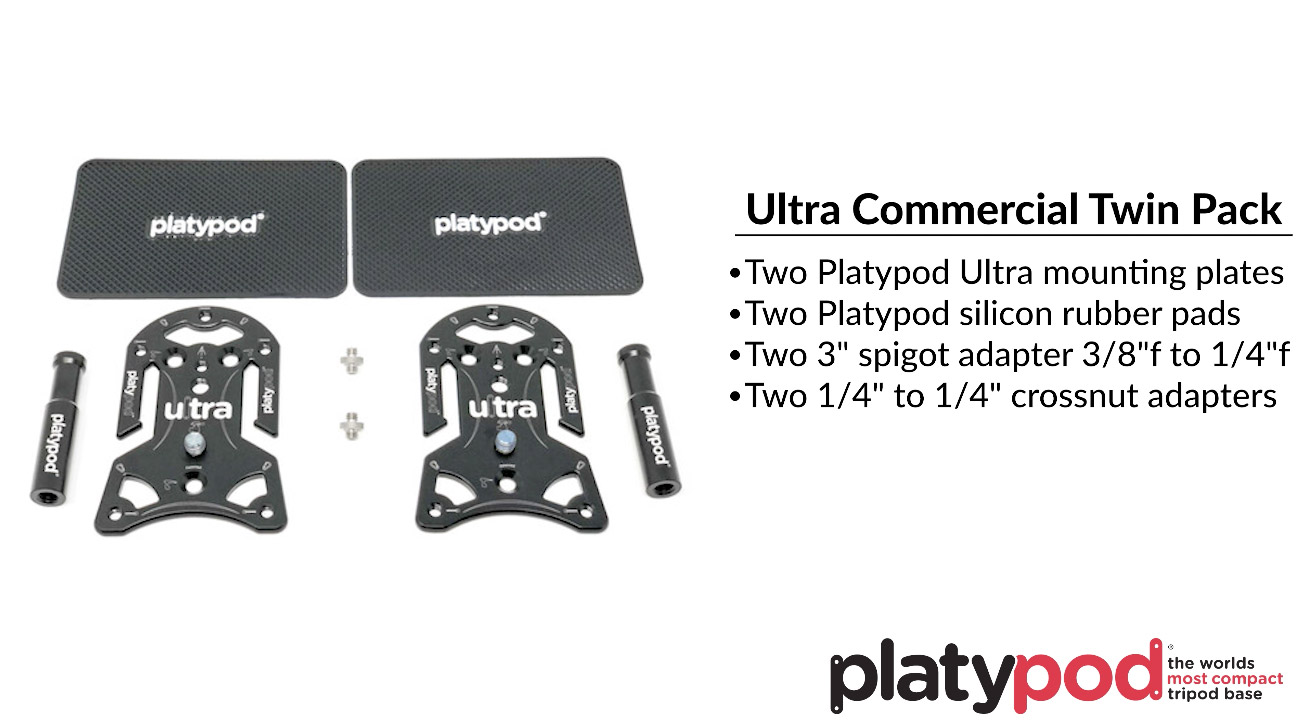
You know how much we love Platypod here at The Slanted Lens. We’ve got two of their packs that are on sale right now. The multi-pack has something that is really unique. It’s got an arca swiss plate. It’s round so it allows you to put on your camera and you can slip it on any ball head and tighten it. You don’t have to orient it a certain way. It makes that really super easy to use. This is something very new from Platypod that’s on sale right now. You should check that out. It’s got all the adapters you need to be able to make this work. Which is the Ultra-Twin pack. This has got two of the Ultras. It’s got two of your spigots. Basically it’s a baby pin but on one side it’s three eighths and the other is a quarter inch. It’s got a quarter inch to quarter inch adapter. And it’s got the silicone pads to be able to put that so they won’t slide if you put it on any kind of a surface. I’ve got one of these attached to the ceiling over the top of our Slanted Lens set. I carry one in my backpack all the time. I think that’s a great way to stabilize a camera. It’s lightweight, with you all the time and just easy to carry around. So check out these two. They’re on sale now. So you check those out, Platypods Multi-Pack and Twin Pack.
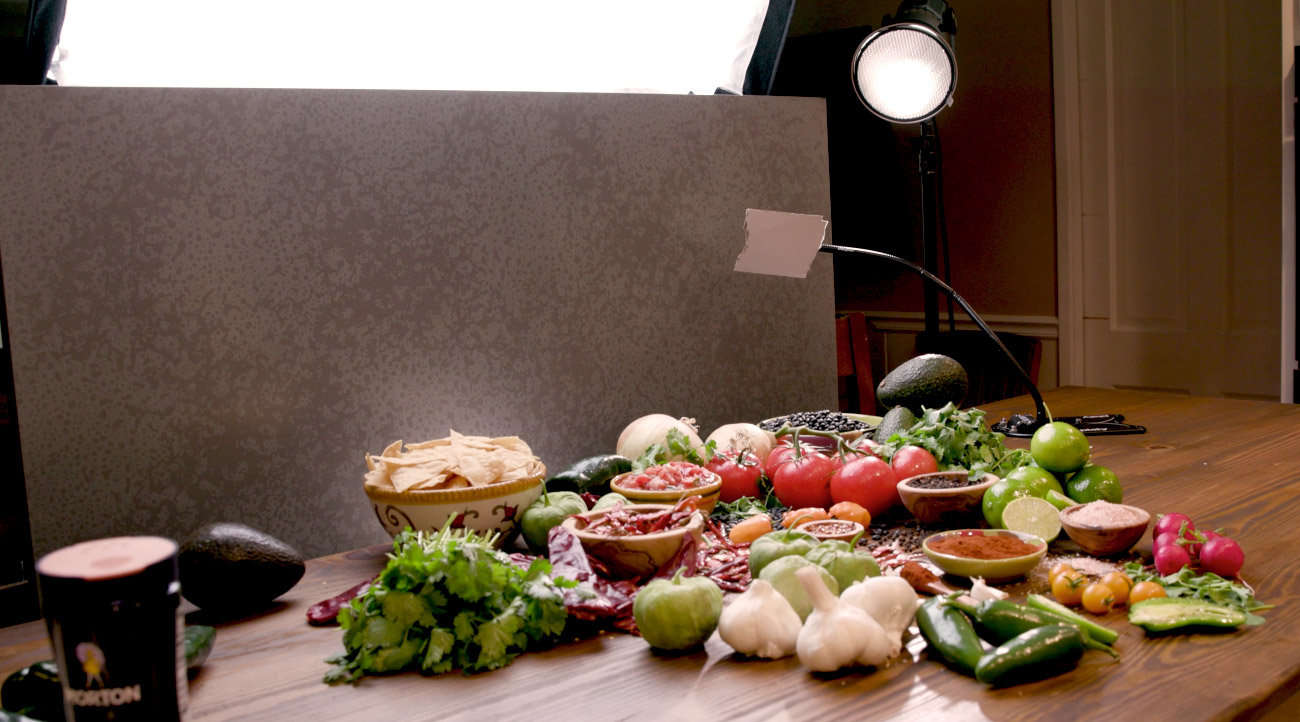
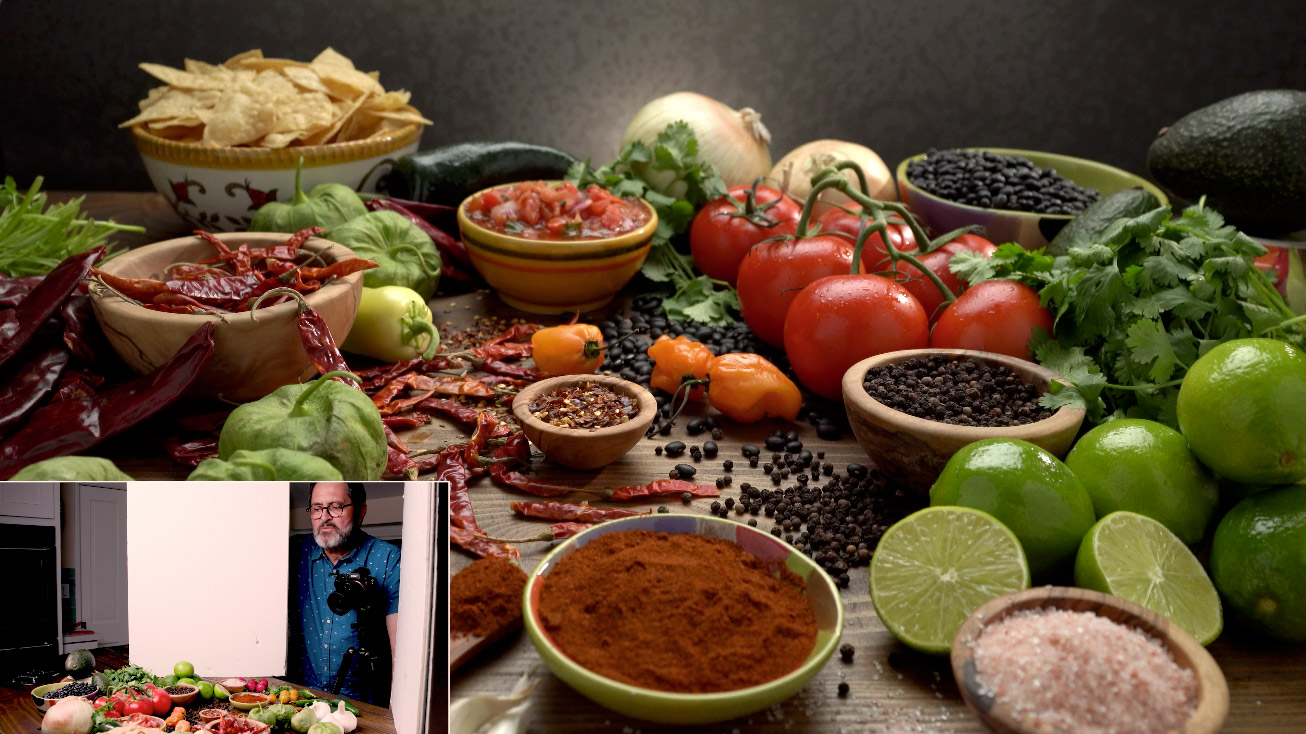
All right, so I’m looking at this now thinking you know what, this is looking pretty good. But the last thing to do with this is to just simply bring up the shadows or the floor. You use those terms, I use those terms interchangeably. The floor is just the amount of light that opens up the shadows but does not create its own shadow. If I put a light right here to open up these shadows that light right here will create its own shadow. And now I’ve got a whole new problem. It looks like there’s two light sources. So I’m going to just bounce our large soft light back into the shadows. And I do this with two different v-flats. These are just little inexpensive v-flats (Foam Board). I get them from a dollar store like a buck $1.30. I tape two of them together. They’re black on one side and white on the other. I can use it to reflect or just subtract light. And these are very easy to work with. So this is the last thing. I do this when I do a top back light. These are the last two cards I set just about every time. If I don’t want the floor or the shadows to be too bright I may only set one. If I want the shadows to be fairly open I’ll set two.
Alright so I’m going to put this in so the angle of view is always on a triangle off from the camera. It gets narrow on the front and deeper at the back, obviously. So I’m going to put this right on that angle of view. I’m going to slide it in as close as I can get it to my lens. And this large white vertical card now is going to start to bounce light into all of the shadows from this side. Will it open up the shadows on this side? Nope, not going to do that. That’s why I’m going to add a second card on that other angle of view. Let’s cut around and put the camera on the other side so we can see that. All right so I’m going to add my second fill card from this side now and I’m going to slide that right in on that angle of view right up to the lens. Right along that camera angle of view. And that’s going to open up all the shadows. I mean this is almost too open a little bit maybe on this side. I might back this out to let my shadows on these lines build just a little bit. Maybe bring this out just a little bit so it’s not quite so open and that makes it just a little more moody. It becomes now a matter of really creative choice. How open do you want the shadows to be. You make that decision depending on how you bring these cards in or how you move them out. I feel at this point like this is ready to shoot. I feel like I’ve got nice raking hard light from that fresnel lens on the right. I’ve got a great top back soft light which opens up and just draws and gives me dimension to all the subject matter. And now I’ve got great fill cards in here that opens up the shadows. And I’ve got that one card taking off light on the onion. You know if I was really working a scene like this and working doing this for a major client. I would probably set up three or four mirrors and two or three cards cutting light off from different areas and really finesse this. Take a picture. Look at it in Capture One. Decide exactly what you want to change, what you want to work on. So this really becomes a starting point. This is where I would show this scene to my client and my client now would say, “Well I like this or I don’t like that.” And we would start working on the things that we do and don’t like. The hardest thing about this setup right here is controlling this many items in a scene. Julene is very good at this. It’s controlled chaos. It really is. It’s getting things in, in a way that gives them groupings and small simple areas design wise. But the whole starts to work together. This works much better. This photograph here is too broad of everything. When we did the video where we rolled into the final scene which is framed up in the back, that’s really what this was meant to do. To be able to use this kind of roll across here fly over. Or using a probe lens to fly into the salsa in the back. And that’s the way this is really designed and set up to look.
So there’s a look at top back lighting here at The Slanted Lens. I love this look. Put some images on our Facebook group. Leave us a comment below. Let us know exactly what you think of this type of lighting. Or if you have other thoughts about it on how you’ve used it. I think it’s a great light to talk about and have that kind of community conversation about top back lighting. If you’re interested in any of the products that we use here at The Slanted Lens we have the list in the write up below. And you can get any of those products from any one of our affiliate programs, Westcott, Amazon or B&H. So check those out if you want to support us here at The Slanted Lens. We appreciate that. So make sure you subscribe to The Slanted Lens. Make sure you check in every Tuesday because we’ve got a new lesson. So keep those cameras rollin’ and keep on clickin’.