

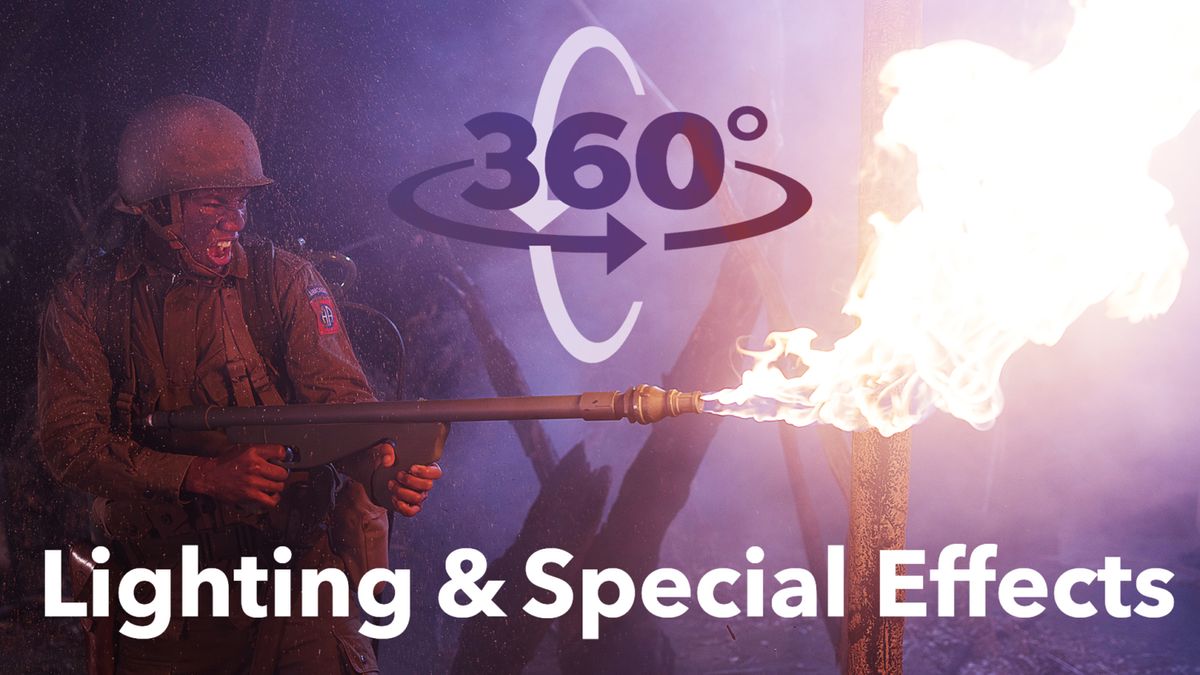
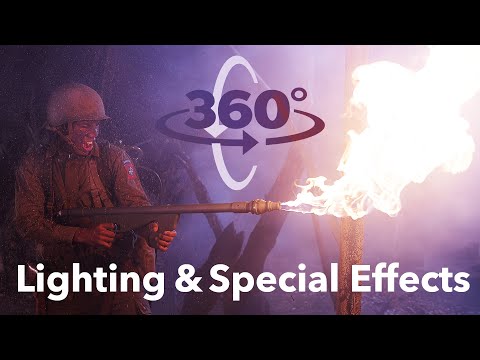
In this Laws of Light Lighting Tutorial we show you step by step how we shot this and you can view it in 360 degrees as you scroll around to see where we placed the lights. You will also see how we used special effects to create this WWII scene using smoke machines, air cannons and flames. Let us know what you think!
Hi, this is Jay P. Morgan. Today on The Slanted Lens I’m going to do something a little different. I’ve been wanting to do this for a long time. But I have a 360, an Insta 360 camera behind me. I’m going to start rolling on that Insta 360 Camera. It’s rolling right now. And I’m just going to go through this shoot. I have an idea how I want the lighting to go here. It’s a little shot of Dwight here and World War II. I have some remnants of a commercial that we shot. I just want to see, I want you to see the process I go through. I have an idea how I want to light this. But it changes as you go along.
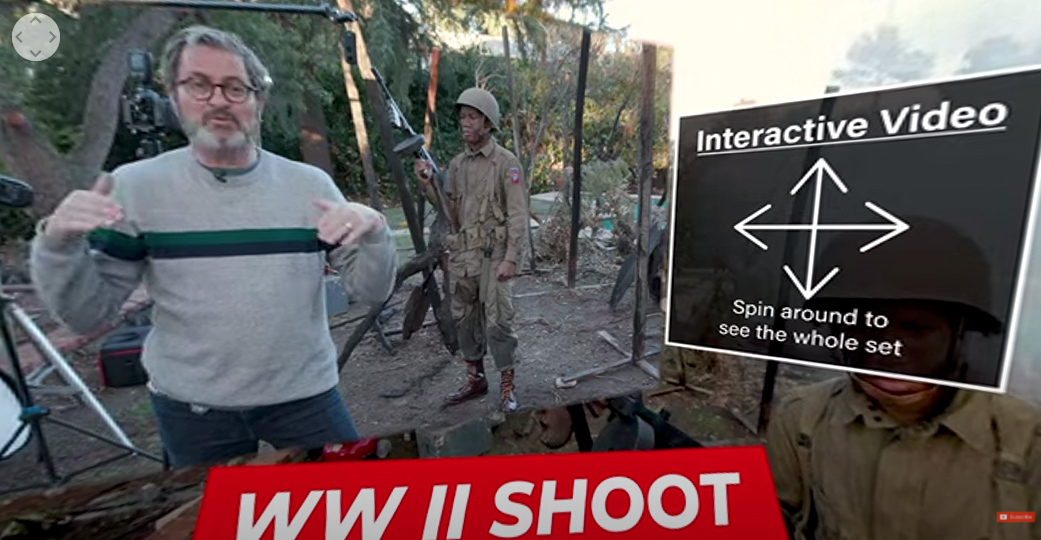

So I have a couple of lights in place so far. But I am going to start to hone each one of those and kind of get everything dialed in. And you will be able to see it in 360 degrees. You can roll around this. You can look up and see what’s going on. You can look down. You can see everyone who is on set. You can see all of the lights that are on set. Some of them are back there a little ways. But it’s all there. So check it out. Look at this 360. See if you like this. Because if you do we will do more of them. So if you like this kind of content make sure you follow us here at The Slanted Lens. Ring that bell and it’s time for a 360 portrait. Let’s do it!

First off I’ve got 3 strobes up. First up, my number one is a bounce off of this card up here. I make sure I number these so I know which one is which. Number one is a bounce into the card. That is my key light.

Number two is a big umbrella back here. I just want a really soft light that comes on his face just to open things up just a little bit. I’m going to keep that really low. I’m going to play with that a bit. I may not even use the key light in the beginning here.

And number three is a back light on the camera right side. It’s got a full CTO on it. And on that left hand side we have, not a CTO, but just an open head. And those two we are going to dial those up and down together.

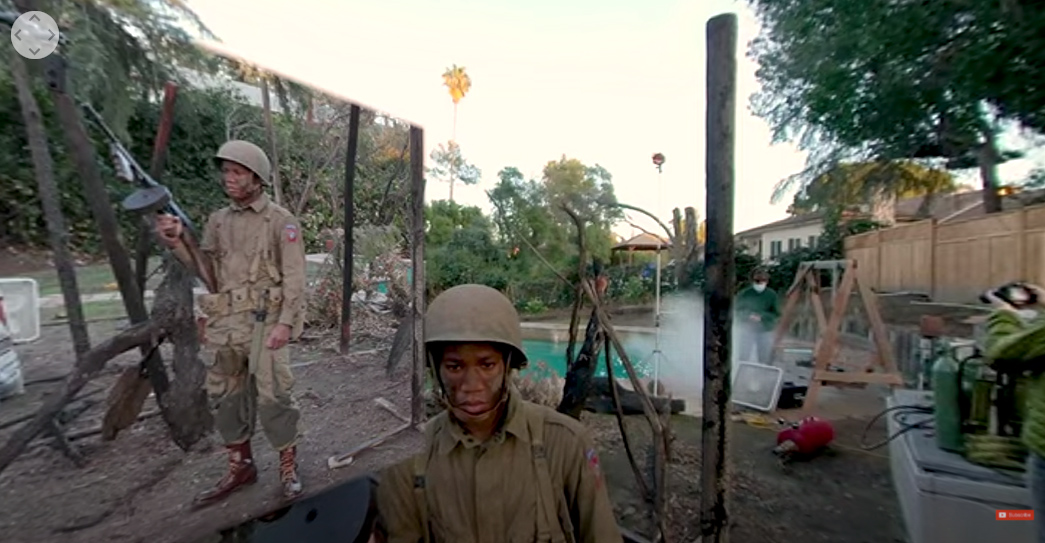
We have in this experience also, as I dial these up and down, we are going to put smoke back there. And those are going to light the smoke from behind to hide most of the yard back there that I just really don’t want to see.
So key is A and B is my fill light and C is my rim light. So let’s start with that. Let’s get our first shot here. I am going to turn A off, the key light. I’m going to leave B. Actually I’m going to take B off for my first shot here. And I’m just going to do C.
So let’s start with the smoke there, Jamie. I always send the smoke through a fan because that fan breaks the smoke up and allows it to spread more. It makes it look less directional and it will just fill up the background a little nicer.
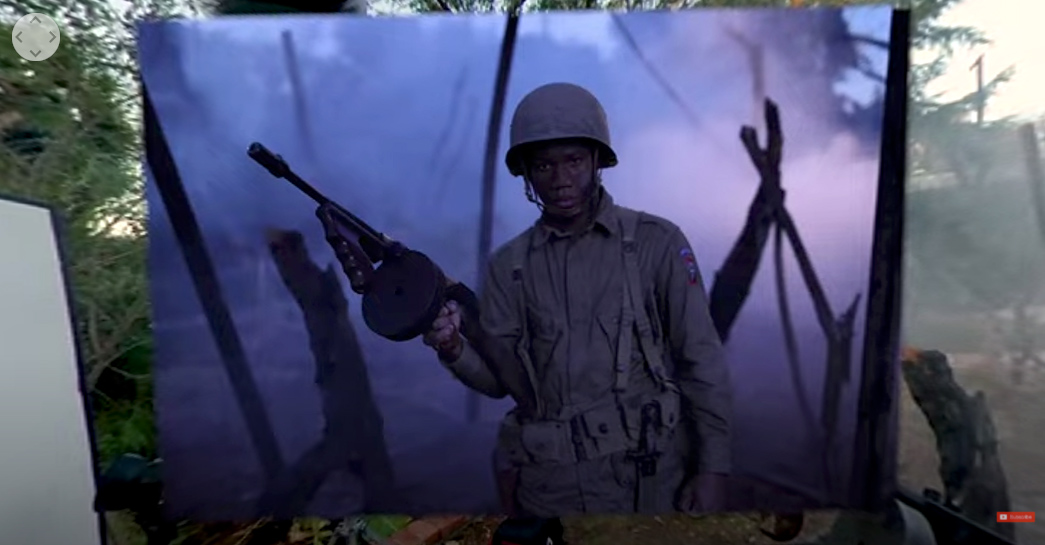
So there’s my first light on the camera right side. I think I could bring that up just a little bit. I just want a little bit of something on his face there. I’ll open it up just a little more at 2,2. I’m going to go up to 3,2, bring it up a stop.
Ok, I’m going to go ahead and bring on my fill light here. Alright I’m not really liking his face here. I’m going to go up another stop on the fill light here just to open it up a bit. It’s starting to be an interesting look. I’ve got the little bounce light in the front here kind of coming from underneath. That rim light from behind, I’m going to walk the rim light in just a little bit.
I’m going to do a few with just the back light on and just these two rim lights. And I’m just picking up what little glow there is left in the sky here. And it’s looking pretty good. But I’m shooting at a tenth of a second. So hold real still for me Dwight.
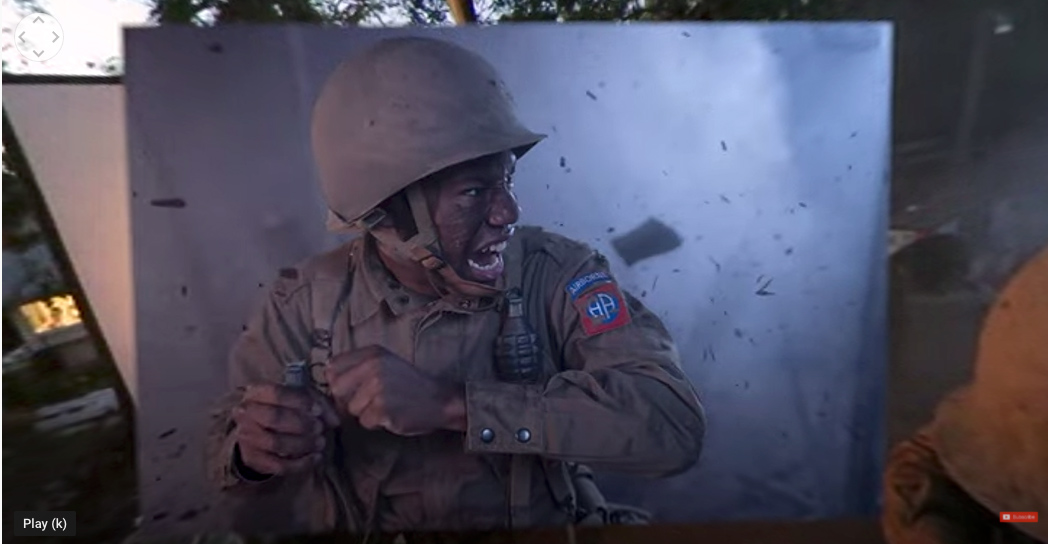

Let’s take a look at some of the air cannon shots. That air cannon is blowing a lot of different things from the camera right side. It’s breaking up into the smoke and breaking up into background and it makes these images look a lot more dynamic.
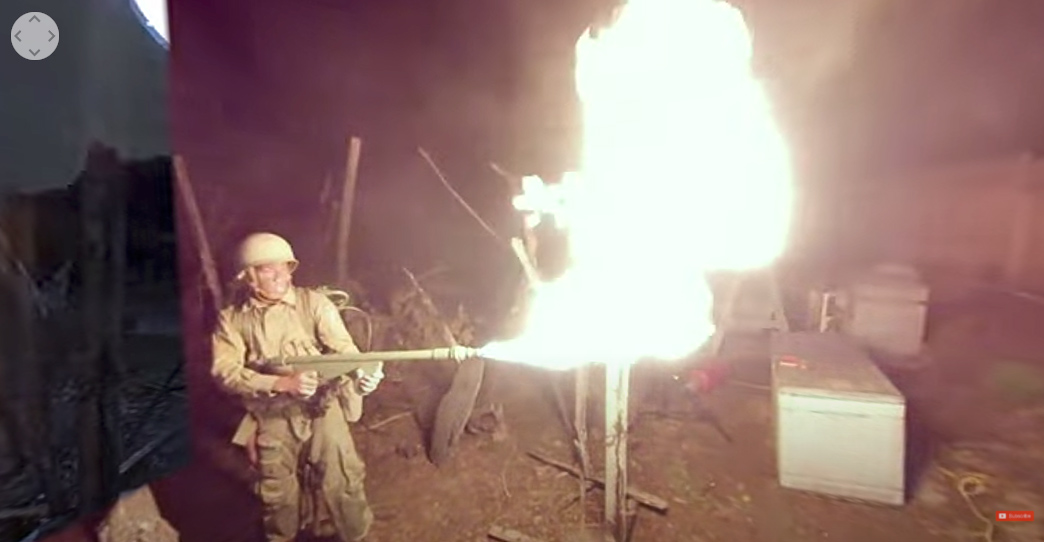

So we are about to shoot some flame thrower images here. Yeah, that’s it. I don’t know what else to say. Throwing flames, here we go. Adding a flame like this creates a new light source in the shot. And you can control that light source with the shutter speed. So at first we were at 1/60th of a second. 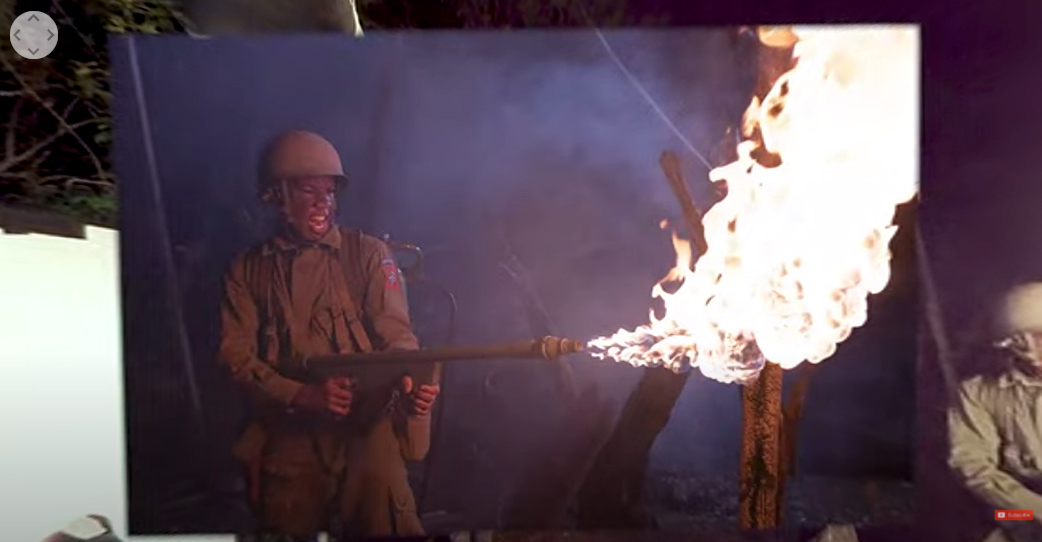

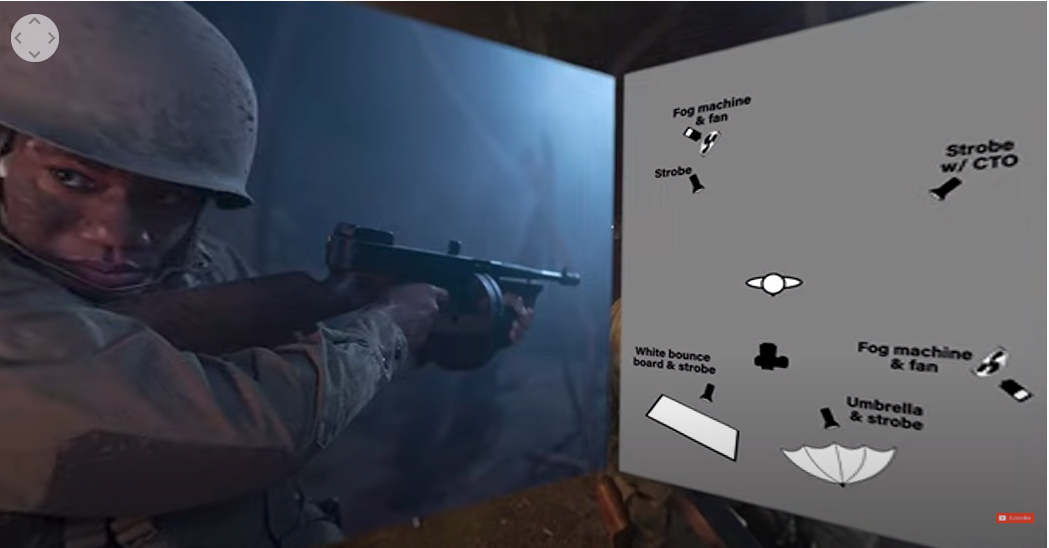
Ok, let’s take a look at the lighting diagram here. In this first image all of our lights are on. The very first one I am going to turn off is the rim light from the camera left side. That’s a hard light with a full blue on it. So it’s a reflector, just a reflector with a head with a full blue. That’s just going to open up the trees and things in the background. It’s going to give us just a little bit of definition in all of the things in the background.
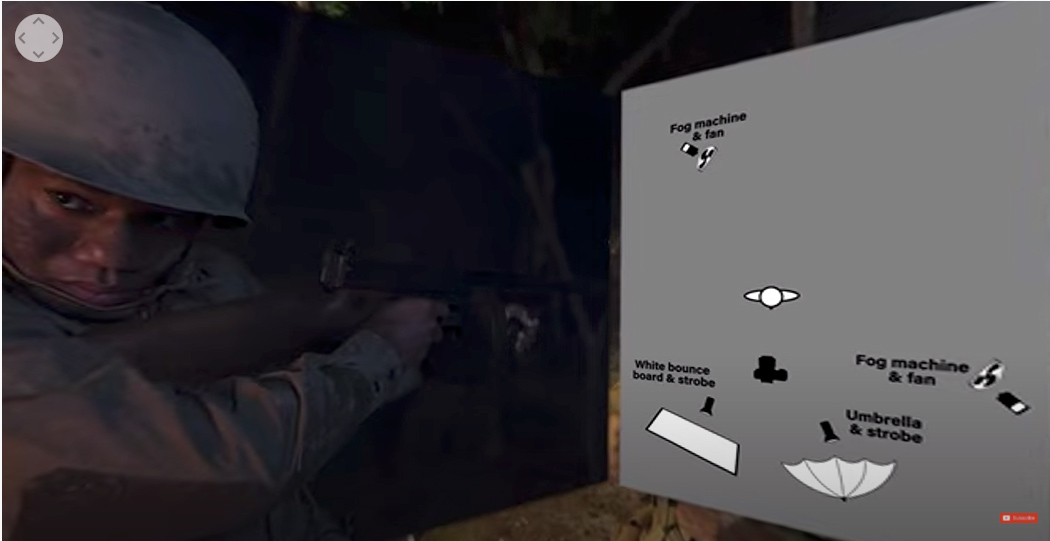

Then we’re going to turn off the camera right side. Same thing, full blue on a reflector head. When we turn that light off we just now have a black background.
Both of those back lights, the two in the back, are going to really show the smoke. They are going to be what will light up the smoke. When you don’t have light behind smoke you don’t get any kind of definition. You don’t see the smoke.
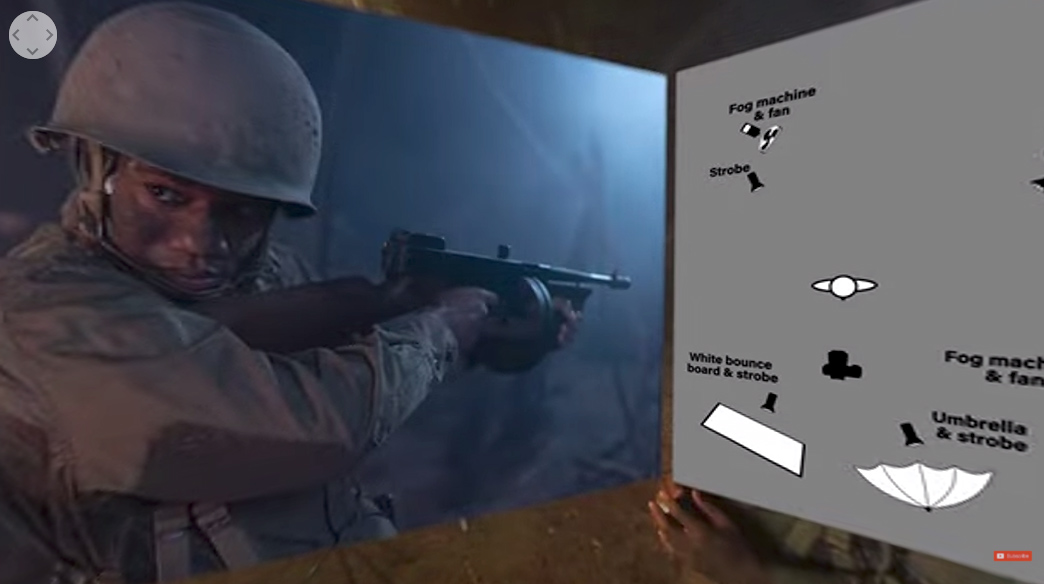

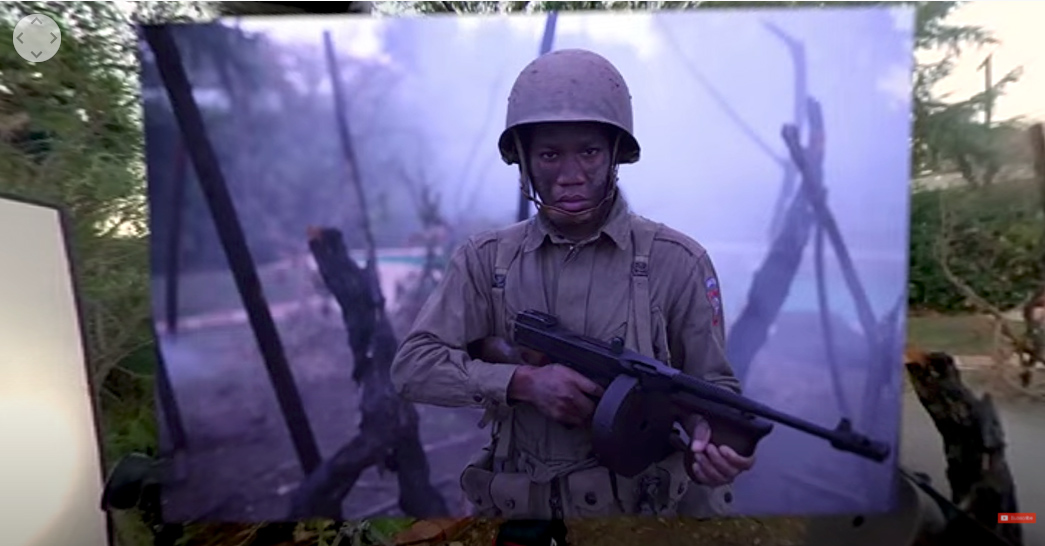
What we are left with here are two lights. We’ve got an umbrella. It’s a large umbrella so it’s giving us a really soft open light and opening up all of the shadows. When we turn that off we now just are left with our main light bouncing into that big reflector. That reflector is supposed to soften it and spread it around so it doesn’t become too directional. But it is also warm. We have a little bit of warmth on it. So it’s a CTO. So it’s gives us a juxtaposition of that compared to the background.
So if we look at that all together it shows you how it all comes together. We see the warmth on the highlight side. We see some really cool shadows on the right, the camera right side. We have backlight for our smoke. And that’s how we lit the images.
So there’s a 360 look at how we set up our lights and how we got this image. I hope you found this educational. We are going to try to perfect this thought so we have these 360 looks so you can just see exactly what is going on on the set. And be able to understand exactly what we are doing. So I hope you enjoyed this. Make sure you subscribe here at The Slanted Lens. And keep those cameras rollin’ and keep on clickin’!