Simple Corporate Portraits – What To Charge And How To Light
Morgan
Hi, this is Jay P. Morgan. Today on The Slanted Lens, we’re going to take a look at how to set up a corporate portrait, a simple corporate portrait in a tight space. Really, it’s about working professionals like dentists, doctors, lawyers, that kind of group. It’s a great place to make money. A great place for a bread and butter income for a lot of people. So let’s take a look at how we set it up, the equipment we need, some tips and what we charge. So let’s take a look at this. Let’s get started and see what we can do.
So let’s take a look at how we set this up. First off, it was a dentist office in a very tight space. I went in thinking that we would do an environmental type portrait. But they said, No, we just want a neutral portrait. We could do white, that would be fine. And I’m looking at the wall going, “This is not a bad color.” I said, “Let’s see what it looks like to just shoot against that wall, I can always put my white up if I need to.” So the only place that I can get enough space to be able to shoot was I had to shoot across the desk. So the person is going to stand up against the desk. I’m going to shoot against the wall behind them. And I’m going to light in that little space right there.
I use a 90 millimeter lens because I just like that look on people’s faces with an 85mm or 90mm. I have both of those. But I use the 90mm very often. I’m going to go to like a f/6.3 with my aperture at 160th of a second. It kind of kills all the ambient in the room, but it gives me a little bit of depth of field. I don’t like shooting on a 90 millimeter, a portrait of someone’s face at f/2.8 because there’s just not enough focus. Their eye will be in focus but their ear will not be in focus. Especially on a full frame sensor. So I want a little deeper depth of field. So I’m going to go to a f/6.3.
So let’s talk about how we lit this. I rarely ever use more than two heads. I’m going to set one up with a large source. Then I’m going to put a head in the background and I’m going to use that just to give me a little bit of rim light in their hair. Then last of all I’ll put in a reflector. I use that Sunbounce. I love the Sunbounce. You can use anything. But the Sunbounce is nice because I will sometimes put it horizontal. Which allows me to bring it forward and bounce the light back into their face from the key, but also wrap it around a little bit to the side of their head as well. Because this is a corporate portrait, I don’t want it to be too dark or moody. I want the shadows to be pretty open. So I’m going to push that card in very close and it’s going to open up the shadows on the side of their faces. So it’s a very simple two light setup. I have a key light, a rim light and a reflector to fill in the shadows. And we’re really ready to shoot at that point.
One thing I like to bring with me in this kind of situation is a small white/black card. So you have a white side and black side. You can get these, it’s just a piece of foam core you can get from the dollar store. But I’ll use that to reflect a little bit of light under the chin. If someone’s a little older, perhaps I’ll put that in just to open up the light under their chin. Or in the case of our dentist, I wanted to kill the light on his white shirt. So I’ll toss that card in and use the black side towards my subject. And I’ll use it as a flag to cut the light off from his shirt. So there’s a look at how we lit this up. A simple two light setup using the wall as our background.
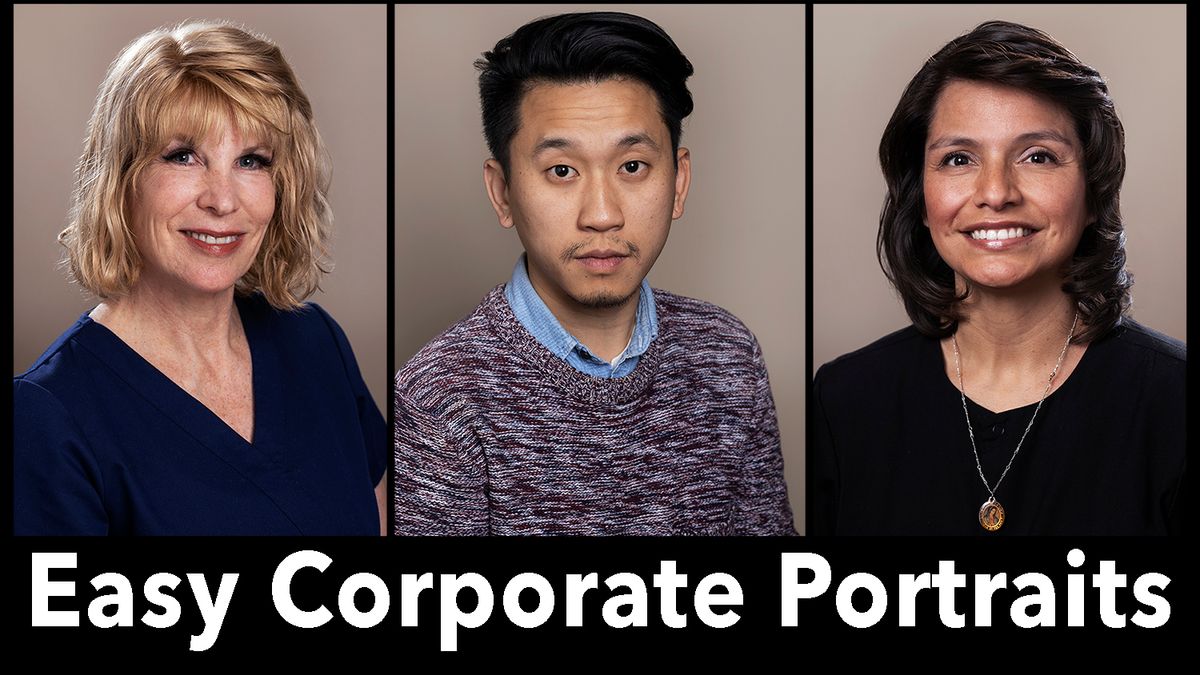
So here’s some of the images.
So here’s a few tips and tricks that I’ve learned in doing this thing over the years.
1. Number one, bring a wagon. Have an equipment list, put everything in your wagon and tow everything up. It makes it really easy because I can roll everything in one trip. Then shoot and put it all back in the wagon and head right out. That’s the idea, get in, shoot quick and go. 2. Number two, bring a small step stool, a collapsing step stool. Those things are just so nice to have with you. Because you’re going to be in a situation where you want to get up higher sometimes. Or maybe your talent needs to be up higher. But just a collapsible folding step stool. 3. Now working with your people, there’s a couple things you should know. First off, look and make sure your talent’s hair is in place. Don’t be afraid if they just have some hair that is way out of control. You want to tame those down a little bit. It kind of helps you with the retouching later. 4. Also, for the men, look at their ties. If their tie is too loose, tighten it up. If their tie is tied in a single Windsor, it’s not going to fill the shirt like it should. Have them tie it into a double Windsor. That will fill the tie and fill up the collar of the shirt and look a lot nicer. It makes it easier when you’re retouching. 5. Also, you just want to make sure that your person’s accessories are ok. Look at the things that they’re wearing like the jewelry, the earrings, the things and just make sure that they’re comfortable with those things. Do they want to show them in the image? If they do, that’s fine. But just make sure. They may say, “Oh no, I wouldn’t want that on.” 6. I think it’s super important that you dress nice when you do something like this. You should look professional. You should look like this means something to you and it just gives a much better impression to the clients you’re working for. So don’t show up in a T-shirt and a pair of jeans. You know, put on a pair of pants, a nice collared shirt, a sweater or something so that you look good and it makes them feel like you’re a professional. That’s really important to do. 7. And the last tip, bring that pop up reflector, that black/white reflector. Because you can throw that up and get a shot on a black background or a white background. That will help you have some background choices.
I try to do environmental portraits as much as I can. I just let the background fall way out of focus. But a lot of times people just want something simple. And they want them all to be the same so everyone in the office has the same shot that you put up on their website. They can use it in mailers they send out. So that’s a little easier just to put against a white or a dark background. I prefer white. Dark is a little heavy for this kind of portraiture. I think it’s better with a lighter background, or this kind of tan color that we used from the office wall.
You just have to be resourceful. We’re looking around going, “Yeah, that wall, I’m thinking that is going to be great. I’ll just shoot against that wall.” I’ve got a spot here where the receptionist was working the entire time we were shooting. She’s there answering the phone and going through. But that was just the space we had. It was a very tight office.
So now let’s talk about what to charge. You know, if I’m doing headshots for a company, and I do these periodically, I’m going to charge somewhere in the $2,000 range for my time. And then, $2000 to $3500 depending on the company. I’m going to charge for my assistant somewhere between $300 and $500. I’m then going to charge for a makeup person in that same category of $300 to $500. And then we’re going to charge for each retouched image somewhere around $75 an image. That’s just kind of a general rule on what we charge. But in this case, I wasn’t there all day. It was just a short shoot. I’m going to come in and shoot and leave. I would not generally use an assistant. I would try to shoot this on my own. Which means I’m going to try to get this in the $300 to $500 range. Probably the most I’m going to be able to charge, if I’m going to shoot a single person is $300. That’s not a bad deal. But if I’m going to shoot a group of people like three or four people, and I’m going to be there for a couple hours, then $500 at the least. If I’m going over two and a half hours then I’m going to charge significantly more like $1200 for half a day and $2000 to $2500 for that full day.
So there’s a quick look at what to charge when you’re doing these kind of commercial portraits. I think it’s a great market to look at, these kind of working professionals. They all need pictures for advertising and for their website. There’s so many things they need these for. It’s a great place to go out and to look and to market to. Because they do need photography on a very regular basis.
So I hope you learned something from this. I hope you got some great tips and tricks. Now go out and light your own portraits and make some money in that commercial photography world in the corporate or professional portraits. So keep those cameras rollin’ and keep on clickin’.
Certain instruments carry certain personality traits. Bass players in general, and I mean, I’m generalizing here and of course being biased. As always, you know, like the smooth cool guy, you know, he’s like the Ninja Assassin. We know we can take care of business. Well, Baja Mundo was an imaginary trip that I did. That’s Bajo meaning base and Mundo, world. The concept of the whole project was, what would it be like if I took my base and a backpack and I go anywhere. There’s different influences from Brazil to Puerto Rico to Cuba to right here in the United States. And all the songs will carry their own flavor representing the title. And it was funny because the title was the first thing that came to mind. And the whole concept of recording the music was that concept and lineup – Bajo Mundo. For all my travel needs, instruments, gear, computers, anything that I need to do. I know it’s going to be safe when I got it in an SKB case.