


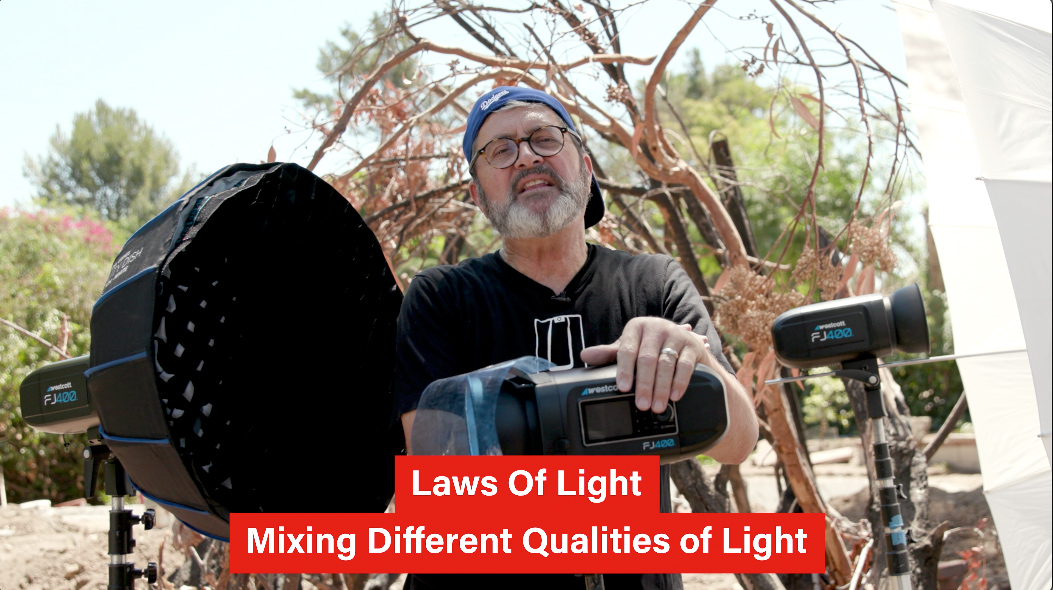
Hi, this Jay P. Morgan. Today on the Laws of Light I want to talk about different qualities of light, mixing different qualities of light in the same image. We talk so often about feathering and cutting and augmenting light, but rarely do we talk about the fact that sometimes you need two or three different qualities of light in the same image. And it gives the image depth. It gives it interest. It helps define the things we want the audience to see. It really helps us to communicate if we use different qualities of light in the same shot.

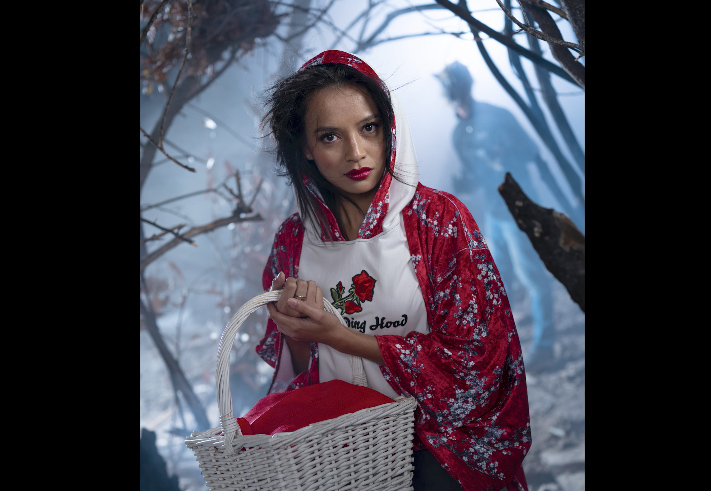
The shot we did last night was Little Red Riding Hoodie. Joe did a great job with that outfit. I thought it was a fabulous image. 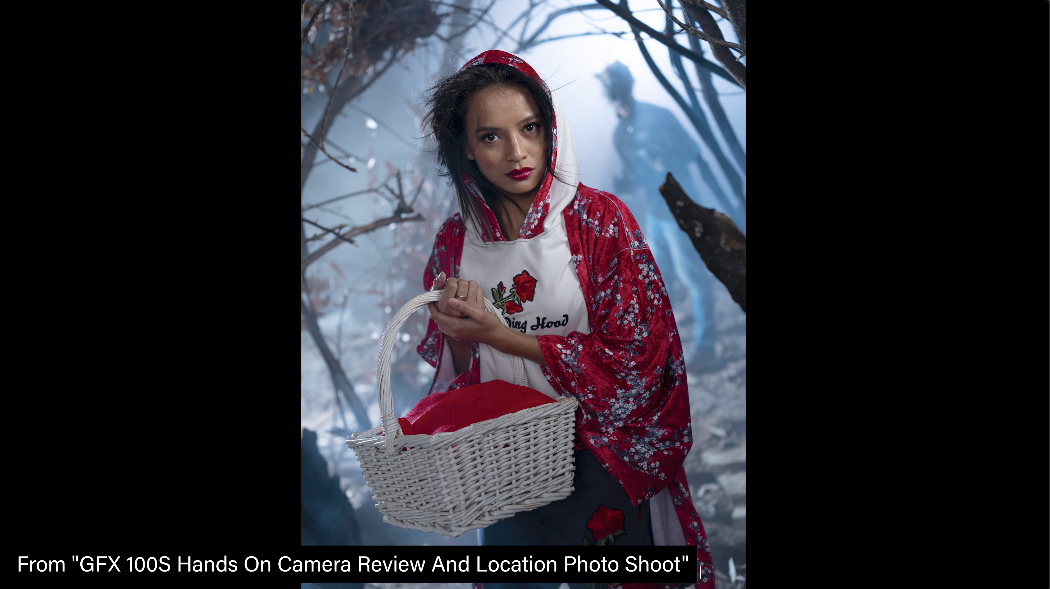

I want to talk about the different qualities of light that we used to make that image. This is not a sponsored video, we just happen to be using all of these things from this one company. But it’s not sponsored. It’s just the company we happen to be using things from, Westcott.
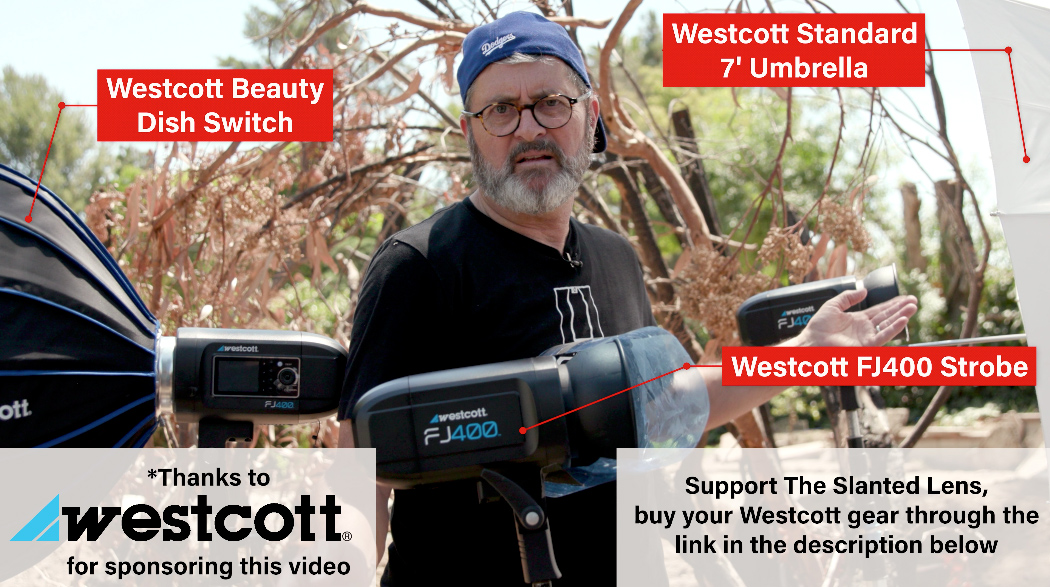

First off, the first light that I set was a hard back light. This is a hard directional light. (Westcott FJ400) The reason I set that up on camera left and on camera right was that I wanted to define everything in the image. It gives me hard lines on all the sticks. It gives me a hard line on her. It separates her from the background.
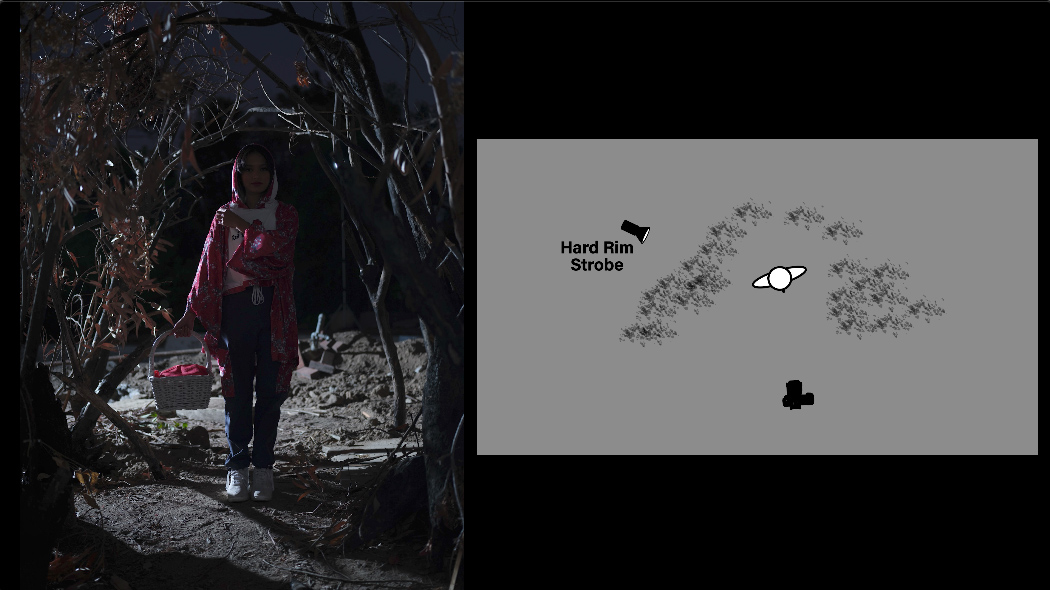

It gives me depth. It kind of lays the canvas for the entire image because it draws lines on everything as it moves forward. But it doesn’t destroy the mood of the image because the light is coming from behind. A lot of times what makes a difference, when you’re setting up an image, is how you balance the exposure of each one of your lights. Most people just throw them up and whatever exposure they are, they go for it. I put that one up and it was too bright. I dialed it down. 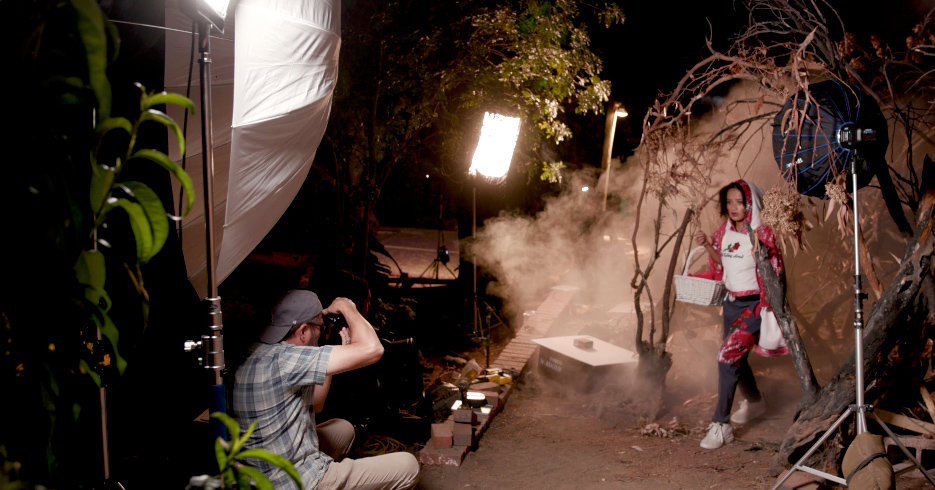

Then as I got to shooting, I realized it’s just all over the ground. And it’s revealing itself too much. So we put in a flag to cut that hard light off from the ground, the dirt at her feet. And that made it look a lot more subtle. Still doing its job, but it was a lot more subtle looking in the image.
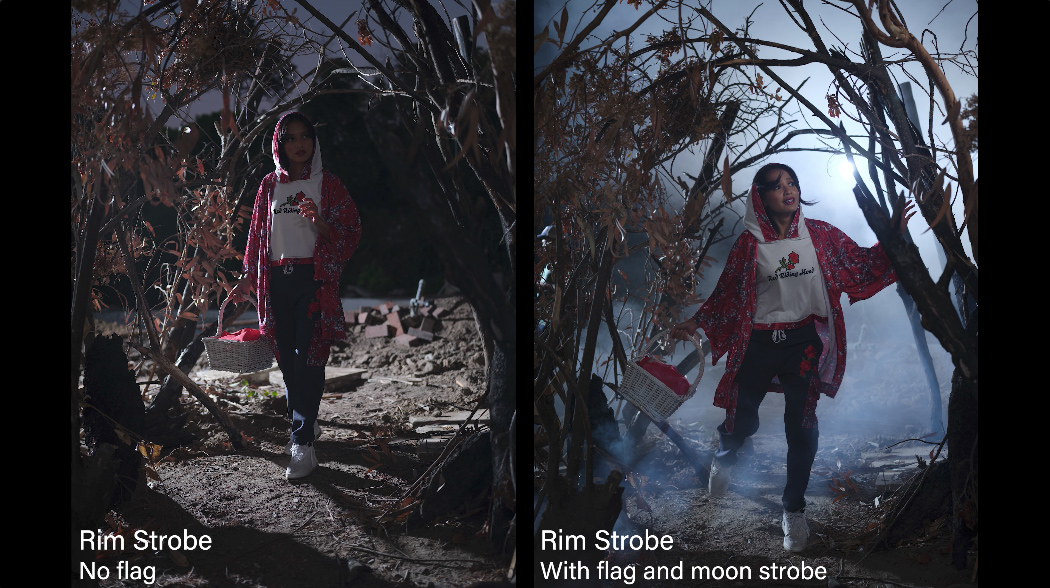

We did add a light in the background to just be like a moon light. (Westcott FJ400) But that was really kind of an effect light. It was dialed down. It didn’t really light our scene. It just gave us a circle of light.
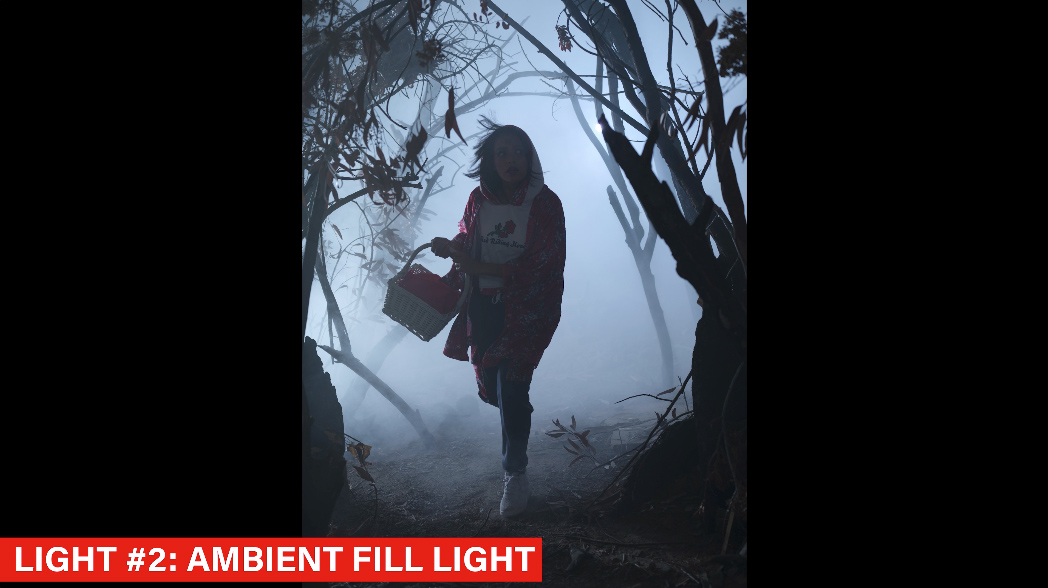

The next light that I set up though is, and I love this concept. Every time we photograph, whether it’s with ambient light or a strobe light, there’s what’s called the floor.
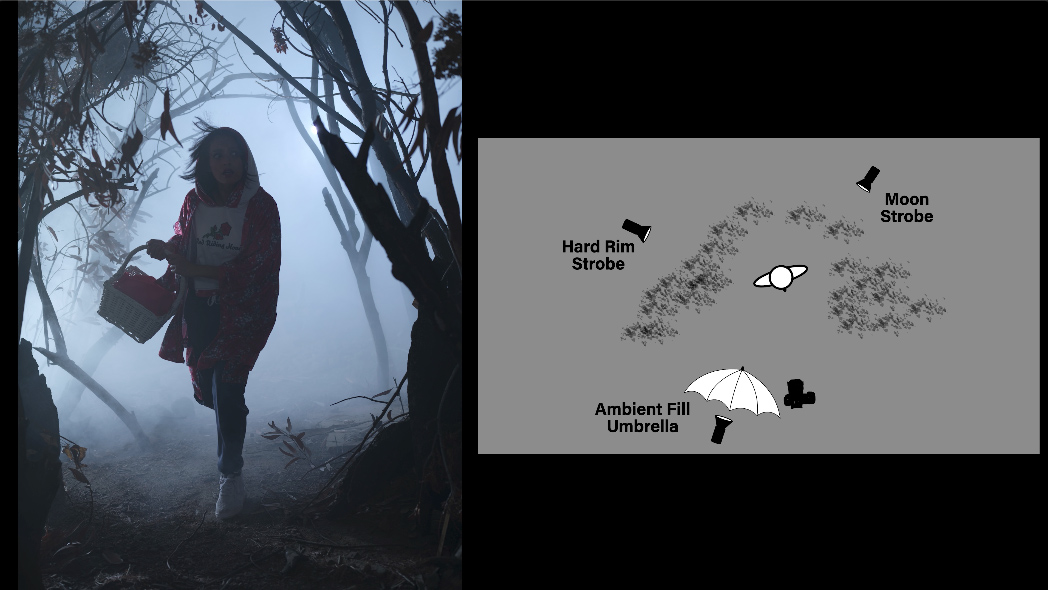

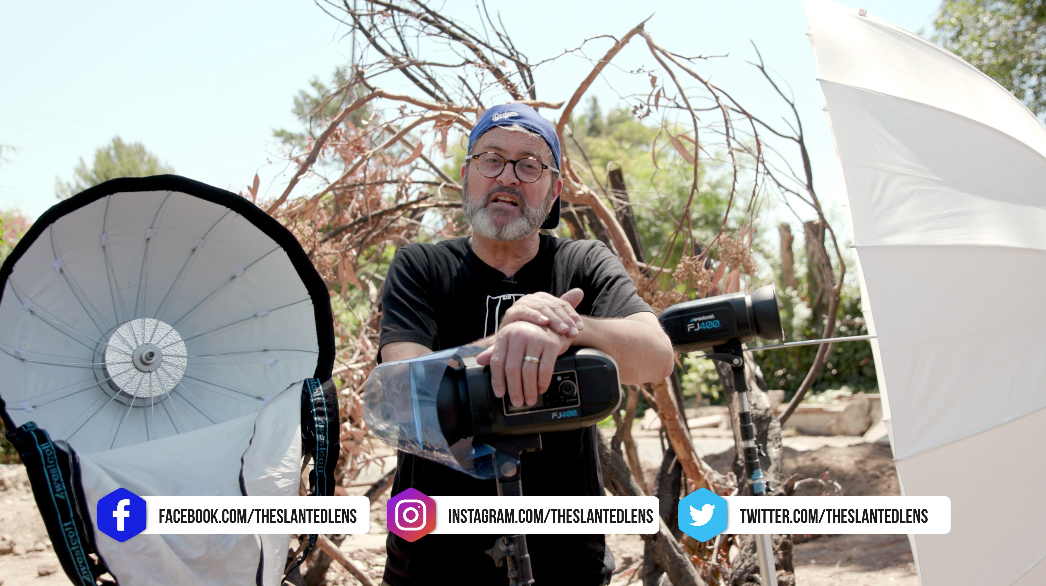
Floor is just a very, very soft, ambient light that brings the entire exposure up so we can see into the shadow detail. I used a shoot through umbrella. (Westcott Standard 7′ Umbrella) I love shoot through umbrellas. They are large and they are soft. And it just opened up all of the shadows in this image without creating its own shadows. And without making it look like it’s strobe lit.
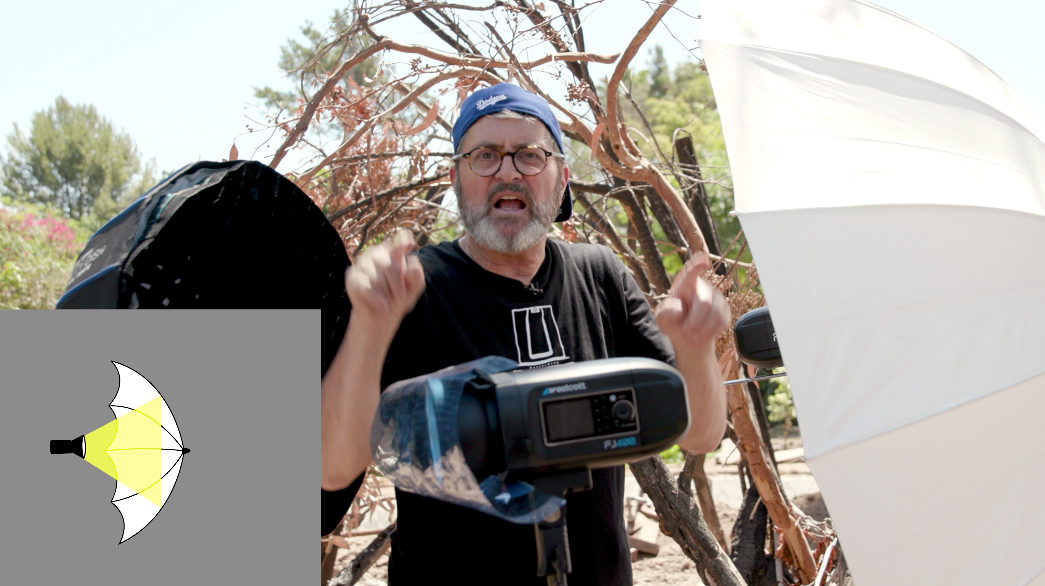
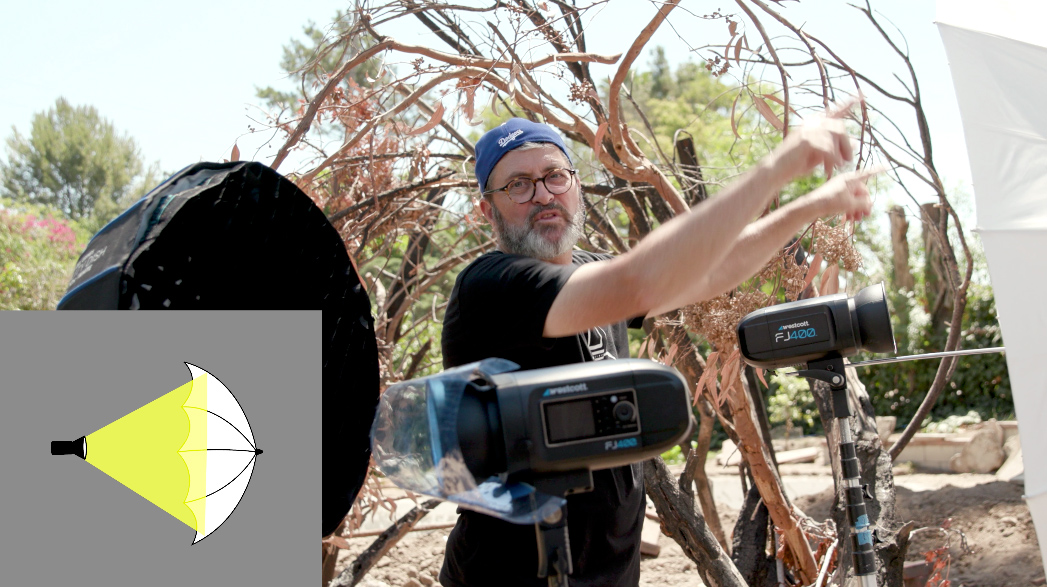


One that thing is very important to understand when you’re using umbrellas is that you can make umbrellas more directional or more soft. If you pull this umbrella in really tight it just puts a little circle of light in your umbrella. And basically it’s made it into a harder, more directional light. But if you push this out as far as you can get it, all the way out to the front. Now this reflector fills that entire umbrella. That entire umbrella becomes a much softer light. So I’ve got a hard backlight. Then right behind the camera, I put this umbrella shooting through the umbrella. And that next exposure, that’s the floor. That’s the ambient light in the image.
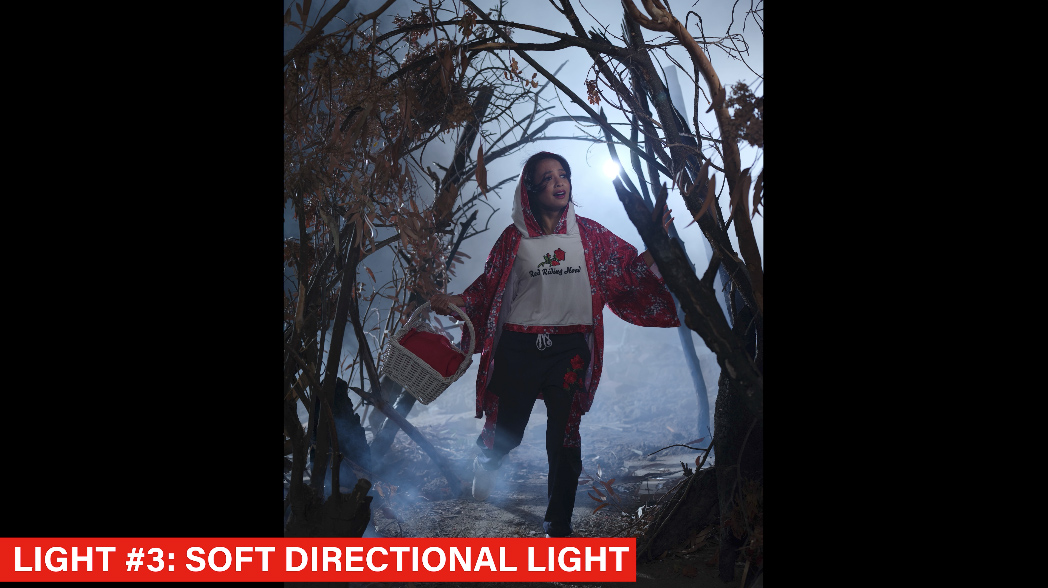
Our third light is a mixture. It’s a soft, but a more directional light. And that’s why I use soft boxes. People ask me all the time, “why don’t you put soft boxes on all of your lights?” Because now they all have the same quality. They all have a soft look.
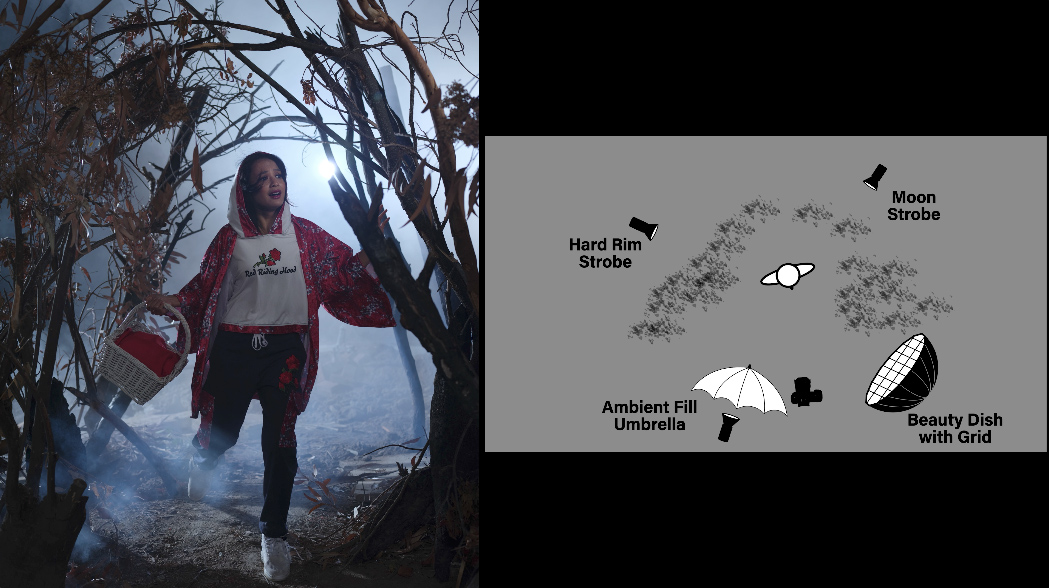

This is a beauty dish. (Westcott Beauty Dish Switch) I do have a grid on it. The reason I have a grid is because I’m going to get this in the sticks. And the area of coverage I want to be very small and just on her face. I want it to fall off on her outfit. So the floor will take care of seeing the outfit. But this will brighten her face and give us a little nicer look at her face.
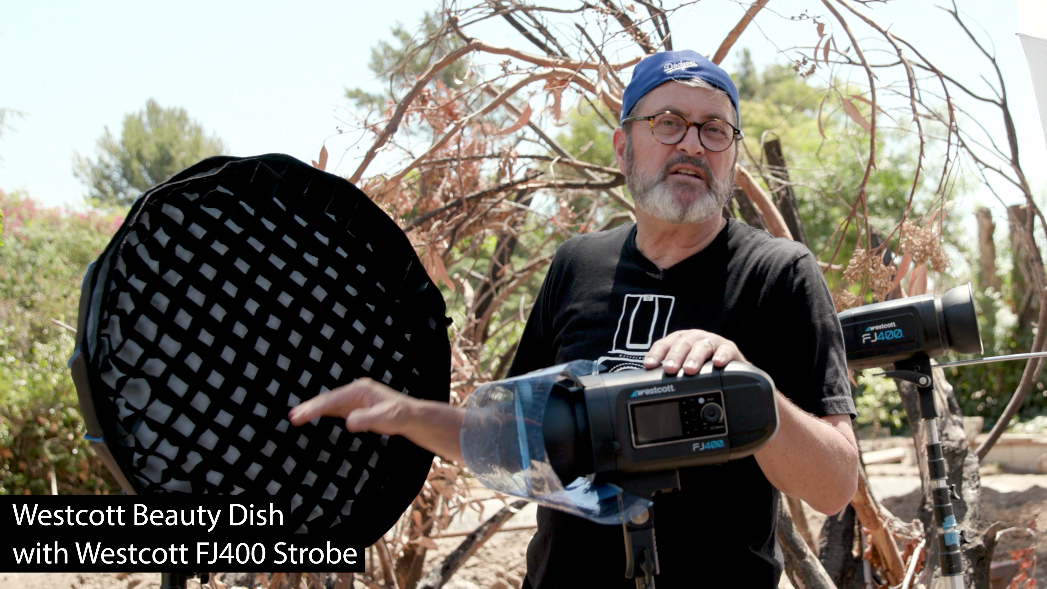

I use beauty dish a lot. And the reason I use it is because inside here we’ve got a disk. 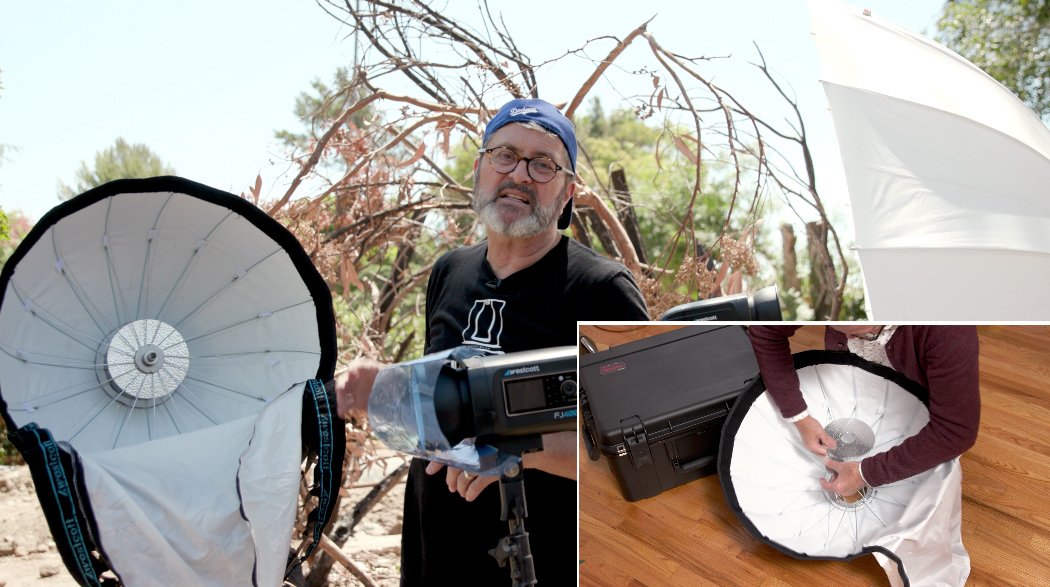
Now that flash tube hits the disk and bounces the light into the beauty dish. And then that soft light comes out the front. It’s not quite as hard as a soft box. A soft box this size is going to be a little harder light because the flash tube is going straight through the front cover.

So there you have a look at different qualities of light. If you want to move your photography to the next level, start changing the quality of lights in each of your images. Mix them up. Use them for different reasons. Use hard light to create texture. Use soft light to make beauty. Use light that kind of mixes those two to give us a look at a face and to chisel it and to make it look defined. So use different qualities of light to make your images look different and to communicate what you want to say about the subject matter, about the scene, about the products or whatever you’re working on.

So there’s a look at mixing qualities of light in the Laws of Light. So keep those cameras rollin’ and keep on clickin’.