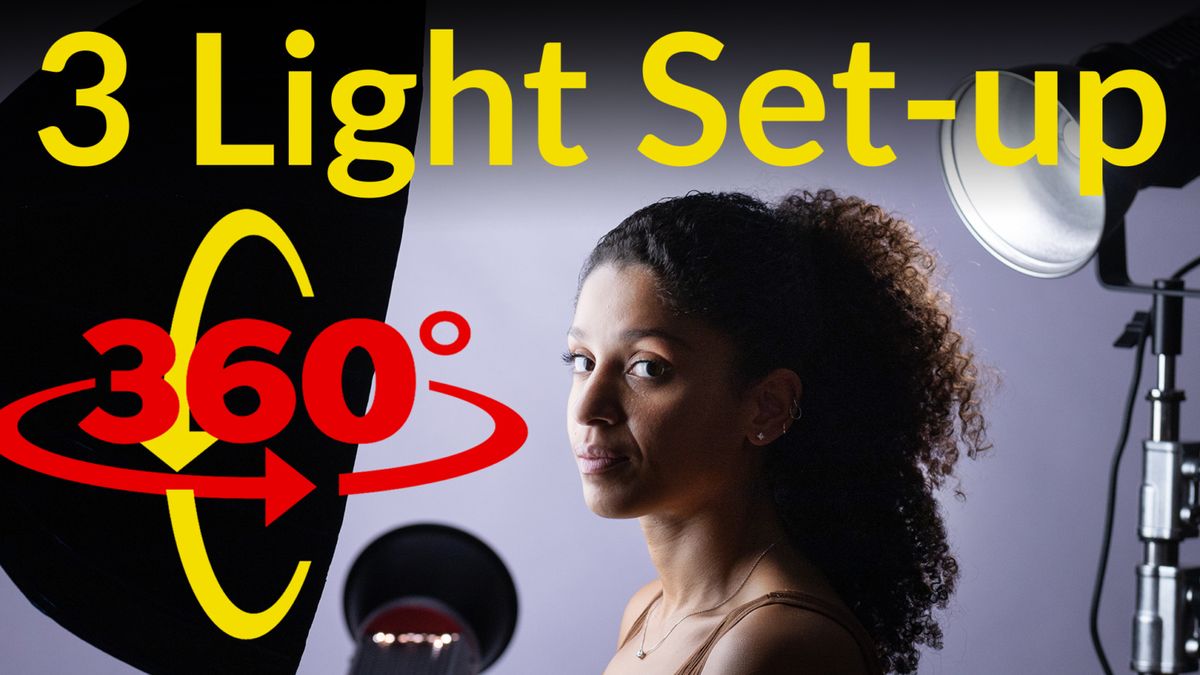
Studio Portrait Lighting – 360 Virtual Interactive Tutorial
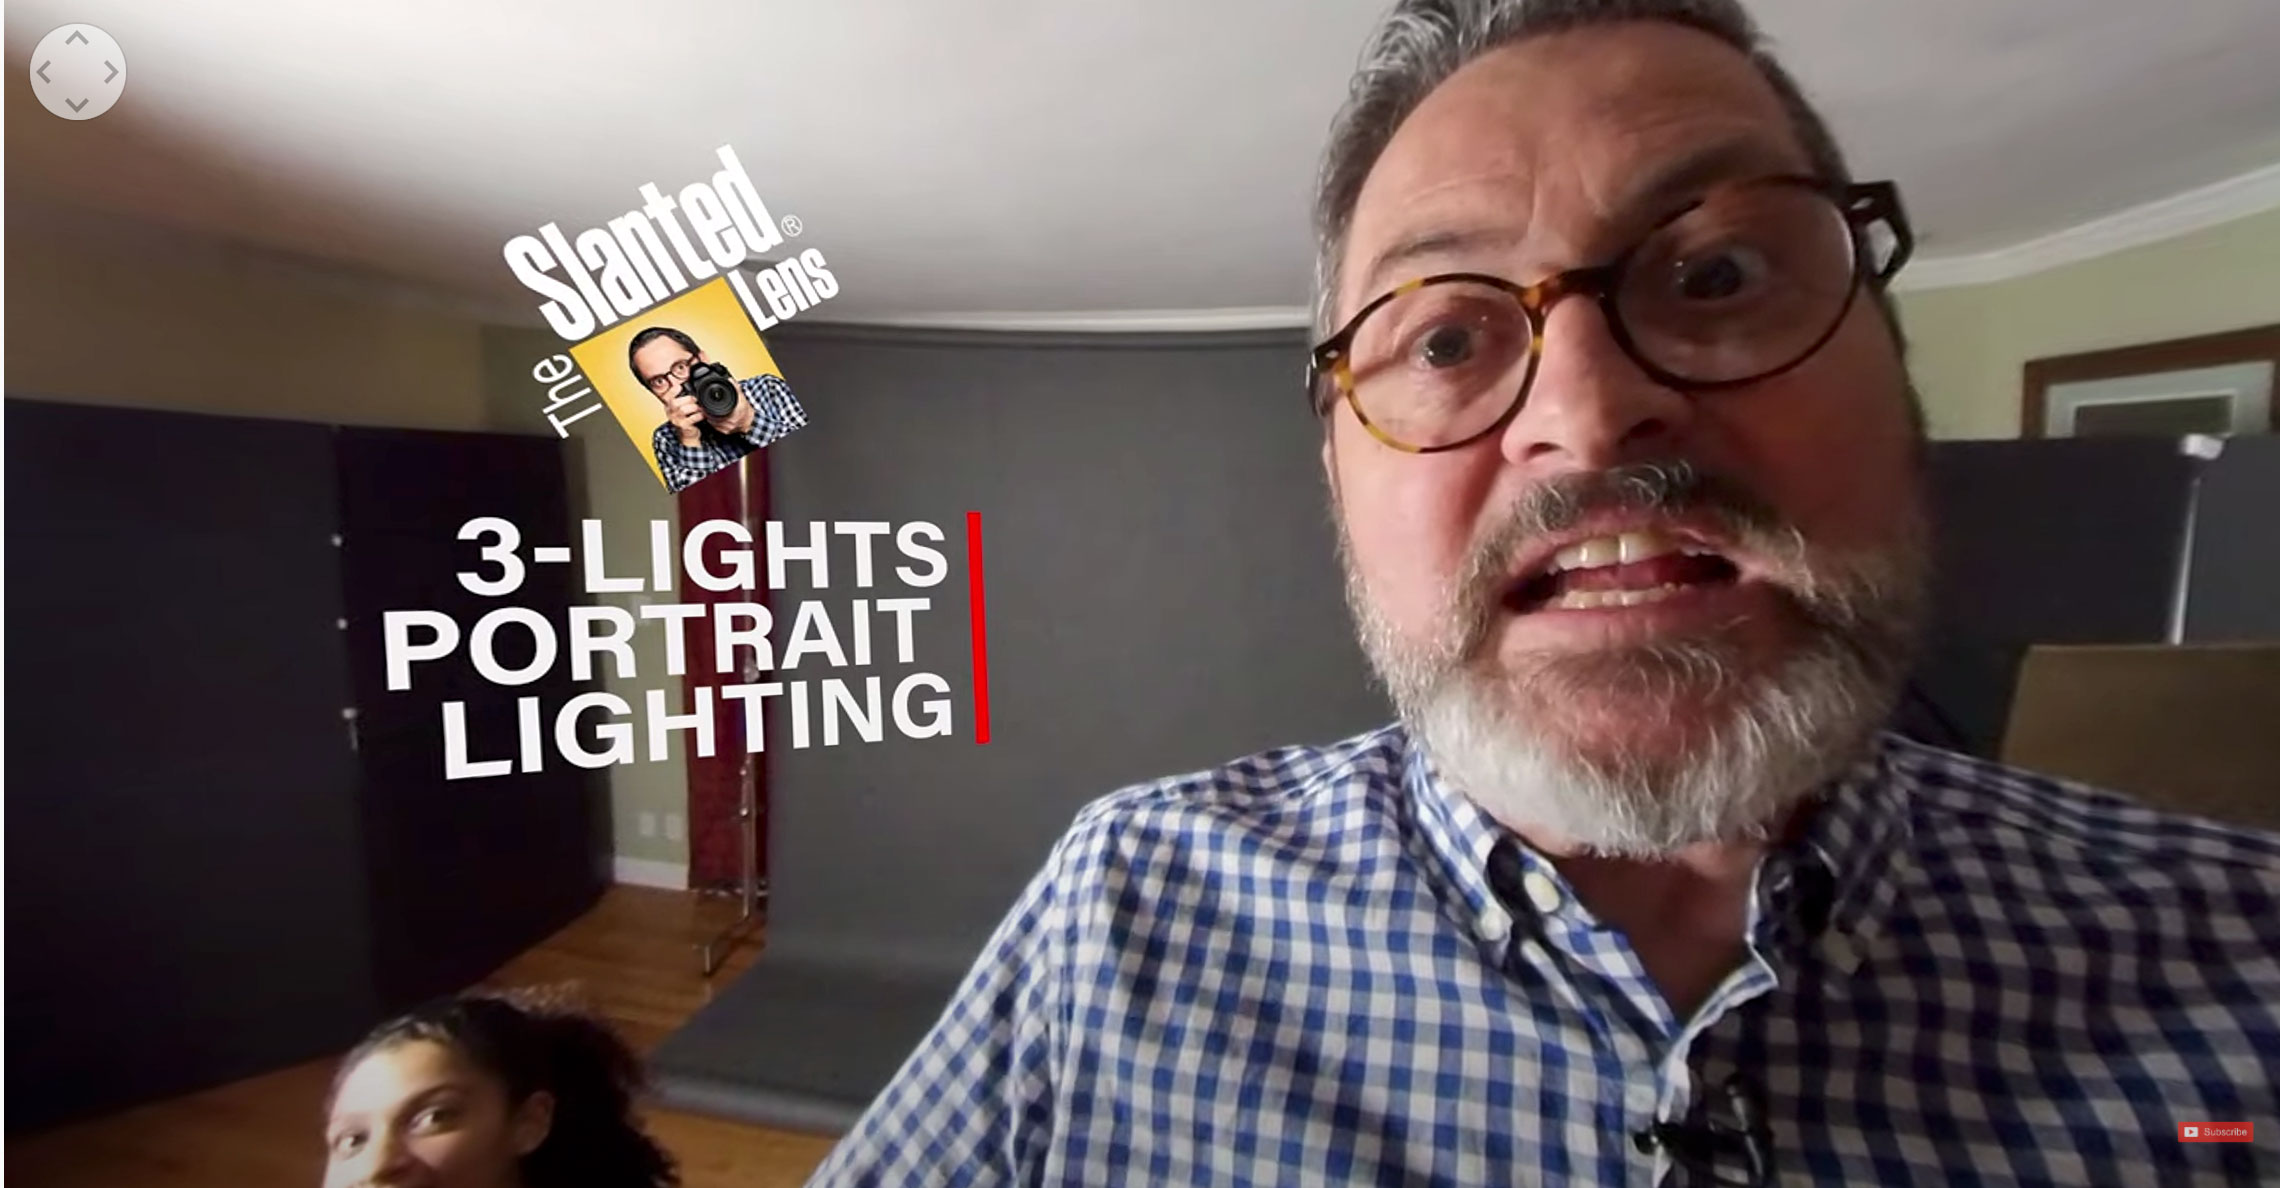
Morgan
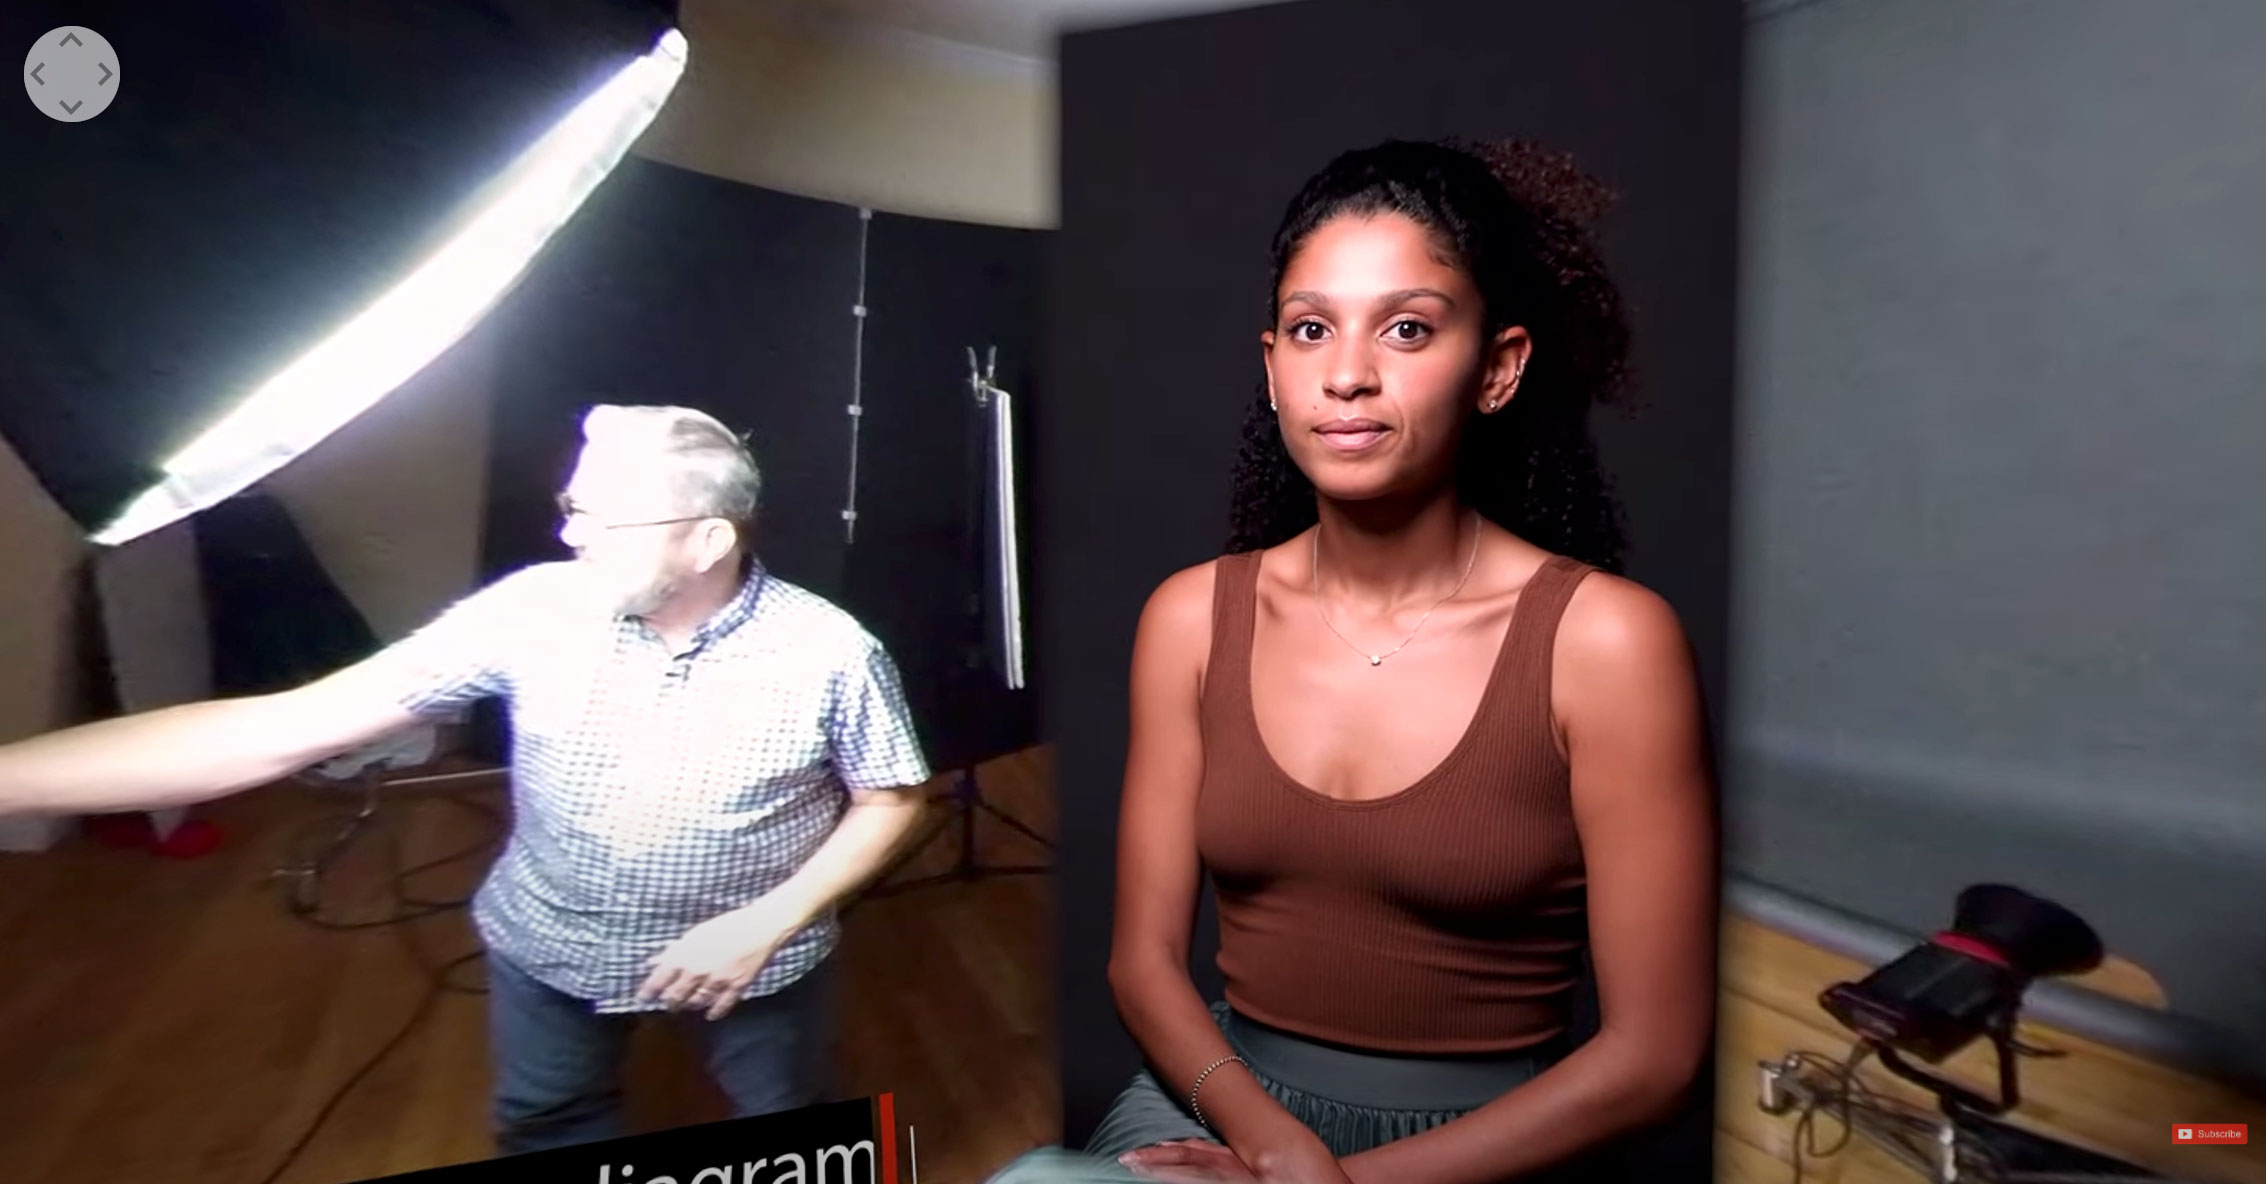
Hi, this is Jay P. Morgan. Welcome to the 360 degree view of lighting here on The Slanted Lens. Take a step with me into this 360 degree view where it’s interactive. You can see exactly where we set each one of our lights. You’ll be able to explore for yourself and see what we’re doing.
Let’s take a look at a one, two and three light setup here on The Slanted Lens. Let’s get to it.
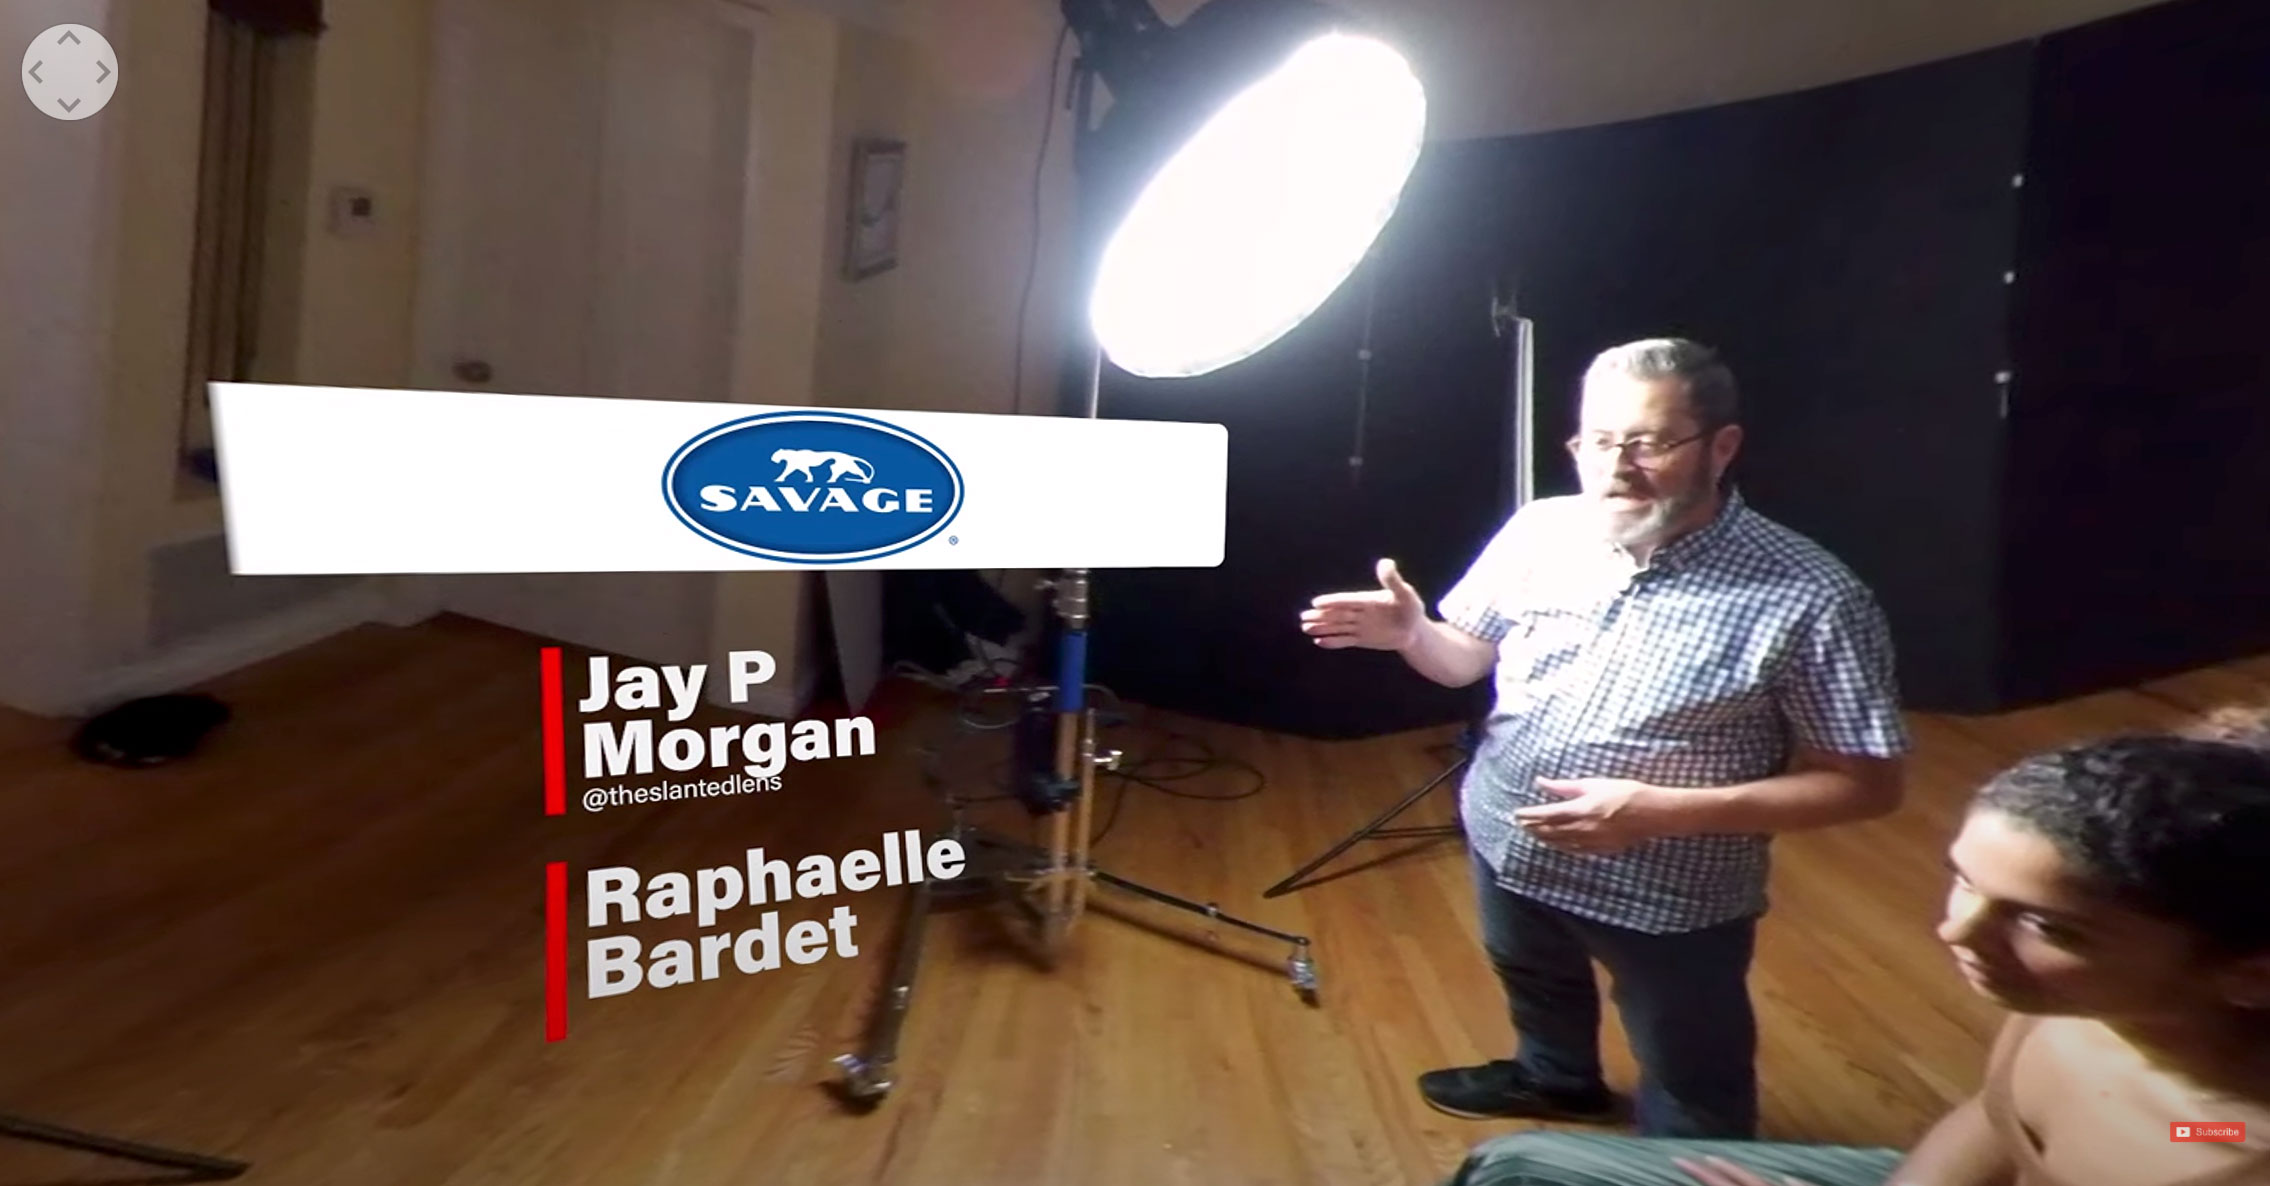
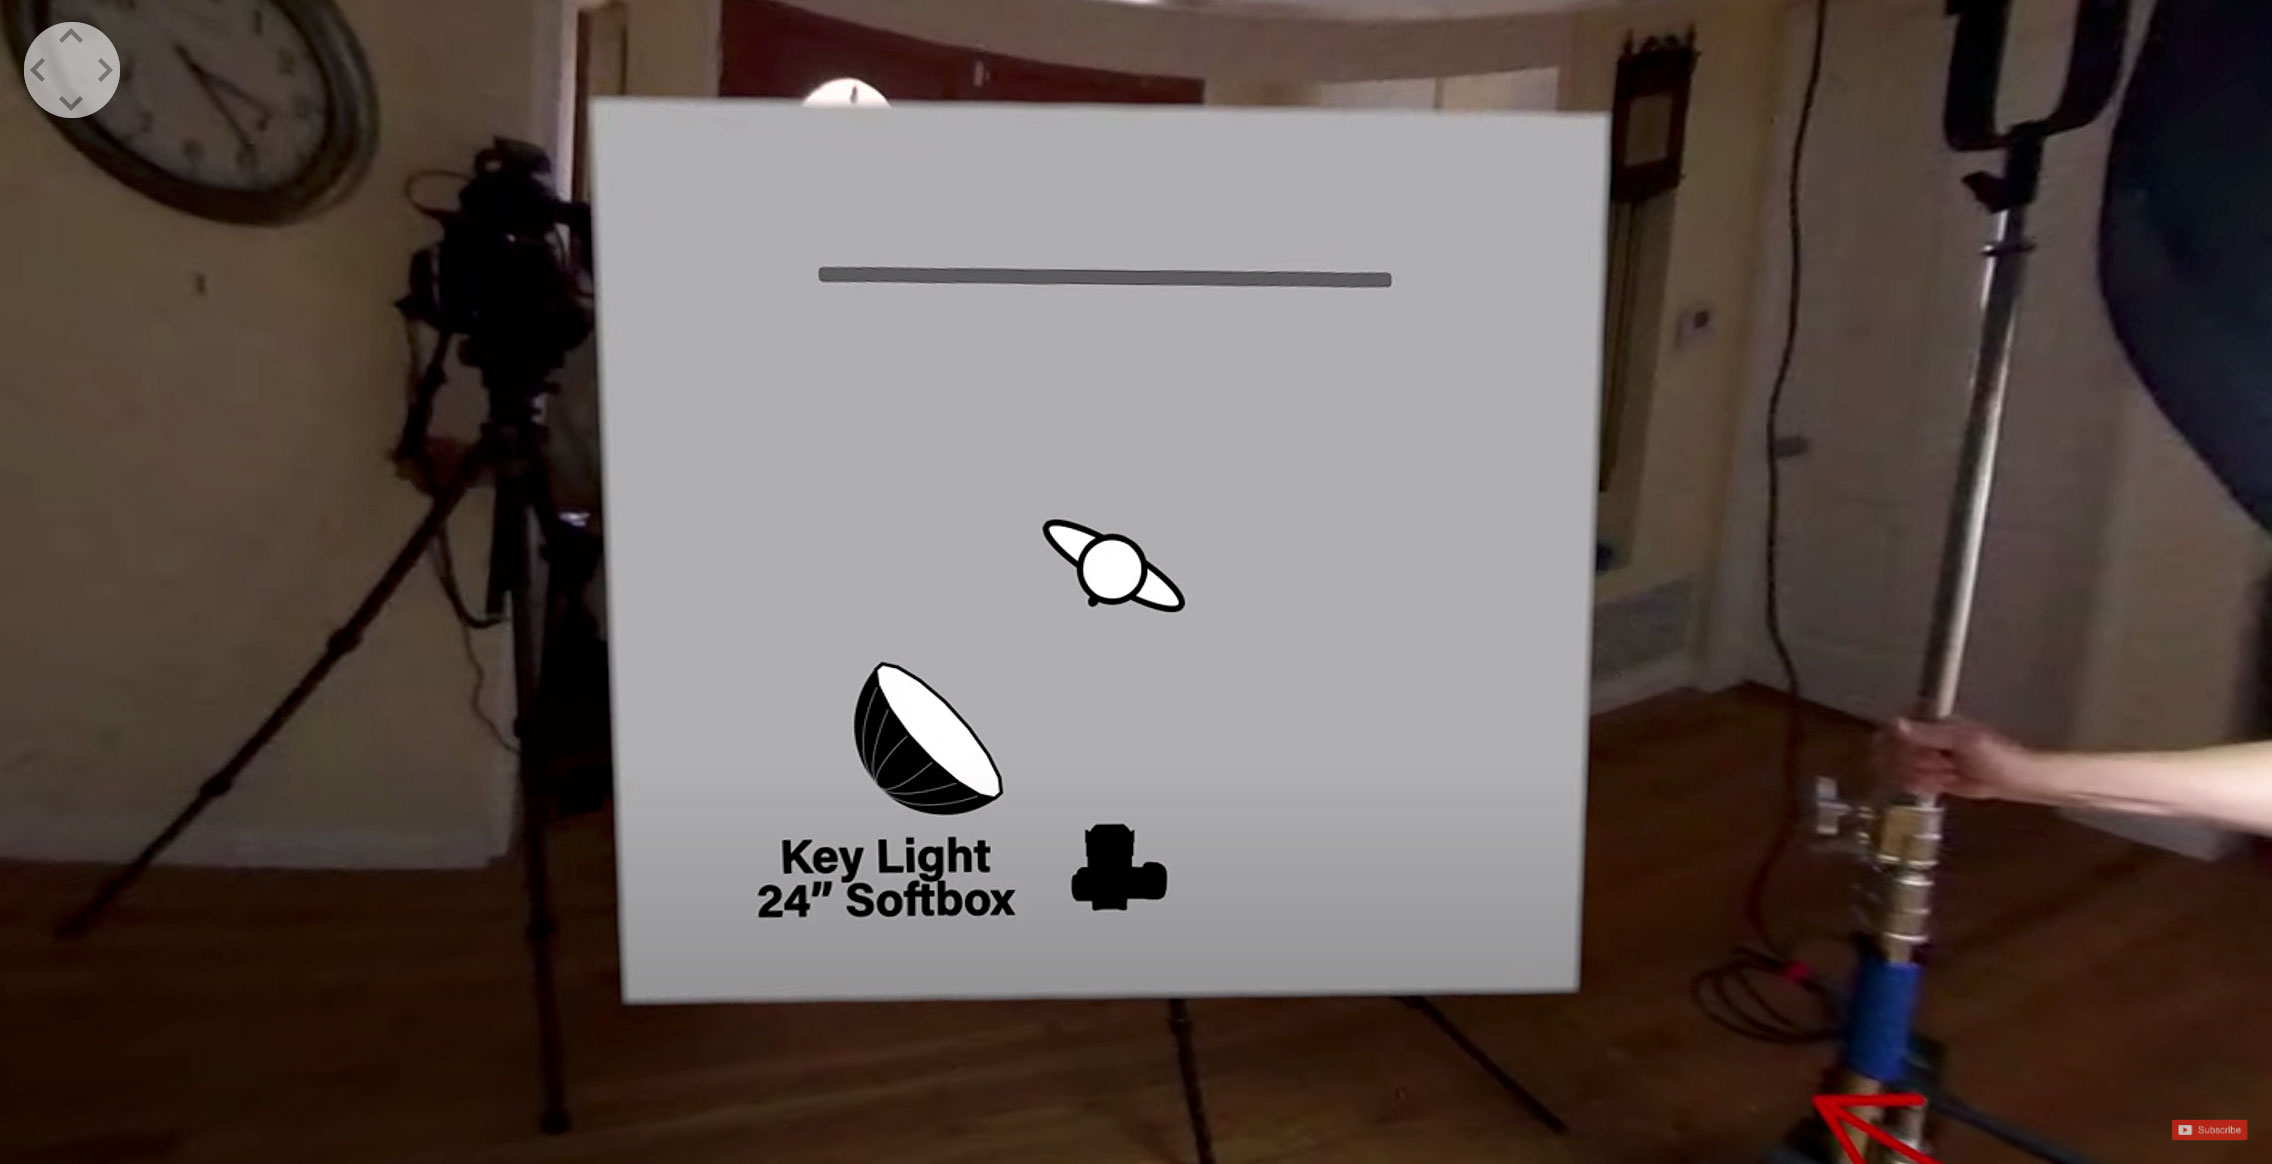
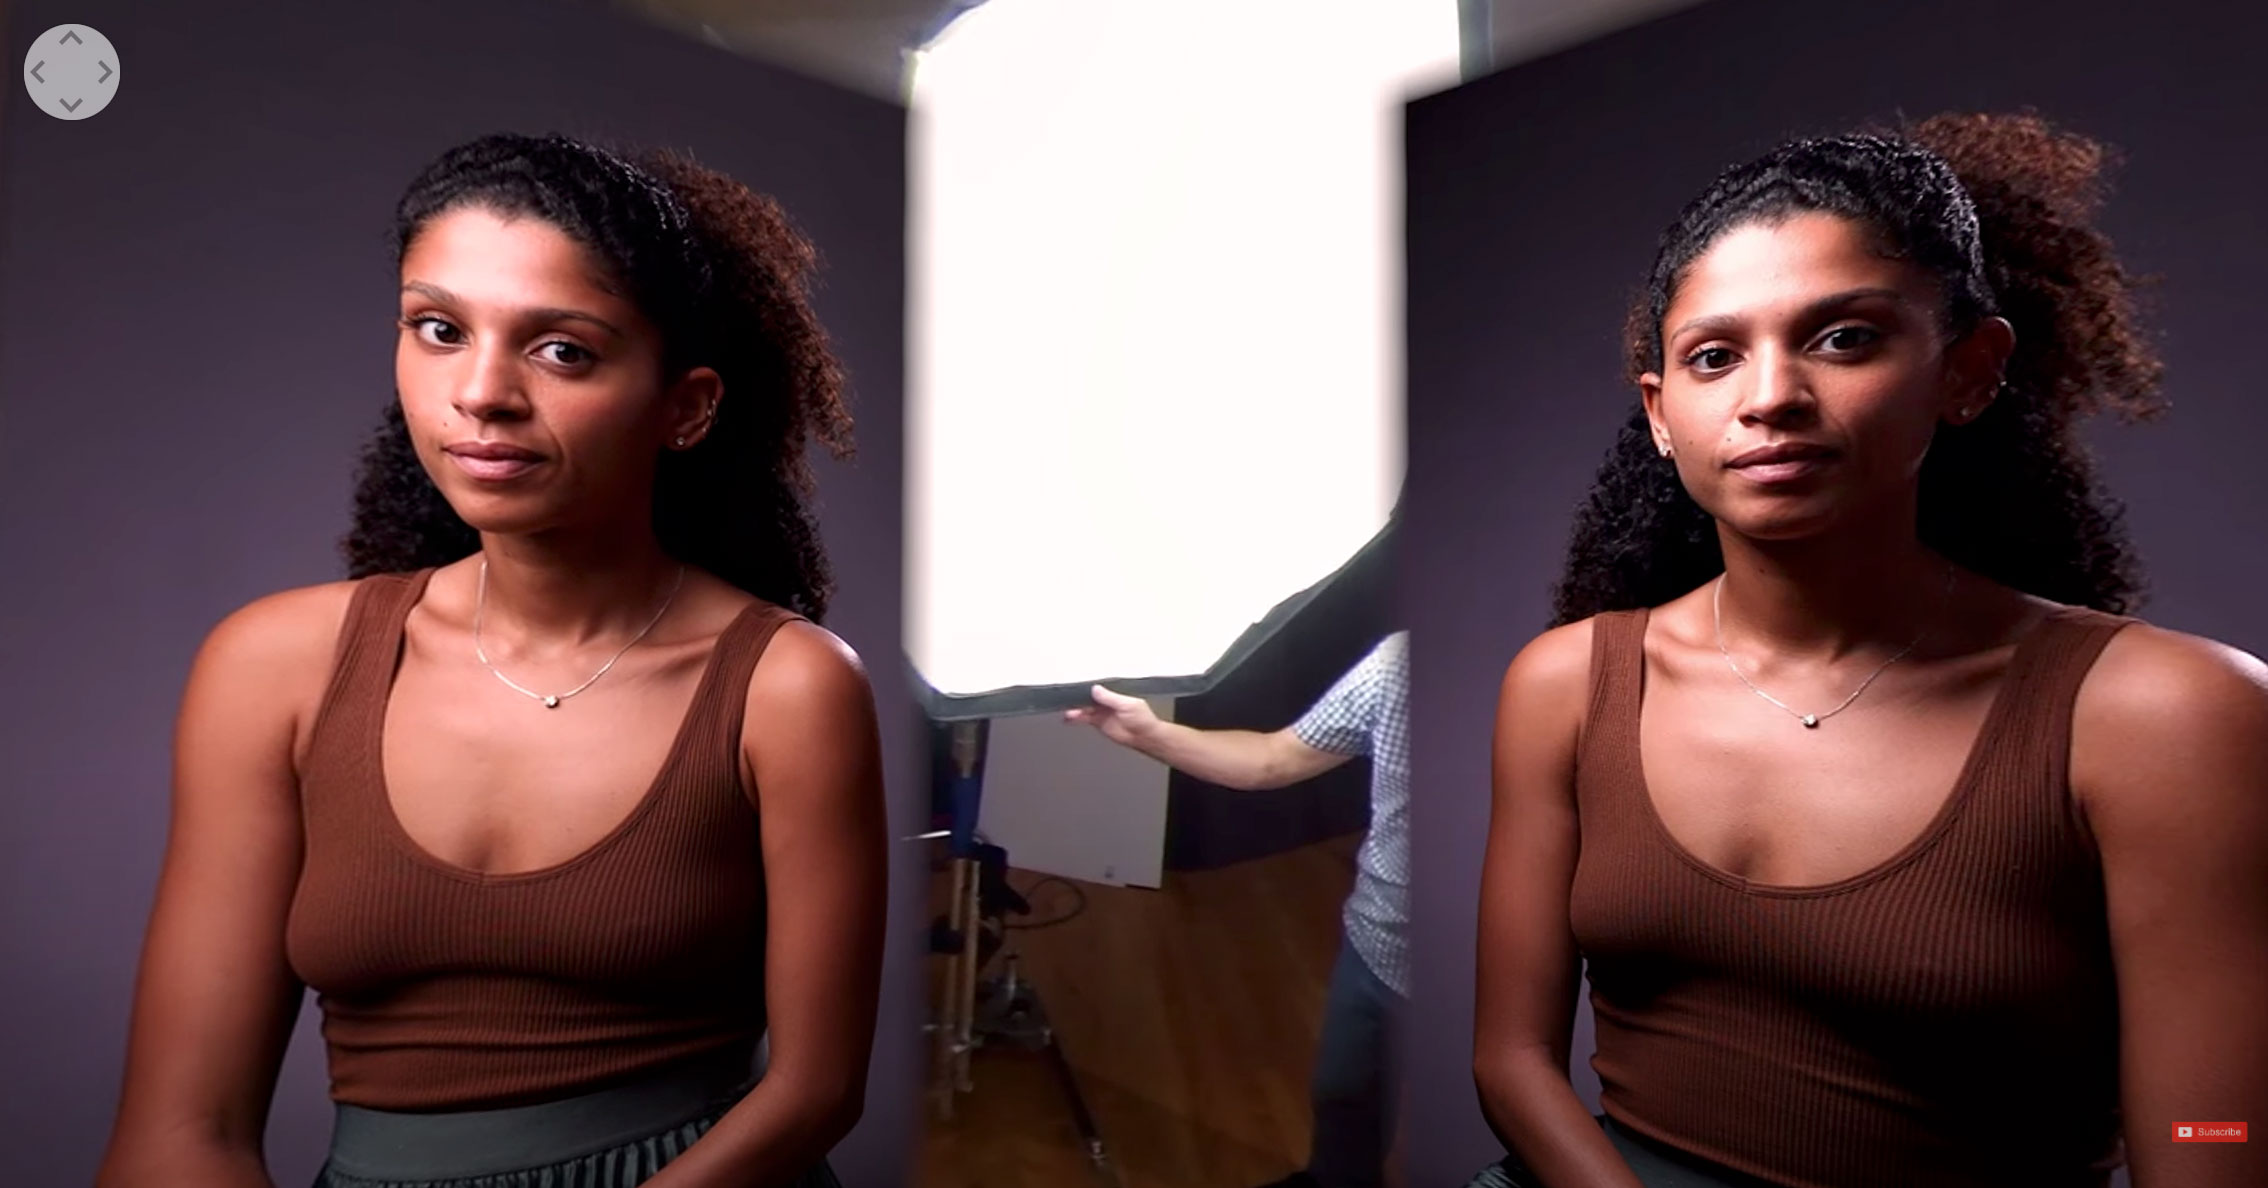
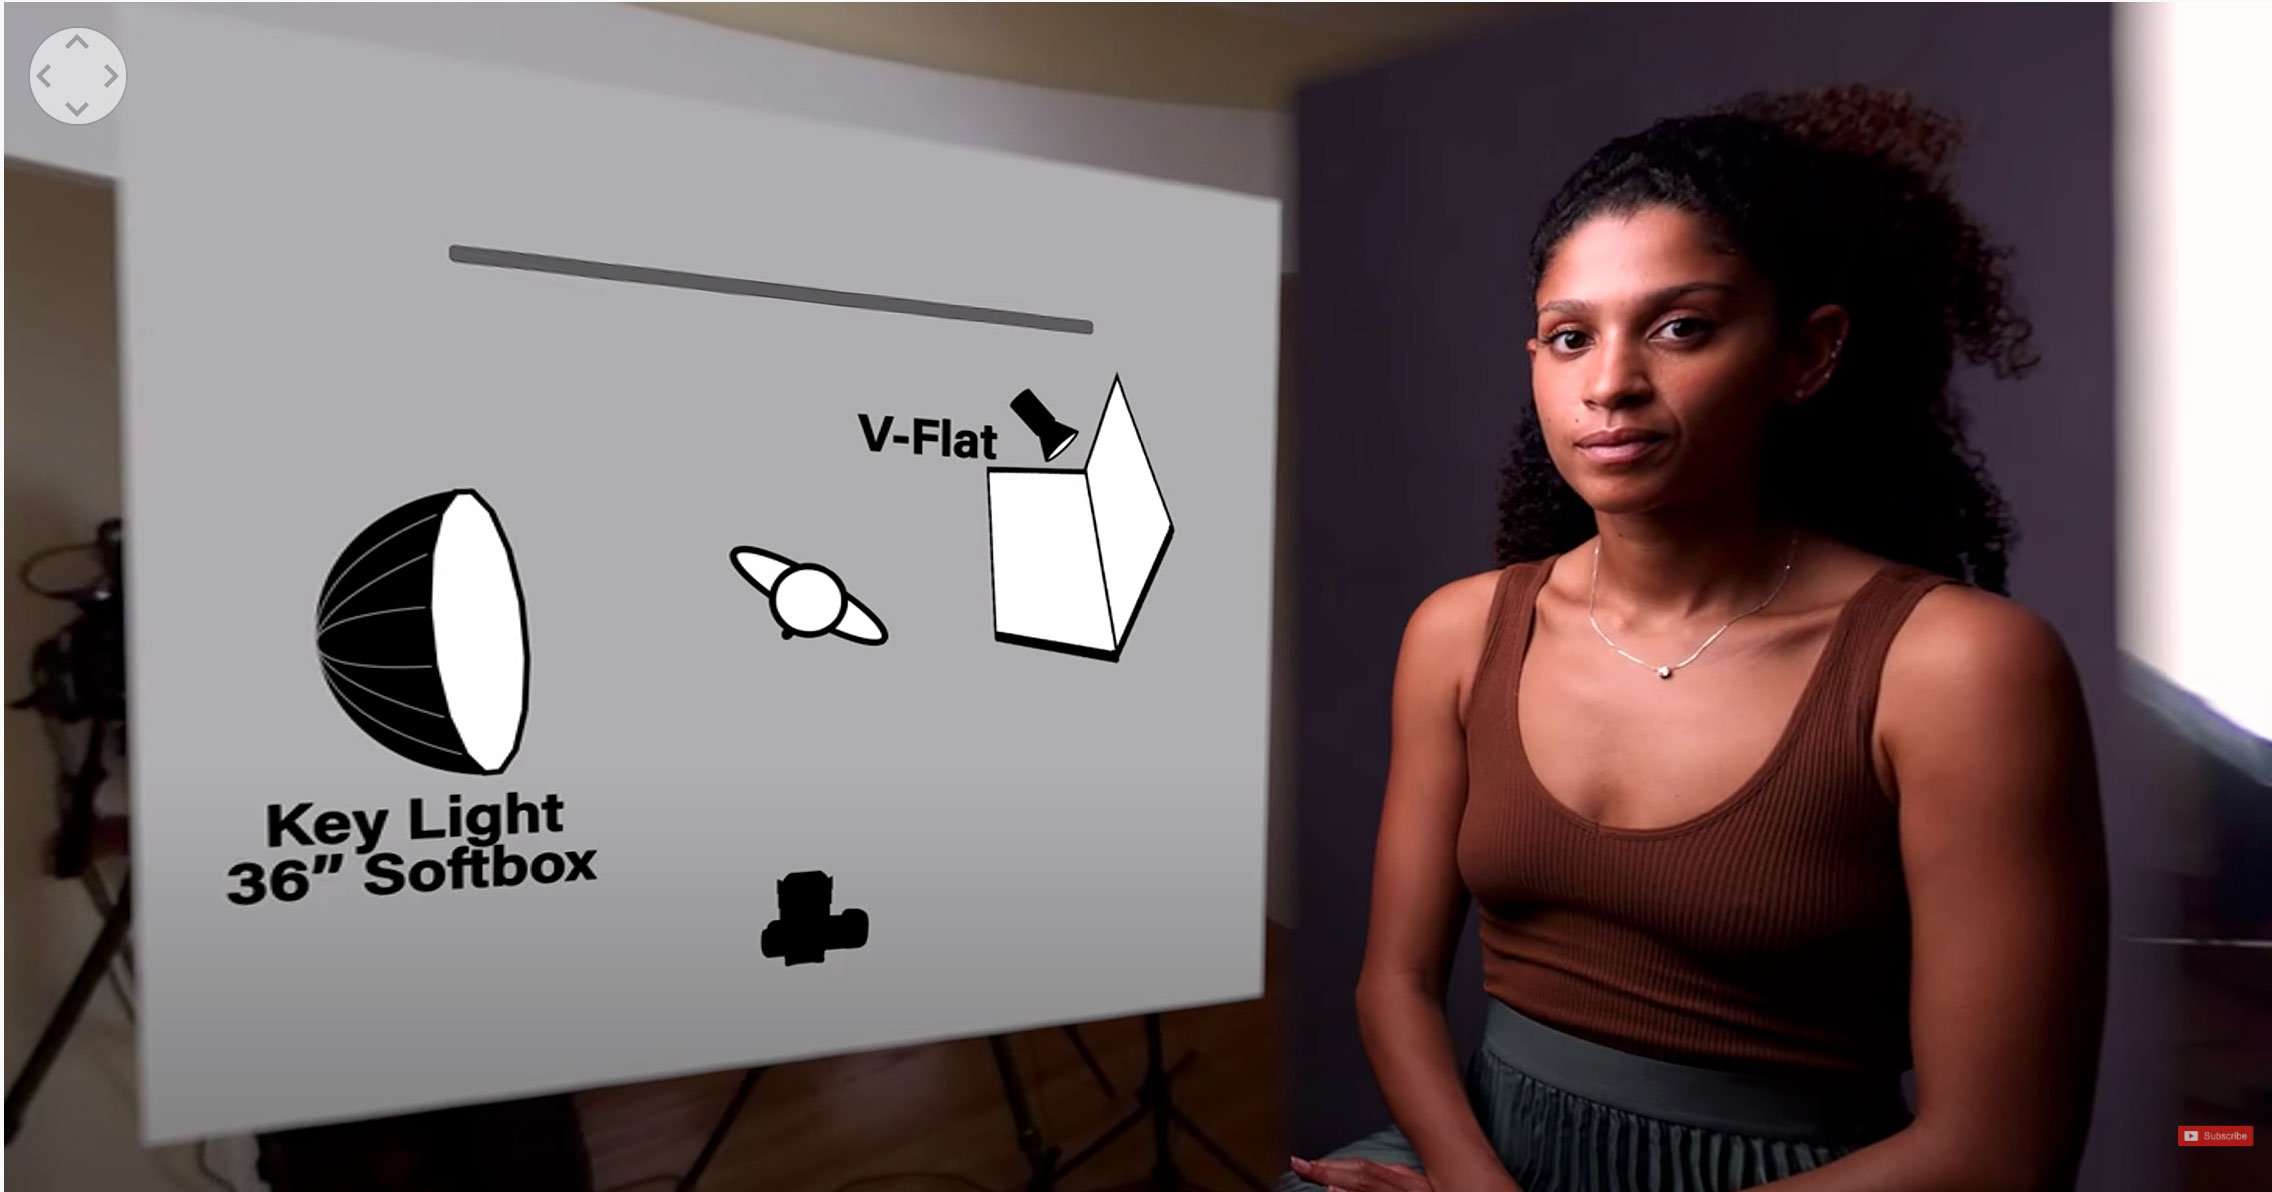
Okay, let’s take a look at our first light in this three light setup. This is the key light position. We learned about this in the last lesson. The first lesson was five portrait lighting positions in that 360 degree view of lighting. So today we’re going to take and build on that. We’re going to set our light in one of those five portrait lighting positions. So check that lesson out if you didn’t get it.
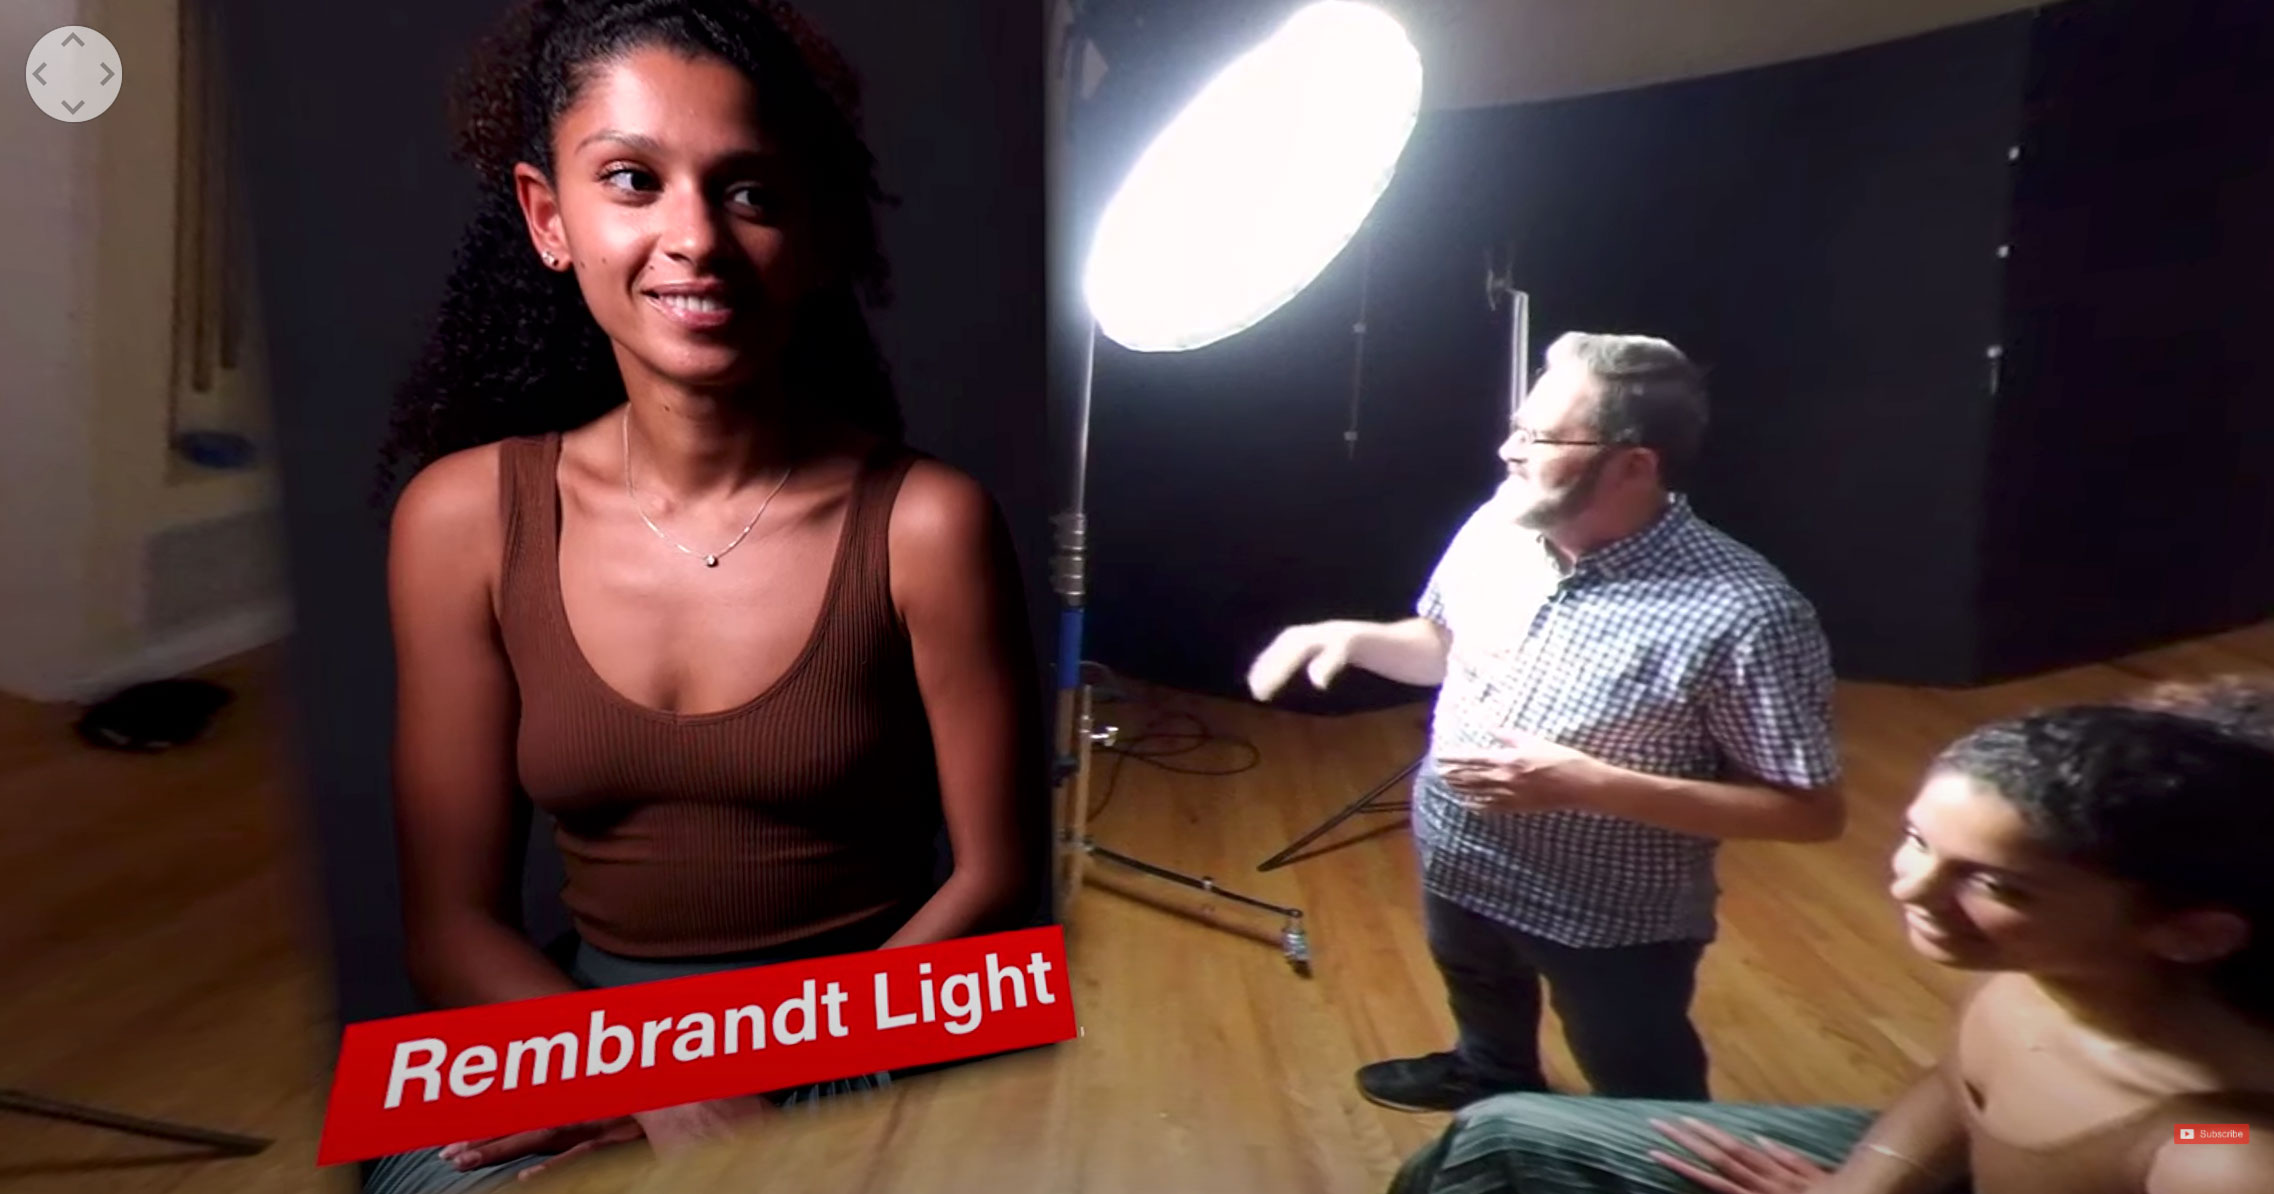
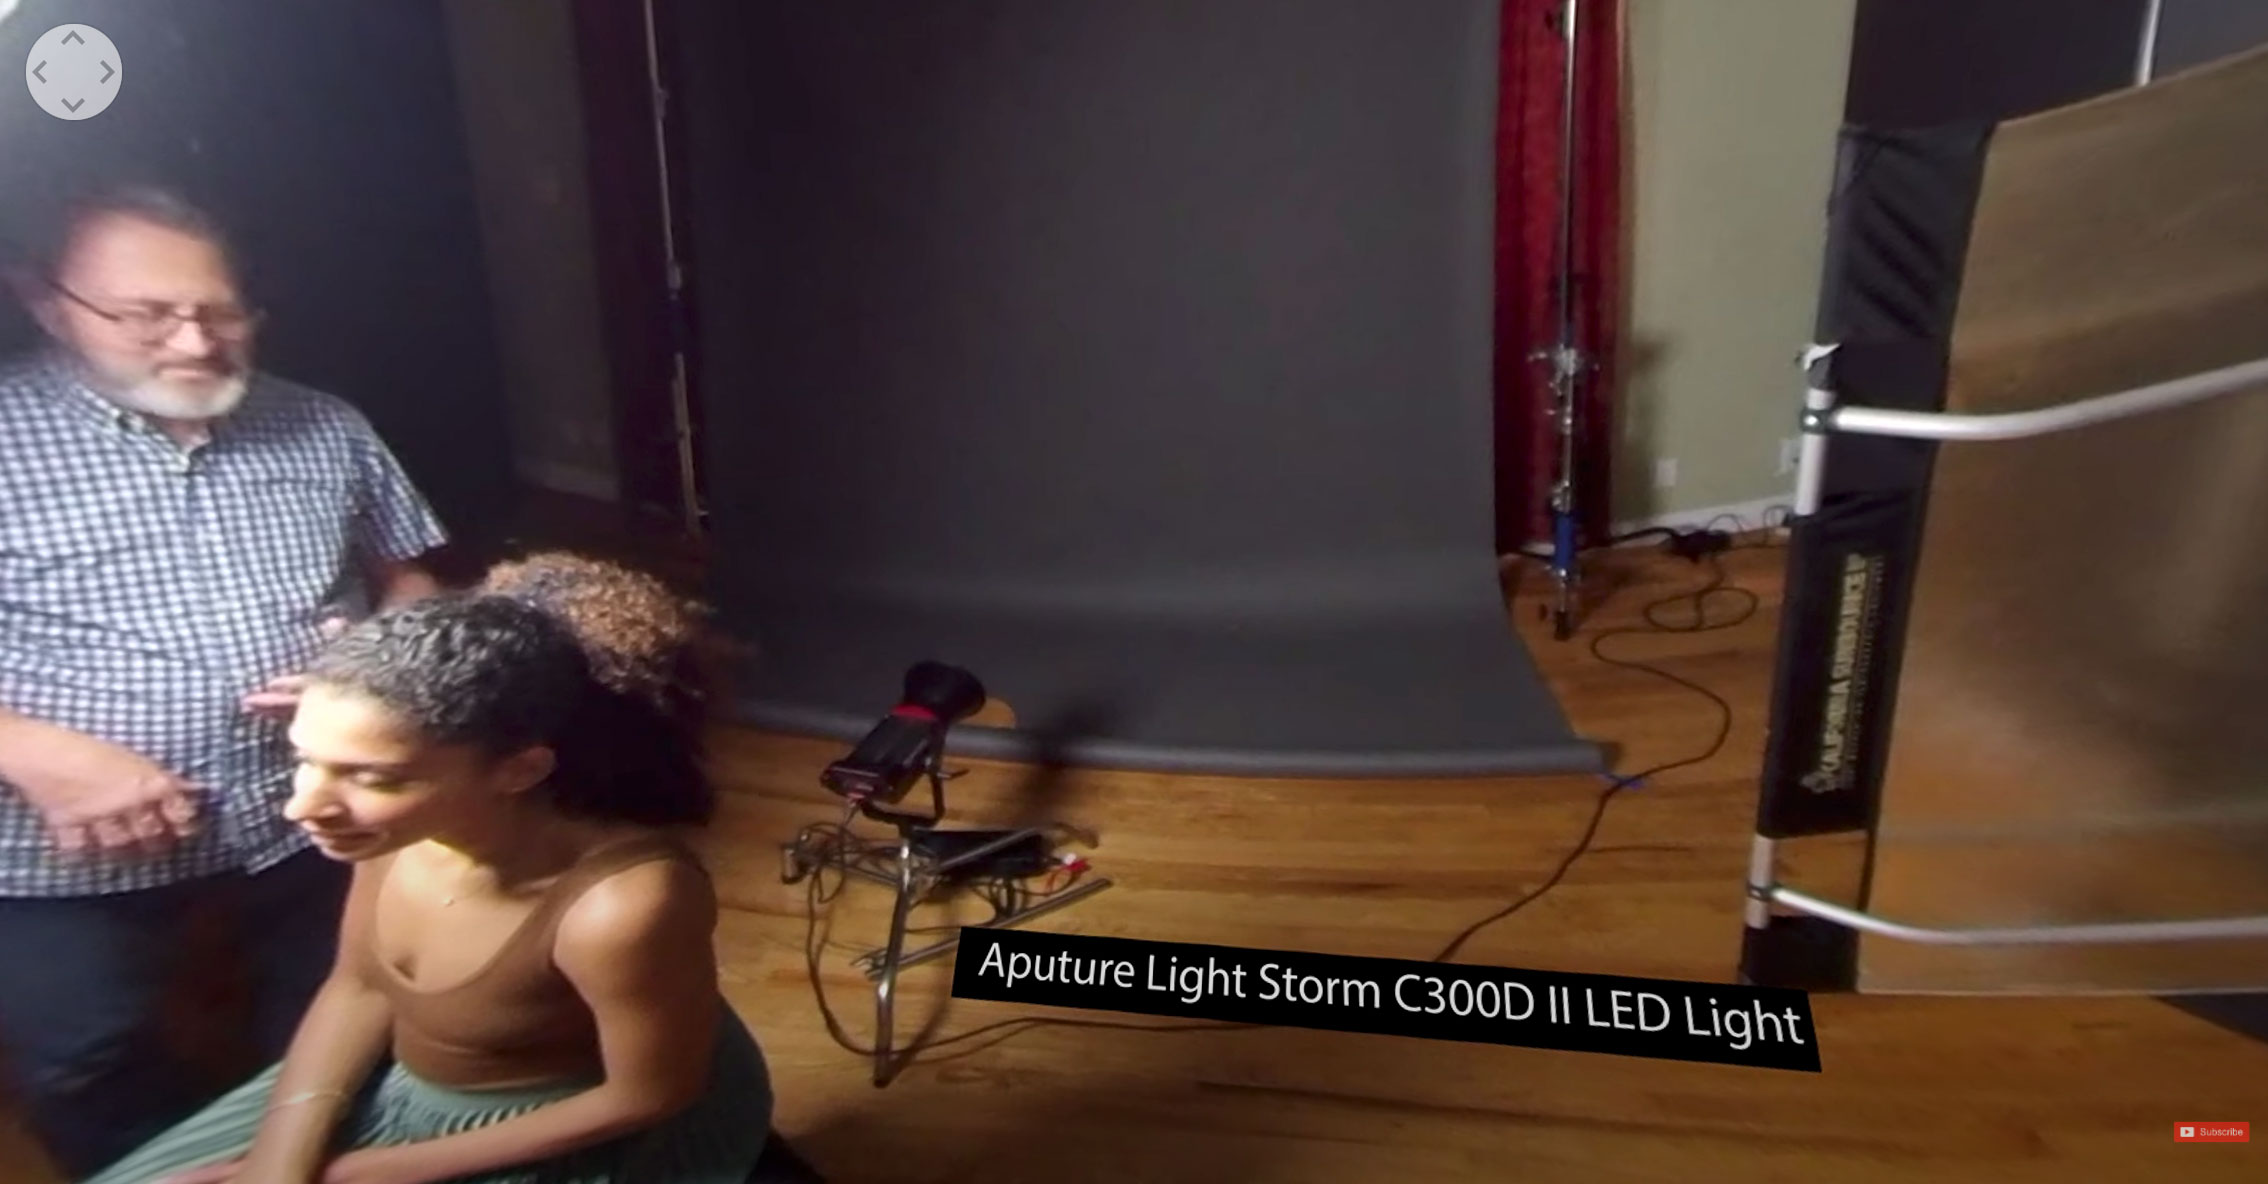
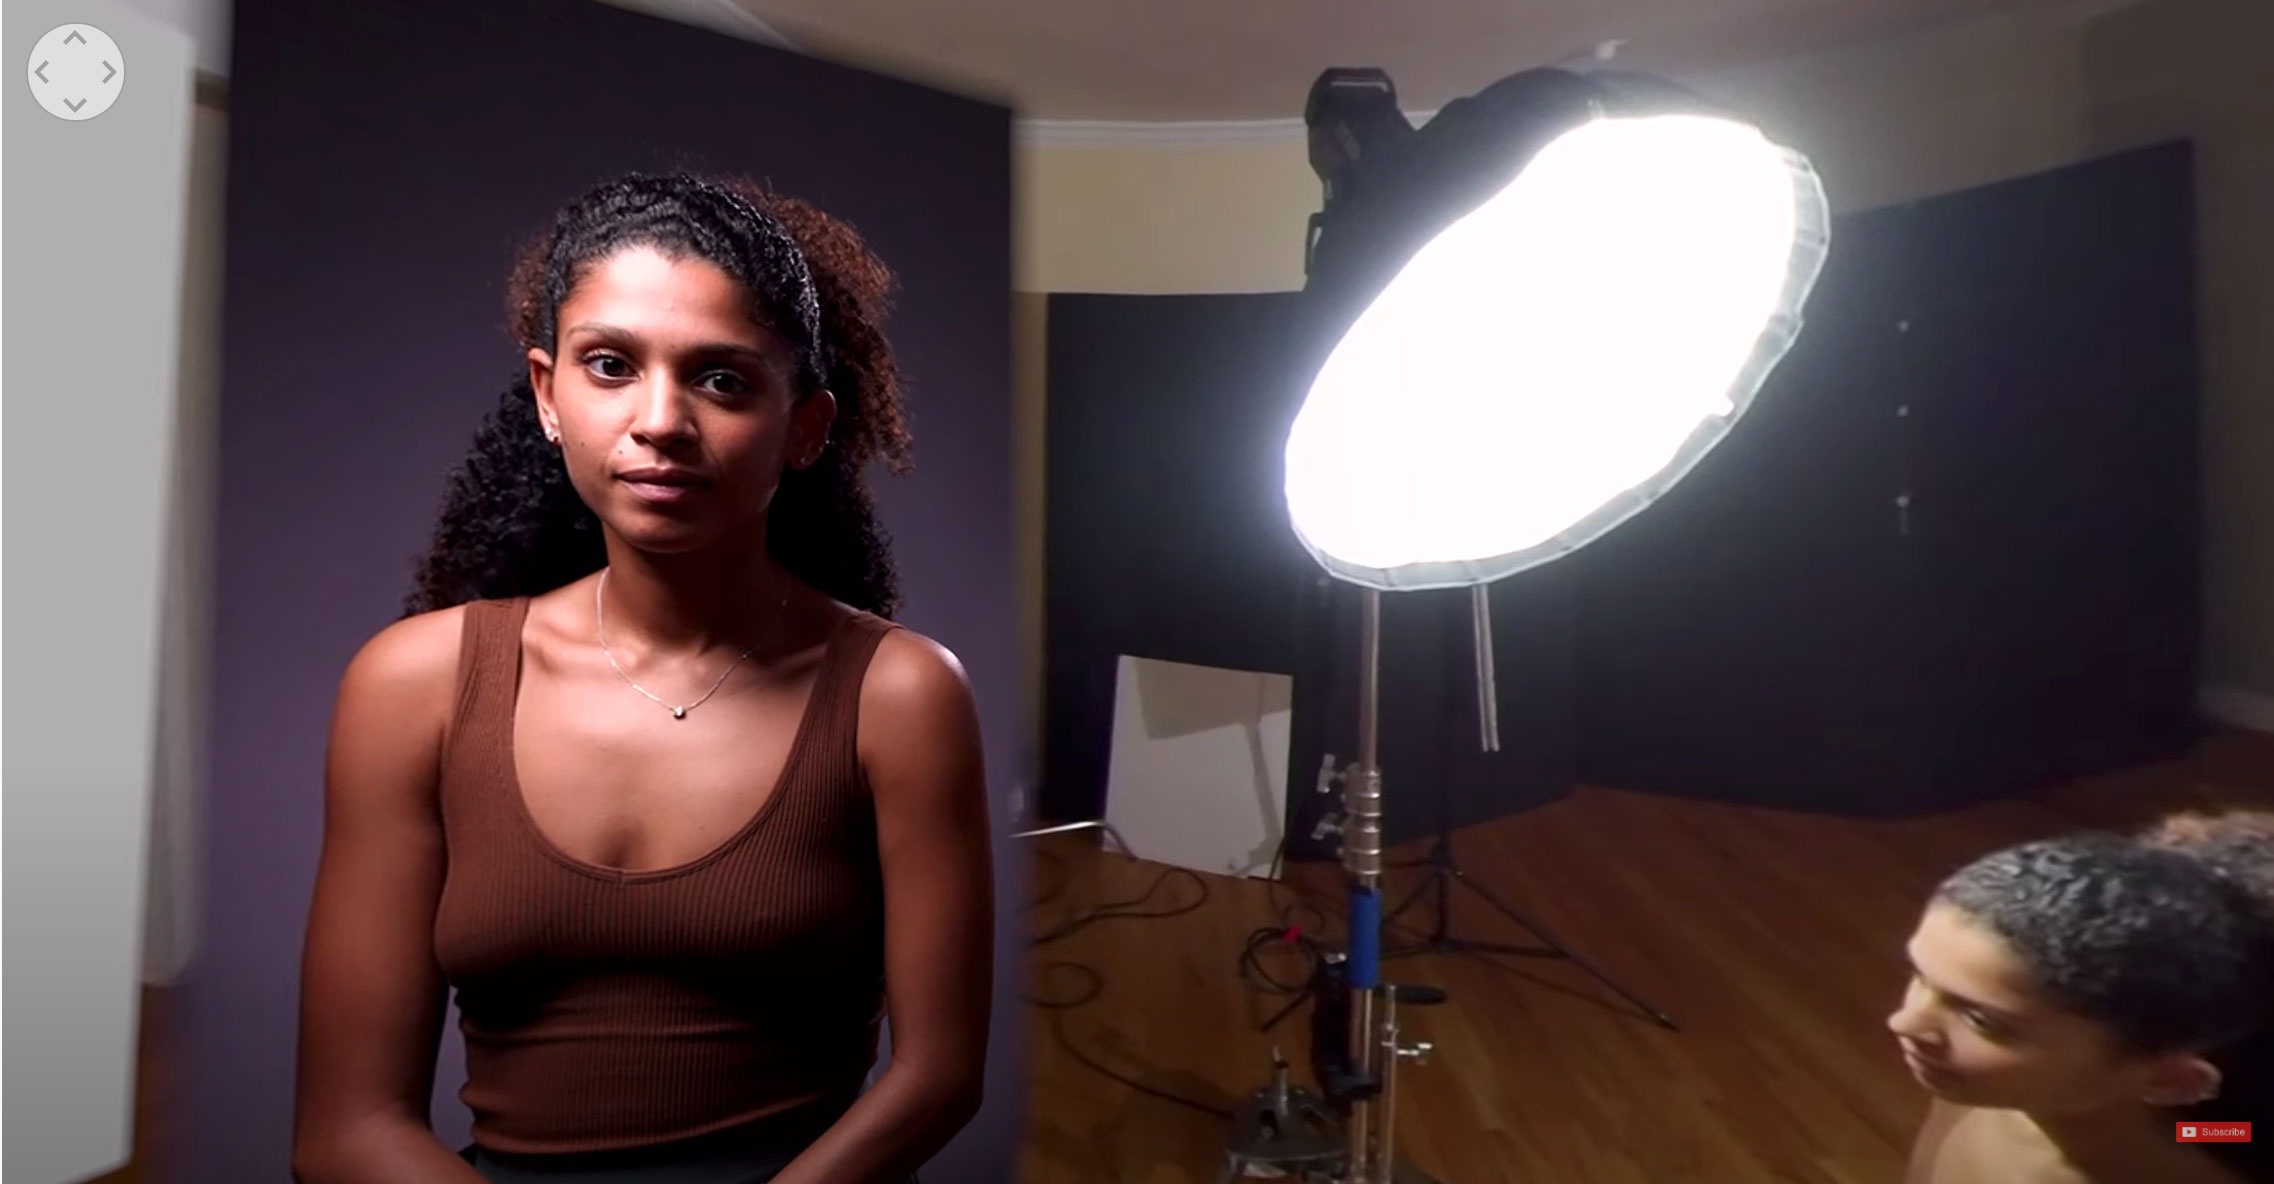
First off I’m going to ask Raphaelle, What’s your favorite portrait lighting position? Good question. I usually set my light in a Rembrandt. There’s a couple of reasons. One is that it gives you a nice nice look at the face and it falls into shadow. So it gives you a foundation where you can make it either very moody and really interesting or you can make it kind of open and light as well. So Rembrandt is good if I’m doing a fashion kind of a shoot. And if I’m wanting to have a lot of open light I’ll start with a butterfly. I’ll roll this stand around and I’ll set the light right in front of my camera. And I get these beautiful shadows on the side of the cheeks that drop into a nice shadow below her chin. And then I’ll bring a fill card in and I’ll bring this right up underneath her chin. I’ll get right in there and that just starts to give us a beautiful look at the face. So that’s a fashion kind of approach. But for me I usually start with a Rembrandt. I like the look of a Rembrandt. I just bring my light around and as I bring my light around I’m now going to get a little triangle on the side of her face below her left eye. It gives you that nice distinct triangle. Now from here as we learned in that first lesson, I can take and I’m going to do it right now, I’m going to move this light off from the background. I’m going to turn the light towards the camera. And what that’s going to do is it’s going to make the background darker. If I turn the light towards the background it makes the background lighter. If I turn the light away from the background it’s going to make it darker on the background. Also, if you look at what it does, it makes a larger triangle on her face because the light is starting to see into the side of her face from the soft box. So if I don’t want that triangle large I can slide the light around and I can get that nice Rembrandt. There we go, that’s our first light. That’s our basic light. That’s where we’re going to start. But if you look at that and we could just go with that. But what we want is we want separation and depth. And the way to create separation and depth is to use shadow or the primary way. You can use color or use a lot of different things. But the easiest and primary way when you are lighting is to use shadow definition. So right now we don’t see much of her hair on her camera left side. We don’t see much of the hair here. We’re not getting much separation from the background. So we’re going to add a light onto the background. This light I have is an Aputure C300D II. But it’s dialed down to like three percent because it’s so powerful. This is going to give us a wash on the background. We’re aiming it straight at the background. So it’s really going to be a directional light. We’ll turn that on right now. We immediately get separation in the background. Her hair separates. We’re getting a nice separation all the way around. That background light is maybe too bright. We can dial it down a little bit. If we want to go down to like one percent and we want it to be really subtle just to give us some subtle definition back there and to not be overpowering. But just some subtle definition.
Is the light on our face too bright? Yes, it’s too bright. So we’re going to bring that down just a little bit here. So that’s a nice portrait. Look right here at me Raphaelle. If you look at that, it’s just a beautiful light. And maybe look this way just a little bit Raphaelle. Right in there, there’s just gorgeous light on her face. It falls into beautiful shadows and you can shoot some very nice portraits here with just those two lights. One light to open up the background and a light to light her face.
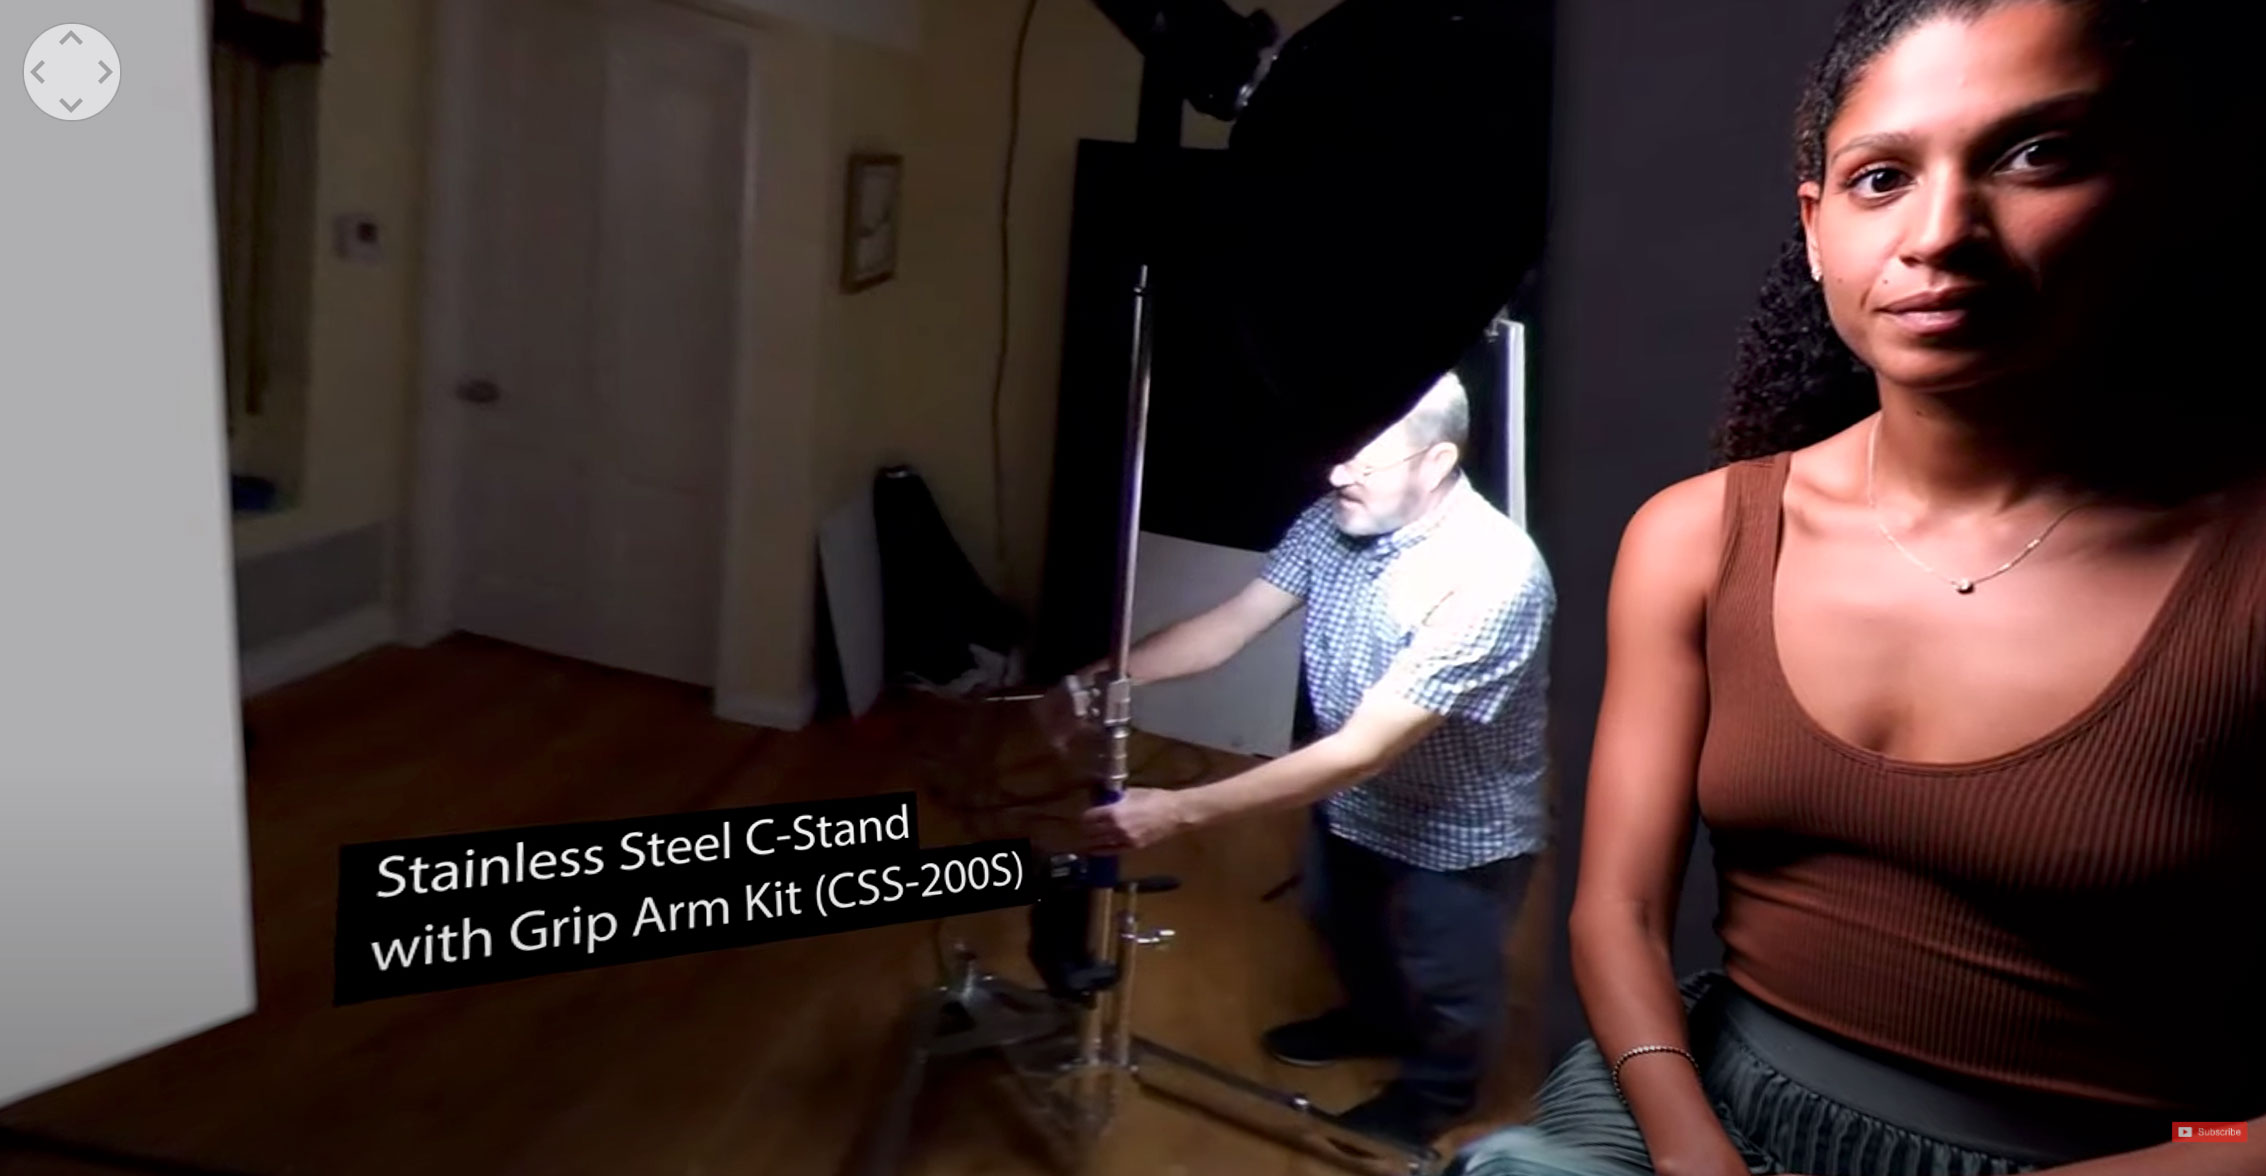
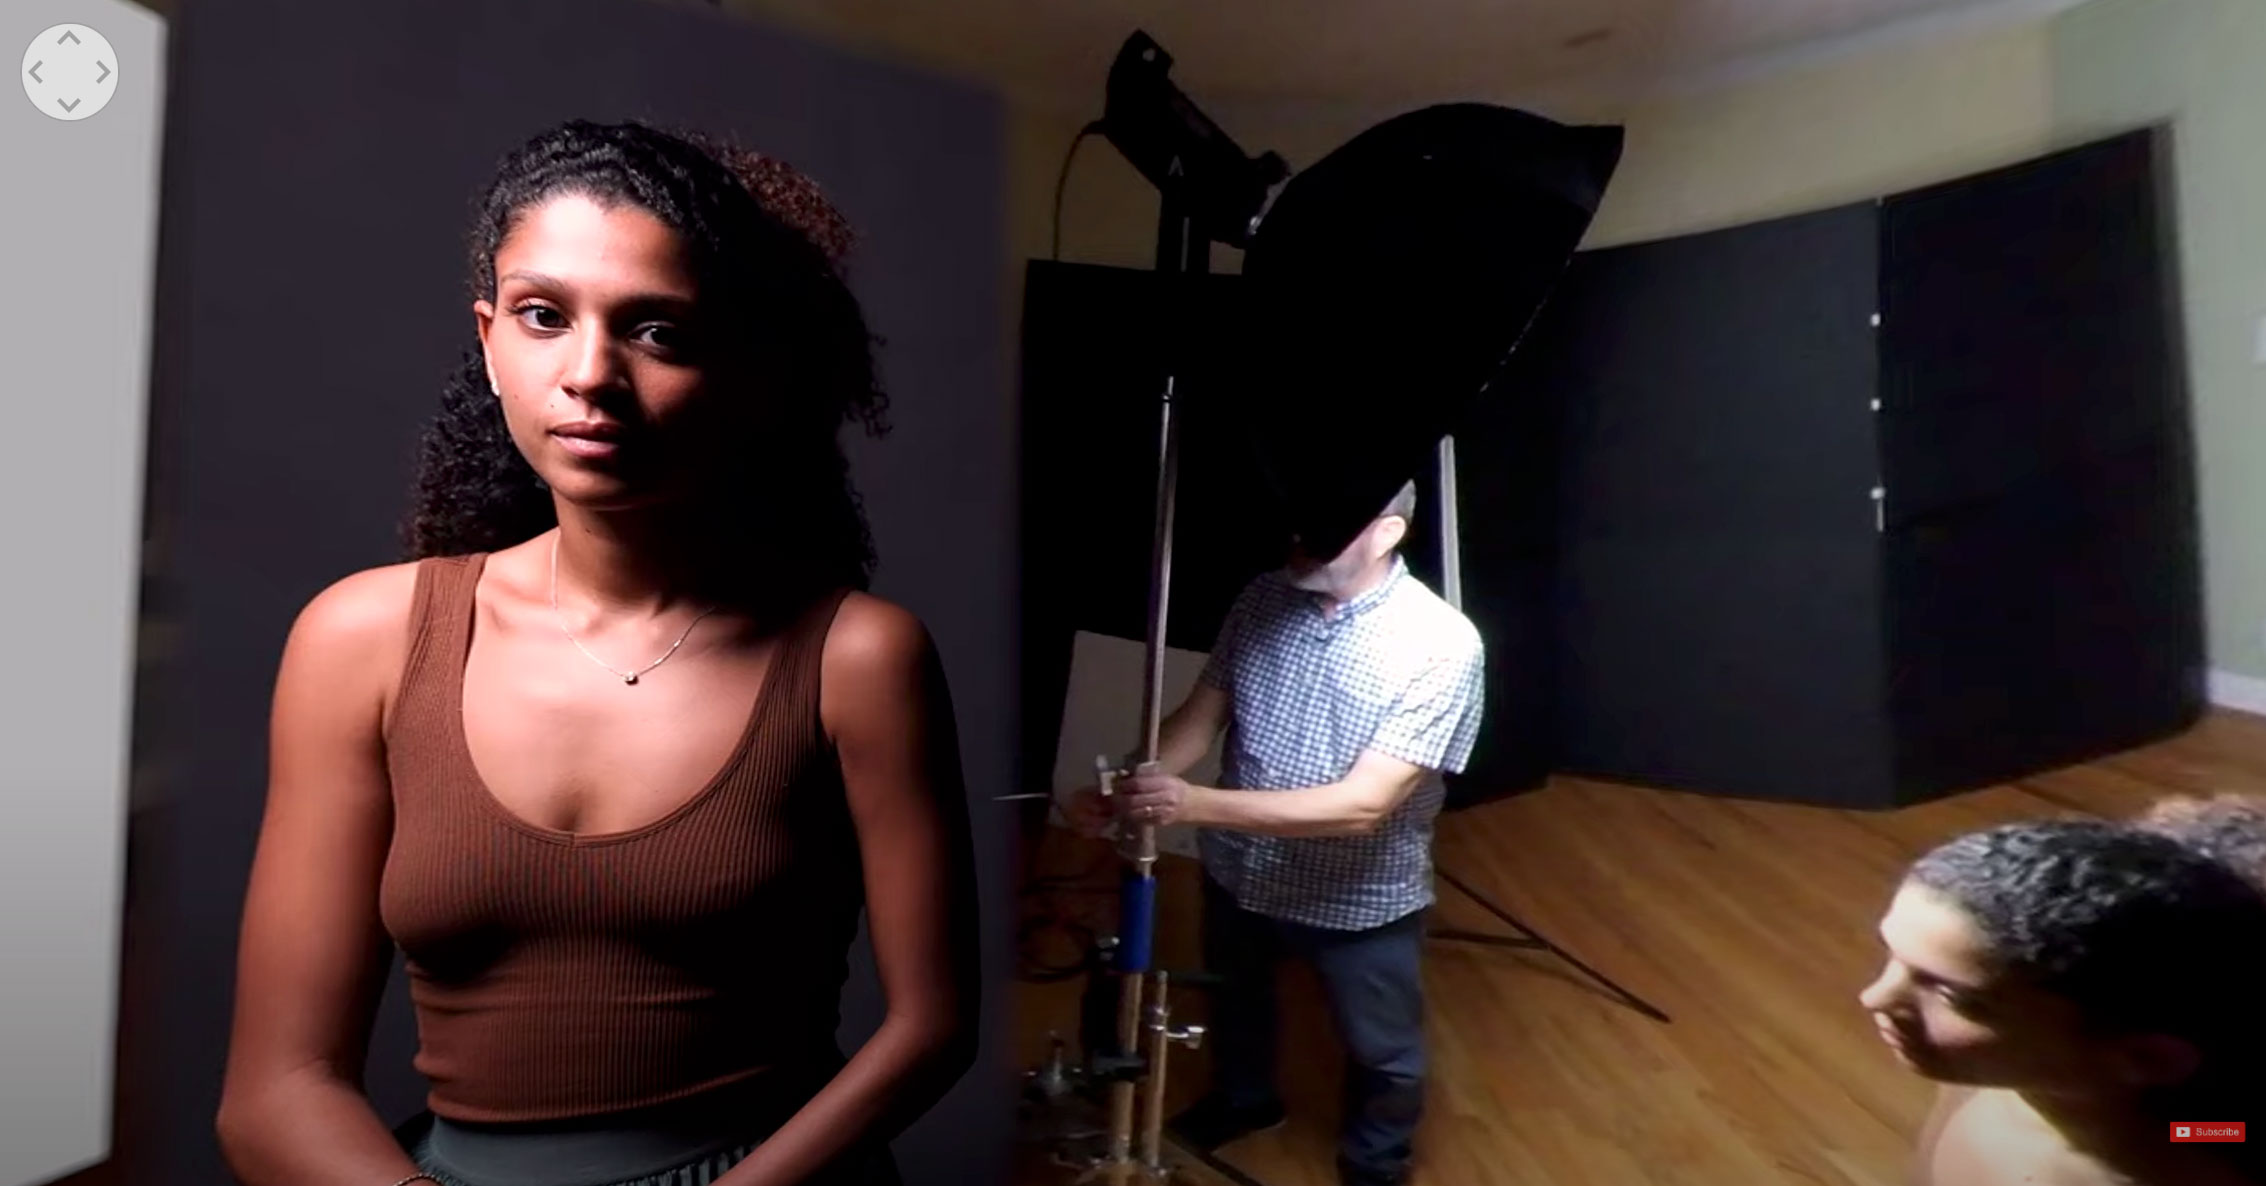
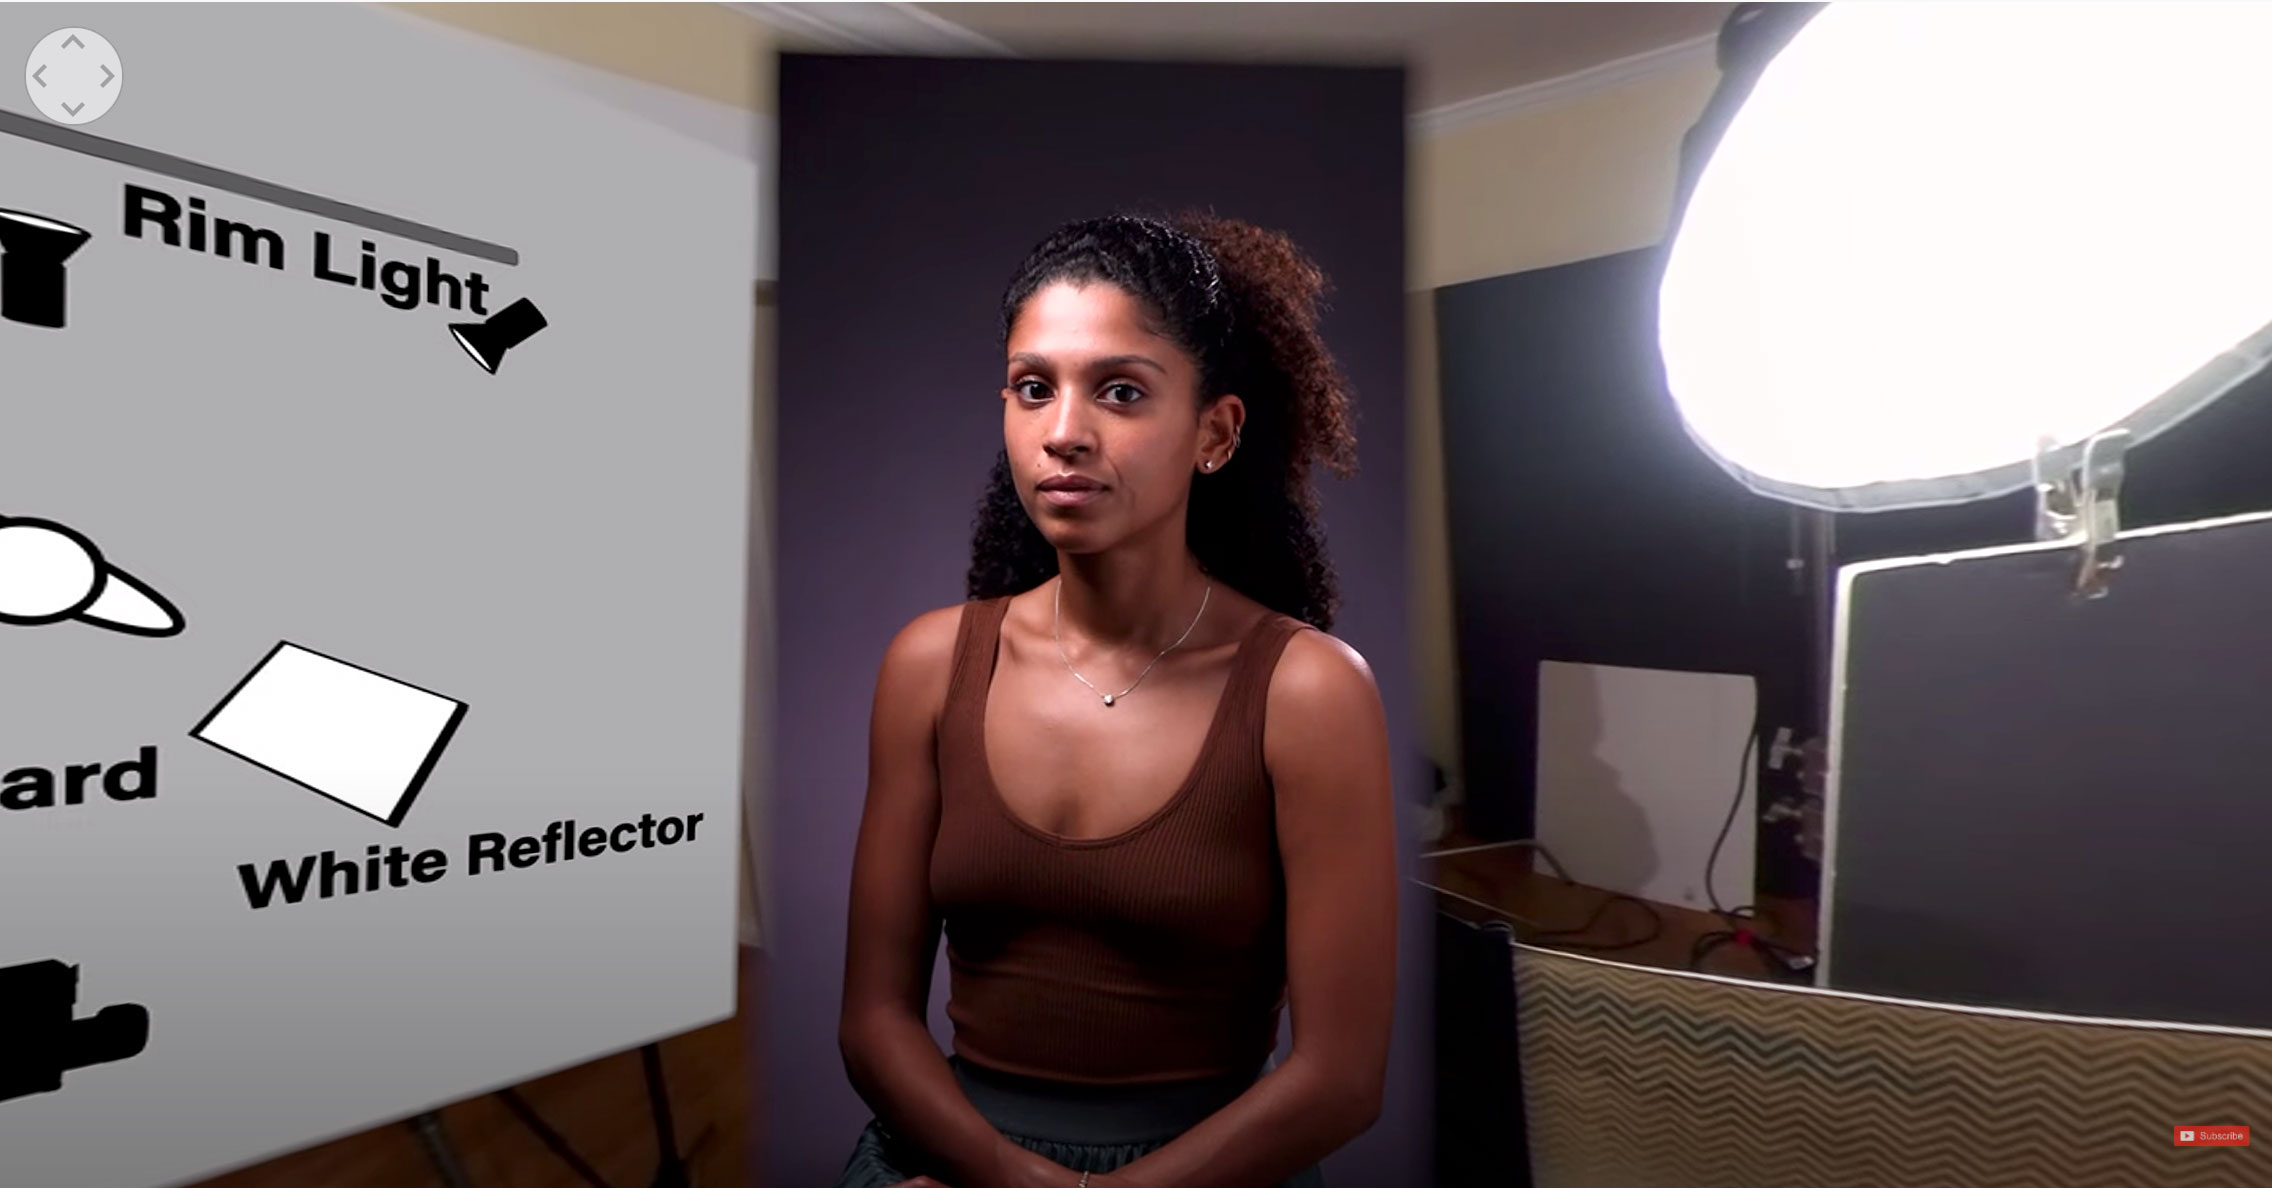
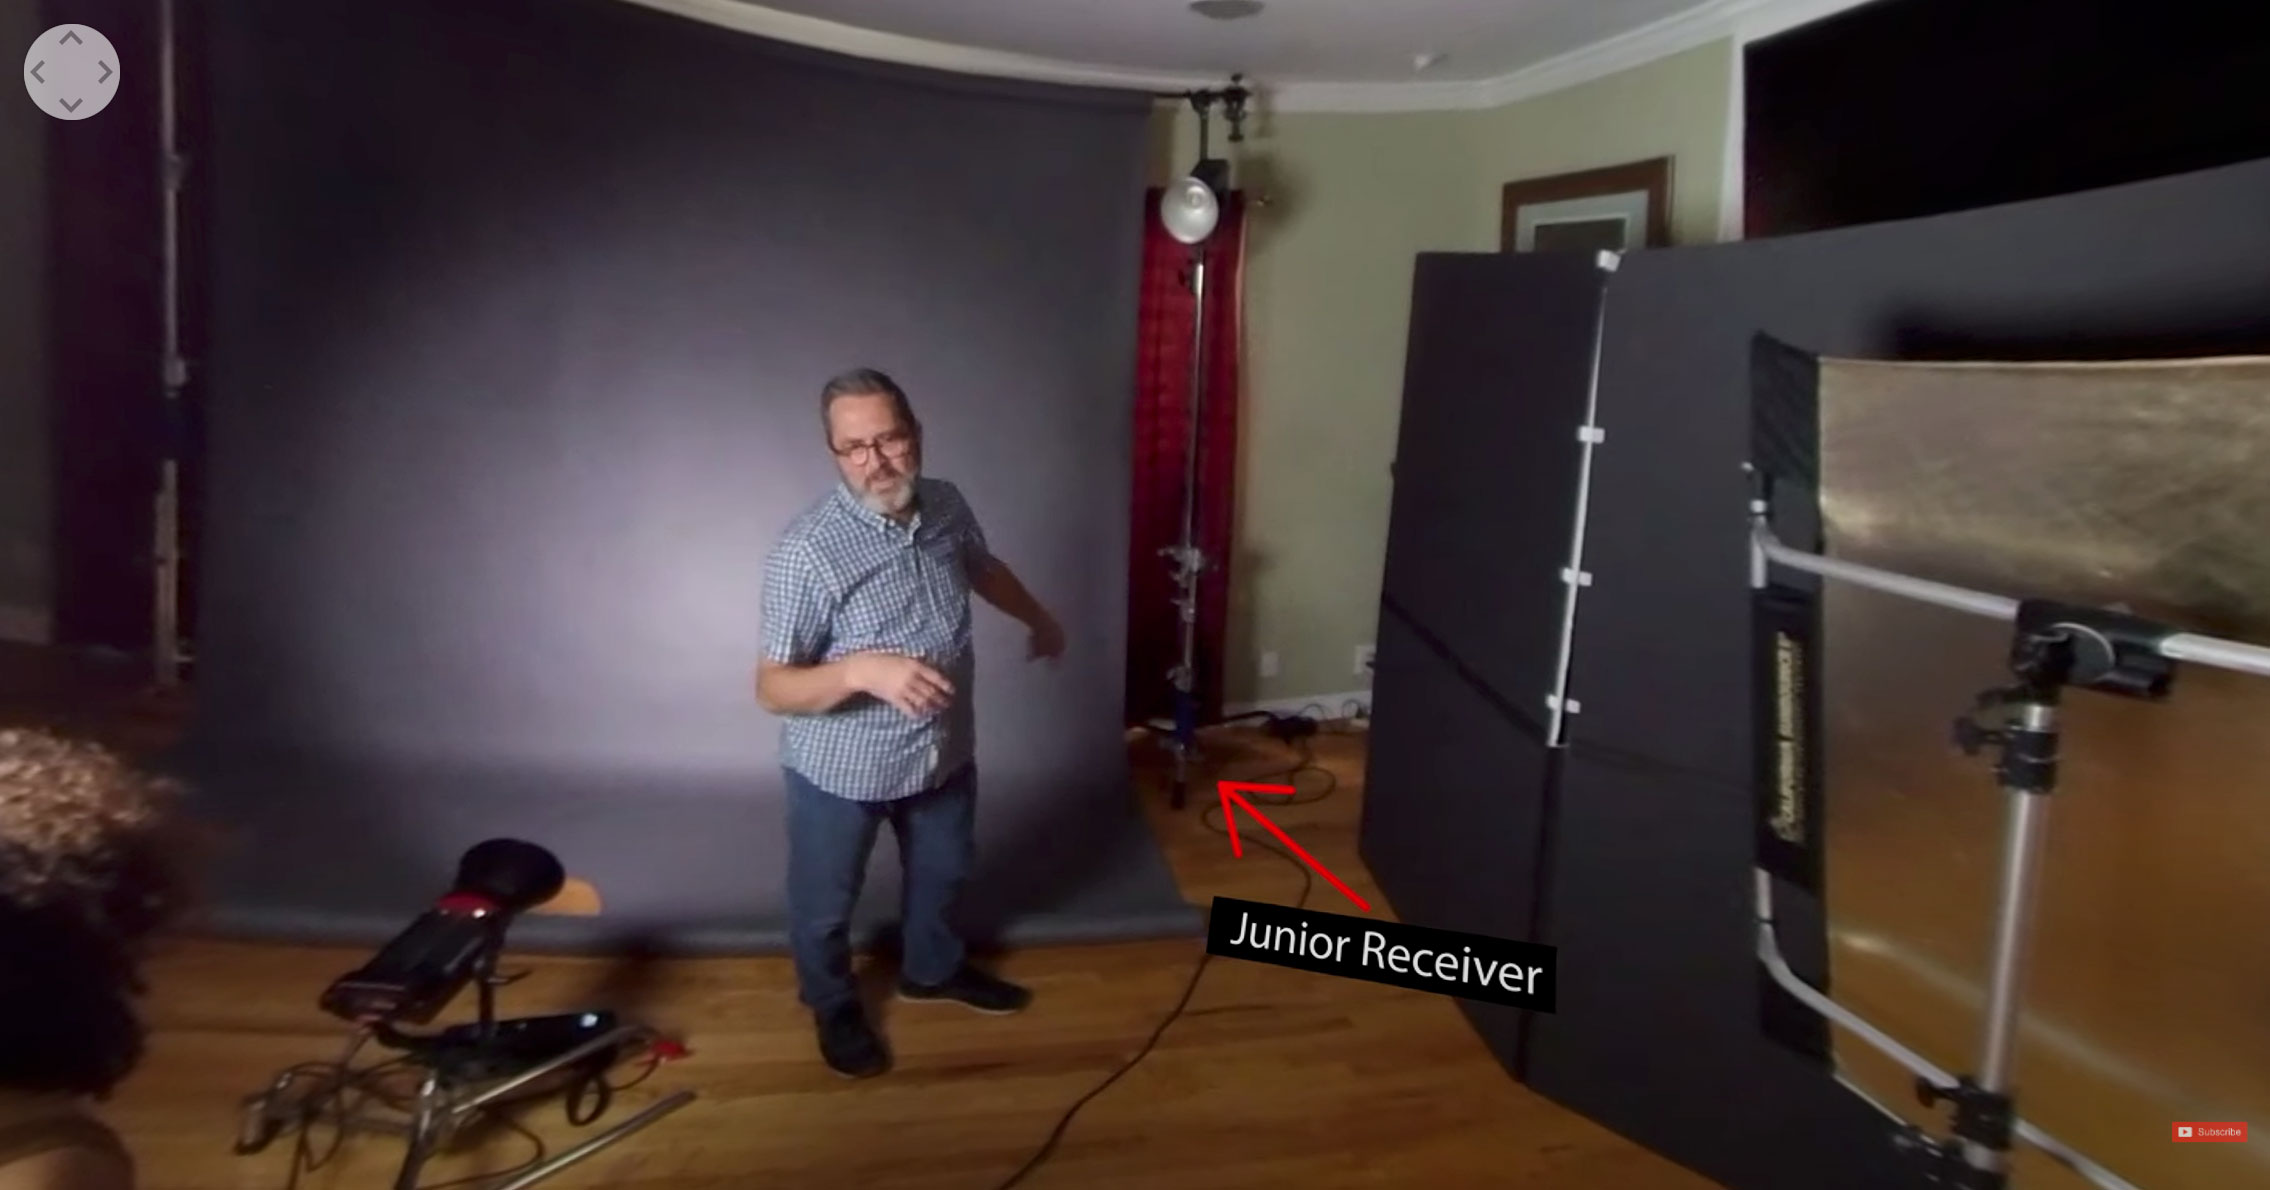
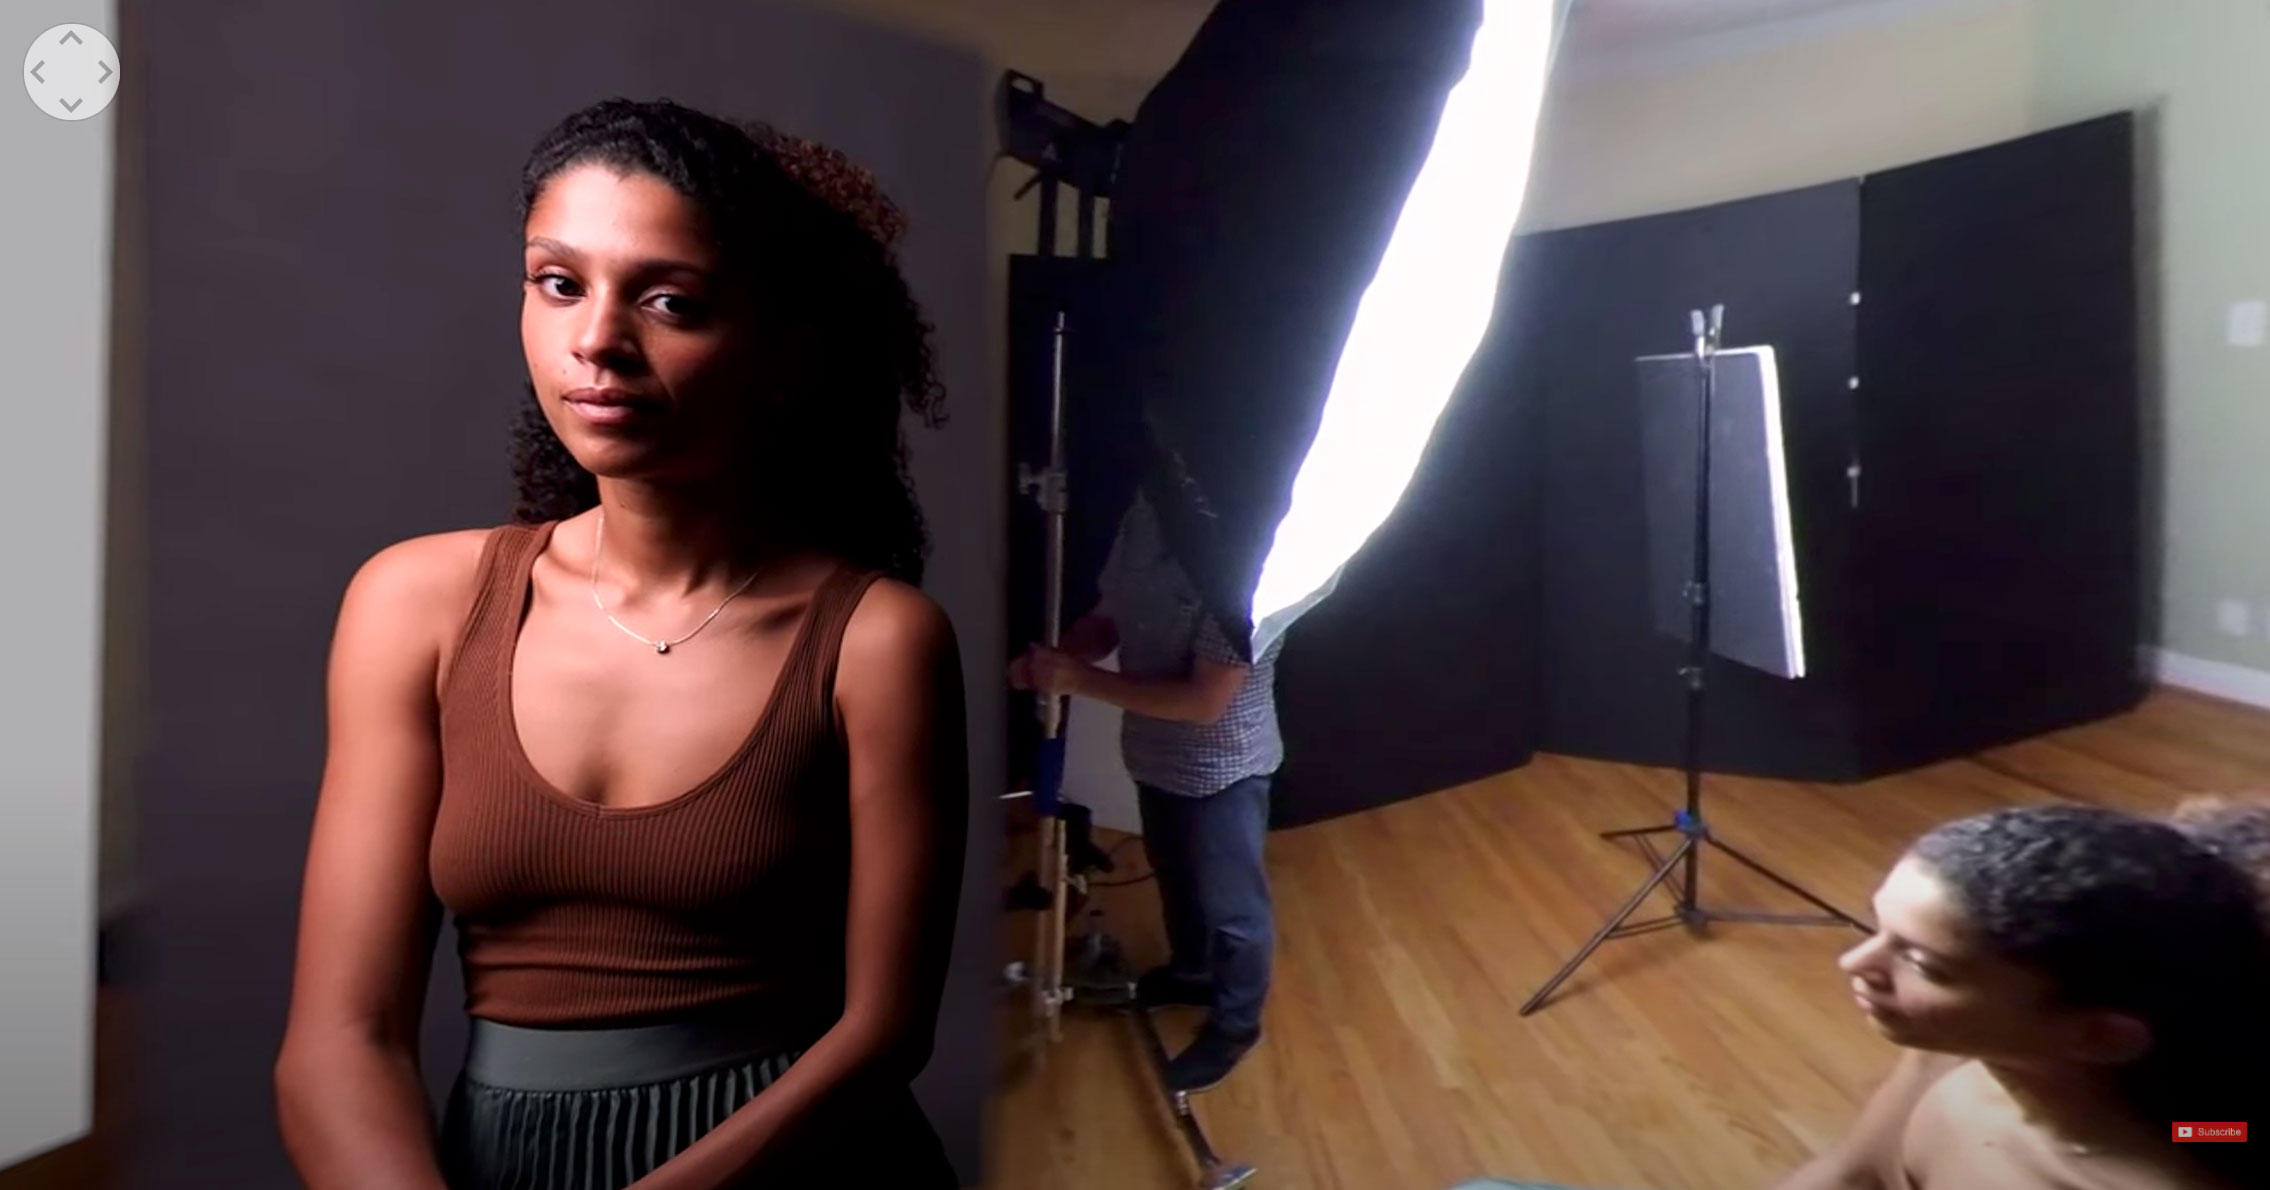
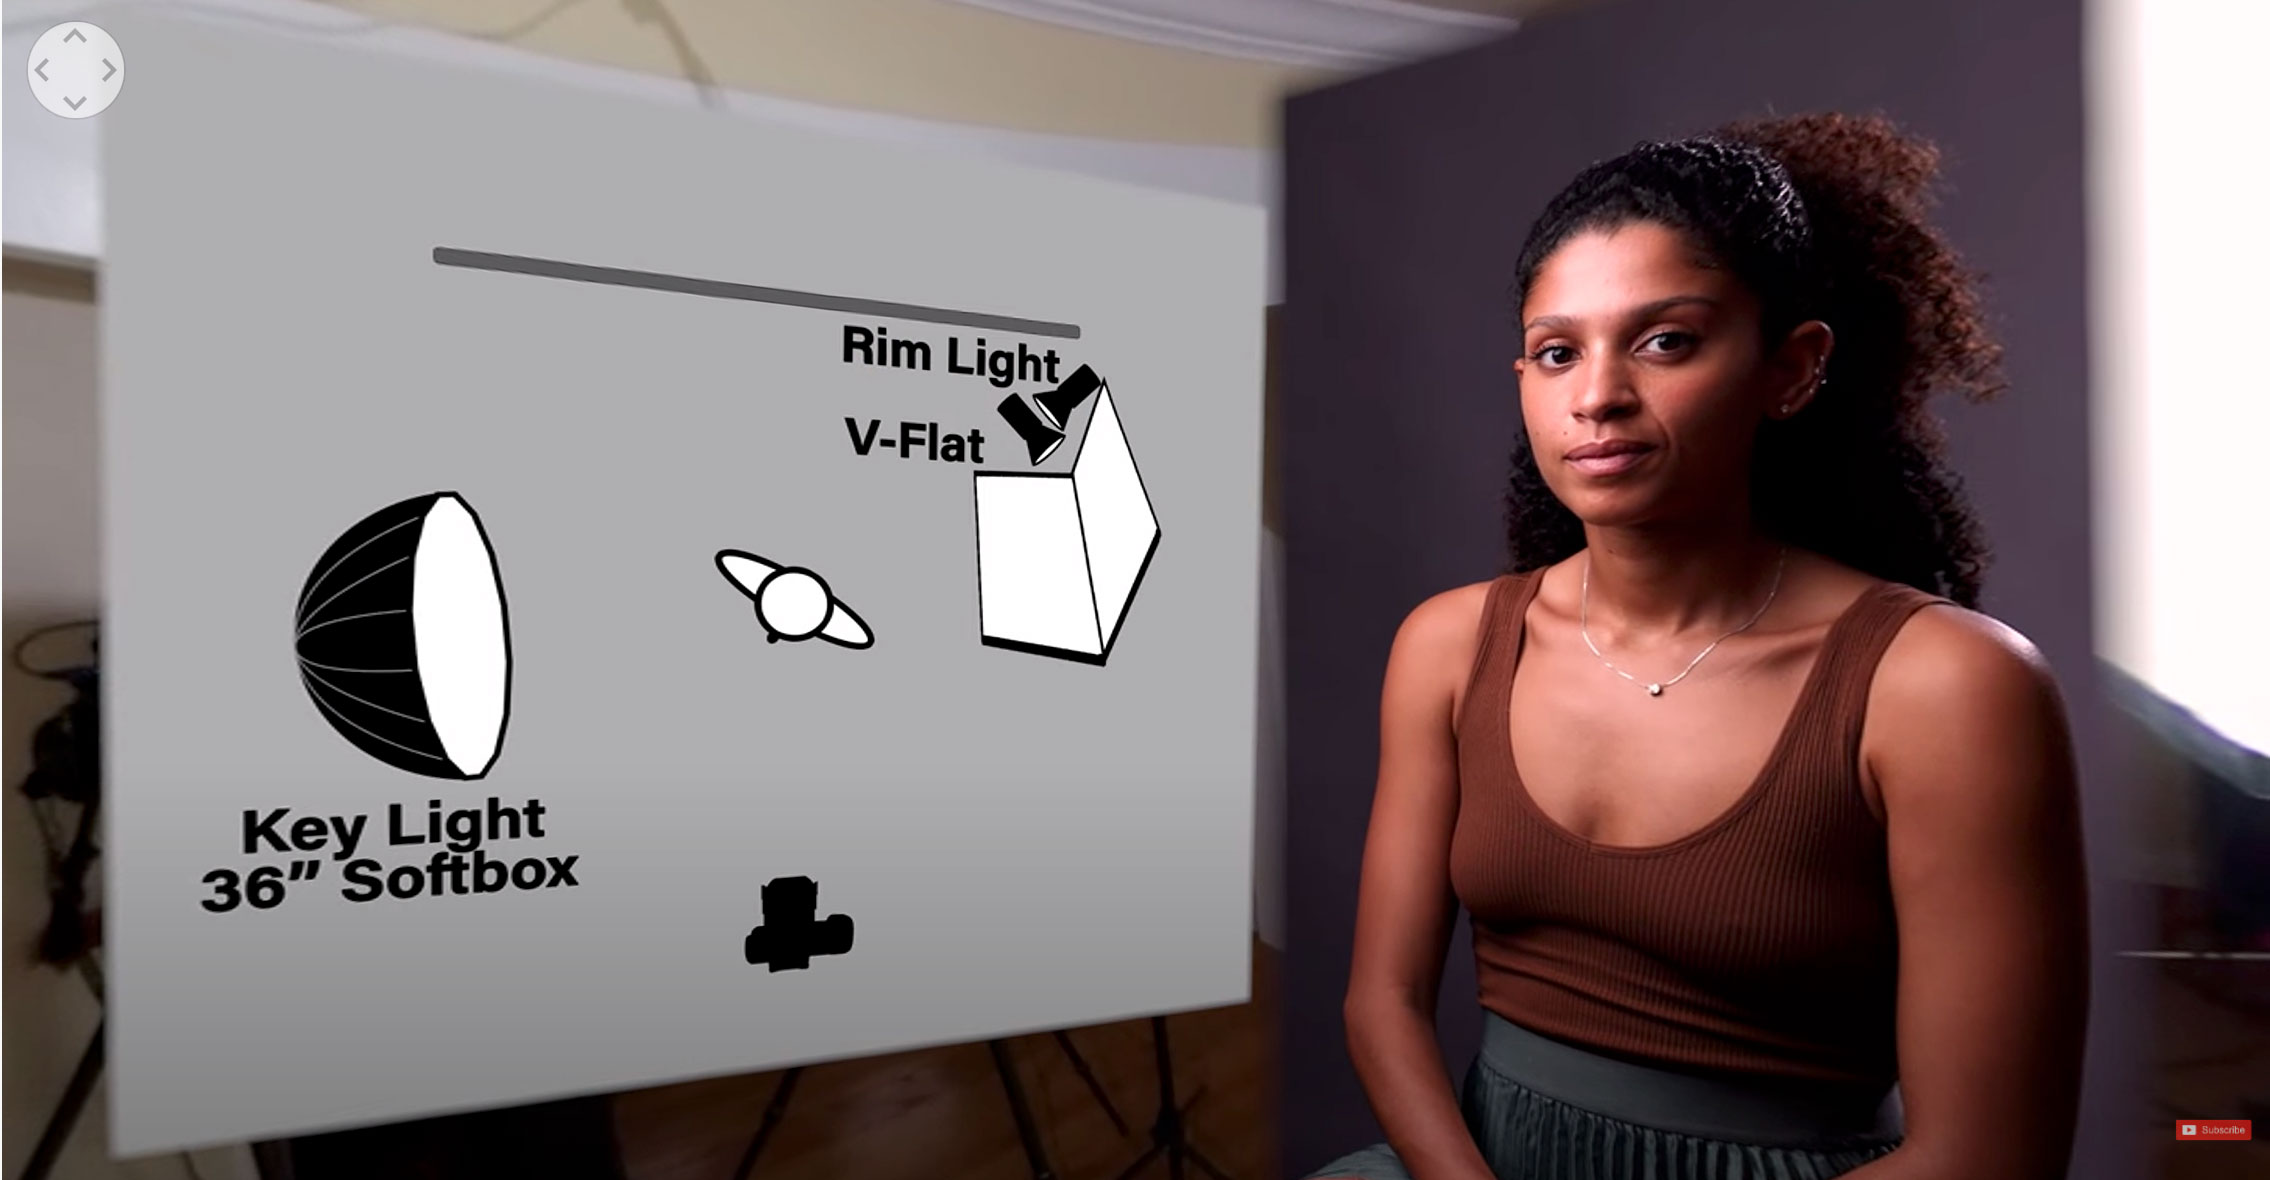
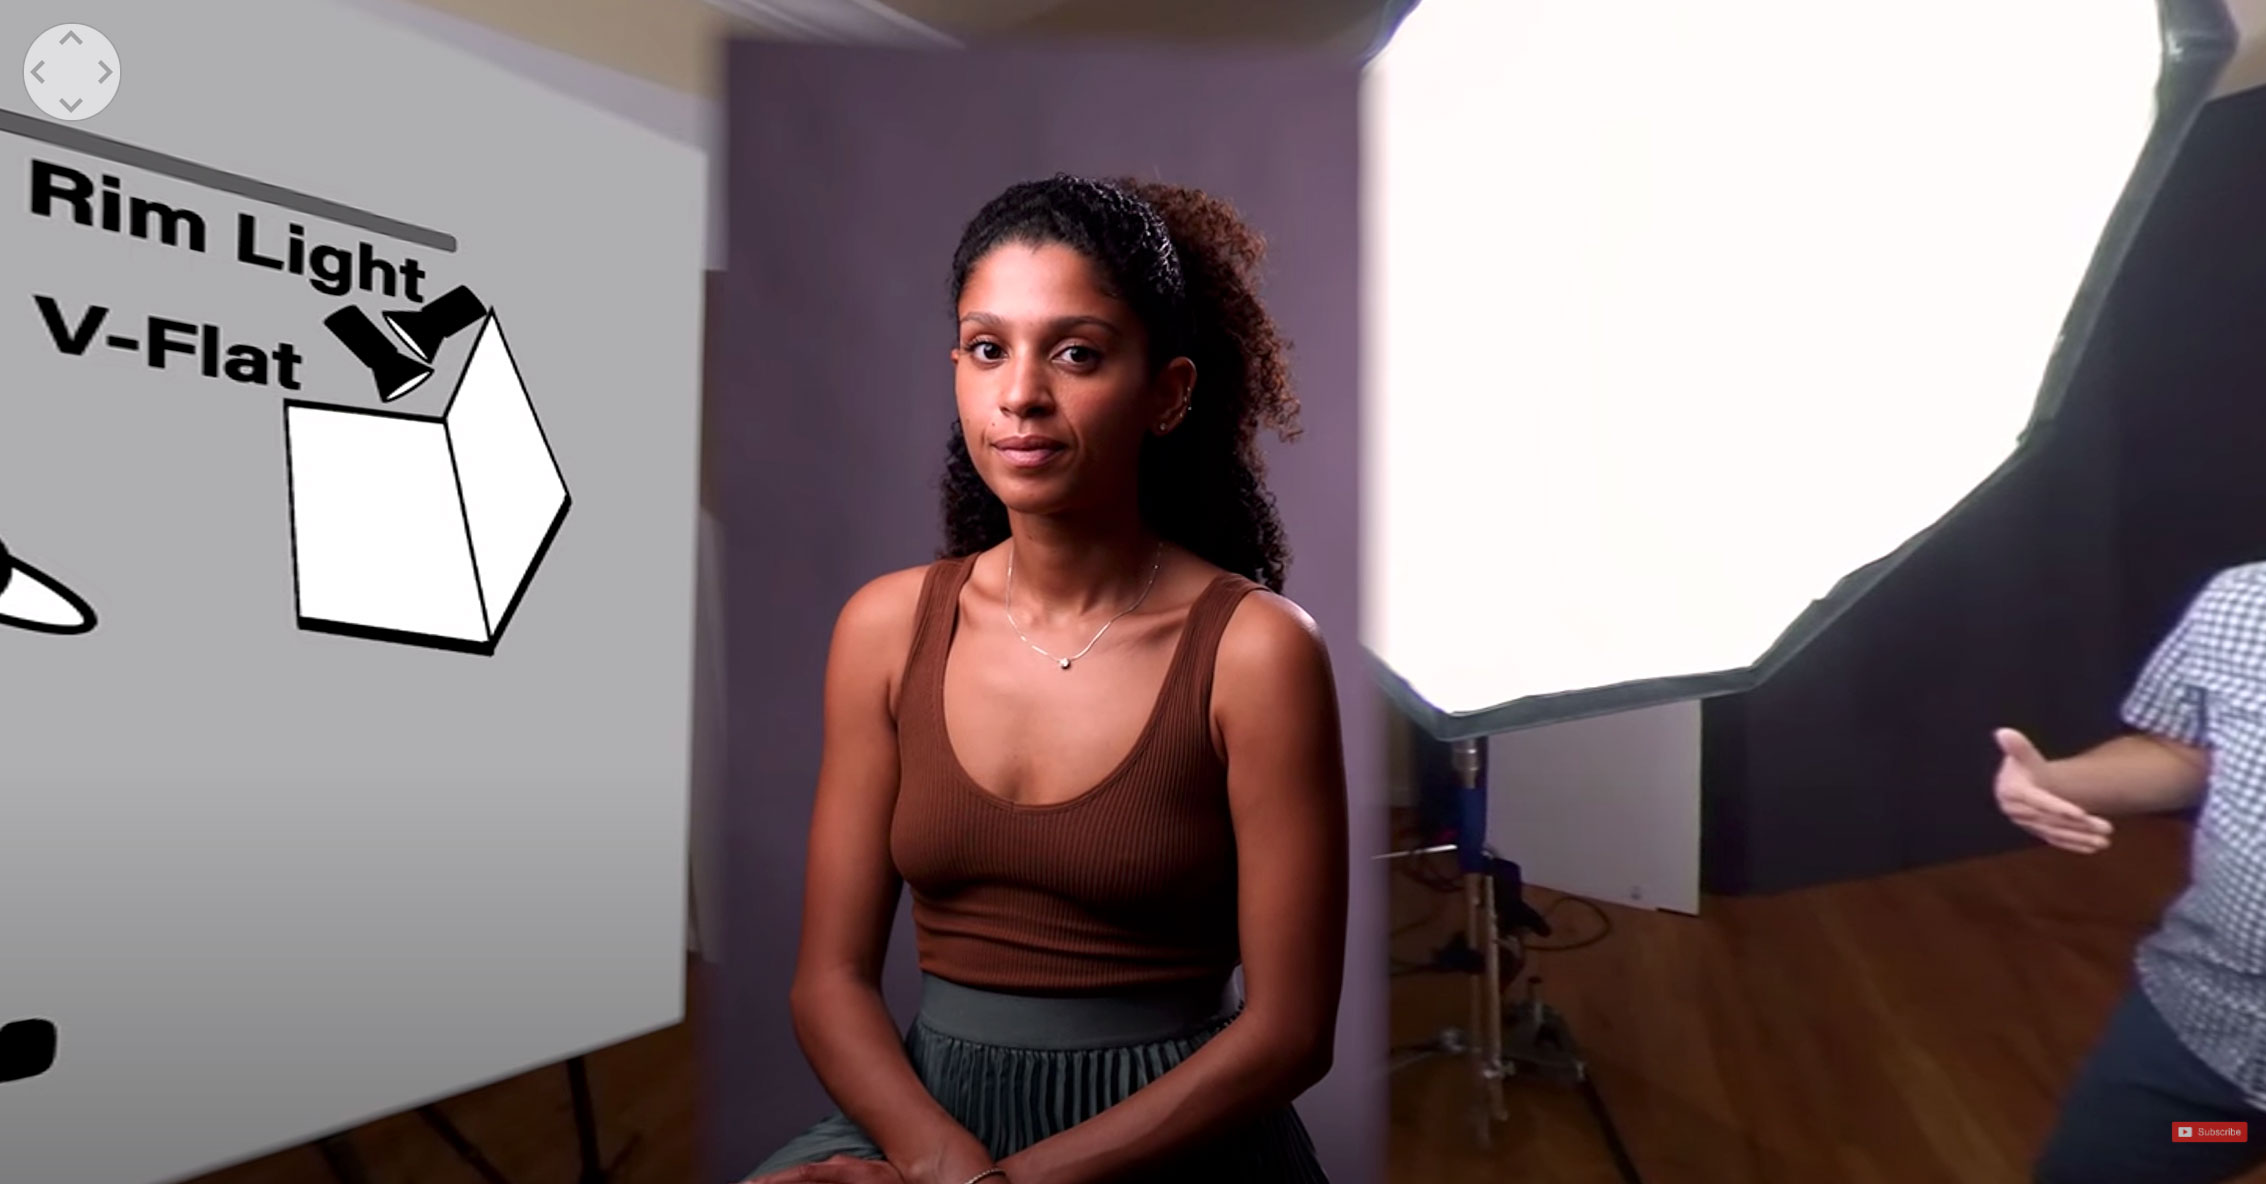
But there’s still very deep shadows. There’s a lot of work we can do to this to make it even better. So the first thing we’re going to do to give us a little more separation and to give us dimension and separation is we’re going to bring in a rim light or a backlight on the camera right side or her left side. And that’s going to separate her hair and give us just a little bit of light on the side of her cheek. We don’t want this to be too bright. We want it to be a little bit of a rim light on the side of her cheek on the camera right side. A great way to set this light up, and it’s a challenge I’ve always had with backlights, is finding a place for them. Getting that stand in the corner and have the stand not be out on the paper. It’s always a challenge. So what we have here is we’ve got a junior pin receiver in the foot of that Savage c-stand. It’s a 40 inch c-stand. And I can take another post, I can take the center post and I just drop it into that receiver and I can put my back light right next to the c-stand that’s holding up my backdrop. It’s absolutely fabulous. It gets it in there out of the way and I don’t have another stand that’s going to get on my backdrop and get in the way. So that’s exactly what we’ve done. We’ve got an Aputure 120D here. We’re going to turn that on and get a little bit of light on the back of her hair.
Alright, so that gives us a little bit of highlight on the side of her hair here. It opens up her hair from behind and gives us a nice light on her. Just opening things up a little bit. You see it start to open up the shadows just a little bit, mostly because there’s so much white in the ceiling here. And that’s something to really consider when you have this much white in a ceiling. It bounces light all around so every time we add a light it’s going to bring the shadows up. But the thing that’s going to really help our shadows is we’re going to just take a reflector and I’m going to shove a reflector in here and I’m going to start opening up the light on her face. That just opens up the light on her face right there.
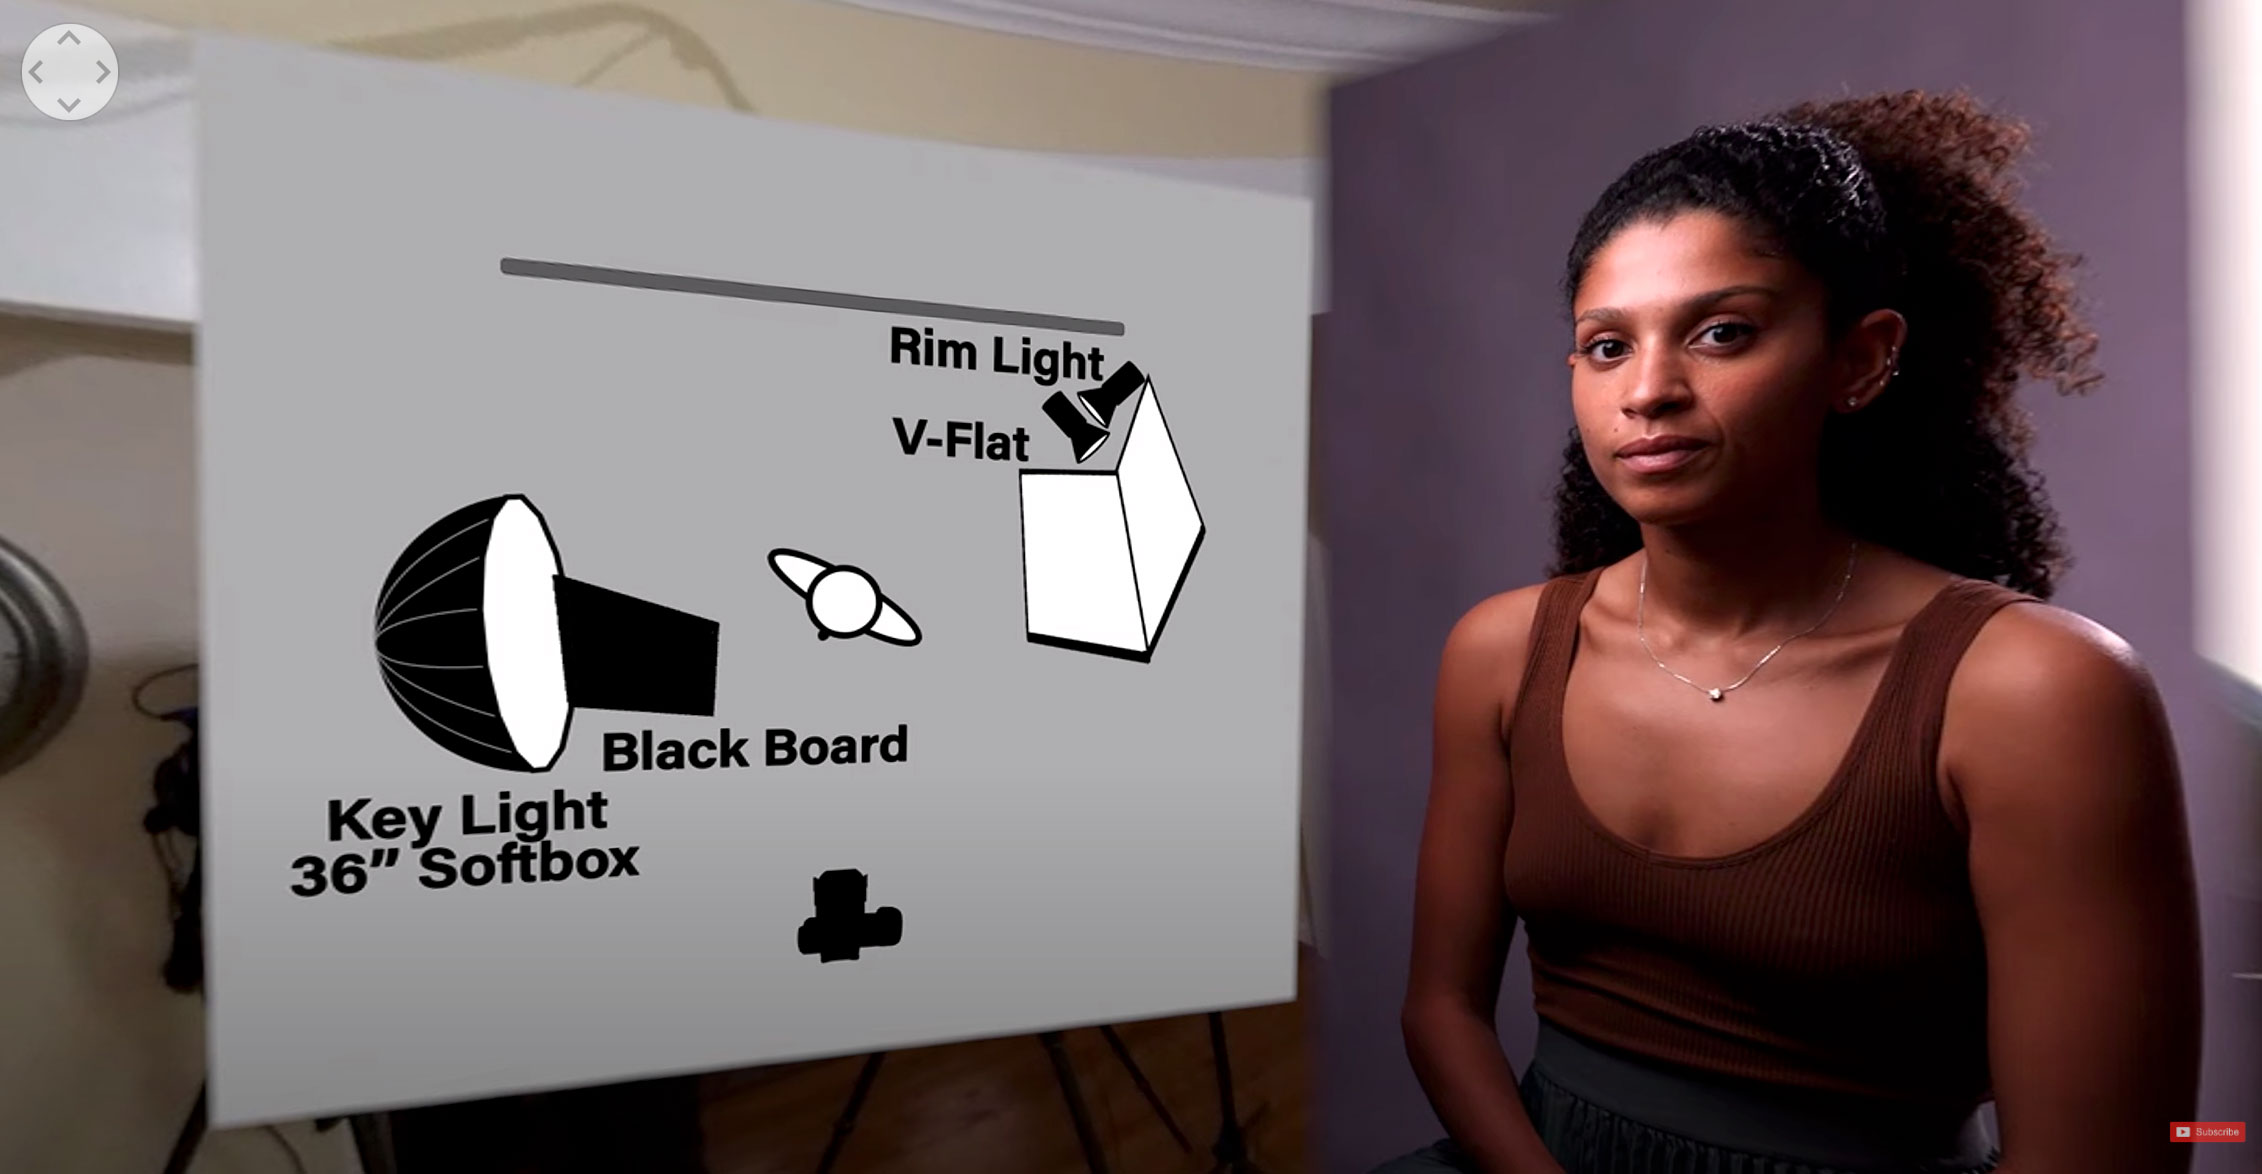
Now it’s looking really good to me. I feel like we’ve got a nice rim light from behind. We got a nice Rembrandt on her face. Just turn your chin towards me. Yes, right in there, not too much. Come back and look in the camera for me. Right in there I’m starting to feel like that looks very nice. But the light is all the same. We’ve lit her face. It’s a little brighter on her face. It doesn’t fall off enough. There’s no reason and nothing going on like seeing her hands in this down here. So we’re going to take and I’m going to bring in a card and I’m going to cut this light off. When I add this card in on the left here I can start to knock the light down just a little bit on her. See how that opens up on her shoulders. You can see that difference it makes there. That card just takes a little bit of light off and the closer I get that to her the harder it cuts the light. The closer I get the card to the light then the softer it cuts the light. The light wraps around it and so it doesn’t quite cut as hard of a line. But as I get it in here closer it’s just a little harder line as it gets closer to her. The card just takes a little bit of light off the front. If I want to back this out just a hair and that would help me to knock some of that light off and it just gives us a little bit of light on her face.
So there’s our three light setup. We’ve got our key light. We’ve got a nice background light and we’ve got a rim light from the camera right side. We’ve brought in a reflector to open up the shadows. That reflector is right underneath my 360 camera. I would actually want to shove this reflector in right here but it blocks the 360 view. But that just starts to give us a really open nice shadow. I now can drop my exposure just a little bit for her face and it’s going to give us a really nice portrait there. Keeping this card in here to make sure it knocks the light off the front of her. The card in closer to her is a little more moody and pulled back away is a little less. It just depends on what we want and what we’d like to see there.
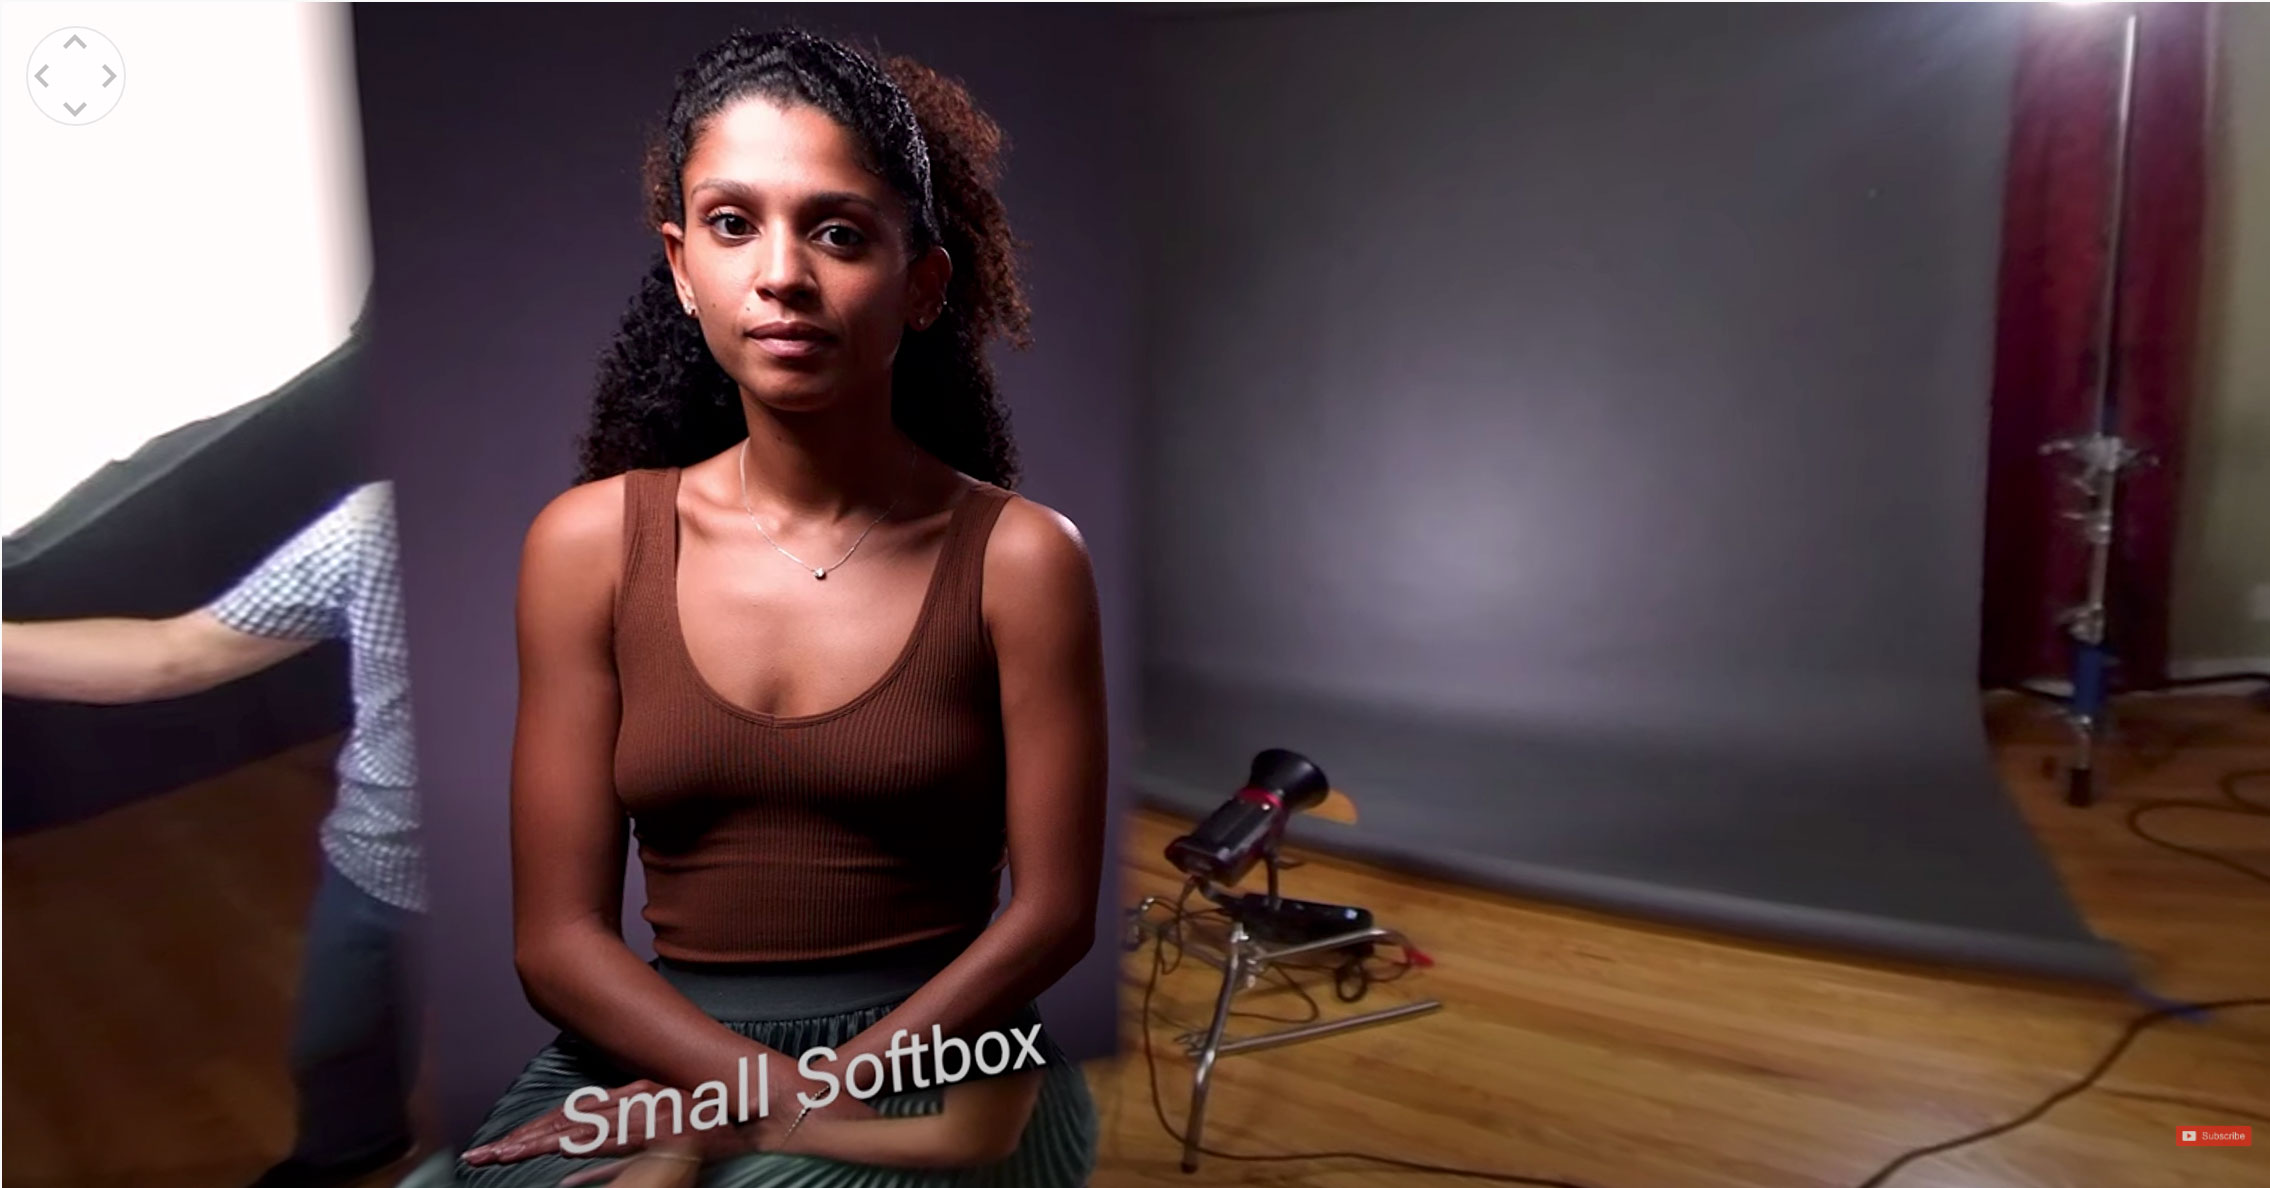
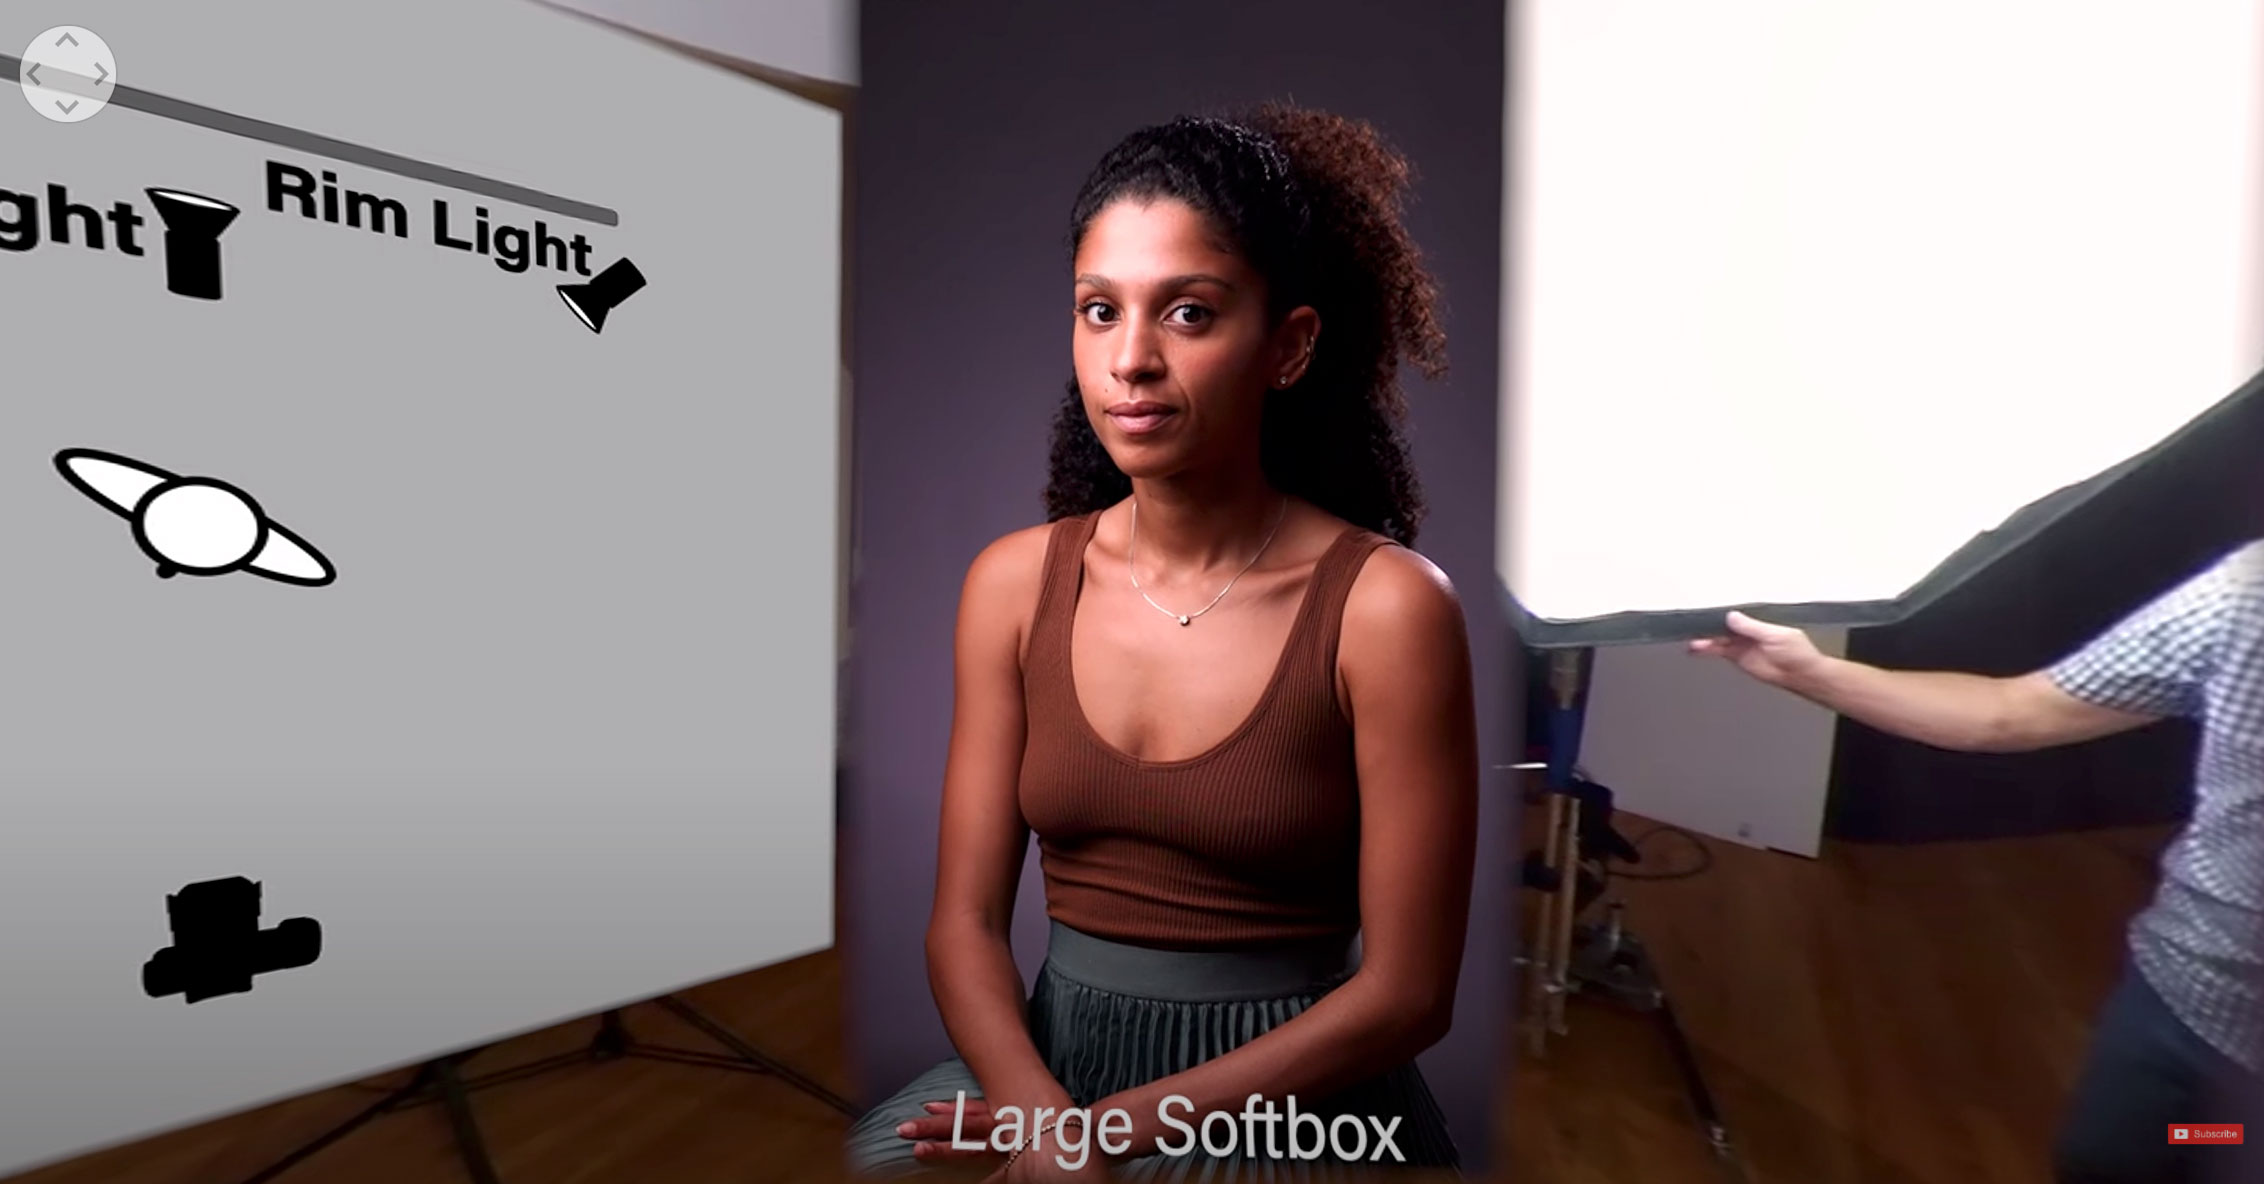
Another thing we’re going to look at with this three light setup is we’ve had a very small light on here which gives us a really direct look at her face. It’s very directional and very moody. You see deep shadows on the side and fast shadow to highlight transition. We’re going to put a larger box on now that’s going to give us a much smoother and much softer shadow to a highlight transition. That’s going to make this a much softer portrait and a lot nicer on her face. So I’m going to change that out right now. Already we have a much softer light on her face and you can see it. And it’s very easy to see that you really have a softer transition from highlight to shadow. It doesn’t go highlight and then shadow. It goes highlight and it wraps into shadow. It’s much nicer. We see a little more light on her ear because it’s just by virtue of the fact that the box can see out further and into the shadow side of her face. It’s so much nicer. Look on Raphaelle’s face. We’re going to go ahead and turn off our background light and our rim light.
So here’s where we can use this larger box to make it more moody on her face and open up the background. I can dial this up now a little bit and that’s going to bring her face up and make it bring the background up. It’s a little more moody on her face. When I roll the light forward it opens her face up more. I can dial the light down to get the correct exposure. And now in that background I’m just going to do something very subtle. I got a very soft light up here. I’m going to take my background light and I’m going to shoot it into this v-flat. I want to make sure I turn this v-flat so that the v-flat does not allow any light from this background to hit Raphaelle on the back of her shoulder or hair. So I’ll bring the back light right over here and nestle it into the v-flat. This gives me a directional light on the background. It’s wrapping from camera right to left which is the same way that her shadows fall on her face. We have the shadow side on the camera right side and that light is coming in on the background on that same side. It gives us separation. We see complete separation there. We see separation of her hair and shoulders. It just gives us a nice transition across the background. It’s a little more directional rather than that kind of halo which sometimes if it’s not done right that halo can look a little bit like the 80s or 90s portraits which were a little obnoxious. But when you go from left to right it just gives us a nice gradation across that background. It’s very nice. We can add our rim light again. When we turn that rim light back on now we get more of that separation and it’s just a different look at that background. We can make that background now as bright as we want it. We can decide, I really want that to to be really bright and it creates a lot of separation. It changes really the value of the gray seamless back there and goes from a little darker to a little brighter. It’s going to gradate across and it changes the look completely. If i take and add my card that’s going to cut the light off from her body. It just makes us a little more focused on her face and doesn’t let the light fall so much onto her body. Just a little card in here. Remember if I put the card in here close if you look at her body there the transition is softer. If I bring the card in closer the transition is harder. It cuts very close. The closer you can get to your subject the harder it cuts. That’s something that’s really important to know.
So the equation goes on and on. It’s a matter of this is a butterfly and it just rolls around to each one of the lighting positions. And if you can’t remember what that is check out the first lesson we did in this 360 series. And then it’s just a matter of taking that equation and mixing it up, harder light in the background, softer light in the background, harder light on the rim light, switching sides with the rim light. Adding the rim light with your highlight or going in and adding a larger softer key light, or a more hard directional key light. It’s just a matter of how you add these together in that equation. There’s three lights but as you add softness to it it becomes a multiplicity of ways you can use them. It really does. When you go out to shoot on location, if you’re shooting using a window or something you have that’s another additional item that’s added to this equation. That window becomes your key light. Now how do you add your second and third light with that to augment it and to make it look better. But it’s all the same principles. You want separation. You want depth. And you use your lights to create that separation, depth and interest. That’s what light is. It creates separation, depth and interest. And if you turn all your lights off do you know what happens? There is no photography. There is no video. Nothing exists unless the lights are on because lighting is what makes the creative process go round. So keep those cameras rollin’ and keep on clickin’