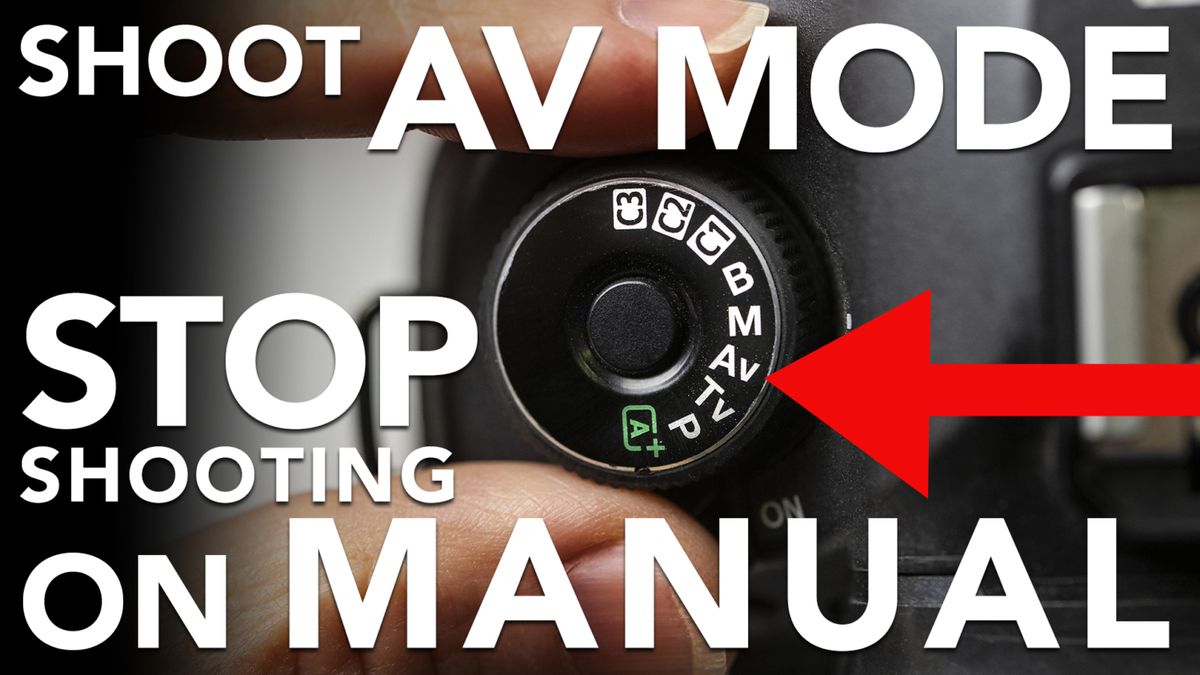
Hi, this is Jay P. Morgan. Stop shooting on manual. This is why I use aperture priority a lot of the time. Especially when I’m in a natural light situation and I’m shooting a model trying to shoot outside and go quick. I always default to aperture priority. Let’s talk about several of the situations that I use aperture priority in. I’ll look at the camera settings and look at the workflow to see exactly how I shoot in aperture priority when I’m outside chasing the sun, trying to shoot quick and get nice images.
This is Jay P. Morgan’s mantra: Whenever you’re shooting any kind of auto program mode on your camera, never let the camera control more than one thing. You always control two things and then you will have complete control of the creative look of your images.
If you’re on auto ISO, you control the shutter and the aperture. If you’re on aperture priority, you control the ISO and the aperture. That’s my mantra. Only let your camera do one thing. You control the other two in the exposure triangle.
So let’s take a look at how aperture priority works in this situation where I’m out shooting with a model. I’m trying to get a couple 1000 images in an hour or two. So I’m kind of changing everything up as quickly as I possibly can. I’m going from vertical to horizontal. I’m getting back further so I can have a real contextual shot and see the palm trees. I’m getting in tight so I just see the logo on the bag. So I’m jumping around and moving all the time.
I started with a tight shot, I’m at f/4 and I’m at a shutter speed of 640. I move back just a little bit and all of a sudden we jumped to 1000 for the shutter. I’m shooting at 4000 and then we go to 2000. I get back further and I see more of her body. I’m jumping back closer again, we’re at 1250, I jump back to that 1250. And now I’m seeing full body and I’m at 2000.
As I get back into a wide full body shot, I’m now at 2000. And it’s going to just go to 3200. But I’m shooting constantly. I can be under by a stop or two stops with digital imagery. And I will have a perfectly printable, perfectly processed and edited image without any problem.
So I just keep shooting, I went to f/3.5 when I went to that full body shot because I want a little shallower depth of field. I want to see the palm trees but I want them to fall out of focus in the background. Now as I shoot there, I’m shooting with her and she goes out of the sun. See that, she goes out of the sun then she steps into the shade. So the shutter automatically drops to 2000. Back to a full body, f/3.5 at 2500. I just keep following her. We jumped over to the train tracks, and right next to the tracks I’m at 2500 at f/3.5. And also I’m thinking to myself, “Well, I can hear train coming.” So I quickly flip her around. And immediately I’m at 3200. And here comes a train. I got 1, 2 and 3 images really, that worked with her walking. I’m using that sun as a key light, even though it’s very hard light, I’m having her look out toward that sun. So it’s going to give me a key on her face. So it gives me a nice beautiful light there on her face. I’m running and gunning. Now I got a nicer kind of soft light on her face and I’m at 2500. And it just keeps changing.
I introduced a reflector at one point. You can see it right there. You see that reflector fly up underneath her face on this image. And so that’s going to bring my shutter speed up. But I’m still at f/3.5. I’m shooting at f/3.5 through this entire experience. Now we get into a very backlit situation at 3200. I would probably take this and I would push my exposure compensation. I would give it a stop, because I’ve got such a backlight situation, to open up the shadows with her. But I don’t want to overexpose the highlights because I’ll never bring them back. But I can bring those shadows up.
When I shoot a full body shot, I’m usually at f/2.8. The reason is, I backed up and I’m seeing the full body and I gained depth of field as I move further away from my subject. I get more and more depth of field. So I’m going to want to crush that depth of field a little bit and get to f/2.8. I don’t want f/4 and I don’t want f/5.6. I want f/2.8. That f/2.8 now is going to let me have a nice out of focus background. And that isolates that body and just looks really spectacular.
So that’s basically my point, my shutter is changing constantly, because my frame is changing constantly. And it’s too hard to keep up in a manual mode and be able to keep that as she walks into the sun and out of the sun. It’s just too hard to follow that. The train is coming. I flipped around really fast to get a shot. I can’t follow that fast enough in the manual mode. I just am not that fast and I miss shots. Whereas I can flip around and I can shoot. I can get a great image as quickly as possible. And I can flip around and shoot again and it just keeps going.
If I’m shooting a family, maybe I’ve got a family at the beach and they’re walking towards me and they’re laughing and having a good time, I’ll probably go to an f/8 because I’ve got several people and they’re not always going to be in the same line. And so I want a little deeper depth of field. I’m going to let that shutter give me whatever shutter because they’re just walking. And it’s not going to be a problem for me. But I’m going to want f/8. If I sit them down and I’m going to get a quick shot of them as a group, then I may go to f/5.6 or f/4. Because they’re not moving around as much and I’m not as concerned about a deep depth of field. But it still gives me the ability to just keep shooting as everyone’s laughing and kind of falling and playing. It helps me to just keep the thing alive.
If you’re photographing children, especially with children, a lot of times I’m going to want a little deeper depth of field so I can stay with them. But I want the background to fall out. So f/4 or f/5.6, and they’re going to be moving and changing and having a good time. And it just gives me the ability to stay up with them to just keep shooting.
If I’m at an event, like a graduation and I’m outside, I’m going to set my aperture to f/2.8 because I’m generally a little ways away from them. And so I have plenty of depth of field. And I’m at 100 ISO because I’m outside. I don’t need a higher ISO. And I’m just going to shoot away. That gives me the settings I need. I’m not going to use any exposure compensation because that’s going to give me a pretty decent image.
Now the minute I go inside, now my camera’s trying to make this dark room into 18% gray. So a lot of times I’m going to minus two thirds the exposure because anytime there’s a light on a person at a podium or something they’re going to look just way blown out. And so I’m going to go to that same f/2.8. I may go to 400 or 600 ISO. And then I’m going to give my exposure compensation like a minus two thirds. And that’s going to give me a nice rich black and not let my highlights over expose.
In a wedding situation I would be at f/8 if I’m doing a large group of people. 100 ISO if I can keep it there. F/4 if I’m doing an individual person. When you start to move in on a full frame into a tight shot of a person’s face, you need f/4 or f/5.6 to give enough depth of field to really see who they are and not just have the eye only be in focus. I’m going to try to stay at 100 ISO. Very likely when I go inside, I’m going to go to 200, 400, or even 800 ISO to give myself an f/4 or f/8. So that it really looks good and gives me enough depth of field to see the person.
One of my favorite situations is when I’m chasing the setting sun. Whether I’m downtown, shooting sunset downtown, or I’m at the beach, or doing some kind of a location shot, I go to AV mode or aperture priority just about every time. And you see in the situation here I was shooting this for Pilot Freight Company. I’m looking over this bridge. The sun’s still pretty much up. It really hasn’t gotten to that sunset yet. I’m at f/3.5 at a 50th of a second. I’m on a tripod now because I know I will need it. And I’ll set my timer on two seconds. So I’ll hit the timer and step away. And it just allows me to I just shoot one every so many seconds or a minute or so. I just keep following that sun. So here the sun starts going down. You see the cars. They’re frozen. They’re a 16th of a second. And as that sun starts to go down, I cropped in just a little tighter. But you see the car lights now starting to blur. I’m at 1/6th of a second. That shutter starting to follow me. I went to f/9 here on this whole scene. And I went to f/9 because we realized in the foreground, I needed the bridge to be in focus as well as the deep focus in the background. So as I was looking at that, and looking at the images, I’m going, “You know what, I’ve got to have f/9.” So I now went to a sixth of a second so I can have this. Because we’re going to put our finished truck on this little bridge going by in the foreground. So I need the background and the foreground in focus. So as I’m watching the cars now are at a 6th of a second. You see them blurring. We’re going to get down to a fourth of a second and half a second. It just keeps going. And you hit this point here, the sun’s going down, and the lights in the building are kind of stationary. And that sun’s going cross and the exposure is going to match each other here. And you’re going to get a few shots where it’s just beautiful. But you’re going to be dragging your shutter. And I’m just using that aperture priority. It just allows me to just keep shooting. And as I keep shooting, now I’m already to almost an eighth of a second or two thirds of a second. There’s a second. And we’re getting really blurred. I’m still kind of dark in the foreground. And the sun is really pretty bright in the background. But there’s going to hit a point here where this whole thing crushes together and it’s pretty easy to follow. I just keep shooting, keep shooting, keep shooting, keep shooting and eventually it’s going to give it to me. And then finally we start to hit it. And it starts to go right in here we’re at 2.5 seconds. Now, those are starting to be so close together and you only get a few of these. I’m at 2.5 seconds. Then I go to 3.2 seconds, and 3.2 up to four seconds. And it’s starting to look beautiful. I’m getting a beautiful sunset back there. I’m getting blurring cars going by. I’m opening up the shadows in the foreground. And I’ve got just a few minutes to shoot here. I’ll get 6 or 8 or 10 images in that few minutes or minute and a half or so. And they look absolutely gorgeous. But I’m not trying to change my shutter and reset my shutter every time. I’m just adjusting aperture priority and I let the shutter drag and it gives me beautiful images in that situation.
Street photography is another time when it is so important to use aperture priority. You’re trying to get an image really quick before people realize you’re there, before people realize that you’re taking an image. And you want that moment that is before they realize they’re being photographed. Those are so interesting and so compelling. So the only way to do that for me is to be on aperture priority. I know I want a shallow depth of field. But I want to quickly get a shot and I want to jump back and forth and just change things up very quickly. And so using aperture priority allows me to get shots quickly. And street photography is so much better on aperture priority. For me, it’s definitely the way to go.
When I shoot action I approach this much differently. I know I want a fast shutter. I know I want a shallow depth of field. So I can only control one thing on that exposure triangle. So what is that? It’s going to be auto ISO. I’m going to let the ISO just do what it has to do. It’s better to get a great image and have it be noisy, than to not get an image at all and is blurry because you can’t stop the action. So that’s a story for another lesson, when I would use shutter priority.
So there you have it. This is why aperture priority is really my favorite way to shoot. I would suggest you practice shooting in this mode and feel comfortable with it. So when you’re in a situation where you really want to get a shot, you’re going to get it. In fact it’s going to make it easier for you to get that shot just about every time. It’s a great way to shoot. One I use it often. So I hope you enjoyed this. I hope it helps you understand the exposure triangle and how you can let your camera do 1/3 of the work for you. Never more than 1/3. Make sure you subscribe to The Slanted Lens. Leave a comment. Tell your friends. Help us grow. Keep those cameras rollin’ and keep on clickin’.
Datacolor, I carry one of these with me everywhere I go because this Datacolor SpyderCheckr is a great little piece to put in the first frame if you’re doing a shoot. I can sample off that 18% gray for that first image. Now it gives me the color I have here, which is a great starting point. I also stick this into the first video clip that I shoot when I’m doing video. Now the editor has a place he can sample off from. And you can correct the color and it just makes all your footage look so much better. So Datacolor SpyderCheckr, take it with you everywhere you go.