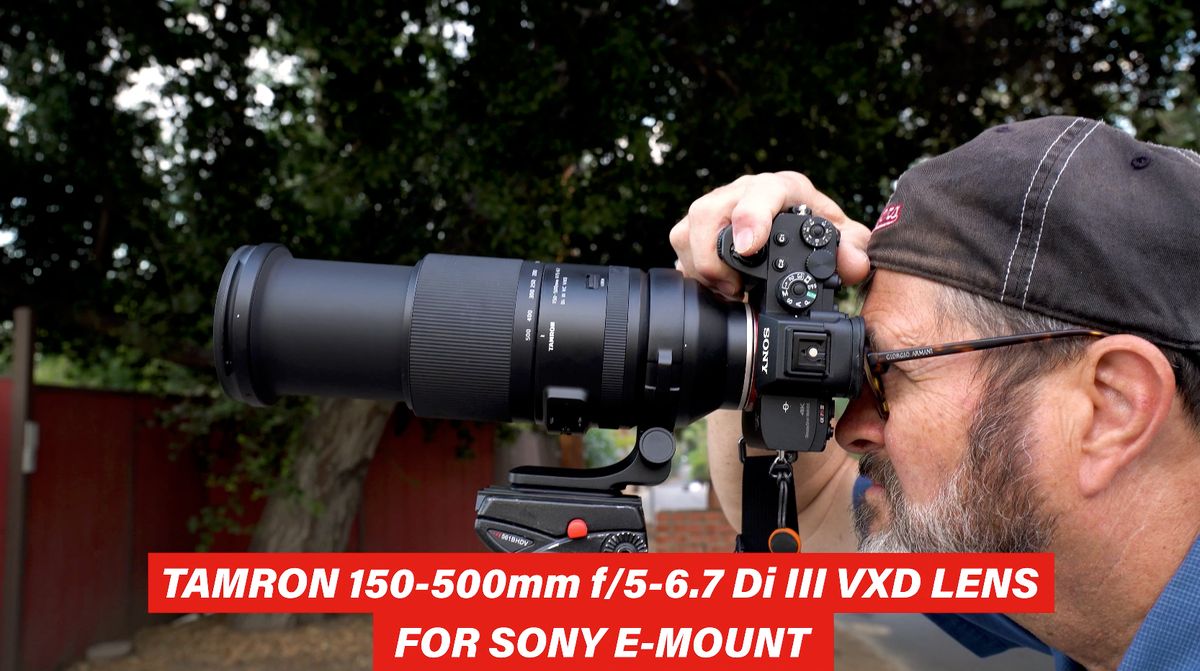
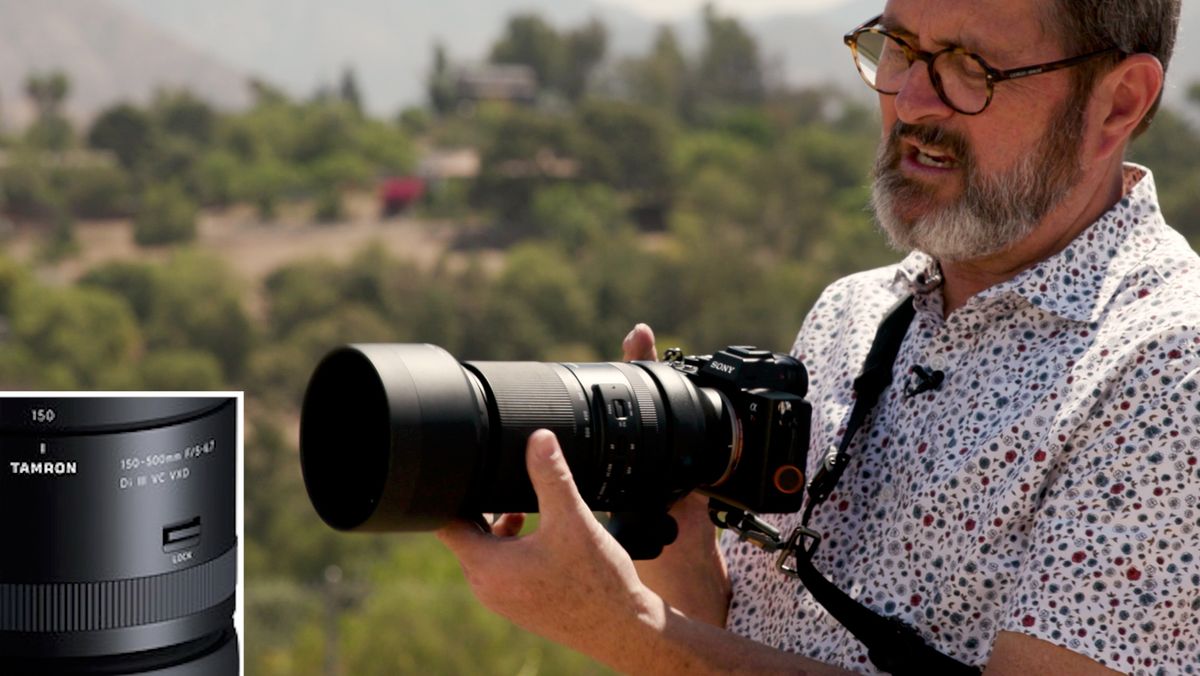
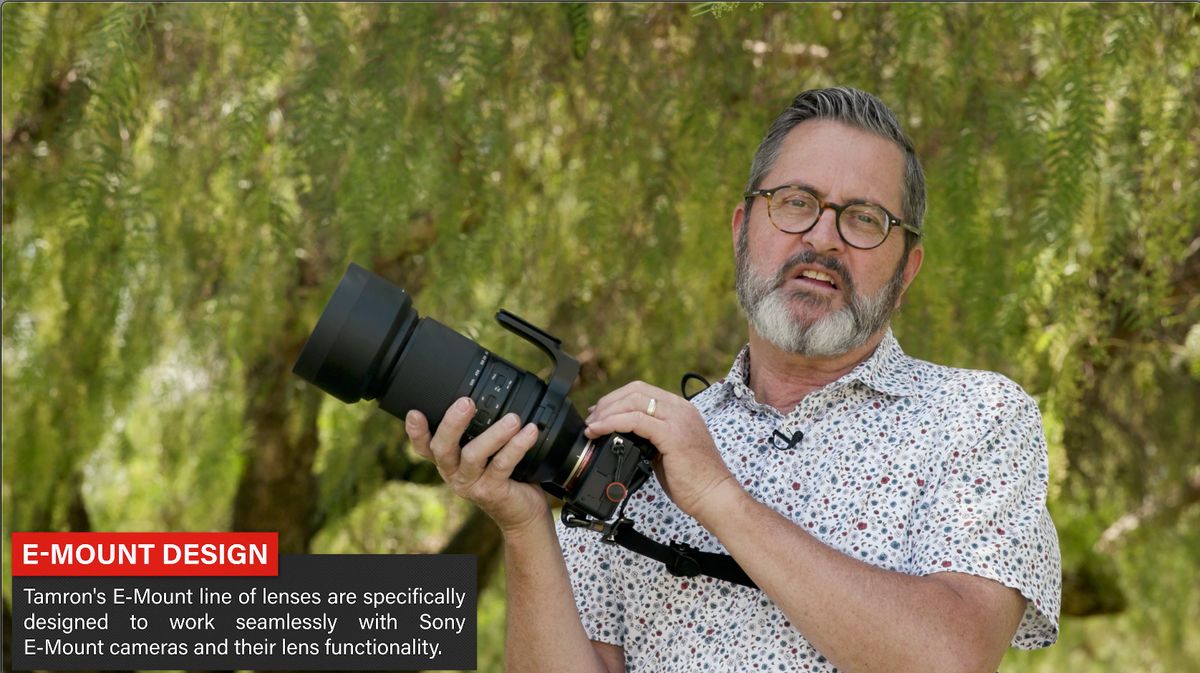
Hi, this is Jay P. Morgan. Today on The Slanted Lens, we’re going to take a look at Tamron’s new 150-500mm lens. This is an f/5-6.7 variable aperture lens.


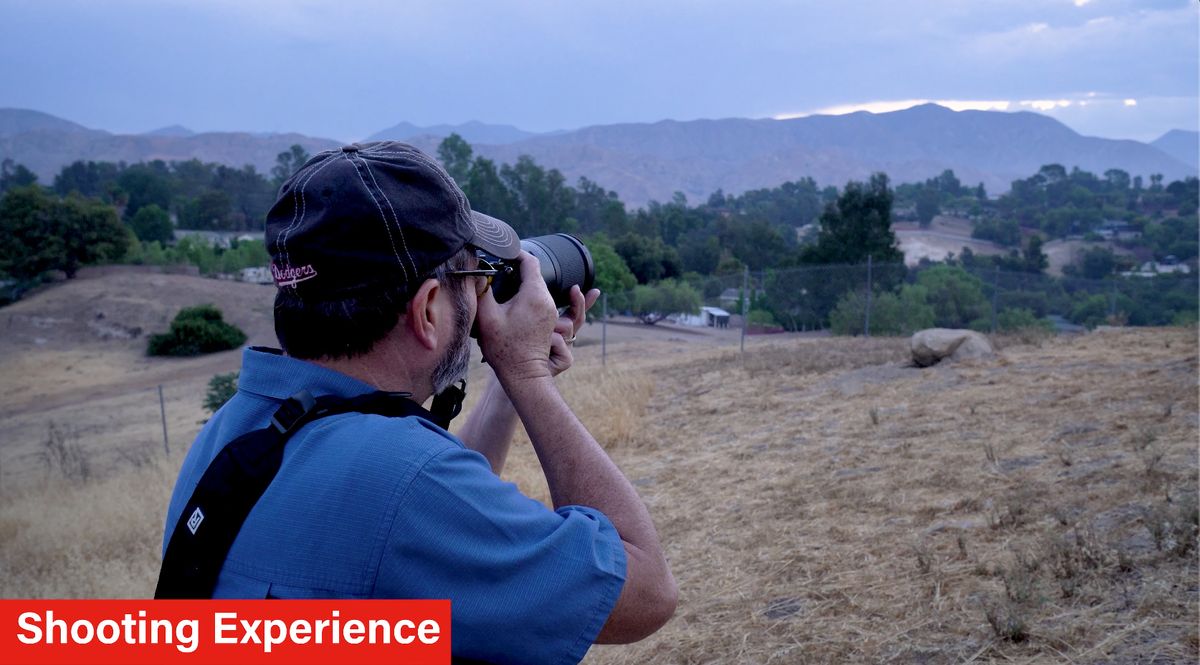
Before we get too much into how I’ve used it, I’ve been shooting with it for the last few days and I’ve had a great experience with it. I’ve done everything from wildlife, to birds, to sports and it’s been a lot of fun to use. But let’s first talk about how this lens works and exactly how to use this lens so you can get the best results from it.

This is an external zooming lens. And what that means is that, as you zoom, it’s going to telephoto. It’s going to make the lens longer. 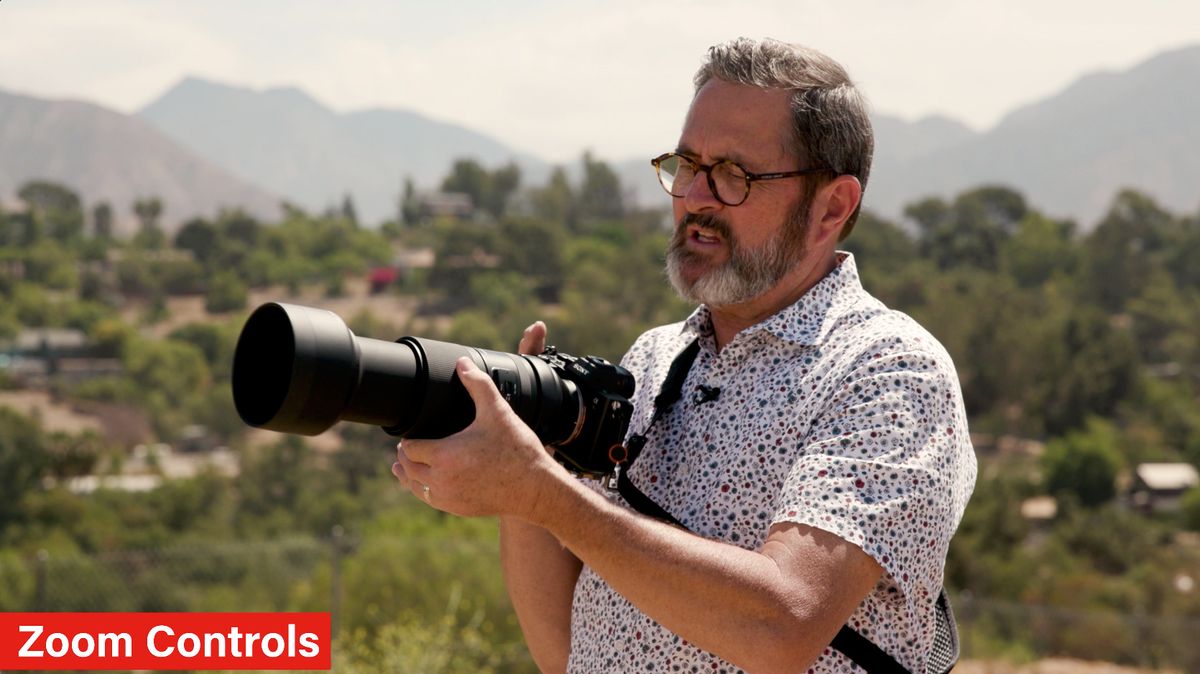


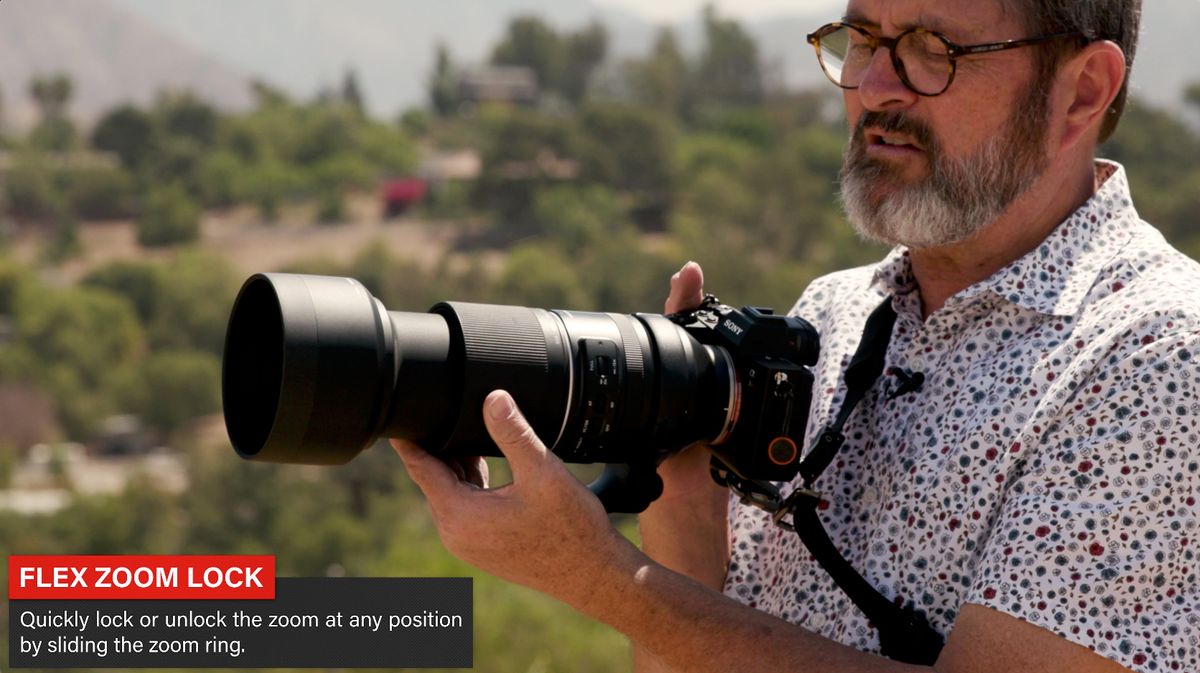

So let’s talk about all of the buttons on the side of the lens here. Because if you understand each one of these, and there’s four of them, it’s going to help this lens perform much quicker for you and be much more effective.
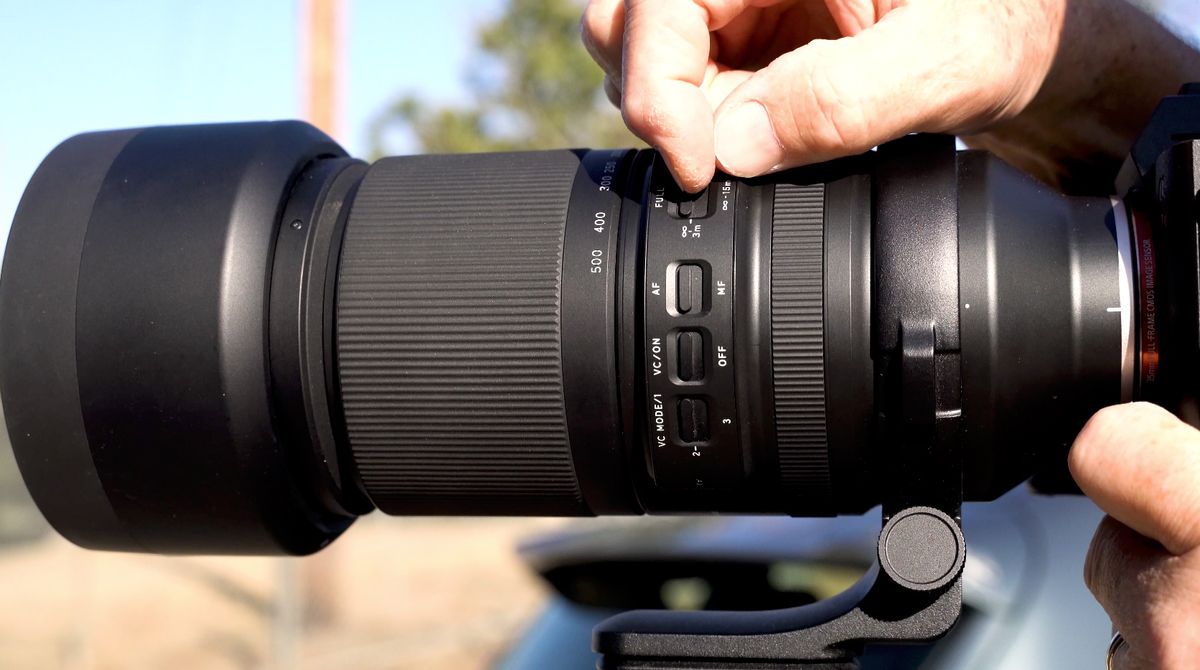

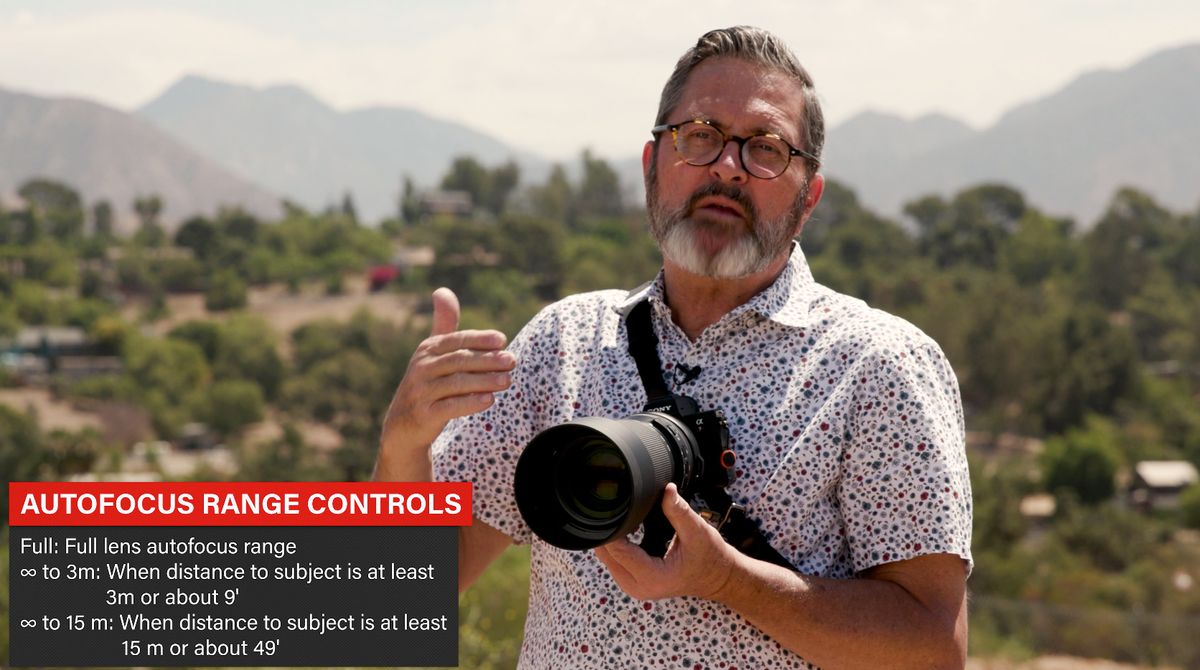
So the first one on the top is you have your autofocus range. You have full autofocus. Which means it’s going to be going as far out and as far in as it can. The motor is going to be driving that lens back and forth, that entire range.

If you know you’re not going to be focusing up front really close, then you can go to the second mode, which is infinity to three meters. So that’s about infinity to nine feet. If you know you’re going to be out there a ways, you don’t want to make this motor have to try to focus that last little bit.
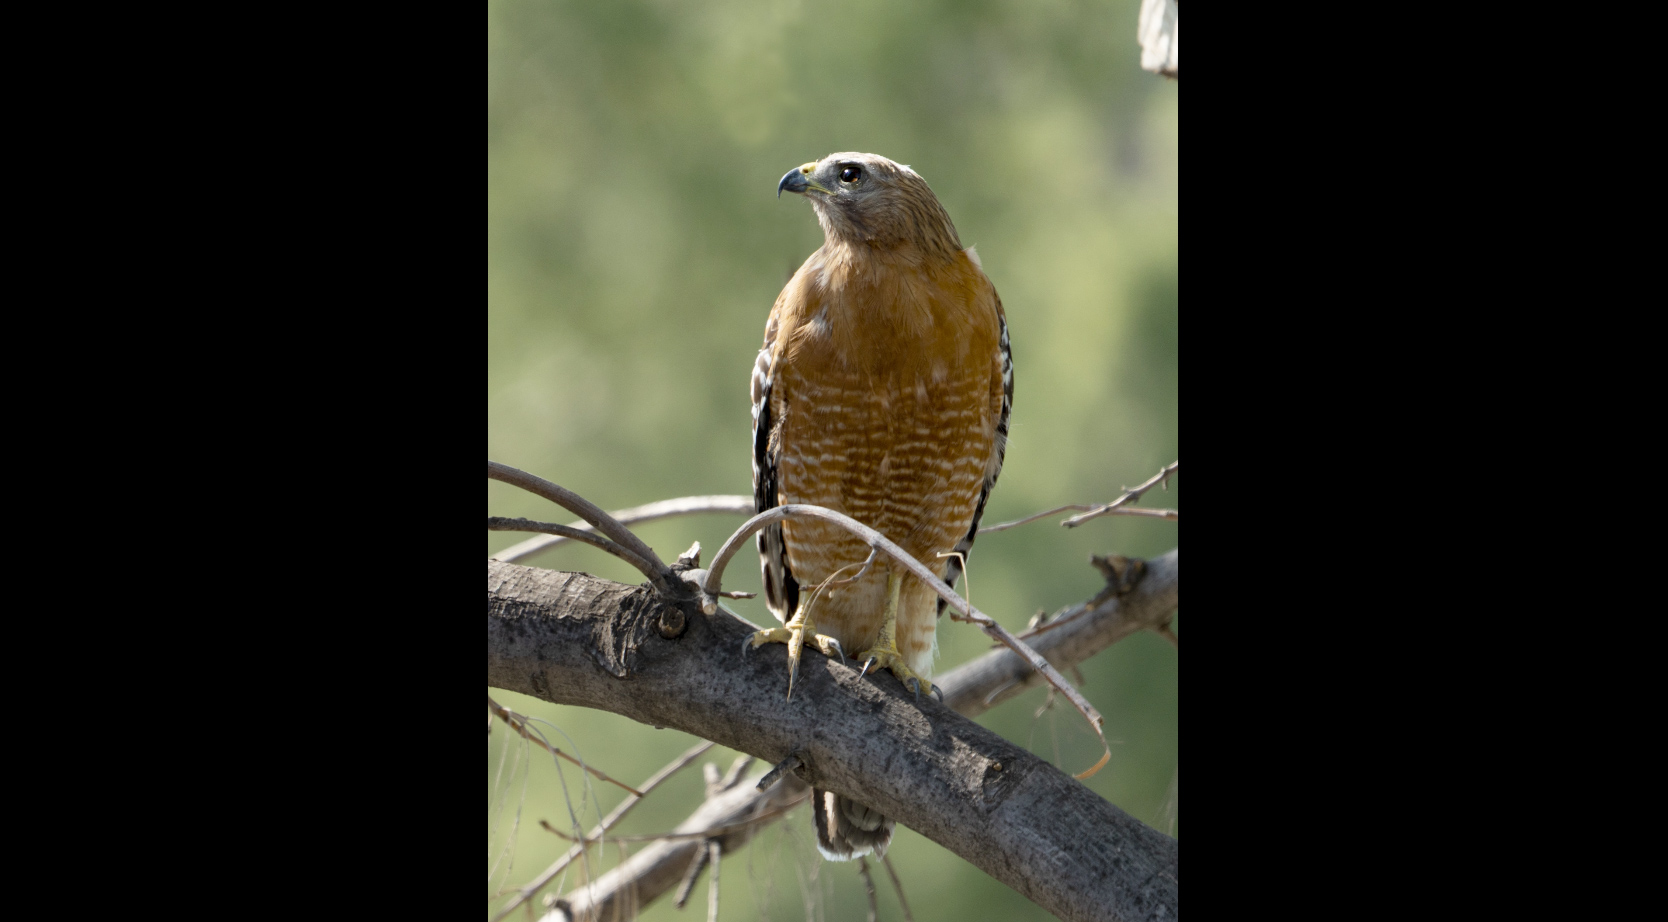

If you know your subject is going to be way out there, go to the last one, which is infinity at 15 meters, which is about 45 feet. So if I’m shooting that Hawk who’s just been flying over us here, I’m going to put that to infinity to 45 meters because I don’t need it to focus super close. It’s out there a ways, and now the motor is going to work faster. It’s super-fast inside this lens, but it’s going to work much quicker to be able to catch your focus and keep it in focus.


So the first decision is, make sure you decide what focusing mode you want to be on in the situation that you’re in. And of course, next is your autofocus or manual focus. So if you’re going to be in a focusing mode, you’ve got to be in autofocus. I don’t shoot manual very often, it’s just too hard for me to pull focus. I use autofocus all the time.
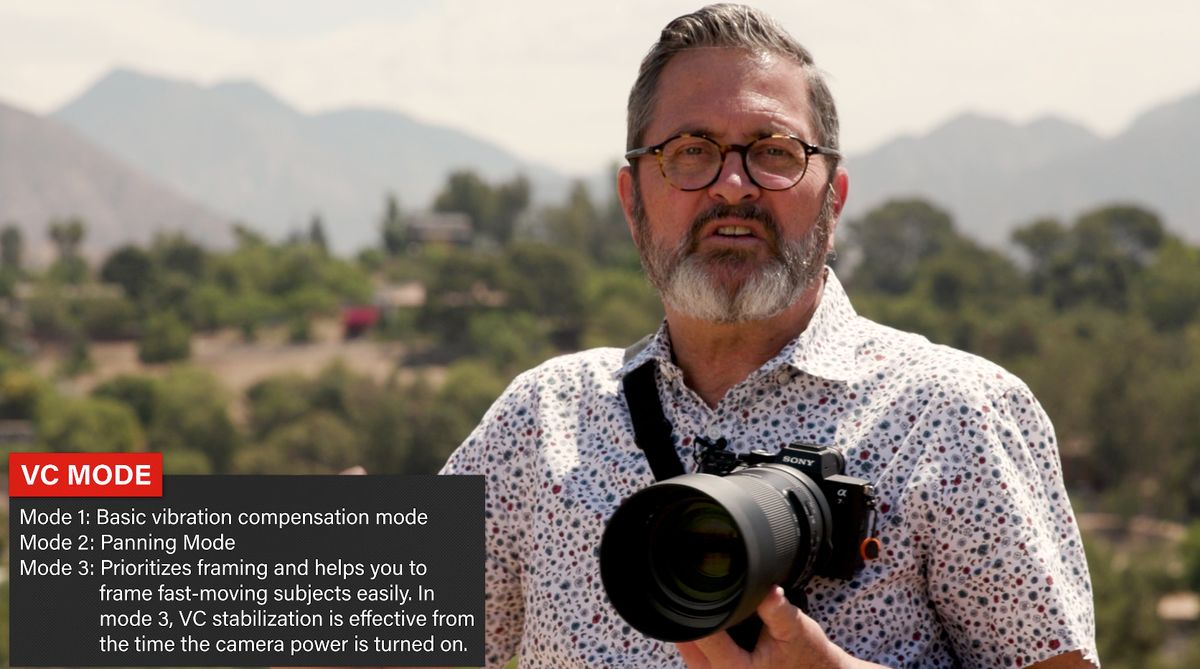
Now we go to VC control. This is one that really messes people up, VC control on or off? If you’re on a tripod, what would you do? Off. You don’t want the VC control on if you’re on a tripod because it’s not going to work the way it should. The camera thinks it’s moving and the lens thinks it’s moving. But it’s in a stationary situation. And it’s going to cause problems. So on a tripod always keep VC control off.
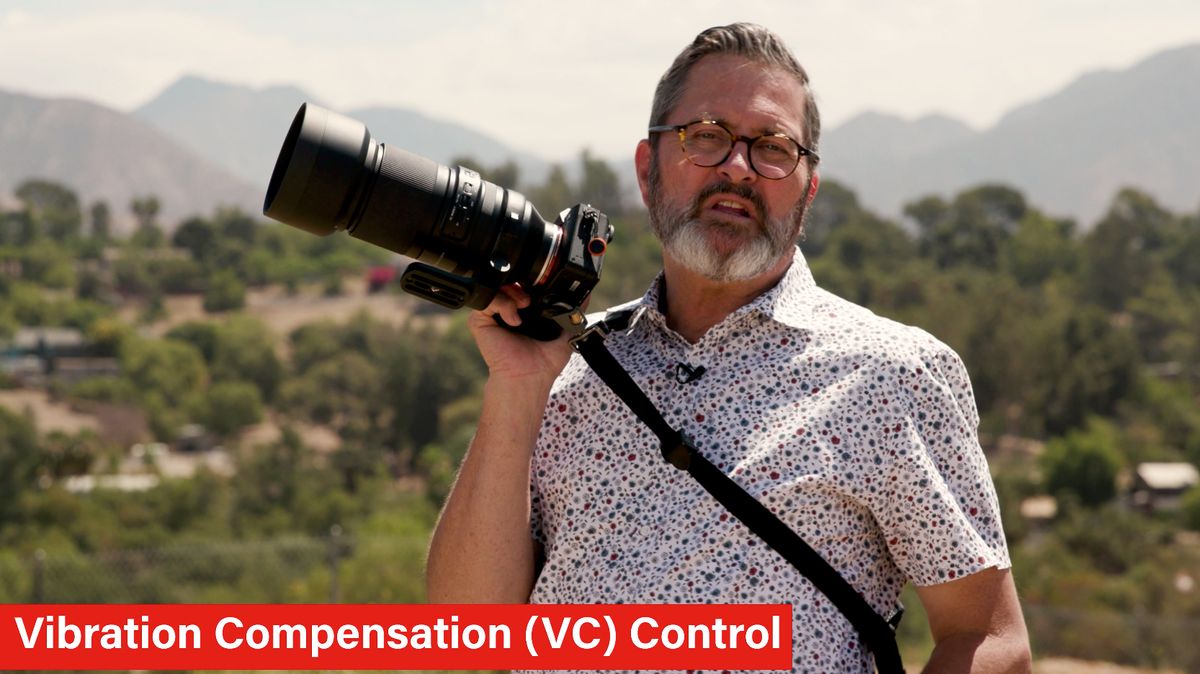
So when you switch to VC on, now you have three modes. The first is a standard mode, it’s just a standard VC control to give you standard stabilization mode. Number two is a panning mode. The lens now is going to work with you as you pan to be able to stabilize. It knows that you’re panning. 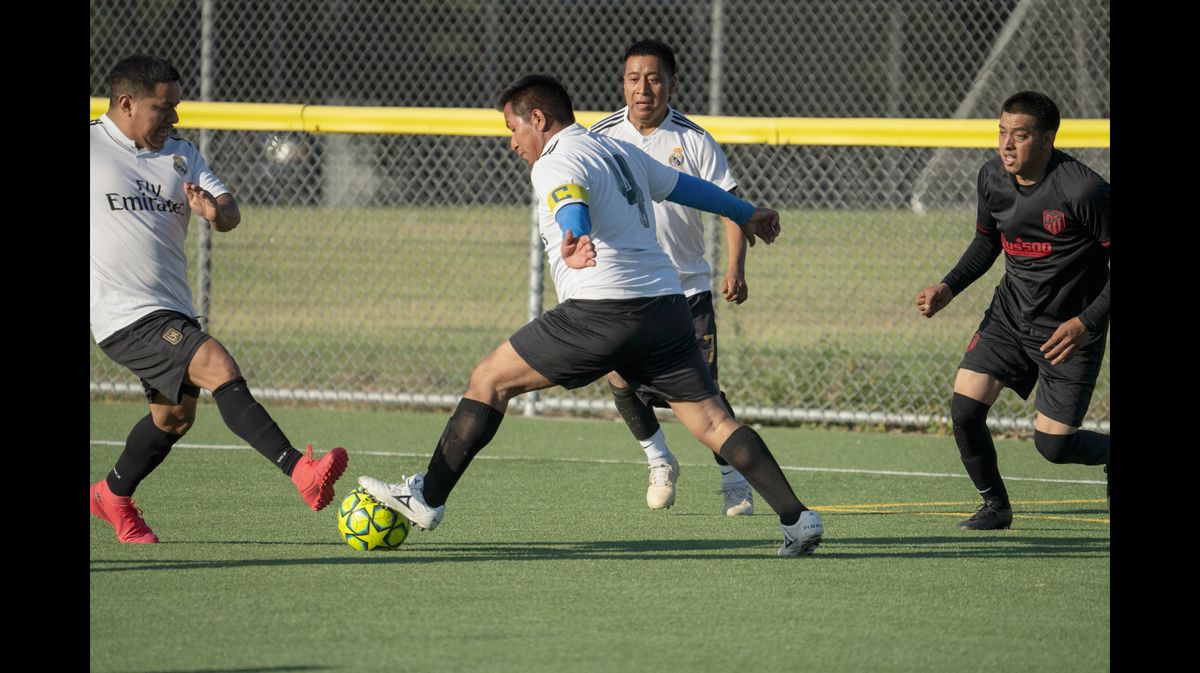


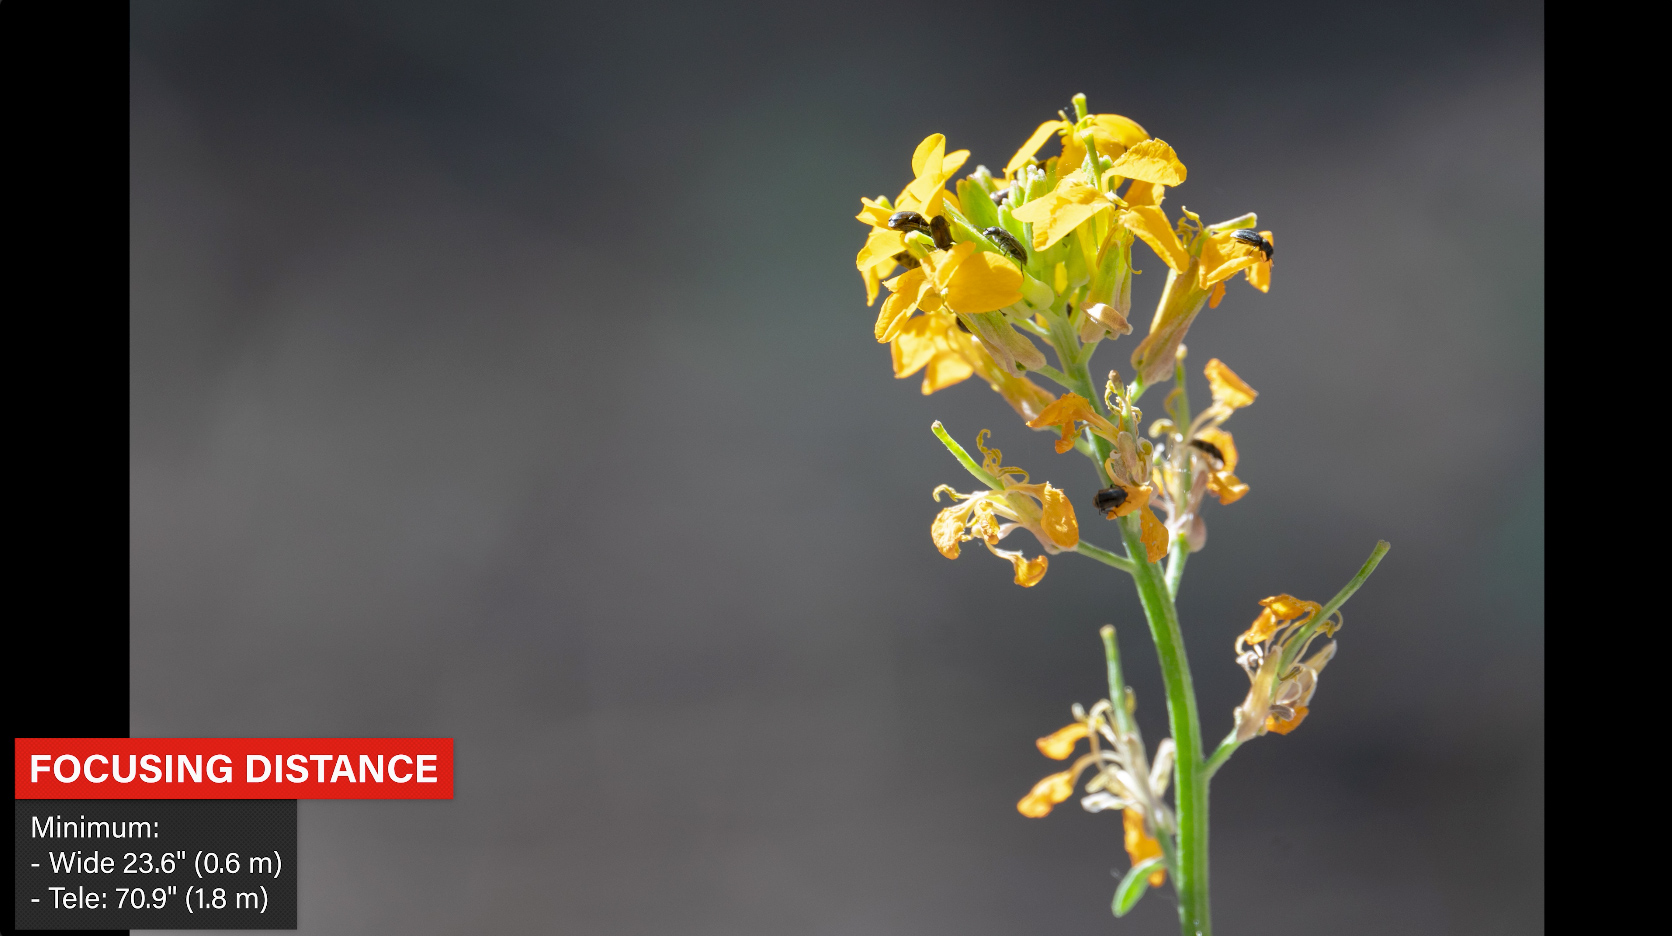
You do get 23.6 inches on 150 millimeters, you get about 70 inches and a bit at 500 millimeters. So I’m usually working this somewhere closer to the 150 millimeters when I’m trying to get in close on subjects. Because I can get in so much closer and it magnifies things and it gives a great result.
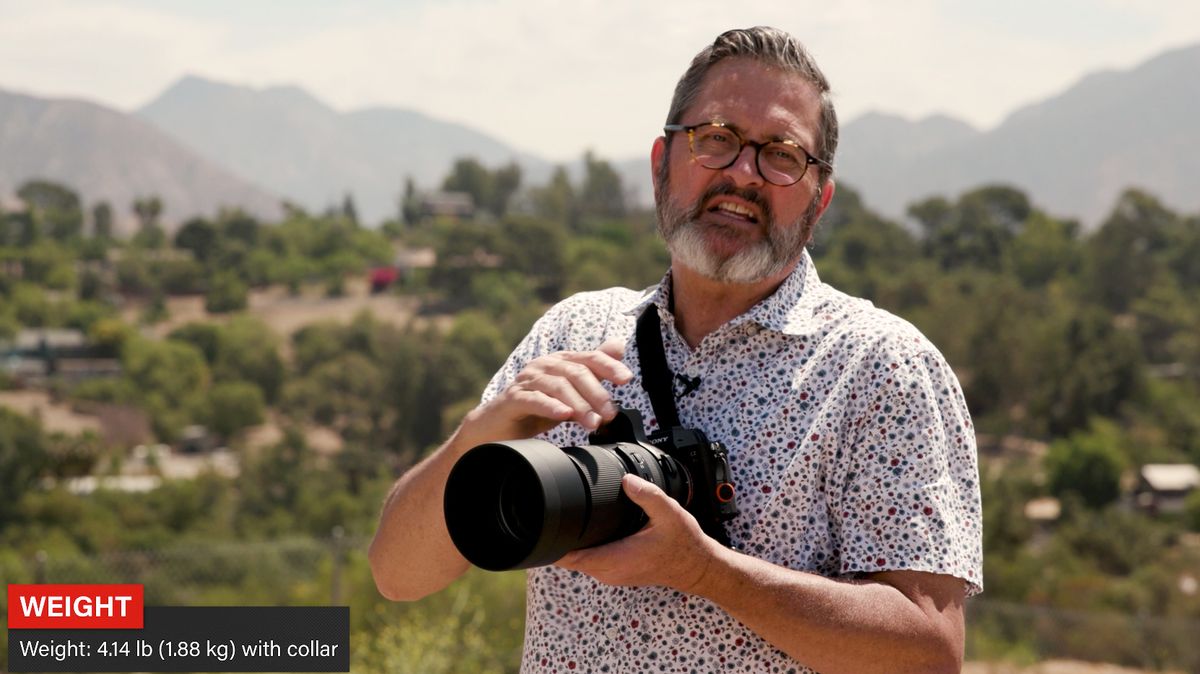
So the weight of this lens is pretty comparable to all the other lenses in this category. It’s definitely not heavier than any other and it’s pretty much about the same as most of them.
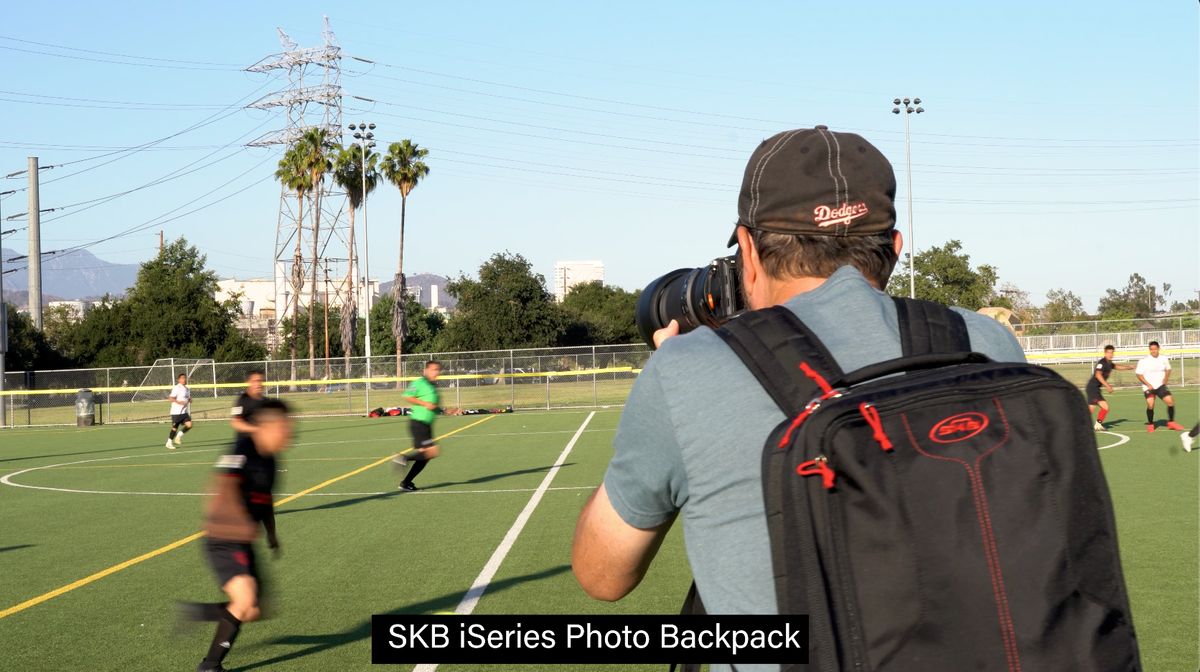
If you can’t use a lens like this and you don’t want to carry it around then would I use a tripod. Use a monopod. Monopods are great for a lens like this because it allows you to run and stabilize. 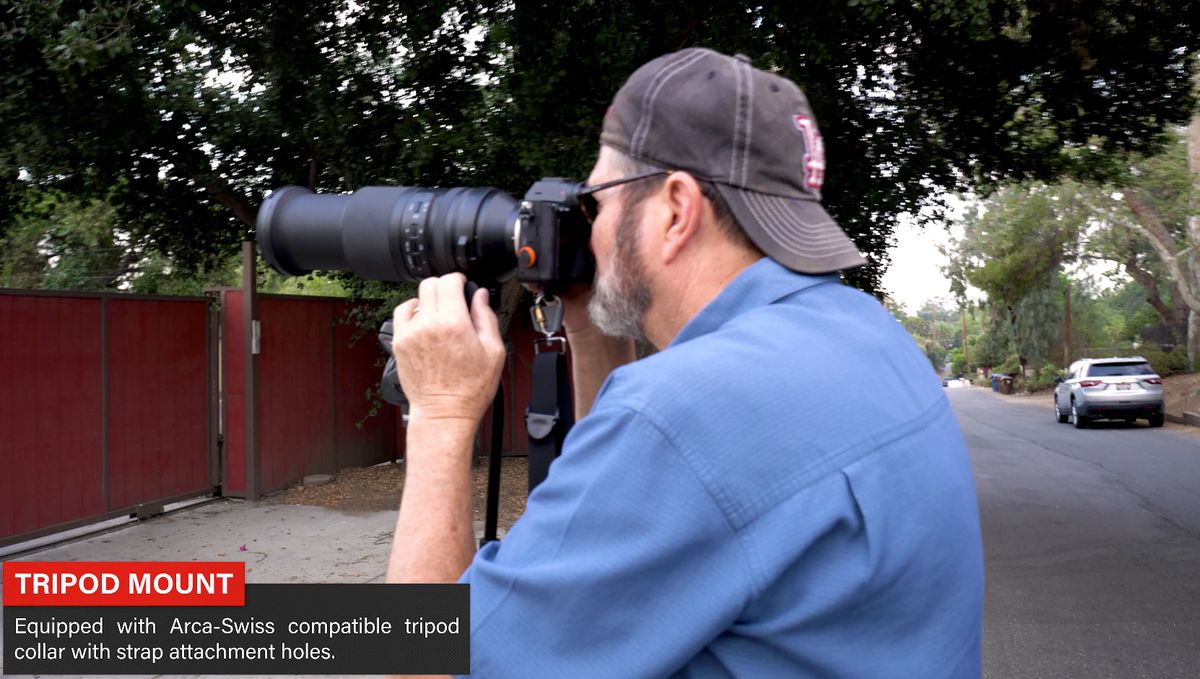

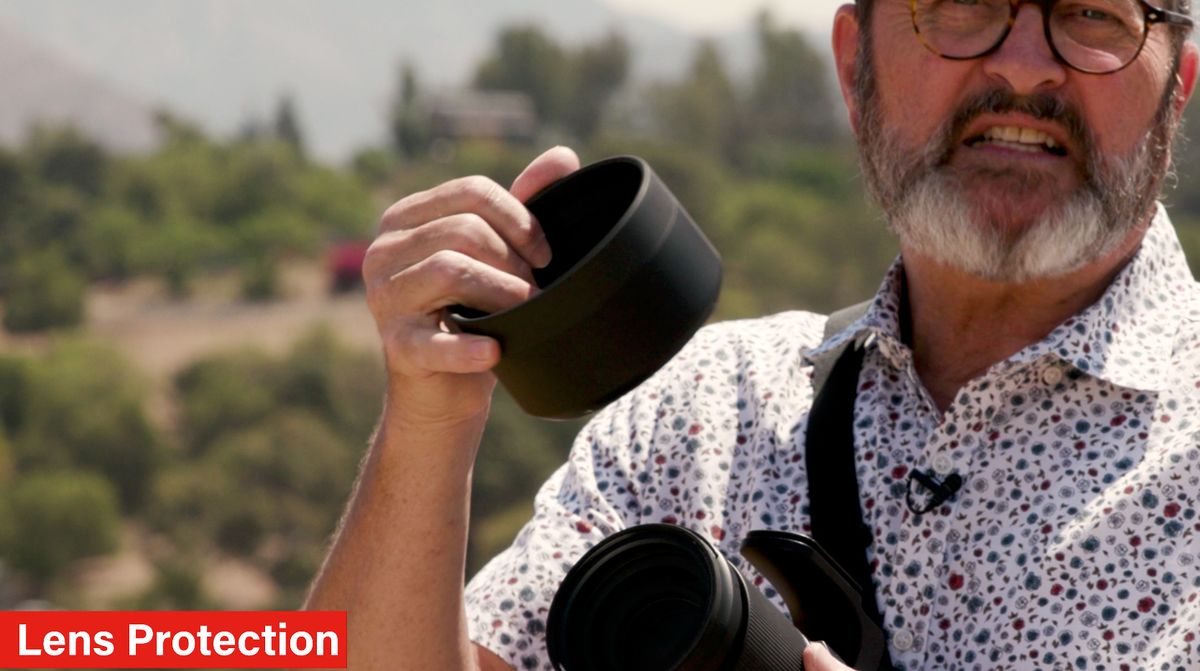

So the lens hood has a rubberized edge on it which is really an advantage. Because if you drop this or bump it a little bit it’s not going to bend that edge up, but it’s going to protect your lens.The lens itself, as with most all of Tamron’s telephoto lenses, has this little rubberized edge on it. So if you do bump it on something that’s going to handle a little bit of a bump. It’s not going to bend that edge of the lens or jam the mechanism. So that’s a real advantage. I like that about these lenses.

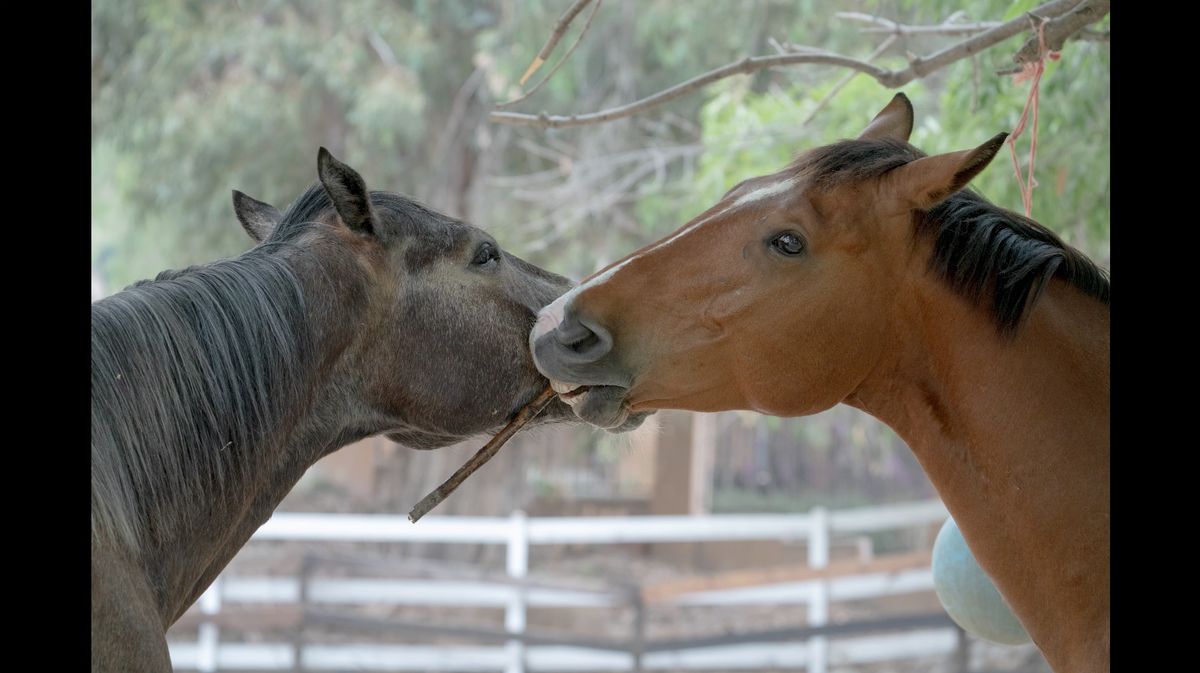
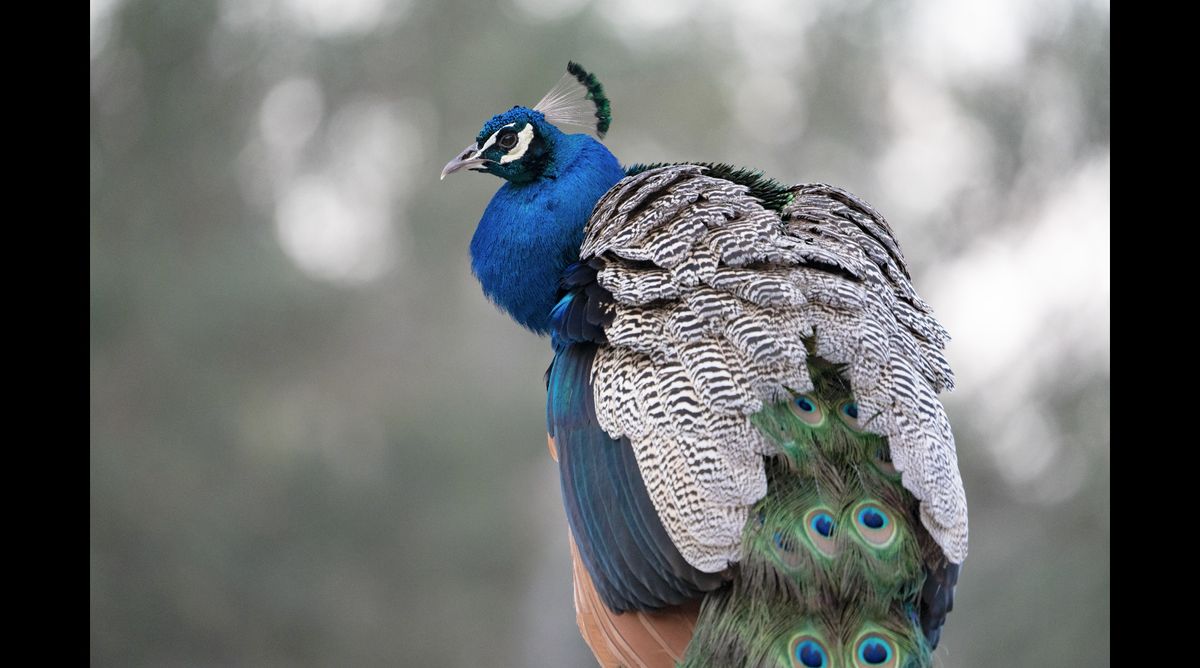
Alright, so let’s talk about my experience with the autofocus on this camera. That’s probably the one feature that most people are concerned about when they’re buying a lens like this. How’s it going to work with Sony? I’ve used it on the a7R III. I’ve used it on the a7R IV. This is the a7R IV right now. And on each of those cameras, I have been able to use the eye tracking. And interestingly enough, when I was photographing horses, I was able to use the animal eye tracking. It was focusing and was tracking the eye of the horse. When I shot the peacocks it was absolutely focusing. The eye tracking for animal was following the eyes of the peacock.

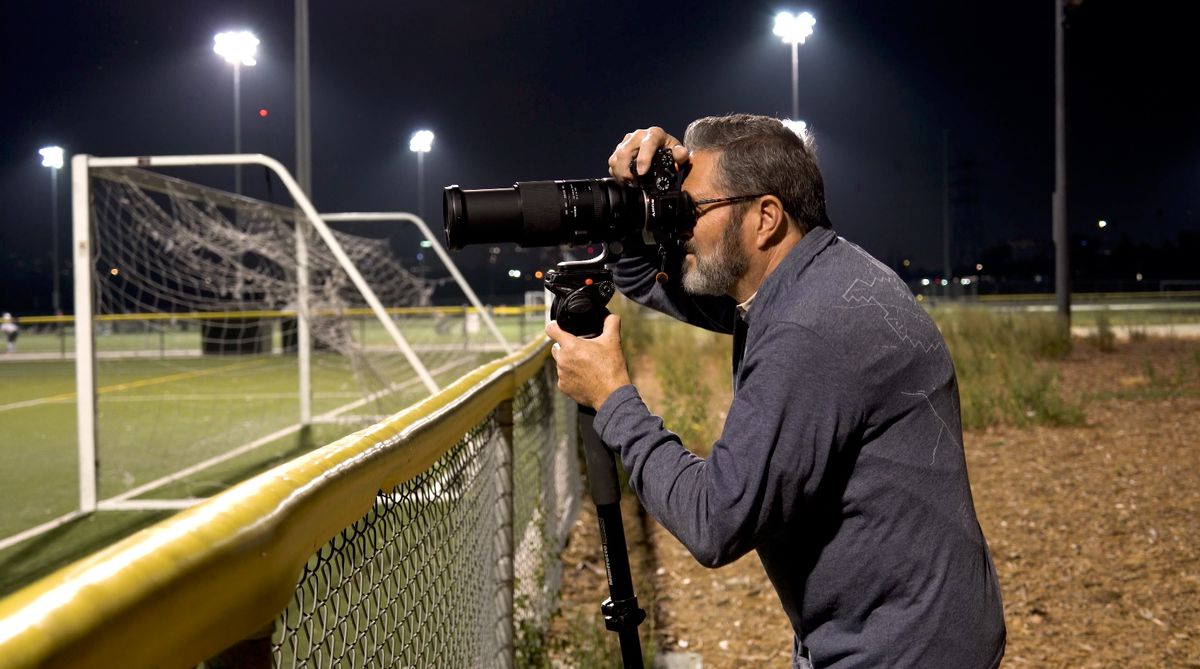
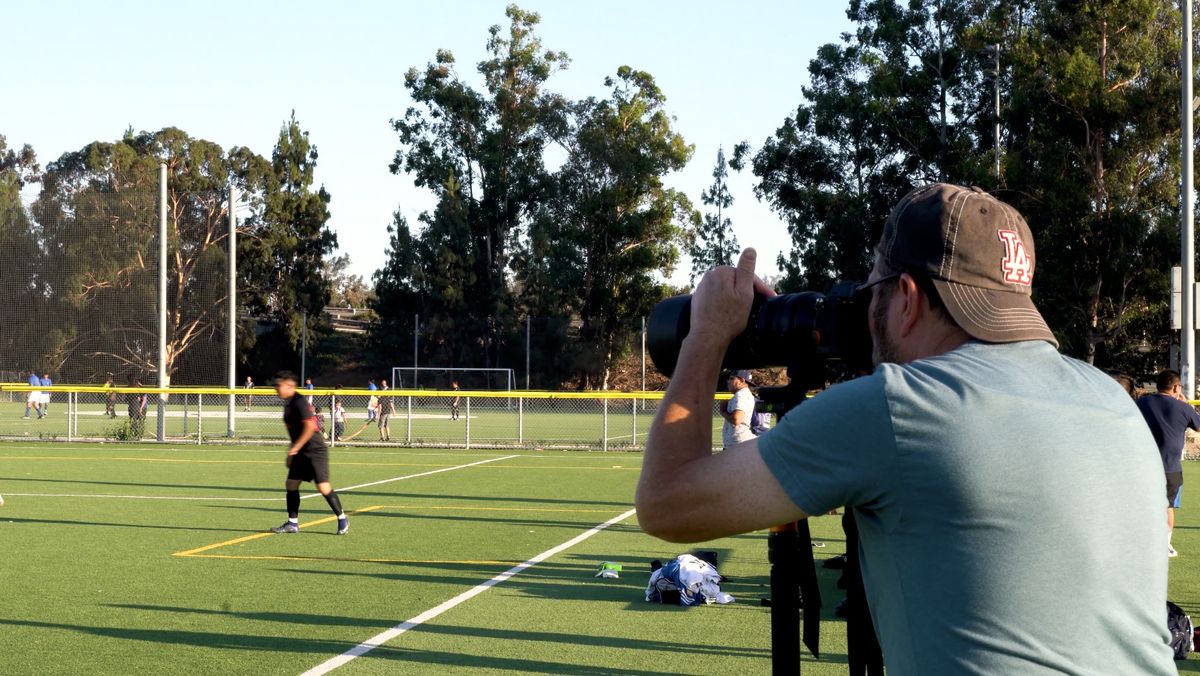
It’s got VHD, which is an extreme motor drive that’s going to drive your focus. Which really works and responds extremely well. I found it to be very responsive. I was able to follow in tracking mode like a bird, when it was flying by. I was able to stay on an object and it was focusing on the eye of a person. Also on a soccer player when I was photographing the soccer players. In each of those modes, I found that the autofocus was responsive and worked very seamlessly with the Sony cameras.

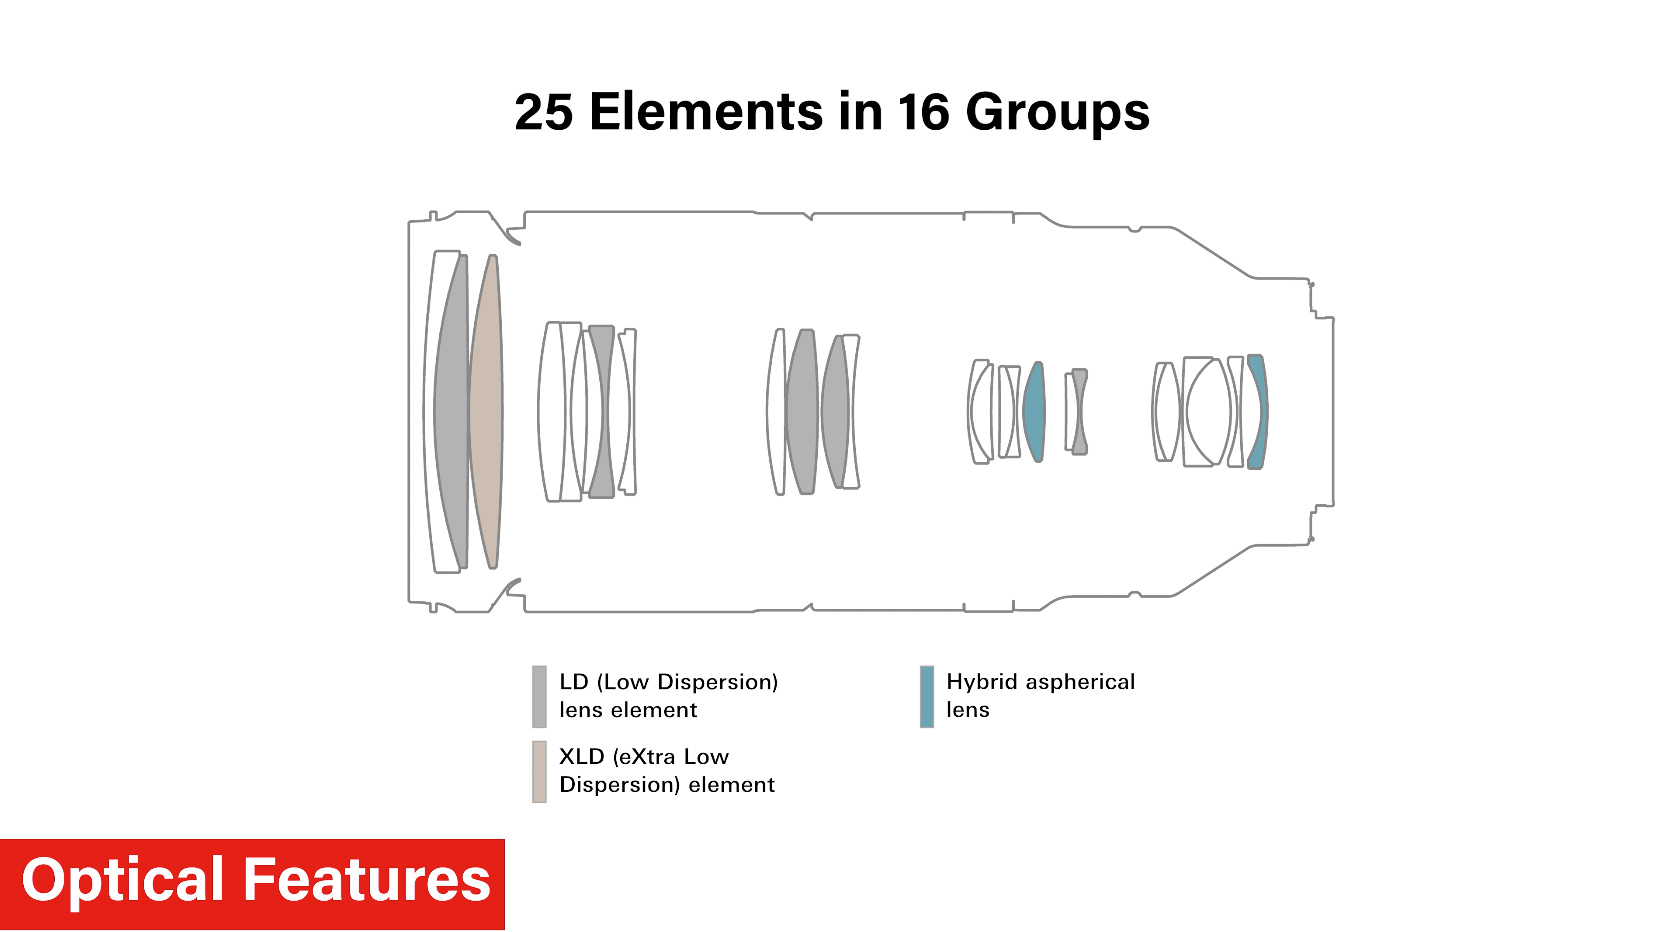

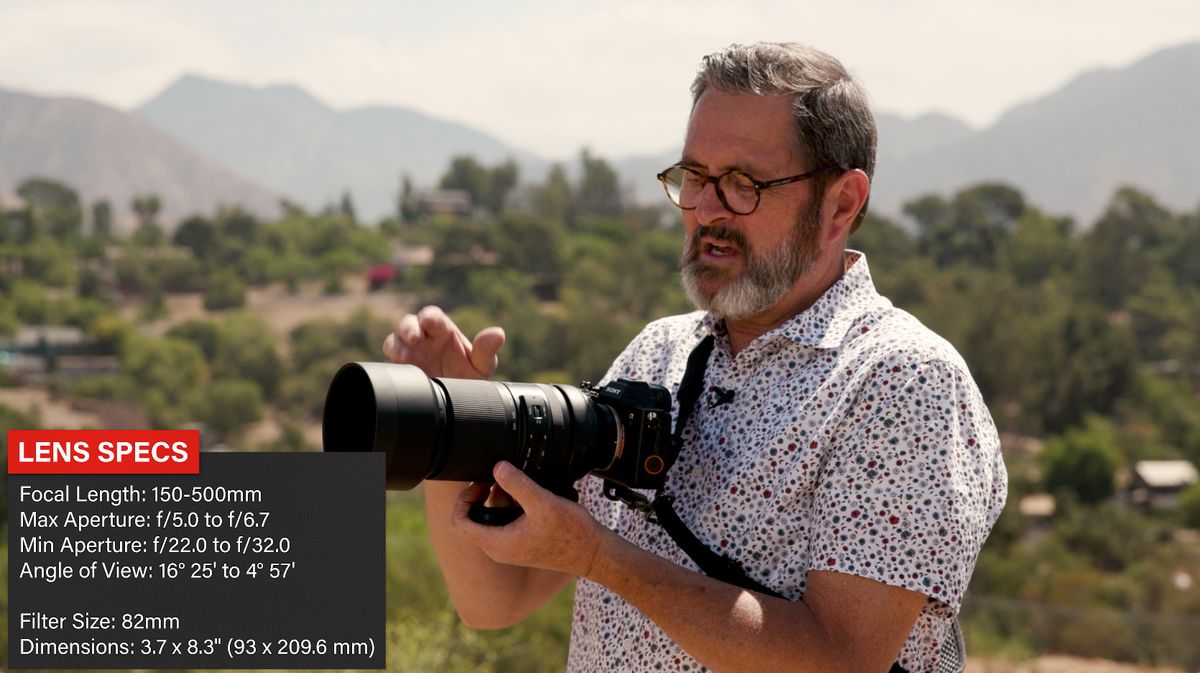
Let’s talk about the optics of this lens. It’s got 25 elements in 16 groups. Each one of those elements is made so that it will control that aberration and give a much cleaner, much sharper image. 


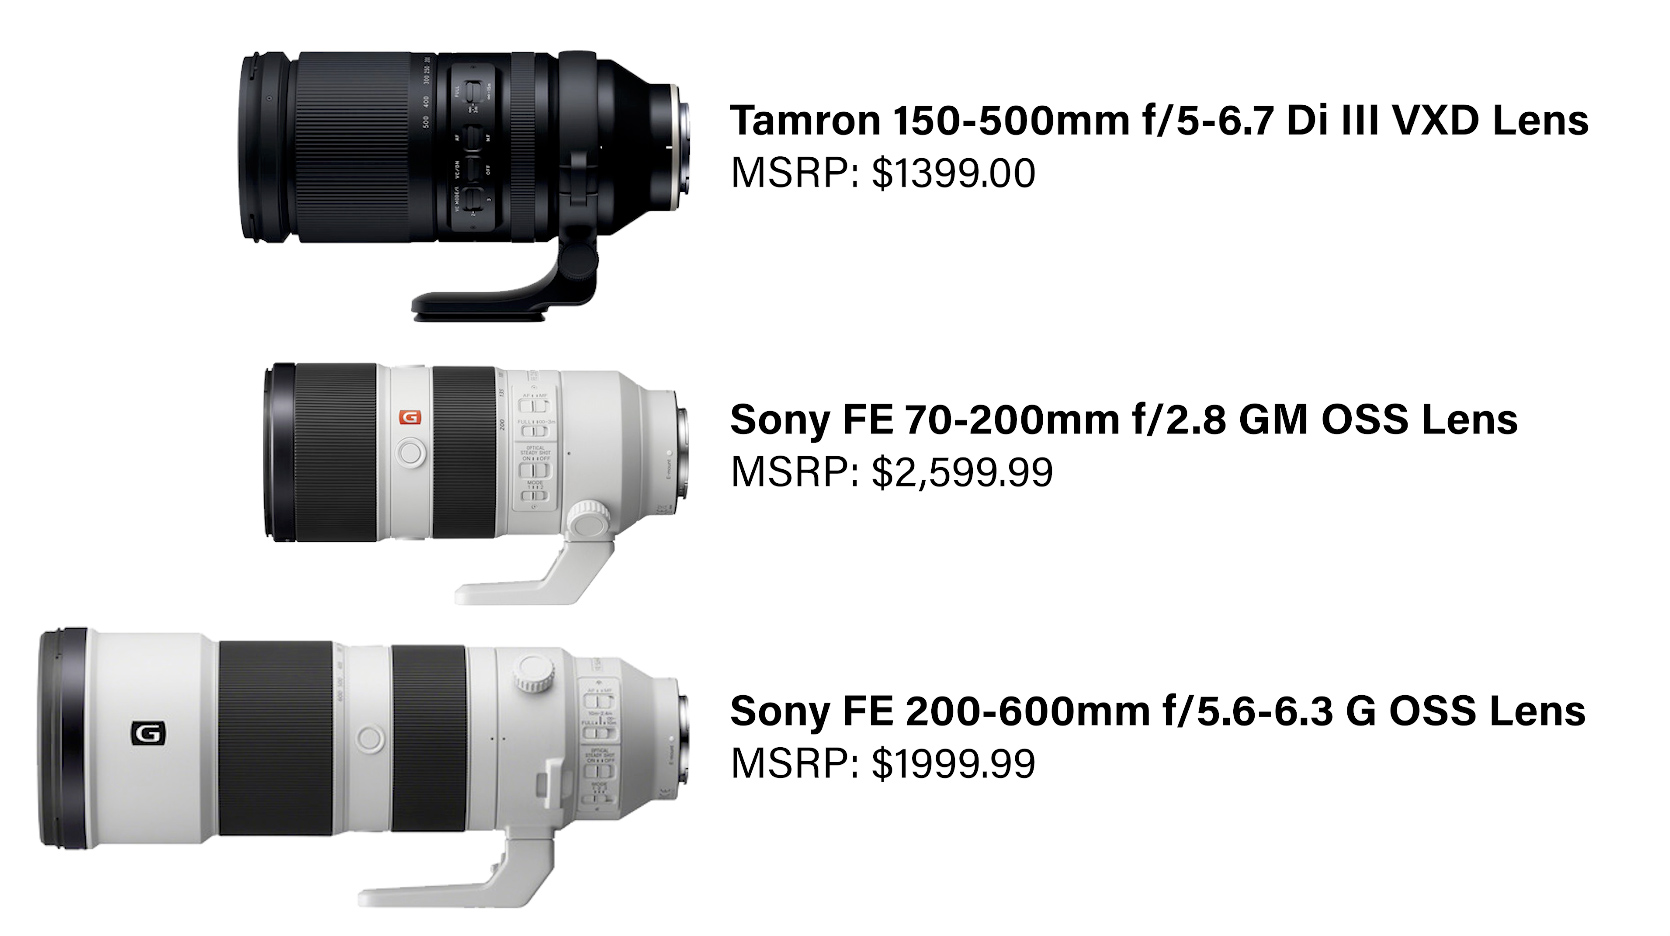
So for $1400 you can get into a lens that allows you to be able to do wildlife or some landscape or some sports type photography. I carried this lens on a hike that we did for four miles and this lens allowed me to get in tight on things and to do some vista types of things and to be able to shoot some animals. 

So I hope you enjoyed this as much as we loved making it, because we love to be out and to be shooting. And this lens was a lot of fun to work with. So check it out. See if it works for you and keep those cameras rollin’ and keep on clickin’.
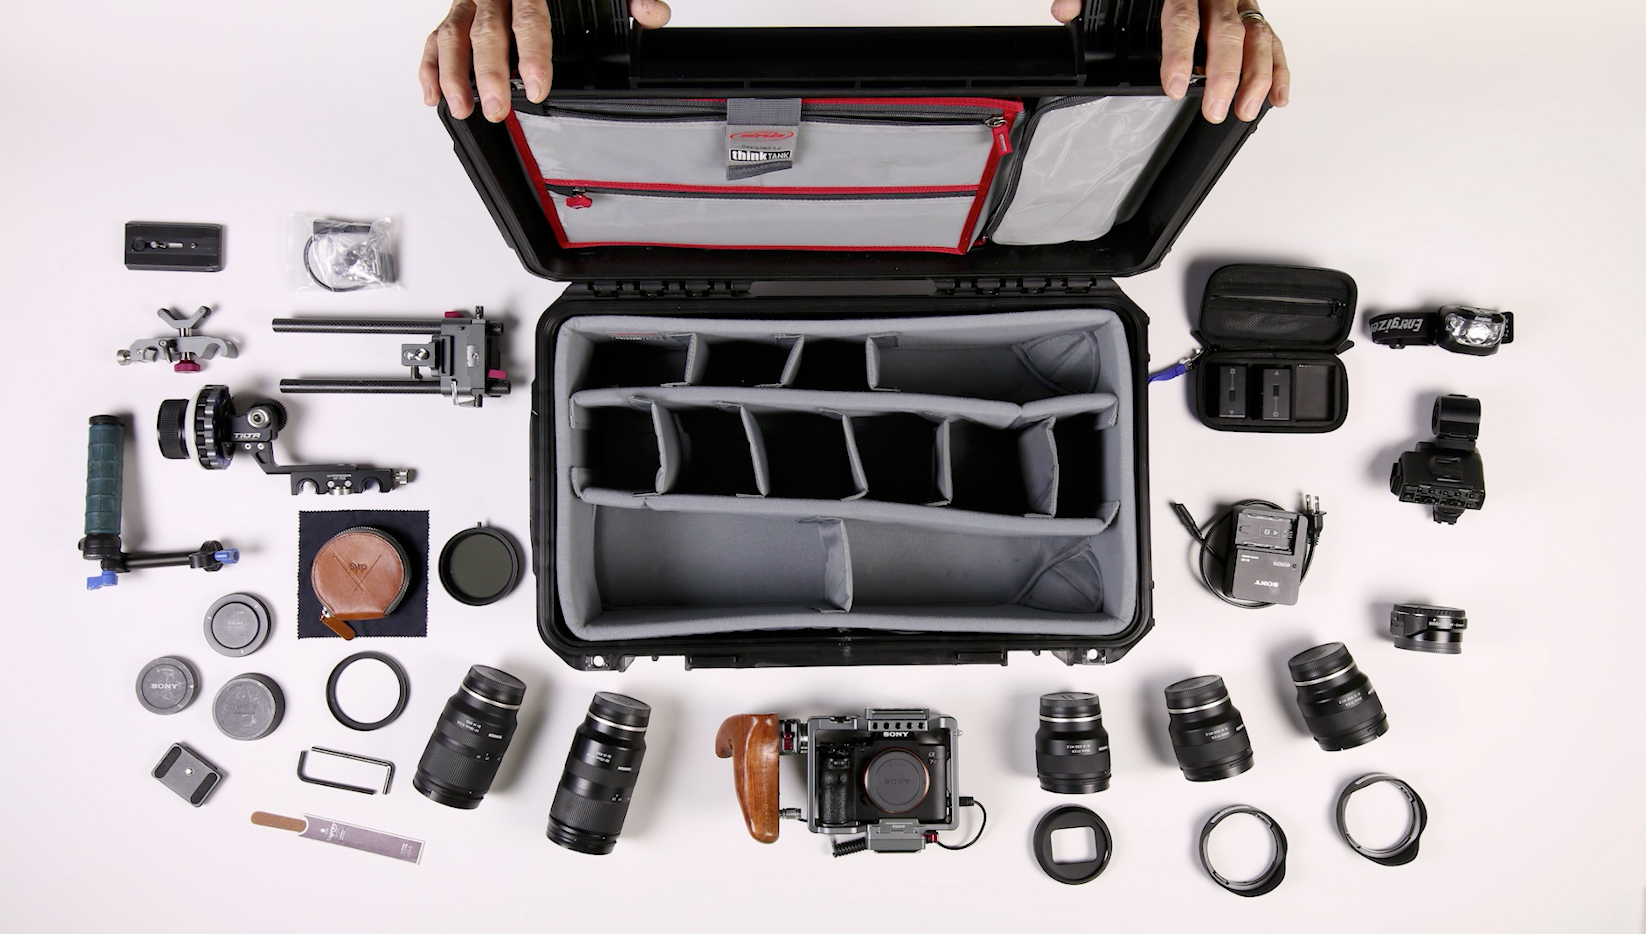

My SKB 2011 Case is perfect for all my Sony gear. Let’s pack it up. Sony a7R III and a Tilta cage. Tamron 28-75mm, Tamron 35mm, Tamron 17-28mm, Tamron 24mm, two Allen wrenches, ARCA Swiss plate and an emery board, Tamron 28 millimeter and shade, polarizer and step down ring, meta bones adapter, extra body and lens caps, Sony battery charger, Syrp variable ND filter and cleaning cloth, K2M Sony audio adapter, Tilta follow focus rig, batteries in a Shutter brands case, nuts and bolts, headlamp, Manfrotto plate…