

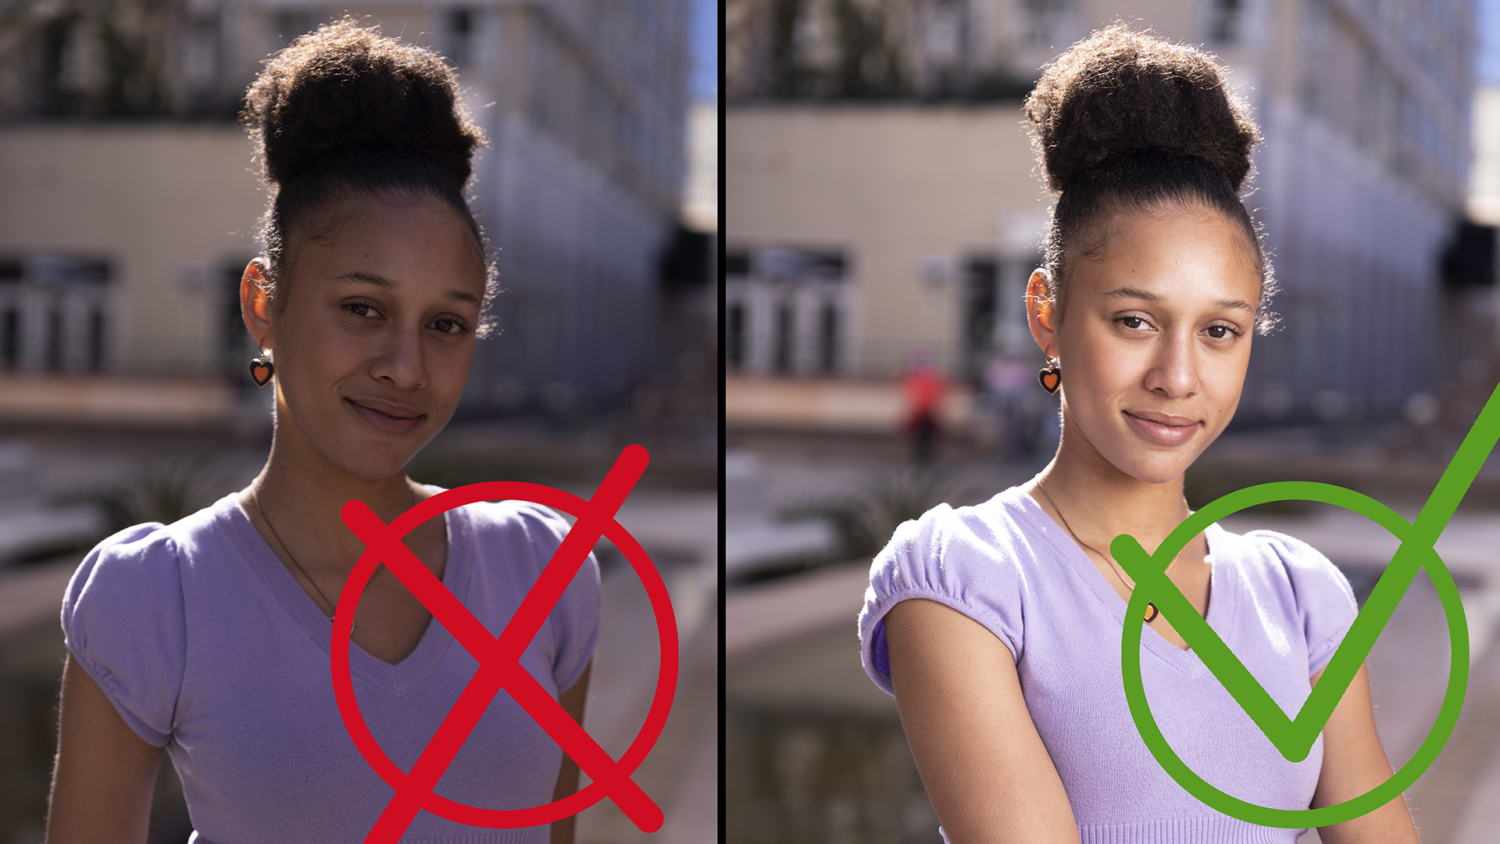
How to shoot head shots outside on location using high speed sync. In this Laws of Light lighting tutorial we show you three ways to shoot portraits when you are battling the mid day sun. These easy approaches will help you shoot head shots, corporate portraits or any kind or portrait outside when you are dealing with bright sunlight. Get our FREE DOWNLOAD questionnaire on what to ask your clients so you are ready to shoot their portraits and there will be no surprises!
Hi, this is Jay P. Morgan. Today on The Slanted Lens I’ve got Anaya here with me. Anaya shot with us before. But she’s here today to help us look at using high-speed sync to do company or corporate portraits outside. 


I mean if a client says to you, “Hey, can we get a full body shot here?” And you go, “Well no, the light really doesn’t look that good.” No, you can’t say that. “It’s our corporate CEO. We want a full body shot.” You go, “Well, the light doesn’t look that great.” No! You have to be able to do it right then, right now. 


Special thanks to Westcott for sponsoring this video.

A quick reminder why we use high speed sync. A shutter opens and then closes. So there’s a moment where the entire sensor is exposed. After 250th of a second it opens and the bottom plane of the shutter follows it across the sensor. So it closes so fast that the sensor is never fully open. 


So setting up the FJ400 is quite simple. You just simply, in the first menu you see sync, you hit sync. And it’s going to go from normal here in the corner. It’s going to go to an h with a flash. That’s high speed sync. 


So why wouldn’t you keep this on high speed sync all the time? Well because the strobe is having to pulse several times, having to flash several times. When you’re in a situation where you don’t need that and you’re under 250th of a second for your shutter, you want all your power at once. So it does limit the amount of power this gives out because it’s having to divide the strobe up into several pulses, in order to give you an exposure. So if you’re in a normal situation you don’t want to use it. But when you have to go above 250th of a second, you definitely want to use it.


So when do we use it? We use it when I want to go to f/2.8 or even a faster aperture like f/1.2, and I want to have a dark background. If I go to f/1.2, we’re here in the shade, f/1.2 is going to make that background just blow out. So I’ve got to go to a faster and faster shutter speed to get that background under control to give myself a beautiful out of focus background with that wide open aperture. And then using a fast shutter to keep the exposure of that background so it doesn’t become too bright and overpower my person in the foreground.

The first thing I do when I roll in to do one of these shoots is I want to isolate my talent and get them out of the sun. I don’t want to have to work in the sun. It’s just too hard to make light look good in the sun. And it doesn’t give you a lot of options. So there’s three different ways you can get your model out of the sun so you can paint the light into the strobe and give you the nice look that you want. 


So the second thing is, I create my own shade. I’ve got a nice overhead topper here.That works great as long as I’m shooting from the waist up. As long as I start to see full body. The problem I get now is I see the sun in the background. But for most of the shots I’m going to do, this overhead kind of shade works perfectly.


All right, so here’s my next setup. I’m just using this reflector. It’s not a translucent. I don’t want any light to come through it. And it’s cutting all the light off of her face. It’s pretty much shade. I am getting some bounce light around in here which is a little crazy. My strobe, I’ve aimed my strobe directly at her because I need more power out of it now. I’m almost up to full power in order to be able to overcome the background here.


When I take my first picture I’ve got a bench in the background that is just super hot. 


The third way to get her out of the sun, to be able to work and to paint the light that I want with my strobes, is to just simply walk into the sun and turn her so that the sun is going to be behind her. 


So here’s our backlight setup. I’ve spun her around so she gets a nice rim light on her hair and her shoulders. I’m looking into the shadows back there because the sun is up and behind her. It casts shadows from the building towards me. And that just gives us a darker background. I’m at 1/640th of a second because I don’t need as much. I don’t need to crush that background as much because it’s pretty dark back there. It looks actually very nice. I get a nice rim on her hair. A nice rim and now I can bring my soft box in and open up the light on her face. It just looks really nice.

So there are the three different ways. 1. Move your model into the shade. 2. Create your own shade. Or 3. Turn your model so the sun is not on their face. And I’m now looking into the background and the sun becomes a rim light around their body. Those are the three different ways to get your model out of the sun. And now you can go to the next step which is high speed sync and setting your strobe.


So generally, when we do a shoot like this we’re going to have specific things that the client wants or you call it a brief. If the client doesn’t tell you exactly, you’re going to have to ask a lot of questions. But generally speaking it comes out to just the basic answers. Do you want vertical or horizontal or both? Do you want tight or do you want full body or just waist up? Some people say, and like one of them we did, they said “We want contextual. We want to see the back lot. We want to be able to see some of the locations there. We want a vertical shots but not too tight. We want some sitting. We want some standing.”


A simple thing can change the entire portrait immensely. If I just have them lean towards me it makes a much different portrait than if they lean away from me. And so I’m just trying those different things. Each person’s a little different. Each person needs to be kind of moved and posed a little differently.

We’ll capture so we’re going to be tethered and capturing to capture one. You can’t use Lightroom. It’s too slow. Capture One is really the way to go. So we’re capturing to Capture One. The client is looking at the images. I’m going to shoot 150 to 300 images per person. And we did this for two days you know, so that’s 30 or 40 people and that’s easily 9,000 to 12,000 images for one shoot. Now we go through and we sort through all the images.


So let’s wrap this up. When I’m doing one of these projects I want to go through the three steps. I want to make sure I get the sun off of my person with either shade, overhead shade I create, or backlight. I then want to use high-speed sync. I set my aperture to f/2.8. Then I want to use my shutter to make the background as bright or as dark as I want. That’s why high-speed sync is so important. It’s so easy to do with that FJ400. It just makes it a very simple process for me. I think I get great images and a good workflow.

So if you enjoyed this take a look at the download that we have. It’s just a sheet of questions you should ask your client when you go to do a head shot or some kind of a corporate portrait. It’s a great thing. Go over to theslantedlens.com and download it there. It’ll give you the ability to ask the right questions so you know exactly what to do when you go on the next shoot when you’re doing a head shot or corporate portraits or some kind of company pictures.

All right, so I hope you enjoyed this and it gave you great information. Leave us a comment. Keep those cameras rollin’ keep on clickin’!