
(If you want to watch the video review go to The Slanted Lens on YouTube!)
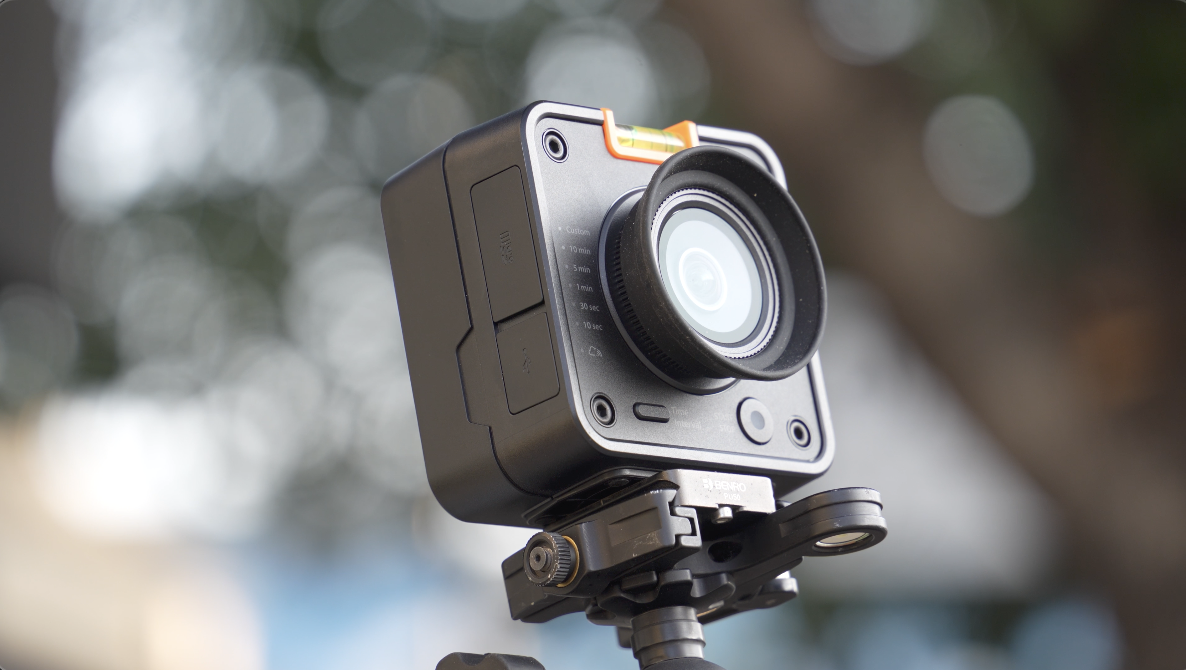
If you don’t have a small time-lapse camera, you are missing out on great opportunities for your business doing time-lapse. Time-lapse for construction, time-lapse for corporate videos, time-lapse even for weddings and events. 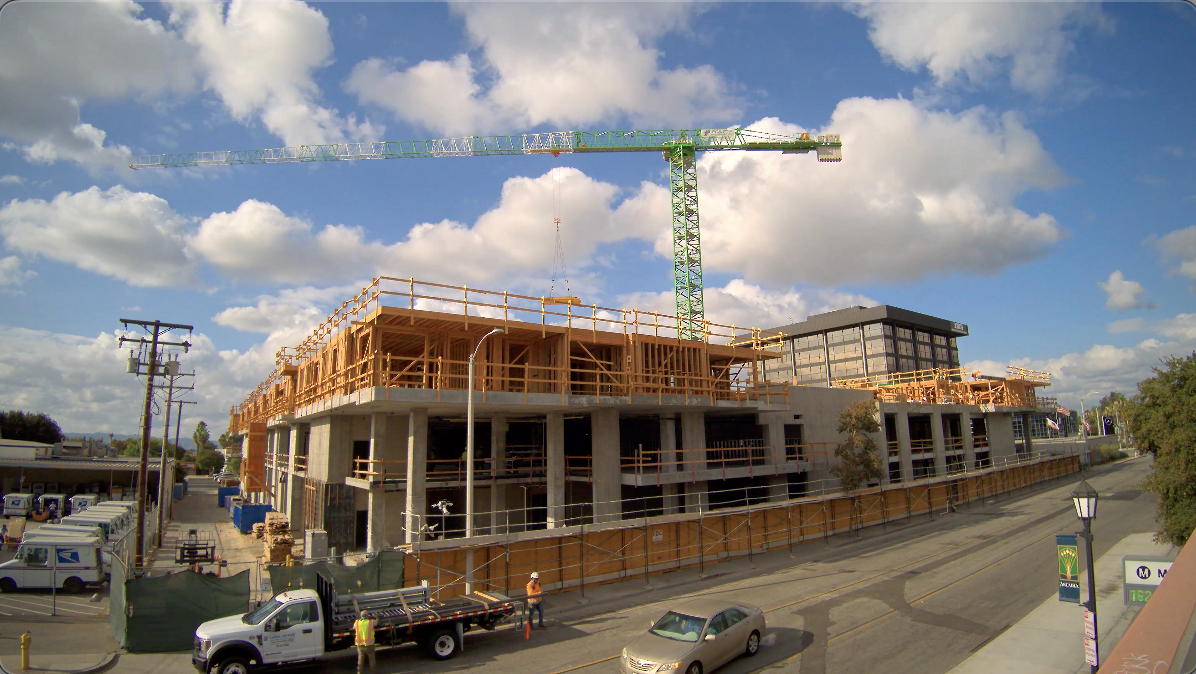 Let’s take a look at the new Brinno TLC5000 and how it will help your business to grow both in photo and video.
 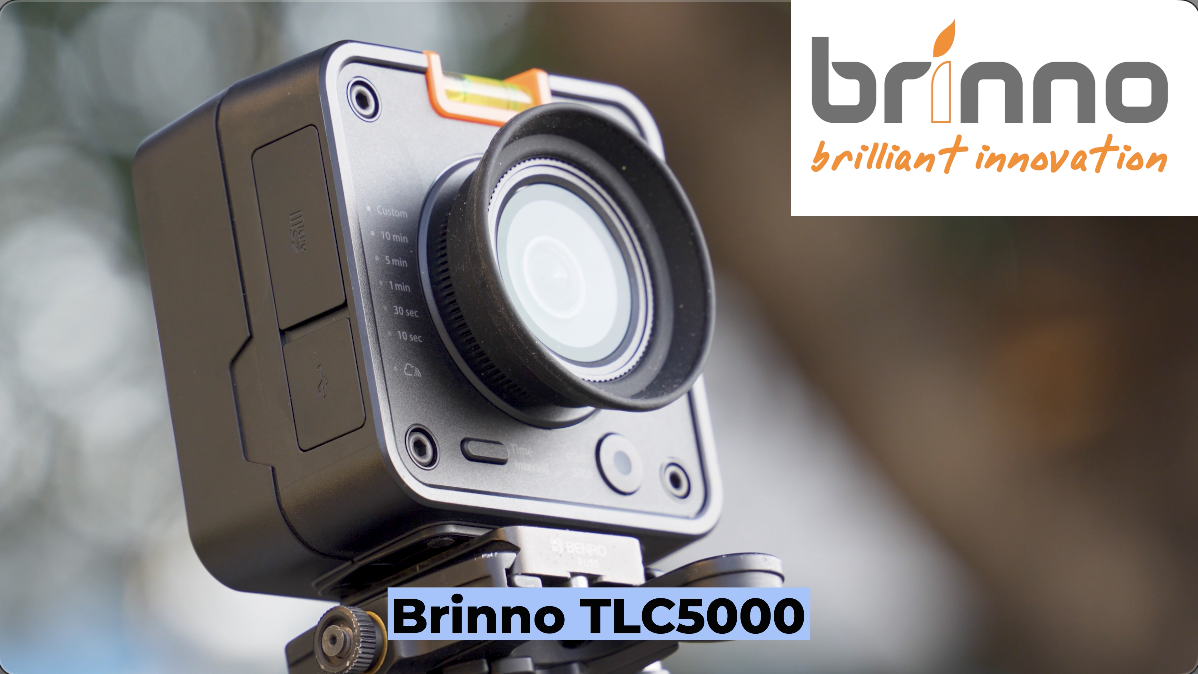 And of course, I immediately got it into an SKB case, because everything I own goes into an SKB case and ready to travel.
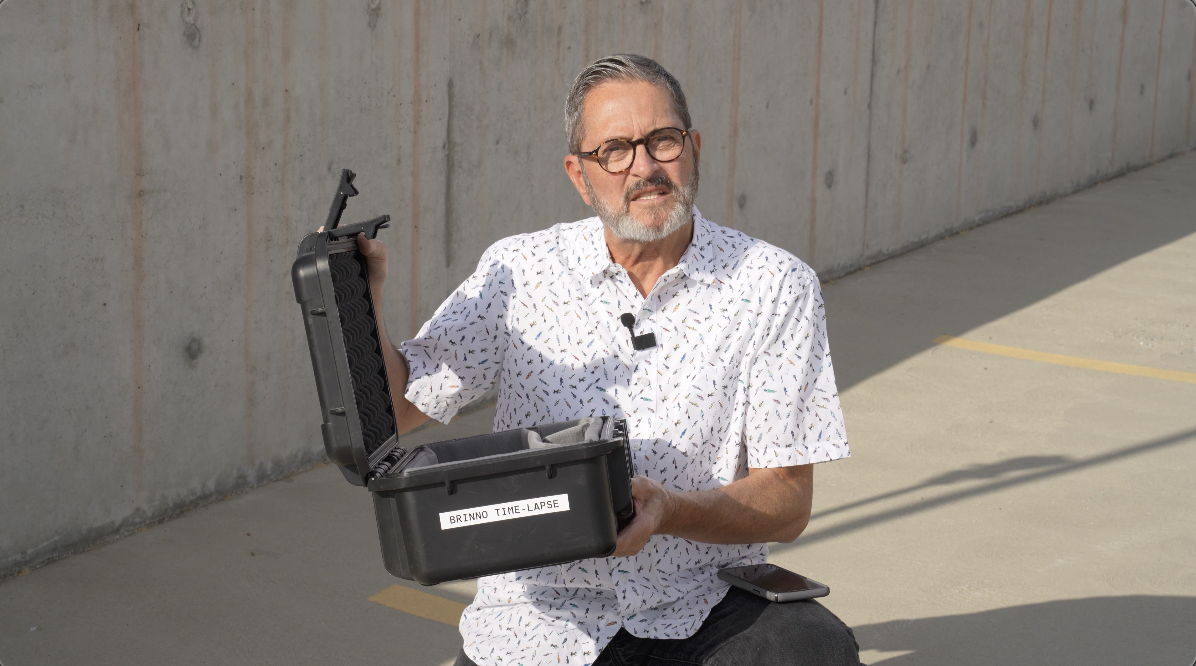
I love these small time-lapse cameras because they’re just easy to carry with you. I can put one in my camera case. I can pull it out, throw it on a tripod, do some time-lapse if I’m doing some kind of an event, if I’m setting up a shoot. 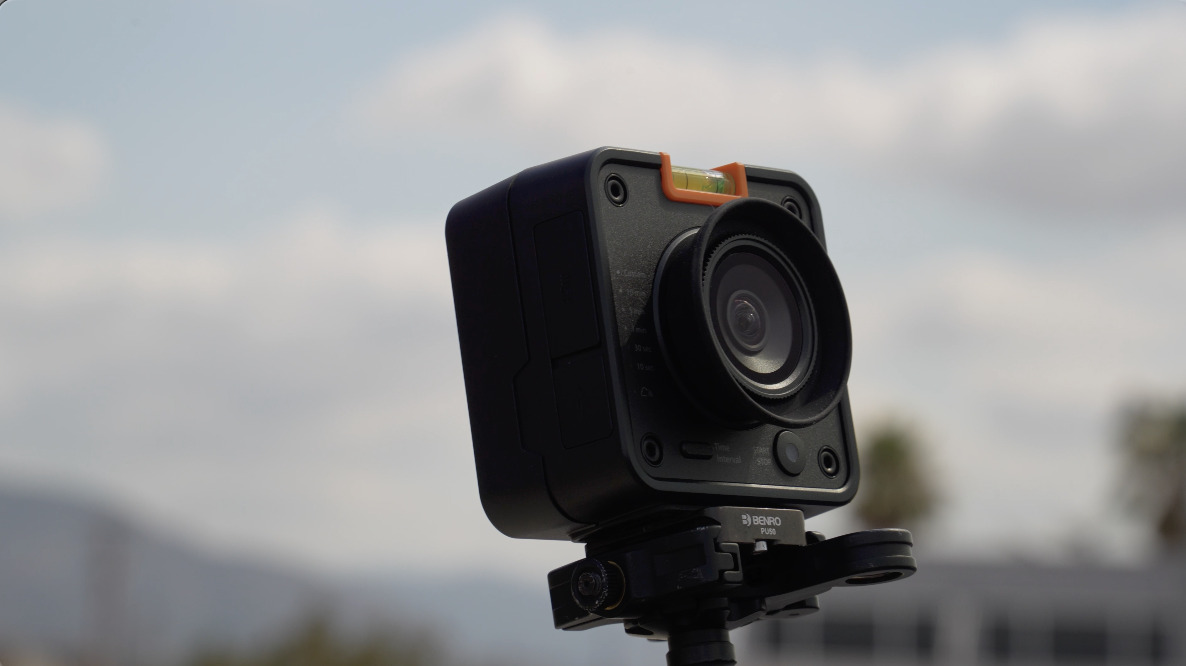 It just me gives me great BTS, behind the scenes kinds of things of what’s going on there. This camera is really nice because it’s 4K.
 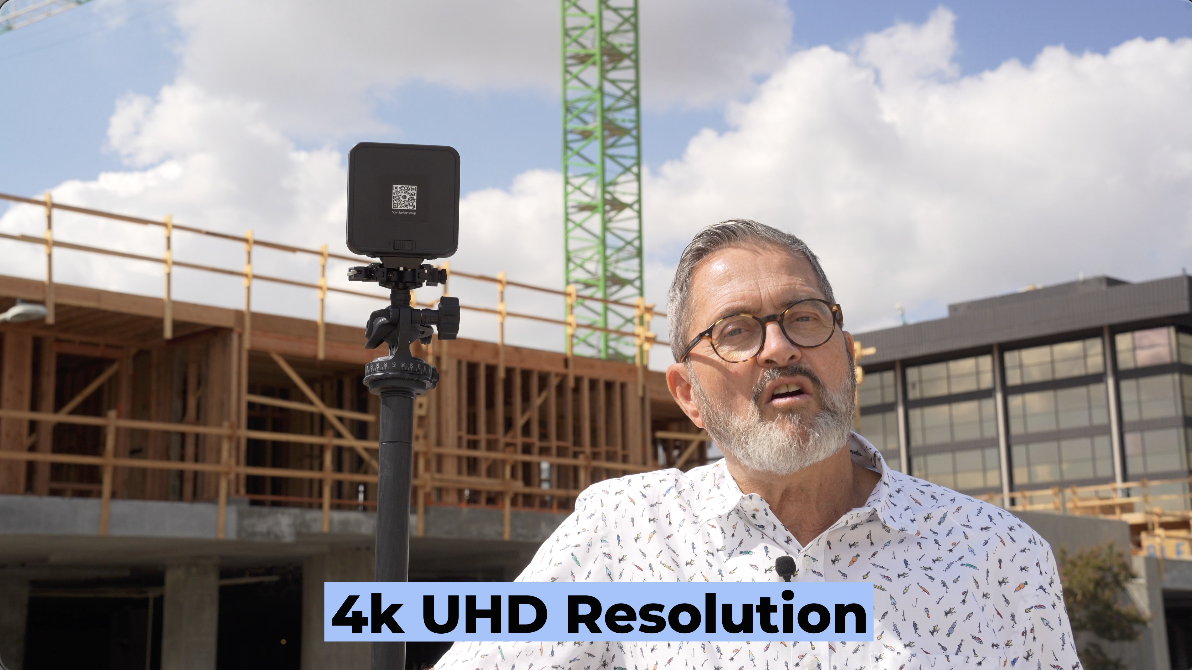 I’ve had a hard time finding good 4K. This is a 4K UHD resolution, so it’s going to give us really high resolution 4K, which allows you to really, it matches the kind of video I’m shooting. And it cuts well into any kind of 4K video project that I’m working on.
 So, it has a 17 mm lens, which gives you about 118 degree, diagonal degree view. It’s very wide. It’s made to be very wide. You can get it in close to things. Uh you can use it in tight rooms. It’s meant to be used in that kind of situation, and that really is its specialty.
 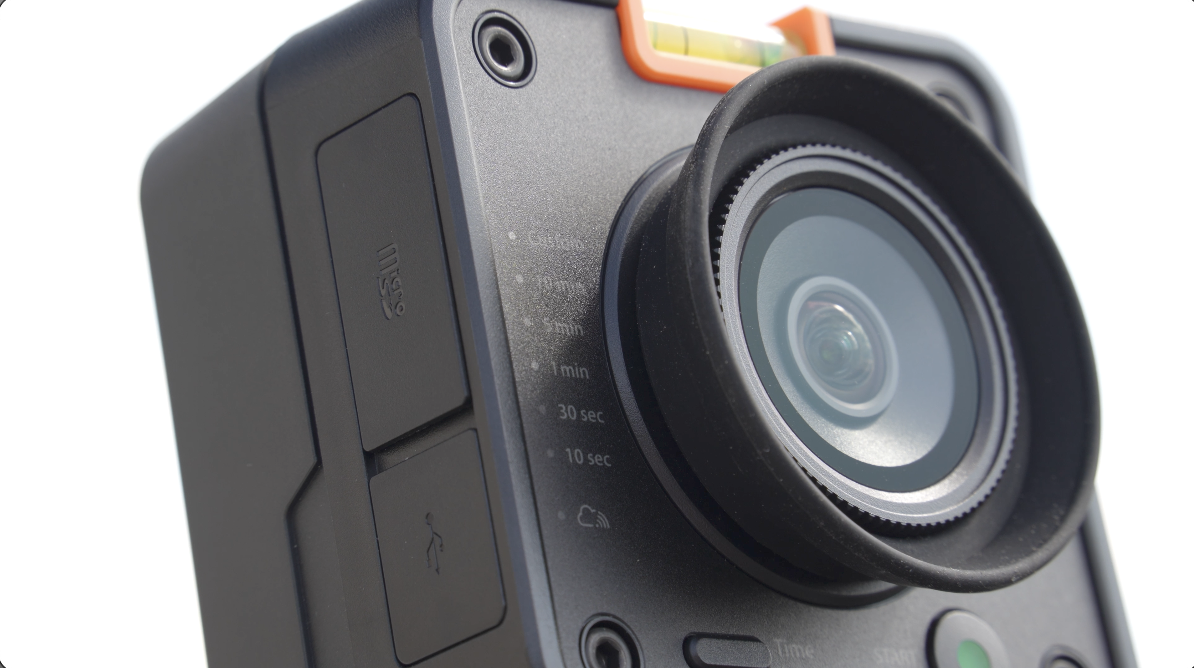 It’s a fixed lens, so you can’t change the lens, but it gives you that 17 mm and that really wide angle of view.
It creates the time-lapse in the camera, so it’s not like you get a string of images you have to go in later and create a sequence out of to create the time-lapse. So, it gives you a finished time-lapse when you’re done.
 I like the fact that it can go from day to night pretty seamlessly. So, you can set it up, you can be shooting daytime and it’ll change right into night.
This is a simple camera. This camera does not have the ability to focus the lens. It does not have the ability to change the white balance. It is all auto white balance, auto exposure. It just gives you a simple solution that goes up fast. Hit record, walk away, and you get a video, a time-lapse video at the end. That’s what I love about it. I don’t have time because this becomes a second camera, sometimes a third or fourth camera when we’re shooting. I don’t have time to really have to babysit this. I want to be able to set it up, have it be able to change depending on the lighting situation that’s it’s in. It kind of takes care of itself and that’s really what I like about it. 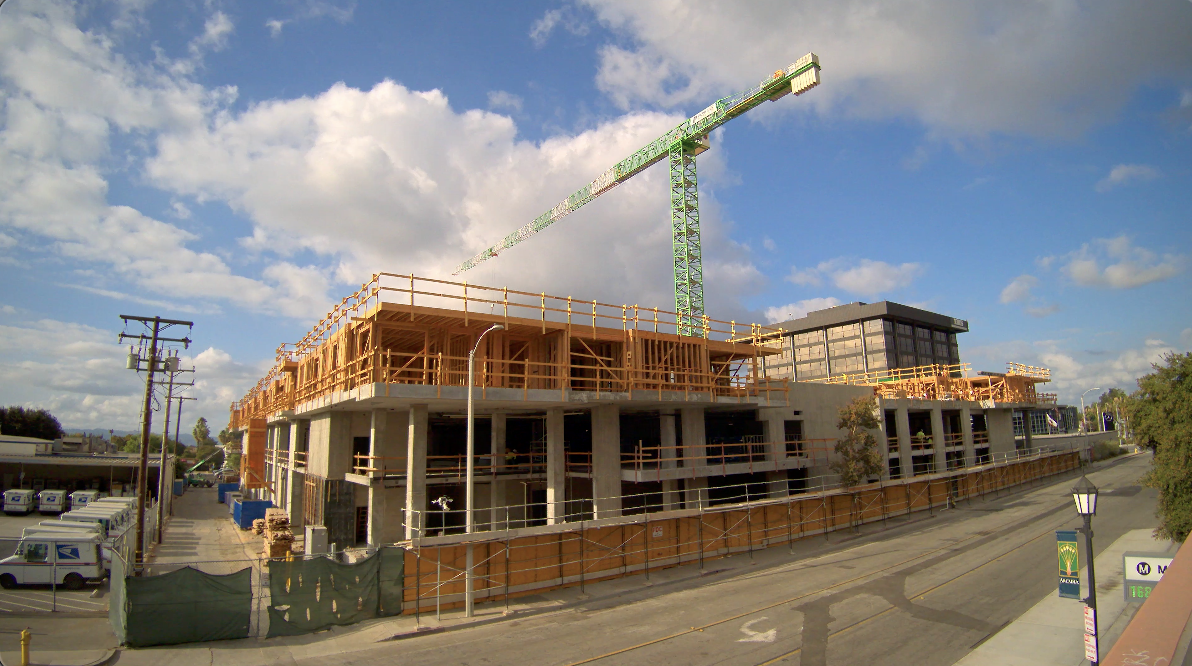 It’s great for being on location because of that doing construction or corporate from day to night because you can’t sit with a camera for 8 weeks for 6 months. You know, you just can’t do that. It doesn’t make any sense. So, it’s going to take care of itself. It’s going to change the exposure. It’s going to change from day to night. It’s going to give you all those different options.
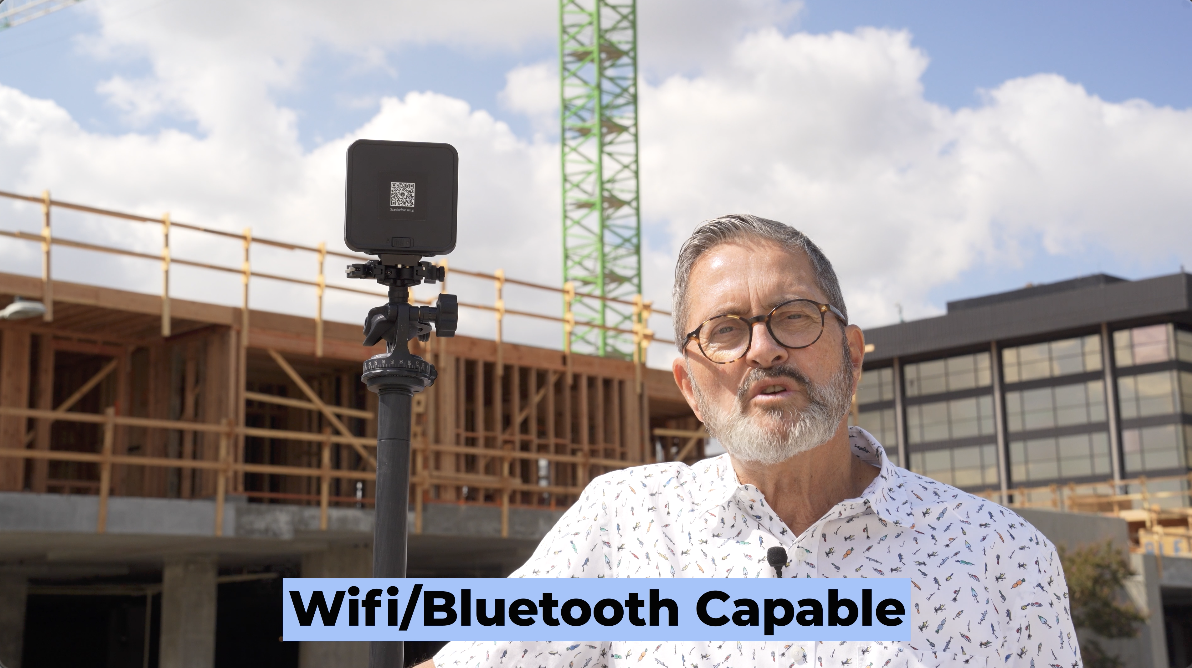 So, great little camera. You can use it. It is Wi-Fi, Bluetooth capable, which means you can use Wi-Fi or Bluetooth to connect to it. It connects to an app so you can make all the adjustments to the app. So, connecting to your cell phone or laptop is pretty easy.
 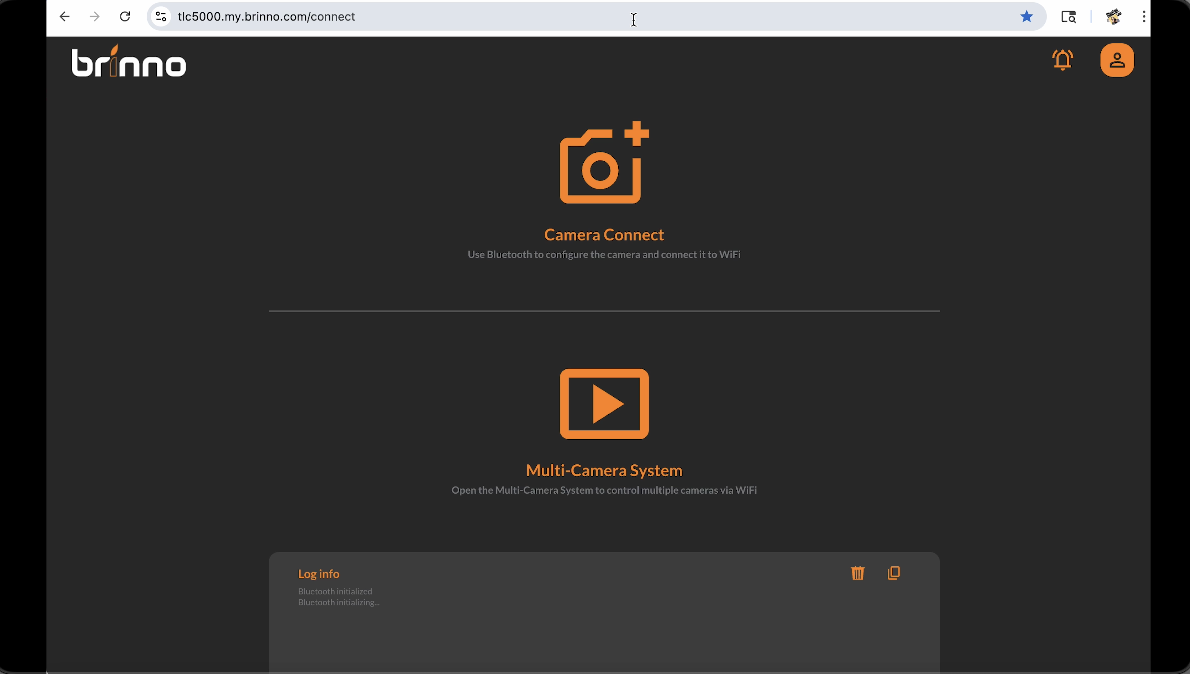 We’re just going to go to the Brinno website and we’re going to click on the BCC5000 helper. It’s going to bring us to this app connection here. We have a Bluetooth option on top and then we have a multi-cam system on the bottom. We’re going to connect first to Bluetooth and that’s going to allow us then to connect to Wi-Fi.
 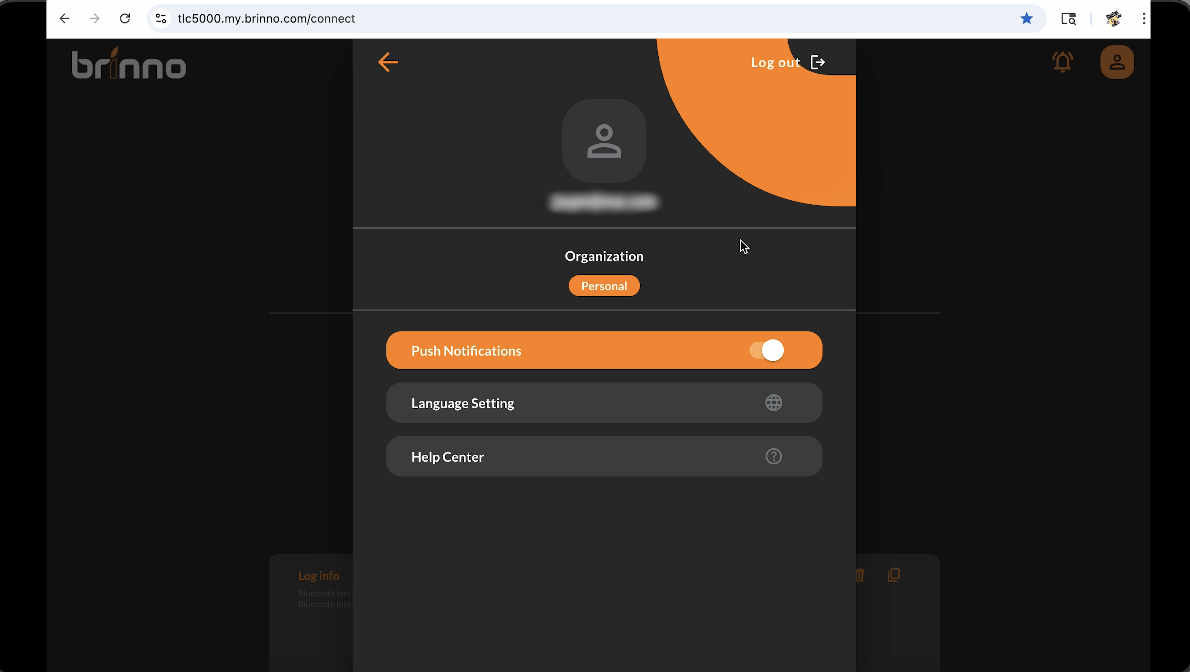 So, first off, we’re going to go up in the corner. We’re going to click on the person here. We’re going to create an account.
 Once we’ve created an account, we’ll go back to our last screen. In that last screen, we now can connect to our camera. Once we connect to the camera, it’s going to come up by Bluetooth, allow us to pair with the camera. I’ve already turned on the camera, so it’s going to say that it’s paired, but I’m going to click on it. I’m going to pair.
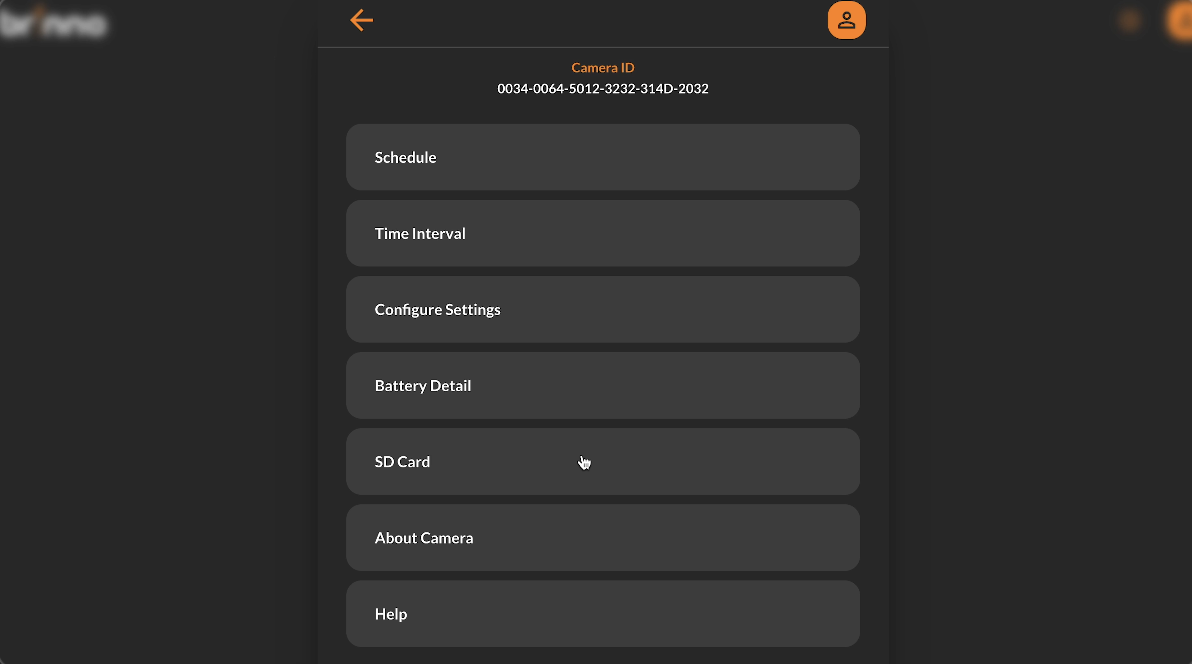
 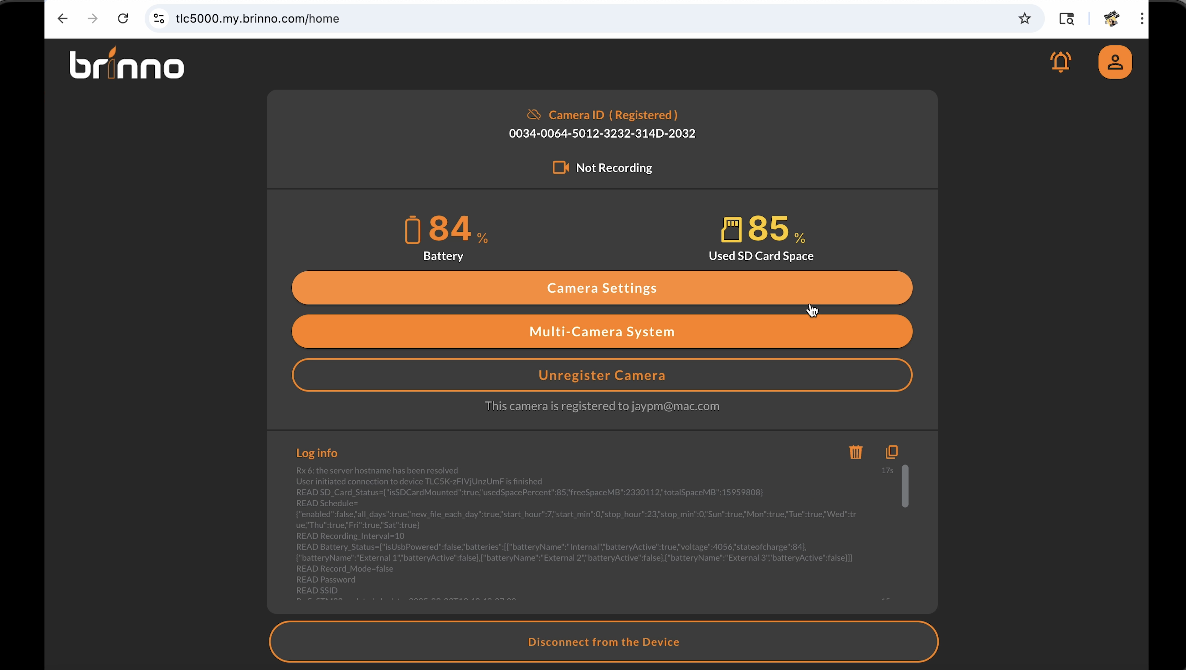 Now that I’ve clicked on it and paired it, it’s going to take us to a screen here where we can see the battery life. We can see the card space that we have left, and we’ve got several different camera settings.
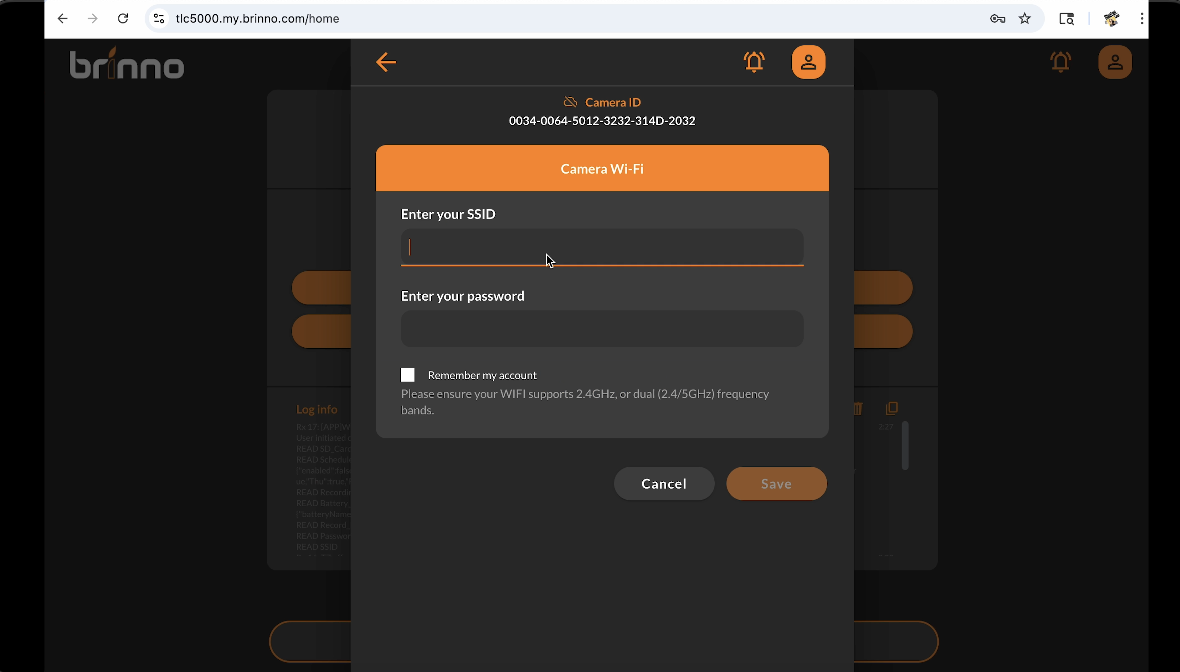 Okay, you’re now going to need to register your camera. Click on the register camera. We’ll register and set up Wi-Fi here. As we register the camera, we’ll set up the Wi-Fi. Enter SSID, either connected to a hotspot or whatever internet you’re using. Now, I can just click back.
  You’ll see that the little cloud there has connected to Wi-Fi. So, I’m going to now go back into my multi-camera settings by clicking the arrow back. And now I can click on that multi- camera settings. I click on the live view and there’s my clock. There’s my clock.
Now I have all the settings down here. I can schedule it. 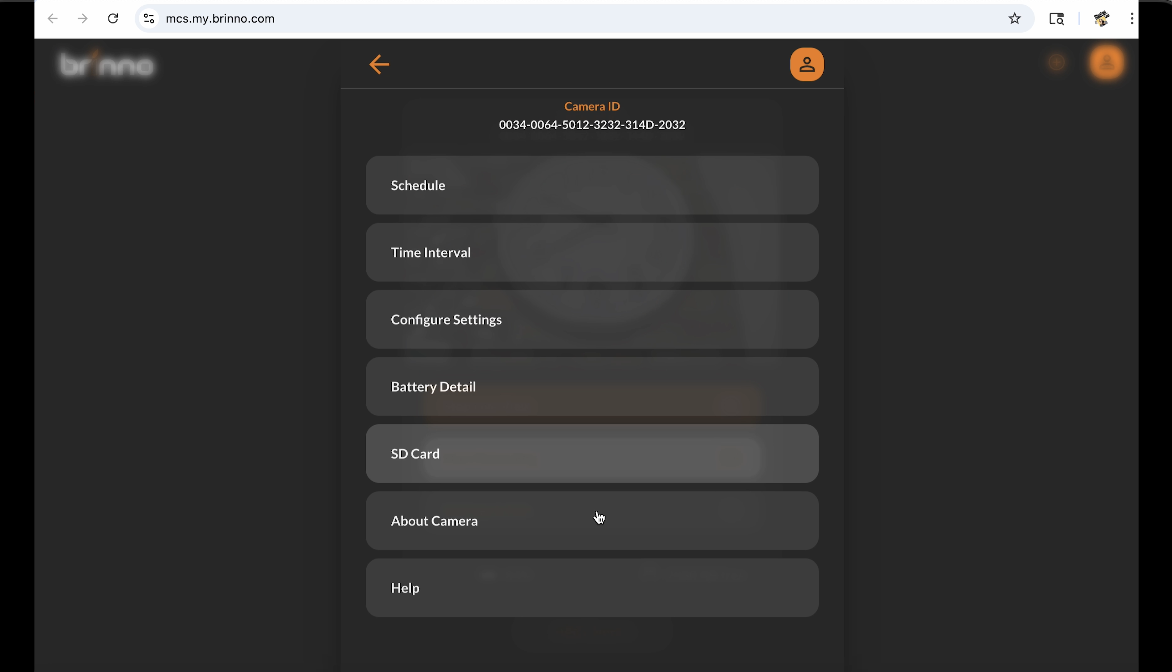 I can do continuous recording in the same file or I can save as a new file each time. I’m going to put it on continuous for right now just because I want a long continuous recording.
 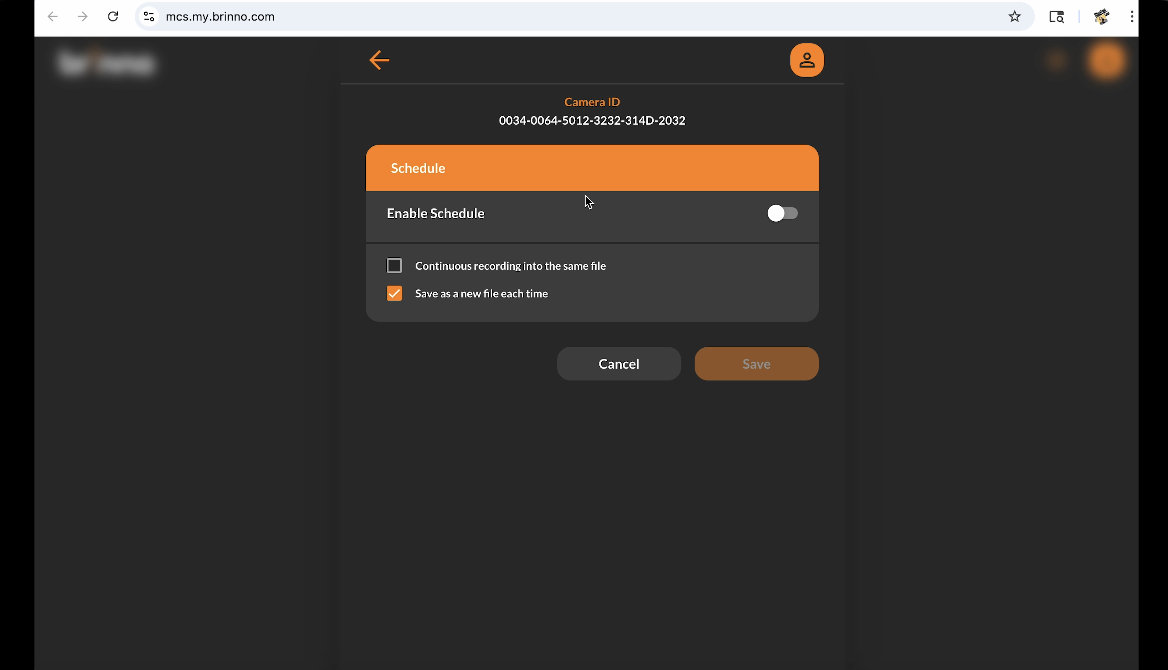 Then I’m going to go into the interval. I’m going to put it at 10 seconds. It has to be at least 10 seconds.
 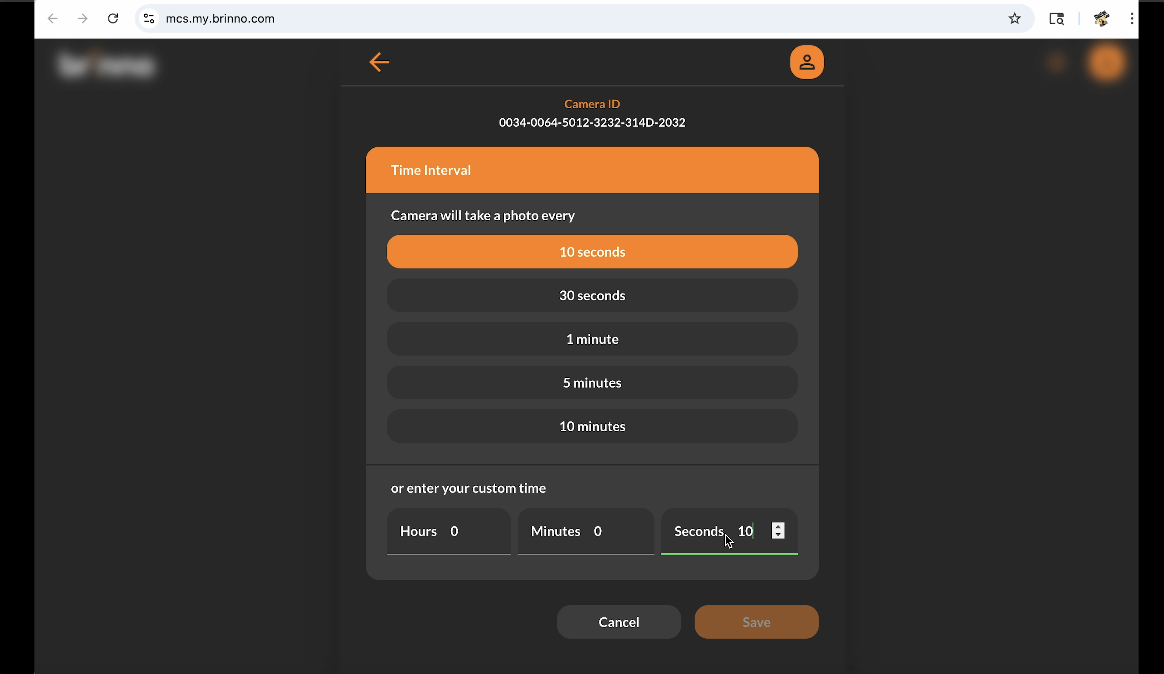 And I can configure my settings like I can be daylight, twilight, or night depending on what I’m doing. I can change off the flicker filter. I can do a time stamp if I want.
 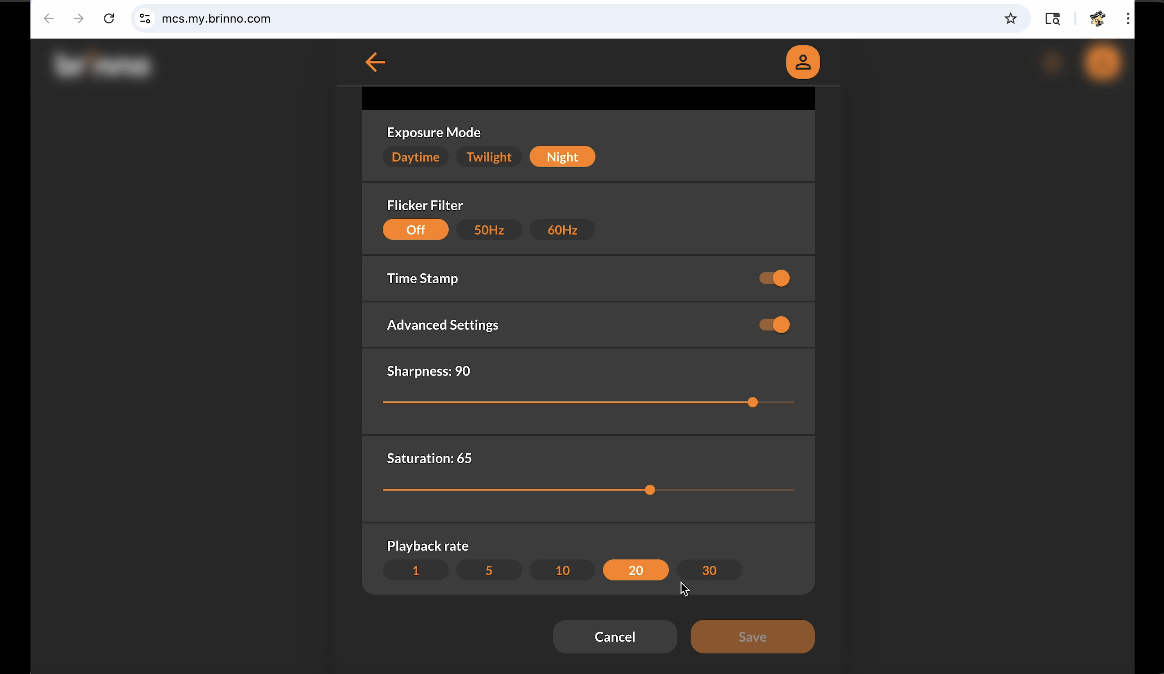 And then there’s advanced settings to allow me to do some other things like the sharpness and the saturation, some other items.
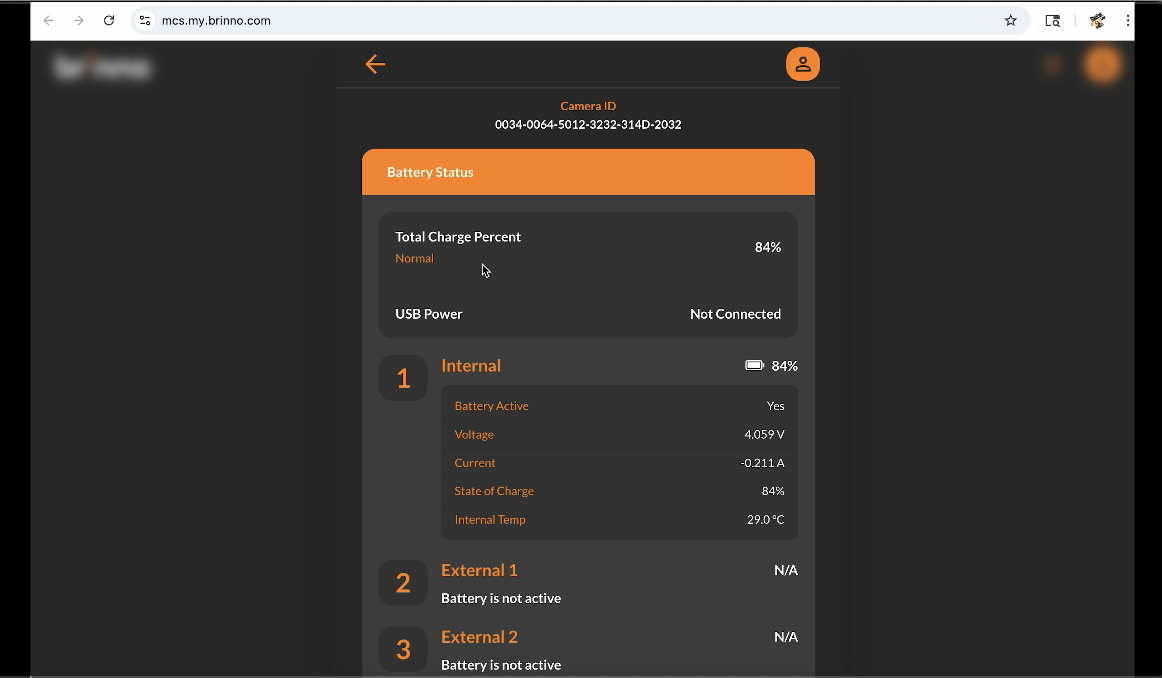 Once I’m done with that, I’m going to go back into where I can look at the battery life. I can see exactly how my battery life is going. I can then look at the camera. So, at that point, I can stop my live view.
 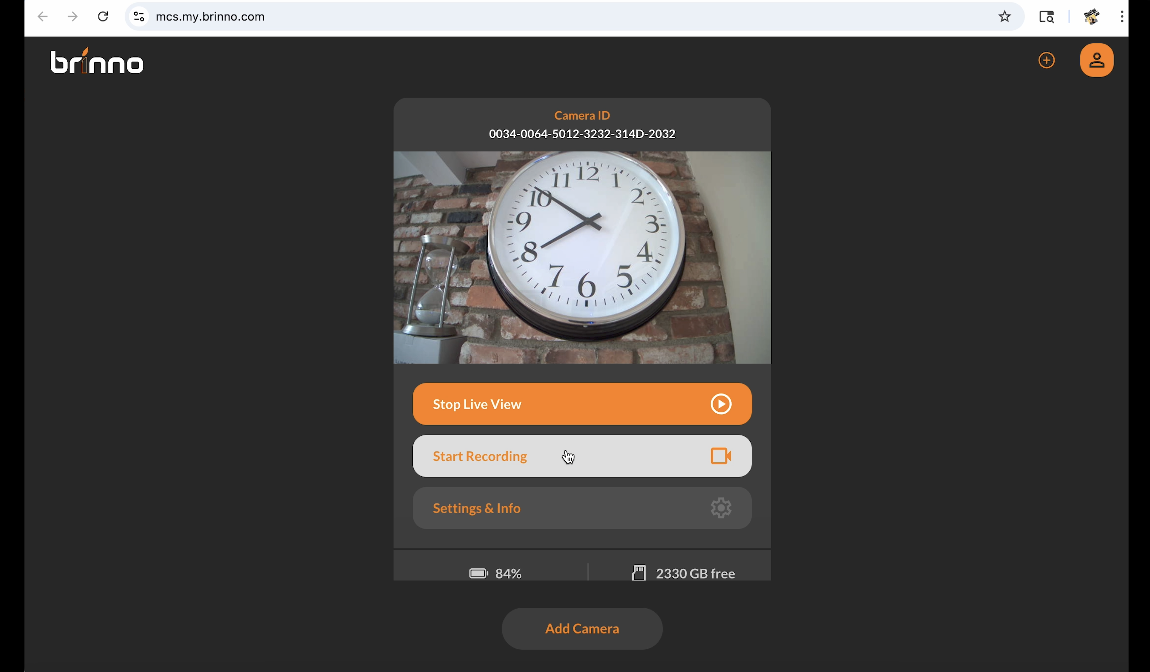 Now, I can just simply start my recording or you can simply turn it on. In the front here, you can set a time, an interval, and hit record, walk away, and not use an app or anything at all. And that works as well. So, great little camera, great setup. And here’s some of that time-lapse.
 The camera uses a micro SD card. You can get up to 256 GB cards, so it gives you plenty of space to be able to record over weeks and long periods of times.
 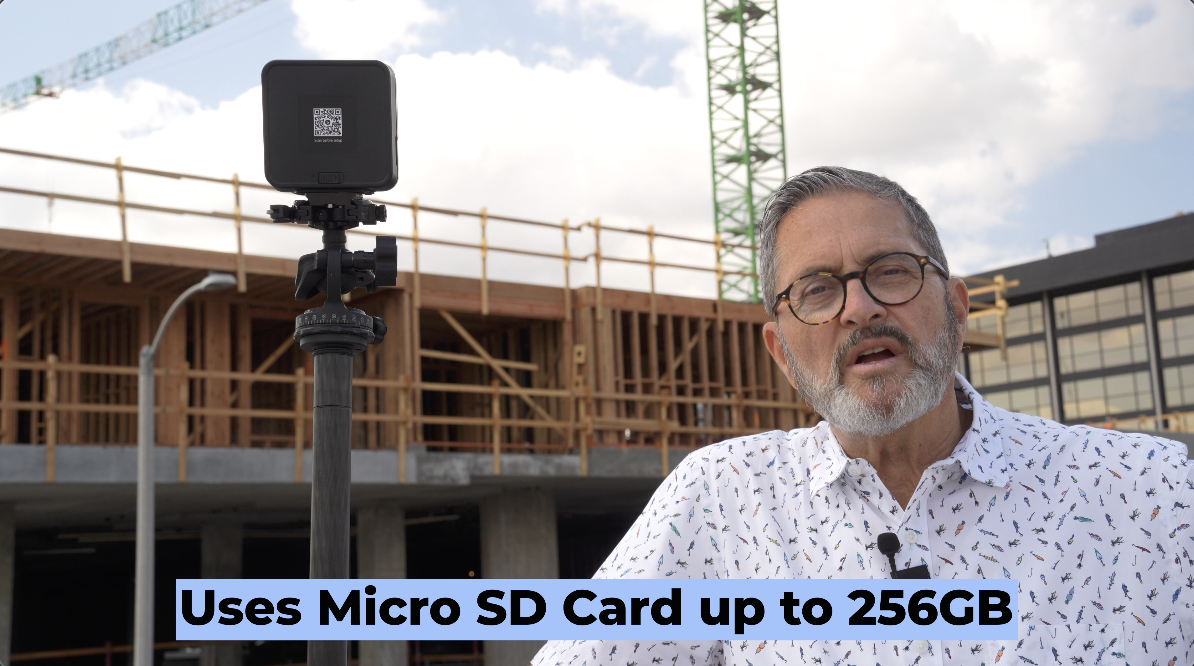 It also has a nighttime mode, so in low light conditions it has a mode to be able to set to be able to expose correctly in those kinds of low light conditions.
 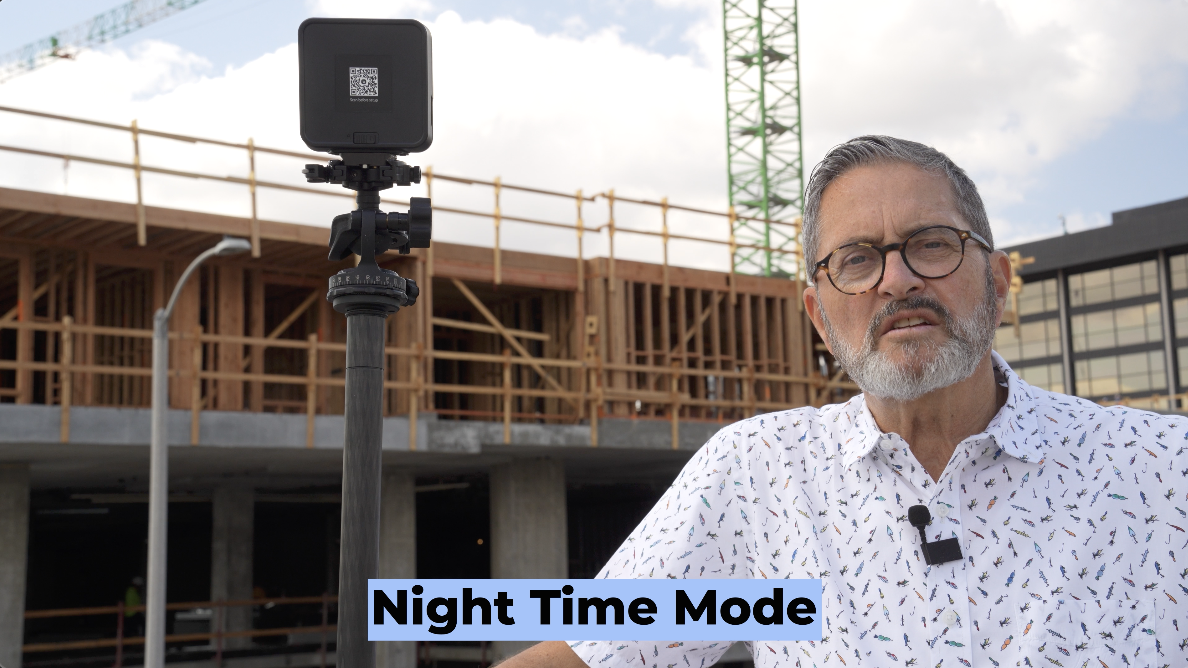 Which makes it really effective at night in those types of things if you’re working in that situation.
 So, construction is a great way to make money doing time lapse. You can install a construction camera, watch a building be built, get the construction company to hire you to be able to do that installation and to be able to provide them with the videos. This camera has an app so you can check on the camera. You can see what it’s seeing and allows you to kind of check in and just see exactly what you’re getting.
 Interval wise when you shoot something like this, today we’ve got it at 10 seconds just because we’re only going to be here for a few hours and I want to see things progress pretty quickly. But if you want to see this building go up as the stories pile on, you’re going to want to do something more like even a minute is way too much. Sometimes you go to an hour. So you’re getting 10, but an hour gives you 10 frames in a day. Now, as I go through the building of the building, I’m here for four, five, six, eight weeks. I’m going to get 3 seconds a day. I’m getting about 60 seconds a month or 90 seconds a month.
  That just gives me a lot of video to look at. I don’t want to cut it too short. I can speed it up. I can cut stuff out of it. I just want enough video so that I can see the progress. I don’t want to make it so choppy that it’s just way too far apart. The slower the process, the slower something is being built. If you’re going to do a time lapse of a plant growing, that’s going to go really slow, you know. So, you may want to do a frame every two hours or 3 hours during daylight time, and that’s going to allow that to grow and to see that progression. So, it is a bit of an experimental process. I just always error on the side of getting too much too often. I can always speed that up and shorten it, and it gives me options later in the edit.
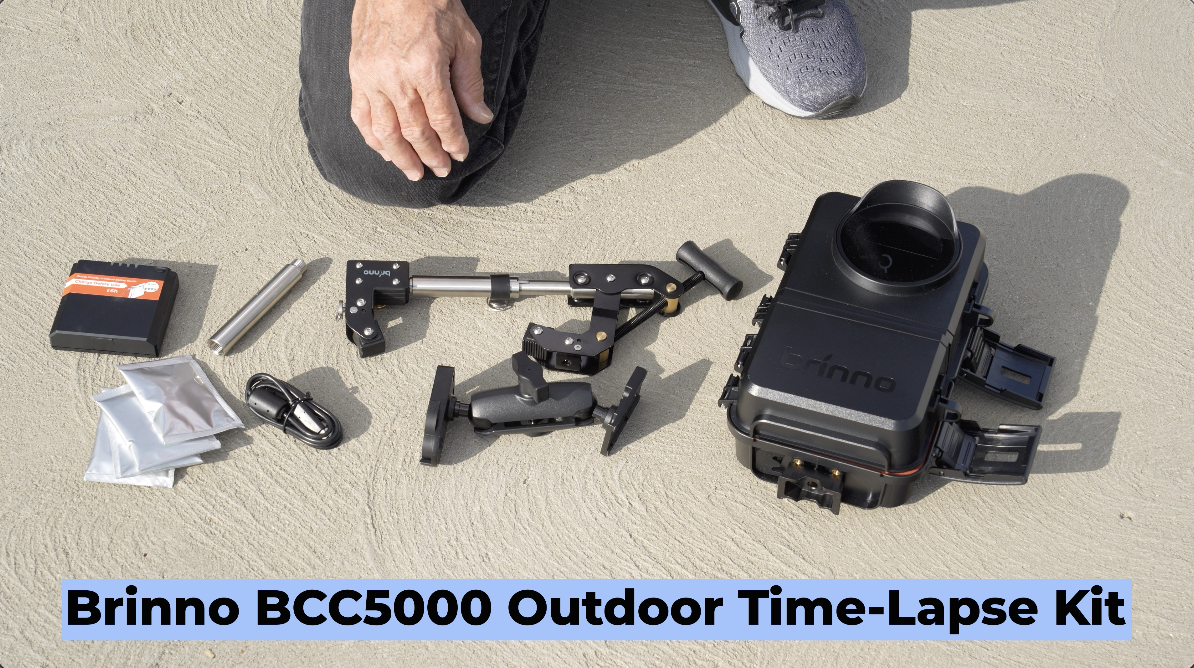 So, this is a BCC5000 outdoor time-lapse kit. It comes with several things to make this so that you can install it outdoors and shoot long-term timelapse.
 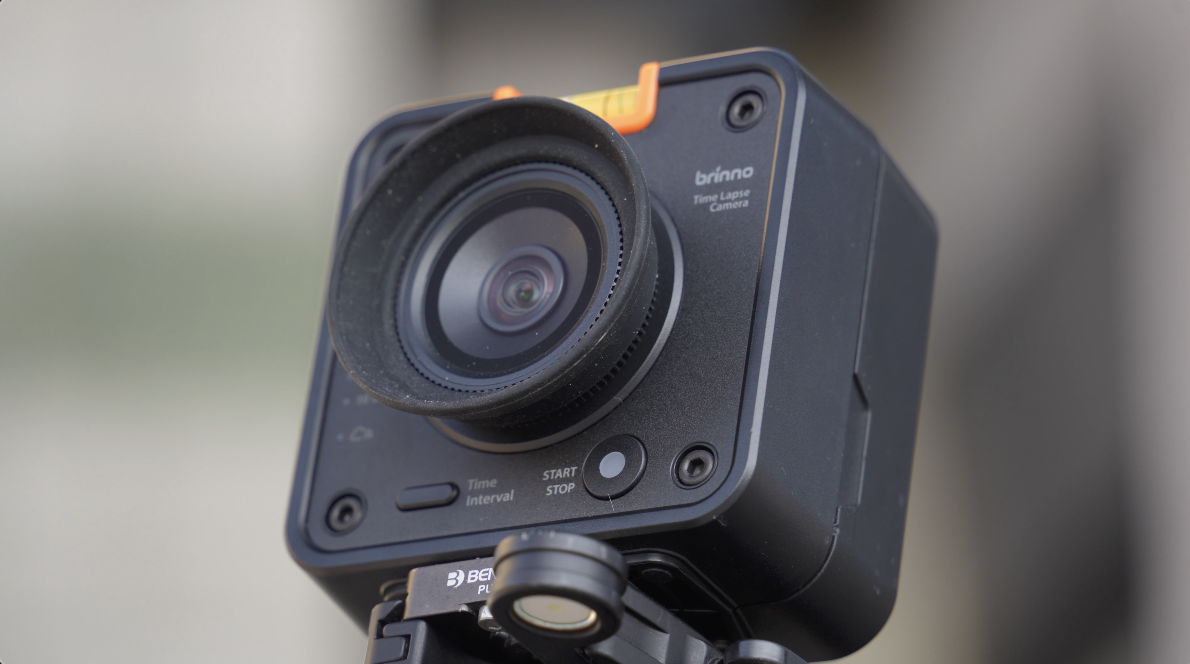 First off, of course, it has the TLC5000 camera, which we’re using to shoot time-lapse with right now, but that camera is going to work with this housing.
  This is a great housing. It’s an ATH5000 housing. In this housing, you have the ability to put in three batteries.
 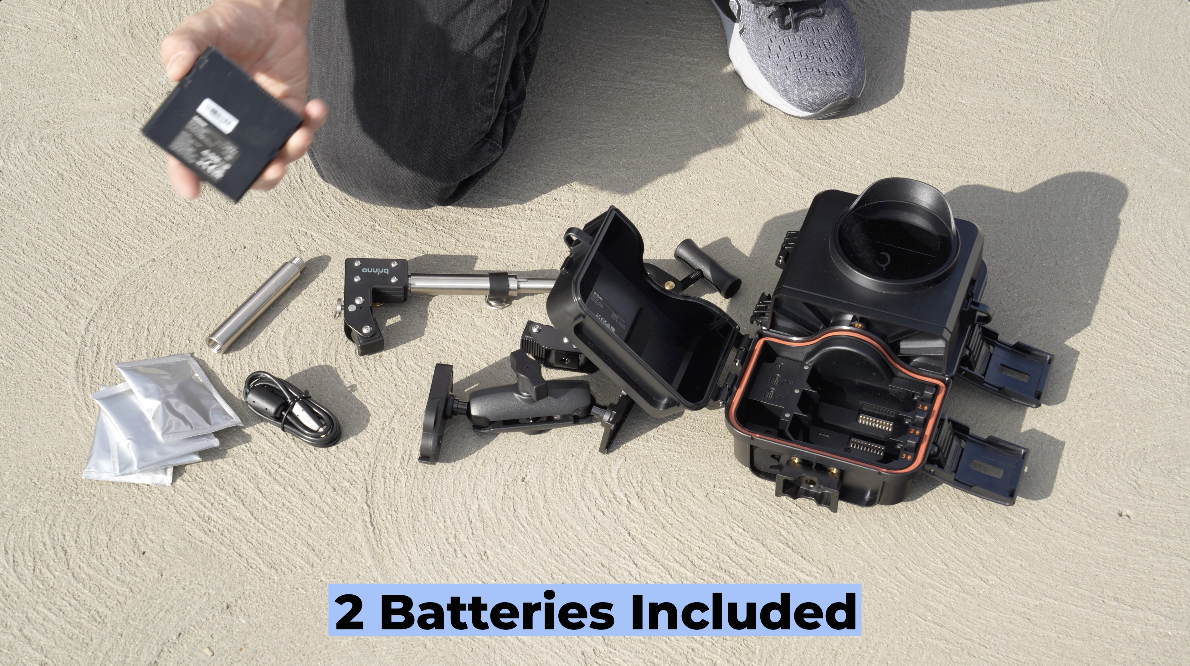 The kit comes with two batteries. We have one in the camera right now. So, you drop these batteries into the housing. This closes up. Now, when you take and open this up on the other side, we can put in the camera.
 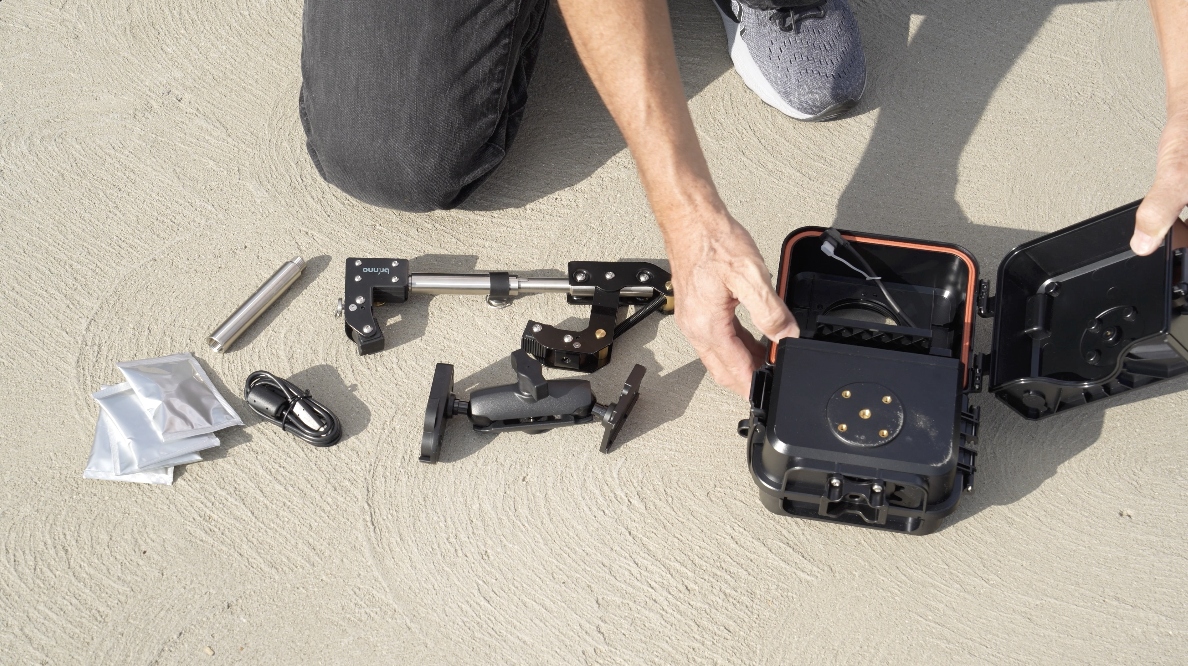 The camera drops right in here. This hooks up to go to the power supply. And then we lock it up for the camera. So, that really becomes a turnkey operation, protection for the camera.
 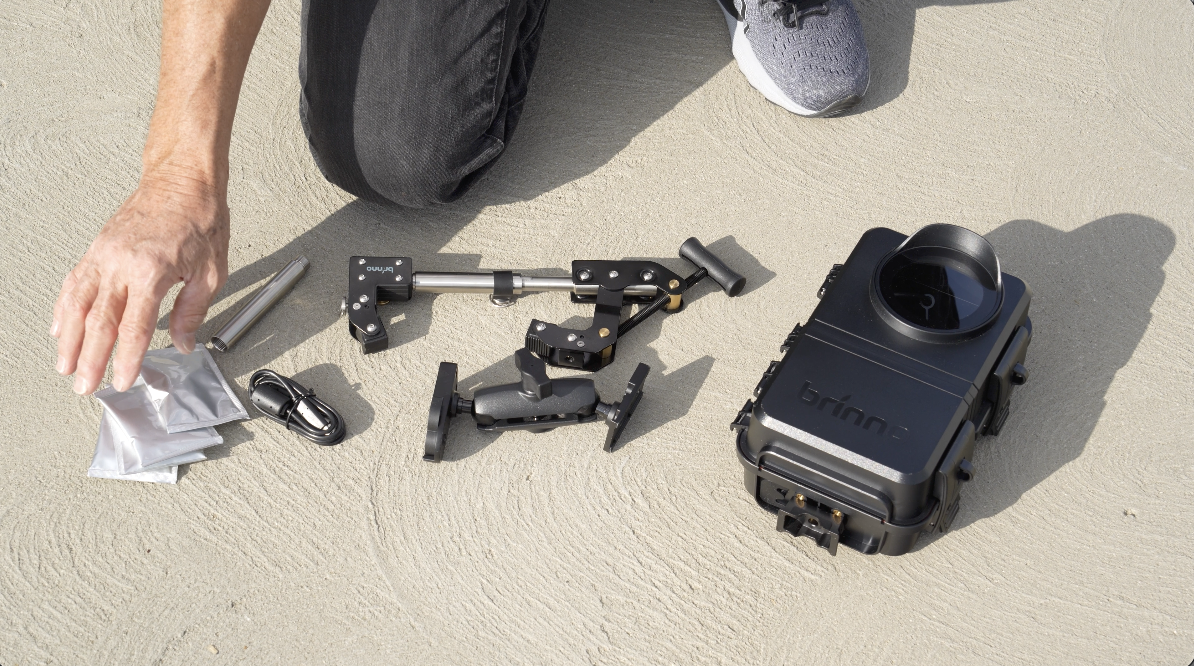 We put these packets in that are going to soak up the moisture. Sometimes condensation will build inside even though the thing is waterproof and there’s not going to be any water get in it. Sometimes the heat going from hot to cold is going to create a little moisture inside the housing. These will soak up that moisture so it doesn’t bother the camera or create fog inside the housing.
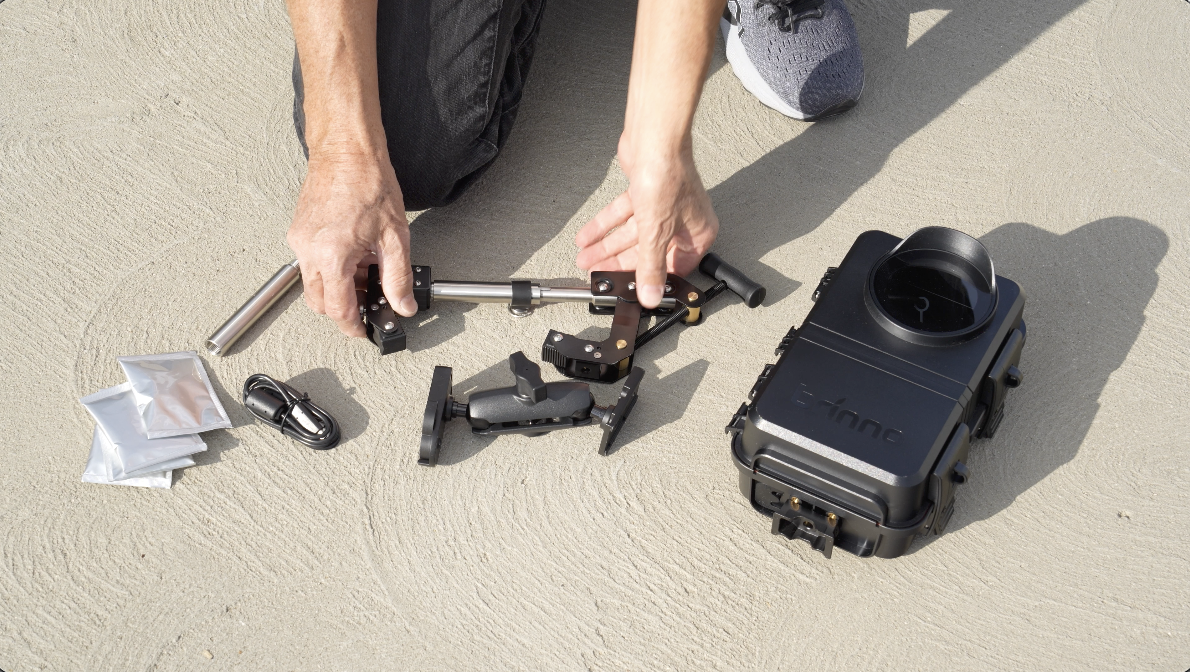 But now mounting this housing, there’s a couple of things here. This is a great clamp. It comes with several different sizes. It starts here. You can put an extension on it so it becomes wider.
 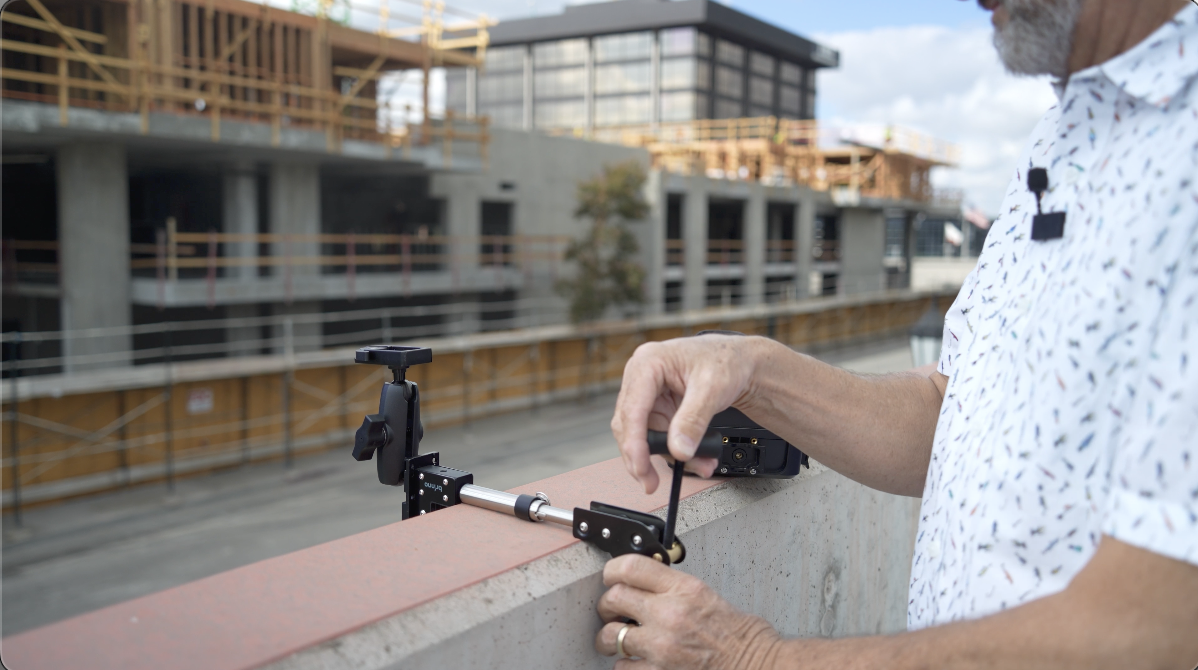 It’s made so it will clamp onto either a square wall like onto the corner of a concrete block or you can put it onto a pipe very easily. And it has an extension, like I say, to make this wider or smaller which allows you to clamp this onto different applications when you’re trying to install the camera.
 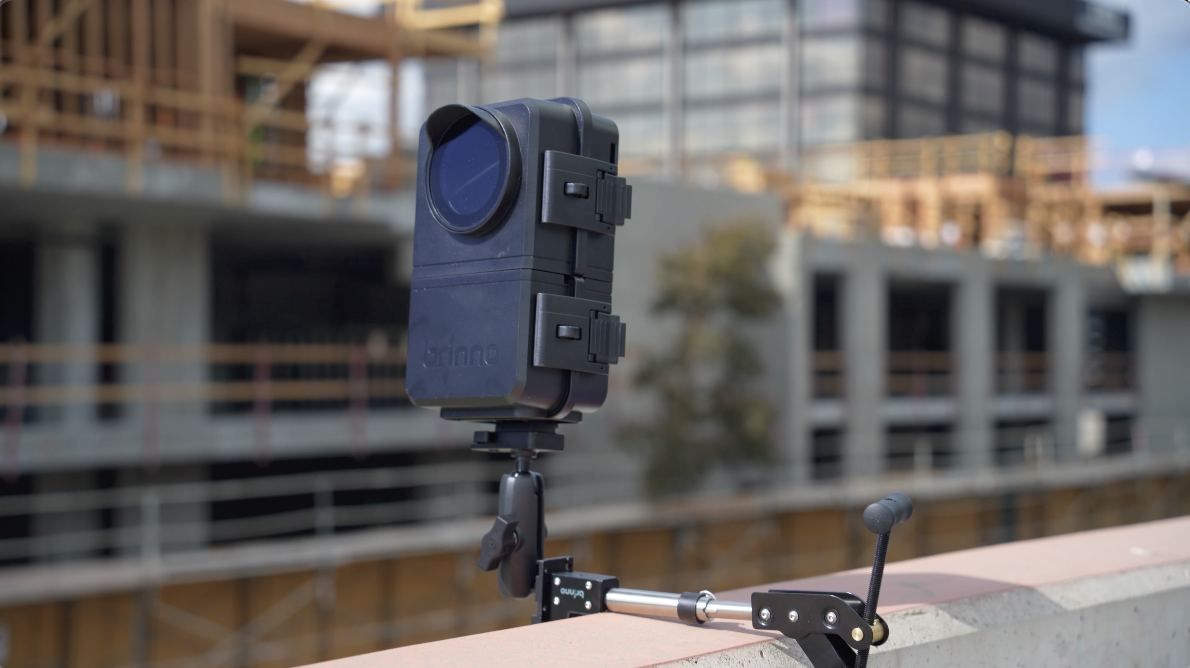 This goes onto the end of the clamp there and becomes a gooseneck which allows you to position the camera. Once this is locked onto your pole, this will just connect on the end and allows you to place your camera wherever you’d like it to look.
 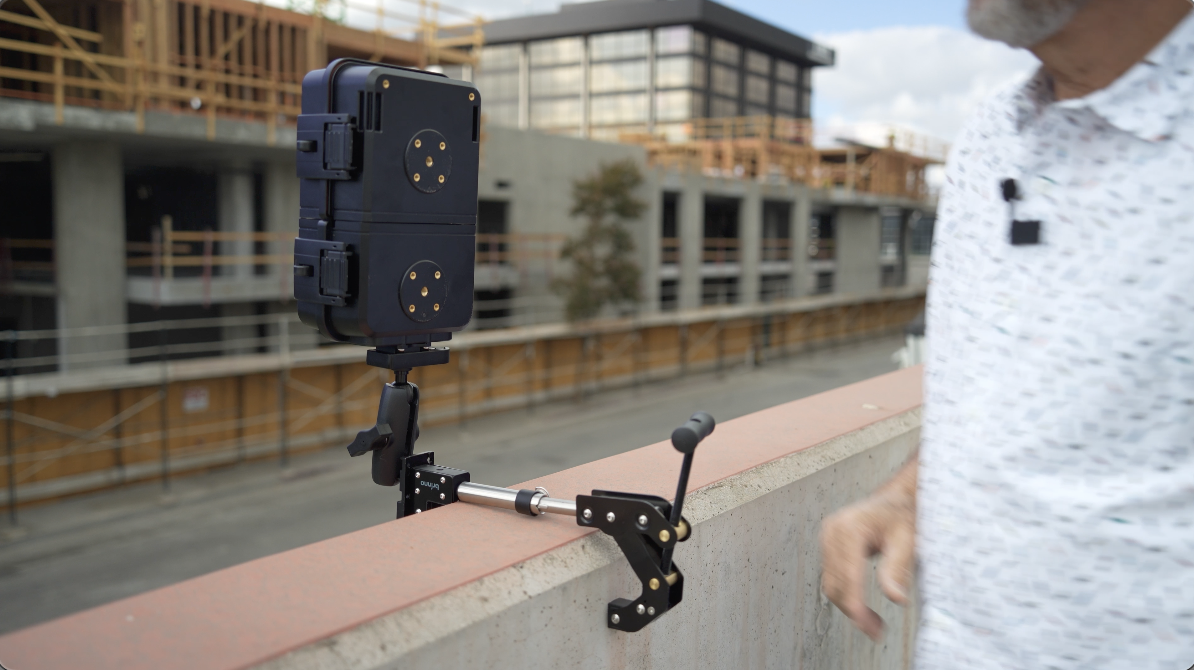 And this hooks onto the bottom here with that Arca-Swiss type plate. Of course, we have a USB cable. We have the packs we talked about. This is a long-term timelapse application.
 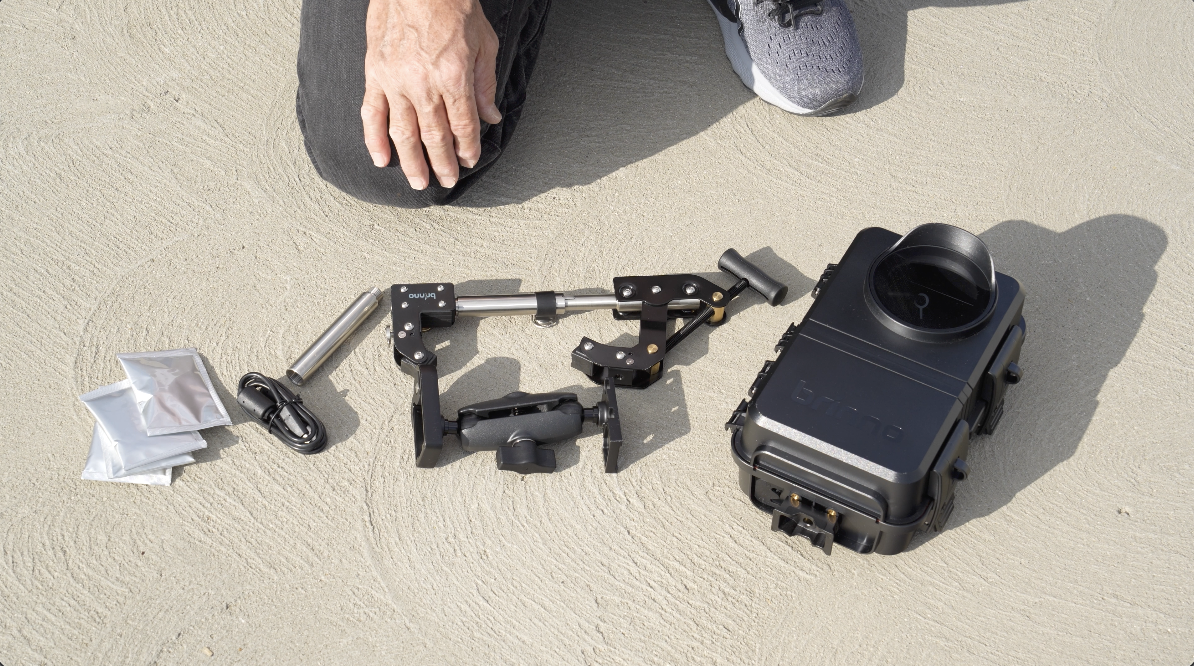 This is made to be set up and left for weeks and to be protected from the weather because the battery life on this can be left out for weeks.
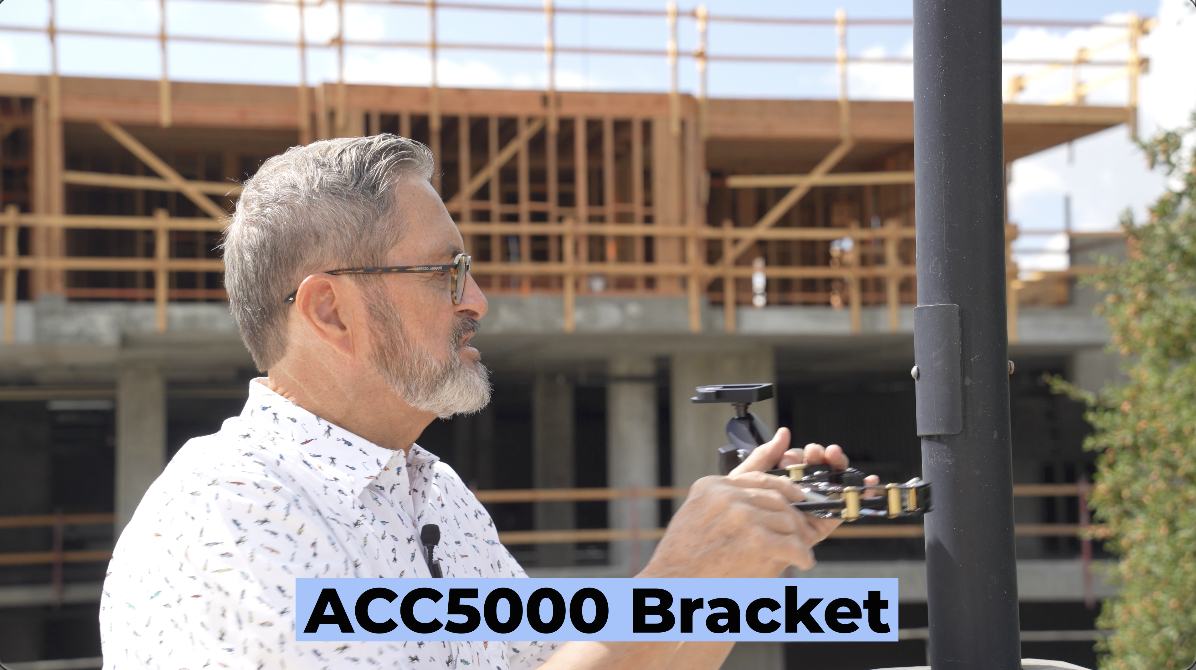 So, the ACC5000 bracket, it’s like an alligator bracket. It comes with three different little posts that you can use to adjust it to different pole sizes or wide enough to be able to clamp onto a cinder block or a brick wall.
 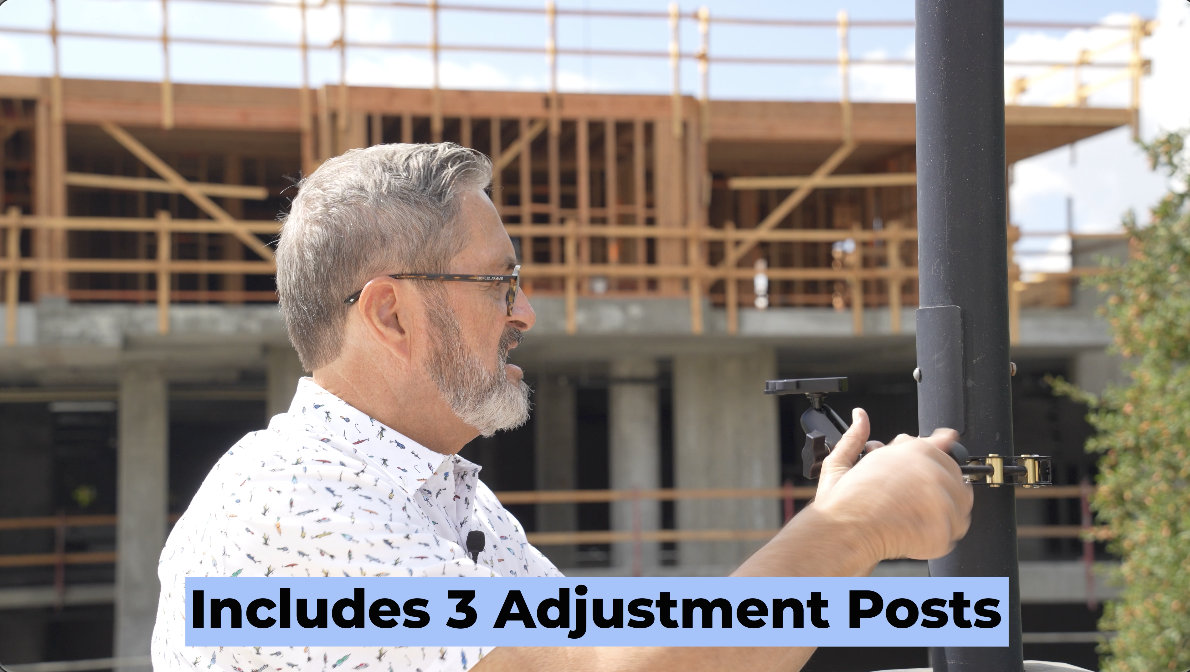 So, it has these different little posts to allow this to get wider to clamp onto bigger pipes or bigger surfaces. And then it’s very simple. You got that gooseneck.
 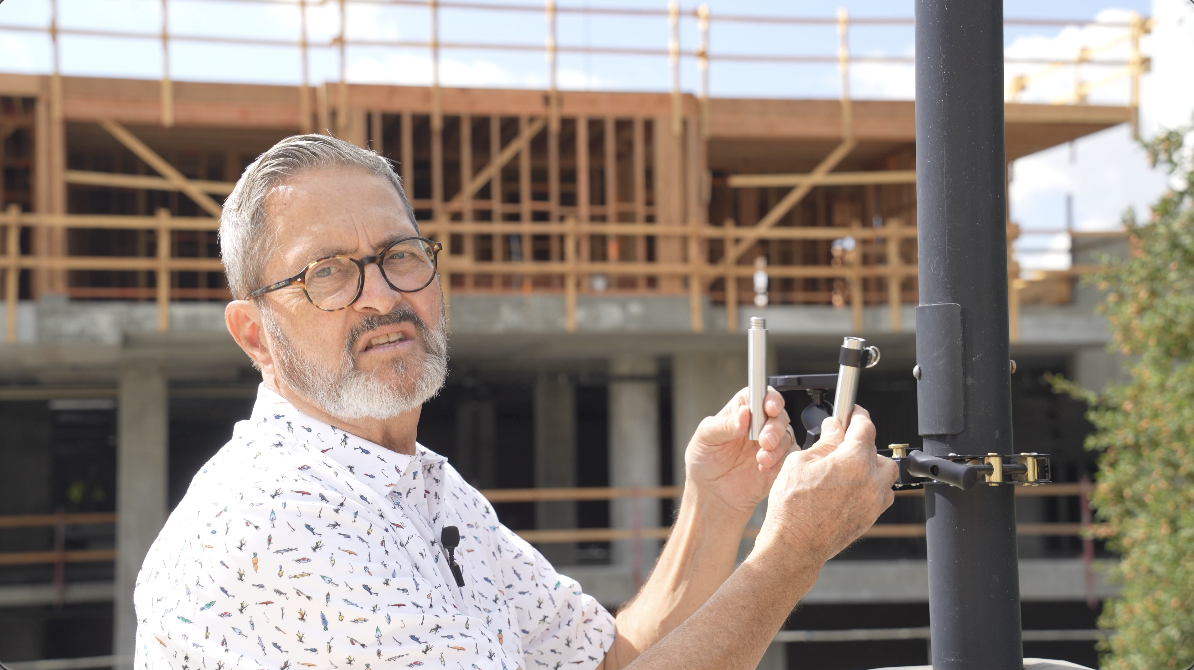 We’re just going to take our camera, lock our camera in. I can change this I can move that camera around and put it wherever I want it.
 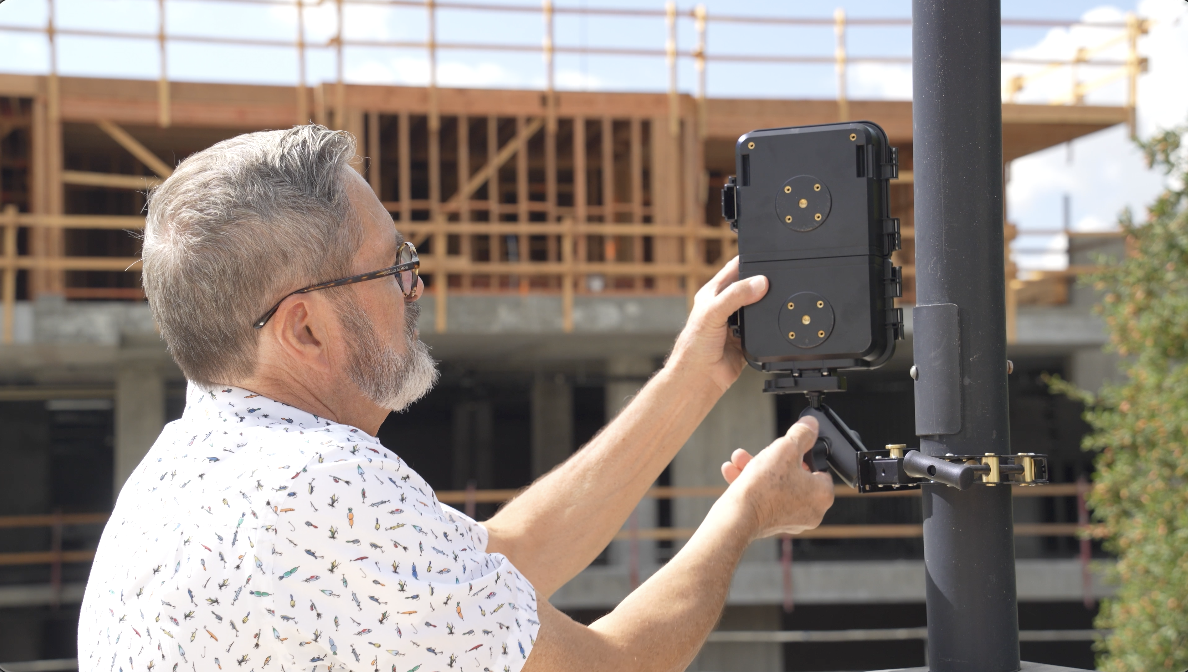 And at that point, I’m ready to take an image and just see exactly what I’ve got and start the recording.
 So once I have clips on my camera, I can click on the SD card. I can then go and just look at the different clips. So, if I go to the second one I have here, which is showing them my clock, it just shows you how much I’ve recorded so far.
 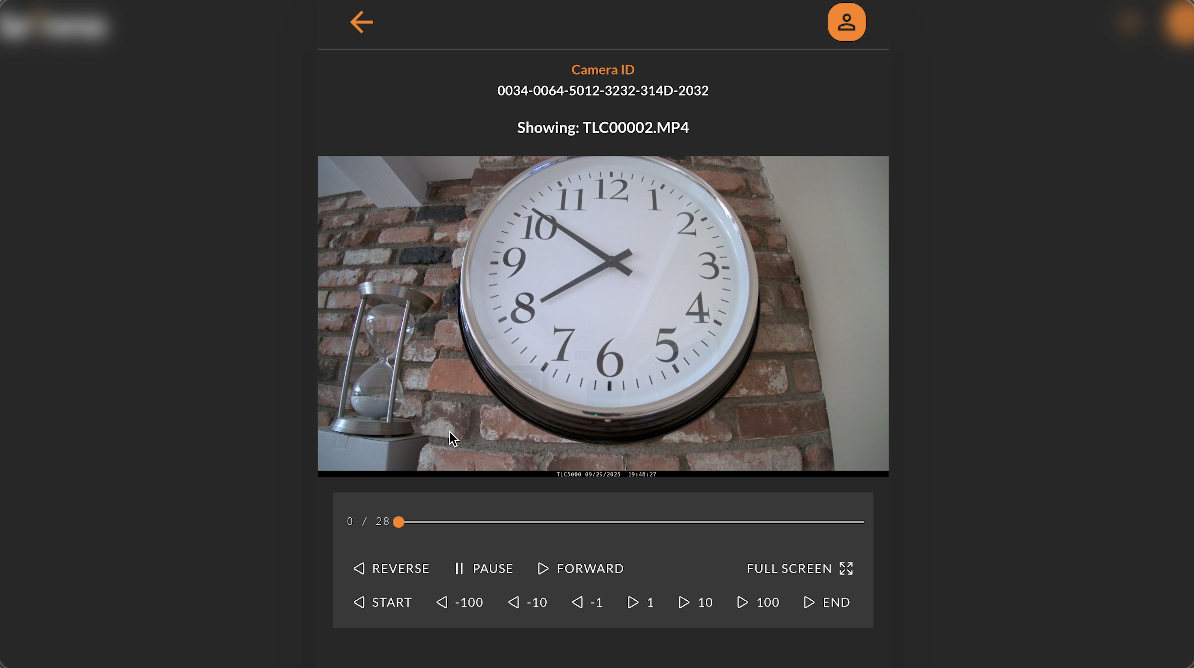 If you notice there, if we go back that I can take and I can download these.
 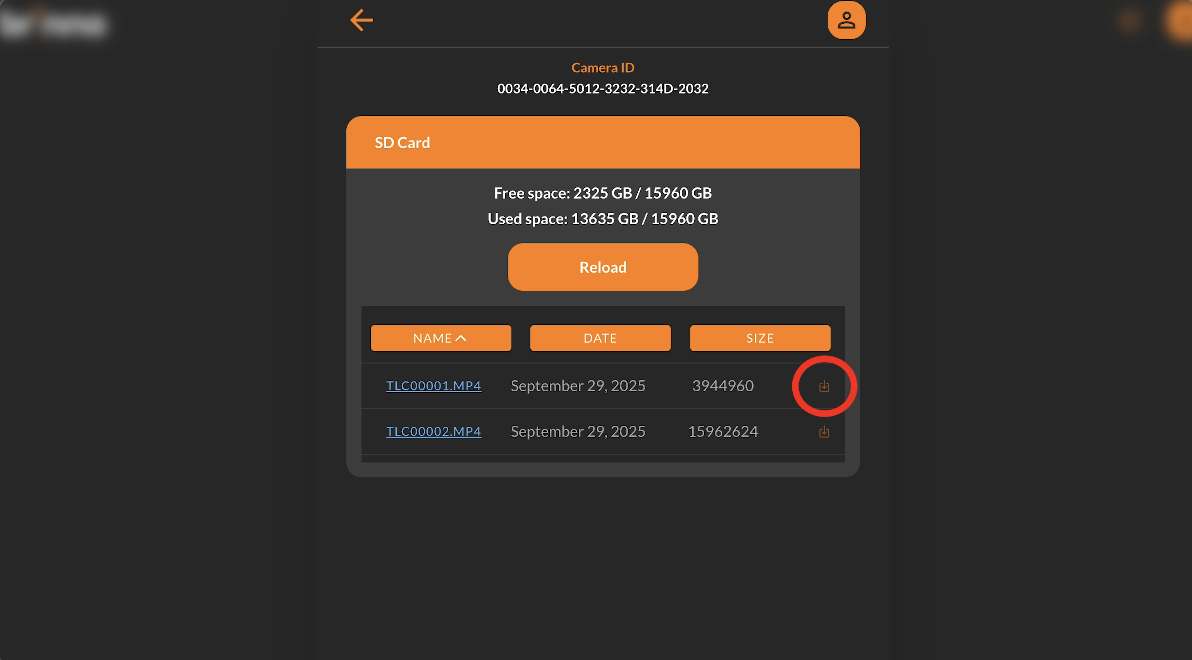 The most important thing is the remote access here. I can download. The download button is right there on the far right side. So, even though it’s on Wi-Fi and I’m not with the camera, I can download it. So, if you have this hooked up on a Wi-Fi network at a construction site, you can simply log into the camera and download the files from your office. It’s certainly a great thing for business. It’s a great thing for construction. It’s an excellent turnkey solution to be able to download the clips directly from the app, not having to go to the location.
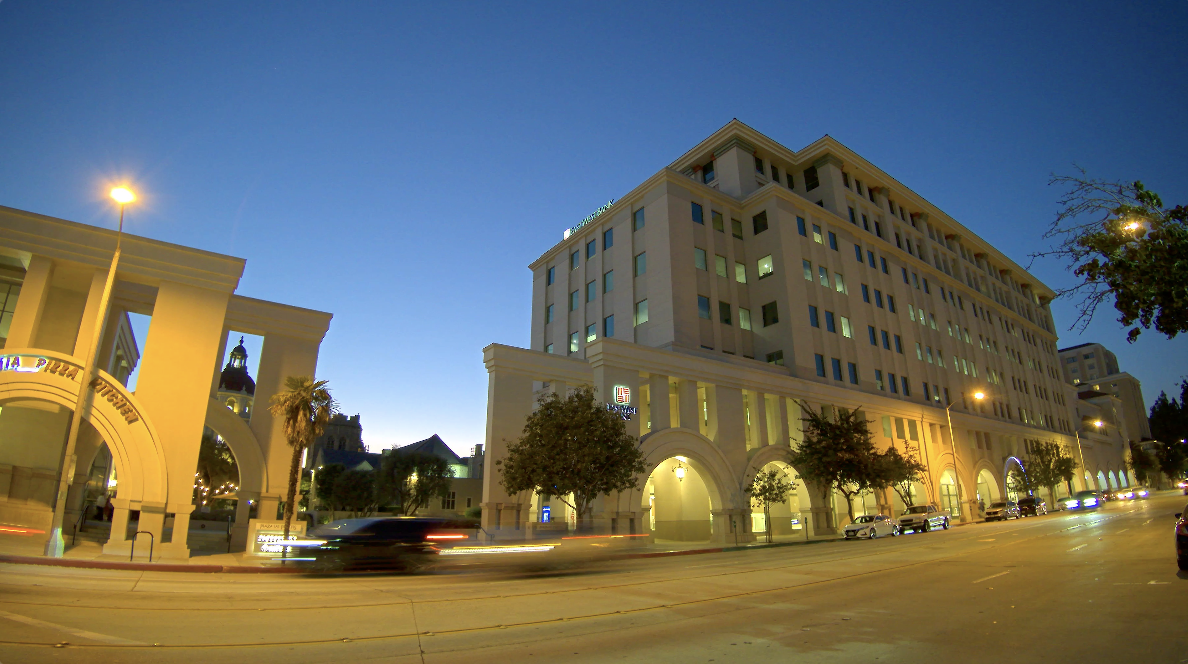
 Another great application for time-lapse video is doing corporate kind of work, corporate videos. It’s a great way if you’re doing an interview or doing a capabilities piece for a company. If you show a time-lapse of their building, the sun going into nighttime.
  If you show the busy street outside the area or the city, some iconic building in the city, show that building, the time-lapse, all the people going around, it just adds production value. It makes your corporate video look so much better. You can also sell that time-lapse to the company as a social media piece. I mean, it’s a great look. You see the sun going down, the lights coming on in the building. You know, bank, you know, “This is what we do”. “We’re here for you day and night”, kind of thing. So, it’s a great use. I love time-lapse in any kind of corporate video, any kind of video application, even if I’m shooting farmers in Idaho. Little time-lapse of the sun coming up or of the, you know, the trucks coming and going as they’re doing potatoes, all those kinds of things, cutting hay. I mean, it just all looks really cool. That time-lapse just adds a lot of depth, a lot of production value, and makes the videos look so much better. So time-lapse for corporate video, for any kind of video application, it’s really worthwhile. I love it because this is finally a 4K camera. Got a 4K camera you can use. That means it’s going to cut into those kinds of videos and it’s going to feel right. Whereas in the past, we have not had cameras that’ll give us a good 4K image on a really good sensor. And this one, the TLC5000, does that.
 So, let’s wrap this up. I love time-lapse. I think it ups the production value for any kind of corporate video applications. It’s a great way to make money shooting time-lapse for construction. And a small box camera like this makes a lot of sense because it sets up quick. You don’t have to deal with a lot of settings. It’s going to give you 4K, so it cuts into a timeline really nicely.
 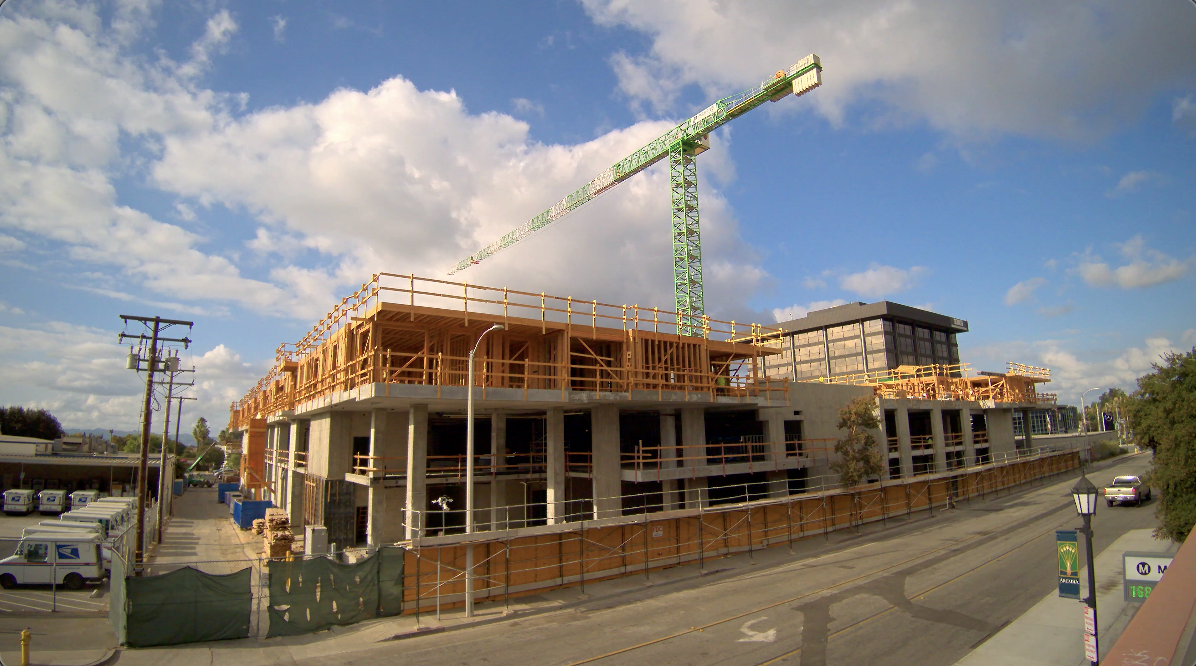 And you don’t have the expense of another camera and a lens and having to deal with all the settings that takes your attention away when you’re trying to shoot other things. I think the TLC5000 is a great setup, especially when you put it with that big bundle that allows you to have a housing to install outside so it’s going to be weather resistant.
  I love the fact that this camera will go from day into night, which just makes that seamless transition that I think makes it really worthwhile. That and the 4K and the easy setup.
  I’m going to use this to get quick time-lapse when I’m shooting my videos. So, keep those cameras rollin’ and keep on clickin’.