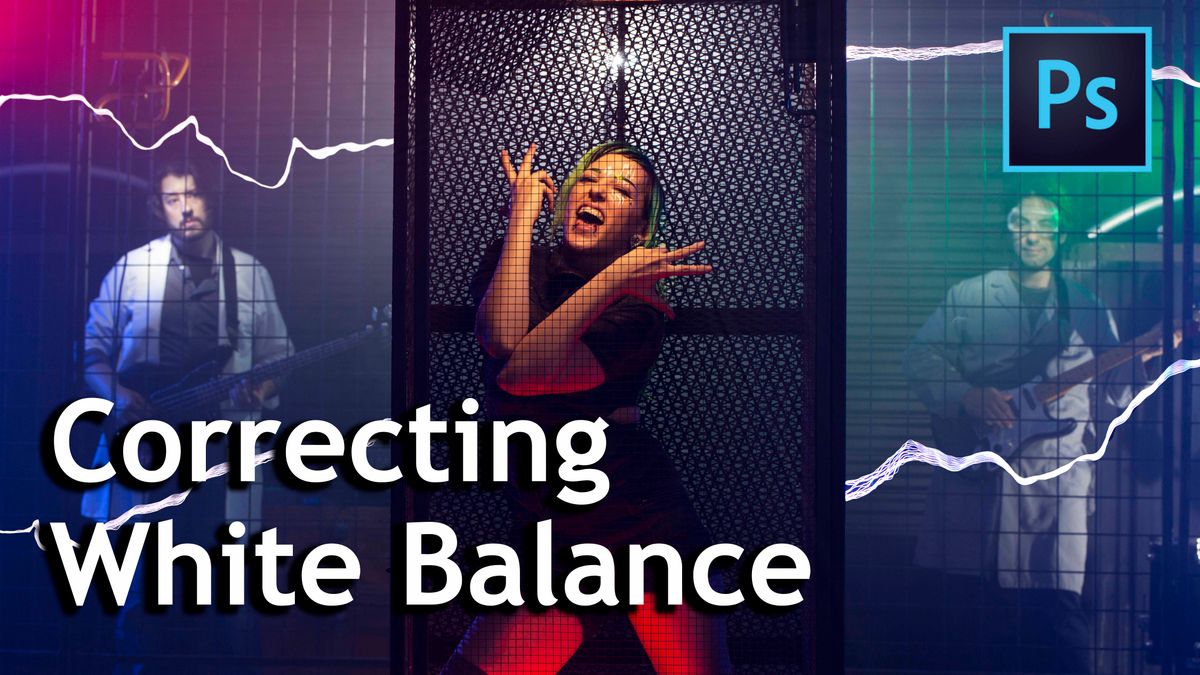
Tesla Coils and ArcAttack
Julene and I were in Huston earlier this month and decided to hit up this band called ArcAttack! They use giant tesla coils to create music. I got my gong out to join in on the fun.
Being Safe
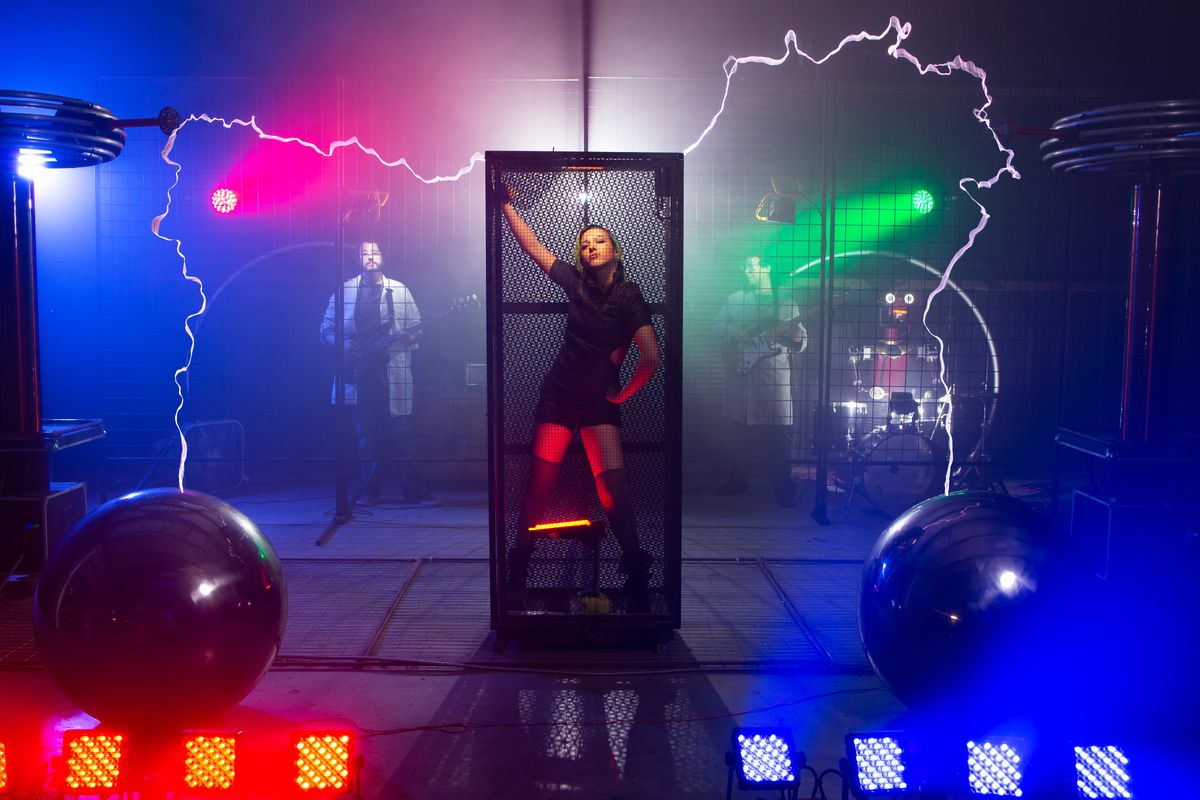
We are playing with electricity here and so the first step was for everyone to be safe! We had all the members be in electric-proof cages or fences that kept them away from the lightning from the Tesla coils as they came off the rods. Please do not try this at home if you don’t have the proper gear.
Photographing with Different Light Sources
ArcAttack has appeared on America’s Got Talent and is professionals when it comes to dealing with lightning from Tesla coils.
During their shows, Arc Attack plays a lot with different colored lights. So the challenge for me today is to have the colors be accurately portrayed while maintaining correct exposure and white balance on the talent’s face.
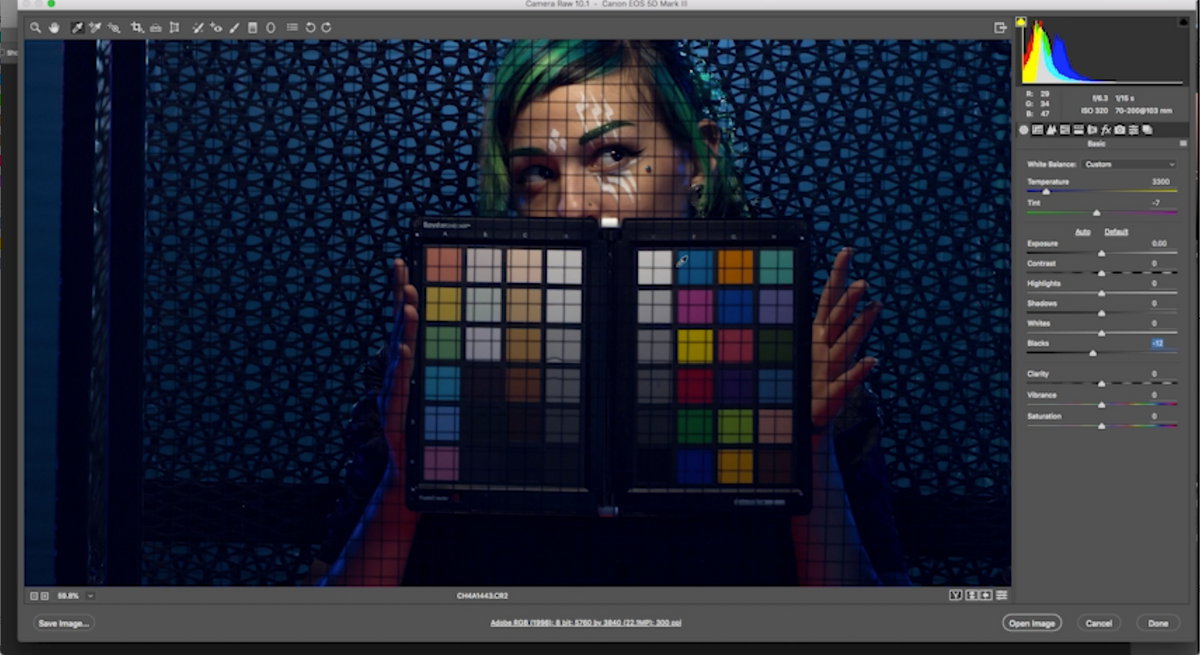
By using the Datacolor Spyder Checker, we can correct exposure and white balance in post.
Every time we have a different lighting set up or a different shot, we have to put our color chart in the shot next to our talent’s light so we can produce accurate colors.
WIN Aputure 120D and Vanguard Alta Fly 55T
Our Lighting Set Up
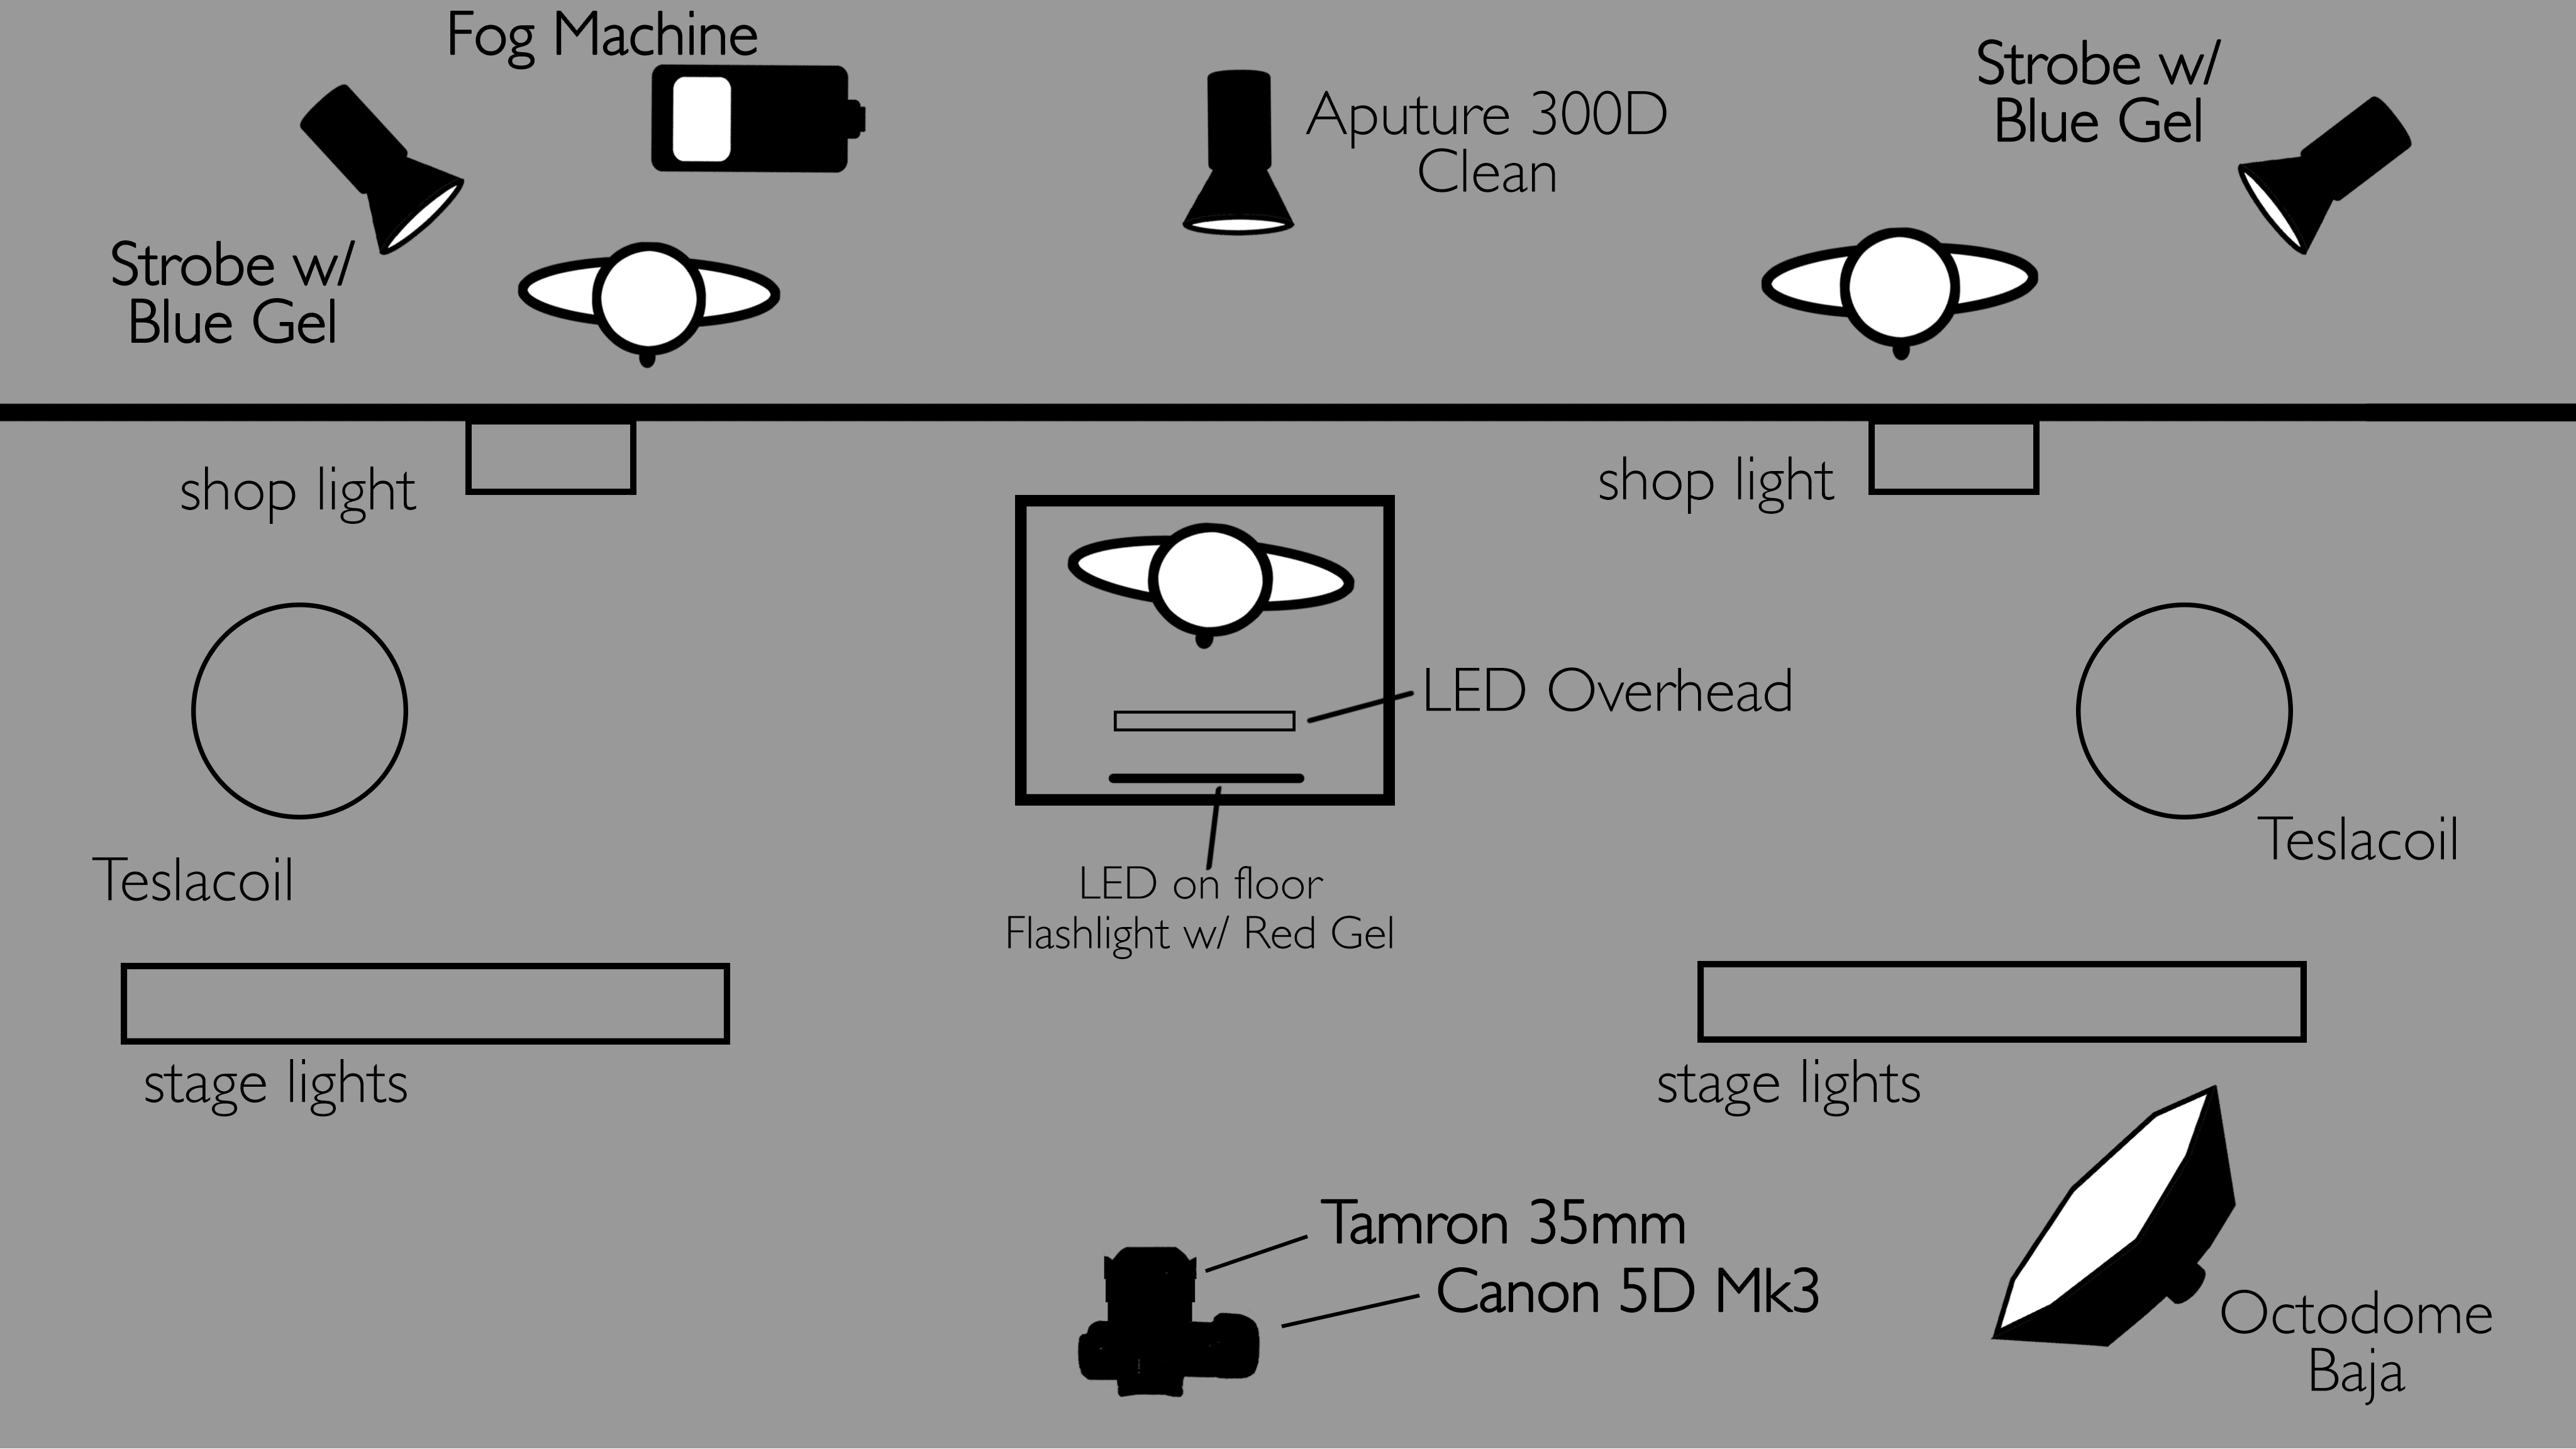
It was a set up with a bunch of lights that’s for sure. I brought over a fog machine on the plane to add some depth to the image. The Aputure 300D was in the back to backlight that shot. Then we had a few strobes around the talent to light them. We put different colored gels on them to add something to their rim lights.
There were some Home Depot work lights, stage lights, cheap LED lights, strobes, and Tesla Coils in this scene. So it was really important that we got an accurate reading of the light on the talent’s face in order to represent all those colors.
Post Processing
Now we’re back in the studio going over our images. Using the picture we took at each lighting set up, we’re going to use our color chart to fix the white balance.
With the photo in Camera RAW, we can use the eyedropper tool to select 20% gray. This will get rid of any casts we might have had.
Then we’re going to adjust the black and white points so it can be 4% for black and 96% for white. For this photo, we want it to be a little moody so our white point is around 60ish percent.
Once we have our settings set, we can save it as a preset to use in all the other images in this setup.
If you want to import this into Lightroom and use the Datacolor app, you can do that as well. Just save the photo from Camera RAW with your settings as a .tiff file and import it into the Datacolor app. Once it loads, you can save the look as a Lightroom preset.
Adjusting Your Profile
Once I have my profile created, it’s much easier to start my color correcting process. This chart will help me make sure my colors are accurate. Each shot is exposed a bit differently so I’ll still need to make some adjustments, but at least I know my colors are accurate!
Gear Used
Datacolor Capture Pro – B&H / Amazon
Canon 5D Mark III – B&H / Amazon