 My Lighting on Location Workshop is April 30th. Save 10% off registration with code “earlybird” at checkout by April 1st.
Hi, this is Jay P. Morgan. Today on The Slanted Lens we’re going to take a wonderful portrait of Mario here bathed in blue light with a double rim. And then we’re going to use our MIOPS trigger in sound mode to stop some action as we smash some bottles on his head. Or he may be smashing bottles on my head. But anyway, let’s get started and see what we can do.
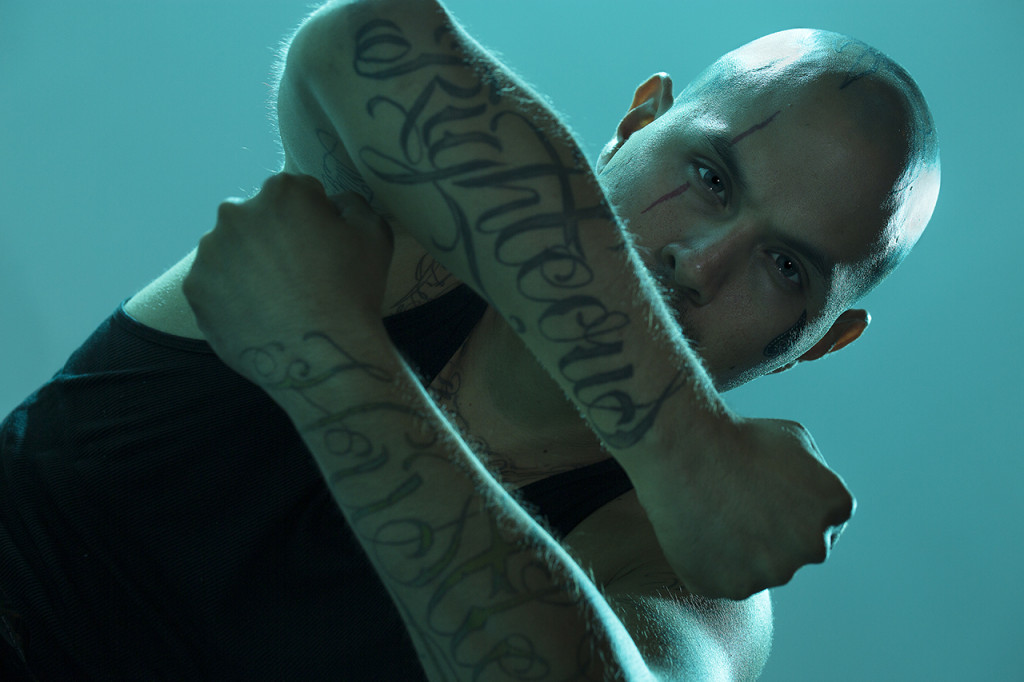
Let’s take a look at our lighting set up. We had a double rim, we put a Cyan 60 gel on the Baja B6 on the background on both sides. Nice rim on our talent, looked fabulous. We wanted a red in the beginning. The red was nice, but it was kind of getting polluted because of the blue kicking back. We turned the red off and thought, “Wow that blue is really pretty. Let’s do that.” Blue on blue made that portrait nice and moody. Then in the foreground we made a snoot on our light with a 20-degree grid, and then black wrap around it to make it really tight just to give us that nice kind of glow on his face. Not very bright, just opens it up just a little bit. And then last of all we slid in a piece of bead foam in the foreground to bounce a little bit of light up into his face. So we got three lights and a piece of bead board and that’s our lighting set up.
Let’s take a quick look at some of these low light portraits. 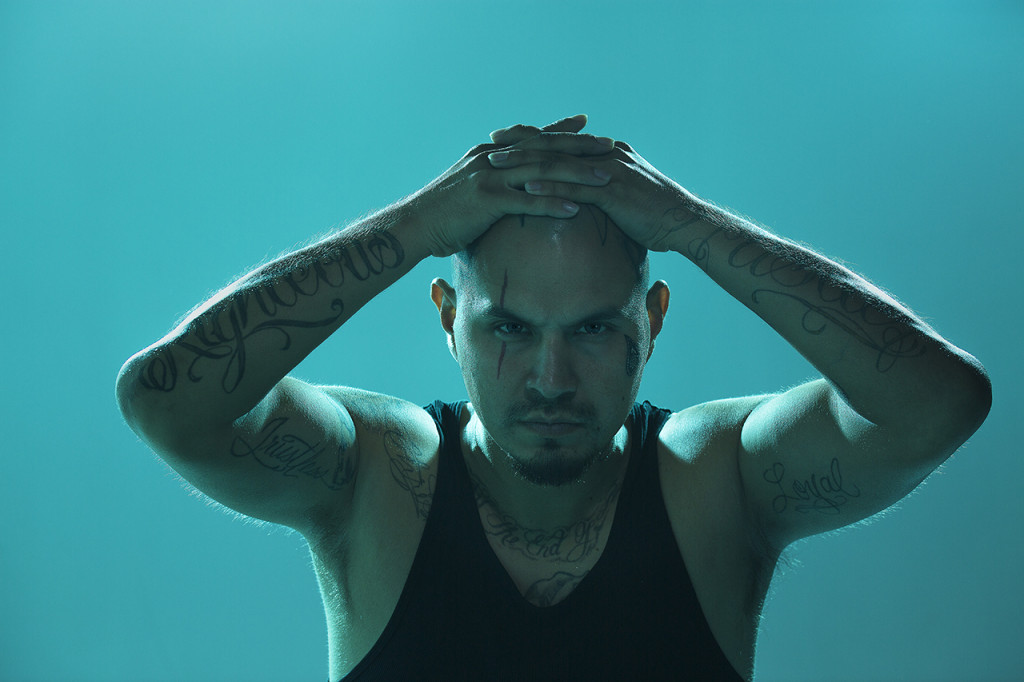
 We decided to bring up the light on his face about one stop for the bottle breaking images. Now let’s look at how we’re going to smash the glass and contain the water. We went back to our old kiddie pool with plastic shield keep everything contained. Once we got that set into place we’re then going to go to our break away bottles. Alfonso’s Breakaway Glass gave us 20 or more of these breakaway bottles. You can smash them on your head and they don’t really hurt that much. So Julene filled it full of water, and Mario’s going to break it on his head.
For our camera setting I used a 5.6 on bulb at 100 ISO. I use that 90mm Tamron lens, which gives you a nice portrait type look. It’s really a fabulous look. That’s kind of the way we had our camera set up. But now when we go to do our shot we’re using the sound trigger. We brought that sound trigger and got it as close as possible to him. So the second the glass hits his head it’s going to go off. With that sound trigger right in that area we’re going to turn the lights off. We’re going to put the camera on bulb and then when the sound triggers, it’s going to fire the strobe.
The first one just barely broke over his head before the trigger fired the strobes.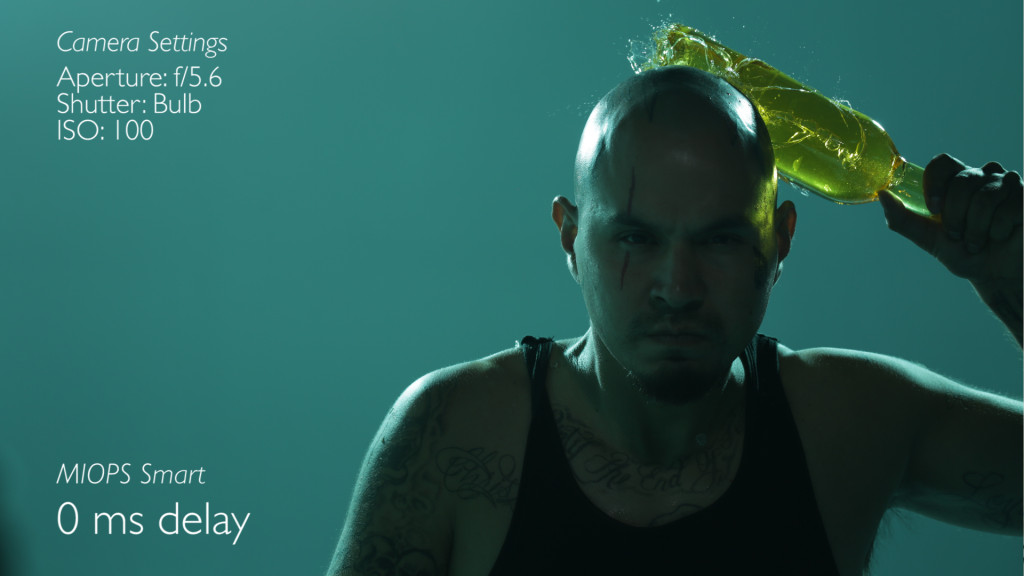 But then we lengthened the delay to 25
 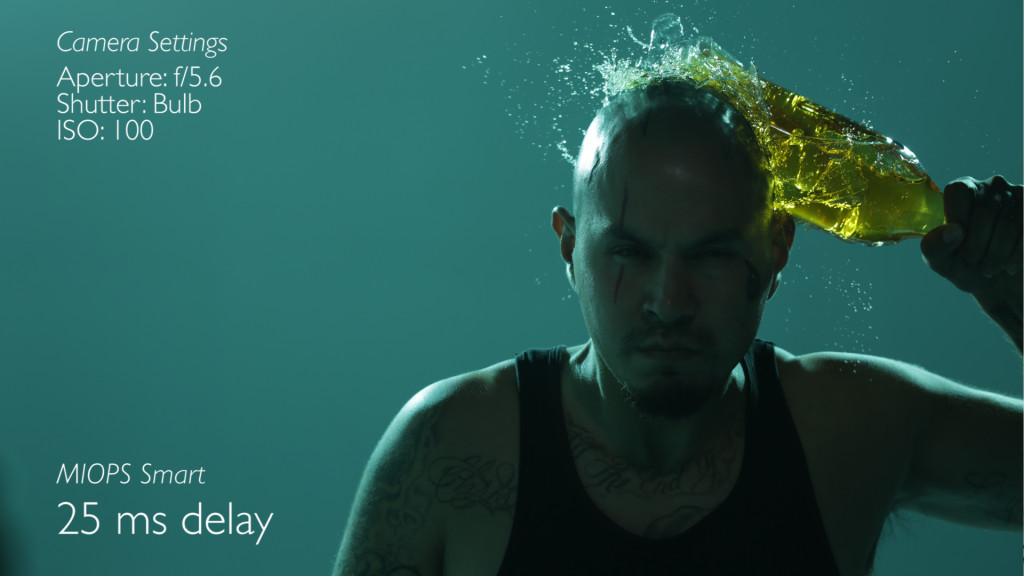 and then to 50.
 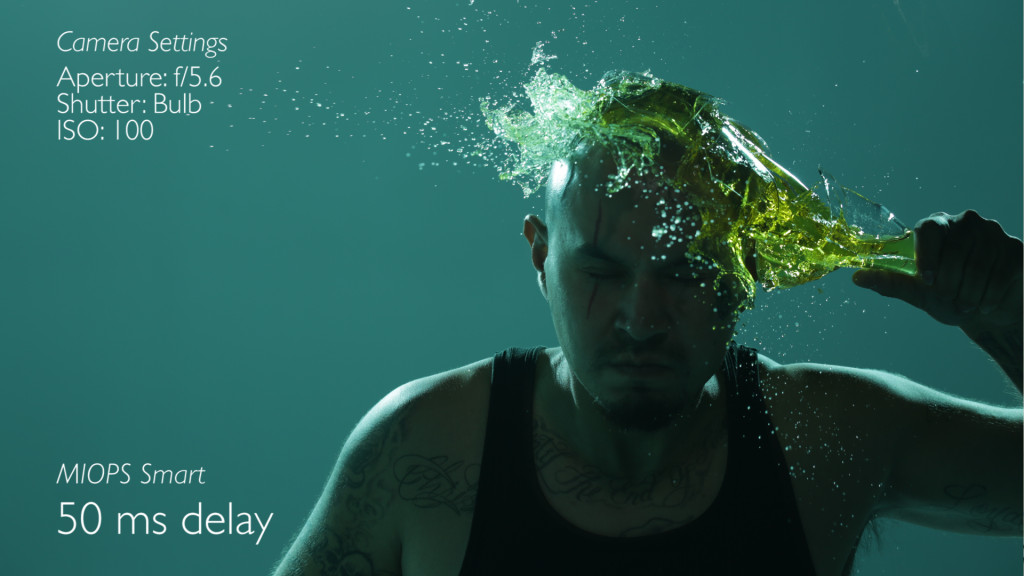 And you can see it’s slowly get further and further into the bottle breaking before the strobe fires.
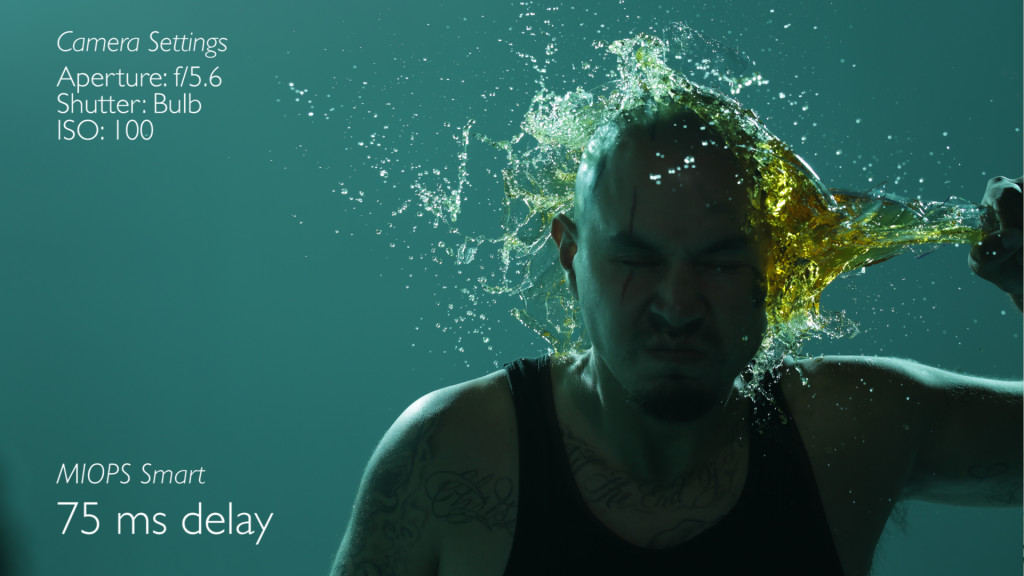
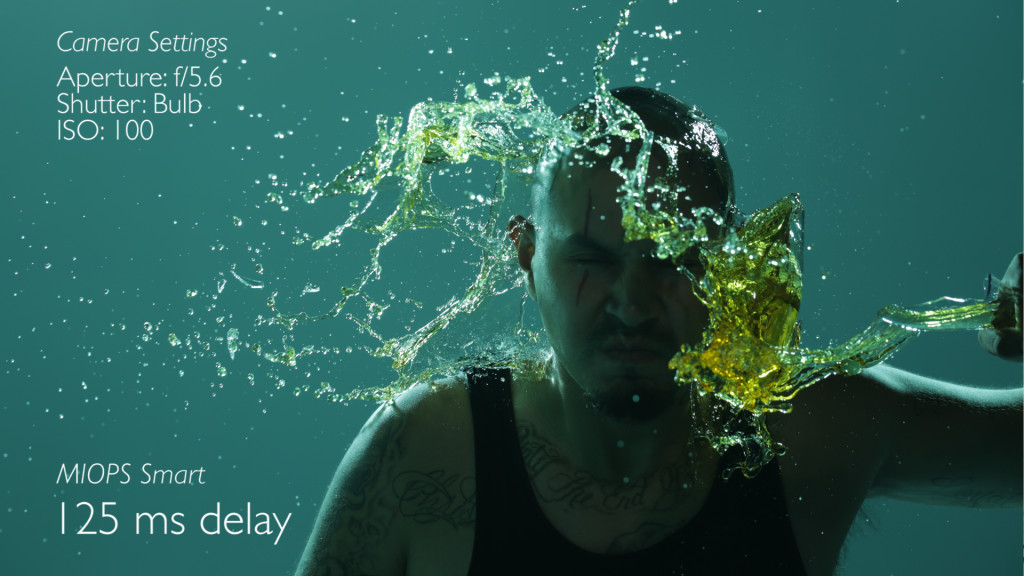 It became very predictable at that point as it hit and exploded over his head. The hardest part about that is that I’ve got my trigger on bulb, and the second the strobe goes off I’ve got to release it because the sound of the glass breaking on his head fires the strobes. But the glass hitting the ground also fires it. So I’ve got to make sure I release that trigger before the second flash. But doing those things together gives a great, controllable look at the splash that hits his head and goes out of the frame.
The reason why you use a MIOPS trigger and not the camera to fire the strobes is because it takes too long. When you have the MIOPS trigger firing the strobes immediately, it’s quick. When you fire the camera, which fires the strobes, it’s too late and it’s too slow. Having the MIOPS trigger that close to where the sound of the glass was breaking made it work fabulously and we had complete control of that. After that we just smashed away and got some great shots of Mario.
We shot pieces of glass that Julene might use to retouch in there. As always we calibrated our monitor with a Datacolor Spyder5Pro before starting the post process. Julene took the best image of the bottle breaking over Mario’s head and composited it with the best facial expression. There were four images composited for this final image. His face, the bottle breaking and a bunch of splashing glass.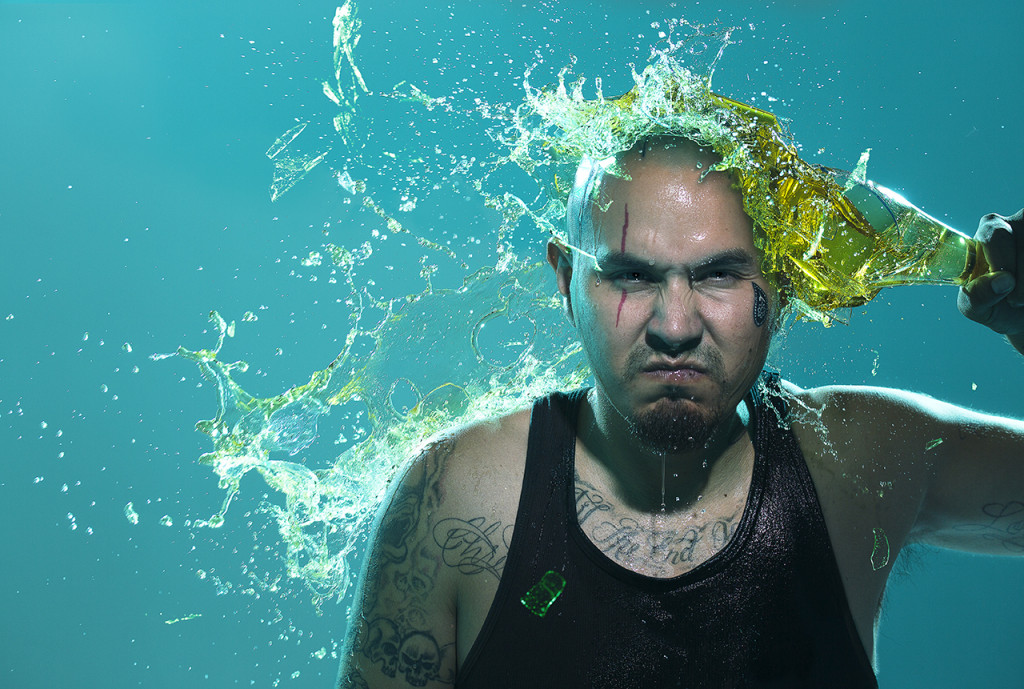
So there you have it. We had a great time doing a portrait of Mario and he broke 18 bottles over his head. He’s the man.
Keep those cameras rollin’, keep on clickin’.
-Jay P.
Please shop our affiliate links to support new content from The Slanted Lens.