


Is AI culling of any value to you? I think it’s useful even for a photographer who doesn’t shoot a ton. And let me show you why. My biggest concern about AI culling in the beginning was, hey, it’s going to make all kinds of decisions for me that I won’t have control over. I like control. I want control. Give me control. But I found out that really the process is so streamlined that you have complete control on what you see and what you don’t see and what you choose and what you don’t choose. So a while back we reviewed Imagen-AI. Great software, great editing software. Their culling part of their software was just coming on. So now we want to look at that culling process and exactly how valuable that is. And the process that I use to be able to cull my images so I can see what I do and don’t want and I can do it quickly. I don’t have to spend hours in this process.

So, I took a project that had over 3,000 images and culled it down to like 300 images. So, let me show you the process so you can have complete control of what you do and don’t see, what you do and don’t keep. So, this is Imagen-AI. First off, I like the fact that it interfaces with Lightroom. I took my images, I loaded them into Lightroom. In Lightroom, I was able to put everything together in Lightroom. My entire, I uploaded all the images that I was going to be working on. So now in Lightroom, I have all my images with their raw data in Lightroom. Then I took that project and I imported into Imagen-AI. So here’s my 3000 image project. So in the culling process, you can use a profile to preview your images. I used “Love and Light” to look at these images. 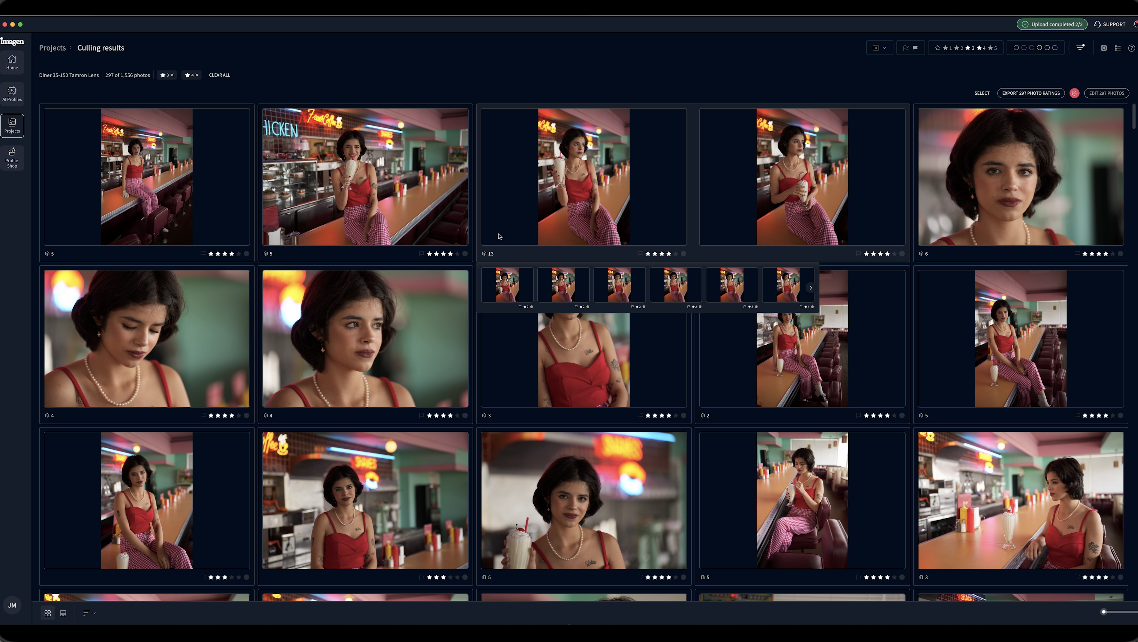


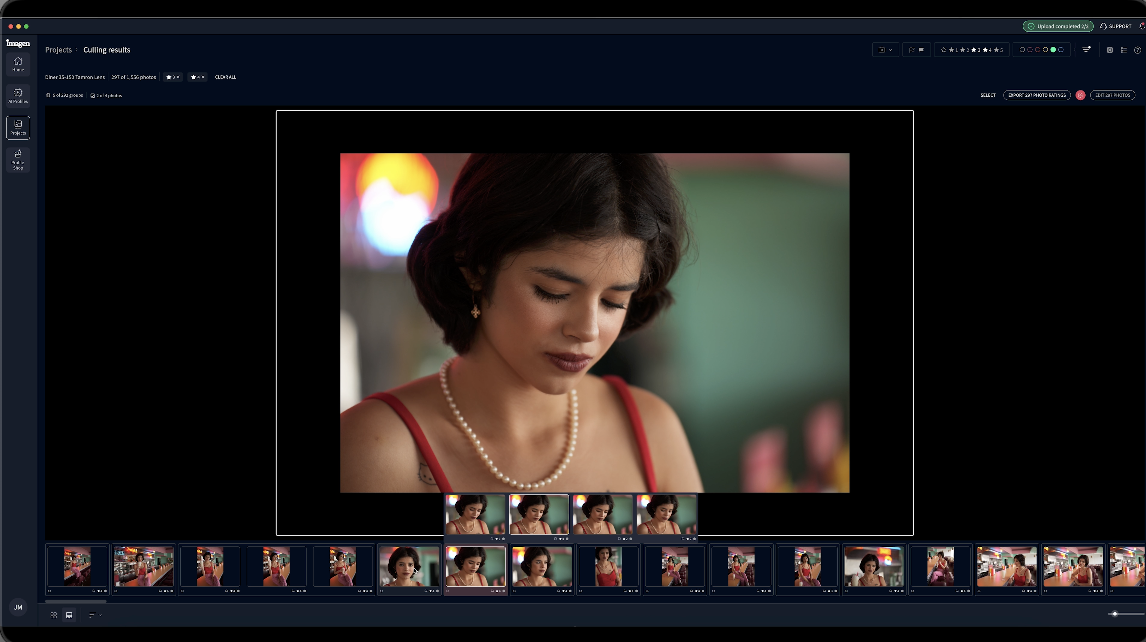

It’s going to look at our eyes closed. And I’ll show you an example of eyes being closed where I wanted the eyes closed and it figured that out without any problem. So, let’s take a look at that. Here’s an example of an image that I did. I like this kind of look. Person’s looking down, looking off. A lot of times you don’t see the eye at all, but it stacked these four images together. It picked the best one as it saw the best one and which I agree with completely. And because their eyes were closed, it didn’t exclude them because it could tell that this was on purpose. It wasn’t just, there’s several with them standing there looking at the camera and one’s blinked. So it’s a very different look and the AI is able to pick that up and that makes a big difference. So you can save that. It won’t throw these kinds of images out at any time. If you want to just clear all of these settings, you can go back to, you know, all the settings, especially when you go back into Lightroom. When you take it back into Lightroom and say, “Okay, look, I just want to look at everything.” I’m not sure why you would do that, but if you’re thinking, “Oh, I missed something.” In the beginning, you may feel a need to do that because you’re not trusting it. But you know, once you understand it and trust it, you’re not going to go down that road very often.


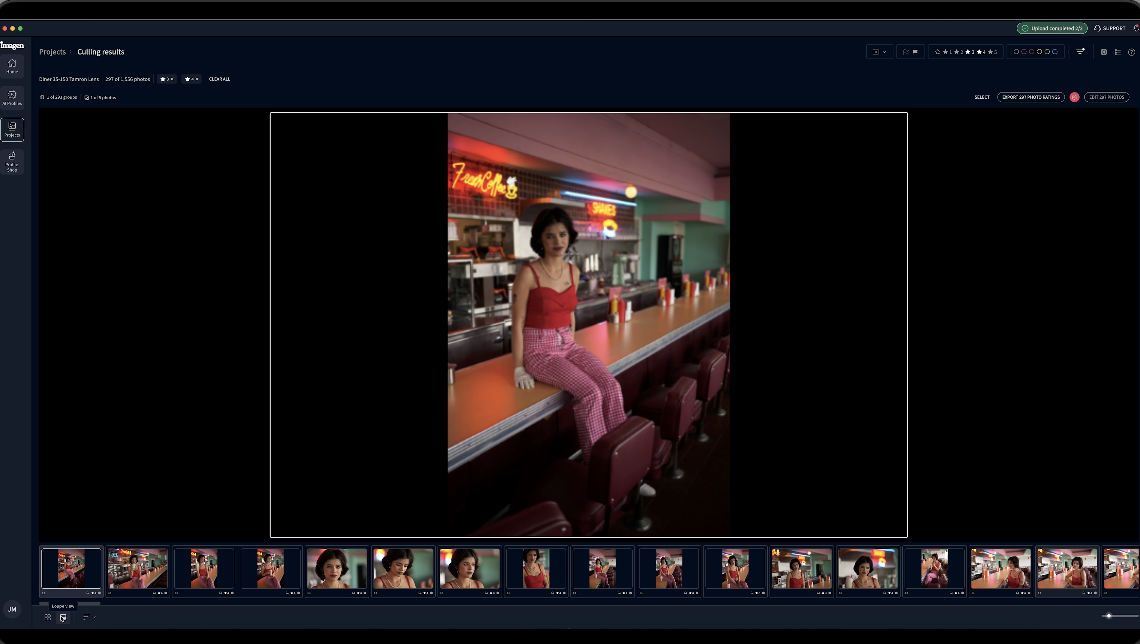
So, here’s our first image. We have this grid view. I can look really quickly if I want to look here. Those are pretty small for me. So, I usually go to what I call a film strip or they call the loop view. In this loop view, if I click on it, there is my number four image. And I can just simply go down and look at the other ones in that file. 1 2 3 4, yep, I like that one. Going on to the next one. There’s a standalone. 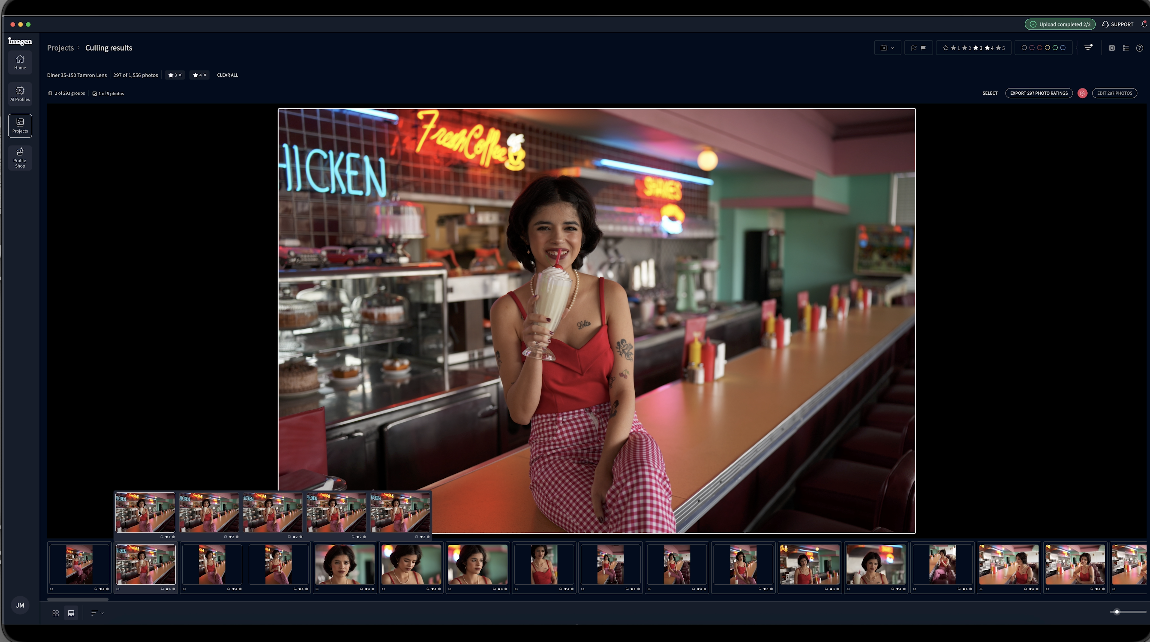


So, if I look up in here, I’m going to have to look at the other images in this stack. And there’s a bunch of them here and decide which one I like. Well, her eyes are not, okay, there we go. Her eyes are closed. That’s not good. I like that one. Oh, that was my four. I don’t like the cropping on that one. She drops down too low. So, it did a great job of deciding which one of those was perfect because it sets her in the frame correctly. 

I find this really useful. It’s a huge timesaver. And actually, there’s a little tab up here, keyboard shortcuts. And if any image that you like, you hit the A button. That becomes the four because that’s my rating for selects four. Any image you don’t like, you hit an X and it gets rid of the whole stack. It just gets rid of all of it. 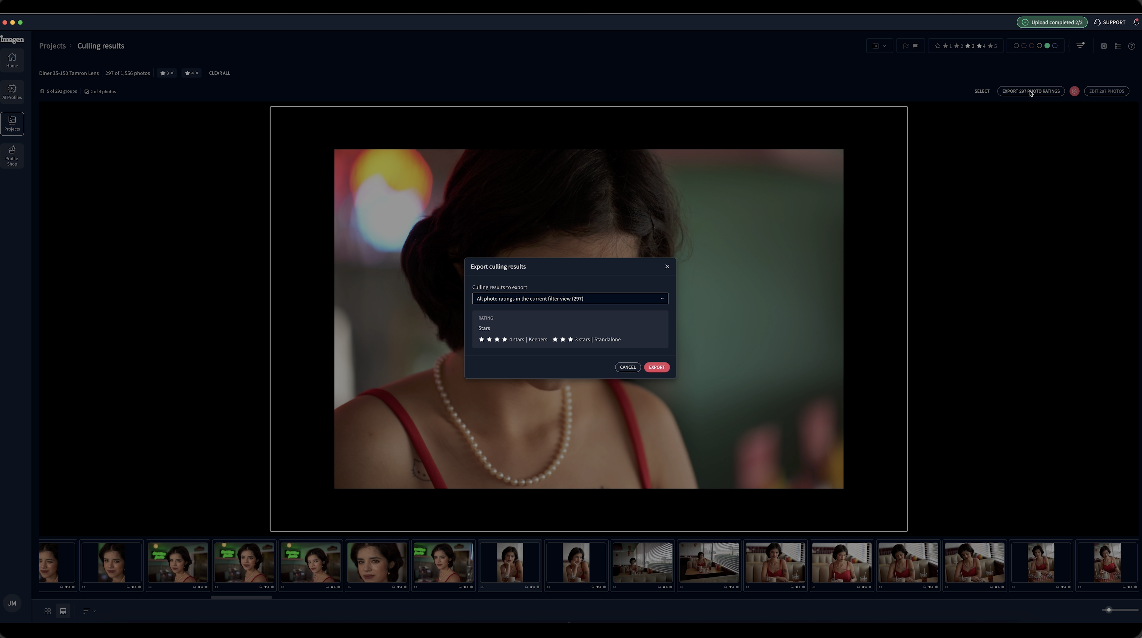

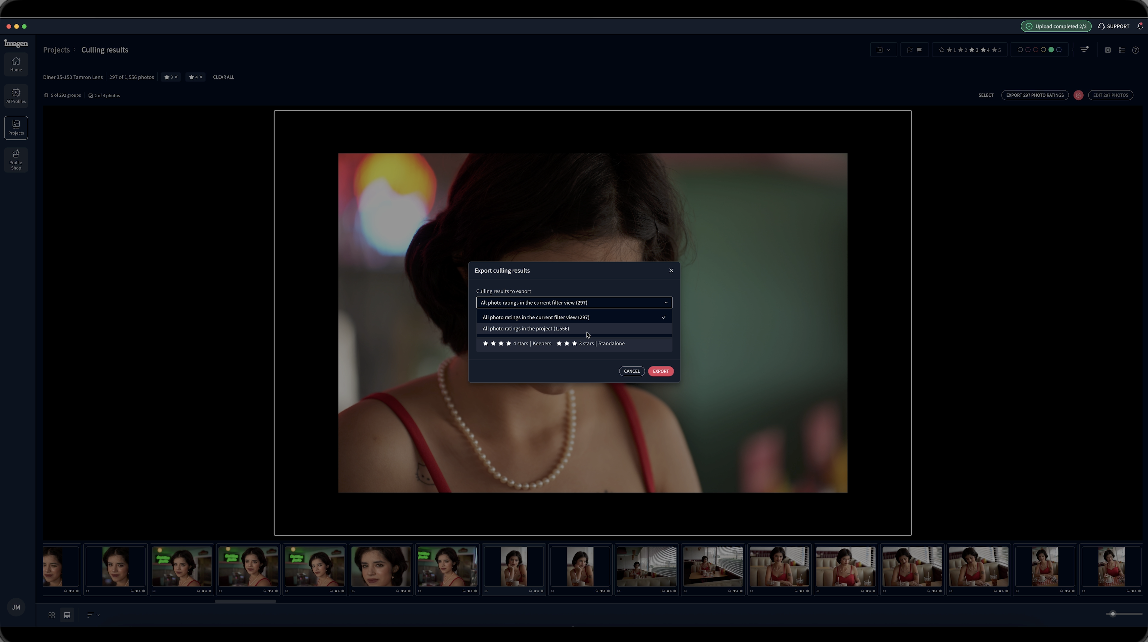

When I export them, it’s going to take them back into the folder where they existed and it’s going to attach them to the images. It’s going to be a sidecar file that’s going to give you all that information. And once I click on that, it’s going to send that information back there. I don’t need to do that because I’ve already done it. 


I’ve already edited using “Love and Light”, but let me just go through the steps in the process. I’m going to edit my project. So if I looked at edit again, it’s going to say, here’s my window. What do you want to do? And I said, well, I can just say crop. But crop is just general cropping. And for me, probably with this situation, I should do general crop. 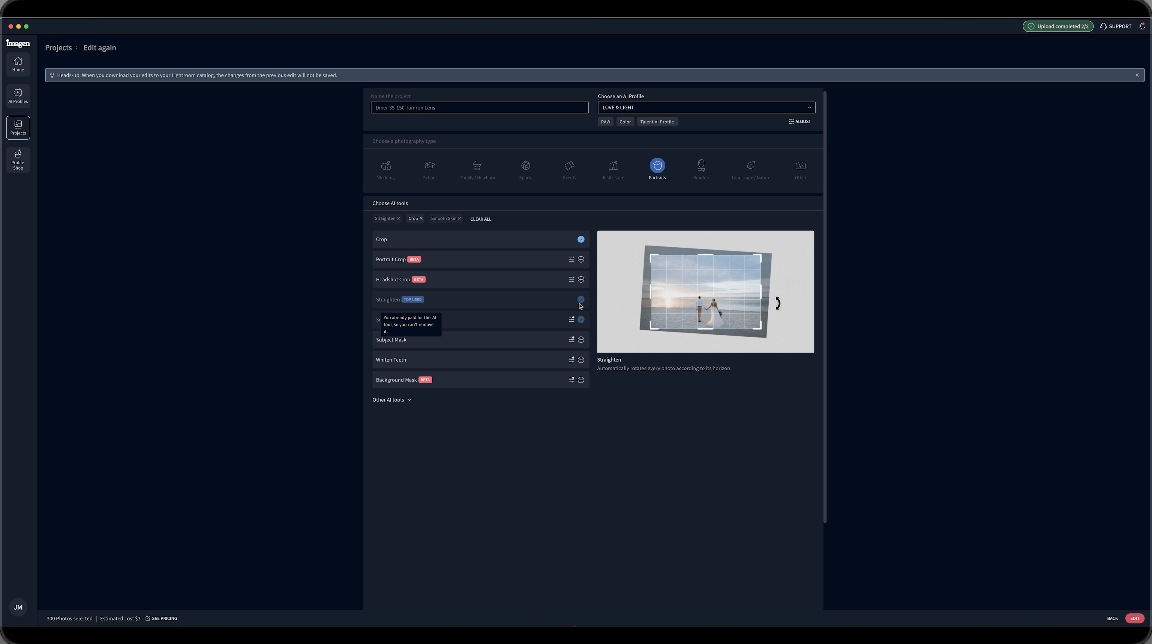


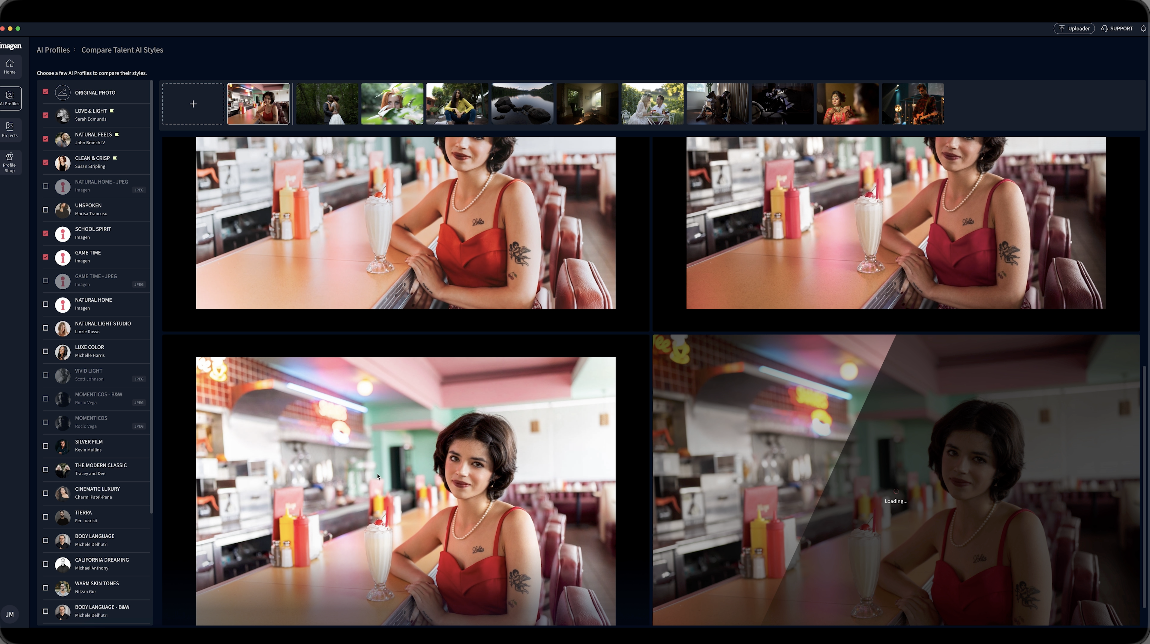


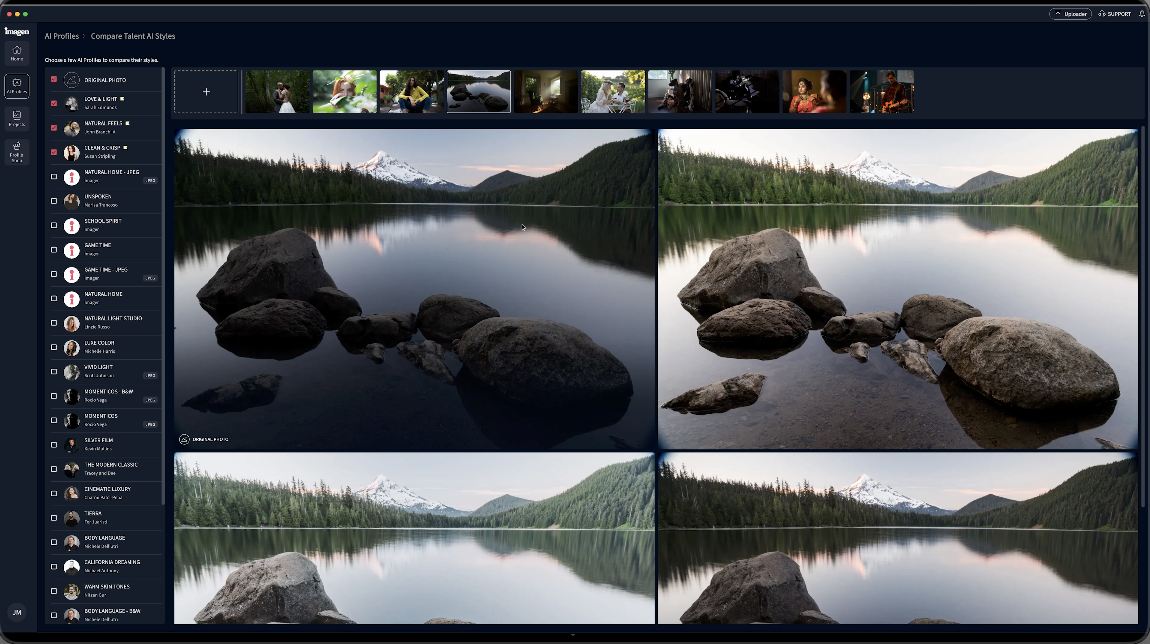
If I’m into landscape, that’s what these different profiles are going to do. They’re opening up the shadows on a lot of these. You really want to look at them and just see exactly how it’s going to affect the image. A lot of them are opening things up, making them more airy and light. This is something in the future I’ve been working on my own profile, both for portraits and for landscape. Something we’d like to make available to everyone because I feel like I’ve got a pretty good look when it comes to profiles for both landscape and portrait. So, as soon as I get that finished, and I’ve just been doing thousands of images to get that profile exactly where I want it to be, but this gives us a good idea. I’m going to try “Love and Light”. Nothing says “Love and Light” like a profile named “Love and Light”. So, here we go, “Love and Light”. So, I’ve selected that. 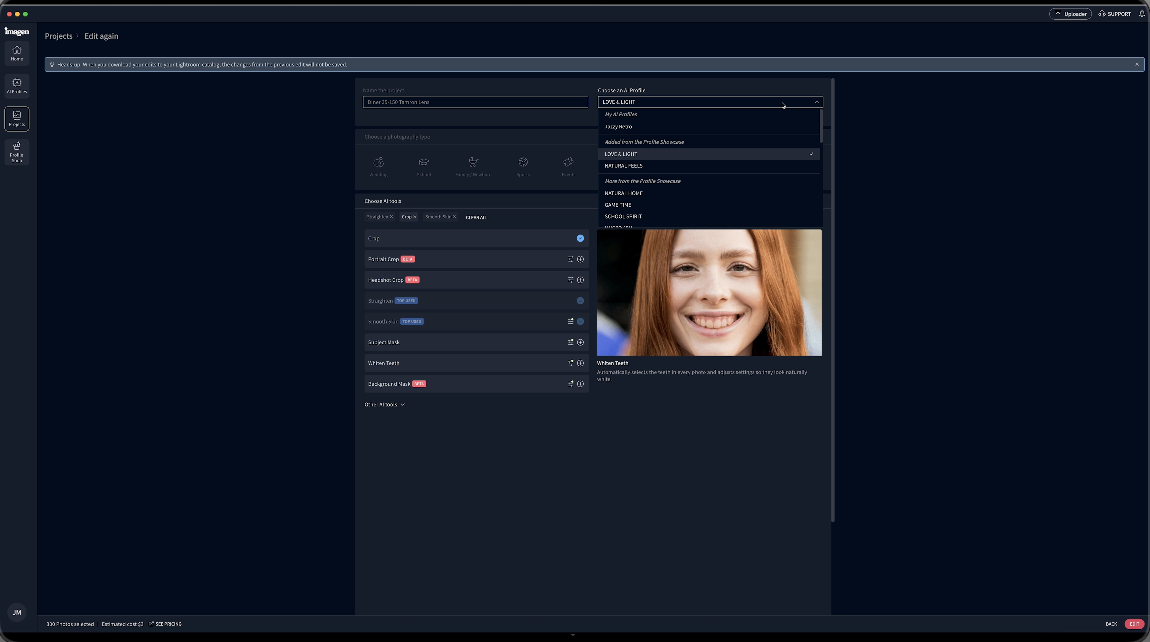
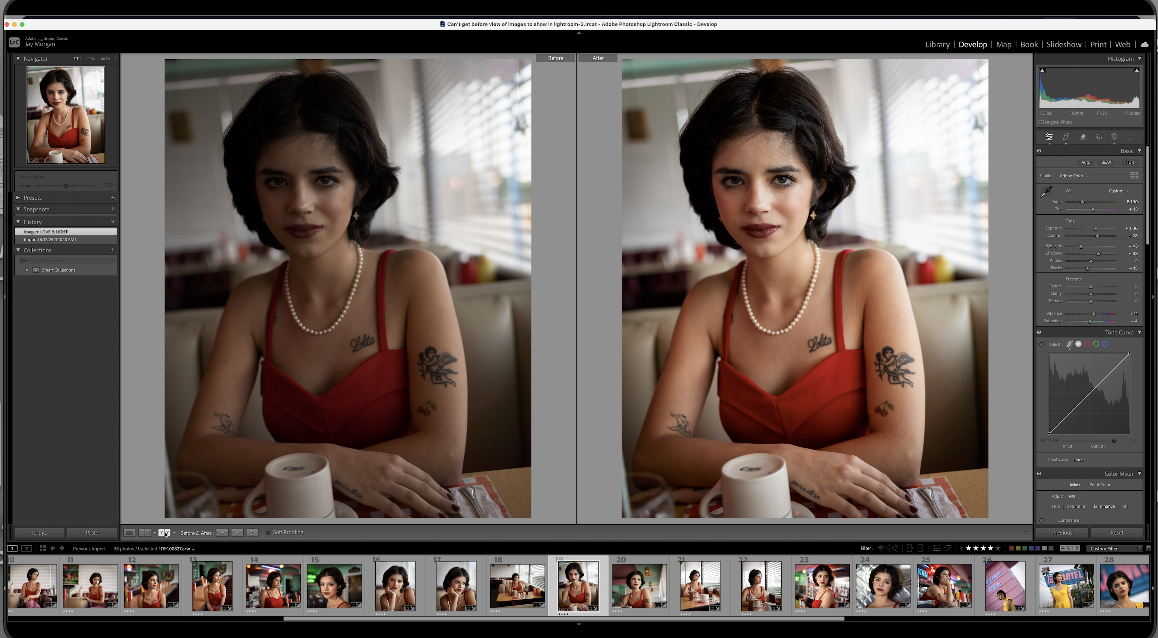

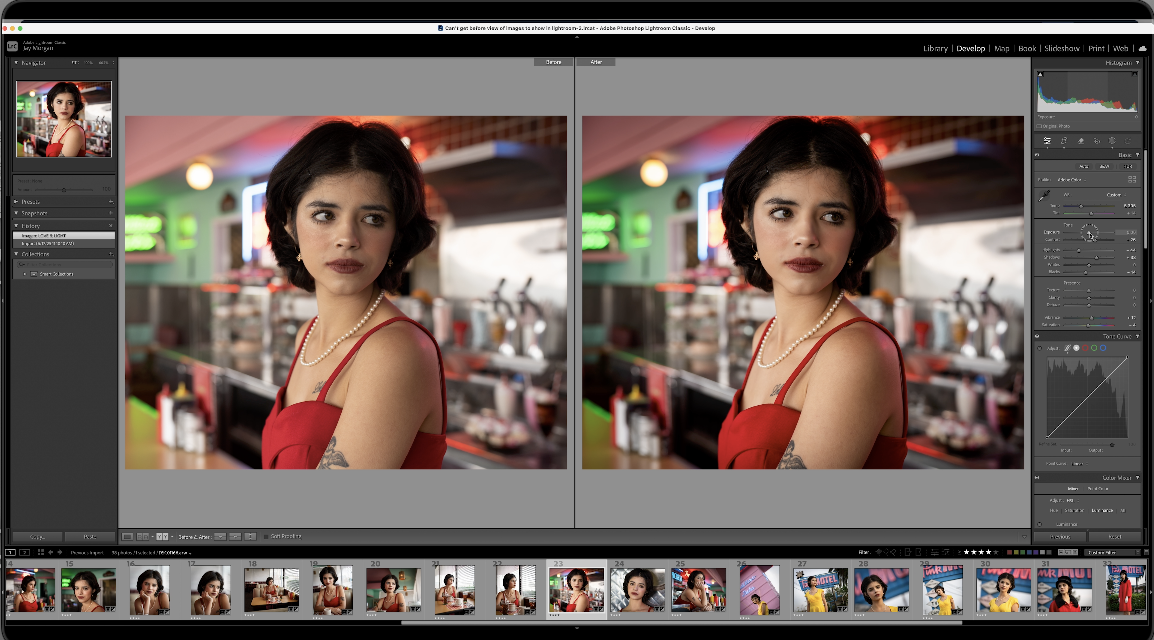
So I go ahead and do this edit process. Hit this button. That’s edit here. When this is done editing, I export it again back to Lightroom. And now I’m back in Lightroom. And here we are. So, if I look at Lightroom and I do a before and after, there’s my before and after. There’s what the editing did. So, as I go through these images, I can just go through and I can see exactly what it did. And now I can make some quick tweak adjustments if I want to. 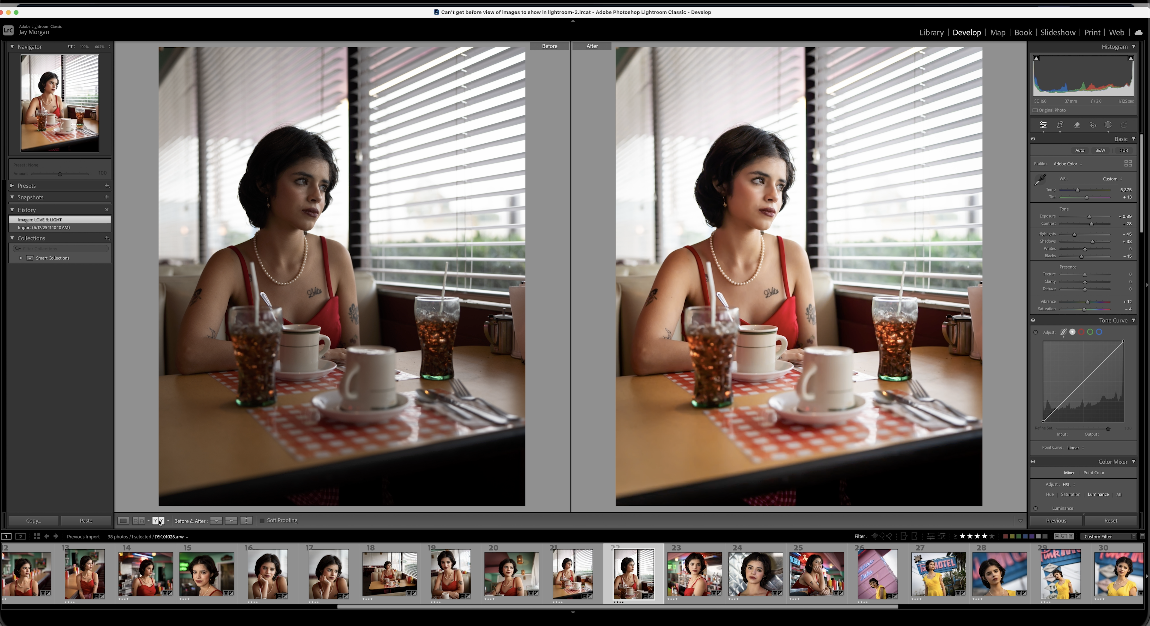


I mean, the program, Imagen-AI, has a $12 a month fee for your culling, everything that you’re going to get to be as much culling as you want to do. So, if you want to just take this to the point where you cull it and then do all of your presets and everything in Lightroom. You could handle it that way. That would be a workflow that would work for some people. But if you want to get into the editing, it’s an additional fee each month and that applies towards the number of images that you can process and edit. I found the editing very useful. I mean, look at that. That’s a beautiful image. I’m super happy with it. This one I may work on a little bit. Open up the shadows maybe a little bit. Bring up my exposure. I like the cropping that we got. It’s cropping keeping the architectural items in the image. I like that about it. So very happy with what we got.
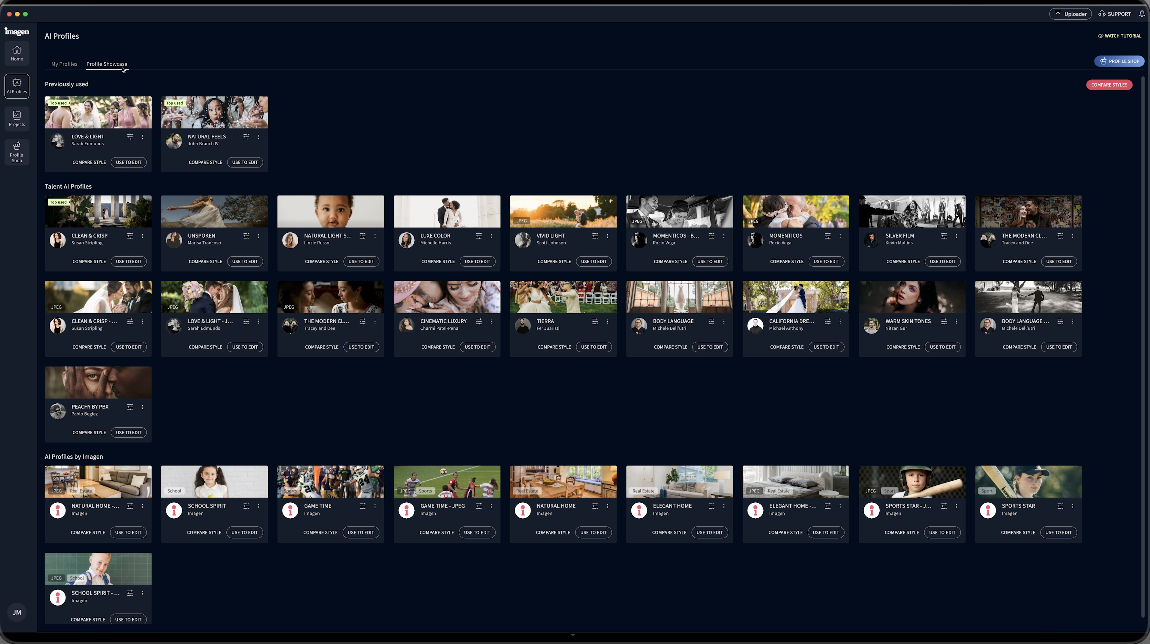
I think what makes this really useful and probably the most useful for wedding photographers, for portrait photographers, event photographers, people who are shooting a lot of images is to get your own profile put together. You just load an X number. You try to get like 3,000 images that show your editing style. You import all those Lightroom catalogs into Imagen-AI and you can create your own editing profile. And we’re going to talk more about that in the next video that we do. We’re going to show our profile and how we put that together and how we apply it. And I’m thinking, you know, I want to have two or three profiles depending on the type of work I’m doing. So, I have different options. But this is, but you can always choose from the ones that they provide.


All right, so there’s a look at that editing process. It was much simpler, easier than I thought it was going to be. I didn’t find it that it left me so far away from what I wanted that it was really difficult for me to tweak them a little bit. I thought it was very, very close and allowed me to just make some quick kind of adjustments and brought everything to exactly where I wanted.
So let’s wrap this up. I really feel like this culling process has moved to a point where it is very useful and it’s viable for photographers. It’s helping me make the right decisions. It’s helping me make those decisions quickly. It is not throwing things out that I would normally keep. It’s allowing me to keep things that perhaps I see that, you know, if a model is standing here and it’s a duplicate and all they do is move their hands, you know, into a couple different positions, then you’re going to have to make a decision on which one of those hand placements you like because it’s going to stack them as duplicates and it won’t know which one you like. So, you’ll make those decisions. It gets it into a format that allows me to quickly see those differences, make those decisions, and then move on. Now, when it comes to editing, I think the editing is excellent because you have an a array of different profiles you can use and apply. But you really want to use the culling to get your images culled down to just your final, the final images you want to provide your client with. Because you’re going to be charged at that, $7 is going to cover up to a thousand images, which for a lot of photographers is more than enough. If it goes beyond that, you’re going to be charged a small fee for each image, but you really want to keep the images really sorted down. But if you’re doing weddings and you’re doing a big wedding, I mean, how much do you charge when you send out to someone to cull and to edit your images? You’re going to spend way more than, you know, $30 or $40 on a project. So, I think it’s really set so that you can make your decisions, apply the profiles, and get things out. If you’re a photographer who’s not doing weddings and events and those kinds of things where you’re just looking at hundreds and hundreds of images, then really the pricing is set so that you have the ability to cull and edit more than enough images that you’ll be shooting in a month.
So, there’s a look at Imagen-AI. I find this process very interesting. I think it just saves so much time, takes a headache away that I didn’t and don’t enjoy. And partly because my work’s sporadic. I’m not doing five weddings a month, you know. I’m doing a commercial shoot here. I’m doing a small interior there, you know. So I’m not cranking out enough, you know, weekly to be sending this out to people. I’m doing it myself. And this makes it so that I can do it quickly myself, make the edits quickly myself, and get it out to my client. And just gives me a lot of time to take care of other things I need to in my business. So, as far as AI goes, this is probably one of the better applications that I’ve seen. So, check it out. See what you think. Keep those cameras rollin’ and keep on clickin’.