Today on The Slanted Lens I’m teaching you stop action photography using the MIOPS Smart trigger in laser mode. You’ll also need a strobe that can fire with short flash duration, like the Dynalite Baja B6. We splashed water on our model, Rebecca Bujko, over and over again. We were able to adjust the delay of the Miops by just milliseconds. That allowed us a tremendous amount of control over stop action of the water. We got that water splash right where we wanted it. So let’s take a look and see how we did it.
First we set up our background. We modified a picket fence from Home Depot and held it in place with a couple of c-stands. We used a kiddie pool to catch the water we’d be throwing, and had Rebecca on a stool on top of some apple boxes. It’s important with this setup that your model not move around a lot, and sitting will help that. The boxes were to get her to the right height. We had a blue backdrop clamped to a stand in back of her.
Next we set up the MIOPS trigger and laser. We set the MIOPS in laser mode and then put it on top of the camera. We used a piece of tape to keep the laser shining. (Be really careful the light doesn’t hit your eye or your camera sensor. You could do serious damage to both.) The beam needed to hit the trigger on top of the camera, so we put it right outside the frame and aimed it back at the trigger. Using a Manfrotto clamp on a small ball head made getting the laser lined up with the trigger easier. Once the LM shows up on the trigger screen we know they’re paired. Now the water will cross that laser beam and trip the trigger, firing the strobes, getting us the stop action shot we’re after.
As the water comes in it breaks the plane of the laser, it’s gonna go off immediately so we need to get the delay set correctly. We started at ten, then went to twenty, forty, ninety, one-thirty, and then one-sixty. You see the water slowly creep further into the frame, until it’s exploding around her head.

The reason the MIOPS laser trigger is so great for this is because it allows us to predict when the water will hit. If we were just throwing the water and trying to catch it at that same point every time it would be very difficult. But with the delay of just milliseconds you can really get the timing down correctly pretty consistently.
We used three lights with this setup. Here’s the breakdown:

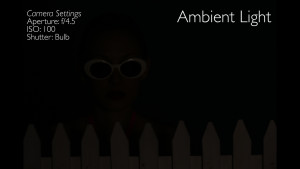
Ambient Light
B6 with a 430 Wide Beam Beauty Dish in front of the model

B4 with reflector as rim light on camera right

B4 with a large piece of Rosco diffusion

We’ve got a PocketWizard plugged into each of the lights and one hooked up to the MIOPS. When the MIOPS trigger goes off it’ll fire them. The key to the stop action look we’re going for is to use a short flash duration. It’s called T-mode on the Bajas. The shutter speed will stop the water on some level, but
it doesn’t really freeze it. The shorter the flash duration, the better it’s going to get that stop action we want. We used T2 on the key light and T3 on the others. T7 gives you a lot of flash power but a longer duration, so the stop action is not as pronounced.
Here’s the final look:

That’s how we captured this stop action with water, using the MIOPS laser trigger and the Dynalite Baja B6 in T-mode. I enjoyed it and learned a lot, and hope you did as well. Let me know your thoughts and any questions.
Keep those cameras rollin’ and keep on clickin’.
-Jay P.