Does Sensor Size Matter? Camera Sensor Size Comparison
Morgan
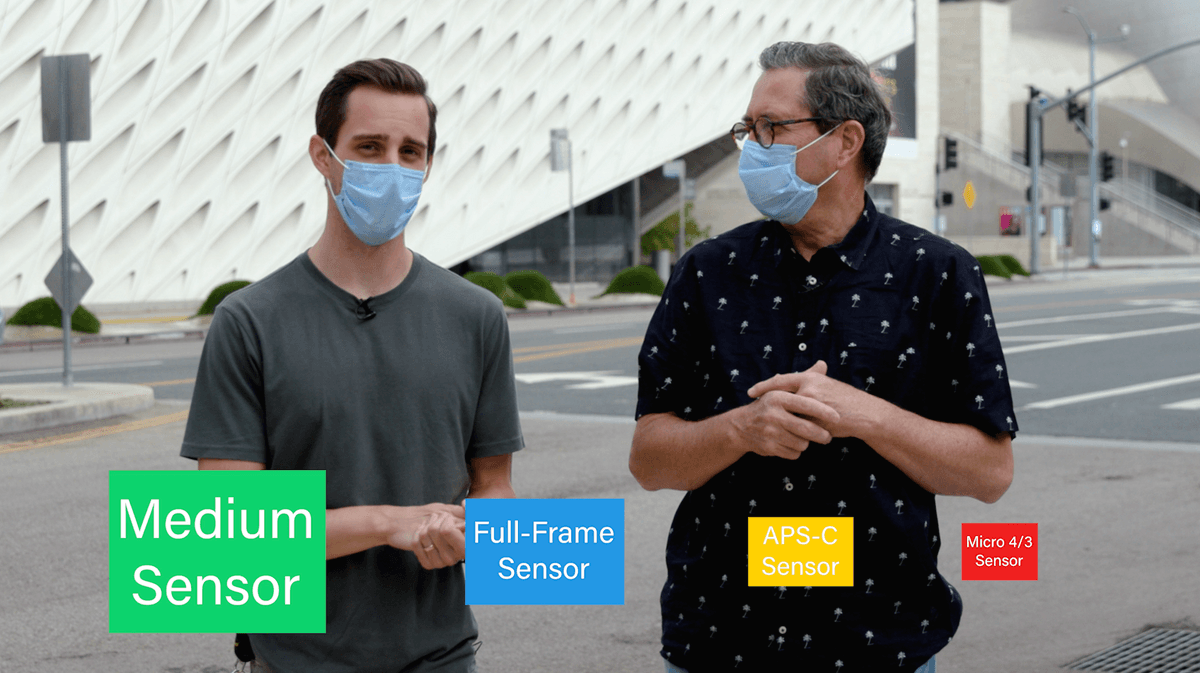
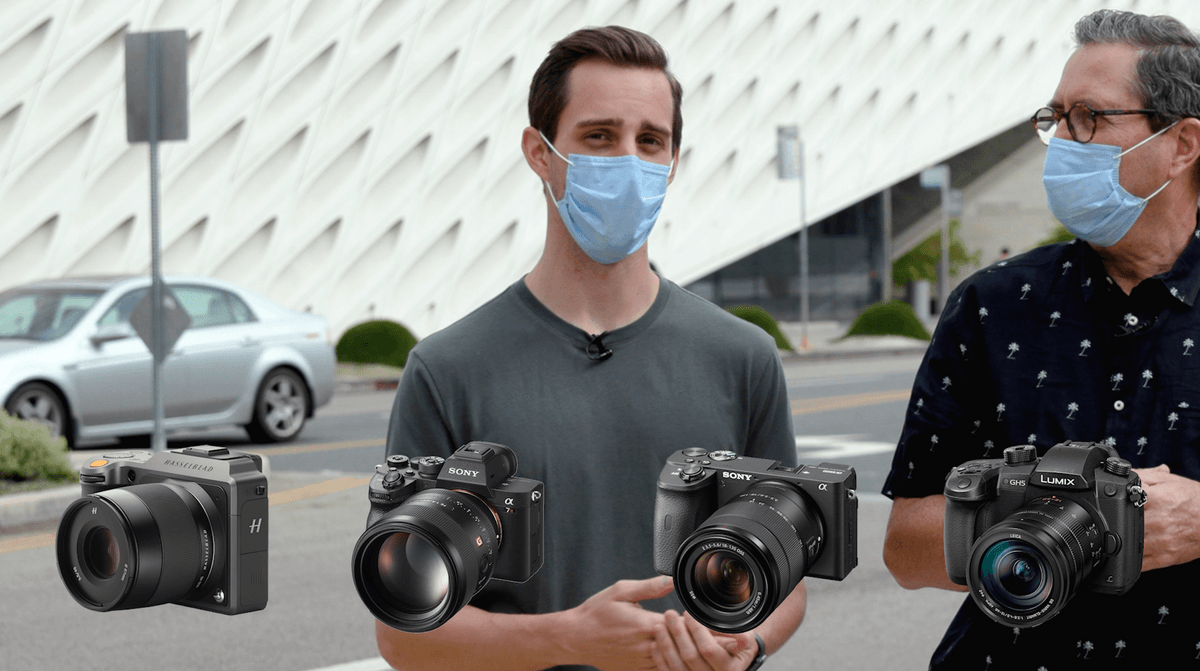
We compare 4 sensor sizes to see how they compare in print image quality: Hasselblad X1D II 50C, Sony a7R IV, Sony a6600 and Panasonic GH5. See how much difference there is in the Medium, Full-frame, APS-C and Micro 4/3 Sensors. Special thanks to our friends at LensProToGo and Datacolor for helping us make this comparison possible.
You can get a 15% Discount on rental gear at LensProToGo. Use the code: SLANTEDLENS15
LensProToGo: https://www.lensprotogo.com/
Does Sensor Size Matter? Camera Sensor Size Comparison
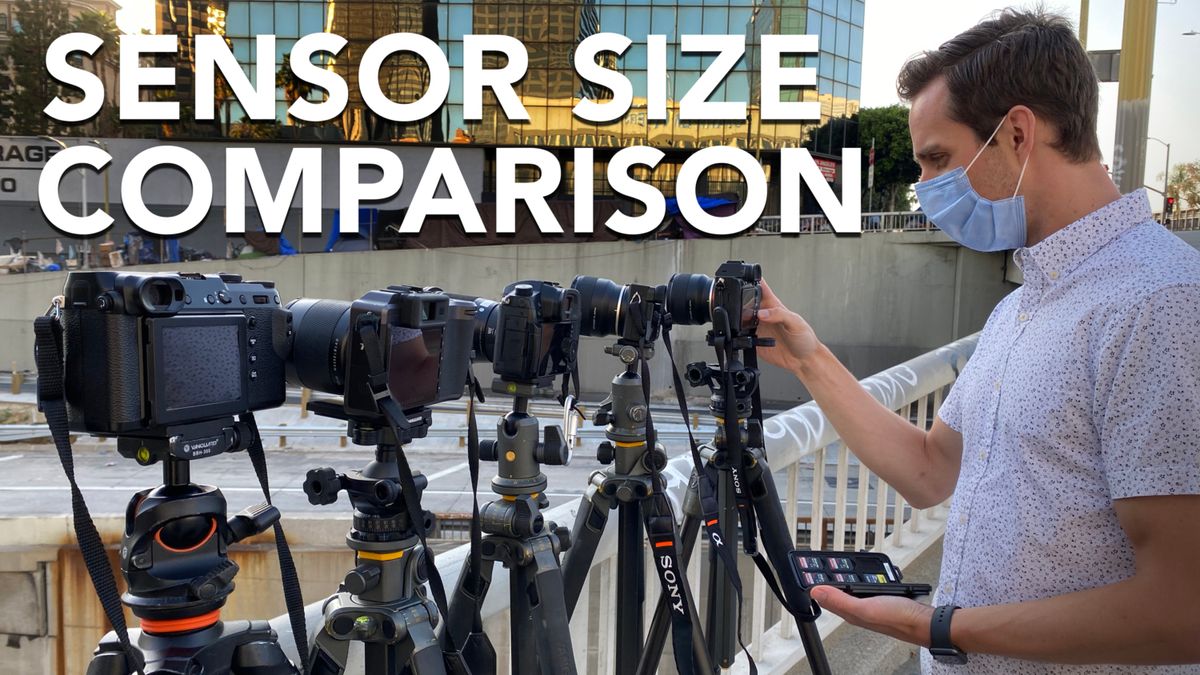
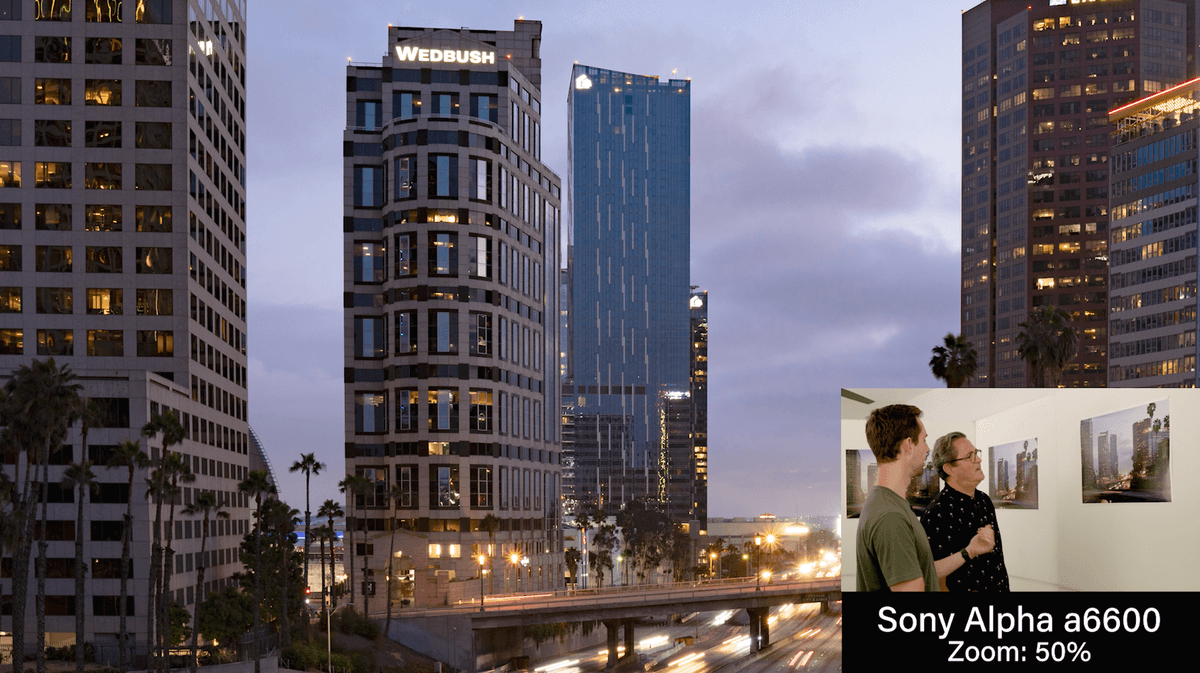
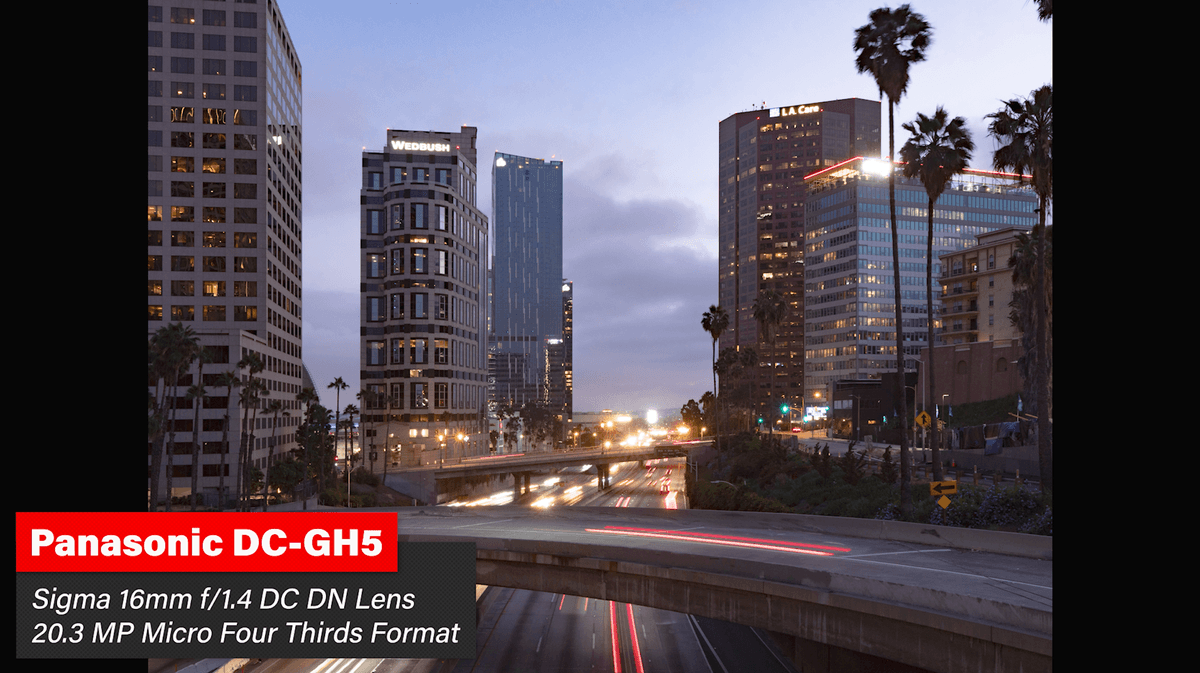
Today we are going to take a look at a format comparison between some major formats out there in the market. We are going to shoot a full-frame sensor, a crop sensor, a micro 4/3 sensor and a medium format sensor. The cameras we are shooting today are the Sony a7 IV, Sony a6600, Panasonic GH5 and the Hasselblad X1D II 50C. I want to blow these things up into 24” wide prints, however they scale out, and look at the detail that you see from each one of these sensors. Does it really deliver what you expect it will. You think “Of course, a GH5 compared to a Hasselblad, there’s going to be a major difference”. Well sometimes obvious things aren’t that obvious. I also want to shoot a scene with high dynamic range and see how all of the sensors compare in that scenario. We are going to shoot a shot of the sun going down tonight so we can really see low light and beautiful color as the sun goes down and the building lights come up. Then we will make those prints and compare them and see what we got.
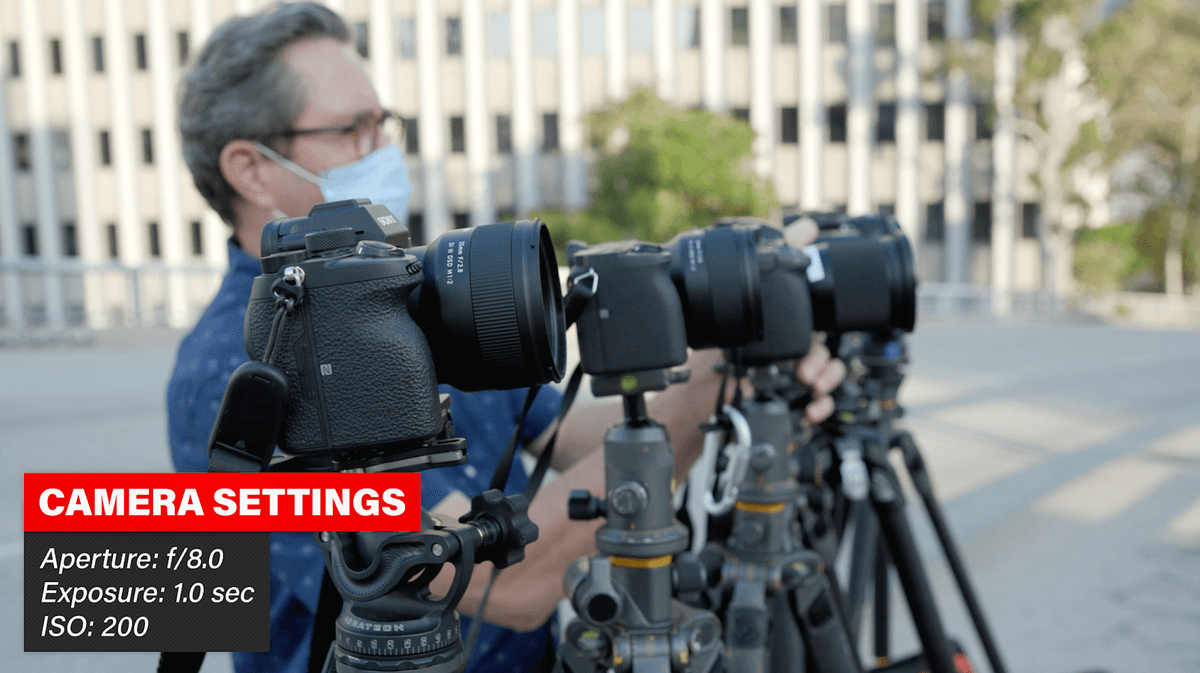
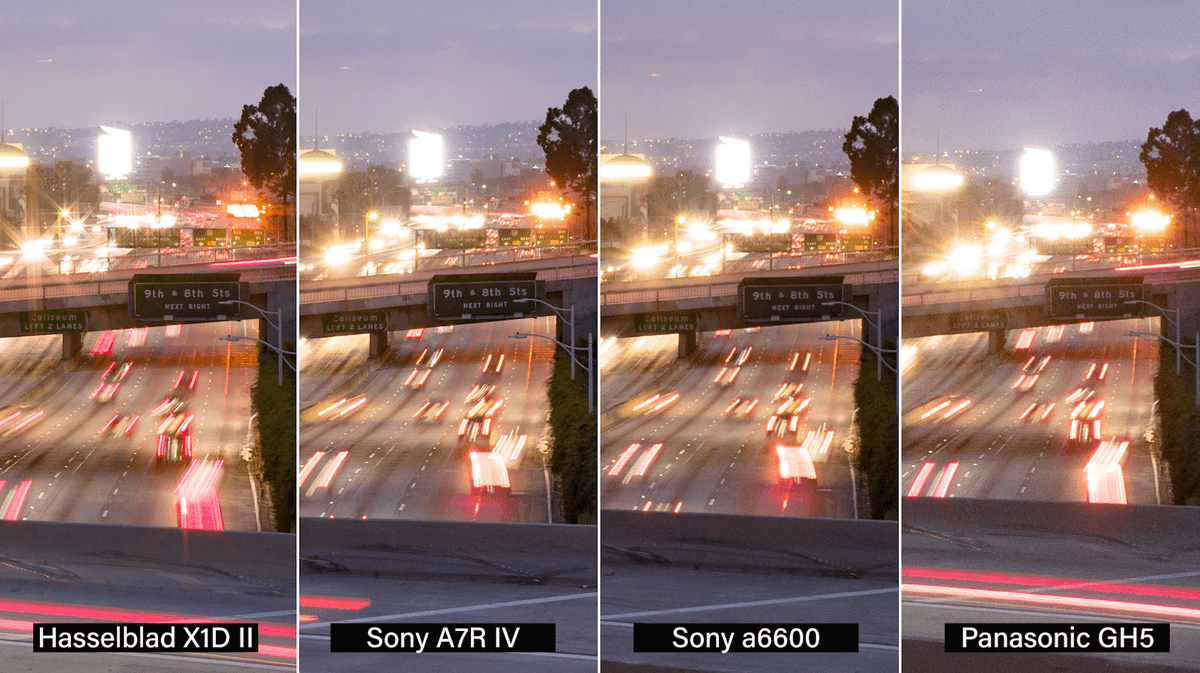
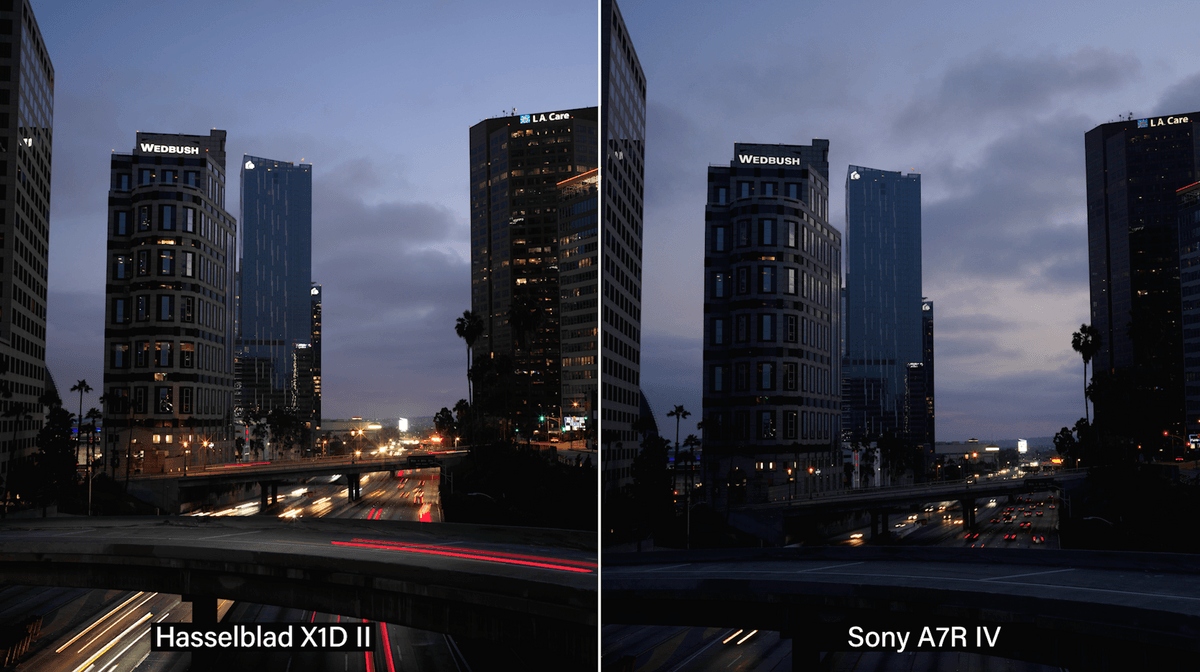
As we said, we went out and shot last night as the sun was going down over the freeways of Los Angeles. The idea was to get a really nice image with great color. And to see how that looks when we print them all up. We have printed them all up now. Let’s talk about our set-up and how we did it.
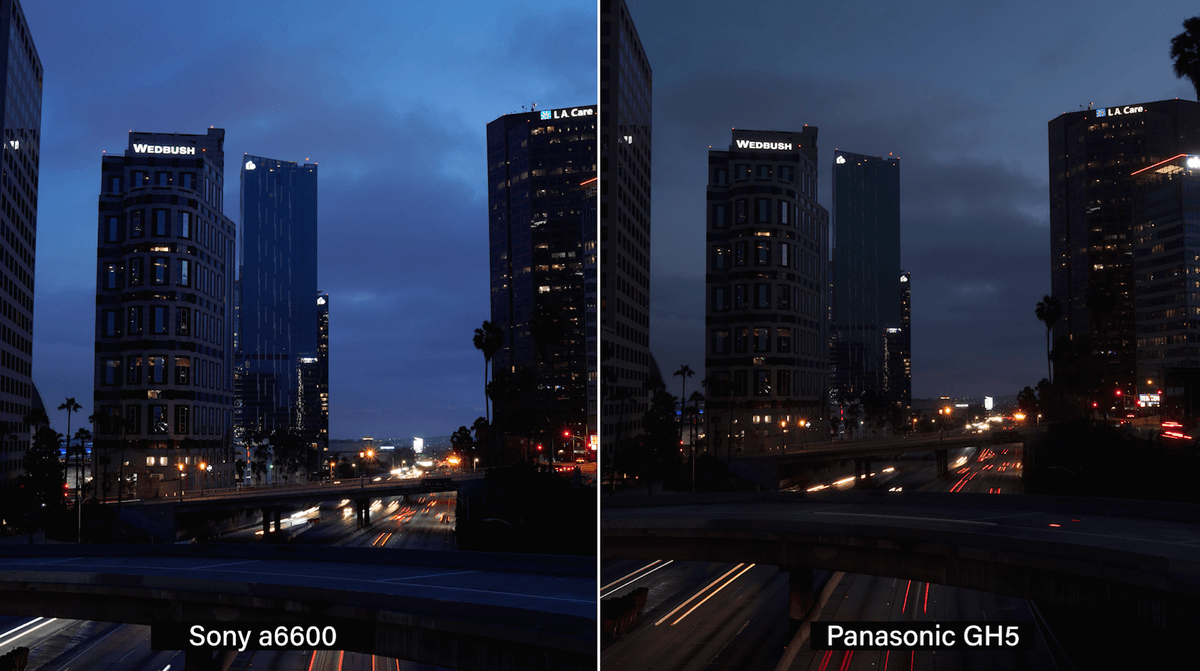
We had the 4 cameras lined up right next to each other. We put all of the exposure settings exactly the same: Aperture f/8, Exposure 1 sec and ISO 200. And they were all taken within a half of a second of each other. As you will see the images are all pretty much identical. We did have to color match them in post. They all came out a little different. So we did have to match them in post. I think we did a pretty good job, but there are still some subtle differences we can talk about.
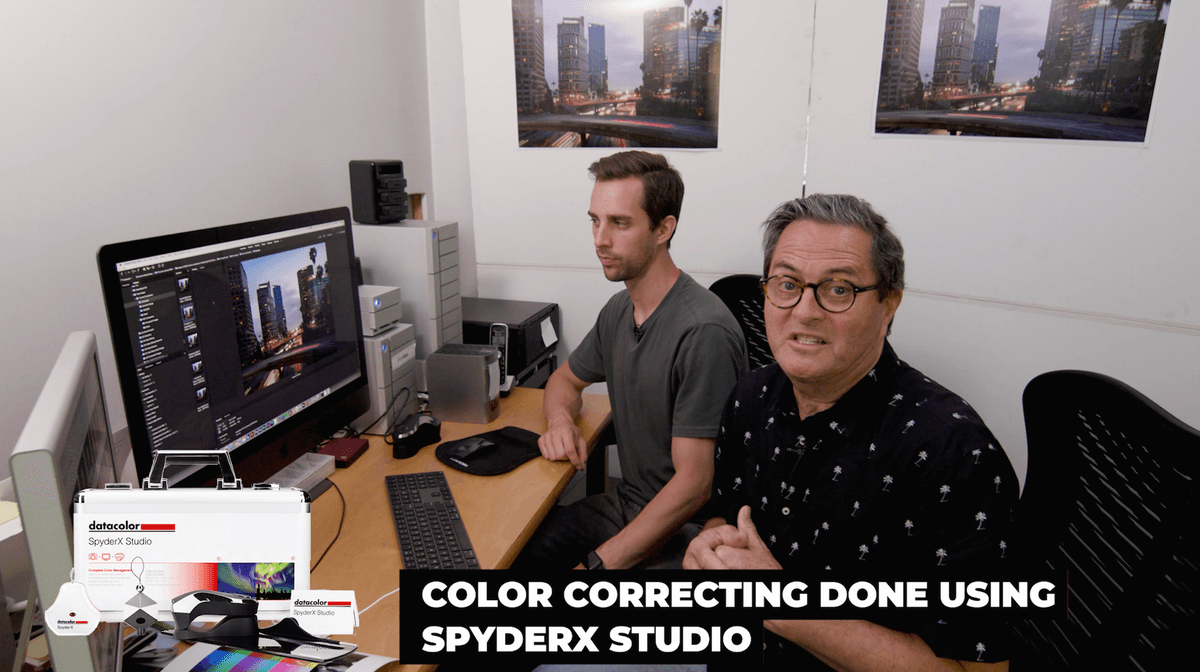
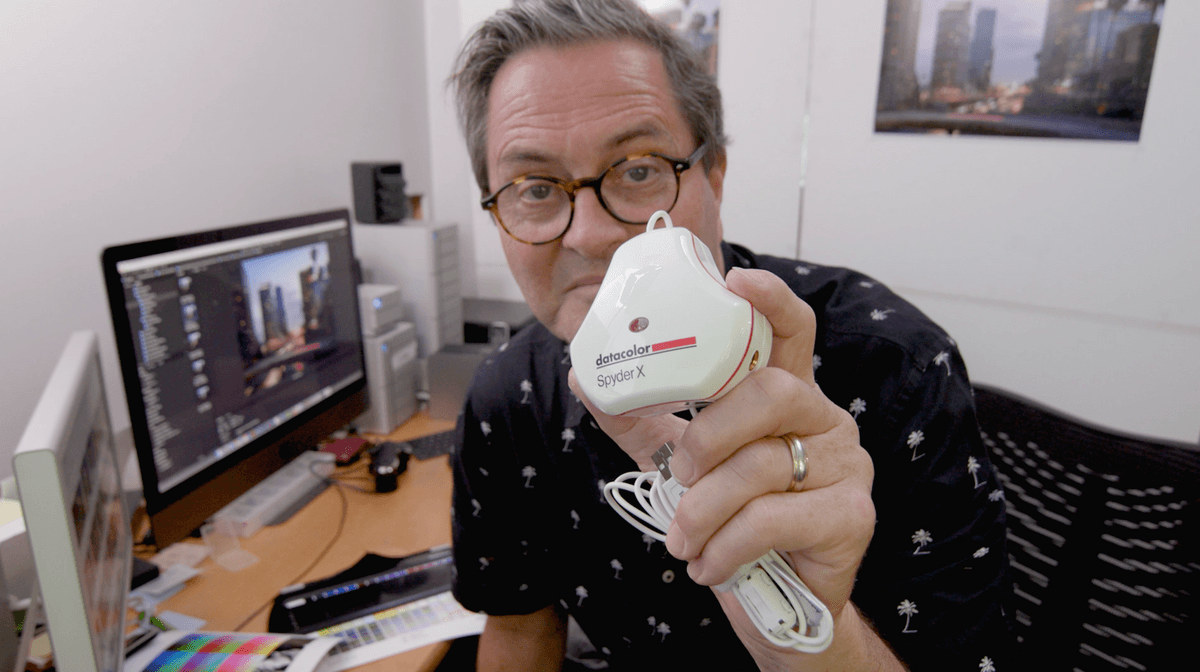
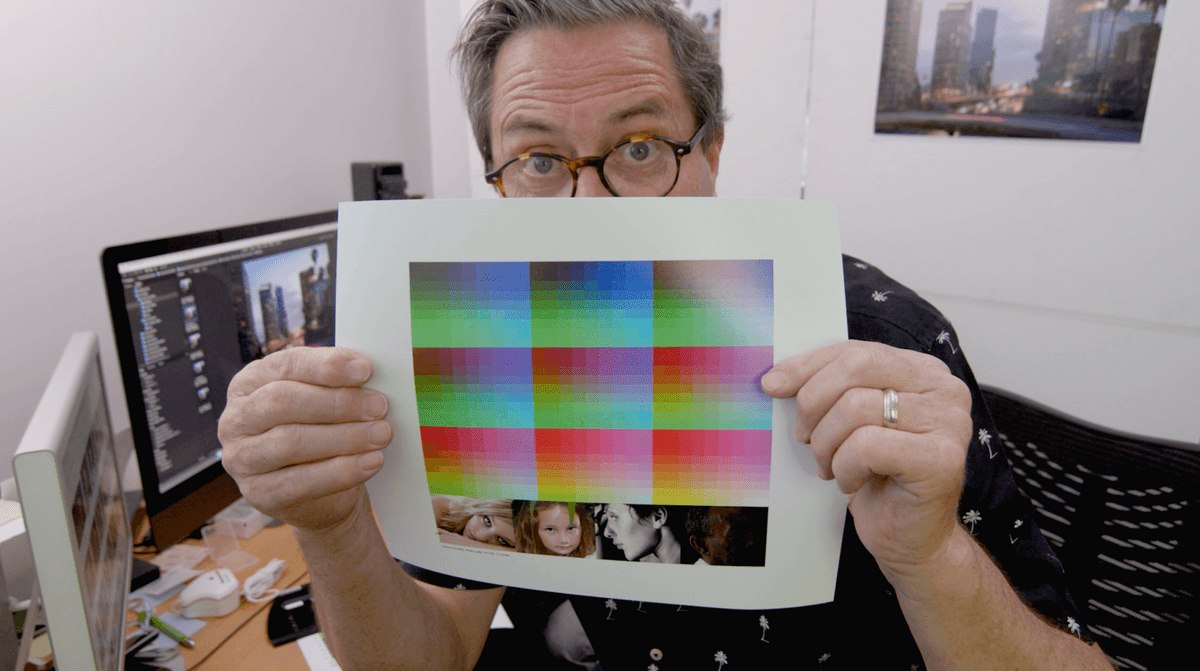
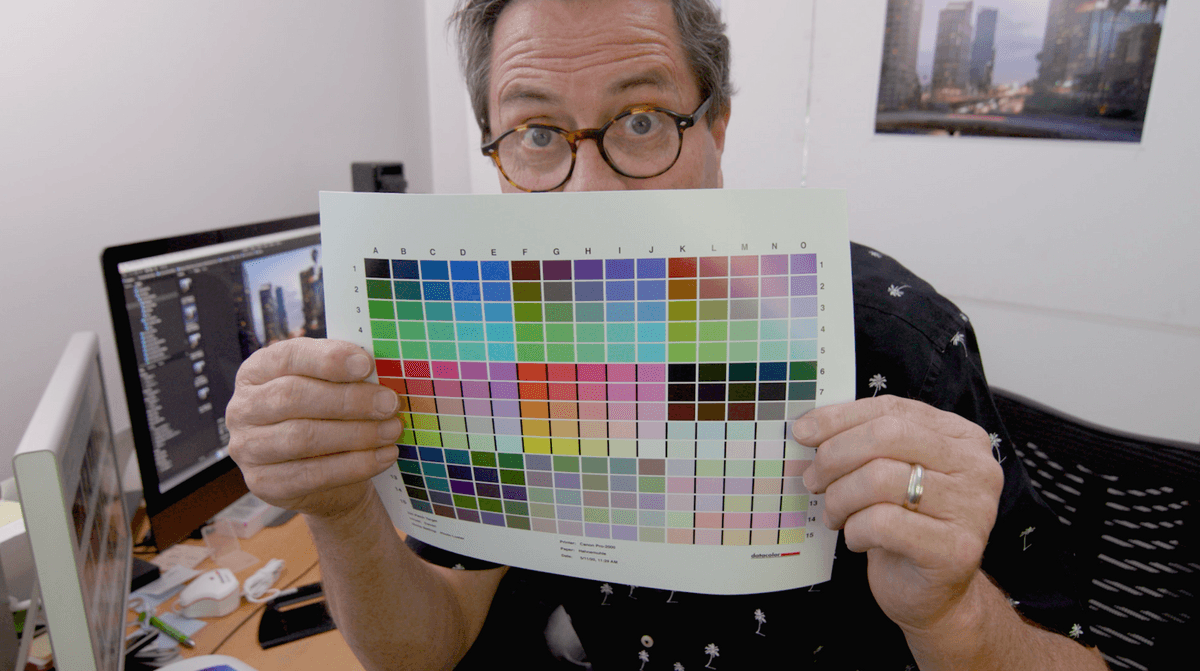
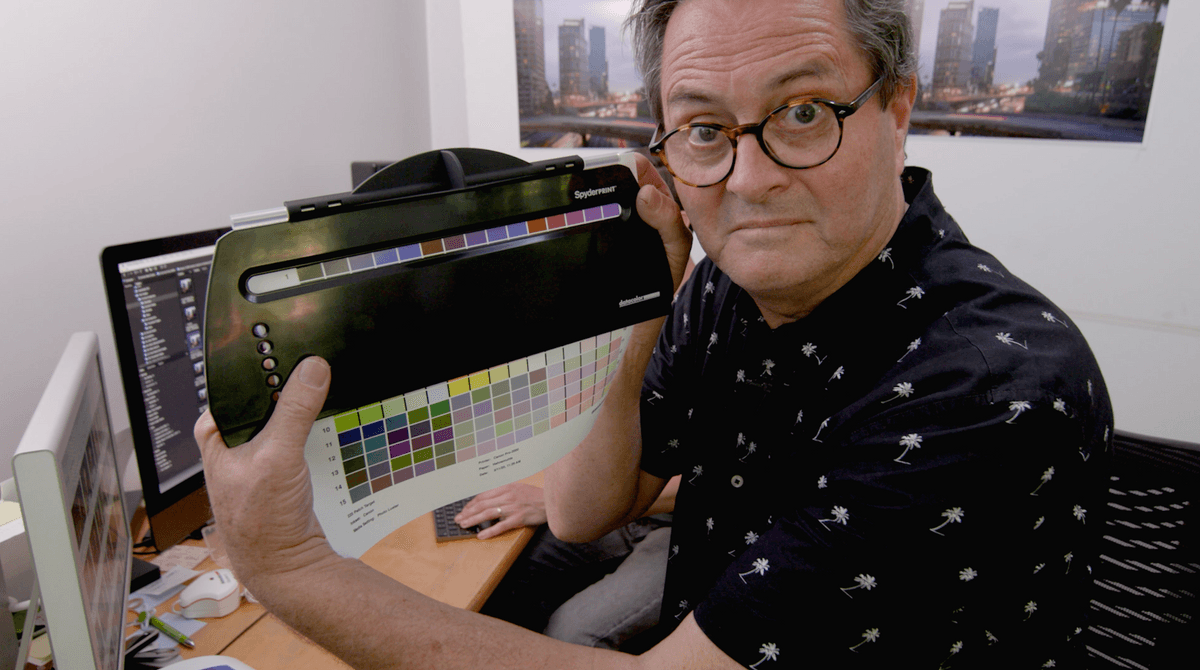
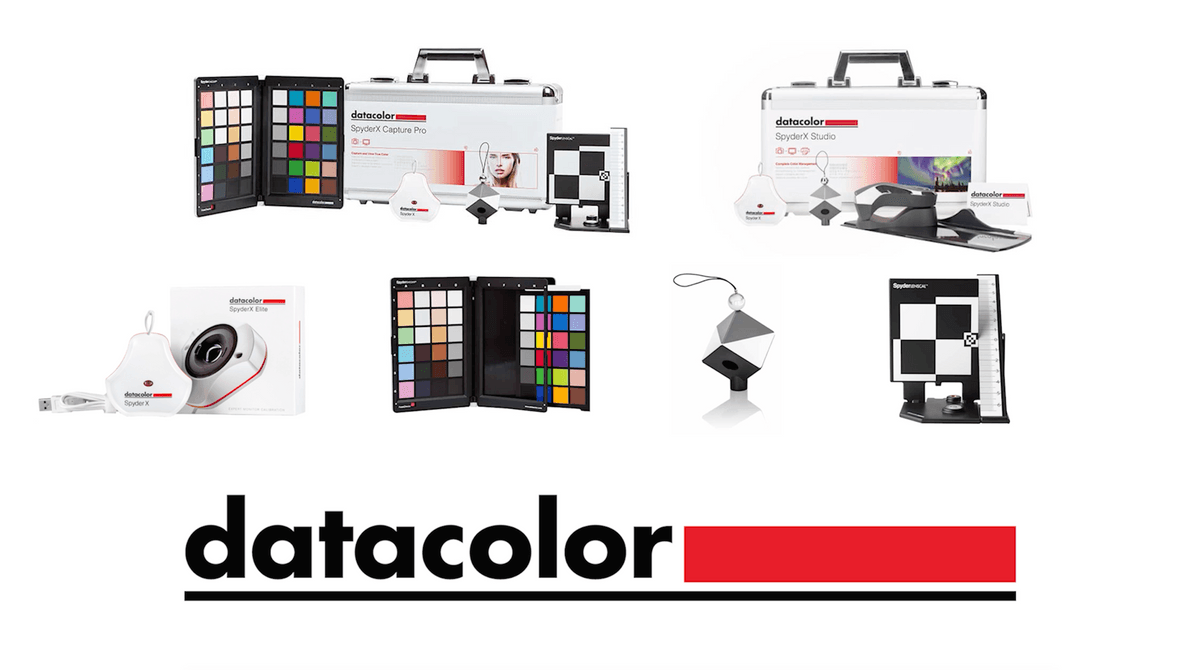
This is always a hard process when you decide you are going to take an image and make a big print and you want the print to look like what you see on your monitor. The first thing to do, using the SpyderX is to calibrate our monitor. Then we know our monitor is calibrated. After we calibrate the monitor we will run test prints through the software we have with datacolor. This helps us to know that the nozzles are clean and we will get decent color out of our printer. Then we are going to print out a color test on our Hahnemuhle paper. So that helps us get what we see on our screen out of our printer on our choice of paper. After we run the test on our paper we use the Spyder Print Spectrocolorimeter tool to make sure the monitor and paper match. It is a little bit of a process but it is worth the time to go through the Datacolor process if you are going to get what you are seeing on your monitor.
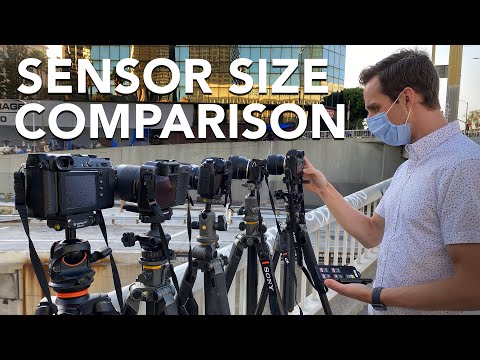
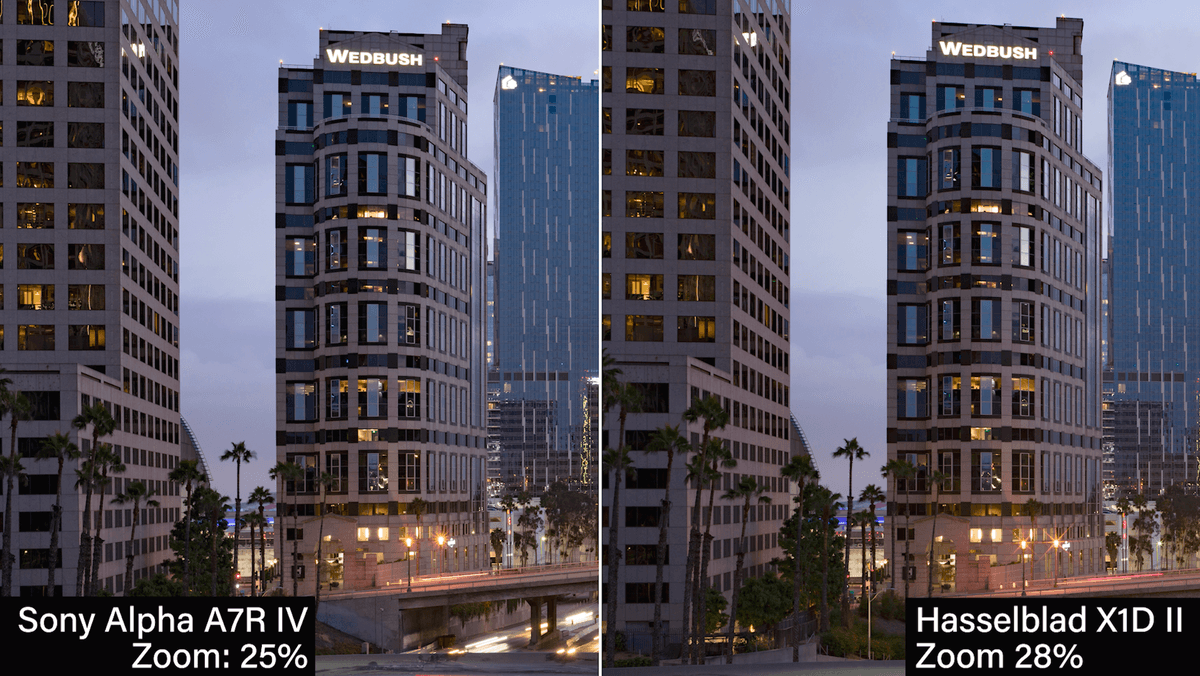
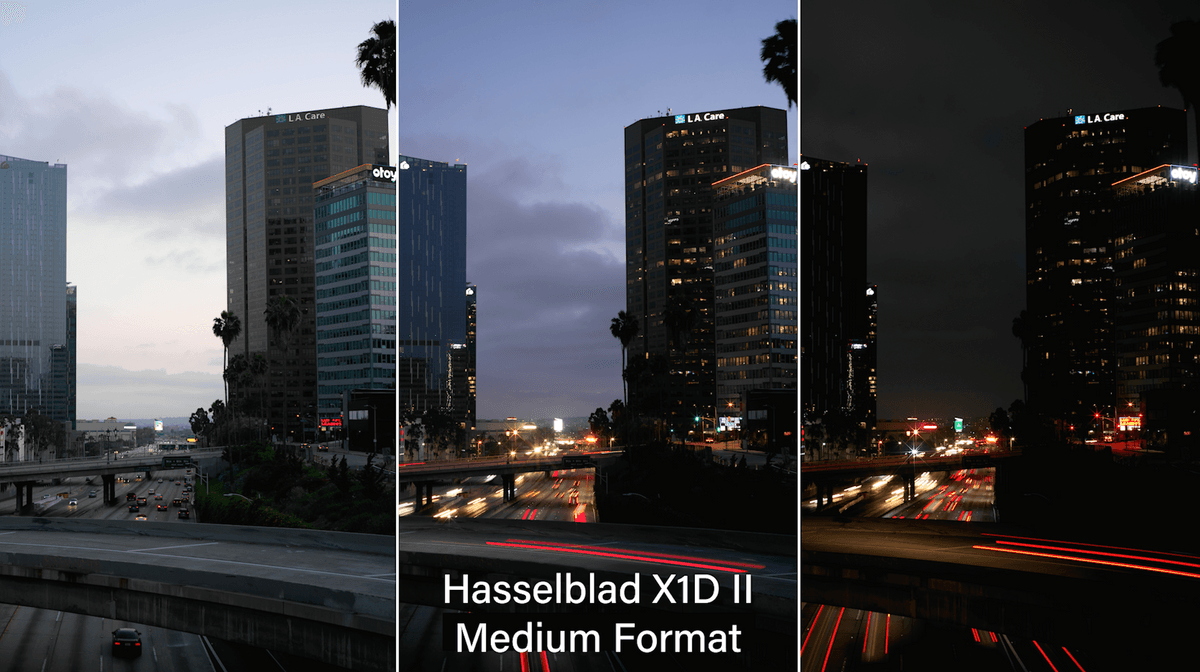
At first blush you look at the prints and you think, “Wow, they all look pretty good.” Let’s see exactly what we do think. Let’s start with the Hasselblad.
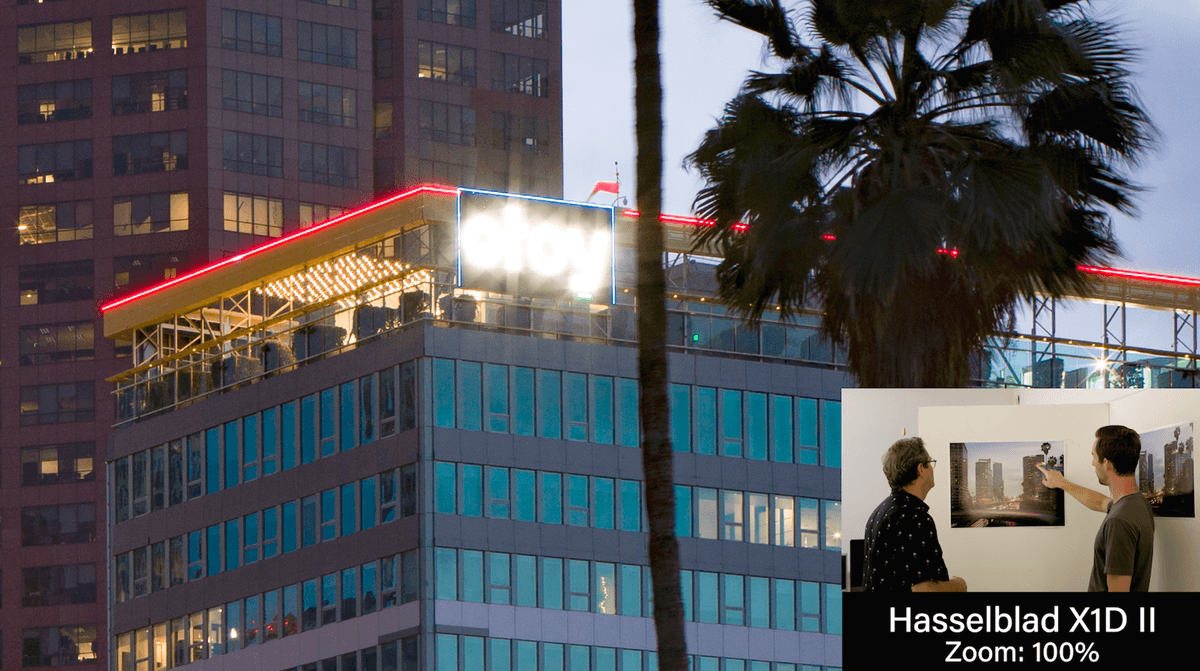
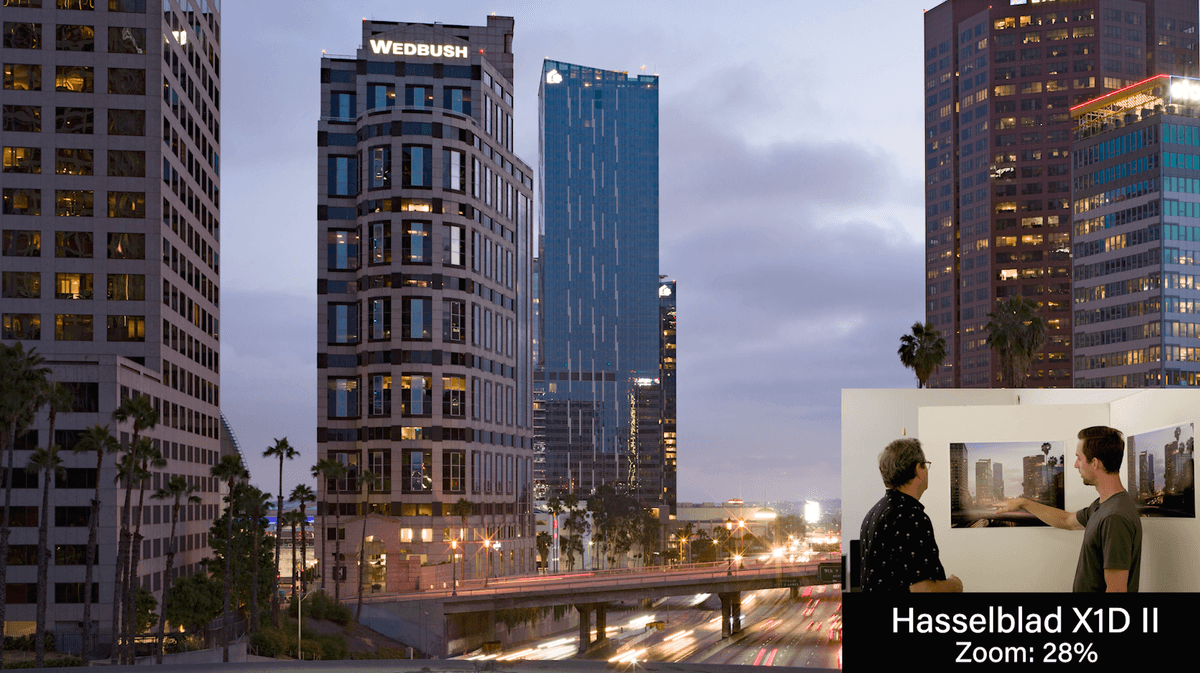
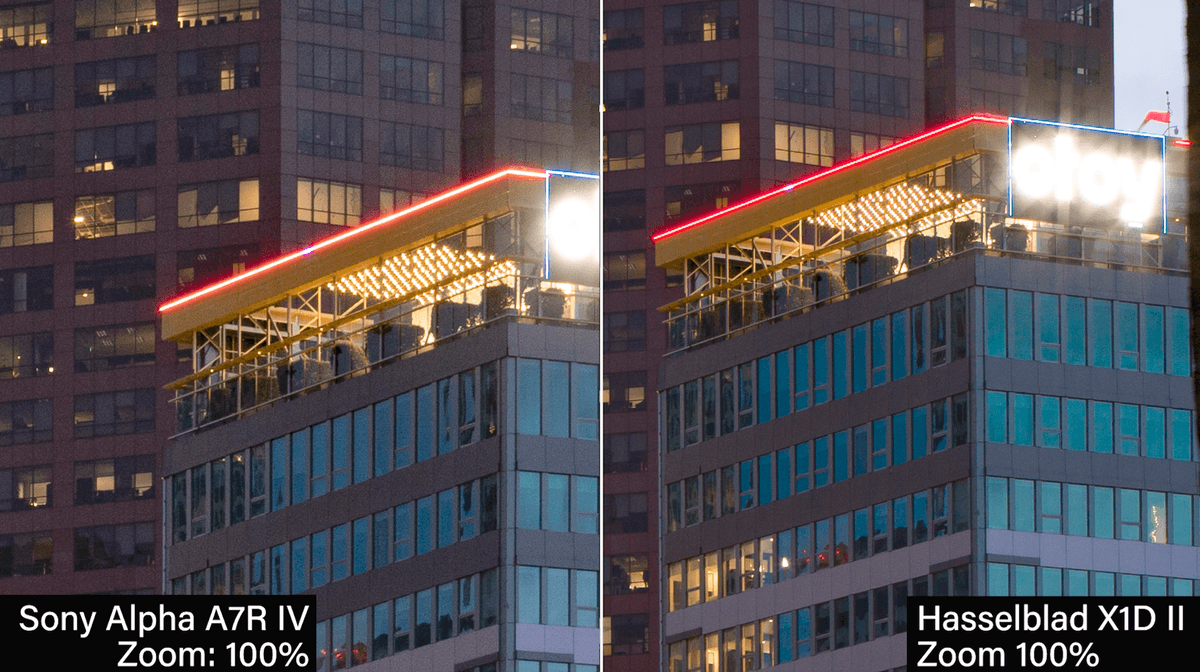
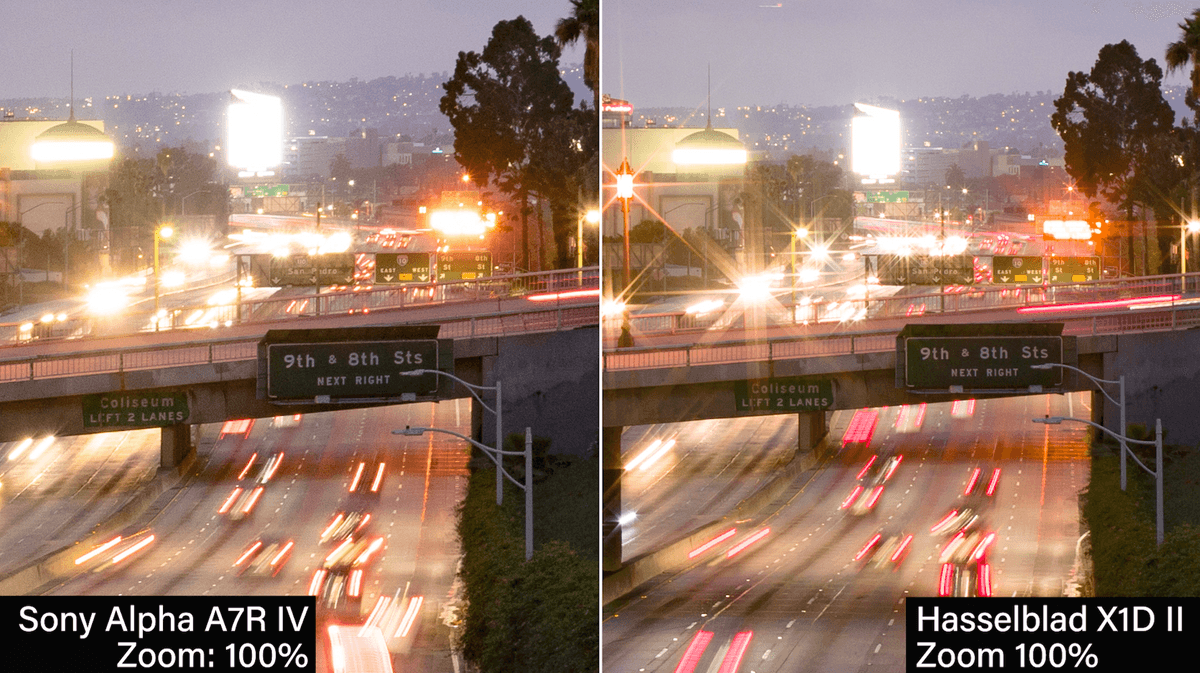
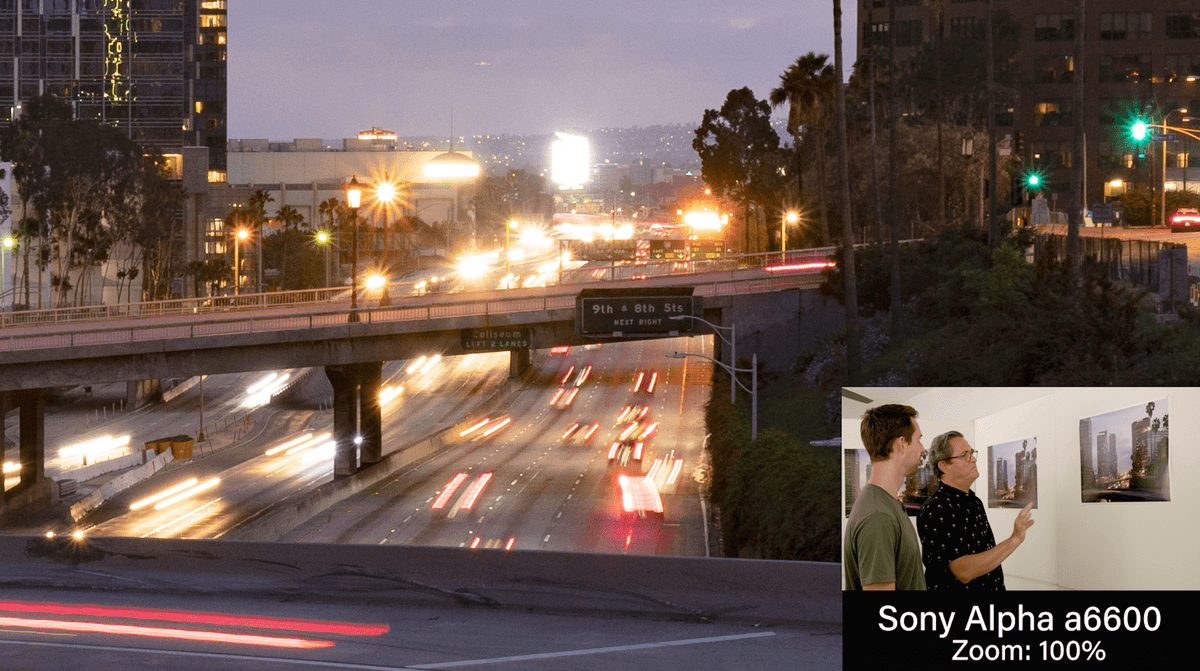
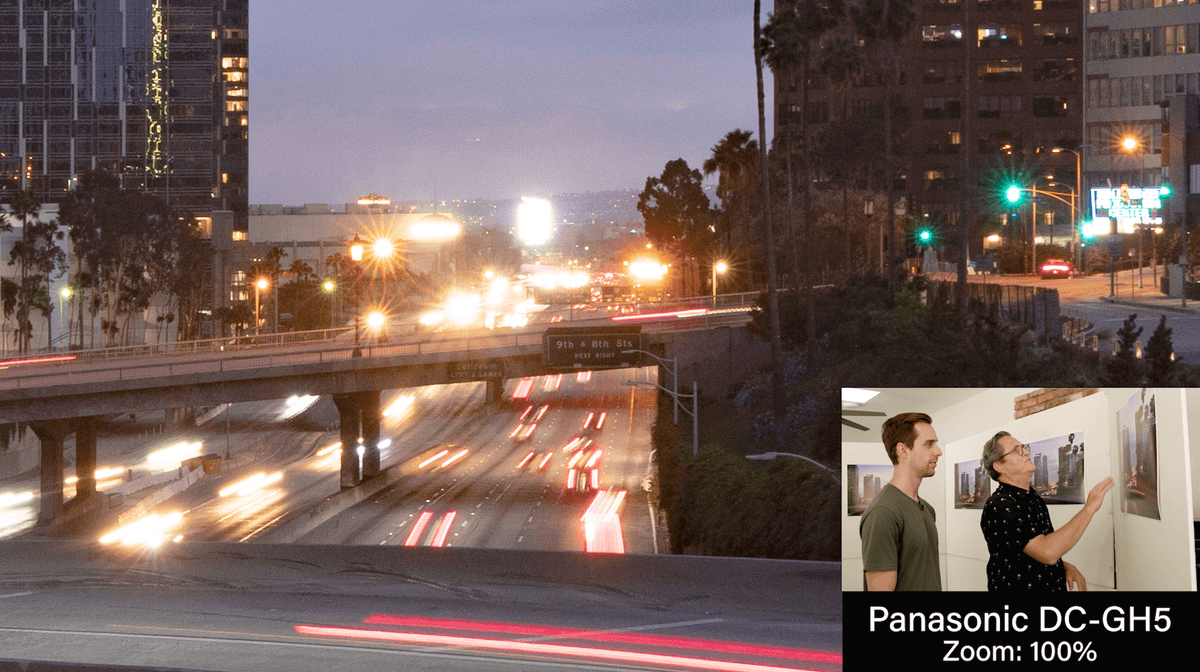
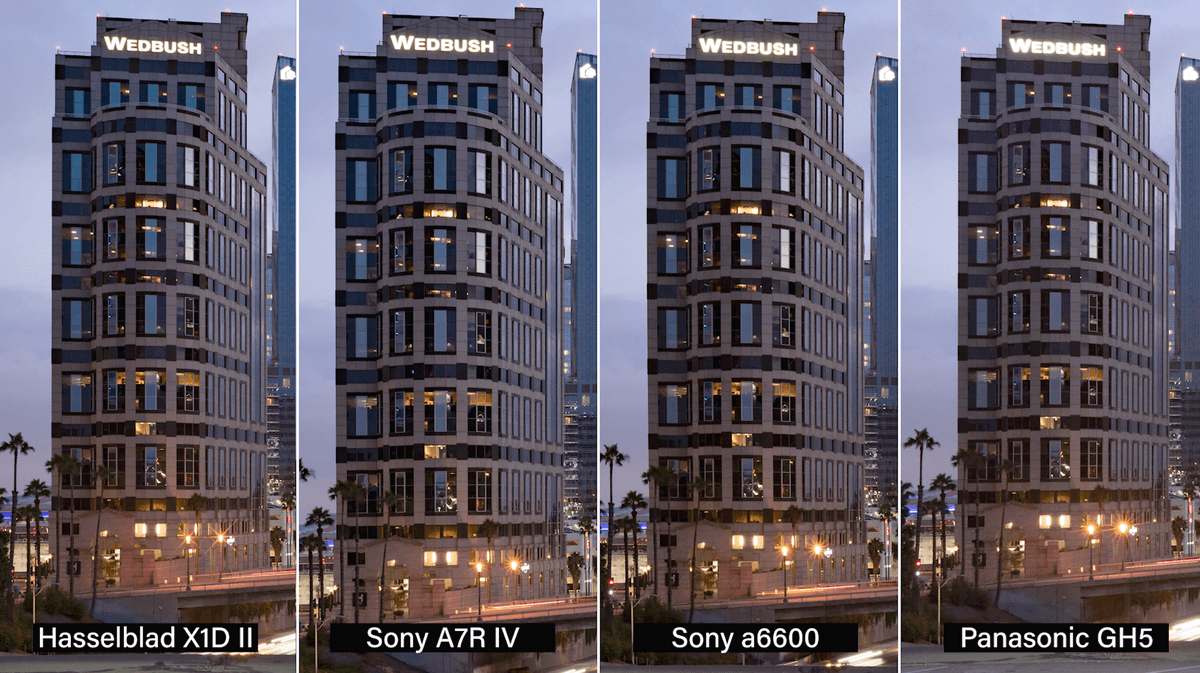
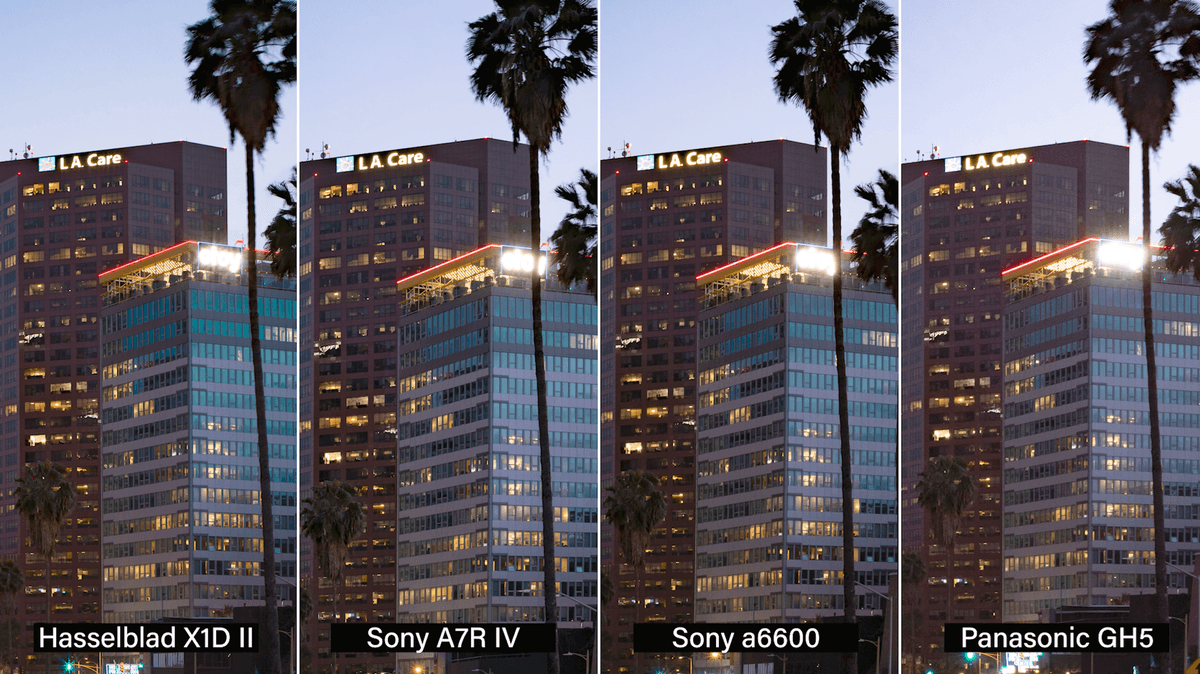
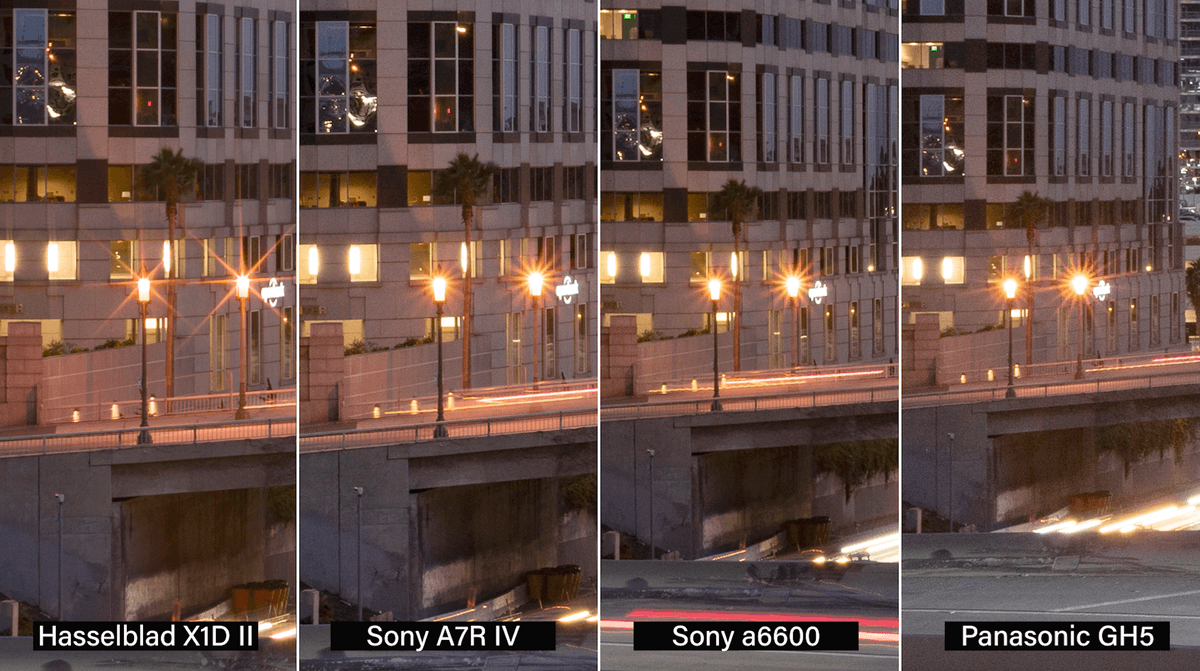
Here is our Hasselblad print and first off we see that the colors are very nice on this print. The reds are really strong. The detail is fabulous. It is a 50 megapixel sensor on a medium format. There is a lot of color separation here. First of all, the reds up here, this is a light source so in a lot of cameras this would kind of turn white because it is really bright. But the Hasselblad holds it. Also, take a look at this building. At the top it is a cool blue and then as it gets toward the street and street lights you see a warmth come in. With a lot of cameras you won’t see that transition. It will all look kind of the same. That is really a beautiful transition and it has open shadows. It is very pretty. I also like the Hasselblad lenses. They have really cool, clean star flares. It’s not too many, it’s just a nice clean look. If you look at the detail down here on the 9th Street and 8th Street sign, it is pretty clean. There is a lot of detail in this camera.
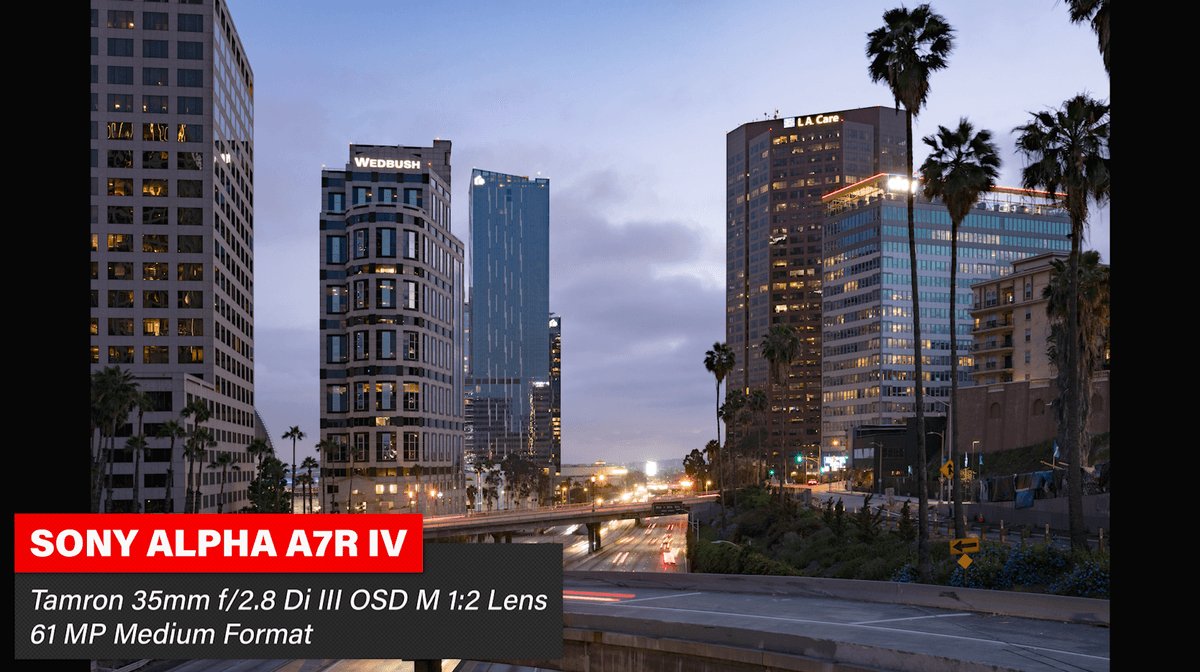
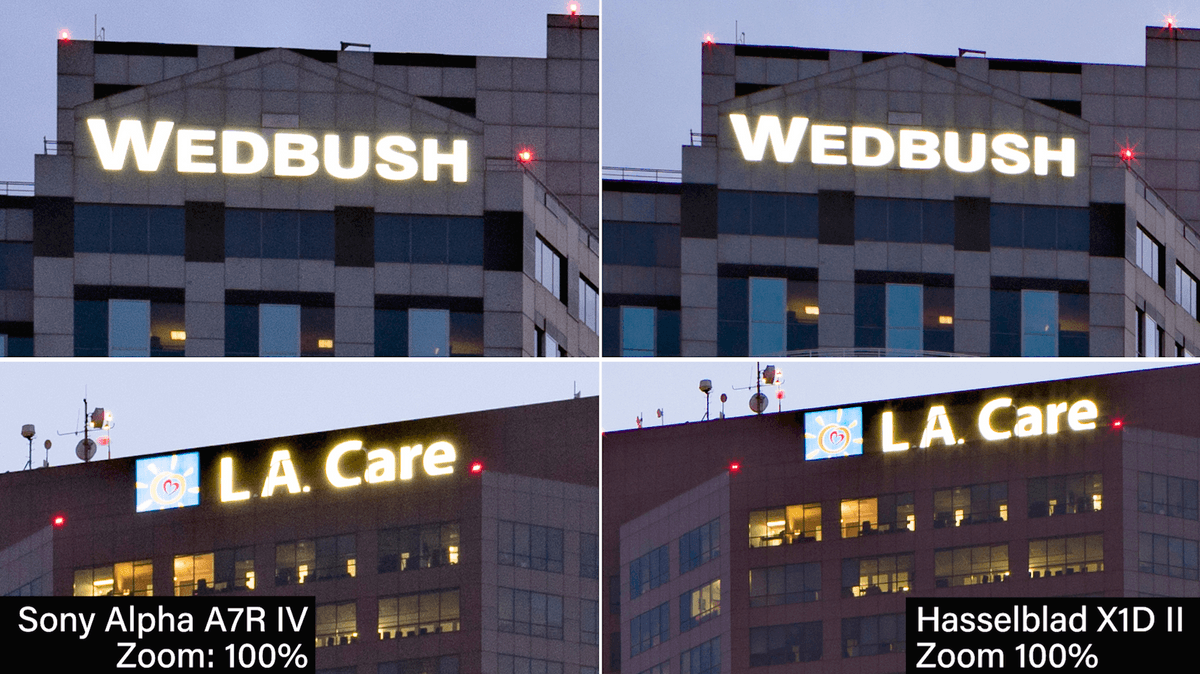
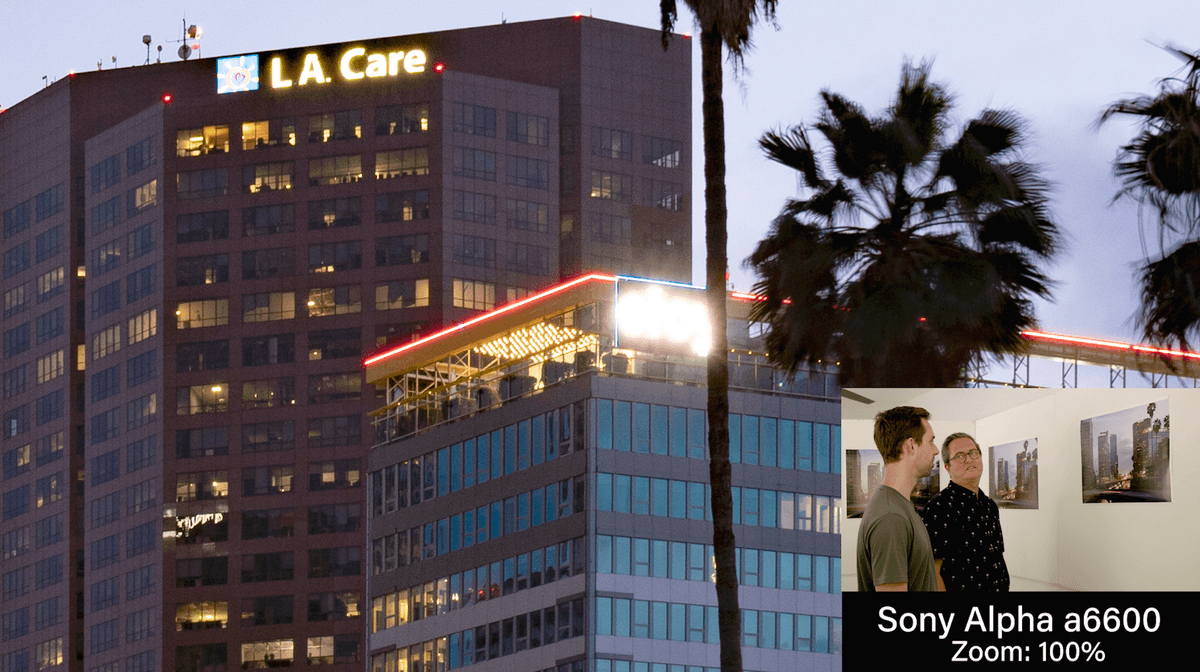
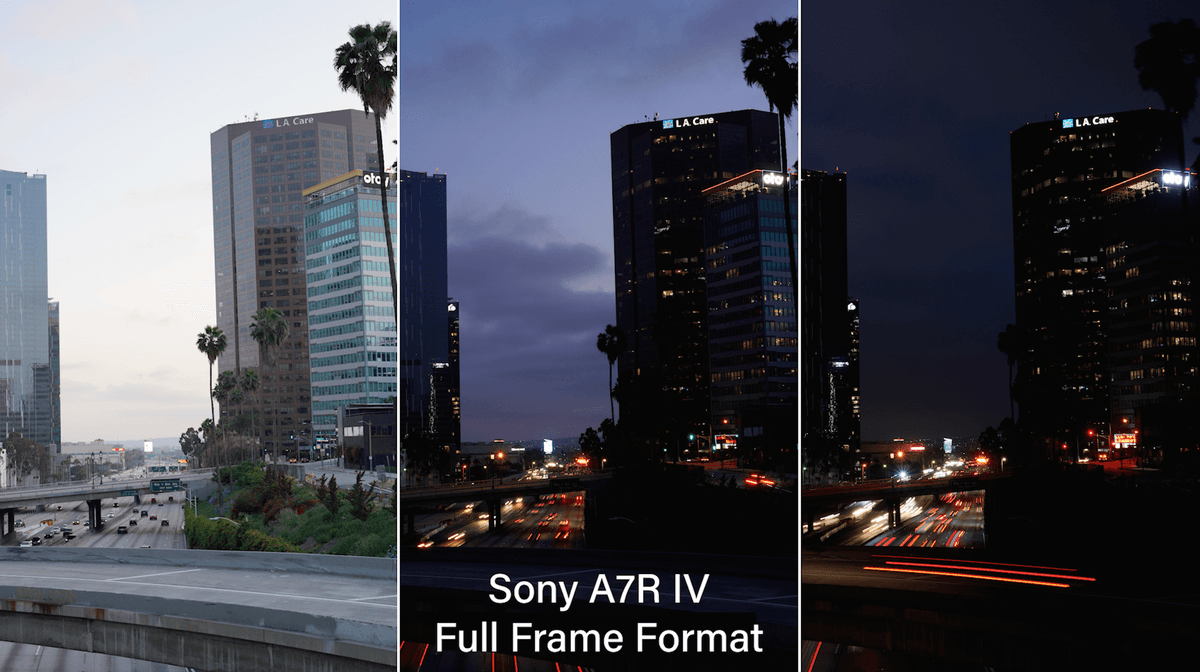
Next is the Sony a7R IV. This is interesting because it is a larger megapixel camera and a smaller sensor. I was curious to see how this would turn out. On the one had you would say that it would print better because of the larger resolution and yet it is a smaller sensor. Let’s look at the red in the light again. We don’t keep the color in the red neon as well as in the Hasselblad. The deep blue in the building, we don’t have the same color punch. Not quite as much. On the tall building the warmth of that transition is there but it is not as strong. That is also a part of the color science of the camera. We are looking at the way the color has been rendered. If I look up close at the 9th Street and 8th Street sign it is still pretty clear. If you take a look at the Wedbush and LA Care logos they are a little more fuzzy than with the Hasselblad.
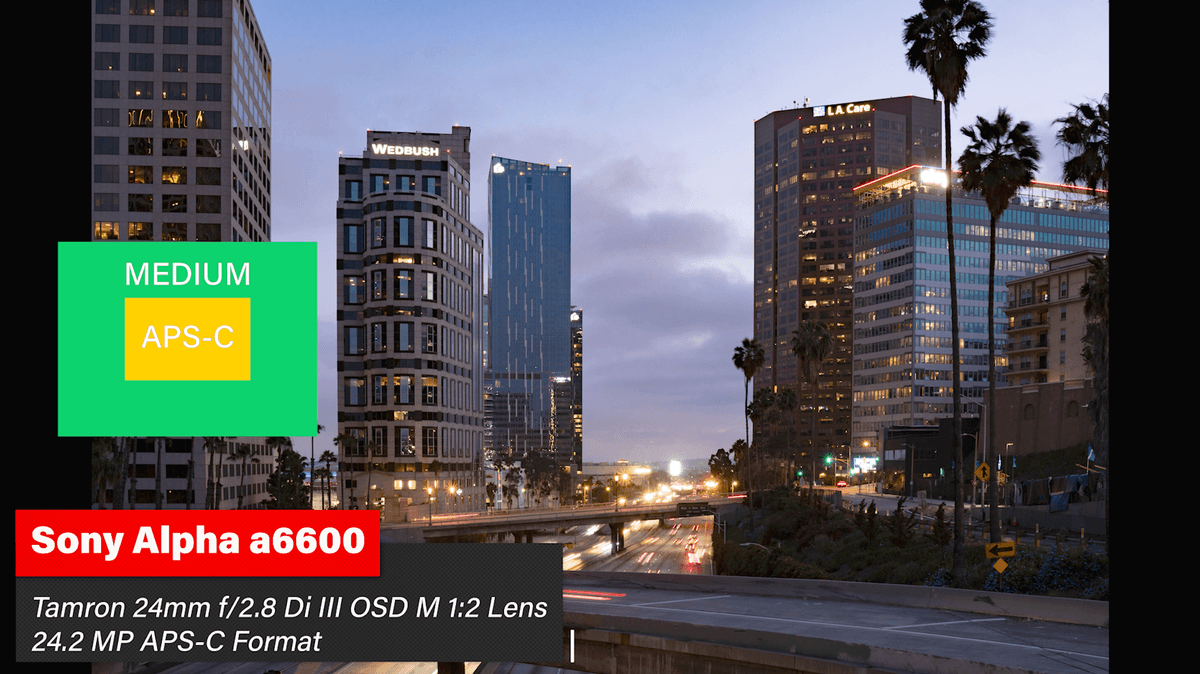
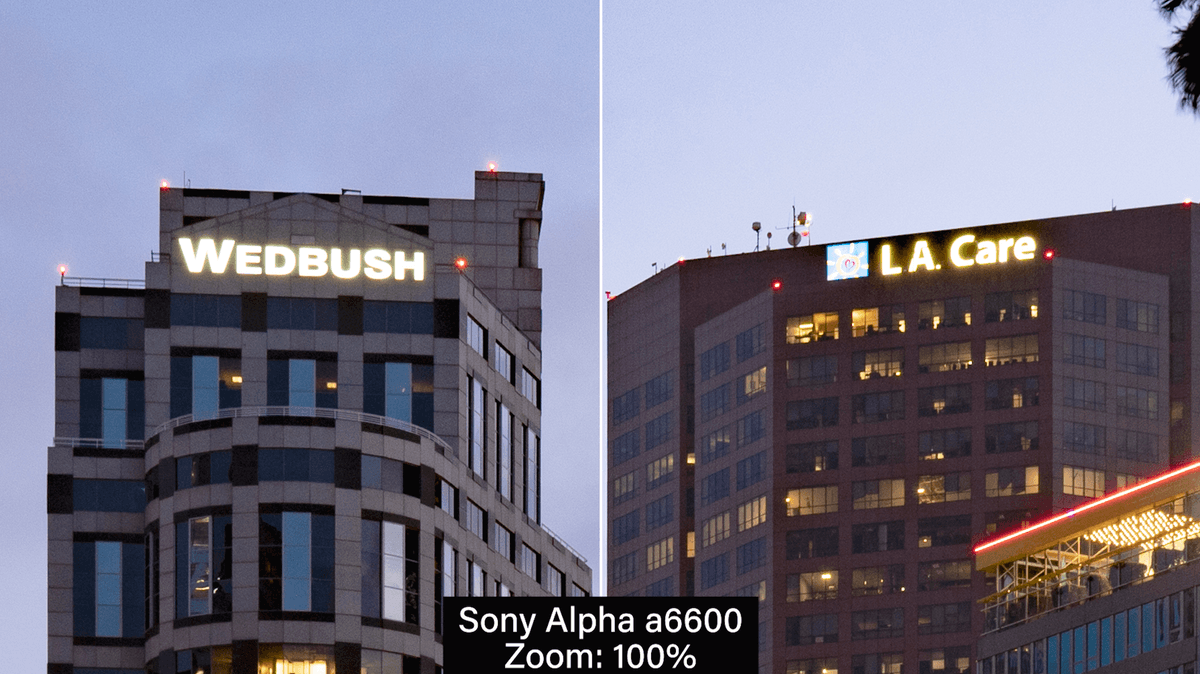
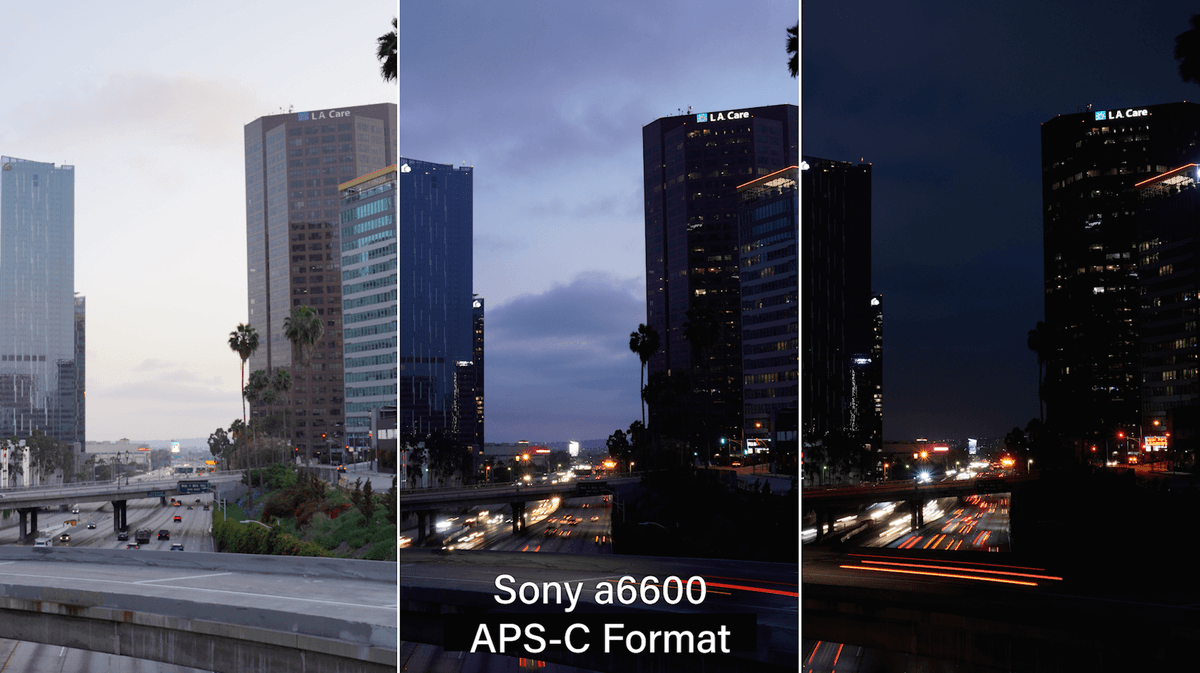
Next is the Sony a6600. This is a crop sensor. This sensor is really tiny compared to the Hasselblad Sensor. If you just look at the sensors over each other it is almost astounding how much smaller this one is. The Wedbush and LA Care logos are even more fuzzy. If I look up close at the 9th Street and 8th Street sign it is less clear, not near as crisp. The color separation is starting to wane a little bit. The reds are clipping more. The gradation on the tall building is not showing much. In fact the whole image feels like it is more one color than the other two are.
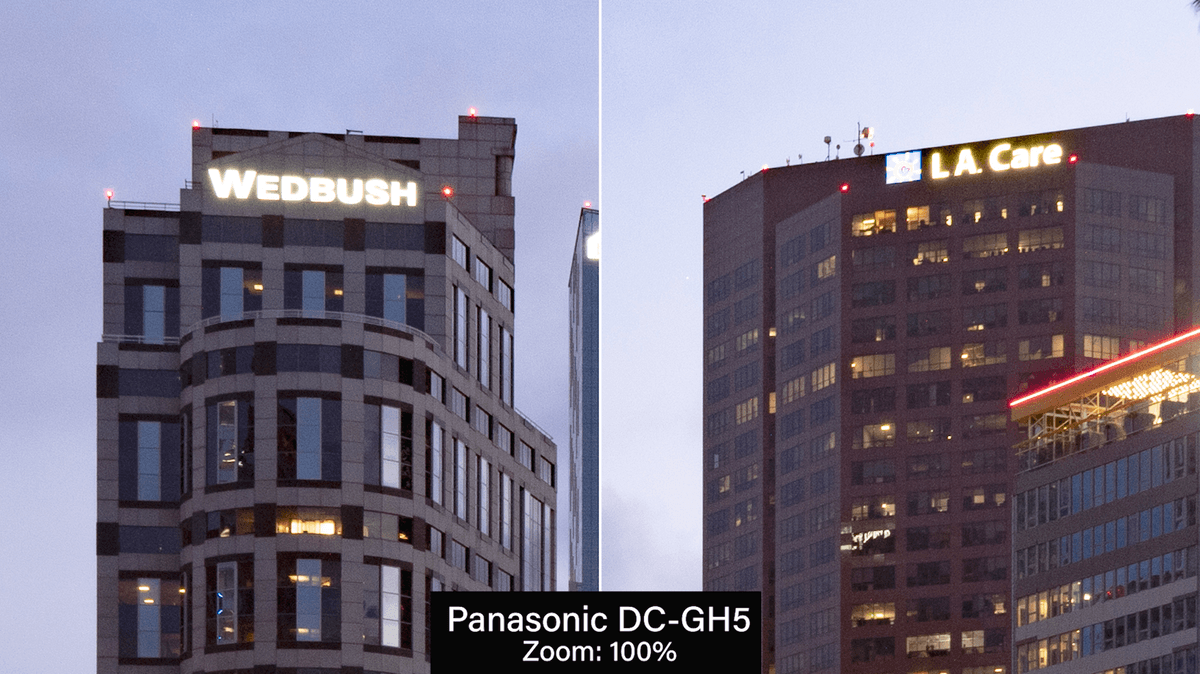
Now we look at the Panasonic GH5, the micro 4/3. This technically shouldn’t have been printed this big. We had to blow it up to get to 24” wide so it is less than 300 ppi. You can see the 9th Street and 8th Street sign is very, very fuzzy. The signs on the buildings are fuzzy. Now this is a 24” wide print. It is holding its own. This camera really is great for video. It is better in that video application than it is with stills. It is not really meant for making big prints.
It is interesting how the overall resolution of the brighter light sources tends to get softer and softer. When you look at the street lights and the signs they get more and more fuzzy. I’m not sure if that has to do strictly with the resolution or if it has to do with how light is being shaped. With these smaller sensors the light is being focused onto a smaller area. So the glass may have a harder time making clean lines. Look at the star points on these. All the cameras except the Hasselblad have many more points.
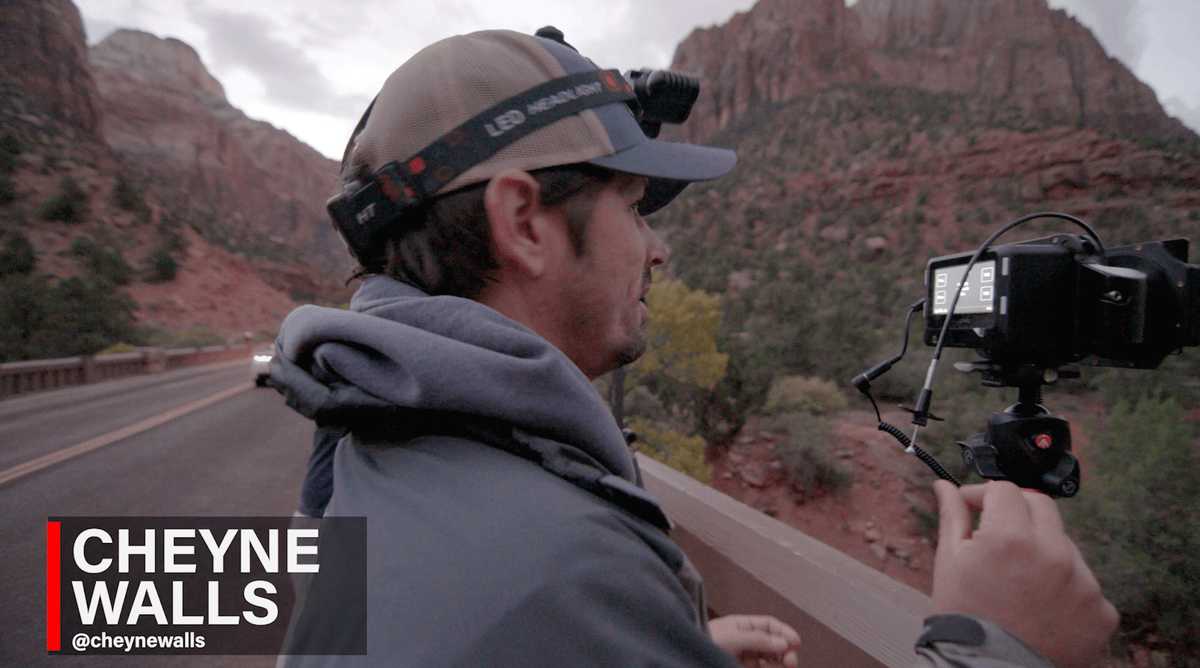
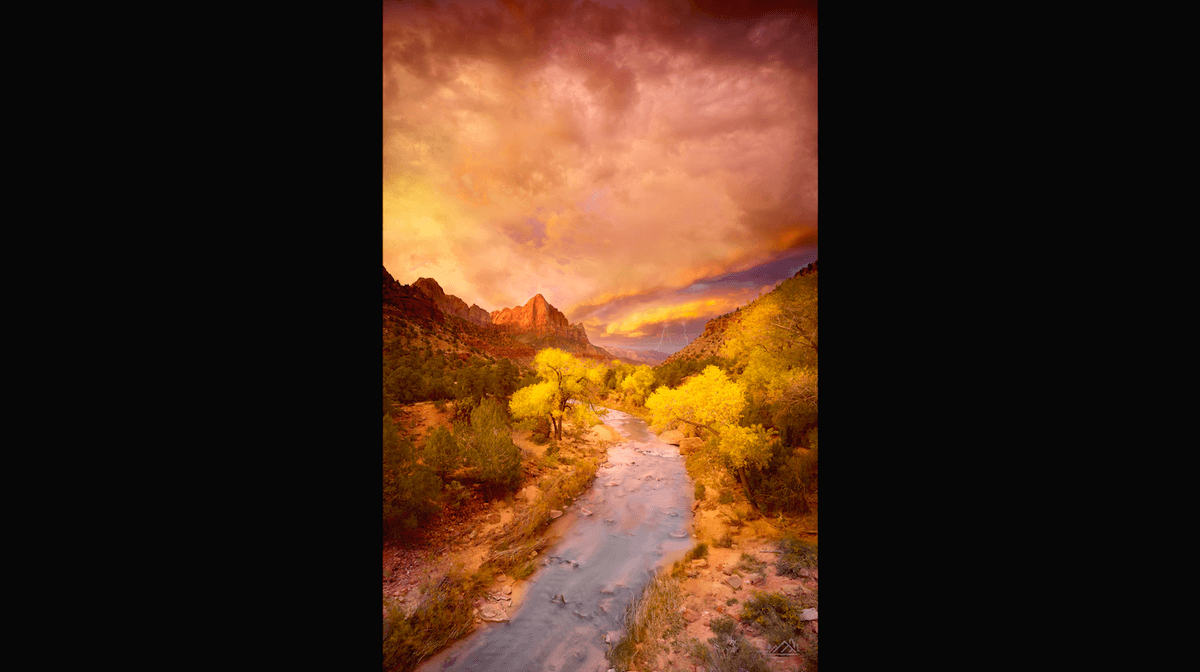
Printing wise, if I am doing landscape photography and I want beautiful big prints I am going to go at least with the Sony a7R IV. And the Hasselblad is pretty hard to beat. The larger format is hard to beat because there is so much detail and it will give you a beautiful image. When I was out shooting with Cheyne Walls he would not use a 24mm lens for a big scene. He was taking his 50mm lens and shooting 3 images that he would stitch together in post. If he wanted a big panoramic view he wouldn’t shoot with a 24, he would shoot several images and stitch them together. So on a Phase back he is basically taking a 60 megapixel Phase back and taking 3 of those to make his image. The shot we saw was absolutely gorgeous. He shot it is 3 pieces as a vertical and that sold really well in his gallery. If you are into doing landscapes and you really want to make gorgeous prints, the color detail and the resolution you get with the medium format is really where it’s at. It is worthwhile.
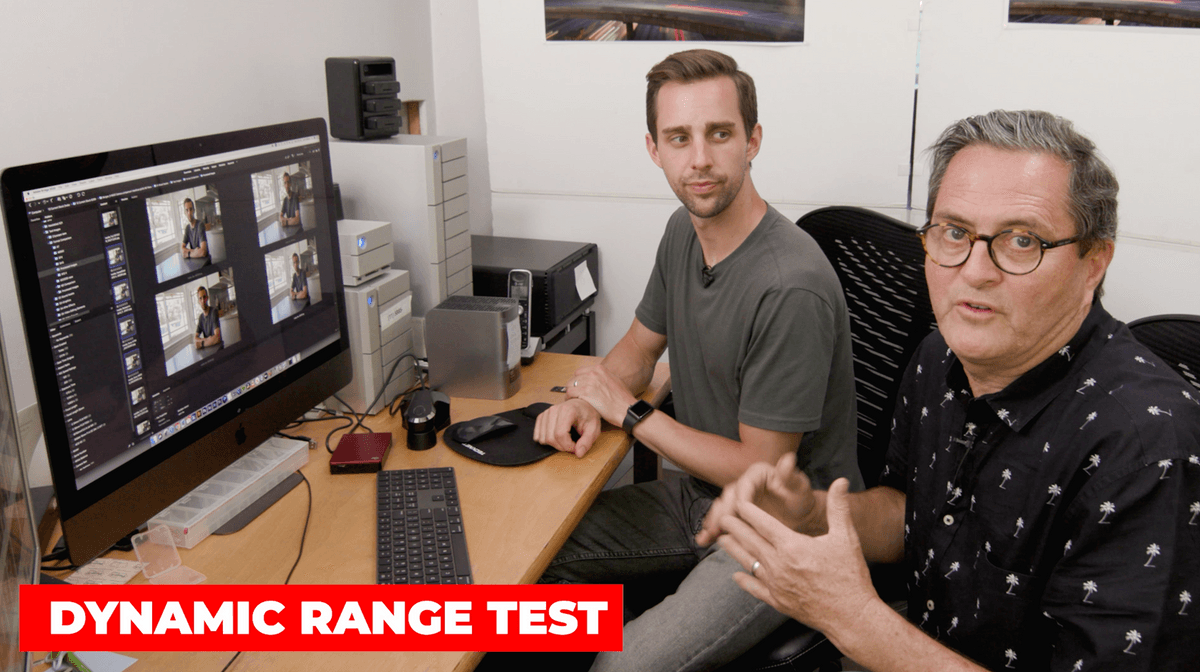
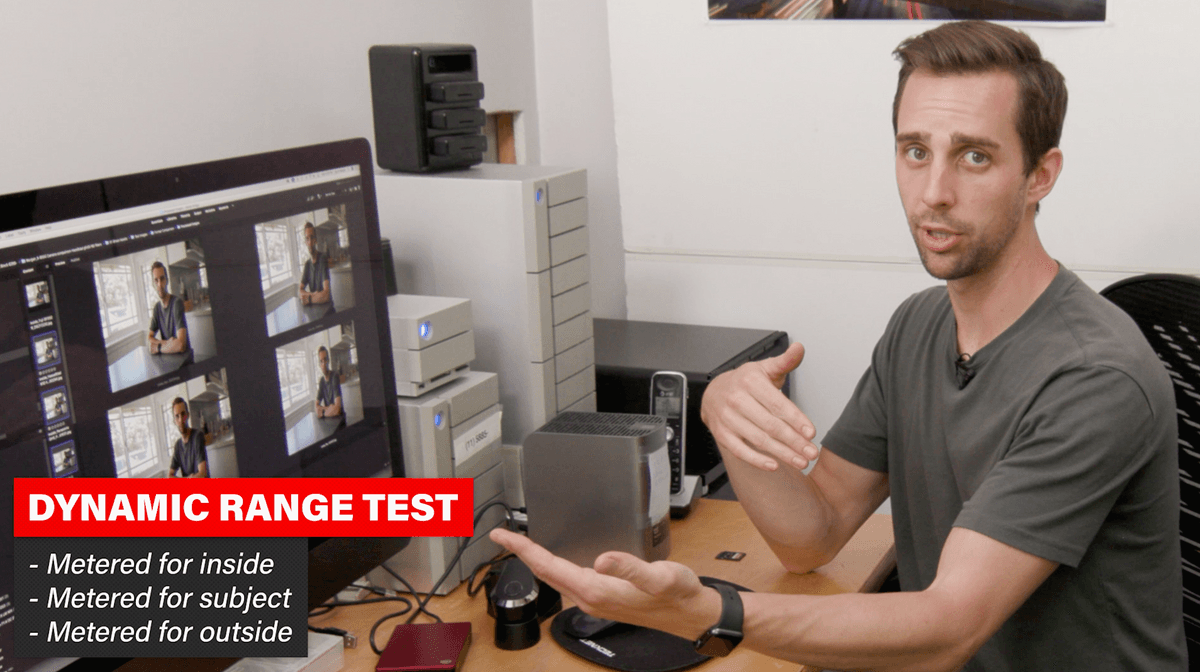
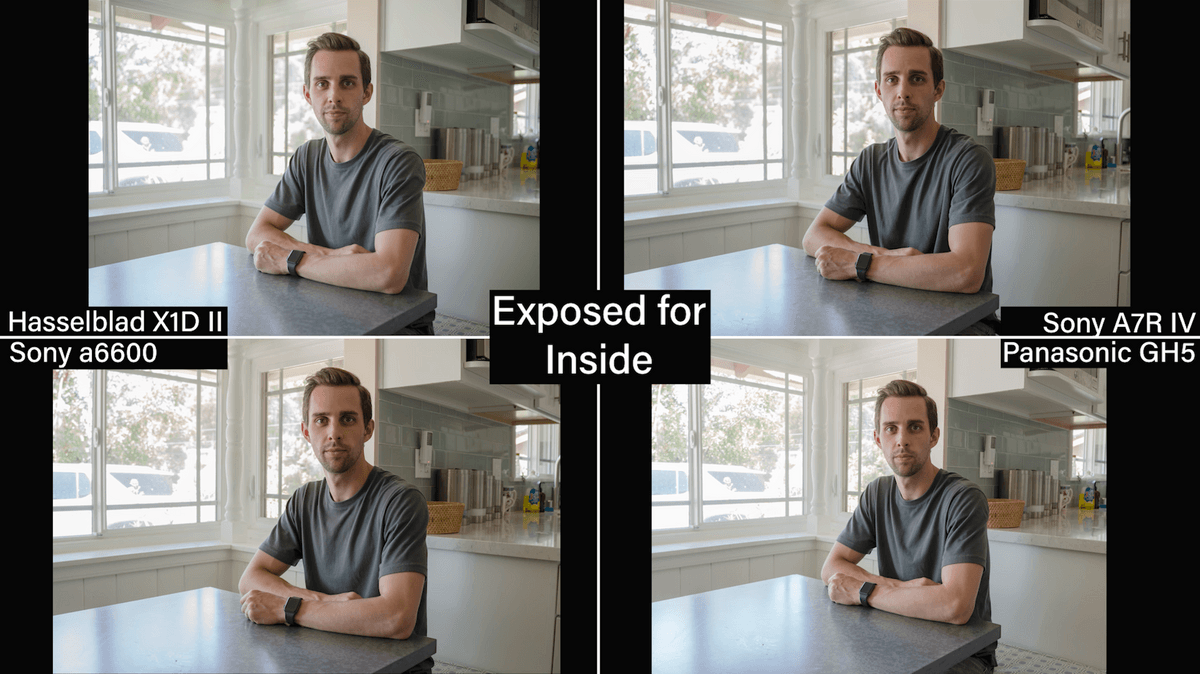
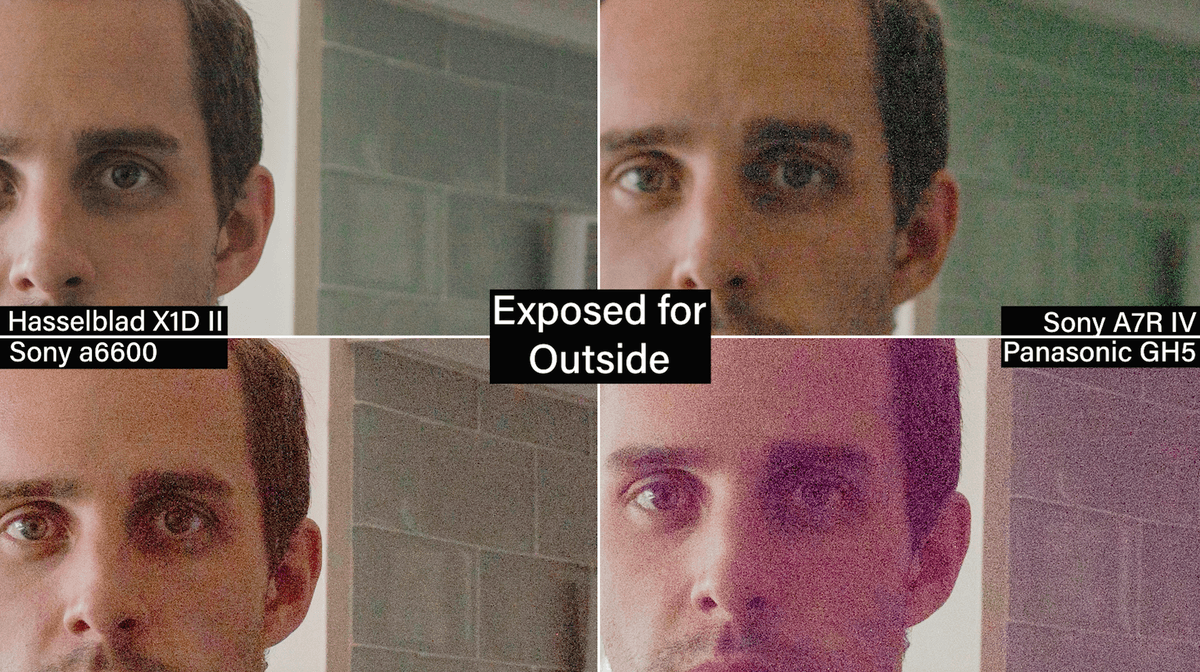
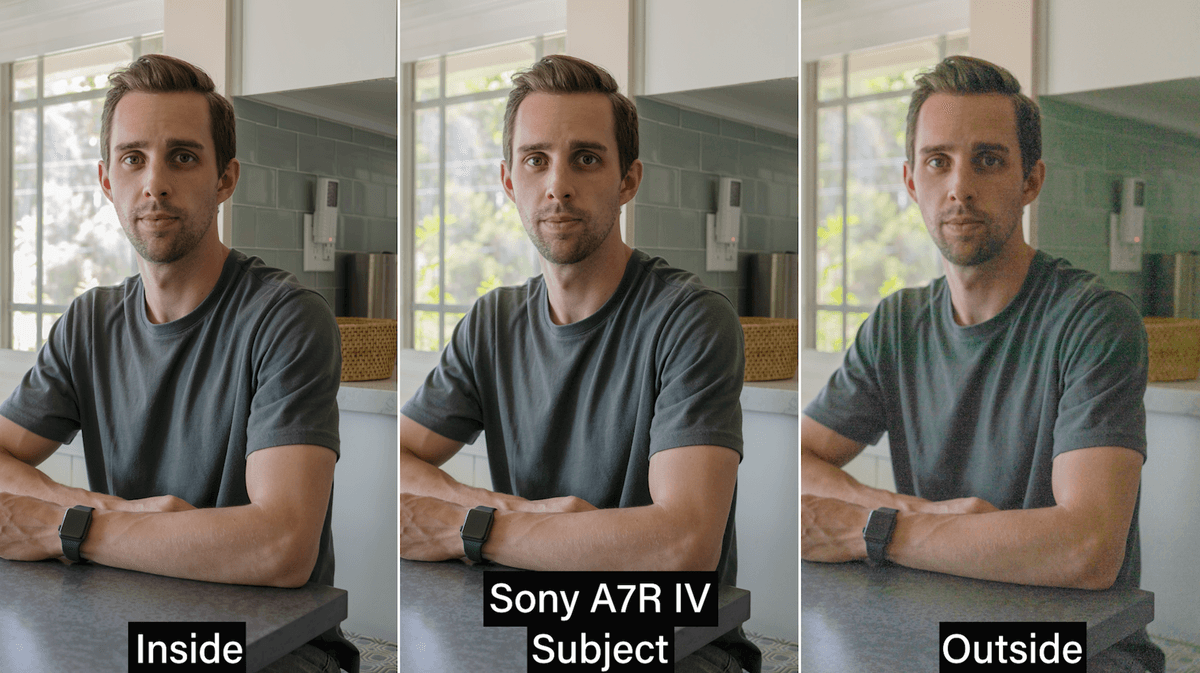
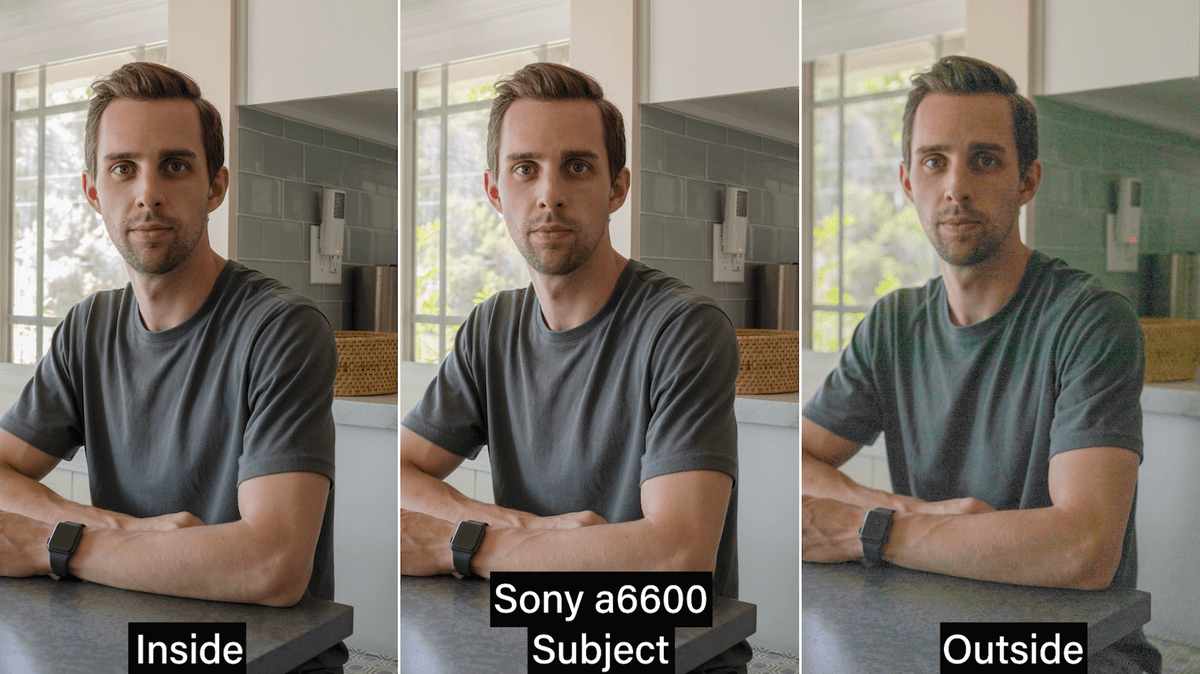
Here is our dynamic range test. We are doing this a little differently than we have done in the past. We have metered for Kenneth’s face inside. We have taken an exposure that is proper for the inside. And of course the outside is blown out like crazy. Then we shoot a series of exposures until the outside is what is exposed properly and the inside is really dark. Then we correct those and try to bring them all back to the right exposure. We are just going to do 3 – the brightest, the darkest and one in the middle.
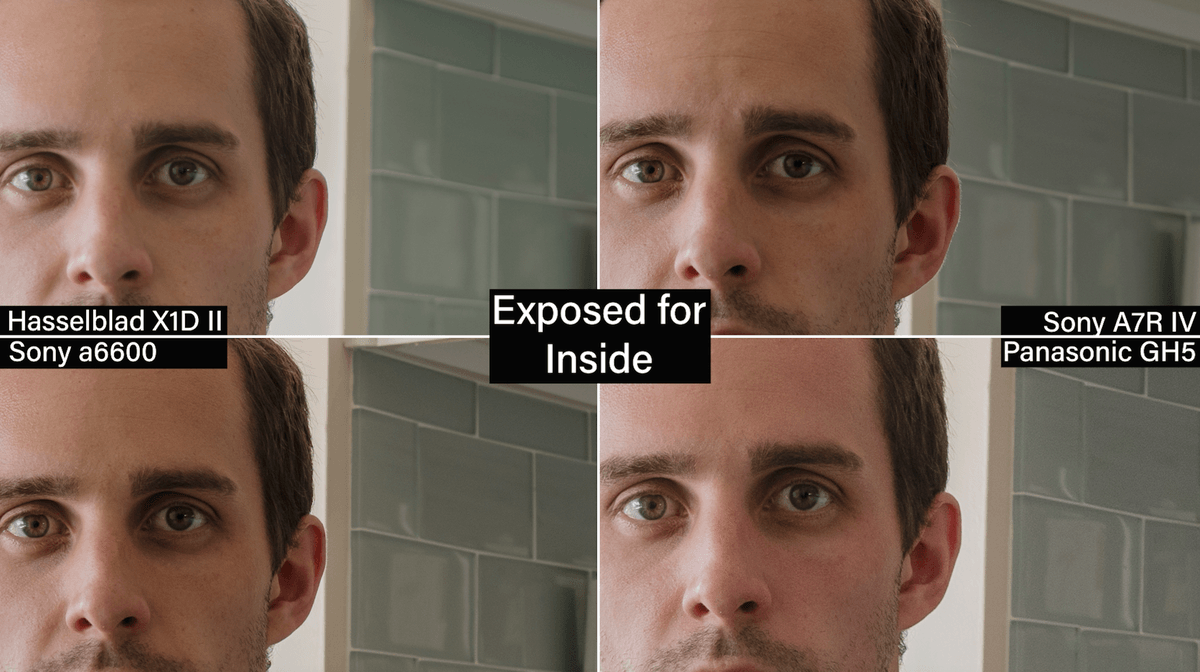
There are seven stops between the inside and the outside. So seven stops to make a correct exposure on his face, between that and the outside. You see right now we are really exposed for inside and the outside is completely blown out. They all look pretty good. They look pretty similar to me. The outside is obviously really hot and doesn’t look great. And the shadow side of Kenneth’s face is still a little underexposed because of how we metered everything. We do see a little bit of grain in the shadows. Not really much on the Hasselblad. We do see a little more on the GH5, especially if you look in the background at the cupboards and the tile.
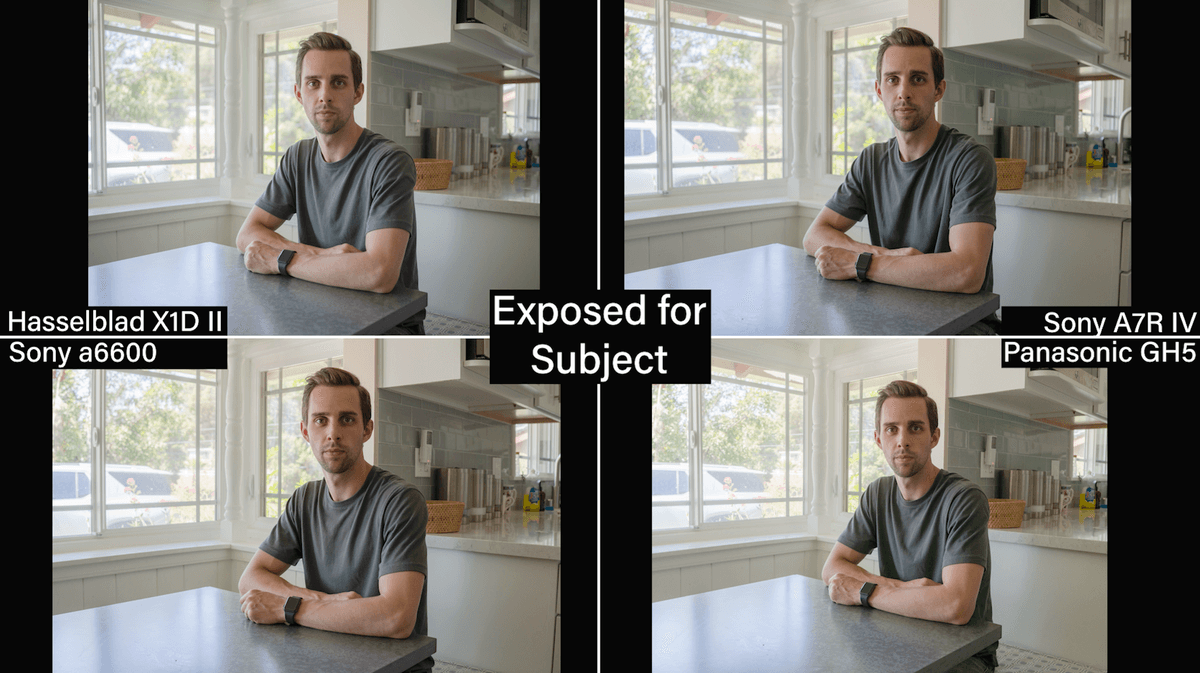
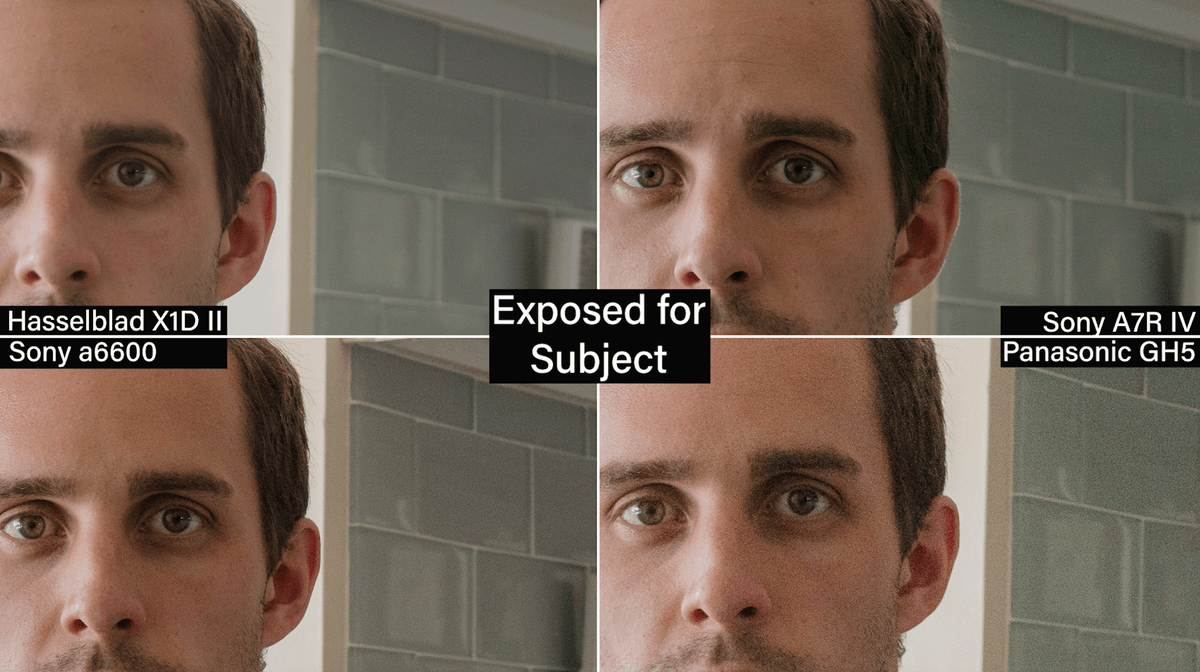
Let’s take a look at the middle exposure. This is a strategic exposure. If I were going to shoot this photo this is probably what I would do. The shadows are underexposed by about 3 stops. Then the highlights are only overexposed by 3 stops. So we are able in post to bring them back together to the right range. In accomplishing that we have created a lot of grain in the shadows. If I were really shooting this I would probably use a flash or something, a light source to balance this out. If we punch in here on Kenneth’s eye or look at any shadow area of the image there is grain there, even on the Hasselblad which is a very clean camera. If you compare the grain across all of the cameras you do see it gets worse and worse the smaller the sensor gets.
Let’s look at being exposed properly for the highlights. Now the shadows are underexposed by seven stops. And the highlights are correctly exposed. Here we will see major problems inside in the shadows. Even the Hasselblad isn’t looking amazing here. You can see blotchiness and green and magenta noise. But compared to the others, especially the crop sensor camera, the GH5 looks really red and gritty. There is almost no detail in the shadows. There is also a major color shift. The Sony a7R IV held up ok but there is a lot of banding. We do see a direct relationship between the sensor size and the amount of dynamic range that the sensor has. That is what this is really about. How much detail can the sensor hold across the range from bright to dark. Obviously the Hasselblad is seeing much further into the dark than the smaller sensors are.
What did we learn. I will tell you what I learned. I learned that it is exactly what you would think it would be. The larger sensor and larger megapixel gives you a great amount of detail and color. And it holds the ISO from creating noise. That large sensor is doing what you expect it to do. That last time we did a similar comparison with portraits I walked away from that tests thinking, “I don’t know if the larger format is really worth it.” Especially when it comes to other compromises like speed and usability. But when you are shooting something like cityscapes and you are looking at the color tonality, detail and dynamic range, it does make a difference. Crop sensors are even pushing it when it comes to quality and professional work. If this is for amateur work and snapshots it obviously doesn’t matter. Whatever you are comfortable with. But for professional work, based on the images we have seen today, you really should have a full frame sensor. That full frame is pretty nice. If you can afford it the medium format images are really nice. But there are compromises when you are shooting that way. You compromise between speed and quality. And then you have to factor in the cost. If you have a slower workflow like with landscapes or architecture and you want a lot of detail in the image that medium format is fabulous. Or even in fashion if you can slow it down a little bit you can get a lot of detail in the clothing.
Interesting test, a lot of fun. I love looking at these things. I hope you enjoyed this. Make sure you subscribe to us on YouTube. We also have a great Patreon group going. So get over to Patreon.com/TheSlantedLens and join our group. We are working on things every month and having a lot of fun together. So keep those camera’s rollin’ and keep on clickin’!