Hi, this is Jay P. Morgan. Today on The Slanted Lens we’re talking about lighting ratios for photo and video.
Today you’re going to learn about lighting ratios. 1:1, 1:2, 1:4, 1:8- what do these numbers all mean? Let’s take a look.
Lighting Ratios
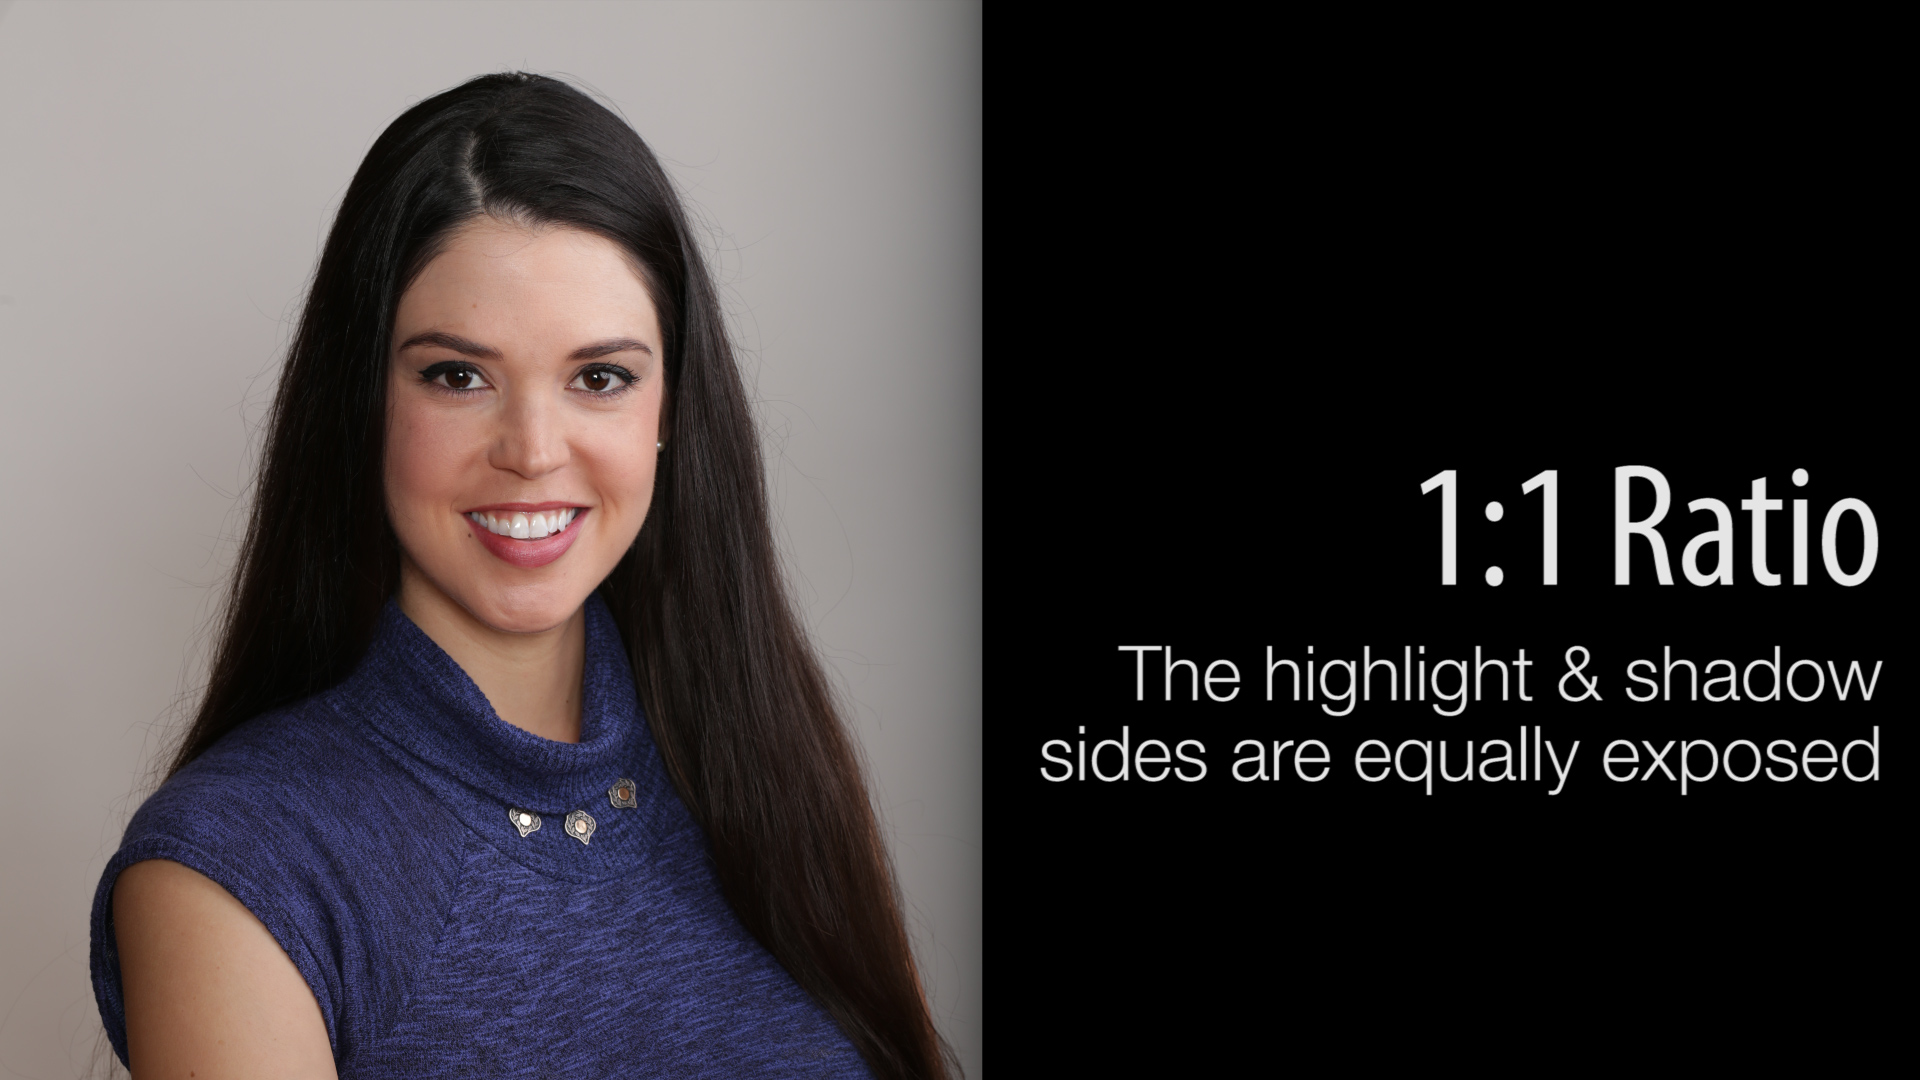
A 1:1 lighting ratio simply means that your subject is equally exposed. This is flat lighting, with no depth or dimension to your subject. You don’t have a shadow or a highlight side with this ratio. The area of your subject facing the camera will be evenly lit. Personally, I think this works better with color than with black and white.
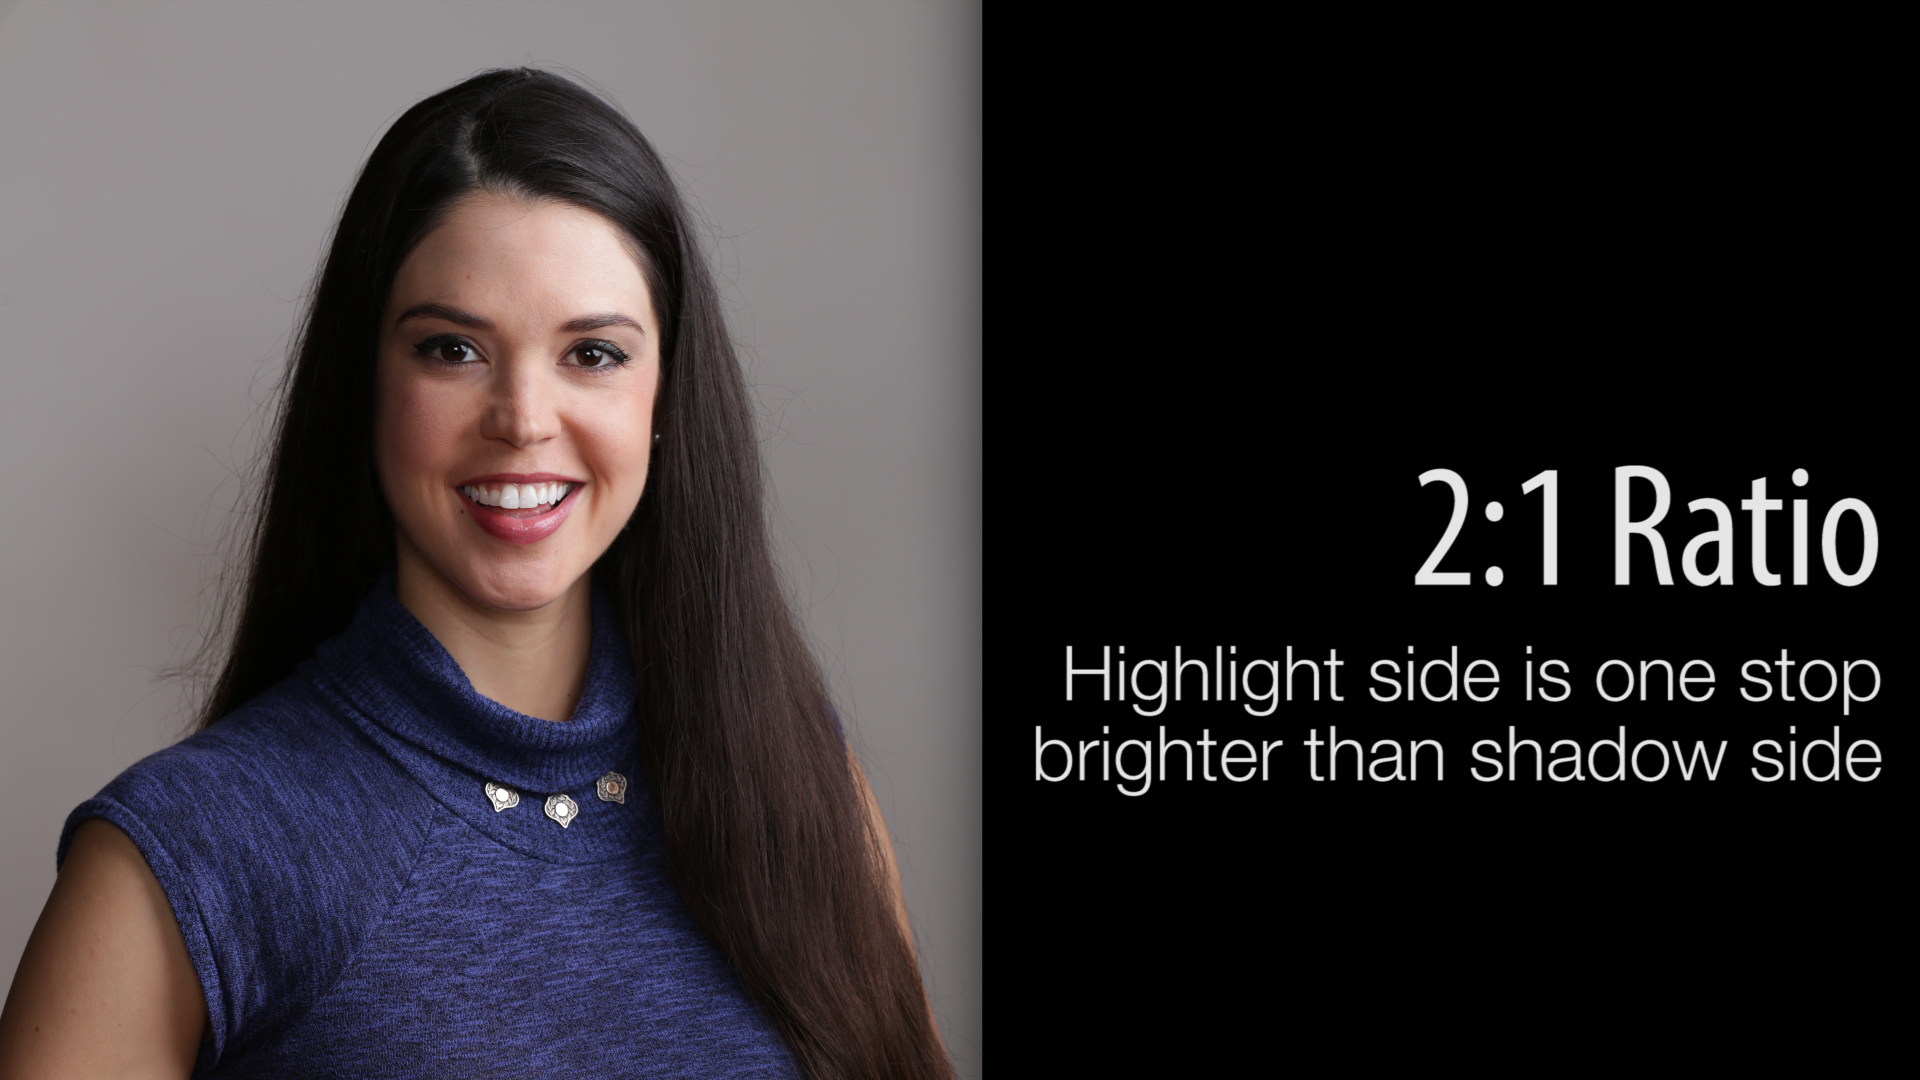
With a 2:1 ratio, your highlight side is one stop brighter than your shadow side. If your highlight is f/8, your shadow is f/5.6.
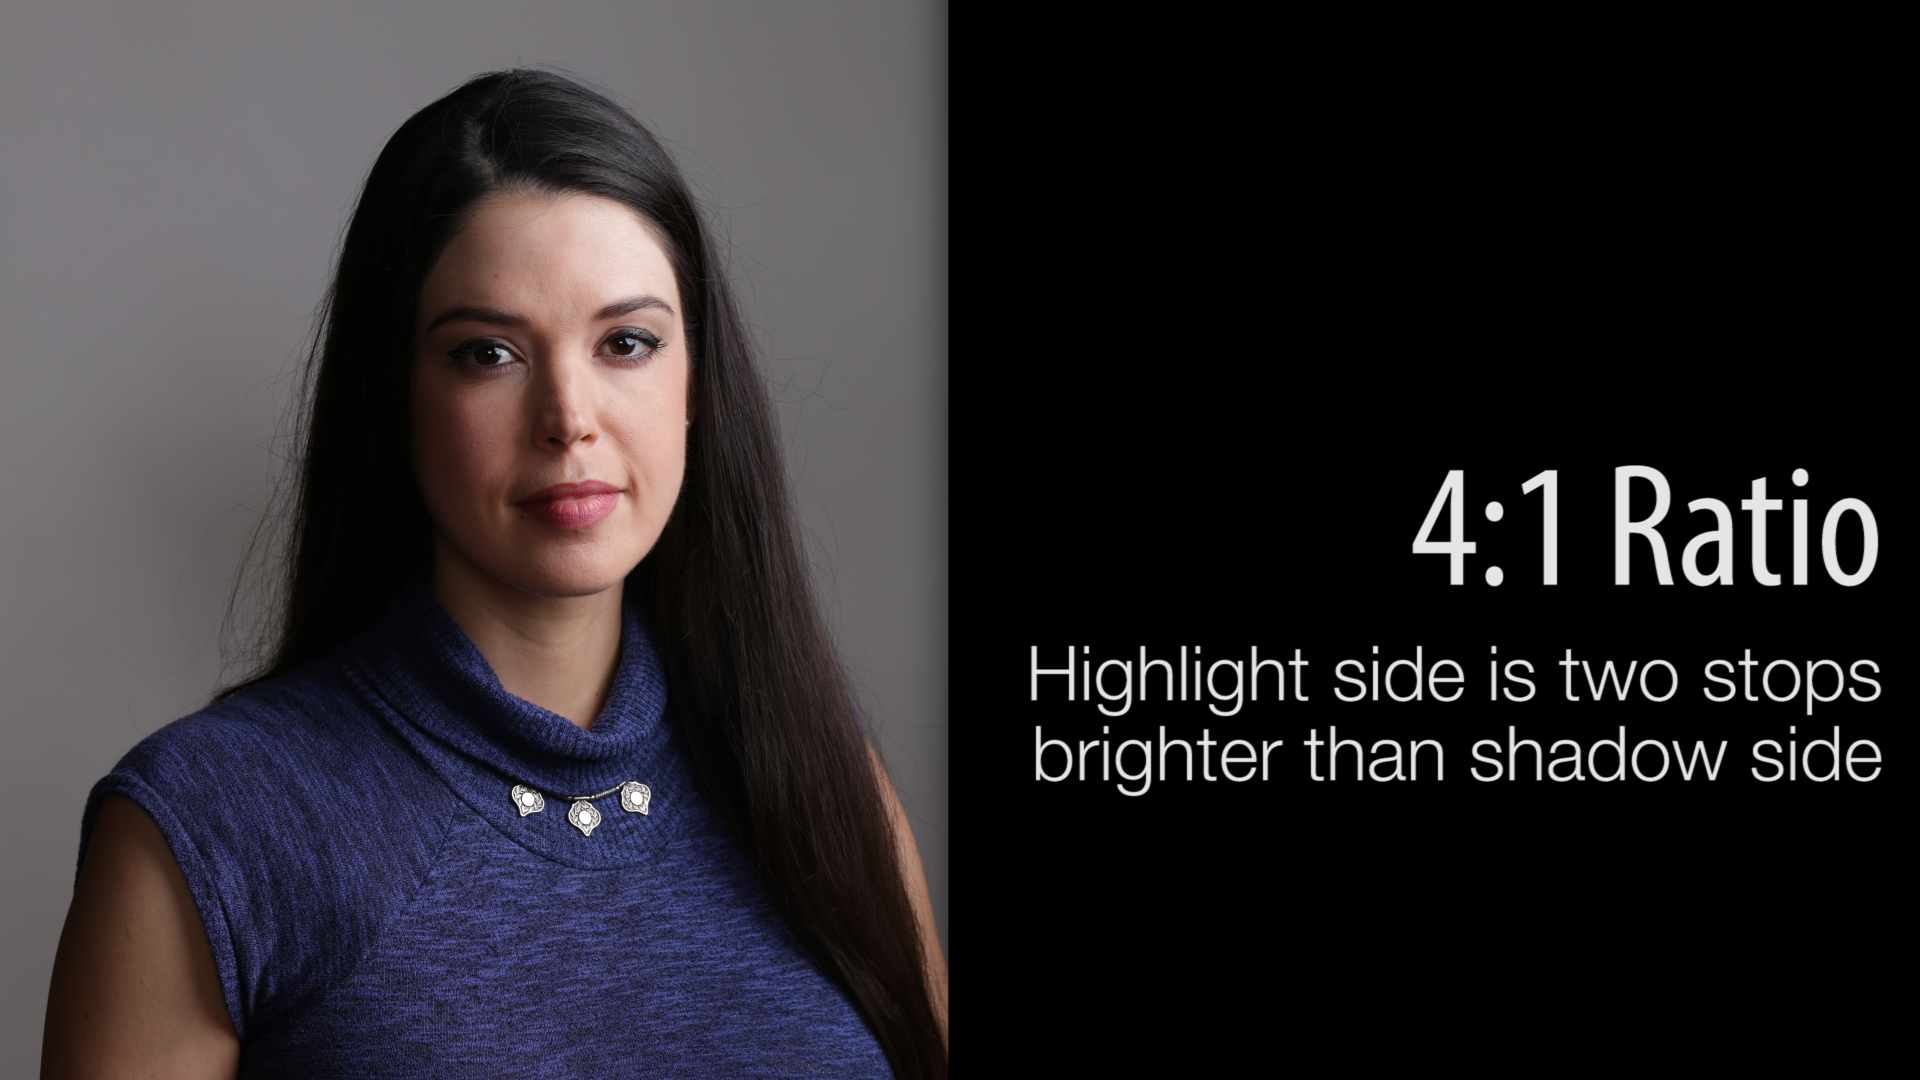
Because photography is in divisions of two, when you go up one stop, your lighting ratio goes from 2:1 to 4:1. The highlight side of your subject is f/11, and her shadow side is f/5.6.
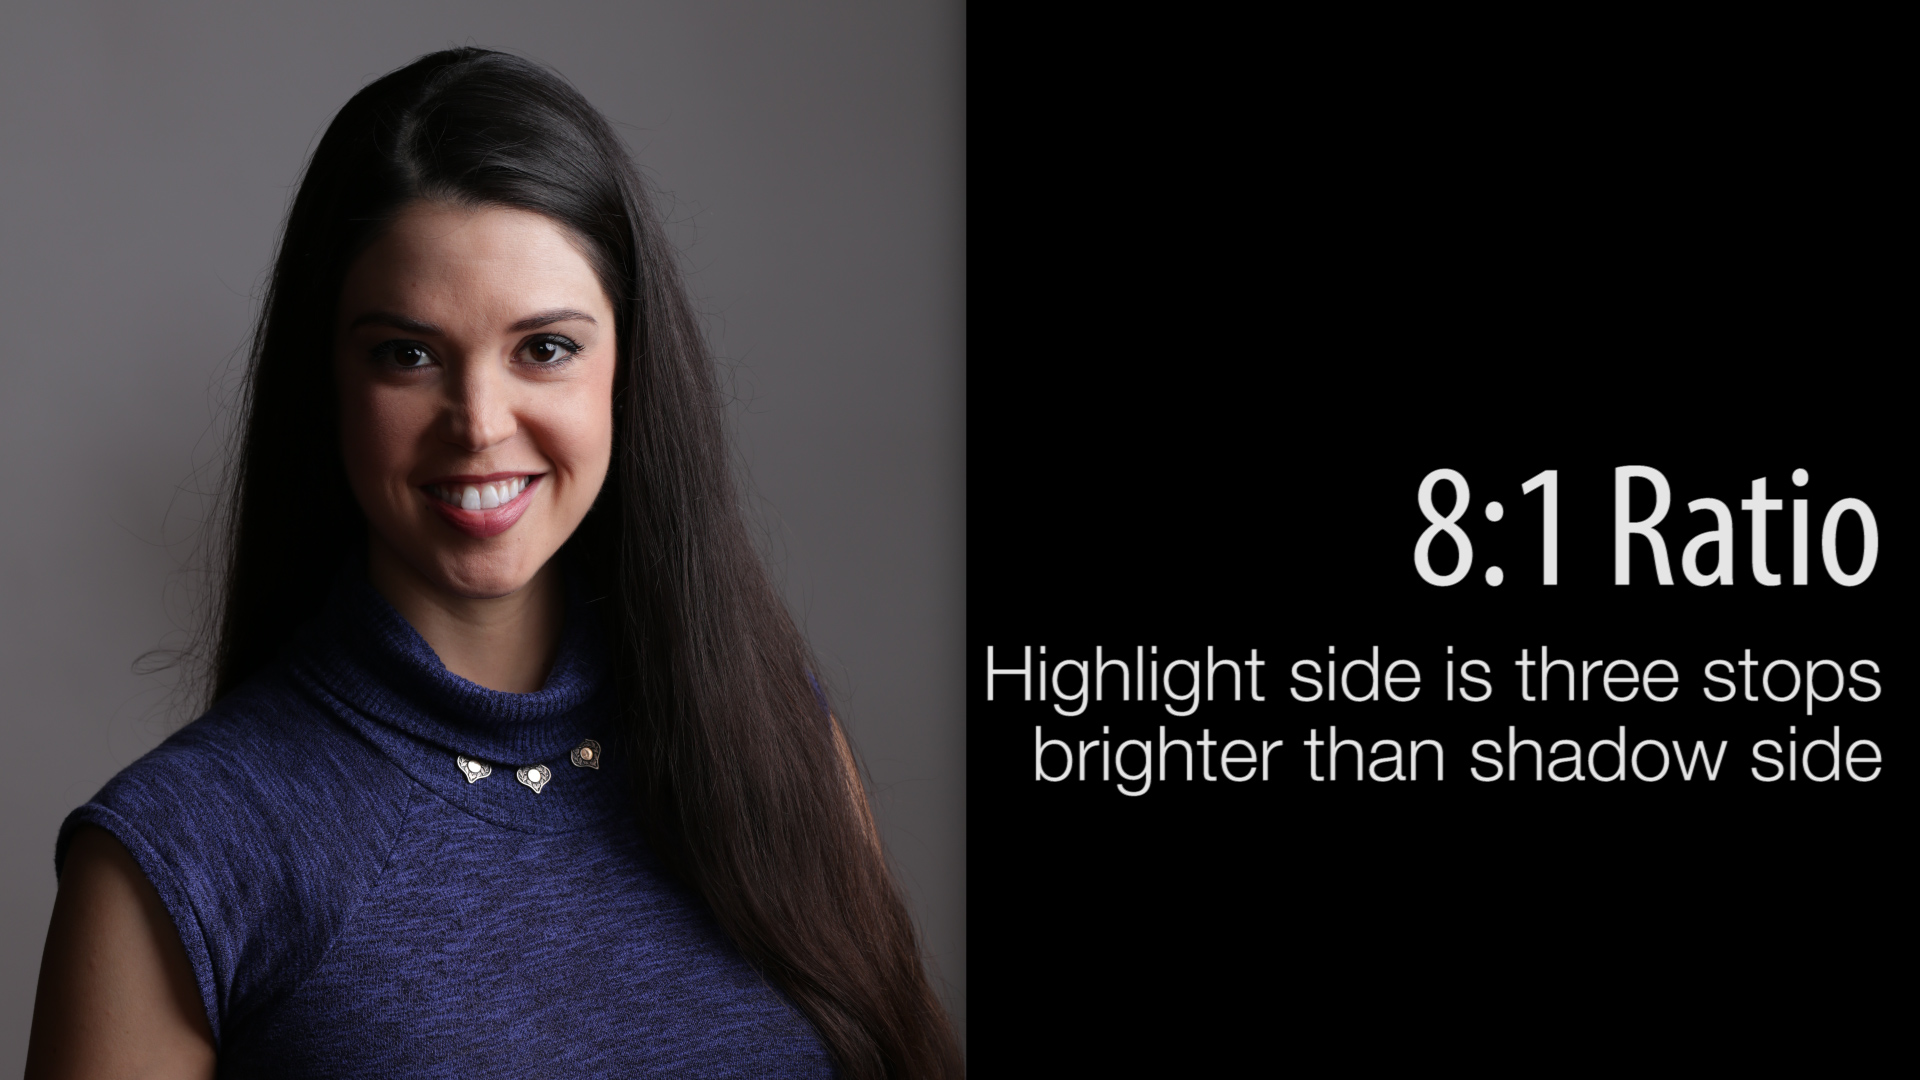
With a ratio of 8:1, your highlight side will be three stops brighter than your shadow side. A highlight reading of f/16 will give your shadow side a reading of f/5.6.
Using a Meter to Find Lighting Ratios
I frequently use light meters to find my lighting ratios. It makes the process so much faster. I recommend the Illuminati Light Meter because I can put several of them up at one time, and find the lighting ratio for my subject very quickly. So how do you use a light meter to find these ratios?
I start by placing a meter in the highlight or the key light side of the image. I get it as close to the subject as I can, and turn it just slightly toward the key light. Then I place the other meter in the shadow side of the subject, positioning it so that it faces the camera, but doesn’t pick up any of the key light. You want a true shadow reading.
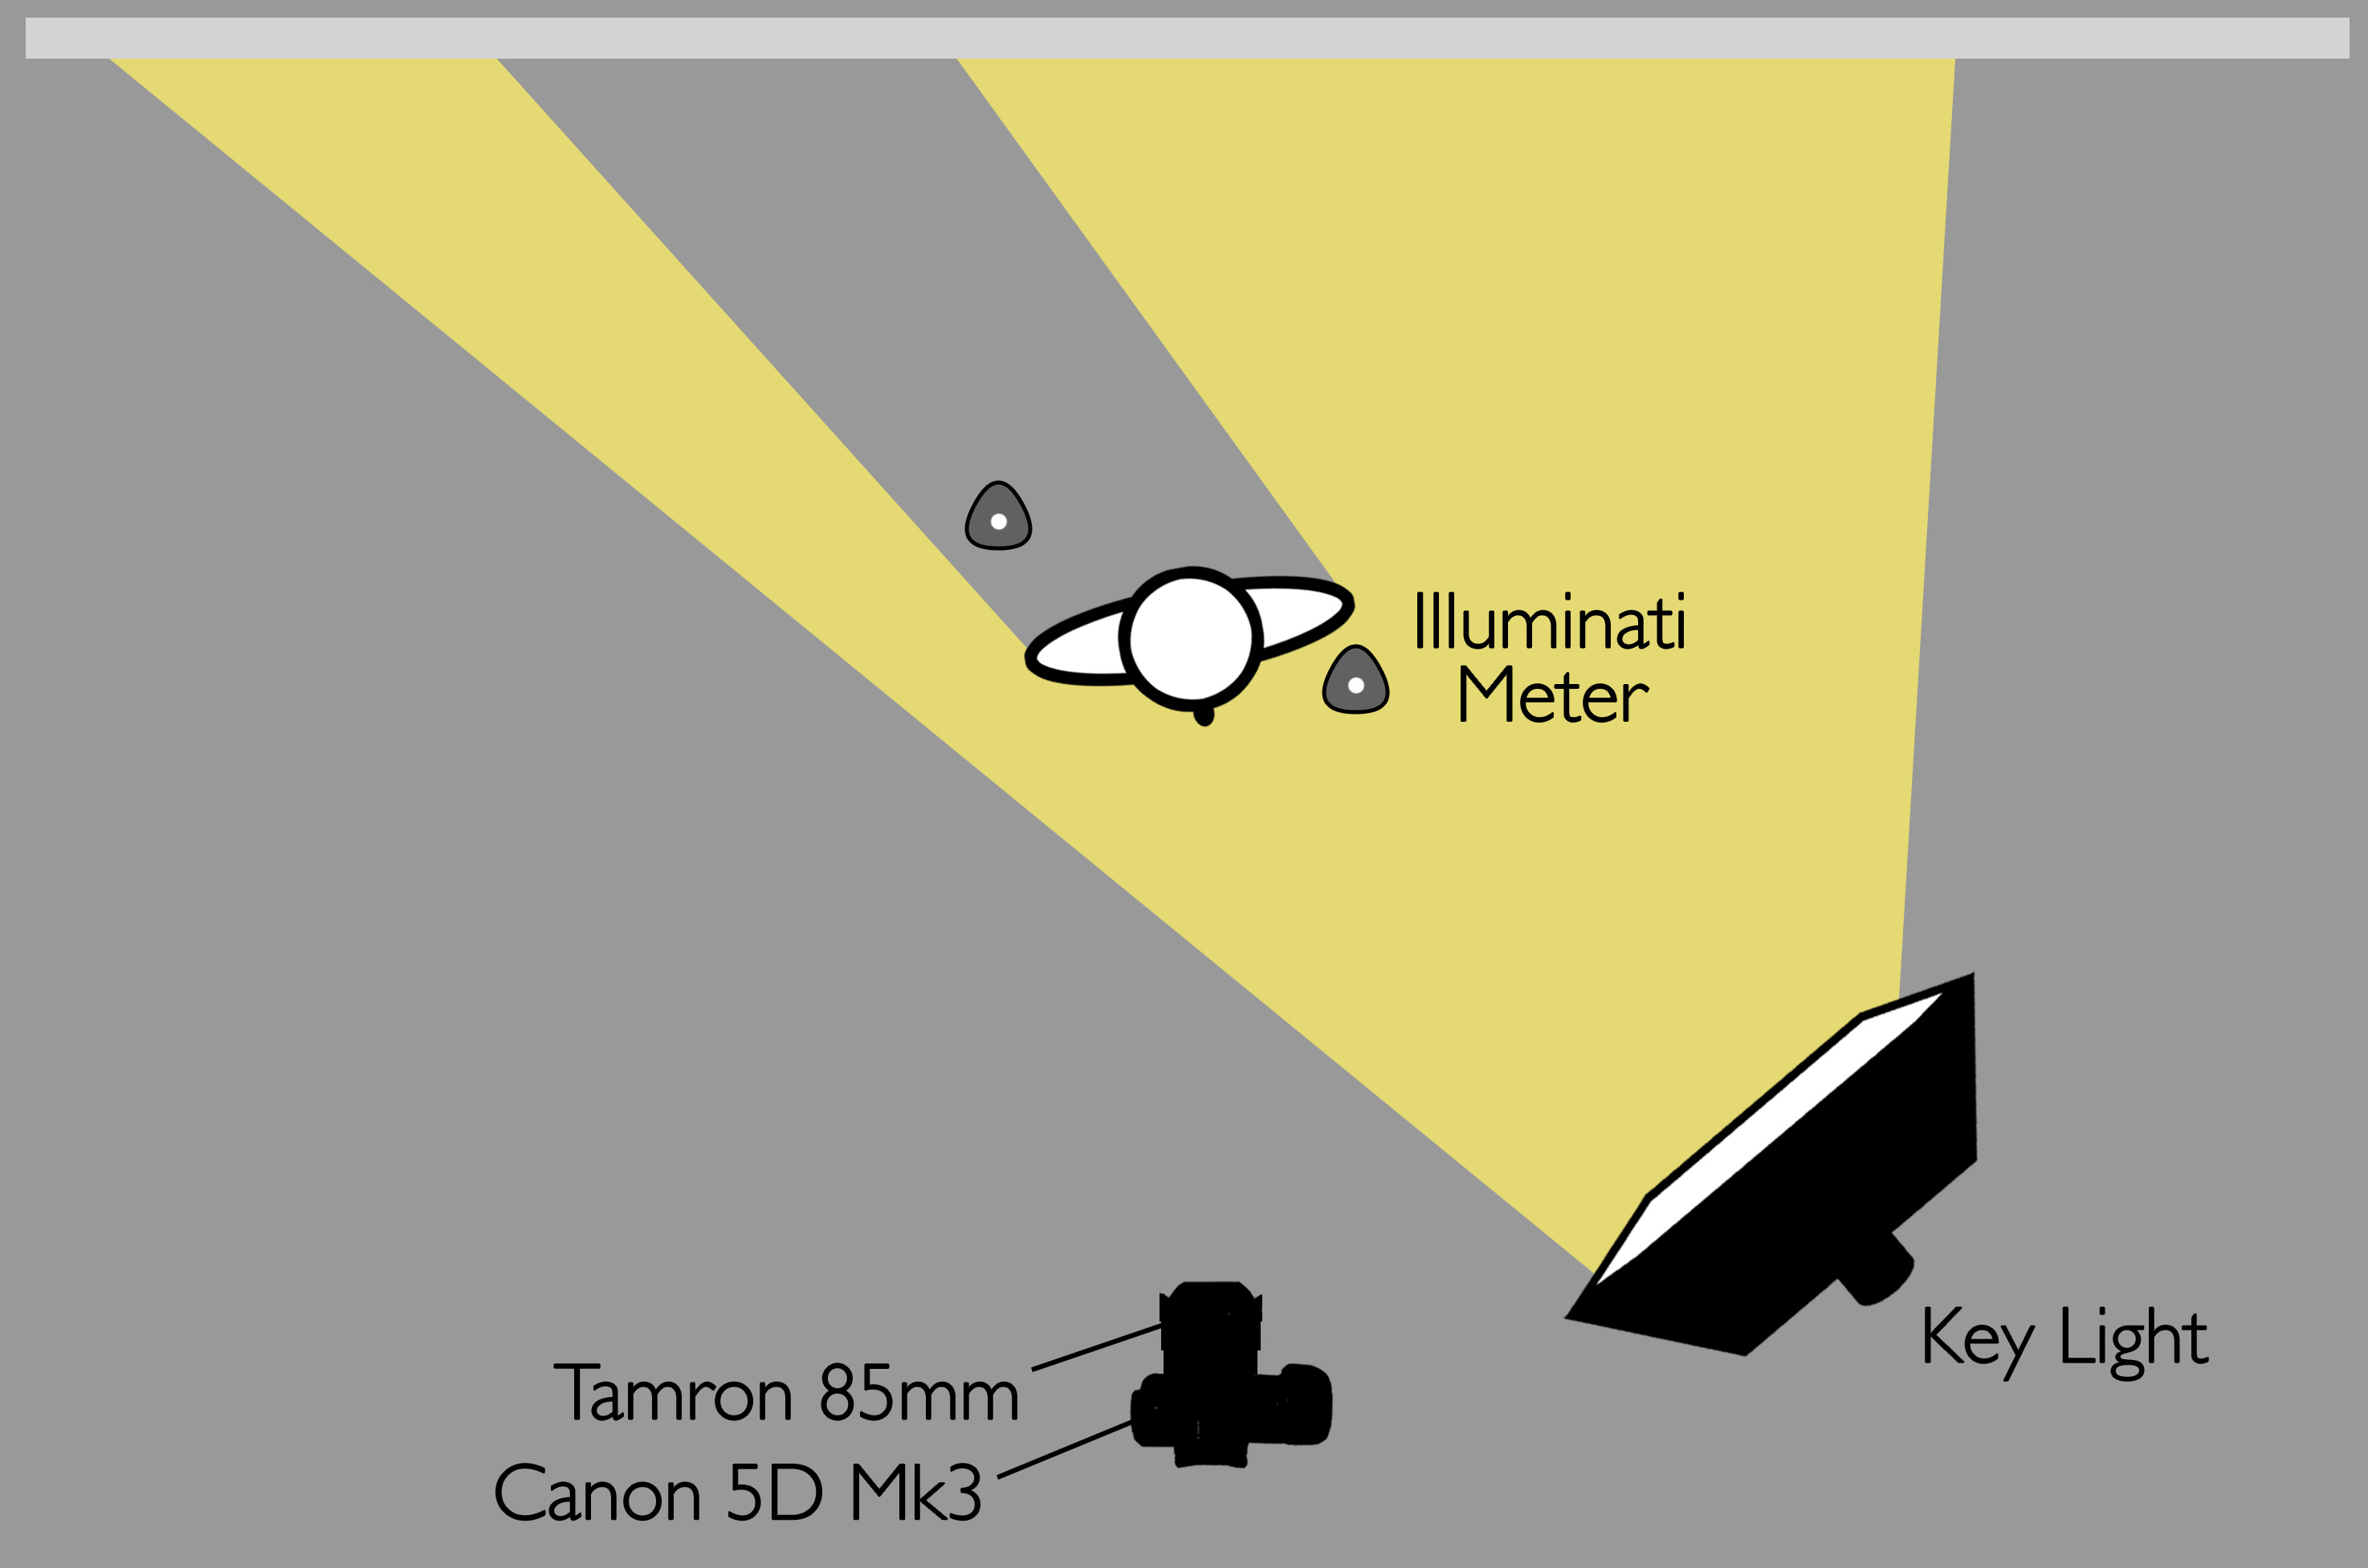
Now I can bring in a fill card or a second light, and take a reading with that.
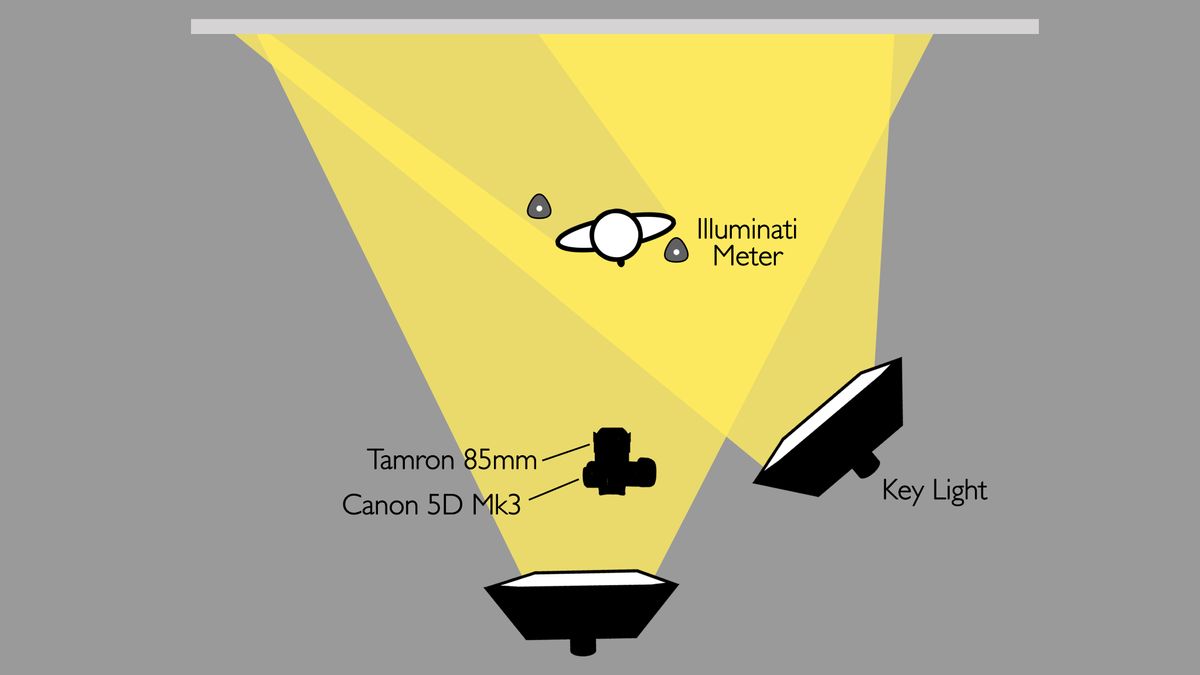
Multiple Incident Light Meters
These Illuminati Meters are incident light meters, which means they’re taking an overall exposure of all the light falling on them, so you have to point them toward the camera. I point mine slightly toward the key light because I want to favor that, but they do point mainly at the camera. It’s nice to be able to use two or three of them on set, because I can monitor my highlight to shadow ratio from my phone at the same time.
Understanding and using lighting ratios will help you create the vision you have for your work. You can decide how you want your final image to look, instead of just stumbling around, trying to make it happen.
Ambient Lighting
One thing you’ll need to be careful of when getting your lighting ratios is the ambient light in your shooting area. If you’ve got walls that have light reflecting off of them, for instance, that will influence your shadow side. You may need to control that to fit your end product.
Illuminati Light Meter
So there’s a look at lighting ratios. You should check out the Kickstarter that Illuminati has going for their Light and Color Wireless Color Meter. It’s a great little meter that will really help ease your workflow by helping you get things right in camera, while you’re shooting.
Thanks for watching and remember, keep those cameras rollin’ and keep on clickin’.
-Jay P.